In this chapter, we will be covering lots of libraries, and it might be overwhelming. However, I want to provide you with a great foundation so you can have the best startup project possible. The startup project will serve you well because you can copy and reuse the code for all the projects and examples we will be using in this book. This practice will make you a top-notch React developer who can tackle any size project that comes your way, as well as help you land your dream job. It will also speed up your development.
By the end of this chapter, you will have a starter project that includes many of the libraries we will be covering in this book. Let’s get started!
Getting Started with the Create-React-App Starter Project
In the previous chapter, we created a simple “Hello World” application from scratch, and we talked about how it works behind the scenes. We covered topics such as JSX, DOM, the React virtual DOM, Babel, ES5/ES6, and SPAs.
Creating a React app was easy and took just few lines of code. However, to create a real-life application based on one page (an SPA) with multiple views, many user gestures, lists with hundreds or thousands of items, member areas, and other common pieces that are common in today’s applications, there is much more we need to learn.
In this book, my goal is to set you up with a large toolbox full of the best libraries and tools so you can build a top-grade React application and get the most out of React. For that, we need to look at several popular libraries and tools in the world of React.
We could start from complete zero, but that’s not needed. As I mentioned in the previous chapter, Create-React-App (CRA) is the most popular starter project for a React web-based application. (See https://github.com/facebook/create-react-app.) It provides a boilerplate project, and you can be up and running quickly with many of the necessary tools and library that are standards when building a top-grade React application.
It includes vanilla-flavor packages and other more valuable packages. Additionally, CRA has an option to include templates with more sophisticated libraries, or you can create your own template that has certain elements that CRA does not include.
CRA has already made some decisions for us. For example, the build tool is a tool called Webpack over Rollup or Parcel. Task Runners is set up with NPM scripts over other tools such as Gulp. CSS, JS, and Jest are used as the defaults.
After working on and reviewing projects and libraries that help get the job done with React, it’s hard to stay neutral and not recommend certain tools, which is why I’ve chosen to use the tools in this chapter. In addition, since many libraries are not easy to migrate to, you’ll want to start on the right foot instead of switching tools later. That’s why we are setting up our project with the libraries in this library. These libraries will help you get the job done, and you can use the template for other projects, whether it’s a small project or a larger enterprise-level project.
React Developer Road Map
Becoming a true professional React developer is more than just knowing the React library. As we’ve mentioned, there are tools and libraries that can help expediate development because, remember, React is not a framework. React is a JavaScript library developed by Facebook to handle the user interface and nothing more.

React developer road map (source: https://github.com/adam-golab/react-developer-roadmap)
This chart demonstrates the path that is recommended to become a top-notch professional React developer.
Do not get intimidated by this chart. If you follow this book, by the time this book is over, you will learn about many of these libraries and more and be able to tackle any size project.
How Can I Integrate These Tools into My ReactJS Project?
As I mentioned, CRA doesn’t include many of the tools that can help you tackle real-life React projects. However, I have set up a CRA template that will include all the must-know libraries. With one command, you can get the starter project that includes all the libraries needed. We will set that up shortly in this chapter.
Keep in mind that things change rapidly; plus, your project may need a different tool or you might want to experiment. That’s why in this section we’ll break it all down and show how to install each library.
Type checker: TypeScript
Preprocessors: Sass/SCSS
State management: Redux Toolkit/Recoil
CSS framework: Material-UI
Components: Styled Components
Router: React Router
Unit testing: Jest and Enzym + Sinon
E2E testing: Jest and Puppeteer
Linter: ESLint and Prettier
Other useful libraries: Lodash, Moment, Classnames, Serve, react-snap, React-Helmet, Analyzer Bundle
The list was React libraries. The folder structure is park of the what I will be covering but it’s not a library. We could add this sentence to explain the readers.
Prerequisites
You can install the libraries using NPM (https://www.npmjs.com/). You need Node.js to get NPM.
NPM and Node.js go hand in hand. NPM is the JavaScript package manager and the default package manager for the JavaScript Node.js environment.
Install Node and NPM on a Mac/PC
Node.js needs to be at least version 8.16.0 or 10.16.0. The reason we need that version is that we need to use NPX. NPX is the NPM task runner introduced in 2017, and it is used to set up CRA.

Nodejs.org
The installer recognizes your platform, so if you are on a PC, it’s the same steps.
The command will output the Node.js version number.
Download the Libraries: Yarn or NPM
To download packages from the NPM repository, we have two options: Yarn or NPM. NPM is installed when we install Node.js. However, in this book, we will mostly use the Yarn library. We will be using Yarn as much as possible for downloading packages instead of NPM because Yarn is faster than NPM. Yarn caches the installed packages as well as installs packages simultaneously.
Install Yarn on a Mac/PC
Create-React-App MHL Template Project
Equipped with Node.js as well as NPM and Yarn, we are ready to get started. We can use the CRA Must-Have-Libraries (MHL) template project I created for you, and it will produce the final result of this chapter and include all the libraries we are setting up in this chapter.
It’s good to have this template project as your starter library, not just because it is easy and includes all the libraries we need, but also because I will be able to update this starter project long after the book is released in case anything breaks or needs an update, as often happens with NPM libraries.
This command will install all the dependencies and start the project on a local server. You will learn more about what’s happening under the hood in the next section.
In the rest of this chapter, I will explain what this project includes and reverse engineer the project for you, so you can understand fully what is happening under the hood. It is not mandatory to do all the steps in this chapter as you already have the final project ready.
Vanilla-Flavor Create-React-App
Note that the development build is not optimized. To create a production build, use yarn build.
Our app will open automatically on port 3000 using our default browser. If it doesn’t, you can use any browser and use this URL: http://localhost:3000/.
If you want to stop the development server, use Ctrl+C.
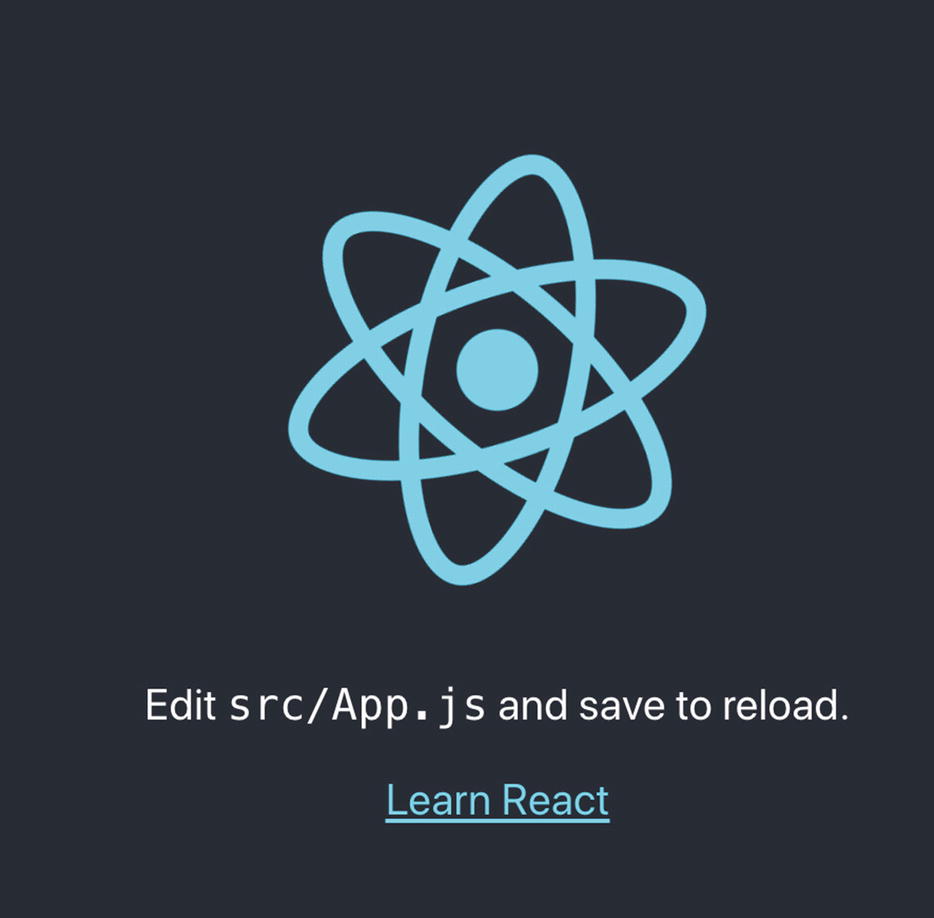
Vanilla CRA on port 3000 in our browser
Congratulations, you just created and published CRA on the development server! The React project includes all the libraries that come with CRA out of the box.

CRA files and folders
React was originally designed to be a SPA, and normally we would need to write a script to combine our files into one file or a chunk of files that we will need to include in our application for the code to be available. However, since we are using CRA, all of that is done for us automatically.
CRA uses Webpack and Babel to pack our files into a single index.html page and into files called bundle.js and *.chunk.js. It may generate other files as well as needed.
CRA is using the Webpack module bundler out of the box. Webpack is an open source JavaScript bundler that uses loaders to bundle files and create static assets.
When we type the command yarn start, the script initiates an NPM script that creates a development environment for us. The script caches our files in memory and serves them when we navigate to the URL.

10,000-foot view to illustrate CRA using Webpack and Babel to pack our files into a single index.html page
To view the application’s source code and check the files created for us, go to this URL on Chrome: http://localhost:3000/.
Or we can also inspect the HTML DOM elements with Chrome DevTools. On Chrome right-click and select Inspect to view the DOM tree.
The bundle.js file, as the name suggests, bundles our JavaScript source code files into one file, and the *.chunk.js files bundle our styles into chunks of files. You can go to the URLs of these files to view the content.
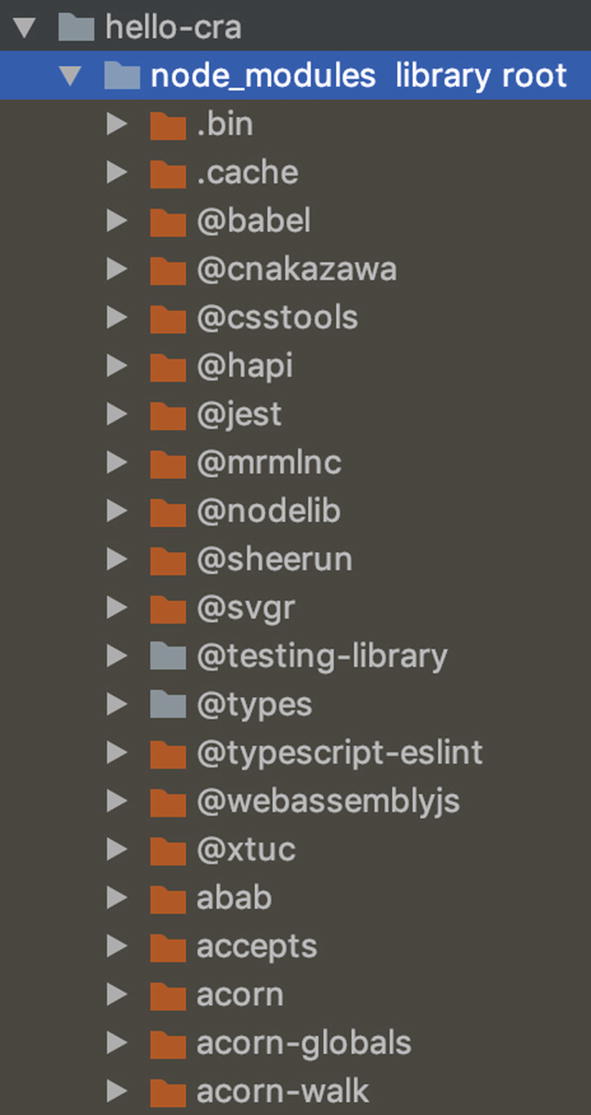
node_modules folder with dependencies
You can find the list of the dependencies in the node_modules folder in a file called package.json, which is used by Node.js. The file contains information about our project such as the version, the libraries are using, and even the scripts Node.js will be running.
Each dependency holds the name of the library and a version number.
If we check our node_modules folder, it is full of other developers’ libraries. In fact, there are more than 1,000, and when we downloaded our CRA, it took a while (depending on your Internet speed, of course) to download the project.
That is because of all these dependencies. Where are all these dependencies coming from then?
Each library includes other dependencies or subdependencies, so although we don’t have these libraries listed in our project’s package.json file, they are listed in other libraries or sublibraries.
react-scripts
These scripts are using a library called react-scripts . If you go to the hello-cra/node_modules/react-scripts/package.json file, you will see a long list of dependencies that the code is using to package files with Babel and Webpack and build our server. Each of these sublibraries will have other dependencies and so on.
That’s how six libraries end up as more than 1,000 in our node_modules folder.
Gitignore
It is common practice to create a .gitignore file in each project. That file can include files we want to exclude.
For instance, CRA already included a .gitignore file, and node_modules already listed it to be excluded. Then we ran the yarn command and checked the package.json file, which installed all these dependencies for us instead of including all these libraries with our project, which will make our project very large.
Public Folder
public/favicon.ico, logo192.png, logo512.png: Icons used inside the manifest.json file
public/index.html: Our index page
public/manifest.json: Information about our application and styles
public/robots.txt: Instructions to search engines
The reason is that the NPM scripts are generating our index file based on this file as well as the files it generates. If we wanted to publish our app to production, for example, we would run a different command (build instead of start), and different files would be generated. You will learn more about publishing to production as well as how to optimize the JS bundle chunks later in this book.
Create-React-App with TypeScript
CRA comes in two flavors: vanilla (JS) and TypeScript. Notice that our application files src/public/App.js and src/public/index.js have .js file extensions, which means they are JavaScript files. CRA sets our project out of the box to JavaScript as the default setting.
However, when it comes to writing React code, there are two main options. We can write our code with JavaScript (JS) or with TypeScript (TS). The vanilla-flavor CRA you downloaded is set to JavaScript. However, we will be writing our code in this book using TypeScript, as we mentioned in the previous chapter.
CRA Template with TypeScript
We are using the --template flag with TS, and we name our project starter-project.
I recommend testing your project after each install to ensure it’s still running. Libraries and dependencies change often, and ensuring the project doesn’t break should be your first priority.

CRA TS app running on port 3000
Notice that the copy changes on the app to src/App.tsx (from Figure 2-3), as well as that the files changed from .js to .tsx in our app.
When using Yarn, we use the -D flag (which stands for developer “dependencies”) when we want to update our project’s package.json to include a library under devDependencies. The package.json file holds the project’s libraries.
The types installed for TypeScript are used to provide TypeScript with type information about APIs that are written in JavaScript.
The types we just installed include TypeScript for Jest tests and ESLint. CRA comes bundled with Jest and Jest-dom to test our application. We will be learning about testing our application with Jest and ESlint later in this book, but I wanted you to be aware that we are setting up these types already.
In addition to changing our code files from .js to .ts, the template project also includes a file called tsconfig.json. This file holds a specific setting for the compiler that will compile our files from .tsx down to .js with information such as what we targeting such as ES6 and other settings.
CSS Preprocessors: Sass/SCSS
Cascading Style Sheets (CSS) is a core functionality in HTML, and you need to familiarize yourself with CSS if you are not already. This goes for working with HTML in particular and in React specifically. On large projects, CSS preprocessors are often used to complement CSS and add functionality. We will discuss these later in this book.
In terms of CSS preprocessors, there are four main CSS preprocessors that are often used with React projects: Sass/SCSS, PostCSS, Less, and Stylus.
CSS is used to represent the visual layout of the web page on different devices. CSS preprocessors are used to enhance CSS functionality.
Sass/SCSS has the upper hand for the majority of today’s projects, so that’s what we will be using. In fact, Sass/SCSS is the most popular and will probably get you the best-paying job as a developer according to surveys (https://ashleynolan.co.uk/blog/frontend-tooling-survey-2019-results). If you want to see a comparison between the different CSS preprocessors, check out my article on Medium: http://shorturl.at/dJQT3.
Just like with CSS, if we want to use SCSS modules in TypeScript the same way we would use them in JavaScript, we need to install Webpack’s loader for Sass/SCSS. It’s called scss-loader.
Redux Toolkit/Recoil
The Redux toolkit is the standard way to organize React app data and user interaction so your code doesn’t get messy.
Redux is an open source JavaScript library for managing application state. It is most commonly used with React for building user interfaces. See https://redux.js.org.
Material-UI CSS Framework
A CSS framework (or CSS libraries) is based on the concept of bringing a more standardized practice to your web development. Using a CSS framework, you can speed up your web development effort versus just using CSS (or other style sheets) as it allows you to use predefined web elements.
Both Bootstrap and Material-UI are great CSS frameworks in certain projects to get started right away, without spending hours creating your own components.
To get Material-UI to work seamlessly with TS, we also need to update some settings in our tsconfig.json file so that the TS page on React doesn’t encounter any errors.
Styled Components
Styled Components go hand in hand with Material-UI. Styled Components is a styling solution, and it can also be used beyond Material-UI.
React Router
React is based on a single-page application; however, most applications need multiple views in React’s single-page application paradigm.
Building an application on a single component is not ideal as the code and complexity can grow and it can become a developer’s nightmare to maintain and test. We will learn more about creating components and subcomponents in the next chapter.
To handle routing, there are many tools to choose from: React Router, Router5, Redux-First Router, and Reach Router, to name a few.
Jest and Enzyme + Sinon
Jest is a JavaScript unit testing framework and the standard for React applications. It was built to be used with any JavaScript project, and it comes with CRA out of the box. However, we do need Jest-dom and Enzyme to enhance the capabilities of Jest.
For Enzyme we want to install the React 16 adapter (that’s the latest version at the time of writing but likely to change to 17). Also, we need to install react-test-renderer so we can render React components to pure JavaScript objects without depending on the DOM or a native mobile environment. Later in the book, we will be using Jest’s snapshot testing feature to automatically save a copy of the JSON tree to a file and use tests to check that it hasn’t changed.
Sinon
Jest and Sinon serve the same purpose, but there are times that you may find one framework more natural and easier to work with for the specific test. We will cover Sinon later in this book.
E2E Testing: Jest and Puppeteer
Testing is at the core of delivering quality software. There is a hierarchy in testing, and E2E is usually only considered after unit testing and integration testing are done.
End-to-end testing (E2E testing) is a testing method that includes testing our app workflow from beginning to end. What we are doing in E2E is replicating real user scenarios so our app is validated for integration and data integrity.
That’s all you need to get set up with Jest and Puppeteer and to configure everything and see an example of E2E testing for App.tsx. You’ll learn more about E2E later in the book.
Component Folder Structure
When you work on a React project and the code keeps growing in size, it can become overwhelming with the number of components you may have, and then it can be hard to find them.

A suggested React folder structure for Redux and TS
This is my recommended folder structure to get started; however, feel free to use it as a suggestion only.
To follow this structure, create these folders:
src/components
src/features
src/layout
src/pages
src/redux
src/recoil/atoms
Generate Templates
As developers, we don’t like writing code again and again. generate-react-cli is a helpful utility we can use. It is based on templates, so we don’t need to write our code again and again.
If you come from Angular, you probably love the Angular CLI and that it can generate templates for your project.
Because it’s the first time running the script, it will install and create generate-react-cli.json with the options you chose the first time you used the tool, but feel free to change these manually.
A cool feature is that we can create our own template. Here is an example of creating a custom template for React pages.
Don’t dig into the template code at this time. We just set these templates, and we will be going over the code and what it means in the next chapter as we build our components.

Template folder structure and files
You can repeat the same steps for components of the type page or anything you like.
Linting: ESLint and Prettier
All code in any code base should look like a single person typed it, no matter how many people contributed.
—Rick Waldron, creator of Johnny-Five
Luckily, this can be done.
Lint is a tool for analyzing your code. It is a static code analysis tool created to identify problematic patterns found in code. Prettier is an opinionated code formatter.
Linting is the process of running a program to analyze your code to find potential errors.
Lint tools can analyze your code and warn you of potential errors. For it to work, we need to configure it with specific rules.
Arguments over style are pointless. There should be a style guide, and you should follow it.
—Rebecca Murphey
Airbnb, as part of its style guide, provides an ESLint configuration that anyone can use as their standard.
ESLint is already installed on Create-React-App, but it’s not optimized with a styling guide and for TypeScript.
Read my article (https://medium.com/react-courses/react-create-react-app-v3-4-1-a55f3e7a8d6d) for more information.
Follow the instructions at shorturl.at/otuU8 to update the following files or just copy them from the CRA MHL template project.
.eslintrc: ESLint run commands configuration file.
.eslintignore: ESLint ignore files
.prettierrc: Prettier run commands configuration file

Output after running Lint

Compiling our code after formatting and linting it
Other Useful Libraries
We will install a couple of useful libraries that will come in handy later in the development exercises in this book.
Classnames
Prop-types
Additional Useful Utilities
Lodash (https://github.com/lodash/lodash): This makes JS easier by taking the hassle out of working with arrays, numbers, objects, strings, etc.
Moment (https://github.com/moment/moment): For working with dates, this is a must-have.
Serve (https://github.com/vercel/serve): Install this with $ yarn add serve. It adds a local server. CRA scripts include a run script to publish your app. It will generate a folder called build. We want to be able to test our build code before going to production. You’ll learn more about production build in later chapters.
Precache React-snap to working offline: This is an optimizing library that we will use to configure our app to work offline. See Chapter 11.
react-helmet change header metadata: This updates a header of each page for SEO; you’ll learn more in Chapter 11.
Analyzer Bundle: You can install the source-map-explorer and cra-bundle-analyzer tools to look inside our JS bundle chunks (more in Chapter 11).
Summary
In this chapter, we learned about the Create-React-App project and set up our starter project and development environment with essential libraries we will be learning about through this book. We installed the CRA MHL template project that already includes everything we need, as well as learned about vanilla CRA and the TypeScript template.
We also learned about libraries such as NPM, Yarn, Webpack, NPM scripts, TypeScript, Sass/SCSS, Redux Toolkit, Material-UI, Styled Components, Router, Jest and Enzyme, Generate templates, and ESLint and Prettier as well as other useful libraries.
In the next chapter, we will be building React custom components and subcomponents.