In the previous chapter, you learned more about how to structure your React functions, classes, components, and subcomponents. You were introduced to the MERN stack. You learned about Recoil and how to build an exclusive members-only area by creating a login system with React as the MERN stack’s front end. We even created a custom front-end toast message component to display messages.
In this chapter, we will pick up where we stopped in the previous chapter and start creating our back end with Node.js, Express, and MongoDB—the other parts of the MERN stack. In this chapter, you will see the full development cycle, from coding your front end to completing the back end so you have a working app. This app is capable of not just including components but actual functionality to log in to a secure members-only area and interacting with a database. It even provides the foundation to connect to a socket to receive live messages.
In the second part of this chapter, we will add a register component and complete the login cycle by encrypting and decrypting the user’s password as well as updating the login selector so we can actually register a user and log into our exclusive member area.
What We’ll Be Building
At this point in our app, if we try to actually log in to the exclusive members-only area we built in the previous exercise, we will get a network error, as shown in Figure 7-1.
Figure 7-1
Attempting to log in to our app
That’s not an error. That is the correct behavior at this point. We get this message because we haven't set up our back-end service yet. In this chapter, we will set up our back-end logic and get the login system to work as well as complete the cycle by adding a register component and the backend API.
You can download the complete backend code that we will be creating from here:
Node.js should not be new to you. In fact, we already installed Node.js and have been using NPM, the Node.js package manager, since Chapter 1. We have been installing and using libraries from NPM.
Note
Node.js is a single-threaded, nonblocking framework based on Google’s V8 JS engine.
Node.js makes code execution superfast. Node.js is a nonblocking, event-driven input/output approach that allows a significant number of fast concurrent connections. This is done with the JavaScript event loop.
When I say many, how many concurrent connections can we create? It really depends on the server we are running as well as the internal configuration settings of the server we are running.
In fact, Node.js can run 1,000 concurrent connections of Node.js at the same time on a standard Ubuntu server, without freezing up the CPU, and even that can be increased by libraries such as Posix (https://github.com/ohmu/node-posix). This is usually sufficient for small and medium-size apps, without setting a complex set of server stacks, load balancer, etc.
In fact, did you know that Node.js is being used by companies such as PayPal, LinkedIn, and Yahoo?
Why Express?
We can use the Node.js HTTP module and write our web server from scratch, so why do we need Express on top of Node.js?
Express is built on top of Node.js and utilizes the Node.js HTTP/HTTPS modules. There are many frameworks that are built on top of Node.js. Express is one of the oldest and widely used Node.js frameworks because it provides a separation of concerns. Express is used by companies such as Myspace, Twitter, Stack, and Accenture.
Note
Node.js is a fast, low-level input/output mechanism with an HTTP/HTTPS module built-in. Express is a web application framework that sits on top of Node.js. Express is light-weight and helps organize your server-side web application.
Why Should You Use MongoDB?
MongoDB is a document-oriented NoSQL database intended for high-volume data storage. Instead of storing data in tables and rows using traditional relational databases, MongoDB offers collections and documents. Documents consist of key-value pairs. Here is an interesting fact: more than 3,000 companies reportedly use MongoDB in their tech stacks, including Uber, Lyft, and the delivery service Hero.
Building the Back End
For the back-end service, we will be using Express to interact with MongoDB using a library that I created called rooms.js (https://github.com/EliEladElrom/roomsjs).
rooms.js is aimed at speeding up our development effort. rooms.js provides a way to send and receive messages and switch to different transporters to create rooms and stream data between users, stream data from a database, and even stream from a third-party CDN.
At the end of this process, we will be able to call the service file we will be creating on our localhost.
In the next chapter, we will be publishing both our front ends and back ends in a project to a remote Ubuntu server so we can see the app running live.
I broke the process down in this chapter to these coding steps:
Database schema
Validate Service API
Express framework
MongoDB
You can download the complete code of the back-end code from here:
To get started, if you recall from our previous chapter when we learned about Recoil, our first step was to set up a model and then an atom. Our first step with our back-end project is going to be similar: setting up the data model on the back end. Go ahead and create a database.js file that we will be using to set up our database schema for our user. That schema will come in handy when we need to interact with the MongoDB database later. Our user object has an email and password of type String. Our database will include other variables that will come handy to when we want to register our user such as an encryption hash and salt (more about encryption later in the chapter), the last time the user logged in, the signup date, a login token, a phone number, a username, and how many times the user tried to log in but couldn’t. Take a look:
// models/database.js
let usersSchema = {
username: 'String',
email: 'String',
passwordHash: 'String',
passwordSalt: 'String',
lastLoginDate: 'String',
attempt: 'Number',
signDate: 'String',
emailEachLogin: 'Boolean',
loginToken: 'String',
phone: 'String'
};
if (typeof exports != 'undefined' ) {
exports.usersSchema = usersSchema;
}
Validate Service API
Next, we need to create a service API that we can use to validate our user. It needs to have an input of the user data and output an authentication response of success or fail. I am not showing here the register service API to set up a user register yet, but the login system usually needs to include encryption and decryption for security. Part of the code is implemented already and will come handy in our second part of this chapter.
At this point, I am allowing users to bypass all the encryption and decryption logic with a baked-in password of isDebug. I am also setting up a mechanism to check how many times the user tried to log into the system, so we can block users in case a hacker launches an assault robot on our login system to try to crack a user password. Security should always be your first priority.
To get started with our service API, we will create a service file and call it validate.js. Take a look at the code:
// src/services/validate.js
'use strict';
At the top of the file, it’s good practice to use use strict to indicate that the code should be executed in strict mode, meaning we can’t, for instance, use undeclared variables.
Next, we will use the database schema we created for the users in the previous step and define the libraries and variables we will be using.
let usersSchema = require("../models/database").usersSchema,
logger = require('../utils/log.js').logger,
moment = require("moment"),
CryptoJS = require('crypto-js'),
async = require('async'),
connector,
users,
isUserExists = false,
params,
user;
Our main function validate will take the data that we pass from our server file and the connection to the database we set.
function validate(data, dbconnectorCallBackToRooms) {
connector = this.getConnector();
params = data.query || data.params;
params.member_id = -1;
We will be using async series logic. Node.js is an event-based loop, and we cannot stop Node.js; however, there are cases when we need to build logic that is based on an async call, and sometimes each operation relies on a previous operation or operations.
That can be done using the async.series library (https://github.com/hughsk/async-series). The library allows one or multiple operations that can be executed one after the other.
In our case, we just do one operation of checkUserInfo, but in future iterations we probably will expand this and include other operations, such as sending an email to the user that they have logged into our system or other required logic.
let operations = ;
operations.push(checkUserInfo);
async.series(operations, function (err, results) {
let retData = {
"exist_member_id": params.member_id,
"isUserExists": isUserExists,
"user": user
};
users = null;
user = null;
isUserExists = false;
params = null;
Once the results are in from the async operations, we can pass them back to the output to display.
For the checkUserInfo operation, we need to validate the user against the MongoDB database.
function checkUserInfo(callback) {
logger.info('validate.js :: checkUserInfo');
if (connector.isModelExists('users')) {
users = connector.getModel('users');
} else {
let schema = connector.setSchema(usersSchema);
users = connector.setModel('users', schema);
}
let findObject = {
email: (params.email).toLowerCase()
};
users.find is using the Mongoose library to sort through the MongoDB document, searching any document that has the object we define. In our case, this is the user’s email address.
users.find(findObject)
.then((doc) => {
if (doc.length > 0) {
user = doc[0]._doc;
params.member_id = (user._id).toString();
Once we have the results, we can use Hash and Salt to decrypt the user information.
let passwordParam = (params.password).toString(),
password = user.passwordHash,
salt = user.passwordSalt,
attempt = user.attempt,
lastLoginDate = user.lastLoginDate;
let databaseTime = moment(lastLoginDate),
now = moment().format(),
diff = moment(now).diff(databaseTime, 'minutes');
If there are three bad attempts, we lock the user out for 60 seconds.
// don't even attempt to login - 3 attempts
if (diff < 60 && attempt >= 3) {
callback('three_attempts_wait_one_hour', null);
} else {
let decryptedDatabasePassword = (CryptoJS.AES.decrypt(password, salt)).toString(CryptoJS.enc.Utf8),
For now, I am overwriting the entire encryption and decryption logic here, so we can test the service using a password of isDebug, but later I will expand how we can encrypt and decrypt. That is a standard protocol. The reason I broke it down into two steps is that first we just want to see our system working. Then we implement security, which is just good practice to ensure our code is working.
if (params.password === 'isDebug’) {
loginSuccess = true;
}
users.updateOne({"email": params.email}, {
$set: {
attempt: new_attempt_count,
lastLoginDate: now
}
}).then((doc) => {
if (loginSuccess) {
isUserExists = true;
callback(null, null);
} else {
isUserExists = false;
callback('No login success', null);
}
}).catch((err) => {
logger.info(err);
callback(err.message, null);
});
}
} else {
callback('no user found', null);
}
})
.catch((err) => {
logger.info(err);
callback(err.message, null);
});
}
module.exports.validate = validate;
Express Framework
Now that we have our validate service API ready, we want to be able to access that logic and send data and display results.
To do that, we will be using Express, with the help of my own library called roomsjs (https://github.com/EliEladElrom/roomsjs). This library simplifies creating services, via SSL or HTTP, and the library can connect to any database (including MongoDB). We will set up MongoDB to use the default settings, but we could easily change the database to use MySQL or any other data source.
In Node.js, we can utilize the Express server using a server.js file that sets up our database and service library. We start by first importing the libraries we need.
For now, we only need the HTTP module as we will be running this logic on a local box, but in the next chapter when we publish to production, we will add logic for HTTPS.
// create server
let server = require('http').createServer(app).listen(port, function () {
logger.info('Listening on http://' + os.hostname() + ':' + port);
});
roomdb (https://github.com/EliEladElrom/roomsdb) is the roomjs companion library. It sets a connector to any database, as well as iterates through any service files that we set.
The library sets a transporter using a socket. We don’t need a socket at this point, and HTTP is sufficient in our logic, but it’s good to have. Sockets can be used in case we want to create an app that needs live messages, for instance, a chat app.
// set rooms
rooms = new rooms({
isdebug : true,
transporter : {
type: 'engine.io',
server : server
},
roomdb : roomdb
});
This is beyond the scope of this chapter, but I wanted you to be aware of what’s possible.
Lastly, we want to catch any uncaughtExceptions and display them so we can work out any issues with our code.
process.on('uncaughtException', function (err) {
logger.error('uncaughtException: ' + err);
});
Local MongoDB
The last piece of the puzzle is to set up MongoDB on our local box. In the next chapter, we will create our MongoDB on a remote server as well as publish our code, but for now we need a working local build first.
We can create a local MongoDB using the following commands on a Mac. To get started, we can install MongoDB with Homebrew.
Note
Homebrew is open source package management to simplify the installation of software on macOS and Linux. brew is the core command of Homebrew.
Next, use the brew command to install MongoDB and set the location and permission of the MongoDB data we are storing.
$ brew install mongodb
$ sudo mkdir /data
$ sudo mkdir /data/db
$ sudo chown -R `id -un` /data/db
$ cd /Locally run mongodb
That’s it. We have MongoDB installed and ready to be used.
Now, we can run Mongod and Mongo; see Figure 7-2 and Figure 7-3.
$ mongod
Figure 7-2
Mongod process running in Mac terminal
$ mongo
Figure 7-3
mongo shell command
Why two commands? What do these commands mean?
Mongod will start the MongoDB process and run it in the background. Mongo will give us a command-line shell that is connected to the Mongod process we are running. Inside the Mongo shell, we can execute commands.
This depends on the MongoDB version you have installed. Some MongoDB versions run as services in the background, and the terminal does not need to stay open.
Note
Mongod (“Mongo daemon”) is the daemon process for MongoDB. Mongod handles the MongoDB data requests, manages the data access, and runs management operations. mongo is a command-line shell to connect to Mongod.
Now inside the Mongo shell terminal window, we need to create our database name.
You can confirm this worked by using the following:
db.users.find();
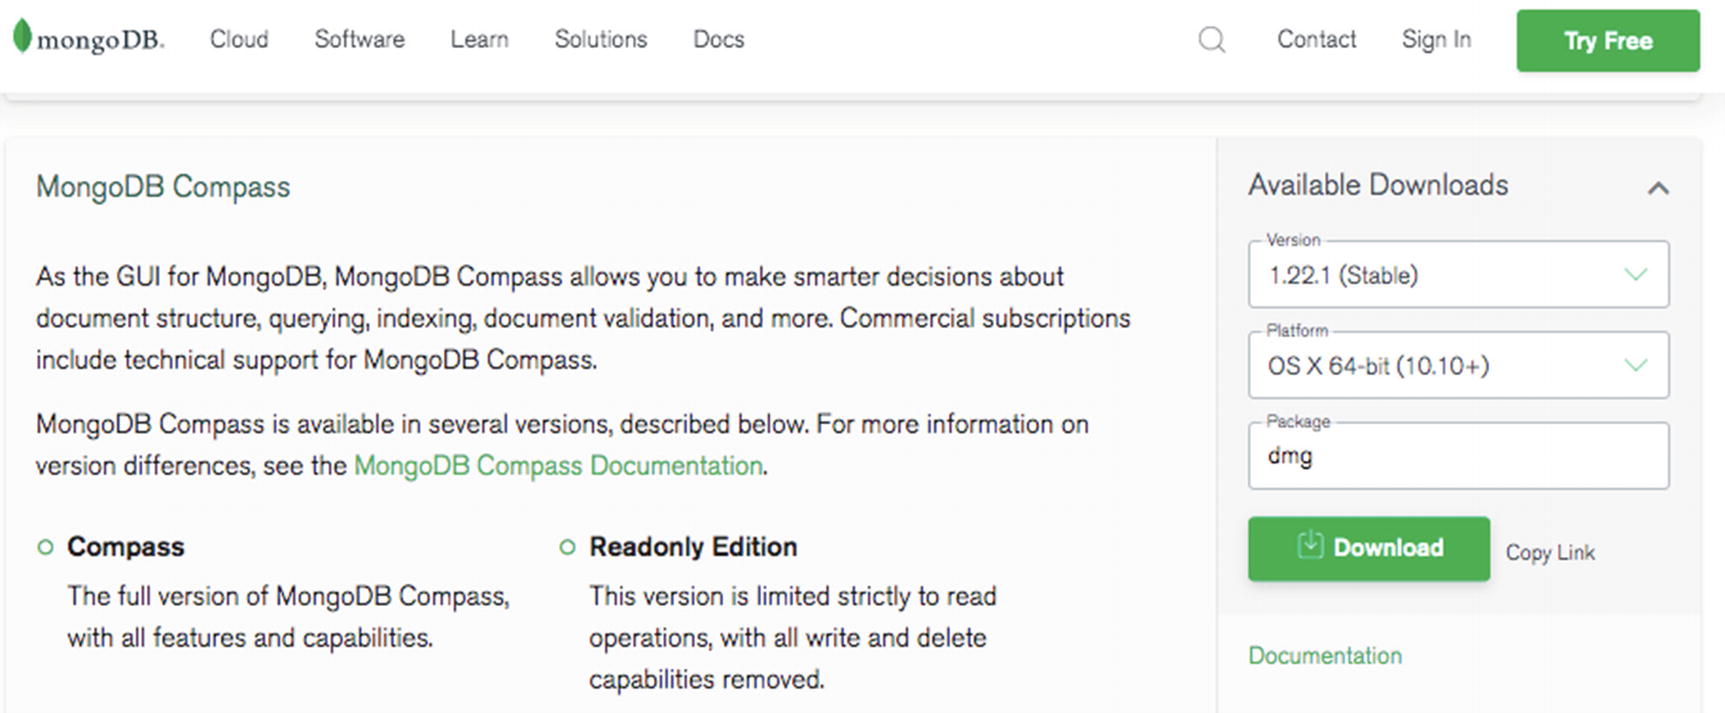
This command will return the user we inserted. Although you can type all the commands in the Mongo shell, there are many graphical user interfaces (GUIs) to help manage the MongoDB database. Two good GUIs that I recommend and that can help are Compass (https://www.mongodb.com/try/download/compass) and nosqlbooster (https://nosqlbooster.com/downloads).
These tools can help back up, export, import, and run commands. See the download page of MongoDB Compass provided by the MongoDB team, as shown in Figure 7-4.
Figure 7-4
MongoDB Compass GUI download page
There are many tools, paid and free, so feel free to do your own research (DYOR). Each tool offers different sets of features based on the subscription and supports different platforms. I am not recommending any tools, and you don’t have to use any GUI. The Mongo command-line shell could be all that you need.
To connect and set up these GUI tools, the process is the same: we connect to MongoDB on our local or remote box. Since we did not change the default MongoDB, the port of MongoDB should be 27017.
GUI Client > local localhost:27017 > connect
Many GUIs also support pasting in a URI. The URI for localhost without security in place will look like this:
URI: mongodb://localhost:27017
Note
The URI value represents a uniform resource identifier (URI) to create a Mongo instance. A URI describes the hosts and options.
Now that we have our MongoDB database set up, we have created our service API, and we have a Node.js server file that utilizes Express, we are ready to run our back-end service. In a separate window, call this:
$ node server.js
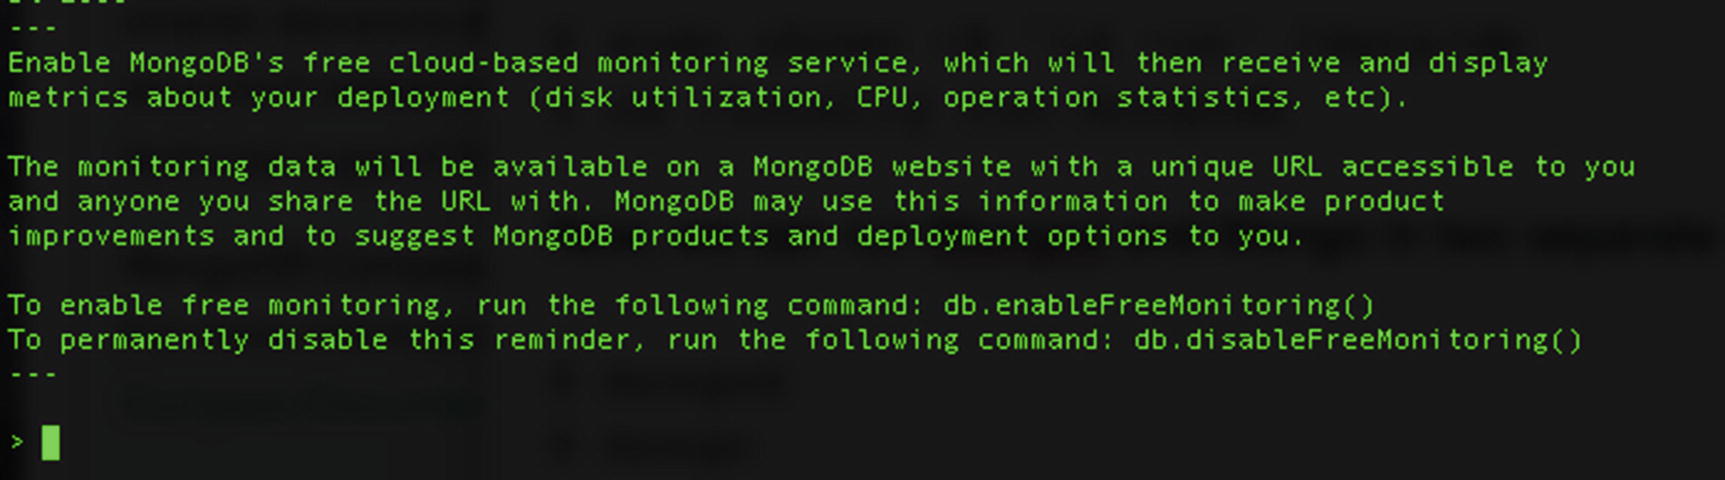
If everything went well, you will get the following output in Terminal:
This means the service file iterates through our service files and sets up a socket for us, in case we need that in the future. Now, if you test the service using this:
Next, if you check your front-end code, using the isDebug password and the email address you set, you can run your app again ($yarn start). You’ll find we can log into our secure member area successfully. Figure 7-5 shows the member secure area that right now only has the logout button that we created in the previous chapter.
Figure 7-5
Secure member area after user logged in successfully
Now let’s open our browser developer console. In Chrome DevTools, for instance, select View ➤ Developer ➤ Developer Tools from top menu.
We can see that our app created the accessToken inside our local storage, with the value we set, as shown in Figure 7-6. These values are used in our app to determine if the user can access the secure area.
Figure 7-6
Chrome developer tools local storage values
Setting Up MongoDB Authentication
We have MongoDB set up on our local machine, so the next step is to create MongoDB authentication. Without authentication, any unauthorized user can just connect to your database and do as they please.
To set that up, in Terminal, connect to the Mongo shell terminal as an admin (ensure Mongod is running). Once we are connected to the database, we can create the user we will be using and set the roles of reading and writing. Here are the commands:
For a sanity check, we can run the getUsers command to ensure our user was added correctly.
$ db.getUsers()
[
{
"_id" : "MyDatabase.myuser",
"user" : "myuser",
"db" : "MyDatabase",
"roles" : [
{
"role" : "readWrite",
"db" : "MyDatabase"
}
],
"mechanisms" : [
"SCRAM-SHA-1",
"SCRAM-SHA-256"
]
}
]
Next, disconnect from the Mongo shell (Cmd+C).
We have our user with a secure password. Next, we can enable authentication in the Mongod configuration file. Enable security, if it’s not already.
$ vim /usr/local/etc/mongod.conf
security: authorization: enabled
Great! Now connect to MongoDB with the username and password.
$ mongo MyDatabase -u myuser -p YOUR_PASSWORD
Bravo! Now our database is password-protected. In the Mongo shell or GUI, if you try to connect without credentials, you will get an error, as shown in Figure 7-7.
Figure 7-7
Authentication error on MongoDB Compass
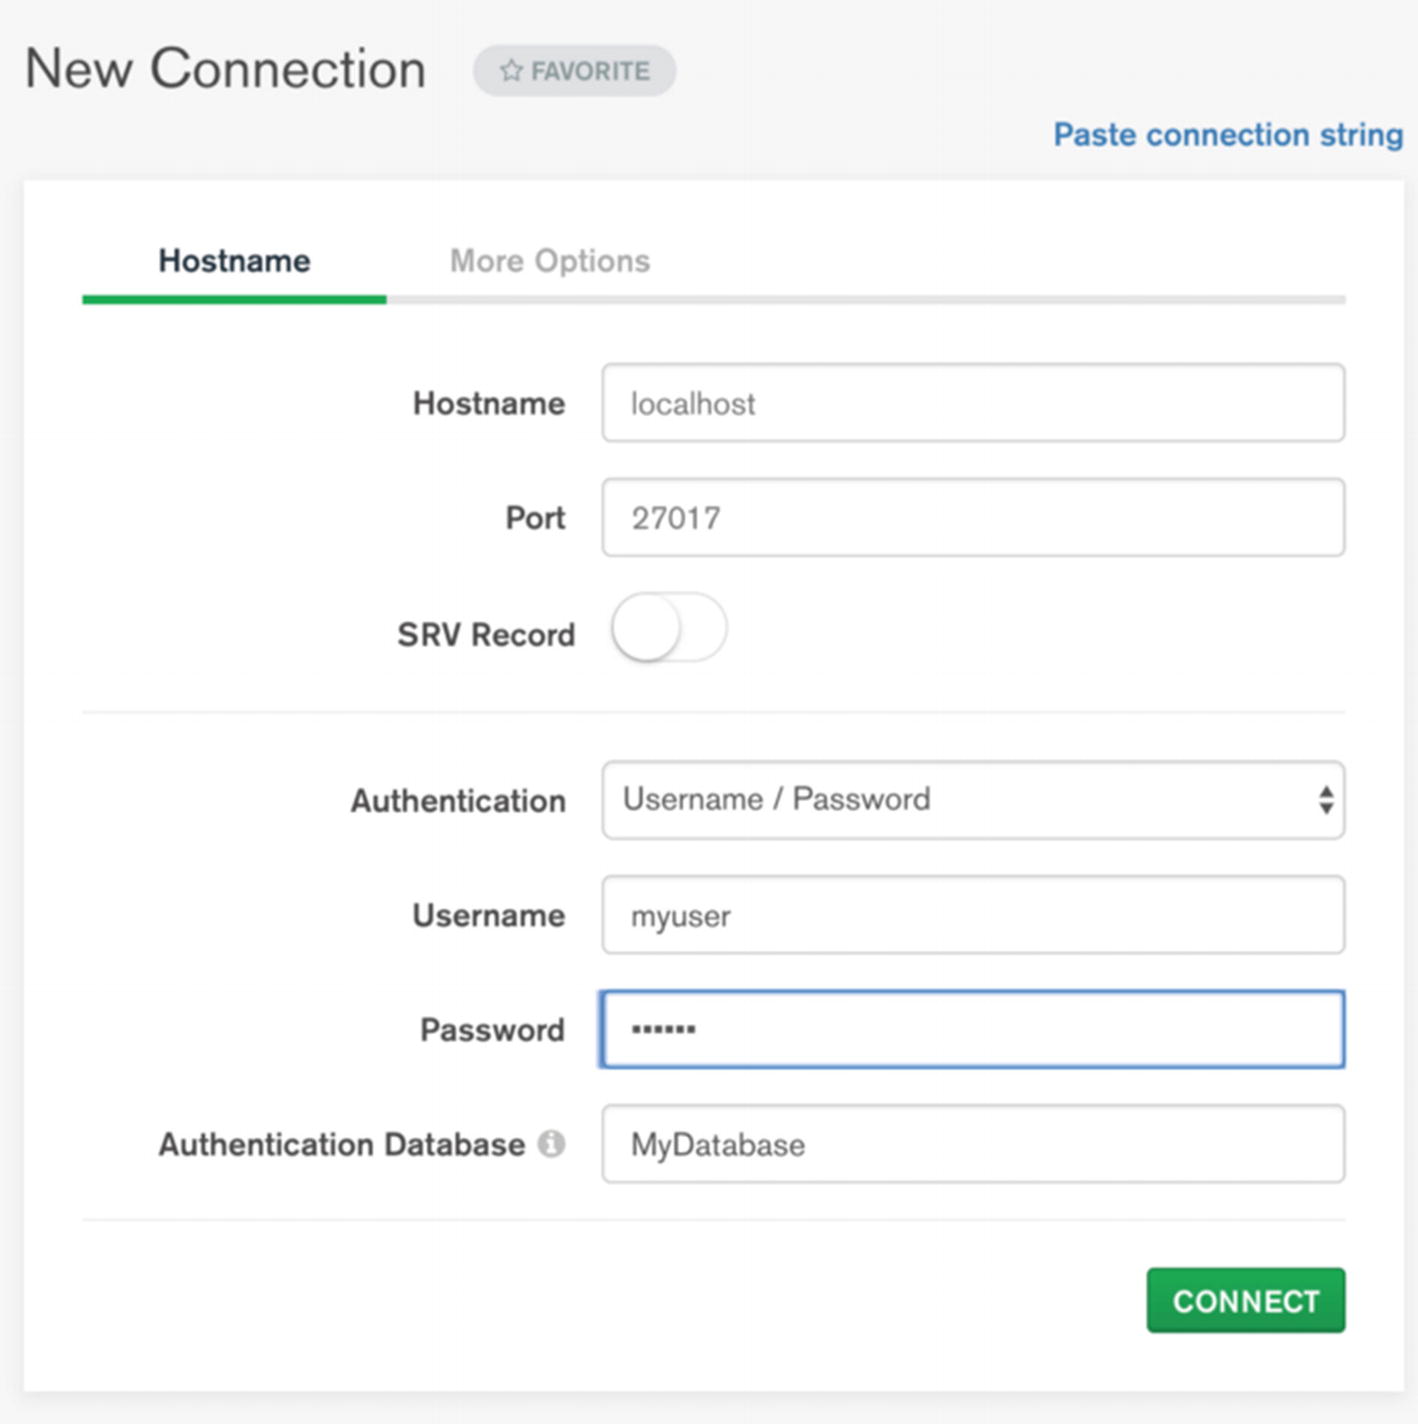
To solve this authentication error, we need to connect with our credentials, as shown in Figure 7-8.
Figure 7-8
Setting authentication in MongoDB Compass
The last part is to set our code to connect using authentication. If you look at the code level of server.js, we are connecting with roomdb, which uses the Mongoose library (https://github.com/Automattic/mongoose) for the connection.
This design prepares us for production, as we have two files for development and production (roomsdb-local.json and roomsdb.json) holding the database information and the code switch between them based on where the code is running.
Full Login Register System
So far, we completed a full cycle from the front end to the back end for the login component, but we are still not code complete. Our code is not reading and writing into our MongoDB.
The reason is that in real life, we need to encrypt and decrypt the user’s password instead of just passing in baked-in data. To do that, we need to add some register logic that can take the user’s password string, encrypt the string, and then store it in our database. When the user wants to log in, we want to decrypt the user’s password and match it with the password the user provided in the login input box. All of this is a normal security protocol for a secured login-register system.
In this part of this chapter, we will do just that. We will create a register component that encrypts the user’s password and a service API to write the data into our MongoDB. Lastly, we will refactor our Recoil login selector to encrypt the password before sending it, so we can test reading the user’s password and compare the results.
You can download the complete front-end code that we will be coding from here:
We can start off the same way we did with the login component, from the model object. Create a registerObject.ts with the register information we want to capture.
In our case, our form will capture the username, email, and password and will ensure the password was inserted correctly with a repeat password input. This can be expanded to any other information you would like to capture. We also will set the initRegister method to set our default values.
Remember to also add the register model to the src/model/index.ts file for easy access.
// src/model/index.ts
export * from './registerObject'
Register Atom
Next is setting up our Recoil atom. Create a new file and call it registerAtoms.ts. The file will use initRegister to set the default values.
// src/recoil/atoms/regsiterAtoms.ts
import { atom } from 'recoil'
import { initRegister } from '../../model'
export const registerState = atom({
key: 'RegisterState',
default: initRegister(),
})
Now that we have our atom ready, we can continue and create our register selector.
Register Selector
For encrypting and decrypting the user’s password, we will be using a library called crypto-js (https://github.com/brix/crypto-js). It’s a JavaScript library of crypto standards.
We will need both the library and the types installed.
$ yarn add crypto-js @types/crypto-js
Our registerSelectors.ts is going to be similar to our login selector.
// src/recoil/selectors/registerSelectors.ts
import { selector } from 'recoil'
import axios from 'axios'
import { registerState } from '../atoms/registerAtoms'
import * as CryptoJS from 'crypto-js'
export const registerUserSelector = selector({
key: 'RegisterUserSelector',
get: async ({ get }) => {
const payload = get(registerState)
if (
payload.email === '' ||
payload.password === '' ||
payload.repeat_password === '' ||
payload.username === '' ||
payload.repeat_password !== payload.password
) {
// eslint-disable-next-line no-console
console.log(
'registerSelectors.ts :: registerUserSelector :: ERROR incomplete form :: ' +
But we will add the encryption. To encrypt, we can create a secret passphrase that we can decide on and then use the CryptoJS.AES.encrypt method to encrypt our password. Take a look:
In addition, we can get prepared for publishing our code for production, which we will be doing in the next chapter. CRA accepts adding environment variables (https://create-react-app.dev/docs/adding-custom-environment-variables/). In fact, process.env.NODE_ENV is already baked into our app with the word development or production. We can use it to set our service API URL that we can set in our code.
Our register selector is complete and ready to be used. However, before we continue and build our view presentation layer, we can also adjust the login selector to send the encrypt string of our password for security. Let’s take a look.
Refactor Login
In this section, we will refactor our login so it will adjust our userSelectors.ts logic so that it sends an encrypted version of our user’s password.
From just passing the username and password, we have this:
Great! Now we have both our login and register selectors ready to pass the user’s encrypted password to our service APIs.
In the next chapter, we will publish to production and set our app on an SSL server so the data is not only encrypted but also secured from hackers stealing our users’ information. As you recall, we also placed some logic to check how many attempts the user tried to log in for extra security.
Register View Layer
For the register view layer, we will be using the same approach that we did with the login view layer. We will be creating the following:
RegisterForm.tsx and RegisterForm.styles.ts
RegisterPage.tsx, which includes RegisterPageInner,SubmitUserFormComponent, and onFailRegister as subcomponents
Take a look at the register component hierarchy, as shown in Figure 7-9.
Figure 7-9
Register view layer component hierarchy wireframe
In RegisterForm.tsx, our RegisterPage will wrap the RegisterPageInner pure subcomponent for the React hooks to work. Once the user submits the atom, the form is updated, and the changes will be reflected in SubmitUserFormComponent, just as we did with the login component. The onSuccessRegister and onFailRegister methods handle what to do on success and failed login attempts. This is the same process we used for the Login view layer in the previous chapter. See Figure 7-10, which shows an activity flow diagram of this process.
Figure 7-10
Register activity flow diagram
Register Form
Our register form is the subcomponent that holds the register form elements. We will start by showing the imported libraries.
// src/components/Register/RegisterForm.tsx
import * as React from 'react'
import TextField from '@material-ui/core/TextField'
import Button from '@material-ui/core/Button'
import { withStyles, WithStyles } from '@material-ui/core/styles'
import CircularProgress from '@material-ui/core/CircularProgress'
import styles from './RegisterForm.styles'
import { registerObject } from '../../model/registerObject'
RegisterFormInner is our wrapped React function component that we will be using to pass the styles and props.
The code takes the same approach as the Login form component we created in the previous chapter for simplicity. We pass the changes to the onUpdateRegisterField and onRegister methods to the parent component.
The onSuccessRegister and onFailRegister methods handle what to do on a successful login attempt and on a failed login attempt. At this point, we just tie this to a baked-in token that we create, but later we can implement a logic to have our back-end system generate unique tokens and have these tokens interpreted by our front-end code; for instance, we can have them expire in 24 hours.
Now that we have our front-end code complete, we can create our register.js service file in our Node.js app. The service is similar to validate.js.
Let’s take a look. Our imports statements include the crypto-js library, so we can decrypt the password using the same library we used in the React app.
// src/services/register.js
'use strict';
let usersSchema = require("../models/database").usersSchema,
logger = require('../utils/log.js').logger,
moment = require("moment"),
async = require('async'),
CryptoJS = require('crypto-js'),
params,
user,
isUserExists = false,
connector,
users;
Our main function, register, includes three operations: readUserInfoFromDB, insertUser, and getUserId.
function register(data, dbconnectorCallBackToRooms) {
logger.info('---------- register ----------');
connector = this.getConnector();
params = data.query || data.params;
params.member_id = -1;
let operations = [];
operations.push(readUserInfoFromDB);
operations.push(insertUser);
operations.push(getUserId);
async.series(operations, function (err, results) {
The readUserInfoFromDB operation will check if the user already exists in the database because we don’t want to have multiple users using the same email addresses.
Our insertUser operation will decrypt the password with the same secret string we created on our React front-end code. We are adding a random salt and hash to ensure that our user’s password is stored securely in our database.
The reason is that we don’t want to use the same password secret for all of our passwords, but a unique secret key for each password. This is a common secure protocol to ensure our users’ personal information is protected.
With all the security in place, I am setting an override of the password, isDebug, which is used for testing purposes only and should be removed on a production build.
Lastly, the getUserId operation will retrieve the userId so we can pass that to our app and ensure our data was inserted correctly.
function getUserId(callback) {
if (isUserExists) {
callback('error', 'user_exists_already');
} else {
logger.info('register :: getUserId');
users.find({
username: params.name,
})
.then((doc) => {
if (doc.length > 0) {
params.member_id = doc[0]._id;
callback(null, doc);
} else {
callback('error username return no results');
}
})
.catch((err) => {
logger.info(err);
callback(err.message, null);
});
}
}
module.exports.register = register;
Tip
I left plenty of logging comments in the code to help you debug and understand the code better in both the front-end and back-end code.
Now run Node.js and Mongo in two Terminal windows.
$ node server.js
$ mongod
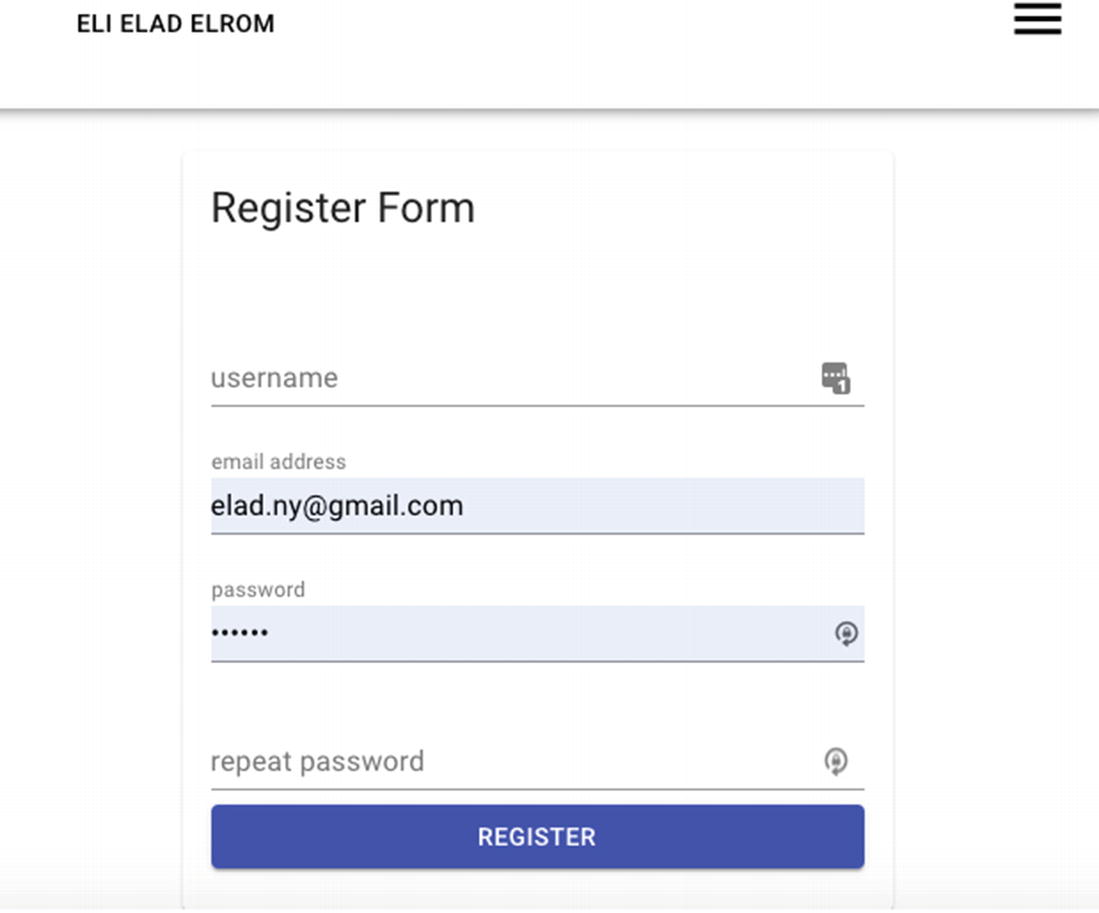
If you navigate to the register page at http://localhost:3000/Register, you will see the screen in Figure 7-11. You can now register a new user.
Figure 7-11
Register page
If everything went well, you can use a Mongo shell or other GUI of your liking to view the database and see the user we just entered. See Figure 7-12.
Figure 7-12
GUI view of a user entered into the MongoDB database
Summary
In this chapter, we created our back end with the help of Node.js, Express, and MongoDB. We started by creating our database schema and then created our validate service. We used the roomsjs and roomdb libraries to expedite Express and Node.js development. We set up our local environment for our back end including creating authentication. In the second part of this chapter, we added a register component and completed the login cycle by encrypting and decrypting the user password as well as updating the login selector.
This chapter was exciting as all the previous chapters are coming together now to create a cycle. We were able to create a fully working website/app that allows users to not just view pages made out of React components but to have common features such as registration and login. We even implemented security measurements. In the process, you were able to learn about React, state management, browser local storage, dealing with data, and how to structure React components and subcomponents.
In the next chapter, you will learn how to publish your work to a deployment server.