One of the most important aspects of software development is state management. With each development project, there’s some sort of tracking being done of data over time as well as of any updates made to that data.
When approaching the user interface in front-end development, it’s important to have a single source of truth when it comes to data. The UI should display the exact state of data. In JavaScript, it is very easy to lose a reference to a data structure, thus creating ghost references that can cause a false presentation of the wrong data.
With Angular version 1, one of the common best practices for keeping and tracking state was to manage it in services (and not in controllers). However, even then, the implementation of how to update this state completely relied on the developer. Tracking the state updates and predicating it was eventually a difficult task. There had to be something better.
In this chapter, we’ll discuss the benefits of state management and how it leverages consistent, predictable state changes. We’ll start to dive in to Angular’s ngrx suite with the ngrx/store library as well as RxJS-based state management. We will integrate ngrx/store into our application, connecting the state to components and eventually displaying it on screen.
Benefits of Store as State Management
ngrx/store is a library for state management for Angular applications. Before we start to understand the technical details of ngrx/store, it’s important to understand the advantages of integrating a store solution and how it contributes to development, production, and testing phases.
One Place for State
A store solution dictates keeping the state of the application in one directory. This makes it easier to predict updates or changes to the state’s structure and how it is manipulated and stored before it is saved by the reducer.
Performance
Utilizing unidirectional flow, relying on individual state changes while taking advantage of observables, makes Angular’s change detection more precise and performant, as it is intended to make use of the marking of direct paths in need of updating.
Testability
Since the store is a collection of reducers—pure functions—it is easy to write tests for such functions; given the same inputs, pure functions should output the same results. Moreover, pure functions don’t produce side effects; i.e., changing or updating variables outside its scope. Each test may cover a wide variety of cases, which a coverage report may sum up at the end.
Devtools
All of the preceding elements lead to a very productive base for creating helpful developer tools that can assist you when developing with a store solution. Redux (which was introduced in chapter 1) was first introduced with the concept of “time traveling”—watching the state as it changes and being able to control it and understand how, when, and why things go wrong while developing. Other useful features are available by connecting to the store before and after actions are dispatched—both client and backend storage, logging (client and backend), and any other “middleware” that can offer a useful feature.
Redux Primer
As I mentioned earlier, state management in front-end applications comes in many forms. Simply put, “state management” refers to simple CRUD (Create, Read, Update, and Delete) actions: retrieving state, changing state, deleting a state, as well as creating a new state.
Redux has answers for many of the challenges of how to achieve correct state management. Redux is a predictable state-management solution for applications. Developed by Dan Abramov, Redux is a library that implements the ideas of Flux. Flux is a design pattern that popularized one-way data flow (a.k.a. unidirectional flow), which was first presented by Facebook.
Flux
In the core of the Flux pattern , the flow for performing CRUD actions should be in one direction. The state should be updated by dispatching an action to the store and not by directly manipulating it. Once the store is updated, the view should re-render the latest state.
There have been dozens of implementations for Flux. Some of them used a more thorough way of handling multiple stores and actions, while some took a simpler approach. Redux took the simpler approach, eventually gaining popularity in state management for front-end applications.
ngrx/store is an implementation of Redux that was developed with RxJS while keeping the core concepts and API of Redux. Before we dive into ngrx/store, we’ll review the basic concepts of Redux.
Redux in Action
Redux is a JavaScript library for state management. Although it was developed around the React framework, it’s agnostic to any framework. Taking ideas from Flux and Elm, it helps you design an application with consistent behavior while leveraging the power of functional programming.
In Redux, the state is kept in a store. A store is essentially a singleton object that is a reference to some structure of data. This data is updated via pure functions, which are called reducers. The return value of a reducers creates a new state in the store. In the following code snippet, we create a simple reducer function that returns a value to indicate whether a light switch is switched on or off:
import { createStore } from 'redux';// reducerfunction lightSwitch(state = 0, action) {switch (action.type) {case 'LIGHT_ON':return 1;case 'LIGHT_OFF':return 0;default:return state;}}
To connect this reducer to the store, we use the createStore function:
let store = createStore(lightSwitch);In order to switch the light on and off, we start dispatching the appropriate actions:
store.dispatch({ type: 'LIGHT_ON' }); // switch the light on - '1'store.dispatch({ type: 'LIGHT_OFF' }); // switch the light off - '0'
In order to listen to events whenever a value changes in the store, we can subscribe to the store:
store.subscribe( () => {console.log(store.getState()); // outputs the state});
These are the basics of using Redux as a state-management solution with any framework. However, Redux has gone beyond this and includes much more. It includes middleware that allows extensibility to the library while connecting plugins; i.e., adding asynchronous actions to mutate the state.
Reduce and Flux for Redux
Considering that the state is kept in an array while reducers are used for manipulating the actual data in the Flux store, to implement the store, the reduce function (from the array) takes another function as the first parameter and an initial value as the second parameter. Finally, the output of a reduce operation contains one value.
The concept of having a reduce function for each slice of the state fits nicely into the Array.reduce function, utilizing both performance in producing a new state (array) and boilerplate code in applying a state change once an action is called.
ngrx/store
ngrx/store is essentially Redux for Angular. Underneath, it is based on RxJS and implements the Redux API while exposing the nature of the RxJS API. This gives asynchronous support from the start to the store, since RxJS unifies both synchronous and asynchronous event handling.
Similar to Redux, ngrx/store is based on unidirectional flow, as shown in Figure 3-1.
Figure 3-1. Simple ngrx/store state flow
Next, we’ll dive into ngrx/store and its implementation while integrating it into our application.
Core Concepts
Similar to Redux, use of ngrx/store is designed around three main objects:
store
reducers
actions
Underneath the hood, there are even more objects, which makes working with these three a breeze.
Store
A store is a singleton object that holds the state of the application. It should be regarded as the one and only single source of data that is delivered to the application. By following this rule, the store represents the application’s true and only state at any time.
The store can be thought of as an object with an Event Bus’ features, among others. Because one of its main goals is to keep and track a state, in order to be notified of a state update, we can “subscribe” to the store. On the other hand, to change the state, we can “dispatch” an action with a new state value.
To achieve that, the store includes two important features of RxJS: an observable and an observer.
Rx.Observable
An observable is an object that holds data that might be updated over time. It can be subscribed to in order to get notifications when something has been updated or changed. In other words, this object allows the store to save and track data, to be “observed” by its subscribers, and be notified once there is a change.
It’s important to distinguish between two types of observables. A “hot” observable produces values even before it has been subscribed to (i.e., mouse move events). A “cold” observable produces values only after it has been subscribed to by an observer.
This is a simple observable that emits the values 1, 2, and 3 and then completes the process.
var observable = Rx.Observable.create(observer => {observer.next(1);observer.next(2);observer.next(3);observer.complete();});
Often, the data that is sent out through the observable is referred to as a strea m. Although it seems to be simple, before the observable emits the values of the stream to its subscribers (in the case of cold observables, once subscribed to), these values can be transformed by operator functions. Much like in JavaScript arrays, for example, the values can be mapped to new values before they are sent to the subscribed functions:
var observable = Rx.Observable.create(observer => {observer.next(1);observer.next(2);observer.next(3);observer.complete();}).map(value => value * 2);
Rx.Observer
An observer is an object that can subscribe to an observable object. In other words, this object allows the store to watch for updates in its state and then lets this update move on to the next subscribers.
An observer should implement at least one function out of three that an observable might call over time: next(x), error(e), and complete(). To connect an observer to an observable and start receiving values, the subscribe method should be used:
var observable = Rx.Observable.create(observer => {observer.next(1);observer.next(2);observer.next(3);observer.complete();});var observer = {next: (value) => console.log(value),error: (err) => console.log(err),complete: () => console.log('done!')};observable.subscribe(observer);
Note
Only after subscribing to an observable can the values be emitted. Each subscribe method creates a new execution for the subscribed function.
An observable can have multiple observers subscribed to it. However, since RxJS creates a new execution for each subscriber, if values are transformed (i.e., with map), each subscriber will get the most recent transformed values.
var observable = Rx.Observable.create(observer => {observer.next(1);observer.next(2);observer.next(3);observer.complete();}).map(value => value * 2);observable.subscribe(val => console.log('1st', val));observable.subscribe(val => console.log('2nd', val * 2));
The output for this code would be:
1st 21st 41st 62nd 42nd 82nd 12
However, looking back at the store concept in Redux, we would like the data to be both observable and an observer. On the one hand, we would like to observe the store’s data for any changes. On the other hand, we would like to perform some operations on this data before emitting these values to potential subscribers.
Rx.BehaviorSubject
A BehaviorSubject is a composition of an observable object and an observer object. This can really be thought of as a special Event Bus (or Event Emitter) that tracks its data and emits the current value once it is subscribed to. It stores the latest emitted value, which is delivered to any subscriber once it subscribes.
Because of this special feature of storing the latest emitted value, the BehaviorSubject is a perfect match for store-related implementation. It reduces boilerplate code with its observable and observer natures as well as tracks and stores data for later use.
Note
A BehaviorSubject is a variant of Rx.Subject, which is a fundamental composition of observable and observer that is used for other variants of Subject as well.
A few of the main objects in ngrx/store are based on BehaviorSubject: dispatcher, reducer, and state. Each of these extends BehaviorSubject and makes use of both its observable and observer natures for emitting values next to the main store stream.
Reducers
A reducer is a pure function (of type ActionReducer). It expects two values as input arguments: the previous state and an action object, which includes an action type and an optional payload property. It should output a new state object as a return value. For that reason, it is easy to test reducers and potentially cover all the relevant cases this function should handle.
The store is composed of one or several reducers, so each reducer represents a portion of data and a way to change it in the store. It follows the reducer pattern of Redux.
For each reducer, an instance of the Reducer class is created, which is based on a BehaviorSubject. It leverages the observable and observer advantages and emits the updated state to the store’s stream.
An important rule to keep in mind regarding reducers is that it should always return a new state object and not mutate it directly. The newly updated state is then delivered to the relevant subscribe method, so you shouldn’t worry about losing a reference to the state object where it is consumed.
A reducer operates on the arguments it receives. The first argument, the previous state, is usually used to construct a new state, copying data that should not change. Meanwhile, the data sent as the second argument, action, dictates what data should change in the state. Usually, a reducer function body would be similar to this:
export function user (state = {}, action: Action): ActionReducer<IUser> {switch (action.type) {case "UPDATE_NAME":return Object.assign({}, state, { name: action.payload });case "LOG_OUT":return Object.assign({}, {logged_in: false,name: ''});default:return state;}
Action
To update the state, an action should be emitted. An action object as received in the reducer function is composed of a type and a payload (optional). The type is a string value that is evaluated with a switch statement.
The payload property is optional and may include any data type. If the action should carry any relevant data that should update the state, then the payload will hold this data.
Emitting an action is performed using the store’s dispatch method. It’s the only way to update the state in the store; no other way should be used instead. Once an action is dispatched, the store performs a reduce process with all its registered reducers, produces a new state, and updates subscribers.
A common practice that we will use is creating an action using action creator s. Action creators receive one optional argument as payload data and return an object with the action type and payload. Since the emitting of actions is common, we can reuse an action object creation, encapsulating its creation and ensuring the exact action type is attached to the returned object. This also allows us to use a mockup for tests that require these actions.
As an example for defining an “action creator”, if want to dispatch an action for updating a user name, we can just call the updateName method (considering it exists and has been imported by a service or on its own) and pass it as an argument to dispatch:
updateName(name: string): Action {return {type: "UPDATE_NAME",payload: name};}// usagethis.store.dispatch(updateName("oren"))
This sums up the core concepts of ngrx/store. Next, we’re going to connect it to our application, add our first reducer, and display it on screen.
Adding ngrx/store
Now that we understand the basic concepts of ngrx/store, it is time to actually connect it to our application within the relevant files and start using it as a state-management tool. To do so, we need to perform these main steps, all of which are detailed in the following sections.
Install npm packages.
Define the main store module.
Create YouTube Videos reducer.
Connect the reducer to the store.
Connect the reducer to a component.
Installing NPM Packages
ngrx/store can be installed via an npm registry as an npm package. It is divided into ngrx/core and ngrx/store. To install, we can simply use npm:
npm install ngrx/store ngrx/core --save-dev Defining the Main Store Module
Files This section refers to the src/app/core/store directory.
ngrx/store is an Angular module; however, we’ll define our application store’s module such that we can simply include it in the main application module. There is no need for a separate module.
Let’s focus on the index.ts file in this directory. First, we import all the objects relevant for creating a store:
import { NgModule } from '@angular/core';import { Store, StoreModule } from '@ngrx/store';import { ActionReducer, Action, combineReducers } from '@ngrx/store';import { compose } from '@ngrx/core/compose';
Next, we define placeholders. Currently these will be empty, but rest assured—we will add the relevant code later. We then define an interface for the store EchoesState. This will assist us in development, providing code-completion and error-reporting assistance. With that, we define an actions array that is provided to our module so we can later import actions from files.
Finally, we include the reducers object, which holds function reducer references and will be used to create the store object that holds the app’s data.
export interface EchoesState {}const actions = [];const reducers = { };
Next, we define our own CoreStoreModule, ready to be imported to our main application module file.
@NgModule({imports: [StoreModule.provideStore(composeStore),],declarations: [],exports: [],providers: [ ...actions ]})export class CoreStoreModule {};
Actually, this module is already connected to the application’s main module through the core module (src/app/core/index.ts). This means that the store object is available to any other module that consumes the application’s core module.
Currently, there’s nothing in the store to consume and show on the screen. Let’s create our first reducer.
Creating a YouTube Videos Reducer
Files This section refers to the src/app/core/store/youtube-videos directory.
The YouTube videos reducer is responsible for storing an array of YouTube media item objects. This directory includes four files:
youtube-videos/index.ts
This file exports this reducer’s actions and reducer function so it can be easily connected to the store once imported.
export * from './youtube-videos.reducer';export * from './youtube-videos.actions';
youtube-videos /youtube-videos.actions.ts
In this file, we declare the actions that this reducer can handle as well as the actions that are allowed to be dispatched by the application’s modules.
The actions are available via a service that can be consumed by any module of the app (Injectable). However, we’re going to use action creators to encapsulate its creation and reuse. Notice that each action is defined as a static property with a prefix. This ensures the uniqueness of each action once reducers are invoked. The Action interface is imported so as to hint at the return value for each action creator function.
import { Injectable } from '@angular/core';import { Action } from '@ngrx/store';@Injectable()export class YoutubeVideosActions {static ADD = '[YoutubeVideos] ADD_VIDEOS';static RESET = '[YoutubeVideos] RESET';addVideo(videos: GoogleApiYouTubeVideoResource[]): Action {return {type: YoutubeVideosActions.ADD,payload: videos};}reset(): Action {return {type: YoutubeVideosActions.RESET};}}
youtube-videos/youtube-videos.reducer.ts
The reducer file defines the function reducer that the store will run each time an action is dispatched.
First, the ActionReducer and Action interfaces are imported to make note of the reducer function type and its return value type.
Second, the interface EchoesVideos is defined for this reducer—an array that contains objects of type GoogleApiYouTubeVideoResource. We will use this interface when we connect the reducer to the store and also later on when we consume this reducer in presentation components. Again, this allows the Typescript linting as well as Typescript-aware code editors to assist with code completion and error reporting.
The videos ActionReducer is the actual reducer function. It expects a state array as a first argument, and if it’s not present, it will initialize it to an empty array. It also expects an action object, which is handled by its type property and optionally by its payload property. Notice how the RESET case returns an empty array, so it doesn’t need to use the action’s payload.
import { ActionReducer, Action } from '@ngrx/store';import { YoutubeVideosActions } from './youtube-videos.actions';export interface EchoesVideos extends Array<GoogleApiYouTubeVideoResource> {};export function videos (state: EchoesVideos = [], action: Action): ActionReducer<EchoesVideos> {switch (action.type) {case YoutubeVideosActions.ADD:return [...state, ...action.payload];case YoutubeVideosActions.RESET:return [];default:return state;}};
youtube-videos /youtube-videos.spec.ts
This file includes tests for the reducer. Since we’re testing a simple JavaScript function, the tests are quite simple, and there’s no need to connect it to Angular. Angular’s default testing framework is called Jasmine. However, Angular is completely agnostic to the testing framework, and you are free to choose the proper solution as you see fit.
First, we need to import the videos function reducer and the relevant actions class. Next, we import a json object from a static file, which will be used as payload data for the ADD action. There are various ways in which we can add videos to the store. The most common way in the Echoes Player (Lite) is by searching YouTube with its data API.
However, we don’t actually want to perform an ajax request to YouTube’s API each time we test. Rather, we want to test the operation of adding videos to the store, especially whether the ajax request has successfully returned the response. For this reason, we import a json file, which is a mocked array of items from the tests directory (located in the root of the application).
import { videos } from './youtube-videos.reducer';import { YoutubeVideosActions } from './youtube-videos.actions';import { YoutubeMediaItemsMock } from '../../../../../tests/mocks/youtube.media.items';
Now, we are ready to create a test suite by using describe. Since the YoutubeVideosActions class doesn’t store data or have any side effects, we can simply instantiate it once for the whole suite. Angular does this behind the scenes once this class is injected into our application. We have to do this manually here in order to gain access to its functions.
describe('The Youtube Videos reducer', () => {const mockedState = [];const youtubeVideosActions = new YoutubeVideosActions();
Next, there are three specs defined with the it function. Each spec should define its own expectation. For the first spec, I want make sure that the videos reducer function will return the same state if is given an action type that it does not handle. To test it, I simply run the function and send to it the state as the first argument and an action object with unknown type as the second. Then, I set the expectation to match the state.
it('should return current state when no valid actions have been made', () => {const state = [...mockedState];const actual = videos(state, { type: 'INVALID_ACTION', payload: {} });const expected = state;expect(actual).toBe(expected);});
For the second spec, I want to test the ADD action. To do so, I call the videos function again. This time, the function receives as its second argument a mocked array of YouTube item objects while using the addVideos action creator to create a proper ADD action. Finally, I expect the state to change and include the new array in addition to what it had before.
it('should ADD videos', () => {const state = [...mockedState];const actual = videos(state, youtubeVideosActions.addVideos(YoutubeMediaItemsMock));const expected = [...state, ...YoutubeMediaItemsMock];expect(actual.length).toBe(expected.length);});
For the last spec, I test the RESET action. For starters, I create an initial state object that includes the array of YouTube objects from the YoutubeMediaItemsMock file. Then, I call the videos reducer function with this initial state as the first argument (remember: this argument functions as the current state that exists in the store) while passing the reset() function (or action creator). As a result of calling this action, I expect the initial state to be empty, meaning its length should be equal to zero.
it('should empty the state when RESET', () => {const state = [...YoutubeMediaItemsMock];const actual = videos(state, youtubeVideosActions.reset());const expected = 0;expect(actual.length).toEqual(expected);});});
If we run the npm test in the terminal, crossing our fingers, we’ll receive the test results (considering the tests in app.spec.ts are disabled with xdescribe since none will currently pass as the code for them has not been added yet) shown in Figure 3-2.

Figure 3-2. Test results for the YouTube videos reducer
It is nice to see that all five of the specs of the YouTube videos reducer are marked with a green check mark (there are two more specs you can find within the source code).
With these results, we can rest assured that our reducer function will handle the data as we expect it to. It’s important to realize that it’s our responsibility to figure out and implement specs for all the edge cases that this reducer should handle.
Now that we have a reducer that is fully working and tested, it’s time to connect the reducer to the store and connect the store to the application so as to view and display its contents.
Connecting Reducer to the Store
Files This section refers to the src/app/core/store/index.ts file.
To connect the YouTube videos reducer to the store, we need to import both the reducer function and its relevant actions class.
First, we import the videos reducer function and the YoutubeVideosActions class.
import { NgModule } from '@angular/core';import { Store, StoreModule } from '@ngrx/store';import { ActionReducer, Action, combineReducers } from '@ngrx/store';import { compose } from '@ngrx/core/compose';// reducersimport { videos, YoutubeVideosActions, EchoesVideos } from './youtube-videos';
We also import EchoesVideos in order to use it in the main store for defining the videos entry of type EchoesVideos. The YoutubeVideosActions class is added to the actions array, which is included later in this file as part of this module’s “providers.”
export interface EchoesState {videos: EchoesVideos;}const actions = [YoutubeVideosActions];
We haven’t connected the reducer yet. To make it officially connected to the main store, we simply have to add it as a key to the reducers object. This object is handed to the provideStore method, which creates the actual store instance.
const reducers = { videos };@NgModule({imports: [StoreModule.provideStore(reducers),],declarations: [],exports: [],providers: [ ...actions ]})export class CoreStoreModule {};
Now that the reducers are connected to our app, they are ready to be consumed in our components.
Connecting Reducer to a Component
Files This section refers to the src/app/youtube-videos/youtube-videos.component.ts file.
First, we need to import the store’s objects that we’ll work with in this component. We’ll need the EchoesState interface, EchoesVideos interface, YoutubeVideosActions class, and YoutubeMediaItemsMock file (for demo purposes).
import { Component, EventEmitter, Input, Output, ChangeDetectionStrategy, OnInit } from '@angular/core';import { Observable } from 'rxjs/Observable';import { Store } from '@ngrx/store';import { EchoesState } from '../core/store';import { EchoesVideos, YoutubeVideosActions } from '../core/store/youtube-videos';import { YoutubeMediaItemsMock } from '../../../tests/mocks/youtube.media.items';
Next, we define a videos$ property on the YoutubeVideos component that will store a reference to the store’s videos key. To make it Typescript-friendly, the EchoesVideos interface is used here to annotate that we’re expecting an observable of the EchoesVideos type. Next, we inject the YoutubeVideosActions class and the Store objects into the constructor method. We use EchoesState in order to define a store of this type.
export class YoutubeVideosComponent implements OnInit {videos$: Observable<EchoesVideos>;constructor(private youtubeVideosActions: YoutubeVideosActions,private store: Store<EchoesState>) {}
Now, we need to connect the videos$ property so it will “listen” to changes within the videos reducer in our store, so that each time this reducer is updated with a new state, this videos$ property is notified. The store’s “select” method is used in order to define which slice of the state should be returned when the state changes. In this case, the “state.videos” is selected and returned to the observable member “videos$”. It’s better to connect this on the ngOnInit component lifecycle after any input parameters have been initialized.
ngOnInit() {this.videos$ = this.store.select(state => state.videos);this.store.dispatch(this.youtubeVideosActions.addVideos(YoutubeMediaItemsMock));}
Notice that for the sake of this demo, I dispatch the YoutubeMediaItemsMock array to mock a response of search results in YouTube. See how I use the youtubVideosActions in order to add videos to the reducer. This dispatch action will eventually invoke the videos reducer function and update the state using the ADD case.
The one last step—but still an important step for displaying something on the screen—is rendering the data from the videos$ observer using this component’s template.
To use an observable in a view, we need to use the async pipe. Since videos$ is not an actual array, the async pipe enables us to extract the actual data from this object and use it in the view. (This is just a very brief introduction for the next chapter.) We use the async pipe to extract the data whenever it is changed in the videos$ observer , which is dependent on the videos reducer. Then, we render the length of this videos array.
@Component({selector: 'youtube-videos',template: `<article class="col-md-12"><h1>Search Results</h1><code>There are {{ (videos$ | async).length }} videos</code></article>`})
There are several operations within this expression, as follows:
We ask the view to listen to the videos$ observer for changes.
After changes have happened, they are propagated into the html code of this component. We ask to evaluate the length property of the videos data object. This operation happens only after the data from the videos$ reducer has been resolved.
Now, we can run the application and see something:
Run this in the terminal: npm start.
Open the browser and navigate to http://localhost:3000.
You should be able to see something similar to what is shown in Figure 3-3, indicating the number of videos that exist in the videos reducer:
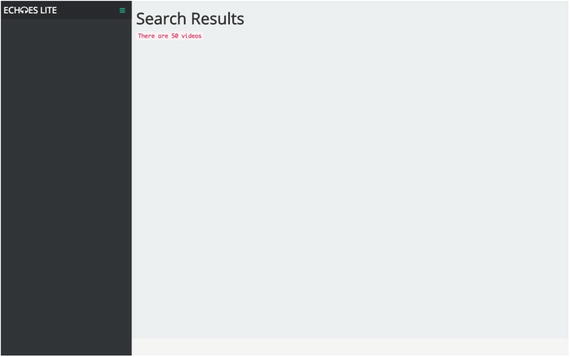
Figure 3-3. Rendering data from the videos reducer
We can take this further and render a list of videos with images:
@Component({
  selector: 'youtube-videos',
  template: `
  <article class="col-md-12">
    <h1>Search Results</h1>
    <code>
      There are {{ (videos$ | async).length }} videos
    </code>
    <ul class="list-unstyled">
      <li *ngFor="let video of (videos$ | async)">
        <img [src]="video.snippet.thumbnails.default.url">
        {{ video.snippet.title }}
      </li>
    </ul>
  </article>
  `
})
Figure 3-4. Rendering a list of videos from the videos reducer
Congratulations! You’ve just connected your real first reducer to the application’s view.
Summary
In this chapter, I introduced the state-management concept and its popularity in JavaScript with Redux. I introduced ngrx/store as an RxJS-based state-management solution for Angular, along with its benefits and core concepts. Finally, I went through the required steps for adding ngrx/store to our application, creating the first reducer for the store, and consuming it in the view with a component.
In the following chapters, we will built on top of these concepts with more aspects of the application while incorporating additional reducers and techniques to work with it.