
Chapter 9: Testing Next.js
Testing is an essential part of the whole development workflow. It gives you more assurance that you're not introducing bugs into your code, as well as that you're not breaking any existing features.
Testing Next.js specifically is not different from testing any other React app or Express.js, Fastify, or Koa application. In fact, we can divide the testing phases into three different stages:
- Unit testing
- End-to-end testing
- Integration testing
We will look at those concepts in detail in this chapter's sections.
If you already have previous experience in writing a React application, you're likely to re-utilize your knowledge for testing a Next.js-based website.
In this chapter, we will look in detail at the following:
- An introduction to testing and testing frameworks
- Setting up a testing environment
- How to use some of the most popular test runners, frameworks, and utility libraries
By the end of this chapter, you'll be able to set up a testing environment using a test runner and a testing library and run tests before sending the code to production.
Technical requirements
To run the code examples in this chapter, you need to have both Node.js and npm installed on your local machine.
If you prefer, you can use an online IDE such as https://repl.it or https://codesandbox.io; they both support Next.js, and you don't need to install any dependency on your computer. As with the other chapters, you can find the code base for this chapter on GitHub: https://github.com/PacktPublishing/Real-World-Next.js.
An introduction to testing
As we've seen during this chapter's introduction, testing is an essential part of any development workflow and can be divided into three separate testing phases:
- Unit testing: These tests aim to make sure that every single function in your code is working. They do that by testing the codebase's functions individually against correct and incorrect inputs, asserting their results and possible errors to ensure they're working expected.
- End-to-end testing: This testing strategy reproduces a typical user interaction with your application, ensuring that the app responds with a specific output once a given action occurs, just like we would do by testing the website manually on a web browser. For instance, if we build a form, we want to automatically guarantee that it is working correctly, validating the input, and performing a specific action on the form's submission. Also, we want to test that the user interface is rendering as we intended by using particular CSS classes, mounting certain HTML elements, and so on.
- Integration testing: In this case, we want to ensure that separate parts of our application, such as functions and modules, are cohesively working together. For instance, we want to assert that composing two functions results in a certain output, and so on. Unlike unit tests, where we test our functions individually, with integration tests, we ensure that a whole group of aggregated functions and modules are producing a correct output when given a different set of inputs.
There might be other testing phases and philosophies, but in the following sections, we will be concentrating on the ones we've mentioned here, as they are the essential parts of the testing workflow, and I strongly encourage you to adopt all of those phases when shipping your code to production.
As said in the introduction for this chapter, testing Next.js is not different than testing a React application or an Express.js/Fastify/Koa web server. We need to choose the proper test runner and libraries and ensure that our code is working as expected.
When talking about test runners, we refer to tools responsible for executing every test found in the code base, collecting the coverage, and displaying the test results in the console. If the test runner process fails (and exits with a non-zero exit code), the tests are considered to have failed.
The Node.js and JavaScript ecosystems offer a large set of choices for test runners, but starting from the next section, we will be concentrating on the two most popular alternatives out there: Jest (for unit and integration tests) and Cypress (for e2e, short for end-to-end, tests).
Running unit and integration tests
In this section, we will write some integration and unit tests by using one of the most popular test runners in the JavaScript ecosystem: Jest.
Before installing all the dependencies we need, clone the following repository, which already contains a small web application that we'll be using as an example for writing our tests: https://github.com/PacktPublishing/Real-World-Next.js/tree/main/09-testing-nextjs/boilerplate.
It's a simple website with the following features:
- Two pages: a home page containing all the articles in our blog and a single article page.
- The article page URL implements the following format: <article_slug>-<article-id>.
- There are some utility functions that create the page's URL, retrieve the article ID from the article URL, and so on.
- Two REST APIs: one for getting all the articles and one for getting a specific article given an ID.
Now let's enter the project we've cloned and install the following dependency:
yarn add -D jest
Jest is the only dependency that we'll need for our tests, as it acts both as a testing framework and as a test runner. It provides an extensive set of features that will make our development (and testing) experience pleasant.
Given that we're writing our functions and components using ESNext" features, we want to tell Jest to use the default Next.js babel preset for transpiling those modules correctly. We can do that by creating a .babelrc file in our project's root and adding the following content:
{
"presets": ["next/babel"]
}
The next/babel preset comes pre-installed with Next.js, so we don't need to install anything, and we're ready to go.
We can start using it without any other configuration, as it comes pre-configured for running every file ending with .test.js or .spec.js.
Still, there are different approaches for how to write and where to place those files. For example, some people prefer to have a test file close to the source file, and others prefer to have all the tests inside a tests/ directory. Of course, neither of those approaches is wrong: it's up to your taste.
Pay Attention When Writing Next.js Pages' Tests
Next.js serves every .js, .jsx, .ts, and .tsx file placed inside of the pages/ directory as an application page. Therefore, you should never place any test file inside that directory, or Next.js will try to render it as an application page. We will see how to test Next.js pages in the next section while writing end-to-end tests.
Let's write our first test, starting from the easiest part of our code base: the utility functions. We can create a new file, utils/tests/index.test.js, and start by importing all the functions that we can find in our utils/index.js file:
import {
trimTextToLength,
slugify,
composeArticleSlug,
extractArticleIdFromSlug
} from '../index';
We can now write the first test for the trimTextToLength function. This function takes two arguments: a string and the length under which we will be cutting it, adding an ellipsis at its end. We use this function to show a sneak peek of the article body to tempt the reader to read the whole article.
For instance, pretend we have the following string:
const str = "The quick brown fox jumps over the lazy dog";
If we apply trimTextToLength to it, we should see the following output:
const str = "The quick brown fox jumps over the lazy dog";
const cut = trimTextToLength(str, 5);
cut === "The q..." // true
We can translate the preceding function description into code as follows:
describe("trimTextToLength", () => {
test('Should cut a string that exceeds 10 characters', () => {
const initialString = 'This is a 34 character long
string';
const cutResult = trimTextToLength(initialString, 10);
expect(cutResult).toEqual('This is a ...');
});
});
As you can see, we're using some of Jest's built-in functions, such as describe, test, and expect. They all have their specific function, and we can summarize them as follows:
- describe: Creates a group of related tests. For example, we should include tests regarding the same functions or modules inside of that function.
- test: Declares a test and runs it.
- expect: This is the function that we use to compare our function's outputs against a fixed number of results.
As we've seen, we can add several tests into the describe group so that we can test our function against multiple values:
describe("trimTextToLength cuts a string when it's too long, () => {
test('Should cut a string that exceeds 10 characters', ()
=> {
const initialString = 'This is a 35 characters long
string';
const cutResult = trimTextToLength(initialString, 10);
expect(cutResult).toEqual('This is a ...');
});
test("Should not cut a string if it's shorter than 10
characters",
() => {
const initialString = '7 chars';
const cutResult = trimTextToLength(initialString,
10);
expect(cutResult).toEqual('7 chars');
}
);
});
Moving on to the slugify function, let's try to write its own tests:
describe('slugify makes a string URL-safe', () => {
test('Should convert a string to URL-safe format', () =>
{
const initialString = 'This is a string to slugify';
const slugifiedString = slugify(initialString);
expect(slugifiedString).
toEqual('this-is-a-string-to-slugify');
});
test('Should slugify a string with special
characters', () => {
const initialString = 'This is a string to
slugify!@#$%^&*()+';
const slugifiedString = slugify(initialString);
expect(slugifiedString).
toEqual('this-is-a-string-to-slugify');
});
});
Now, try to implement the tests for the remaining functions on your own. If you have any doubt, you can find the complete test implementation here: https://github.com/PacktPublishing/Real-World-Next.js/blob/main/09-testing-nextjs/unit-integration-tests/utils/tests/index.test.js.
Once we've written all the remaining tests, we're finally ready to run our test suite. To make it easier and standard, we can create a new script inside of our package.json file:
"scripts": {
"dev": "next dev",
"build": "next build",
"start": "next start",
"test": "jest"
},
And that's all we need! We can now type yarn test in the console and admire the following output:
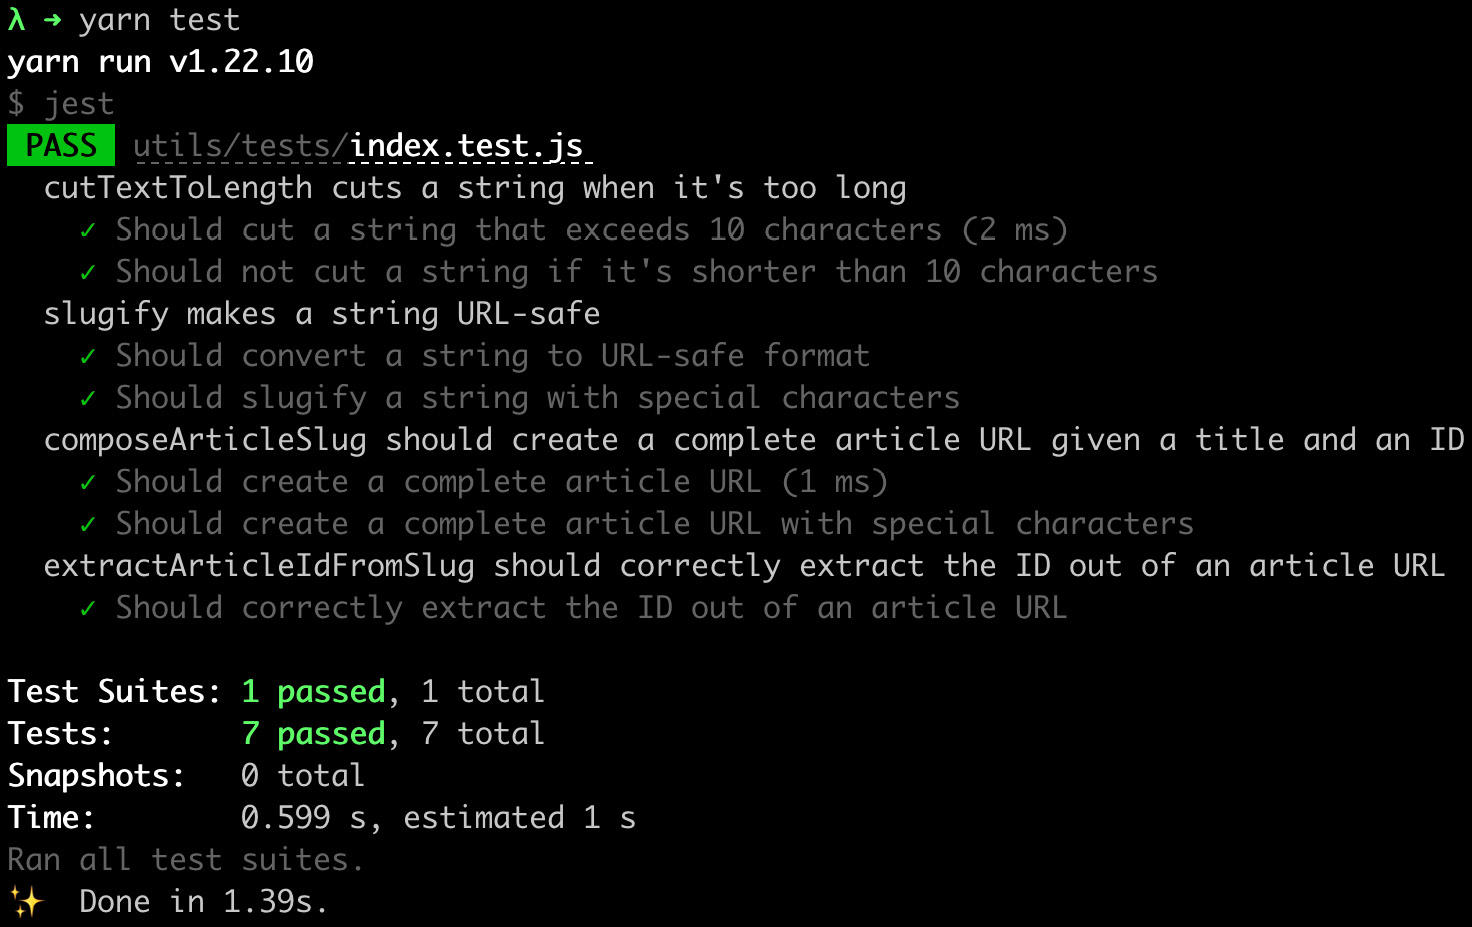
Figure 9.1 – Unit test output
We can now move on to writing a more complex test. If you open the components/ArticleCard/index.js file, you will see a simple React component that creates a link to a Next.js page.
In that case, we want to test that our composeArticleSlug and trimTextToLength functions (used in that component) integrate correctly by producing the expected output. We also want to test that the displayed text will match a fixed result when given an article as input.
Sadly, Jest alone is not enough for testing React components. We will need to mount and render them to test their output, and specific libraries do that incredibly well.
The most popular options out there are react-testing-library and Enzyme. In this example, we will be using react-testing-library, but feel free to experiment with Enzyme and see which approach you prefer.
Let's install the react-testing-library package by running this:
yarn add @testing-library/react
Now let's move on to create a new file named components/ArticleCard/tests/index.test.js.
Before moving on to the test implementation, let's consider something. We now need to test our ArticleCard component against a REST API, but we won't be running the server during the test's execution. Right now, we're not testing that our API is responding with the correct JSON containing the article, we're just testing that given an article as input, the component will produce a fixed output.
That said, we can easily create a mock containing all the information we expect an article to contain, and give it as an input to our component.
Let's create a new file, components/ArticleCard/tests/mock.js, with the following content (or just copy it from this book's GitHub repository under 09-testing-nextjs/unit-integration-tests/components/ArticleCard/tests/mock.js):
export const article = {
id: 'u12w3o0d',
title: 'Healthy summer melon-carrot soup',
body: 'Lorem ipsum dolor sit amet, consectetur adipiscing
elit. Morbi iaculis, felis quis sagittis molestie, mi
sem lobortis dui, a sollicitudin nibh erat id ex.',
author: {
id: '93ksj19s',
name: 'John Doe',
},
image: {
url: 'https://images.unsplash.com/photo-1629032355262-
d751086c475d',
author: 'Karolin Baitinger',
},
};
If you try to run the Next.js server, you will see that the APIs inside of pages/api/ will return either an array of articles or a single article in the same format we used for the mock.
We're finally ready to write our tests. Open the components/ArticleCard/tests/index.test.js file and start by importing the react-testing-library functions, the components, mocks, and utilities we want to test:
import { render, screen } from '@testing-library/react';
import ArticleCard from '../index';
import { trimTextToLength } from '../../../utils';
import { article } from '../tests/mock';
Now let's write our first test case. If we open the ArticleCard component, we will see that there's a Next.js Link component wrapping the entire card. This link's href should be in the format /articles/<article-title-slugified>-id.
As a first test case, we will test that there's one link, where the href attribute is equal to /articles/healthy-summer-meloncarrot-soup-u12w3o0d (which is the title we can see in our mock, plus the article ID):
describe('ArticleCard', () => {
test('Generated link should be in the correct format', ()
=> {
const component = render(<ArticleCard {...article} />);
const link = component.getByRole('
link').getAttribute('href');
expect(link).toBe(
'/articles/healthy-summer-meloncarrot-soup-u12w3o0d'
);
});
});
We're using the react-testing-library render method to mount and render the component, then we get the link and extract its href attribute. We eventually test this attribute value against a fixed string, which is the expected value.
Still, there is a problem with our test. If we try to run it, we will see the following error appearing in the console:
The error below may be caused by using the wrong test environment, see https://jestjs.io/docs/configuration#testenvironment-string.
Consider using the "jsdom" test environment.
That's because react-testing-library relies on the browser's document global variable, which is unavailable in Node.js.
We can quickly solve this problem by changing the Jest environment for this test file to JSDOM, a library that emulates a large part of the browser's features for testing purposes. We don't need to install anything; we can just add the following comment at the top of our testing file, right before the import statements, and Jest will do the rest:
/**
* @jest-environment jsdom
*/
If we now run yarn test in the terminal, the tests will succeed as expected.
Inside the ArticleCard component, we show a brief extract of the article body to tempt the reader to read the entire piece. It uses the trimTextToLength function to trim the article body to a maximum length of 100 characters, so we expect to see those first 100 chapters inside the rendered component.
We can proceed with writing a test as follows:
describe('ArticleCard', () => {
test('Generated link should be in the correct format', ()
=> {
const component = render(<ArticleCard {...article} />);
const link = component.getByRole('link')
.getAttribute('href');
expect(link).toBe(
'/articles/healthy-summer-meloncarrot-soup-u12w3o0d'
);
});
test('Generated summary should not exceed 100
characters',
async () => {
render(<ArticleCard {...article} />);
const summary = screen.getByText(
trimTextToLength(article.body, 100)
);
expect(summary).toBeDefined();
});
});
In this case, we render the whole component, then generate the article summary and expect it to exist inside our document.
That was an elementary example of how we can test our code base by using Jest and react-testing-library. When writing a real-world application, we also want to test our components against incorrect data to see if they can handle any errors correctly, either by throwing an error, showing a message on the screen, and so on.
Testing is not an easy topic, but it must be taken seriously as it can help us avoid shipping broken code or introducing regressions (for example, breaking a component that was previously working fine) into the existing code base. It is such a complex matter that there's also an entire book on how to test React components using react-testing-library: Simplify Testing with React Testing Library by Scottie Crump, published by Packt.
If you're interested in learning more and digging deep into React testing, I strongly suggest reading this book.
That said, there is still one piece missing in our tests. We're not testing the full-page renders, whether the APIs send back correct data, and whether we can navigate correctly between pages. But that's what end-to-end tests are all about, and we will discuss this in the next section.
End-to-end testing with Cypress
Cypress is a powerful testing tool that can test anything that runs on a web browser.
It enables you to write and run unit, integration, and end-to-end tests efficiently by running them on Firefox and Chromium-based browsers (for example, Google Chrome).
So far, we have written tests for understanding whether our functions and components are working as expected. Now it's time to test whether the entire application is working correctly.
To get started with Cypress, we just need to install it as a dev dependency in our project. We will be using the same project as the latest section, but if you want to get started from a clean project, you can clone the following repository and get started from there: https://github.com/PacktPublishing/Real-World-Next.js/tree/main/09-testing-nextjs/unit-integration-tests.
Let's install Cypress by typing the following command into the terminal:
yarn add -D cypress
Once Cypress is installed, we can edit our main package.json file by adding the following script:
"scripts": {
"dev": "next dev",
"build": "next build",
"start": "next start",
"test": "jest",
"cypress": "cypress run",
},
We now need to create a Cypress configuration file. Let's write a cypress.json file in the project root containing the following content:
"baseUrl": http://localhost:3000
}
Here, we're telling Cypress where to look when running tests; in our case, localhost:3000. Now that we're all set, let's move on to writing our first tests!
By convention, we will be putting our end-to-end tests inside a folder called cypress/, placed at the root level of the repository.
We will start with an easy test to verify that our REST APIs are working correctly.
If you open the pages/api/ folder, you will see two different APIs:
- articles.js, which returns a list of articles:
import data from '../../data/articles';
export default (req, res) => {
res.status(200).json(data);
};
- article/index.js, which takes an article ID as a query string parameter and returns the single article with that ID:
import data from '../../../data/articles';
export default (req, res) => {
const id = req.query.id;
const requestedArticle = data.find(
(article) => article.id === id
);
requestedArticle
? res.status(200).json(requestedArticle)
: res.status(404).json({ error: 'Not found' });
};
Let's create our first Cypress test file, named cypress/integration/api.spec.js, and add the following content:
describe('articles APIs', () => {
test('should correctly set application/json header', ()
=> {
cy.request('http://localhost:3000/api/articles')
.its('headers')
.its('content-type')
.should('include', 'application/json');
});
});
The APIs are slightly different from the Jest ones, but we can still see that they share the same philosophy. We use them to describe the response coming from the server, testing it against a fixed value.
In the preceding example, we're just testing that the HTTP headers include the content-type=application/json header.
We can proceed by testing the status code, which should be equal to 200:
describe('articles APIs', () => {
test('should correctly set application/json header', ()
=> {
cy.request('http://localhost:3000/api/articles')
.its('headers')
.its('content-type')
.should('include', 'application/json');
});
test('should correctly return a 200 status code', () => {
cy.request('http://localhost:3000/api/articles')
.its('status')
.should('be.equal', 200);
});
});
Moving on to a more complex test case, we can test the API output to be an array of objects, where each object must contain a minimum set of properties. The test implementation would look like this:
test('should correctly return a list of articles', (done) => {
cy.request('http://localhost:3000/api/articles')
.its('body')
.each((article) => {
expect(article)
.to.have.keys('id', 'title', 'body', 'author',
'image');
expect(article.author).to.have.keys('id', 'name');
expect(article.image).to.have.keys('url', 'author');
done();
});
});
As you can see, we're using the .to.have.keys method to test that returning object contains all the keys specified in the function argument.
Another thing to notice is that we're doing that in an each loop. For that reason, we will need to call the done method (highlighted in the code snippet) once we've tested all the desired properties, as Cypress cannot control when the code inside of the each callback has returned.
We can proceed by writing another couple of tests to see if we can get a single article given a fixed article ID:
test('should correctly return a an article given an ID', (done) => {
cy.request('http://localhost:3000/api/article?id=u12w3o0d')
.then(({ body }) => {
expect(body)
.to.have.keys('id', 'title', 'body', 'author',
'image');
expect(body.author).to.have.keys('id', 'name');
expect(body.image).to.have.keys('url', 'author');
done();
});
});
And we can also test that the server returns a 404 status code when the article is not found. To do that, we will need to change our request method a bit as Cypress, by default, throws an error when a status code greater than or equal to 400 is encountered:
test('should return 404 when an article is not found', () => {
cy.request({
url: 'http://localhost:3000/api/article?id=unexistingID',
failOnStatusCode: false,
})
.its('status')
.should('be.equal', 404);
});
Now that we have written the tests, we're ready to run them, but there's still a problem. If we try to run yarn cypress, we will see the following error on the console:
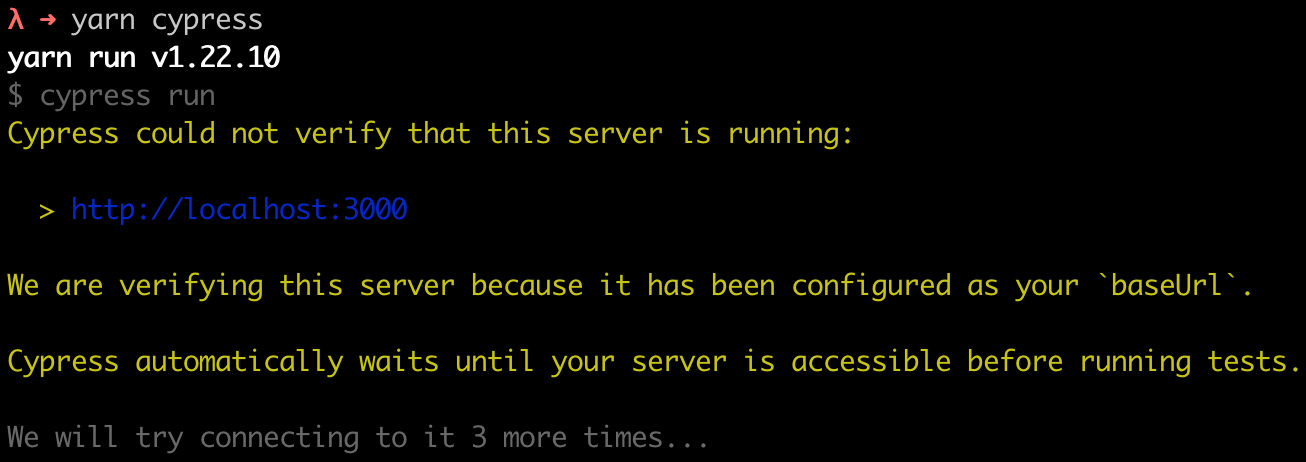
Figure 9.2 – Cypress cannot connect to the server
In fact, Cypress runs our tests against a real server, which is not reachable at the moment. We can quickly solve that by adding the following dependency:
yarn add -D start-server-and-test
This will help us by building and starting the server, and once it's reachable, it will run Cypress. To do that, we will need to edit our package.json file too:
"scripts": {
"dev": "next dev",
"build": "next build",
"start": "next start",
"test": "jest",
"cypress": "cypress run",
"e2e": "start-server-and-test 'yarn build && yarn start'
http://localhost:3000 cypress"
},
If we now try to run yarn e2e, we will see that the tests are passing correctly!
Let's create one last test file where we'll be testing the navigation between pages. We can call it cypress/integration/navigation.spec.js, and we can add the following content:
describe('Navigation', () => {
test('should correctly navigate to the article page', ()
=> {
cy.visit('http://localhost:3000/');
cy.get('a[href*="/articles"]').first().click();
cy.url().should('be.equal',
'http://localhost:3000/articles/healthy-summer-meloncarrot-
soup-u12w3o0d');
cy.get('h1').contains('Healthy summer melon-carrot
soup');
});
test('should correctly navigate back to the homepage', ()
=> {
cy.visit('http://localhost:3000/articles/
healthy-summer-meloncarrot-soup-u12w3o0d');
cy.get('a[href*="/"]').first().click();
cy.url().should('be.equal', 'http://localhost:3000/');
cy.get('h1').contains('My awesome blog');
});
});
In the first test case, we're asking Cypress to visit our website's home page. Then, we look for all the links where the href property contains /articles. We then click on the first occurrence and expect the new URL to be equal to a fixed value (http://localhost:3000/articles/healthy-summer-meloncarrot-soup-u12w3o0d).
We also test that the <h1> HTML element contains the correct title. But what does this test tell us?
- We can navigate between pages; links aren't broken. Then, of course, we should add more and more tests for links, but we just want to look at the concept right now.
- The Next.js server correctly asks and serves the correct data, since we can spot the right title inside the rendered page.
In the second test case, we ask Cypress to visit a single article page, then click on a link to go back to the home page. Again, we test the new URL is correct, and the <h1> HTML element contains the right title for the home page.
Of course, these are not complete tests, as we might want to check whether the behavior of the website is consistent between browsers (especially if we do a lot of client-side rendering), that an existing form gets validated correctly, giving accurate feedback to the user, and so on.
Like unit and integration testing, end-to-end testing is a vast and complex topic that we must deal with before shipping code to production, as it can ensure greater quality for our product, with fewer bugs and more control over regressions.
If you're interested in learning more about Cypress, I suggest you read the book End-to-End Web Testing with Cypress, by Waweru Mwaura, published by Packt.
Summary
In this chapter, we've seen how to write unit, integration, and end-to-end tests using some of the most popular libraries and test runners out there, such as Cypress, Jest, and react-testing-library.
As mentioned multiple times during the chapter, testing is essential for any application development and release process. It should be taken seriously as it can be the difference between a successful and an unsuccessful product.
In the next chapter, we will focus on a different yet crucial topic: SEO and performance. Even if our code base is 100% tested, well-designed, and working great, we need to consider its SEO score and performance. In many cases, we want as many people as possible to be browsing our applications, and we must take care of search engine optimization to reach a large audience to validate our product.