
Chapter 4: Organizing the Code Base and Fetching Data in Next.js
Next.js initially became popular thanks to its ability to make it easy to render React pages on the server instead of the client only. However, to render specific components, we often need some data coming from external sources such as APIs and databases.
In this chapter, we will first see how to organize our folder structure, as this will be the determinant for keeping the Next.js dataflow neat when managing the application state (as we will see in Chapter 5, Managing Local and Global States in Next.js), and then we will see how to integrate external REST and GraphQL APIs, both on client and server-side.
As our application grows, its complexity will inevitably increase, and we need to be prepared for this since the bootstrapping phase of the project. As soon as we implement new features, we will need to add new components, utilities, styles, and pages. For that reason, we will take a closer look at organizing our components on the basis of the atomic design principles, utility functions, styles, and how to make your code base ready for handling the application state quickly and neatly.
We will cover the following topics in detail:
- Organizing our components using the atomic design principle
- Organizing our utility functions
- Organizing static assets neatly
- An introduction to organizing styling files
- What lib files are and how to organize them
- Consuming REST APIs on the server side only
- Consuming REST APIs on the client side only
- Setting Apollo to consume GraphQL APIs both on client and server
By the end of this chapter, you will know how to organize your code base by following the atomic design principles for your components and how to split up different utility files logically. You will also learn how to consume REST and GraphQL APIs.
Technical requirements
To run the code examples in this chapter, you need to have both Node.js and npm installed on your local machine. If you prefer, you can use an online IDE such as https://repl.it or https://codesandbox.io, as they both support Next.js and you don't need to install any dependency on your computer.
You can find the code base for this chapter on GitHub: https://github.com/PacktPublishing/Real-World-Next.js.
Organizing the folder structure
Organizing your new project's folder structure neatly and clearly is incredibly important in terms of keeping your code base scalable and maintainable.
As we've already seen, Next.js forces you to place some files and folders in particular locations of your code base (think of _app.js and _documents.js files, the pages/ and public/ directories, and so on), but it also provides a way to customize their placement inside your project repository.
We've already seen that, but let's do a quick recap on a default Next.js folder structure:
next-js-app
- node_modules/
- package.json
- pages/
- public/
- styles/
Reading from top to bottom, when we create a new Next.js app using create-next-app, we get the following folders:
- node_modules/: The default folder for Node.js project dependencies
- pages/: The directory where we place our pages and build the routing system for our web app
- public/: The directory where we place files to be served as static assets (compiled CSS and JavaScript files, images, and icons)
- styles/: The directory where we place our styling modules, regardless of their format (CSS, SASS, LESS)
From here, we can start customizing our repository structure to make it easier to navigate through. The first thing to know is that Next.js allows us to move our pages/ directory inside an src/ folder. We can also move all the other directories (except for the public/ one and node_modules, of course) inside src/, making our root directory a bit tidier.
Important Note
Remember that if you have both pages/ and src/pages/ directories in your project, Next.js will ignore src/pages/, as the root level pages/ directory takes precedence.
We will now take a look at some popular conventions for organizing the whole code base, starting with React components, in the next section.
Organizing the components
Now, let's see an example of a real-world folder structure, including some styling assets (Chapter 6, CSS and Built-In Styling Methods) and test files (Chapter 9, Testing Next.js).
As for now, we will only discuss a folder structure that can help us write and find configuration files, components, tests, and styles with ease. We will dig into the previously quoted technologies in their respective chapters.
We have different ways of setting up our folder structure. We can start by separating components into three different categories and then putting styles and tests in the same folder for each component.
To do that, create a new components/ folder inside our root directory. Then, by moving inside it, create the following folders:
mkdir components && cd components
mkdir atoms
mkdir molecules
mkdir organisms
mkdir templates
As you may have noticed, we're following the atomic design principle, where we want to divide our components into different levels so as to organize our code base better. This is just a popular convention, and you're free to follow any other approach for organizing your code.
We will divide our components into four categories:
- atoms: These are the most basic components that we will ever write in our code base. Sometimes, they act as a wrapper for standard HTML elements such as button, input, and p, but we can also add animations, color palettes, and so on, to this category of components.
- molecules: These are a small group of atoms combined to create slightly more complex structures with a minimum of utility. The input atom and the label atom together can be a straightforward example of what a molecule is.
- organisms: Molecules and atoms combine to create complex structures, such as a registration form, a footer, and a carousel.
- templates: We can think of templates as the skeleton of our pages. Here, we decide where to put organisms, atoms, and molecules together to create the final page that the user will browse.
If you're interested in learning more about atomic design, here's a good article explaining it in detail: https://bradfrost.com/blog/post/atomic-web-design.
Now, let's pretend that we want to create a Button component. When we create a new component, we often need at least three different files: the component itself, its style, and a test file. We can create those files by moving inside components/atoms/ and then creating a new folder called Button/. Once we create this folder, we can move on to creating the components' files:
cd components/atoms/Button
touch index.js
touch button.test.js
touch button.styled.js # or style.module.css
Organizing our components that way will help us a lot when we need to search, update, or fix a given component. Let's say that we spot a bug in production that involves our Button component. We can easily find the component inside our code base, find its test and styling files, and fix them.
Of course, following the atomic design principle is not a must, but I'd personally recommend it as it helps keep the project structure tidy and easy to maintain over time.
Organizing utilities
There are specific files that don't export any component; they're just modular scripts used for many different purposes. We're talking here about the utility scripts.
Let's pretend that we have several components whose purpose is to check whether a particular hour of the day has passed to display certain information. It wouldn't make any sense to write the same function inside every component. We can therefore write a generic utility function and then import it inside every component that needs that kind of feature.
We can put all of our utility functions inside a utility/ folder and then divide our utilities into different files according to their purpose. For example, let's say that we need four utility functions: the first one will make computations based on the current time, the second will execute certain operations on localStorage, the third will work with JWT (JSON Web Token), and the last one will help us to write better logs for our applications.
We can proceed by creating four different files inside the utilities/ directory:
cd utilities/
touch time.js
touch localStorage.js
touch jwt.js
touch logs.js
Now that we've created our files, we can proceed by creating their respective test files:
touch time.test.js
touch localStorage.test.js
touch jwt.test.js
touch logs.test.js
At this point, we have our utilities grouped by their scope, which makes it easy to remember from which file we need to import a specific function during the development process.
There might be other approaches for organizing utility files. You may want to create a folder for each utility file so that you can put tests, styles, and other stuff inside it, thereby making your code base even more organized. It's totally up to you!
Organizing static assets
As seen in the previous chapter, Next.js makes it easy to serve static files, as you only need to put them inside the public/ folder, and the framework will do the rest.
From this point, we need to figure out which static files we need to serve from our Next.js application.
In a standard website, we may want to serve at least the following static assets:
- Images
- Compiled JavaScript files
- Compiled CSS files
- Icons (including favicon and web app icons)
- manifest.json, robot.txt, and other static files
Moving inside our public/ folder, we can create a new directory called assets/:
cd public && mkdir assets
And inside that newly created directory, we will be creating a new folder for each type of static asset:
cd assets
mkdir js
mkdir css
mkdir icons
mkdir images
We will place our compiled vendor JavaScript files inside the js/ directory and do the same with compiled vendor CSS files (inside the css/ directory, of course). When starting our Next.js server, we will be able to reach those public files under http://localhost:3000/assets/js/<any-js-file> and http://localhost:3000/assets/css/<any-css-file>. We will also be able to reach every public image by calling the following URL, http://localhost:3000/assets/image/<any-image-file>, but I suggest that you serve those kinds of assets using the built-in Image component, as seen in the previous chapter.
The icons/ directory will primarily be used to serve our web app manifest icons. The web app manifest is a JSON file that includes some useful information about the progressive web app that you're building, such as the app name and the icons to use when installing it on a mobile device. You can learn more about the web app manifest on https://web.dev/add-manifest.
We can easily create this manifest file by entering the public/ folder and adding a new file called manifest.json:
cd public/ && touch manifest.json
At this point, we can fill the JSON file with some basic information. Let's take the following JSON as an example:
{
"name": "My Next.js App",
"short_name": "Next.js App",
"description": "A test app made with next.js",
"background_color": "#a600ff",
"display": "standalone",
"theme_color": "#a600ff",
"icons": [
{
"src": "/assets/icons/icon-192.png",
"type": "image/png",
"sizes": "192x192"
},
{
"src": "/assets/icons/icon-512.png",
"type": "image/png",
"sizes": "512x512"
}
]
}
We can include that file using an HTML meta tag, as seen in Chapter 3, Next.js Basics and Built-In Components:
<link rel="manifest" href="/manifest.json">
That way, users browsing your Next.js app from a mobile device will be able to install it on their smartphones or tablets.
Organizing styles
Style organization can really depend on the stack you want to use to style your Next.js application.
Starting from CSSinJS frameworks such as Emotion, styled-components, JSS, and similar ones, one common approach is to create a specific styling file for each component; that way, it will be easier for us to find a particular component style inside our code base when we need to make some changes.
However, even though separating styling files depending on their respective components can help us keep our code base organized, we may need to create some common styles or utility files, such as color palettes, themes, and media queries.
In that case, it can be useful to reuse the default styles/ directory shipped with a default Next.js installation. We can put our common styles inside that folder and import them inside other styling files only when we need them.
That said, there isn't really a standard way to organize styling files. We will take a closer look at those files in both Chapter 6, CSS and Built-In Styling Methods, and Chapter 7, Using UI Frameworks.
Lib files
When talking about lib files, we refer to scripts that explicitly wrap third-party libraries as lib files. While the utility scripts are very generic and can be used by many different components and libraries, the lib files are specific for a certain library. To make the concept clearer, let's talk about GraphQL for a moment.
As we're going to see in Data fetching, the last section of this chapter, we will need to initialize a GraphQL client, save some GraphQL queries and mutations locally, and so on. To make those scripts more modular, we will store them inside a new folder called graphql/, which lies inside a lib/ directory, at the root of our project.
If we try to visualize the folder structure for the preceding example, we will end up with the following schema:
next-js-app
- lib/
- graphql/
- index.js
- queries/
- query1.js
- query2.js
- mutations/
- mutation1.js
- mutation2.js
Other lib scripts can include all those files connecting and making queries to Redis, RabbitMQ, and so on, or functions specific to any external library.
While an organized folder structure seems out of context when talking about the Next.js data flow, it can actually help us to manage the application state, as we will see in Chapter 5, Managing Local and Global States in Next.js
But talking about the application state, we want our components to be dynamic most of the time, meaning that they can render content and behave differently depending on the global application state or the data coming from external services. In fact, we need to call external APIs to retrieve our web app content dynamically in many cases. In the next section, we will see how to fetch data on the client and server sides, using both GraphQL and REST clients.
Data fetching
As seen in the previous chapters, Next.js allows us to fetch data on both the client and server sides. Server-side data fetching could happen in two different moments: at build time (using getStaticProps for static pages), and at runtime (using getServerSideProps for server-side rendered pages).
Data can come from several resources: databases, search engines, external APIs, filesystems, and many other sources. Even if it's technically possible for Next.js to access a database and query for specific data, I'd personally discourage that approach as Next.js should only care about the frontend of our application.
Let's take an example: we're building a blog, and we want to display an author page showing their name, job title, and biography. In that example, the data is stored in a MySQL database, and we could easily access it using any MySQL client for Node.js.
Even though accessing that data from Next.js can be relatively easy, it would make our app less secure. A malicious user could potentially find a way to exploit our data using an unknown framework vulnerability, injecting malicious code, and using other techniques to steal our data.
For that reason, I strongly suggest delegating database connections and queries to external systems (in other words, CMSes such as WordPress, Strapi, and Contentful) or backend frameworks (in other words, Spring, Laravel, and Ruby on Rails), which will make sure that the data is coming from a trusted source, will sanitize the user input detecting potentially malicious code, and will establish a secure connection between your Next.js application and their APIs.
In the following sections, we will see how to integrate REST and GraphQL APIs from both the client side and the server side.
Fetching data on the server side
As we've seen so far, Next.js allows us to fetch data on the server side by using its built-in getStaticProps and getServerSideProps functions.
Given that Node.js doesn't support JavaScript fetch APIs like browsers do, we have two options for making HTTP requests on the server:
- Using the Node.js' built-in http library: We can use this module without installing any external dependency, but even if its APIs are really simple and well made, it would require a bit of extra work when compared to third-party HTTP clients.
- Using HTTP client libraries: There are several great HTTP clients for Next.js, making it really straightforward to make HTTP requests from the server. Popular libraries include isomorphic-unfetch (this renders the JavaScript fetch API available on Node.js), Undici (an official Node.js HTTP 1.1 client), and Axios (a very popular HTTP client that runs both on client and server with the same APIs).
In the next section, we will be using Axios to make REST requests, as it is probably one of the most frequently used HTTP clients for both client and server (with ~17,000,000 downloads per week on npm), and there's a high chance that you will be using it sooner or later.
Consuming REST APIs on the server side
When discussing the integration of REST APIs, we need to divide them into public and private APIs. The public ones are accessible by anyone without any kind of authorization, and the private ones always need to be authorized to return some data.
Also, the authorization method is not always the same (and different APIs might require different authorization methods), as it depends on who developed the APIs and the choices they made. For instance, if you want to consume any of the Google APIs, you would need to go into a process called OAuth 2.0, which is an industry standard for securing APIs under user authentication. You can read more about OAuth 2.0 in the official Google documentation: https://developers.google.com/identity/protocols/oauth2.
Other APIs, such as the Pexels APIs (https://www.pexels.com/api/documentation), allow you to consume their contents using an API key, which is basically an authorization token that you'll need to send within your request.
There may be other ways in which to authorize your requests, but Oauth 2.0, JWT, and API Key are the most common ways that you'll likely encounter while developing your Next.js applications.
If, after reading this section, you want to experiment with different APIs and authorization methods, here's an awesome GitHub repository containing a list of free REST APIs: https://github.com/public-apis/public-apis.
For now, we will be using a custom API explicitly made for this book: https://api.realworldnextjs.com (or, if you prefer: https://api.rwnjs.com). We can start by creating a new Next.js project:
npx create-next-app ssr-rest-api
After running the Next.js initialization script, we can add axios as a dependency, as we'll use it as an HTTP client for making REST requests:
cd ssr-rest-api
yarn add axios
At this point, we can easily edit the default Next.js index page. Here, we will list some users using a public API exposing just their usernames and personal IDs. After we click on one of the usernames, we will be redirected to a detail page to see more personal details for our users.
Let's start by creating the pages/index.js page layout:
import { useEffect } from 'react';
import Link from 'next/link';
export async function getServerSideProps() {
// Here we will make the REST request to our APIs
}
function HomePage({ users }) {
return (
<ul>
{
users.map((user) =>
<li key={user.id}>
<Link
href={`/users/${user.username}`}
passHref
>
<a> {user.username} </a>
</Link>
</li>
)
}
</ul>
)
}
export default HomePage;
If we try to run the preceding code, we will see an error, as we don't yet have our users' data. We need to call a REST API from the built-in getServerSideProps and pass the request result as a prop to the HomePage component:
import { useEffect } from 'react';
import Link from 'next/link';
import axios from 'axios';
export async function getServerSideProps() {
const usersReq =
await axios.get('https://api.rwnjs.com/04/users')
return {
props: {
users: usersReq.data
}
}
}
function HomePage({ users }) {
return (
<ul>
{
users.map((user) =>
<li key={user.id}>
<Link
href={`/users/${user.username}`}
passHref
>
<a> {user.username} </a>
</Link>
</li>
)
}
</ul>
)
}
export default HomePage;
Now, run the server and then go to http://localhost:3000. We should see the following list of users to appear on the browser:
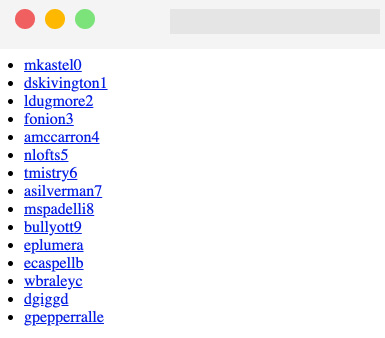
Figure 4.1 – API result rendered on the browser
If we now try to click on one of the listed users, we will be redirected to a 404 page, as we haven't created a single page user yet.
We can solve that problem by creating a new file, pages/users/[username].js, and calling another REST API to get the single user data.
To get the single user data, we can call the following URL, https://api.rwnjs.com/04/users/[username], where [username] is a route variable representing the user we want to get the data of.
Let's move to the pages/users/[username].js file and add the following content, starting with the getServerSideProps function:
import Link from 'next/link';
import axios from 'axios';
export async function getServerSideProps(ctx) {
const { username } = ctx.query;
const userReq =
await axios.get(
`https://api.rwnjs.com/04/users/${username}`
);
return {
props: {
user: userReq.data
}
};
}
Now, inside the same file, let's add a UserPage function, which will be the page template for our /users/[username] route:
function UserPage({ user }) {
return (
<div>
<div>
<Link href="/" passHref>
Back to home
</Link>
</div>
<hr />
<div style={{ display: 'flex' }}>
<img
src={user.profile_picture}
alt={user.username}
width={150}
height={150}
/>
<div>
<div>
<b>Username:</b> {user.username}
</div>
<div>
<b>Full name:</b>
{user.first_name} {user.last_name}
</div>
<div>
<b>Email:</b> {user.email}
</div>
<div>
<b>Company:</b> {user.company}
</div>
<div>
<b>Job title:</b> {user.job_title}
</div>
</div>
</div>
</div>
);
}
export default UserPage;
But there's still a problem: if we try to render a single user page, we will get an error on the server side as we are not authorized to get the data from that API. Remember what we said at the beginning of this section? Not all APIs are public, which makes a lot of sense as there are times where we want to access very private information and companies and developers protect this information by restricting access to their APIs to authorized people only.
In that case, we need to pass a valid token as an HTTP authorization header while making the API request, such that the server will know that we are authorized to access this information:
export async function getServerSideProps(ctx) {
const { username } = ctx.query;
const userReq = await axios.get(
`https://api.rwnjs.com/04/users/${username}`,
{
headers: {
authorization: process.env.API_TOKEN
}
}
);
return {
props: {
user: userReq.data
}
};
}
As you can see, axios makes it really easy to add an HTTP header to the request, as we only need to pass an object as the second argument of its get method, containing a property called headers, which is an object including all the HTTP headers we want to send to the server within our request.
You may be wondering what process.env.API_TOKEN stands for. While it is possible to pass a hardcoded string as a value for that header, it is bad practice for the following reasons:
- When committing your code using Git or any other version control system, everyone having access to that repository will be able to read private information such as the authorization token (even outside collaborators). Consider this as a password that should be kept secret.
- Most of the time, API tokens change depending on the stage at which we're running our application: running our app locally, we may want to access APIs using a test token, and use a production one when deploying it. Using an environment variable will make it easier for us to use different tokens depending on the environment. The same is valid for API endpoints, but we will see that later on in this section.
- If an API token changes for any reason, you can easily edit it using a shared environment file for the whole app instead of changing the token value in every HTTP request.
So, instead of manually writing sensitive data inside our files, we can create a new file called .env inside our project's root and add all the information we need for our application to run.
Never Commit Your .env File
The .env file contains sensitive and private information and should never be committed using any version control software. Make sure to add .env to your .gitignore, .dockerignore, and other similar files before deploying or committing your code.
Now, let's create and edit the .env file by adding the following content:
API_TOKEN=realworldnextjs
API_ENDPOINT=https://api.rwnjs.com
Next.js has built-in support for .env and .env.local files, so you don't have to install external libraries to access those environment variables.
After we've edited the file, we can restart the Next.js server and click on any user listed on the home page, thereby accessing the user detail page, which should look like this:
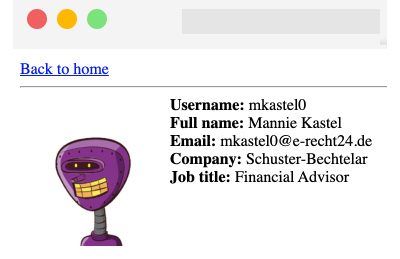
Figure 4.2 – The user detail page
If we try to reach a page such as http://localhost:3000/users/mitch, we will get an error, as a user with mitch as their username does not exist, and the REST API will return a 404 status code. We can easily catch this error and return the Next.js default 404 page by just adding the following script to the getServerSideProps function:
export async function getServerSideProps(ctx) {
const { username } = ctx.query;
const userReq = await axios.get(
`${process.env.API_ENDPOINT}/04/users/${username}`,
{
headers: {
authorization: process.env.API_TOKEN
}
}
);
if (userReq.status === 404) {
return {
notFound: true
};
}
return {
props: {
user: userReq.data
}
};
}
That way, Next.js will automatically redirect us to its default 404 page with no other configuration needed.
So, we've seen how Next.js allows us to fetch data exclusively on the server side by using its built-in getServerSideProps function. We could have used the getStaticProps function instead, meaning that the page would have been statically rendered at build time, as seen in Chapter 2, Exploring Different Rendering Strategies.
In the next section, we will see how to fetch data on the client side only.
Fetching data on the client side
Client-side data fetching is a crucial part of any dynamic web application. While server-side data fetching can be relatively secure (when done with caution), fetching data on the browser can add some extra complexities and vulnerabilities.
Making HTTP requests on the server hides the API endpoint, parameters, HTTP headers, and possibly the authorization tokens from the users. However, doing so from the browser can reveal that private information, making it easy for malicious users to perform a plethora of possible attacks that exploit your data.
When making HTTP requests on browsers, some specific rules are not optional:
- Make HTTP requests to trusted sources only. You should always do some research about who is developing the APIs you're using and their security standards.
- Call HTTP APIs only when secured with an SSL certificate. If a remote API is not secured under HTTPS, you're exposing yourself and your users to many attacks, such as man-in-the-middle, where a malicious user could sniff all the data passing from the client and the server using a simple proxy.
- Never connect to a remote database from the browser. It may seem obvious, but it is technically possible for JavaScript to access remote databases. This exposes you and your users to high risk, as anyone could potentially exploit a vulnerability and gain access to your database.
In the next section, we will take a closer look at consuming REST APIs on the client side.
Consuming REST APIs on the client side
Similar to the server side, fetching data on the client side is relatively easy, and if you already have experience in React or any other JavaScript framework or library, you can re-use your current knowledge for making REST requests from the browser without any complications.
While the server-side data fetching phase in Next.js only occurs when declared inside its built-in getServerSideProps and getStaticProps functions, if we make a fetch request inside a given component, it will be executed on the client side by default.
We usually want our client-side requests to run in two cases:
- Right after the component has mounted
- After a particular event occurs
In both cases, Next.js doesn't force you to execute those requests differently than React, so you can basically make an HTTP request using the browser's built-in fetch API or an external library such as axios, just like we saw in the previous section. Let's try to recreate the same simple Next.js application from the previous section, but move all the API calls to the client side.
Create a new Next.js project and edit the pages/index.js file as follows:
import { useEffect, useState } from 'react';
import Link from 'next/link';
function List({users}) {
return (
<ul>
{
users.map((user) =>
<li key={user.id}>
<Link
href={`/users/${user.username}`}
passHref
>
<a> {user.username} </a>
</Link>
</li>
)
}
</ul>
)
}
function Users() {
const [loading, setLoading] = useState(true);
const [data, setData] = useState(null);
useEffect(async () => {
const req =
await fetch('https://api.rwnjs.com/04/users');
const users = await req.json();
setLoading(false);
setData(users);
}, []);
return (
<div>
{loading &&<div>Loading users...</div>}
{data &&<List users={data} />}
</div>
)
}
export default Users;
Can you spot the differences between this component and its SSR counterpart?
- The HTML generated on the server side contains the Loading users... text, as it is the initial state of our HomePage component.
- We will be able to see a list of users only after React hydration occurs. We will need to wait for the component to mount on the client side and the HTTP request to be spawned using the browser's fetch API.
Now we need to implement the single user page as follows:
- Let's create a new file, pages/users/[username].js, and start writing the getServerSideProps function, where we fetch the [username] variable from the route and the authorization token from the .env file:
import { useEffect, useState } from 'react'
import Link from 'next/link';
export async function getServerSideProps({ query }) {
const { username } = query;
return {
props: {
username,
authorization: process.env.API_TOKEN
}
}
}
- Now, inside the same file, let's create the UserPage component, where we'll execute the client-side data fetching function:
function UserPage({ username, authorization }) {
const [loading, setLoading] = useState(true);
const [data, setData] = useState(null);
useEffect(async () => {
const req = await fetch(
`https://api.rwnjs.com/04/users/${username}`,
{ headers: { authorization } }
);
const reqData = await req.json();
setLoading(false);
setData(reqData);
}, []);
return (
<div>
<div>
<Link href="/" passHref>
Back to home
</Link>
</div>
<hr />
{loading && <div>Loading user data...</div>}
{data && <UserData user={data} />}
</div>
);
}
export default UserPage;
As you may have noticed, once we set the data using the setData hook function, we render a <UserData /> component.
- Create that last component, always inside the same pages/users/[username].js component:
function UserData({ user }) {
return (
<div style={{ display: 'flex' }}>
<img
src={user.profile_picture}
alt={user.username}
width={150}
height={150}
/>
<div>
<div>
<b>Username:</b> {user.username}
</div>
<div>
<b>Full name:</b>
{user.first_name} {user.last_name}
</div>
<div>
<b>Email:</b> {user.email}
</div>
<div>
<b>Company:</b> {user.company}
</div>
<div>
<b>Job title:</b> {user.job_title}
</div>
</div>
</div>
)
}
As you can see, we're using the same approach as we did for the home page, making an HTTP request as soon as the component mounts on the client side. We're also passing the API_TOKEN from the server to the client using getServerSideProps so that we can use it for making an authorized request. However, if you try to run the preceding code, you will see at least two problems.
The first one is related to CORS.
CORS (which stands for Cross-Origin Resource Sharing) is a security mechanism implemented by browsers that aims to control the requests made from domains different from those of the API domain. In our HomePage component, we've been able to call the https://api.rwnjs.com/04/users API from a different domain (localhost, a replit.co domain, CodeSandbox domain, and so on) as the server allowed any domain to access its resources for that specific route.
In that case, however, the browser makes some restrictions on the https://api.rwnjs.com/04/users/[username] endpoint, and we're not able to call this API directly from the client as we get blocked by CORS policy. CORS can be tricky sometimes, and I encourage you to read more about it on the Mozilla Developer Network page dedicated to this security policy: https://developer.mozilla.org/en-US/docs/Web/HTTP/CORS.
The second problem relates to exposing the authorization token to the client. In fact, if we open the Google Chrome developer tools and go to Network, we can select the HTTP request for the endpoint and see the authorization token in plain text in the Request Headers section:

Figure 4.3 – The HTTP Request Headers
So, what's wrong with that?
Imagine that you're paying for a service exposing live weather updates via an API and pretend that it costs $1 for every 100 requests.
A malicious user who wants to use that same service without paying could easily find your private authorization token in the request header and use it to power their weather web app. That way, if the malicious user makes 1,000 requests, you'll be paying $10 without actually using their services.
We can quickly solve both problems thanks to the Next.js API pages, which allows us to quickly create a REST API, making the HTTP request for use on the server side and returning the result to the client.
Let's create a new folder inside pages/ called api/ and a new file, pages/api/singleUser.js:
import axios from 'axios';
export default async function handler(req, res) {
const username = req.query.username;
const API_ENDPOINT = process.env.API_ENDPOINT;
const API_TOKEN = process.env.API_TOKEN;
const userReq = await axios.get(
`${API_ENDPOINT}/04/users/${username}`,
{ headers: { authorization: API_TOKEN } }
);
res
.status(200)
.json(userReq.data);
}
As you can see, in this case, we're exposing a simple function taking two arguments:
- req: An instance of Node.js' http.IncomingMessage (https://nodejs.org/api/http.html#http_class_http_incomingmessage) merged with some pre-built middlewares such as req.cookies, req.query, and req.body.
- res: An instance of Node.js' http.serverResponse (https://nodejs.org/api/http.html#http_class_http_serverresponse), merged with some pre-built middleware such as res.status(code) for setting the HTTP status code, res.json(json) for returning a valid JSON, res.send(body) for sending an HTTP response containing a string, an object, or a Buffer, and res.redirect([status,] path) for redirecting to a specific page with a given (and optional) status code.
Every file inside the pages/api/ directory will be considered by Next.js as an API route.
Now we can refactor our UserPage component by changing the API endpoint to the newly created one:
function UserPage({ username }) {
const [loading, setLoading] = useState(true);
const [data, setData] = useState(null);
useEffect(async () => {
const req = await fetch(
`/api/singleUser?username=${username}`,
);
const data = await req.json();
setLoading(false);
setData(data);
}, []);
return (
<div>
<div>
<Link href="/" passHref>
Back to home
</Link>
</div>
<hr />
{loading && <div>Loading user data...</div>}
{data && <UserData user={data} />}
</div>
);
}
If we now try to run our website, we will see that both our problems are solved!
But there's still something we need to pay attention to. We've hidden the API token by writing a kind of proxy for the single user API, but a malicious user would still be able to use the /api/singleUser route to access private data with ease.
To solve that specific problem, we can act in a variety of different ways:
- Render the component list exclusively on the server, just like in the previous section: That way, a malicious user won't call a private API or steal a secret API token. However, there are cases where you cannot run those kinds of API calls on the server only; if you need to make a REST request after the user clicks on a button, you're forced to make it on the client side.
- Use an authentication method to let authenticated users only access a specific API (JWT, API key, and so on).
- Use a backend framework such as Ruby on Rails, Spring, Laravel, Nest.js, and Strapi: They all provide different ways of securing your API calls from the client, making it way more comfortable for us to create secure Next.js applications.
In Chapter 13, Building an E-commerce Website with Next.js and GraphCMS, we will see how to use Next.js as a frontend for different CMSes and e-commerce platforms, and we'll also cover user authentication and secure API calls. For now, in this chapter, we will only focus on how to make HTTP requests from both the server and client.
In the next section, we will see how to adopt GraphQL as a REST alternative for fetching data in Next.js.
Consuming GraphQL APIs
GraphQL has been a game-changer in the API world, and it is increasing its popularity thanks to its ease of use, modularity, and flexibility.
For those who are not very familiar with GraphQL, it is basically a query language for APIs first invented by Facebook back in 2012. It improves many key aspects of data fetching and manipulation compared to other web service architectures such as REST or SOAP. In fact, it allows you to avoid data over-fetching (you can simply query the data fields you need), get multiple resources within a single request, obtain a strongly and statically typed interface for your data, avoid API versioning, and so on.
In this section, we will be using Apollo Client (https://www.apollographql.com/docs/react), a very popular GraphQL client with built-in support for both React and Next.js for building a very simple online signbook.
Let's start by creating a new project:
npx create-next-app signbook
Now, let's add a couple of dependencies:
yarn add @apollo/client graphql isomorphic-unfetch
We will need now to create an Apollo client for our Next.js application. We will do that by creating a new file inside lib/apollo/index.js and then writing the following function:
import { useMemo } from 'react';
import {
ApolloClient,
HttpLink,
InMemoryCache
} from '@apollo/client';
let uri = 'https://rwnjssignbook.herokuapp.com/v1/graphql';
let apolloClient;
function createApolloClient() {
return new ApolloClient({
ssrMode: typeof window === 'undefined',
link: new HttpLink({ uri }),
cache: new InMemoryCache(),
});
}
As you can assume, by setting ssrMode: typeof window === "undefined", we will use the same Apollo instance for both client and server. Also, ApolloClient uses the browser fetch API to make HTTP requests, so we'll need to import a polyfill to make it work on the server side; in that case, we'll be using isomorphic-unfetch.
If you try to run https://api.realworldnextjs.com/04/signbook/graphql on a browser, it will redirect you to a public GraphCMS GraphQL editor. In fact, we will be using that headless CMS as the data source for the application we're currently writing.
Inside the same lib/apollo/index.js file, let's add a new function to initialize the Apollo client:
export function initApollo(initialState = null) {
const client = apolloClient || createApolloClient();
if (initialState) {
client.cache.restore({
...client.extract(),
...initialState
});
}
if (typeof window === "undefined") {
return client;
}
if (!apolloClient) {
apolloClient = client;
}
return client;
}
This function will allow us to avoid recreating a new Apollo client for each page. In fact, we will store a client instance on the server (inside the previously written apolloClient variable), where we can pass an initial state as an argument. If we pass that parameter to the initApollo function, it will be merged with the local cache to restore a full representation of the state once we move to another page.
To achieve that, we will first need to add another import statement to the lib/apollo/index.js file. Given that re-initializing the Apollo client with a complex initial state can be an expensive task in terms of performance, we will use the React useMemo hook to speed up the process:
import { useMemo } from "react";
And then, we will export one last function:
export function useApollo(initialState) {
return useMemo(
() => initApollo(initialState),
[initialState]
);
}
Moving to our pages/ directory, we can now create a new _app.js file, as seen in Chapter 3, Next.js Basics and Built-In Components. Here, we will wrap the whole app using the official Apollo context provider:
import { ApolloProvider } from "@apollo/client";
import { useApollo } from "../lib/apollo";
export default function App({ Component, pageProps }) {
const apolloClient =
useApollo(pageProps.initialApolloState);
return (
<ApolloProvider client={apolloClient}>
<Component {...pageProps} />
</ApolloProvider>
);
}
We can finally start to write our queries!
We will organize our queries inside a new folder called lib/apollo/queries/.
Let's start by creating a new file, lib/apollo/queries/getLatestSigns.js, exposing the following GraphQL query:
import { gql } from "@apollo/client";
const GET_LATEST_SIGNS = gql`
query GetLatestSigns($limit: Int! = 10, $skip: Int! = 0){
sign(
offset: $skip,
limit: $limit,
order_by: { created_at: desc }
) {
uuid
created_at
content
nickname
country
}
}
`;
export default GET_LATEST_SIGNS;
We can now import this query inside our pages/index.js file and try to make our first GraphQL request using Apollo and Next.js:
import { useQuery } from "@apollo/client";
import GET_LATEST_SIGNS from
'../lib/apollo/queries/getLatestSigns'
function HomePage() {
const { loading, data } = useQuery(GET_LATEST_SIGNS, {
fetchPolicy: 'no-cache',
});
return <div></div>
}
export default HomePage
As you can see, the Apollo client is incredibly easy to use. Thanks to the useQuery hook, we will have access to three different states:
- loading: As the name suggests, it only returns true or false when a request is fulfilled or is still pending.
- error: If the request fails for any reason, we will be able to catch the error and send a nice message to the user.
- data: Contains the data we asked for with our query.
Now, let's move back to our home page page for a moment. For simplicity, we will just add a remote TailwindCSS dependency for styling our demo app. In Chapter 6, CSS and Built-In Styling Methods, and Chapter 7, Using UI Frameworks, we will see how to optimize and integrate UI frameworks, but for now, we will keep things simple as we want to focus just on the data-fetching part of our application.
Open the pages/index.js file and edit it as follows:
import Head from "next/head";
import { ApolloProvider } from "@apollo/client";
import { useApollo } from "../lib/apollo";
export default function App({ Component, pageProps }) {
const apolloClient =
useApollo(pageProps.initialApolloState || {});
return (
<ApolloProvider client={apolloClient}>
<Head>
<link href="https://unpkg.com/tailwindcss@^2/dist/ tailwind.min.css"
rel="stylesheet"
/>
</Head>
<Component {...pageProps} />
</ApolloProvider>
);
}
Now, we can create a new file, components/Loading.js. We will render it while we're fetching the signs from GraphCMS:
function Loading() {
return (
<div
className="min-h-screen w-screen flex justify-center
items-center">
Loading signs from Hasura...
</div>
);
}
export default Loading;
Once we have successfully fetched the desired data, we need to display it on the home page. To do that, we will create a new component inside the components/Sign.js file with the following content:
function Sign({ content, nickname, country }) {
return (
<div className="max-w-7xl rounded-md border-2 border-
purple-800 shadow-xl bg-purple-50 p-7 mb-10">
<p className="text-gray-700"> {content} </p>
<hr className="mt-3 mb-3 border-t-0 border-b-2
border-purple-800" />
<div>
<div className="text-purple-900">
Written by <b>{nickname}</b>
{country && <span> from {country}</span>}
</div>
</div>
</div>
);
}
export default Sign;
Now, let's integrate those two new components inside our home page:
import { useQuery } from "@apollo/client";
import GET_LATEST_SIGNS from
'../lib/apollo/queries/getLatestSigns'
import Sign from '../components/Sign'
import Loading from '../components/Loading'
function HomePage() {
const { loading, error, data } =
useQuery(GET_LATEST_SIGNS, {
fetchPolicy: 'no-cache',
});
if (loading) {
return <Loading />;
}
return (
<div className="flex justify-center items-center flex-
col mt-20">
<h1 className="text-3xl mb-5">Real-World Next.js
signbook</h1>
<Link href="/new-sign">
<button className="mb-8 border-2 border-purple-800
text-purple-900 p-2 rounded-lg text-gray-50
m-auto mt-4">
Add new sign
</button>
</Link>
<div>
{data.sign.map((sign) => (
<Sign key={sign.uuid} {...sign} />
))}
</div>
</div>
);
}
export default HomePage
If we now try to browse the home page, we will see a list of signs!
We could also create a simple route for adding a new sign by creating a new page under pages/new-sign.js. Let's start by adding the required imports for that page:
import { useState } from "react";
import Link from "next/link";
import { useRouter } from "next/router";
import { useMutation } from "@apollo/client";
import ADD_SIGN from "../lib/apollo/queries/addSign";
As you can see, we're importing a bunch of functions from different libraries. We will use the useState React hook to keep track of the changes in our form for submitting the sign, Next.js' useRouter hook for redirecting the user to the home page once they have created a new sign, and Apollo's useMutation hook for creating a new sign on GraphCMS. We also import a new GraphQL mutation called ADD_SIGN, and we will see this in detail after we have created this page.
Moving on, we create the page structure:
function NewSign() {
const router = useRouter();
const [formState, setFormState] = useState({});
const [addSign] = useMutation(ADD_SIGN, {
onCompleted() {
router.push("/");
}
});
const handleInput = ({ e, name }) => {
setFormState({
...formState,
[name]: e.target.value
});
};
}
export default NewSign;
Reading from top to bottom, we can see that we're using Apollo's useMutation hook to create a new sign. Once the sign has been created correctly, it will run the onCompleted callback, where we will redirect the user to the home page.
Moving to the next function declared inside the component body, we can clearly see that we'll use the handleInput function to dynamically set the form state using the React useState hook as soon as the user types something in any form input.
We now need to render the actual HTML containing a form with just three inputs: the user's nickname, a message to be written in the signbook, and (optionally) the country where the user is writing from:
return (
<div className="flex justify-center items-center flex-
col mt-20">
<h1 className="text-3xl mb-10">Sign the Real-World
Next.js signbook!</h1>
<div className="max-w-7xl shadow-xl bg-purple-50 p-7
mb-10 grid grid-rows-1 gap-4 rounded-md border-2
border- purple-800">
<div>
<label htmlFor="nickname" className="text-purple-
900 mb-2">
Nickname
</label>
<input
id="nickname"
type="text"
onChange={(e) => handleInput({ e, name:
'nickname' })}
placeholder="Your name"
className="p-2 rounded-lg w-full"
/>
</div>
<div>
<label htmlFor="content" className="text-purple-
900 mb-2">
Leave a message!
</label>
<textarea
id="content"
placeholder="Leave a message here!"
onChange={(e) => handleInput({ e, name:
'content' })}
className="p-2 rounded-lg w-full"
/>
</div>
<div>
<label htmlFor="country" className="text-purple-
900 mb-2">
If you want, write your country name and its
emoji flag
</label>
<input
id="country"
type="text"
onChange={(e) => handleInput({ e, name:
'country' })}
placeholder="Country"
className="p-2 rounded-lg w-full"
/>
<button
className="bg-purple-600 p-4 rounded-lg text-
gray-50 m-auto mt-4"
onClick={() => addSign({ variables: formState })}>
Submit
</button>
</div>
</div>
<Link href="/" passHref>
<a className="mt-5 underline"> Back to the
homepage</a>
</Link>
</div>
);
)
Let's take a closer look at how we create a mutation by clicking the submit button:
onClick={() => addSign({ variables: formState})}
As you can see, we're taking the entire state stored inside the formState variable coming from the useState hook and passing it as a value for the variables property used by the addSign function:
const [addSign] = useMutation(ADD_SIGN, {
onCompleted() {
router.push("/");
}
});
The addSign function represents the mutation that will add a new sign to GraphCMS, and we can add dynamic data by passing an object matching the mutation variables written inside the lib/apollo/queries/addSign.js file:
import { gql } from "@apollo/client";
const ADD_SIGN = gql`
mutation InsertNewSign(
$nickname: String!,
$content: String!,
$country: String
) {
insert_sign(objects: {
nickname: $nickname,
country: $country,
content: $content
}) {
returning {
uuid
}
}
}
`;
export default ADD_SIGN;
The ADD_SIGN mutation, in fact, takes three argument variables: $nickname, $content, and $country. Using form field names that reflect the naming of the mutation variables, we can simply pass the whole form state as a value to our mutation.
You can now try to create a new sign. After submitting the form, you will be automatically redirected to the home page and you will see your sign at the top of the page.
Summary
In this chapter, we've taken a look at two crucial topics when talking about Next.js: the project structure organization and the different ways of fetching data. Even if these two topics seem unrelated, being able to logically separate components and utilities, and fetching data in different ways, are essential skills that will allow you to better understand the next chapter, Chapter 5, Managing Local and Global States in Next.js. As we've seen in this chapter, the complexity of any application can only grow over time as we add more features, bug fixes, and suchlike. Having a well-organized folder structure and a clear data flow can help us keep track of our application's state.
We've also taken a look at how to fetch data using GraphQL. This is an exciting topic as, in the next chapter, we will see how to use Apollo Client as a state manager other than a GraphQL client.