
This is the place to get up close and personal with small subjects – photographically speaking, that is. Learn how to picture them life-size and larger than life.
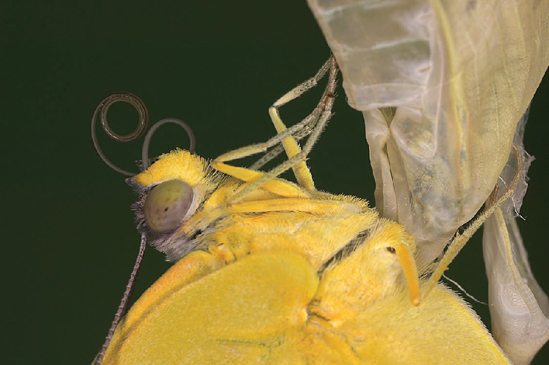
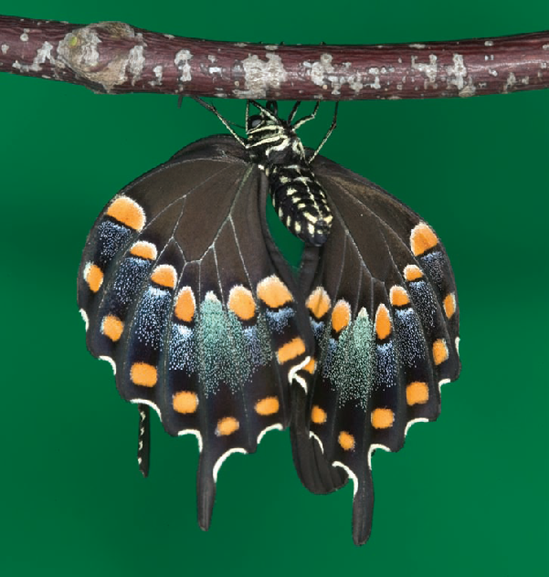
For true macro photographs, you need a macro lens, as opposed to the macro or close-up setting on a zoom lens. Macro lenses let you get much closer to a subject than zoom lenses that have a macro or close-up setting. This picture of a newborn butterfly was taken with a Canon MP-E 65mm macro lens, which offers tremendous magnification – much like a bellows system does for an SLR camera. It's a specially designed, manual focus macro lens that actually lets you fill the frame with subjects as small as a grain of rice.
The remaining photographs in this section were taken with the more commonly used macro lenses:50mm and 100mm. The main difference between these two lenses is that the 100mm lens provides a greater camera to subject distance, so you don't frighten skittish subjects, such as butterflies.
Some of the pictures in this section appeared in my coffee-table book, Flying Flowers.
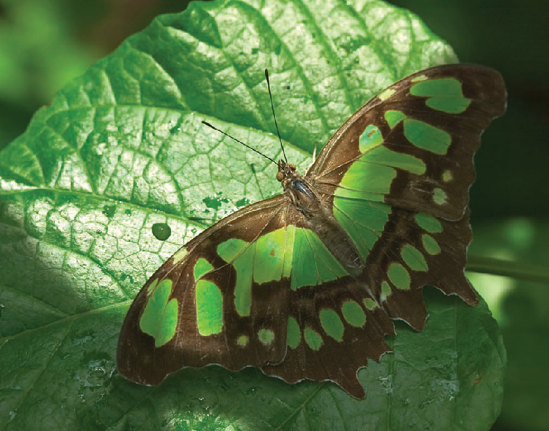
Macro lenses exaggerate camera shake, as do telephoto lenses. To reduce the chance of a blurry picture caused by camera shake, which is most noticeable in available light pictures, you need to use a tripod. I used the tripod with a ball head (for easy positioning) when I took this natural light photograph of a butterfly that was partially in the shade.
To further reduce camera shake, use a cable release or your camera's self-timer to trip the shutter. You can also use your camera's mirror lockup feature to help steady your shots, although you won't be able to view your subject through the lens.
Keep in mind that as steady as your camera may be, subject movement is also exaggerated at close distances. When taking natural light pictures, be very aware of subject movement.
The background can make or break a close-up picture. Try to compose a picture so the background complements the main subject and does not detract from it.
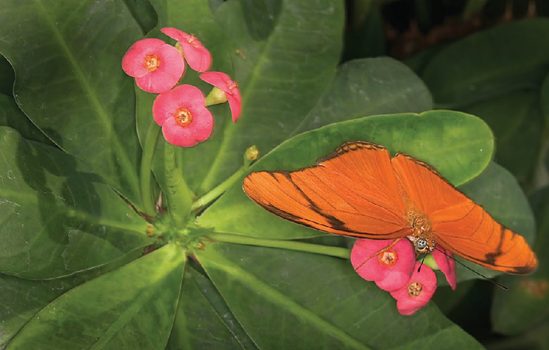
From a compositional standpoint, this is one of my favorite close-up photographs. In this book I talk about composing a picture with the subject off-center, and imagining a tic-tac-toe grid over the scene and placing the subject where the lines intersect. I was thinking about those techniques when I composed this picture.
When taking both natural light and flash pictures, it's important to "see the light"; that is, the highlights and shadows in the scene. For me, the shadow of the flower, created by a nearby light bulb, adds a nice touch to this picture, as well as adding a sense of depth and dimension to it.
If the background is too distracting in a scene, you can change it by adding your own background. It's simple, easy and fun!
Photograph a leaf with your macro lens, make an inkjet print, and use the print as a background. For more creative control, try blurring the leaf in Photoshop using the Gaussian Blur filter (Filter > Blur > Gaussian Blur) to simulate the effect of using different aperture settings.
The distance you hold the print from the camera also affects the amount of blur. The further away you hold the print, the softer it becomes, because depth-of-field decreases when you stay focused on the subject.
Need another background idea? Try using a solid color t-shirt. I have used black and green t-shirts with much success!
If you are really serious about close-up photography, and really want to take creative control, invest in a ring light, sometimes called a ring flash. A ring light (mine is pictured in the Photo Gear section) fits on a macro lens and can provide ratio (1:1, 1:2, etc.) as well as shadowless lighting. You control the light output on the Canon ring light that I use (others may be different) by turning it on and off and adjusting the power output of the two flash tubes that encircle the lens.
In addition, you can use the ring light's Flash Exposure control (the +/− settings) to fine-tune your exposure, and to take a daylight fill-in flash picture, which I cover in the Photographing People chapter of this book.
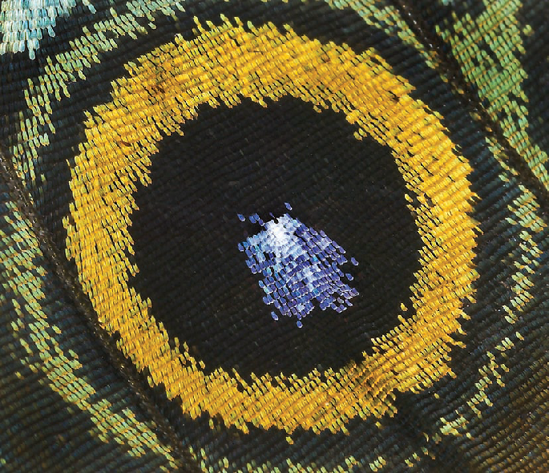
The light from a ring light also adds contrast to a picture, making it look sharper than a natural light photograph. I used a Canon Macro Light MR-14 EX on my 50mm macro lens for this close-up picture of a butterfly's wings.
You cannot use a ring light on a wide-angle lens. If you do, you'll get a hot spot in the center of the frame.

Ring lights are wonderful accessories for close-up photography. There is, however, one problem when using them when photographing reflective objects, such as the eyes of the red-eye tree frog. As you can see in the bottom image (cropped from the original top image), the reflections of the flash tubes show up in the animal's eyes. There is no way around that when taking a picture. Therefore, you need to clone out the reflections in the digital darkroom.
For best results, zoom in on the photo on your monitor so that the eyes (in a case like this) almost fill the monitor. Then select a small, soft-edge brush, select the Clone Tool, and carefully clone out the reflections. As usual, I believe the smaller the brush size used the better.
In close-up photography, as with telephoto photography, focus is extremely critical. You need to focus on the most important element in a scene, such as the eyes of a butterfly. It's also important to shoot at a small aperture for good depth-of-field (unless you want the area in front of and behind your subject out of focus). In that case you would use a wider aperture.
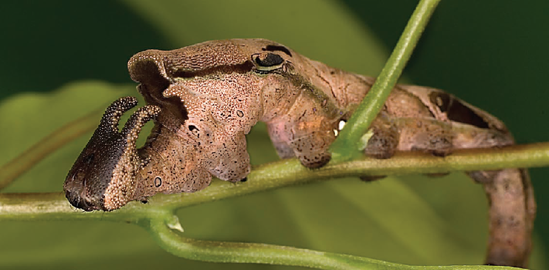
I set my 50mm macro lens at f/16 for this close-up of a caterpillar and focused on its head, yet the tail end is still out of focus – because I was so close to the subject.
If you are wondering why I did not choose f/22, which provides more depth-of-field than f/16, check out the F-stop Info topic in the Digital SLR Must-Know chapter of this book.
To check your focus before you shoot, use the depth-of-field preview button on your camera (if it has one), which, when pressed, stops down the lens to the chosen aperture.
You can check your focus after a picture is taken by using the magnifying feature on your camera to zoom in on the picture displayed on the camera's LCD monitor.
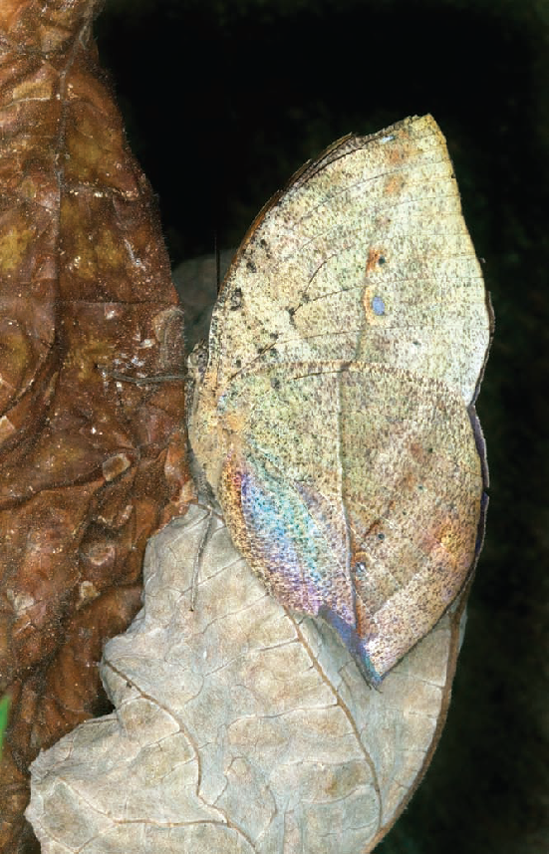
When I produced my butterfly book, Flying Flowers, I worked with some of the top butterfly experts in the country. Working with them gave me a wonderful understanding of butterflies. I also learned how to spot some of the more camouflaged butterflies, such as this dead leaf butterfly, in nature.
I believe the more you know about your subject, the more you appreciate it and the more you, well, love it. One of my photo philosophies is that you really need to fall in the love with the subject, from a photographic standpoint, in order to get a good picture.
If you have an idea for a book on photography and are not an expert on a subject, team with an expert. It will give you – and your book – credibility.
By the way, when working with my experts I learned the scientific name of the dead leaf butterfly: Kallima inachus. Do a Web search on this butterfly and you'll see that when it has its wings open, it's alive with color!
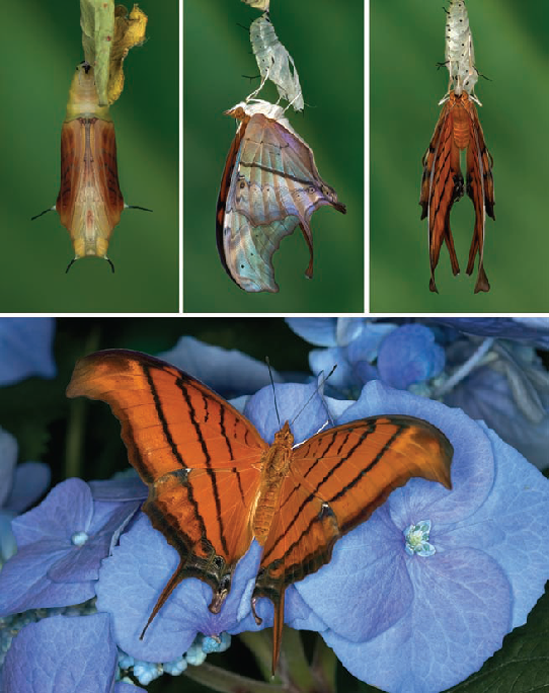
This tip actually applies to all the sections in this book. When we are taking close-up photographs, as well as when we are photographing animals, landscapes, people and so on, putting on our "storyteller" hat helps us tell a story of the subject. We can tell the story in many ways; one is by shooting a sequence, as I did here when I photographed the birth of this dagger wing butterfly.
We can also tell a story by simply taking wide-angle and close-up views, and by zooming in and out – and by photographing the subject from different angles.
The important thing to remember is that as photographers, we are, at heart, storytellers.
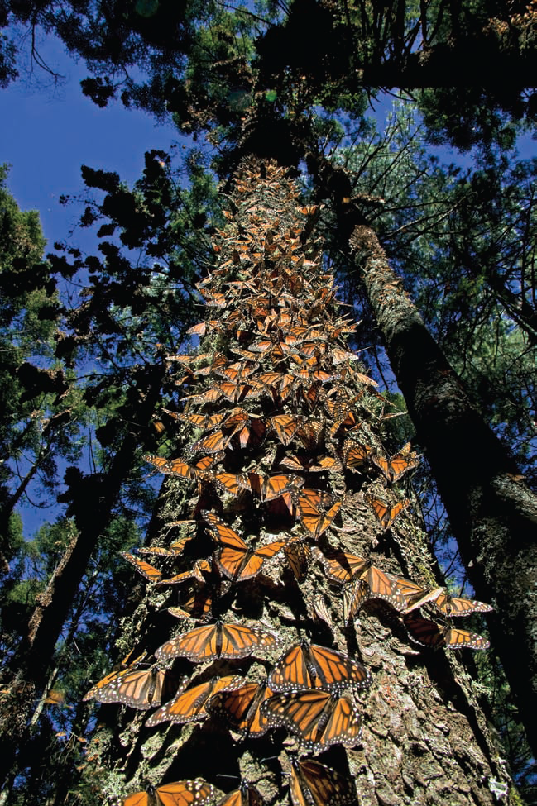
Macro lenses have shallow depth-of-field, while wide-angle lenses offer good depth-of-field, especially when set at small apertures. Wide-angle lenses are usually used for landscape and scenic photographs. However, they can also be used for close-up photography, getting everything in focus from what's right in front of the camera to almost infinity.
To get this shot, which I took in Mexico in a colony of 30 million monarch butterflies, I set my 16–35mm lens at 16mm. I set the aperture at f/11. Following the standard practice for setting the lens for its maximum depth-of-field, I set the focus one-third of the way up the tree using the focus lock on my camera, recomposed my shot and took the picture.
Hey, I know this is a super busy shot, but that busyness helps to tell the story of this incredible event in nature.