
Here you'll find great tips and images from some of my best friends in the digital photography community. Check out their work on their Web sites. Great people, great images and great info.
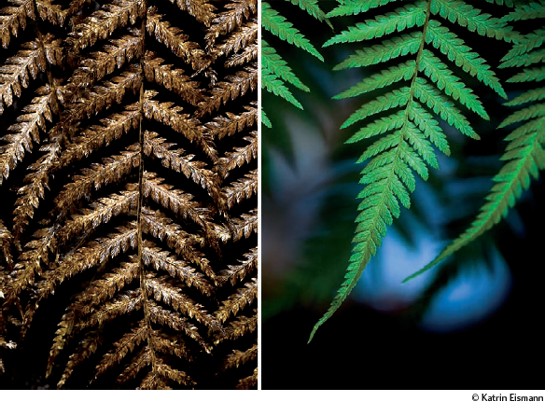
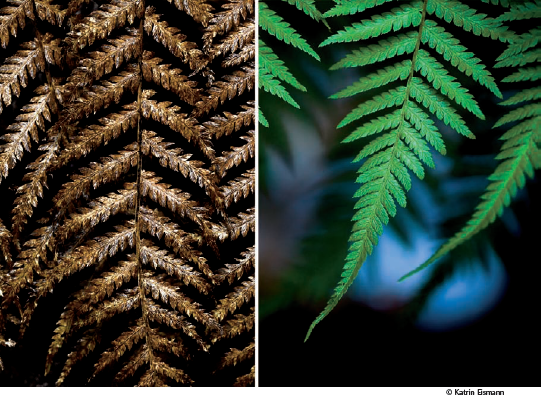
Take your time to savor taking the initial photographs. These images were captured while exploring a eucalyptus forest, alpine moorland and dense fern groves in Mt. Field National Park in Tasmania.
Using a macro lens and an extension tube (which allows you to get extremely close to a subject), I concentrated on capturing the shape, texture and structure of the beautiful ferns.
After downloading the image to my computer, I used Adobe Lightroom 2.0 to process my RAW files. I then used Lightroom's selective adjustments to dodge the highlights and darken the shadows, which added shape and depth to the leaves. To enhance the moistness in the images, I "painted" sharpening over the highlights, which added sparkle and liveliness to my images.
When you are working on your images, explore contrast and juxtaposition by combining images together in Photoshop. You'll see that parts will create a new whole.
| Katrin Eismann |
www.katrineismann.com |
Artist, teacher, author and co-founder and chair of the Masters of Professional Studies in Digital Photography at the School of Visual Arts (www.sva.edu) in New York City. |
Many digital SLRs have built-in black-and-white or sepia modes. Some even offer options to enhance gray tones while making the rest of the colors less vibrant, producing an old-fashioned hand-colored look. You can always make these kinds of adjustments after the fact using Adobe Photoshop or your favorite digital imaging software. However, shooting directly in black and white impacts how you see while making the images and getting instant feedback helps focus your vision. I'm not afraid of losing the color image for future use because I can always capture color and monochrome image files at the same time. While Rick prefers shooting in RAW and doesn't like to shoot JPEG files using monochrome mode or Picture styles, this method lets you do both, and you end up with two files: an untouched RAW file and a JPEG that has been manipulated in-camera.
Tip #1: Almost all digital SLRs offer the ability to simultaneously capture RAW+JPEG files, and these same cameras also allow you to capture monochrome images only as JPEG files. If you set your SLR for RAW+JPEG capture then select the monochrome effect you want, you'll end up with two files: one in color (RAW) and the other in black and white (JPEG.)
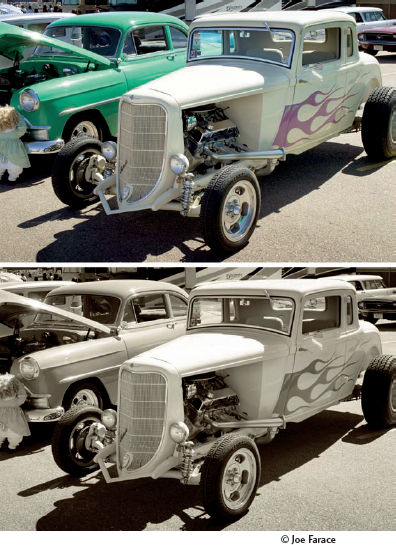
Tip #2: Beginning with the EOS 1D Mark II N, Canon digital SLRs with dual-memory slots let you capture RAW files on one memory card and JPEGs on the other. Yup, that means you can put all your color RAW files on one memory card and the monochrome shots on the other.
| Joe Farace |
www.joefarace.com |
A Colorado-based photographer and author of 30 books and 1700+ magazine stories. He's a Contributing Photographer/Writer for Shutterbug. For more photo tips visit his blog: www.joefaraceblogs.com. |
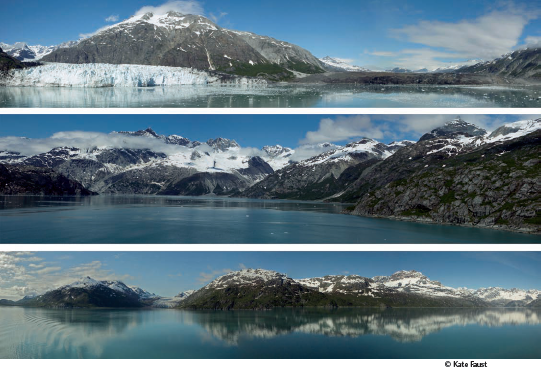
Try this tip for some photo fun. Shoot a series of pictures of a scene from right to left or vice versa with the intention of making a panoramic photograph. A tripod helps, but it's not necessary. It is necessary, however, to overlap the photographs slightly. Take three to six photographs. The more the merrier.
To stitch them together, use Photoshop: File > Automate > Photomerge and follow the on-screen prompts. Don't forget to flatten the layers or you'll get some strange-looking lines in your image.
Here are some of my favorite recent panoramas from a recent trip to Alaska.
| Kate Faust |
www.imagerybykate.com |
| Photographer, painter, artist |
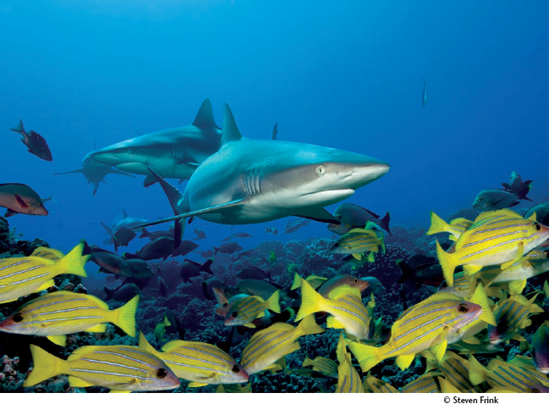
Underwater photography requires close proximity to the subject, because the medium is 800 times denser than air and acts as a massive soft focus and cyan filter. So, to achieve color, clarity and resolution, it is necessary to work close to the subject and use a submersible strobe.
For this image, I used my Canon 16–35 mm II on my EOS 1 Ds Mark III in a Seacam (www.seacamusa.com) housing. The shark is about two feet from the dome port on the housing. My strobe light helped stop the action and define color on both the sharks and nearby reef fish.
As you get closer to the subject, your pictures will increase in sharpness.
| Steven Frink |
www.stevenfrink.com |
| Underwater photographer, teacher, Canon Explorer of Light and workshop leader |

Many times I find that when color is insufficient, nearly non-existent or not pleasing in one of my photographs, I reduce the image to black and white to see if it looks better, often with positive results.
To me, good black-and-white images can have as much – if not more – impact than color images, especially those with mediocre color. My theory of why black-and-white continues to intrigue photographers and movie-lovers is that it reaches a deep emotional, almost evolutionary primitive part of our psyche. To understand this theory, you'll need to understand how the human eye functions.
As humans, we have two types of light receptors in our eyes: cones for colors, and rods that see only in shades of gray. Cones work well in bright light, but don't function well in dim light, which is when the rods take over.
Humans have limited night vision compared to other animals – some of which can be predators of ours. At dusk when we become more vulnerable due to our limited night vision, our ability to see color is decreased and we begin to see in black-and-white. Thus, the same sense of urgency that we feel when we're vulnerable in the dark seems to persist when we look at images that have no color.
Thinking in black-and-white can open up a whole new world of creativity for you.
| Steven Inglima |
| Explorer of Light, Canon USA |
www.usa.canon.com/dlc |
Okay, so Rick asked me for one tip for this chapter, but I thought I'd go a bit further and offer five. Here goes!
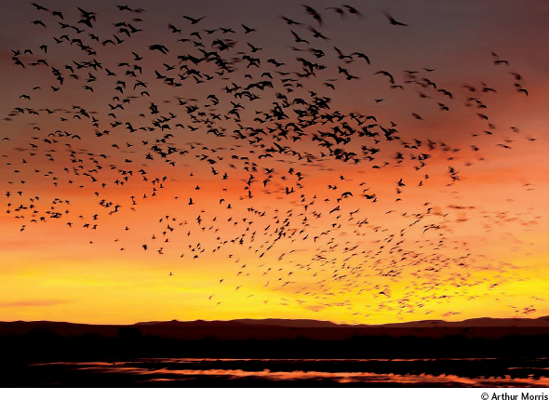
- If you want to learn to be a better nature photographer, study to become a good naturalist. Knowing the pattern of the Snow Geese (pictured here) migration allows me to travel to productive sites.
- With large groups of birds (or other animals) choose a slow shutter speed to create pleasing blurs. Note: To be effective, intentional blurs must be focused accurately.
- Learn to evaluate and adjust your histogram to ensure a perfect exposure in any lighting situation.
- Work on a tripod and use a double bubble level to ensure level horizons.
- Zoom lenses allow infinite framing options; fixed focal length lenses do not.
| Arthur Morris |
www.birdsasart.com |
| Photographer, author, lecturer and Canon Explorer of Light |
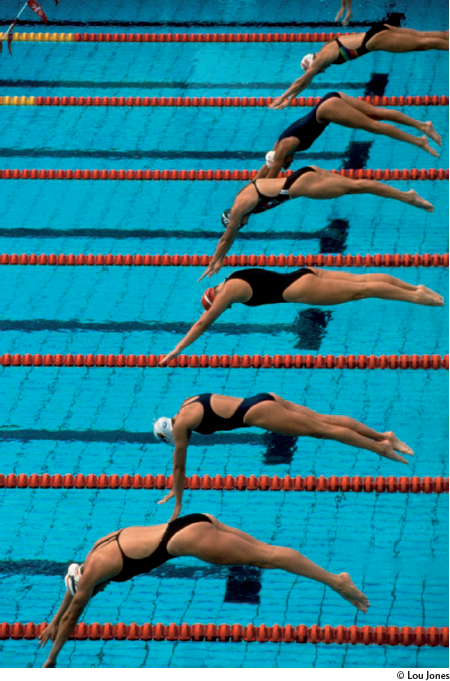
I took this photograph at the 1992 Barcelona Olympics, one of thirteen Olympic games I've photographed.
For me, the start of a race is visually far more interesting than the finish, so get on site early and choose a position.
This kind of assignment is entirely dependent upon access, so make sure you have access to an event before you show up.
Long lenses give you access, too. The distances are often so vast that a 300 mm becomes your "normal" optic, so pack your longest lens.
Shoot sports, and you'll find it one of the most challenging and rewarding photography specialties.
| Lou Jones |
www.fotojones.com |
| Photographer, author, workshop leader |
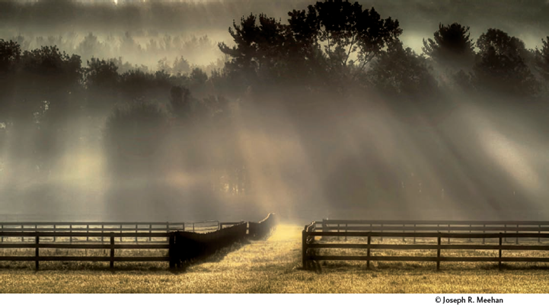
I have always been fascinated by the ethereal effect that shafts of sunlight piercing through fog (called corpuscular rays) can have on the most mundane of subjects. All too often, however, this type of light has an extreme highlight-to-shadow range beyond the latitude of either film or digital sensors. Enter Photomatix (www.hdrsoft.com), a software program that offers a combination of exposure blending and tone mapping to bring out the available color and tone information from a series of bracketed exposures. With my camera on a tripod, I used five bracketed exposures to capture the full brightness range of this farm scene at sunrise and Photomatix did the rest.
Try the Photomatix and try to get up early to catch the beauty of corpuscular rays.
| Joseph R. Meehan |
www.josephmeehan.com |
| Photographer, author, lecturer |
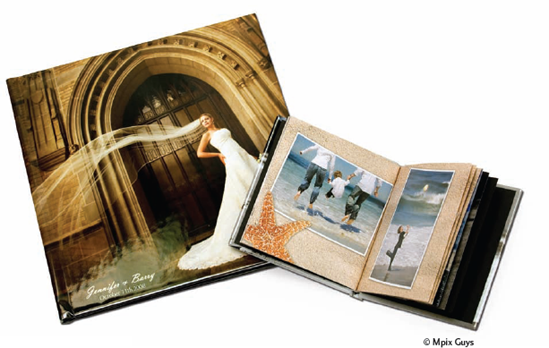
If you like making photo books from your favorite photos, here are some tips for making your first book a best seller (with family and friends, anyway). These tips apply to Mpix books, but they also apply to personal book-making in general.
Use the latest version of the book's software. Updated features speed up and enhance the process.
Preview your book before ordering. Check all text, images and most importantly the cropping of your pages to ensure your book will be as you have visualized it.
Upload RGB images. RGB provides the optimal color results for on-line printing.
Avoid large amounts of solid color to reduce the likelihood of any streaking.
Use the JPEG format at 300 PPI for the optimal size and format.
Save your project frequently to avoid losing your work.
Pick the right paper type to show off your images.
Last tip: Have fun!
| Mpix Guys: Joe Dellesega, Matt Miller, John Rank |
www.mpix.com |
| On-line prints, books, cards and a host of other digital services |
Do you know where your horizon is? In many types of nature photographs, the horizon line in the image is often not apparent or important. In broad, scenic views that include a foreground, distant objects and sky, where the horizon is placed within the frame is vital. The proportion of land to sky strongly affects the impact of a landscape photograph.
When it comes to the horizon line, the bottom line is that it is important to explore all the options — up, down or center — without blinders. Even though I rarely place the subject, be it the horizon or a flower, in the center of my camera frame, I don't want to narrow my choices. If I had adhered to the "don't center" rule and my own tendency, I could not have made the photograph shown here: Cloud Reflections and Mt. Moran, which is one of my best-selling fine art prints.
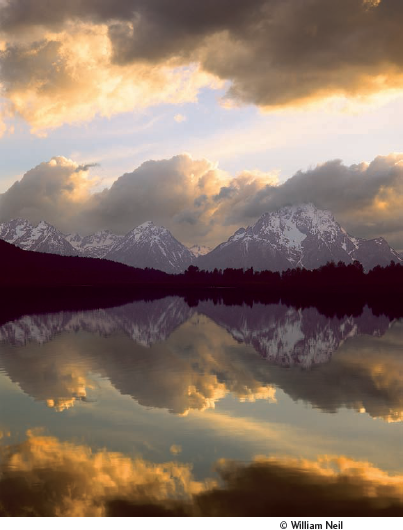
As soon as you become aware of the importance of the horizon line's placement, you will be making similar decisions when designing your images. Watch carefully as you raise and lower your camera to see how relationships within the frame change. How do the mood, emphasis and scale change? Think about what is most important to you in the image. When the foreground is most important, try pushing the horizon towards the frames' top edge to see if it works. When you have an amazing sky, try the horizon in a low position.
The next time you photograph the landscape, consider the horizon, and break a few rules!
| William Neil |
www.williamneill.com |
Photographer, Author, Teacher, instructor on BetterPhoto.com, Canon Explorer of Light and columnist for Outdoor Photographer magazine |
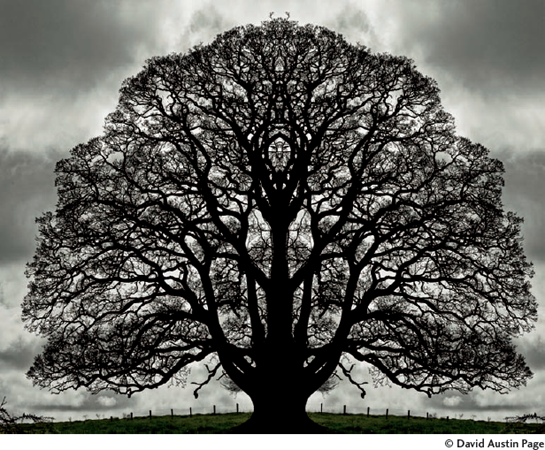
Most often, a first impression is the best impression. However, with advancements in digital photography, the world of "What if?" can inexpensively improve a good photograph.
Such was the case when my friend, Dick Zakia, and I were recently photographing in Ireland. One day, Dick asked me to stop the car because he saw a great tree backlit against an angry sky. From our angle, the tree had a great rounded right side, but a stunted left side. Dr. Zakia headed off to the right to improve his angle. I had not planned to take a picture because it was "his" tree.
While standing by the car, I asked myself, "What if I only photographed that right side of the tree and flipped it in the digital darkroom for the left to make a symmetrical image?" So I took the picture.
The result is the image you see here. The resulting "faces" in the center of the image were a welcome, unexpected bonus. I am sure you will see them if you look closely.
I used to tell my students film is cheap, use it. Now I say pixels are free. Use them wisely and explore, "What if?"
| David Austin Page |
www.David-Page-Photography.com |
| Retired Duke University Fine Arts Photographer and former Photographic Engineer |
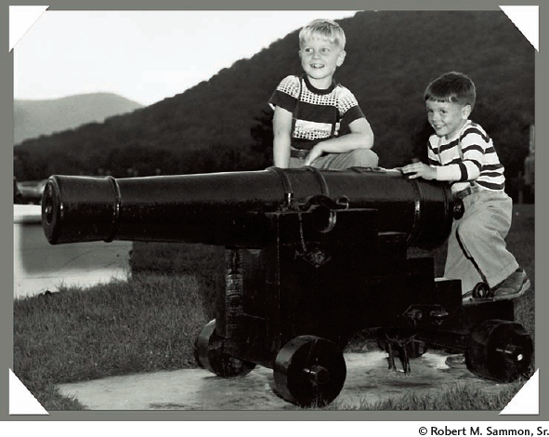
From an early age, I was serious about my photography, using everything from a Kodak Brownie to a 4×5 Speed Graphic to a variety of single and twin lens film cameras to a Canon Vt to a Canon EOS digital SLR. Recently, however, macular degeneration has caused me to reluctantly put down my Canon, and I do miss it.
I still love photography, however, and I often think of the professional-looking pictures that my wife and I took of family activities and our travels abroad and throughout the United States. Each image is a record of a memorable experience.
Now at 90 years old, the pictures I think about most often are the pictures I took of my family, including this shot that I took in 1955 of our sons Rob and Rick (the author of this book) playing on a cannon at Bear Mountain State Park in New York.
That image, like my other favorite family photographs, is a frozen moment in time, capturing a special day for me ... because it was a day spent with my family.
My advice to all photographers – amateurs and pros alike – is to take as many family shots as possible. When you are my age (and even younger), they will be your most important photographs, and wonderful memories, too.
| Robert M. Sammon, Sr. |
| Photographer and Rick's Dad, Friend and First-Round Editor for all his books |
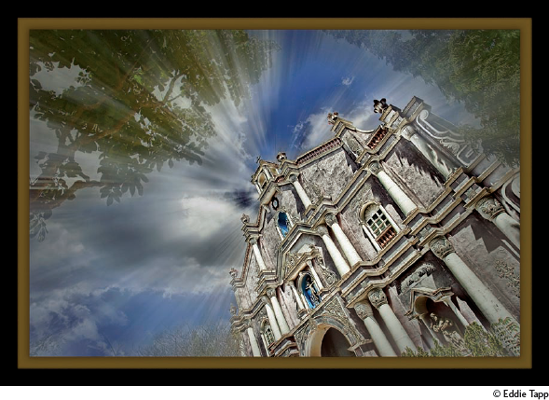
Want to add some drama to a scene? Use the Zoom option in Photoshop's Radial Blur filter to create this exciting effect. Here's how to do it.
Go to Filter > Convert for Smart Filters.
Then go to Filter > Blur > Radial Blur > Zoom. Click on the Blur Center box and use the grid to choose the center point of the blur – the church's steeple in my image.
After applying the filter, click on the Smart Filters' mask.
With black selected as your foreground color, select a soft-edge brush and "paint out" the area in which you don't want the effect applied, in this case most of the church.
Try this effect on action images, especially those in which the subject is coming toward the camera.
| Eddie Tapp |
www.eddietapp.com |
| Photographer, Photoshop expert, educator, Canon Explorer of Light and consultant |
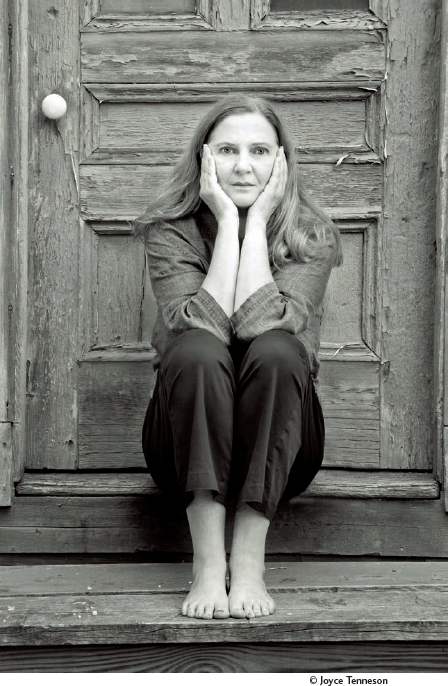
My Celtic ancestors had an intuitive sense of spirituality illuminated by their closeness to nature. In Maine, I feel a sense of inner belonging. Each day heightens the awareness of the completing of a circle, and the more I age, the more intense and stimulating the adventure and the journey become.
I took this photograph while teaching a class at the Maine Media Workshops, a great place to take photography courses over the summer and fall (www.theworkshops.com).
My advice to photographers: Get in touch, and stay in touch, with nature.
| Joyce Tenneson |
www.tenneson.com |
| Photographer, author, workshop leader, Canon Explorer of Light, Fine Art Photographer of the Year (2005) |
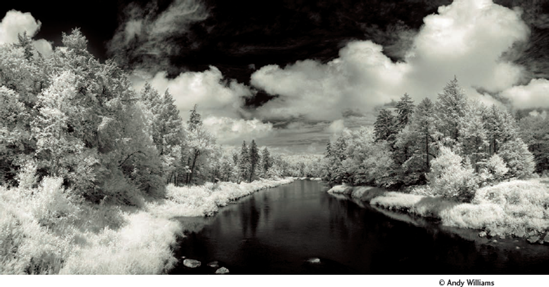
Want to turn summer into winter, photographically speaking? Go infrared! With an IR-converted camera, green leaves and foliage take on an icy, winter look.
Here's one of my favorite photographs. It was taken in the middle of the day on a hot, steamy July day in the Adirondacks of New York with an IR-converted compact digital camera. It's actually a stitched panorama of six shots taken in portrait orientation.
Go IR if you feel you are in a creative slump.
| Andy Williams |
www.moonriverphotography.com |
| Professional landscape photographer, manager of Smugmug and co-founder of Muench Workshops |

When I raise my camera to eye level, it's usually because I see something that is pulling me into a scene emotionally. So, my first tip is that the more you are drawn to a scene, the more powerful your photographs will be.
I try to capture the most compelling composition while attempting to limit the amount of potential distractions in the scene. Therefore, when you are composing a photograph, keep an eye out for distracting elements.
I take that a step further when I get to Photoshop and often remove distractions like telephone lines and parked cars to prevent the viewer from being distracted by elements that didn't attract my eye.
I then attempt to draw the viewer's attention to whatever pulled me into the scene by brightening, adding contrast or boosting color in the elements I want their eyes to explore. In the image here, I added a tobacco-colored, tinted black-and-white effect to most of the image while leaving the areas my eye was drawn to in full color. That helped direct the viewer's eye and produced somewhat of a nostalgic feeling in the image.
To learn the start-to-finish workflow I use to produce images like this, check out my High Dynamic Range (HDR) DVD at www.DigitalMastery.com
| Ben Willmore |
www.thebestofben.com |
Ben Willmore, author, worldwide speaker, inductee into the Photoshop Hall of Fame and 40-foot long motorcoach traveler (www.whereisben.com) |
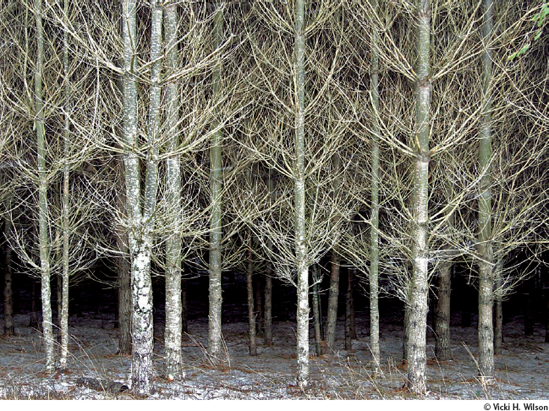
I love the snow. I spotted this large grove of trees on a rural road in the foothills of Virginia. I was attracted to the sublime symmetry of the uplifted, thin bare limbs, in contrast to the dark background. The scene evokes serenity and peace—an entrancing atmosphere, with subtle touches of green hinting at life's cycle of seasons.
My tip: Photograph without preconceived ideas. I have a passion for capturing bright colors and reflections, and this image totally defies all of my photographic tendencies and instincts.
Digital photography fosters spontaneity. Defy your natural instincts, and you may surprise yourself – and others who view your work.
| Vicki H. Wilson |
| Former graphic design and photography instructor at Alamance Community College, Graham, NC |
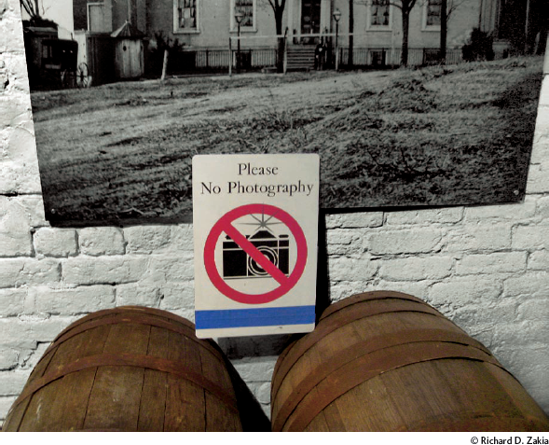
This photograph was taken at the Museum of Confederate History in Richmond, Virginia. It is a simple snapshot taken on the spur of the moment. I keep coming back to it, searching for meaning and finding none. It continues to puzzle me and perhaps that is its meaning.
If something catches your eye and you feel drawn to it for some unknown reason, don't spend time thinking about it. Photograph it and study it later. It can reveal itself over time.
| Richard D. Zakia |
| Retired faculty member, Rochester Institute of Technology. Dr. Zakia's latest book is Perception and Imaging: Photography – A Way of Seeing. |
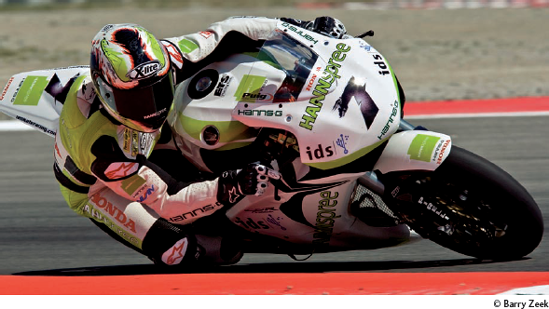
I try to always plan my shots and not shoot from the hip. In this shot, taken on a bright, sunny day, my goal was to freeze the action.
My subject was traveling at 175 mph – pretty darn fast. Using my Canon EOS 1 D Mark III, I chose a high shutter speed (1600th of a second) with the camera set to TV (time value) mode. The reason to choose the TV mode is that if the light level changes, the shutter speed remains the same, while the camera changes the f-stop to compensate for the change in light level.
I set my ISO to 100 for the cleanest possible image, because as the ISO increases, so does the digital noise in an image.
I also set my camera on the AI Servo focus mode, which tracks the subject right up until the time of exposure.
And because the subject was moving so very fast, I set my drive mode to high speed, which gave me a series of pictures from which to choose.
To help ensure sharp, clean shots of fast-moving subjects, try the aforementioned camera settings. Also shoot with both eyes open, so you can see if any other subjects are coming into the scene.
| Barry Zeek |
www.barryzeek.com |
| Specialist in high-speed motor sports photography |