The last chapter discussed the fundamental concepts of C++ and the object-oriented programming concepts used to program robots. In this chapter, we look at the basics of the Python programming language, which can be used to program robots.
C++ and Python are the common languages used in robotics programming. If your preference is performance, then you should use C++, but if the priority is easiness in programming, you should go with Python. For example, if you are planning to work with a robotic vision application, C++ is a good choice because it can execute the application faster by using less computing resources. At the same time, that application can quickly prototype using Python, but it may take more computing resources. Basically, choosing a programming language for the robotics application is a trade-off between performance and development time.
Getting Started with Python
The Python programming language is a commonly used, general-purpose, high-level, object-oriented programming language popular for writing scripts. When compared with C++, Python is an interpreted language that executes code by line by line. Python was created by Guido van Rossum who started development from 1989, and first internal release was in 1990. It is an open source software managed by the non-profit Python Software Foundation ( www.python.org/psf/ ).
The main design philosophy of Python is the readability of code and syntax, which allows programmers to express their concepts in much fewer lines of code.
In robotics applications, Python is commonly preferred where less computation is required, such as writing data to a device using serial communication protocols, logging data from a sensor, creating a user interface, and so forth.
Timeline: The Python Language
Here are the major milestones in the Python programming language:
The project started in 1989.
The first version was released in 1994.
The second version was released in 2000.
A popular version of Python, 2.7, was released in 2010.
The third version was released in 2008.
The latest version of Python, 3.6, was released in 2016.
Python in Ubuntu Linux
Introduction to Python Interpreter
Let’s start programming Python in Ubuntu Linux. Like the GNU C/C++ compiler, Python interpreter is preinstalled in Ubuntu. The command shown in Figure 3-1 opens the default Python version interpreter.
$ python 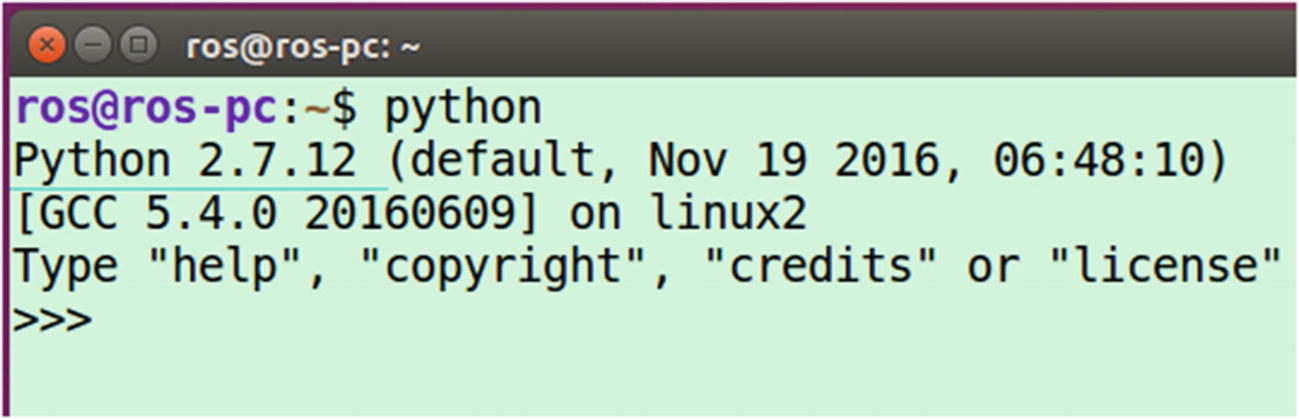
Figure 3-1 Python interpreter in the terminal
The default Python version is 2.7.12. You get a list of the installed Python version by pressing the Tab key twice after entering the Python command. The list of Python versions available in Ubuntu are shown in Figure 3-2.
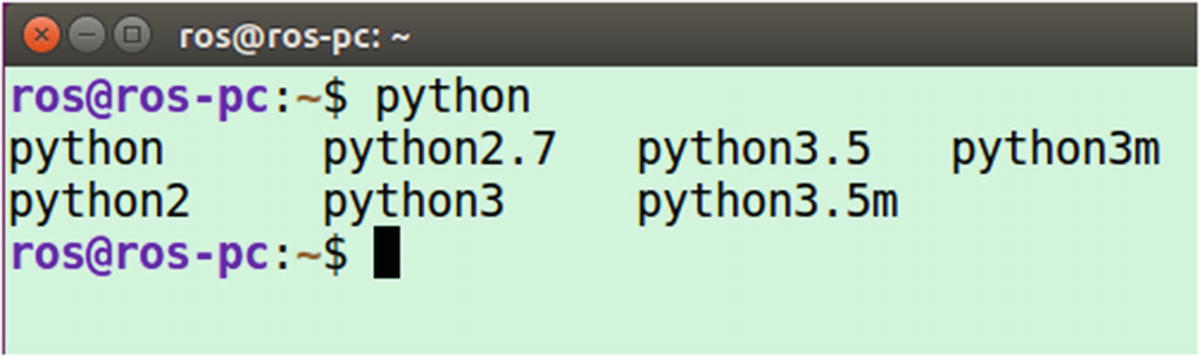
Figure 3-2 List of Python versions installed on Ubuntu
Here you see a list of Python commands for two different versions of Python: 2.7.12 and 3.5.2. The python, python2, and python2.7 commands launch version 2.7.12, and the remaining commands launch version 3.5.2. python3m and python3.5m are versions with pymalloc enabled, which performs better for memory allocation than the default memory allocation using malloc (see www.python.org/dev/peps/pep-3149/#proposal ).
Installing Python on Ubuntu 16.04 LTS
As discussed, Python is preinstalled on Ubuntu, but the following command installs Python manually.
$ sudo apt-get install python python3 We can also install Python from source code by using the instructions explained in the next section.
Verifying Python Installation
This section shows how to check the Python executable path and version.
The following checks the current path of the python and python3 commands (also see Figure 3-3).
$ which python$ which python3

Figure 3-3 Location of Python interpreter
If you want to see the location of Python binaries, sources, and documentation, use the following command (also see Figure 3-4).
$ whereis python$ whereis python3.5
Figure 3-4 Location of Python interpreter, sources, and documentation
Writing Your First Code
Our first program will be printing a Hello World message. Let’s see how we can achieve it using Python. Before going into the programming, let’s look at the two ways in which we can program in Python.
Programming directly inside Python interpreter
Writing Python scripts and running using interpreter
These two methods work in the same way. The first method executes line by line inside the interpreter. The scripting method writes all the code in a file and executes using the same interpreter.
The standard practice is to use Python scripting. We may use the Python interpreter shell for testing a few commands.
Let’s print a Hello World message in a Python interpreter shell (see Figure 3-5).
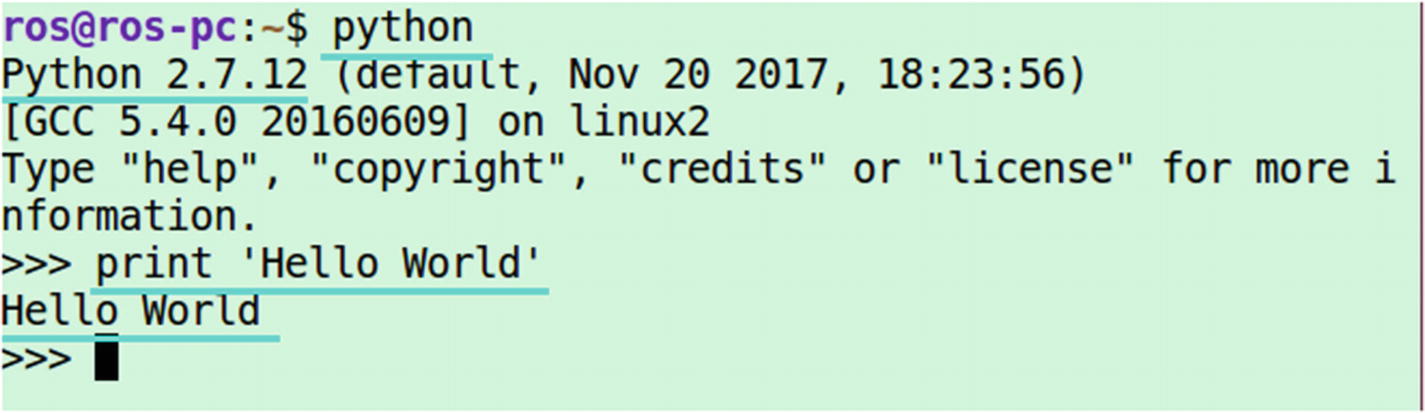
Figure 3-5 Running Hello World in Python 2.7
Figure 3-5 shows that it’s very easy to print a message in Python. Simply use the print statement along with your message, and press Enter.
>>> print 'Hello World' If you are doing the Hello World program in Python version >= 3.0, there are some changes in the Python statement. The main differences are found at https://wiki.python.org/moin/ Python2orPython3. Instead of the print statement used in Python2.x, the following statement is used in Python3.x for printing a message (also see Figure 3-6).
>>> 'print('Hello World') 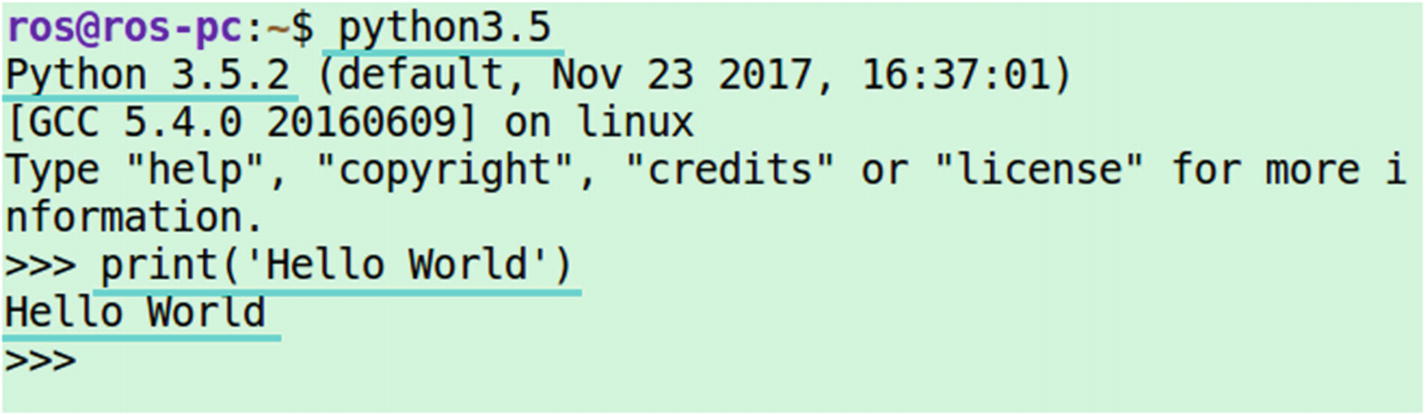
Figure 3-6 Running Hello World in Python 3.x
Let’s start scripting using Python. With scripting, we write the code into a file with a .py extension.
The standard way to write Python code is explained at www.python.org/dev/peps/pep-0008/ .
We are going to create a file called hello_world.py and write the code in the file (see Figure 3-7). You can use the gedit editor or any text editor for this.
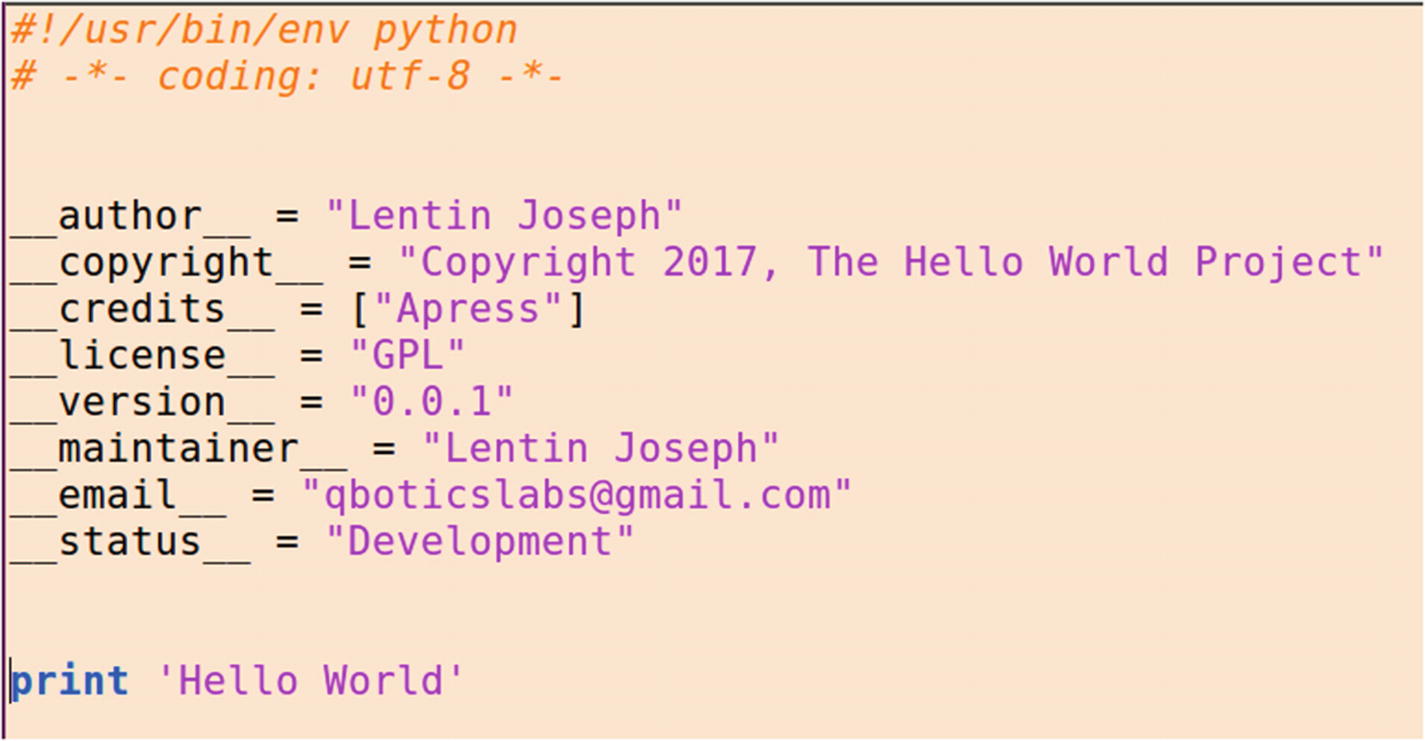
Figure 3-7 The hello_world.py script
You may be wondering about the purpose of the extra lines in the script when compared to a print statement. There are certain standards to keep in the Python script in order to make it more readable, maintainable, and have all the information about the software that we made.
The first line (#!/usr/bin/env) in Python is called Shebang. If we execute the Python code, the program loader parses this line and executes the reset of the code using that environment. Here we are setting Python as the environment, so the rest of the code will execute in the Python interpreter.
There are coding styles suggested by Google at https://google.github.io/styleguide/pyguide.html .
Let’s look at how to execute the preceding code.
Running Python Code
You can save the hello_world.py in your home folder or in your Desktop folder. If you are in Desktop, you have to switch the path to Desktop.
Figure 3-8 shows the execution of the hello_world.py code.
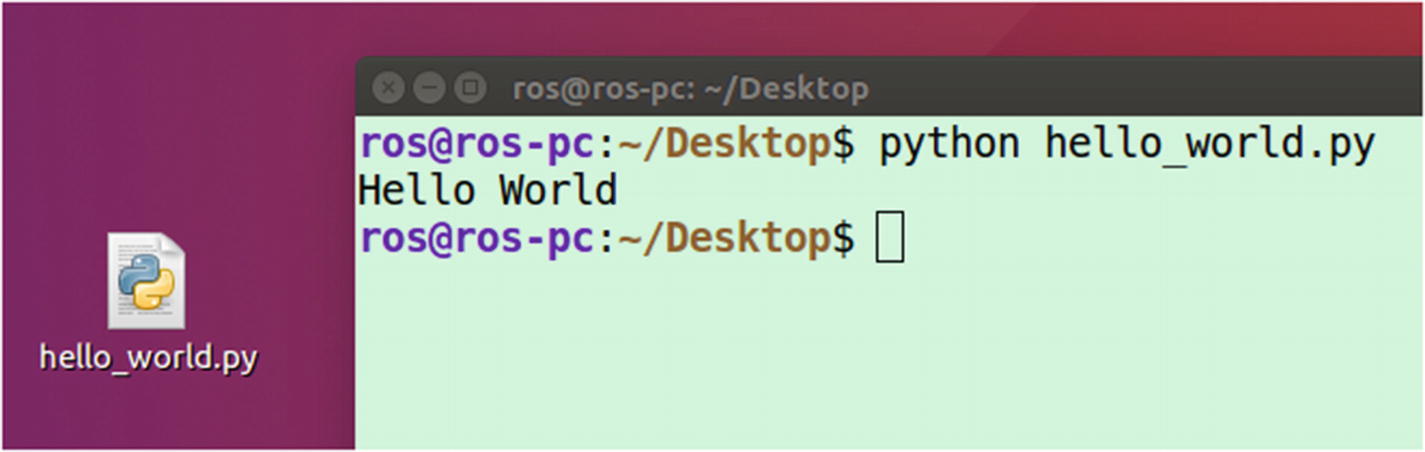
Figure 3-8 Executing the hello_world.py script
Currently, the code is in the Desktop folder, and you can execute the code by using following command.
$ python hello_world.py If your code does not have any errors, it shows output like that shown in Figure 3-8.
There is another way to execute the Python file. Use the following command.
$ chmod a+x hello_world.py By using the chmod command, you are giving executable permission to the given Python code.
You can further explore the chmod command at www.tutorialspoint.com/unix_commands/chmod.htm .
And after giving permission, you can simply execute the Python code using the following command.
$ ./hello_world.py Figure 3-9 shows how to execute the C++ executables too.

Figure 3-9 Executing the hello_world.py script
So you have seen how to write a Python script and execute it. Next, we discuss the basics of Python. This is actually a big topic, but we can discuss each aspect of Python by using examples to accelerate learning.
Understanding Python Basics
The popularity of the Python language is mainly due to its easiness in getting started. The code is short, and we can prototype an algorithm more quickly in Python than in other languages. Because of its popularity, there are a vast number of Python tutorials online. There are active communities to support you. There are extensive libraries to implement your application. The availability of the Python library is one reason to choose this language over others. With a library, you can reduce development time by using existing functions.
Python is a cross-platform language that is widely used in research, networks, graphics, games, machine learning, data science, and robotics. Many companies use this language for automating tasks, so it is relatively easy to get a job in Python.
So how difficult is to learn this language? If you can write pseudo code for a task, then you can code in Python, because it is very similar to pseudo code.
What’s New in Python?
If you know C++, it is easy to learn Python, but you have to be aware of a few things while writing Python code.
Static and Dynamic Typing
Python is a dynamic typing language, which means that we don’t need to provide the data type of a variable during programming; it takes each variable as an object. We can assign any kind of data type to a name. In C++, we have to first assign a variable with a data type, and then we can only assign that type of data to that variable.
C++ is a static typing language; for example, in C++, we can assign like this:
int number;number = 10; //This will worknumber = "10" // This will not work
But in Python, we can assign like this:
#No need mention the datatypenumber = 10 #This will worknumber = "10" #This will also work
So currently, the value of number is "10".
Code Indentation
Indentation is simply the tab or white space prior to a line of code. In C++, we may use indentation to group a block of code, but it is not mandatory. The C++ code compiles even if we are not keeping any indentation, but it is different in Python. We should keep the block of code in the same indent; otherwise, it shows an indentation error. When indentation is mandatory, the code looks neat and readable.
Semicolons
In C/C++, semicolons at the end of each statement are mandatory, but in Python, they are not. You can use a semicolon in Python as a separator but not as a terminator; for example, if you want to write a set of code in a line, you can write it by separating semicolons. This can be done in C++ too.
Python Variables
You have already seen how Python handles variables. Figure 3-10 shows assigning and printing primitive data types, such as int, float, and string. These examples are tested in Python version 2.7.12.
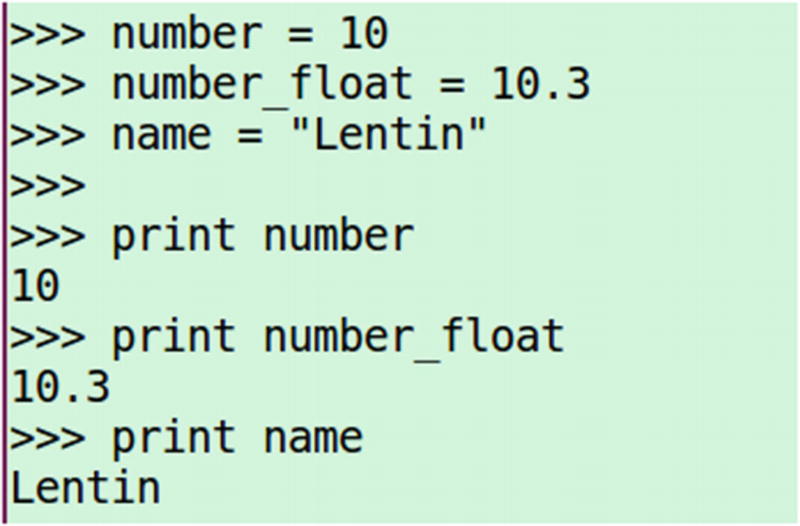
Figure 3-10 Primitive variable handling in Python
Similar to an array in C/C++, Python provides lists and tuples. The values inside a list can be access though a list index using square brackets ([]); for example, the first element in a list can be accessed by a [0] subscript, which is similar to an array in C/C++.
Figures 3-11 and 3-12 show Python lists and tuples.

Figure 3-11 Handling lists in Python
Figure 3-12 shows how we can work with Python tuples.
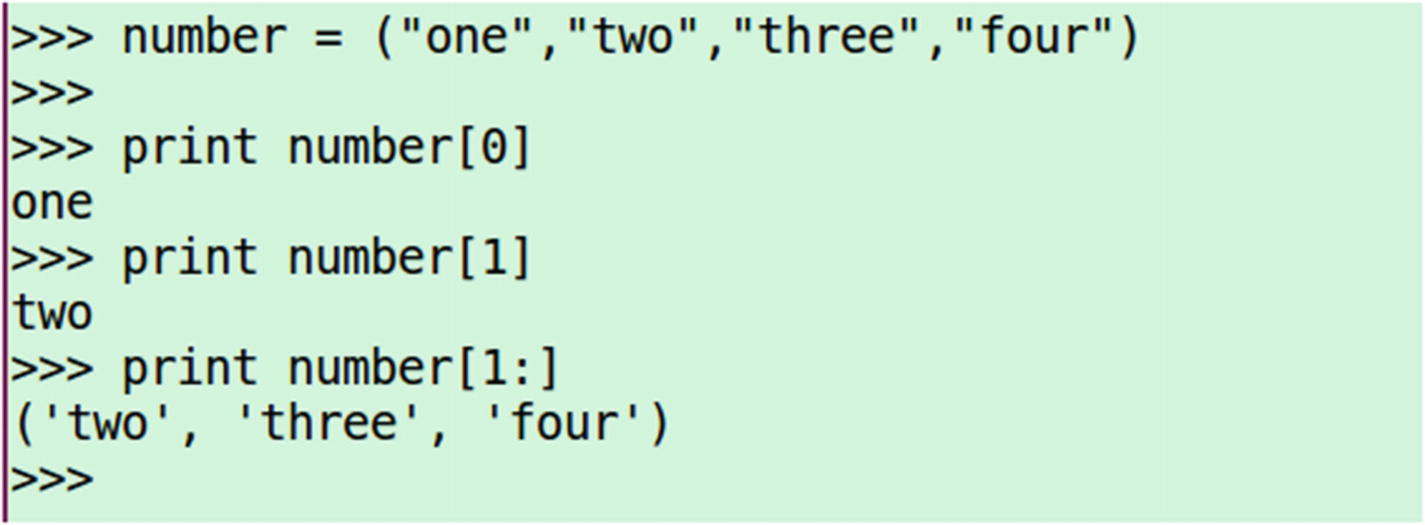
Figure 3-12 Handling tuples in Python
Tuples work similarly to lists, but a tuple is enclosed in parenthesis (()) and a list is enclosed in square brackets ([]). A tuple is a read-only list because its value can’t update once it is initialized, but in a list we can update the value.
The next inbuilt data type Python provides is a dictionary. Similar to an actual dictionary, there is a key and a value associated with it. For example, in our dictionary, there is a word and the corresponding meaning of it. The word here is the key, and value is its meaning.
Figure 3-13 shows the workings of a Python dictionary.

Figure 3-13 Handling a dictionary in Python
If we give the key in the dictionary, it returns the value associated with the key.
In the next section, we look at the Python condition statement.
Python Input and Conditional statement
Similar to C++, Python also has if/else statements to check a condition. In the following example, you see how Python handles user input and makes a decision based on it.
The logic of the program is simple. The program asks the user to enter a command to move a robot. If the user enters a valid command, such as move_left, move_right, move_forward, or move_backward, the program prints that it is moving; otherwise, it prints Invalid command (see Figure 3-14).
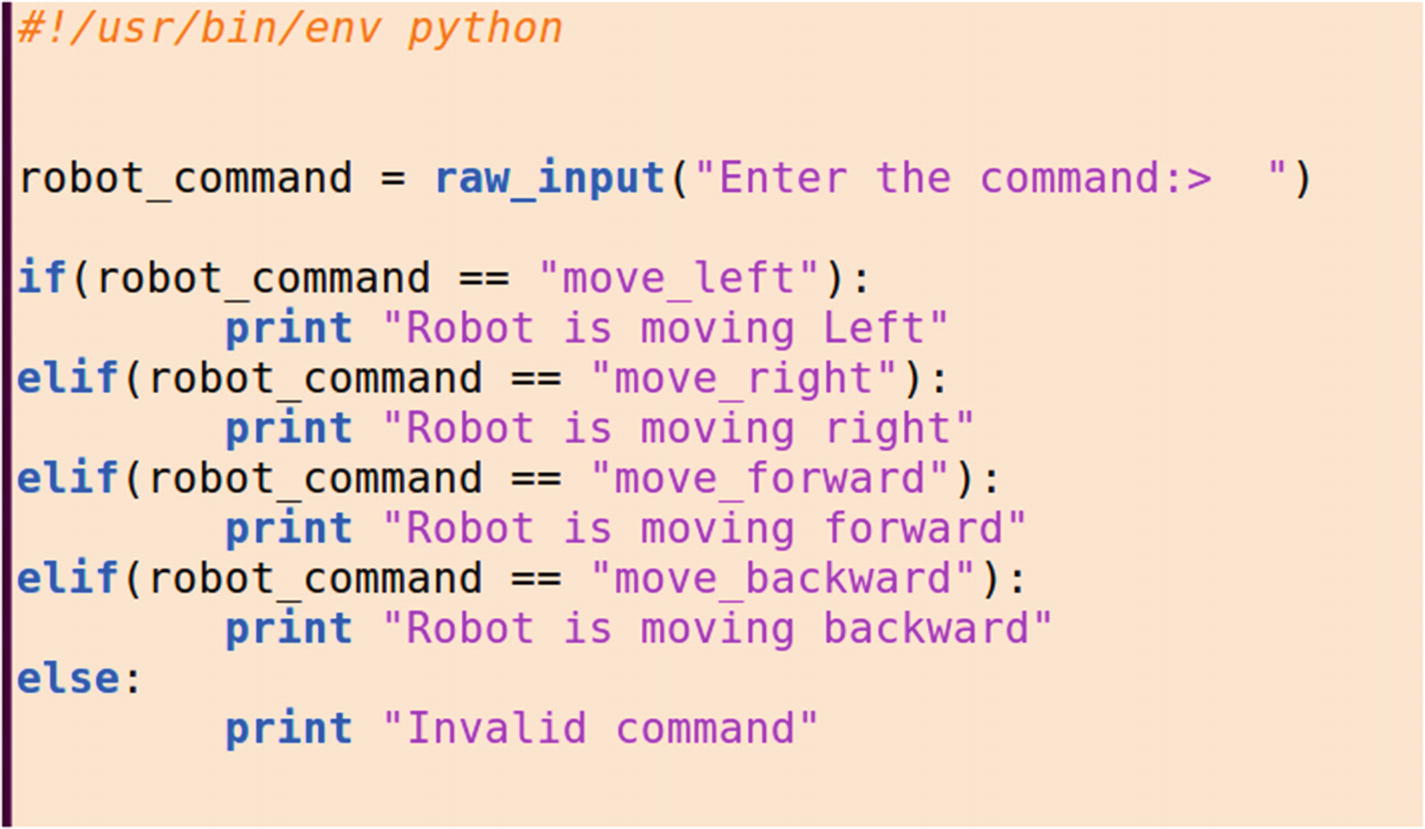
Figure 3-14 Handling input and the conditional statement in Python
To take input from a user in Python, we can use either the raw_input() function or the input() function. The raw_input() function accepts any kind of data type, but the input() function only accepts integer types. Here is the syntax of the raw_input() and the input() functions.
var = raw_input("Input message")var = input("Input message")
raw_input() stores the user input in variable called var as a string.
After storing the user input, we compare the input to a list of commands. Here is the syntax for the if/else statement.
if expression1:statement(s1)elif expression2:statement(s2)else:statement(s3)
A colon ends each expression, after which you have to use indentation for writing the statement. If you don’t use indentation, you will get an error.
Python: Loops
Python has while and for loops, but not do while loops, by default. Figure 3-15 showcases the usage of the while loop and the for loop in Python. In this example, the robot position in the x and y direction is incremented, and if it is reached in a particular position, the program terminates after printing a message.
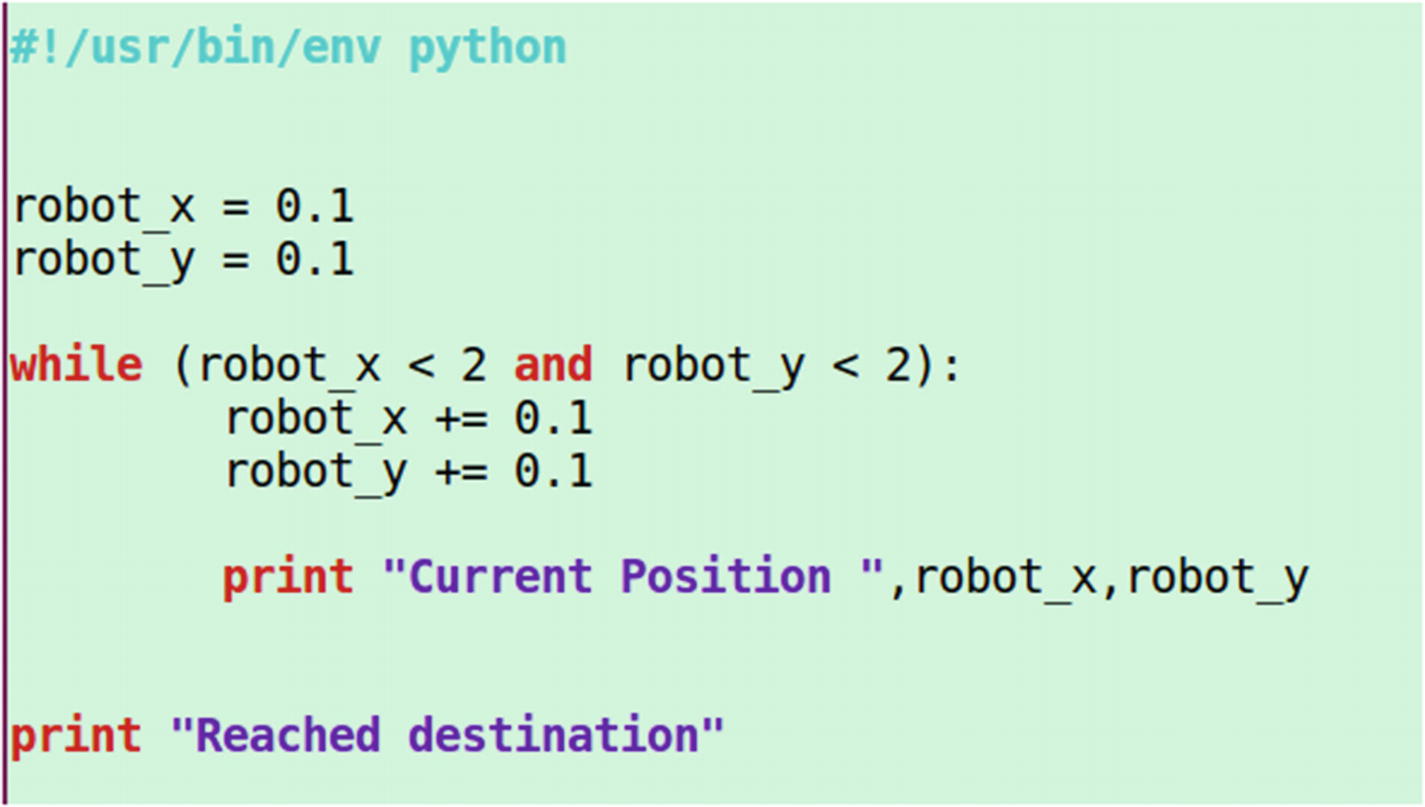
Figure 3-15 Usage of the while loop in Python
The following shows the syntax of a while loop.
while expression:statement(s)
In the preceding example, the expression is (robot_x < 2 and robot_y < 2).
There are two conditions inside the expression. We are performing AND logic between two conditions. In Python, 'and', 'or' are logic AND and logic OR.
If the condition is true, the inside statements are executed. As discussed earlier, we have to use proper indents on this block. When, the expression is false, it quits the loop and prints the message 'Destination is reached'.
If we run this code, we get the output shown in Figure 3-16.

Figure 3-16 Output of the while loop Python code
We can implement the same application using the for loop in Python. Figure 3-17 shows the workings of the for loop.
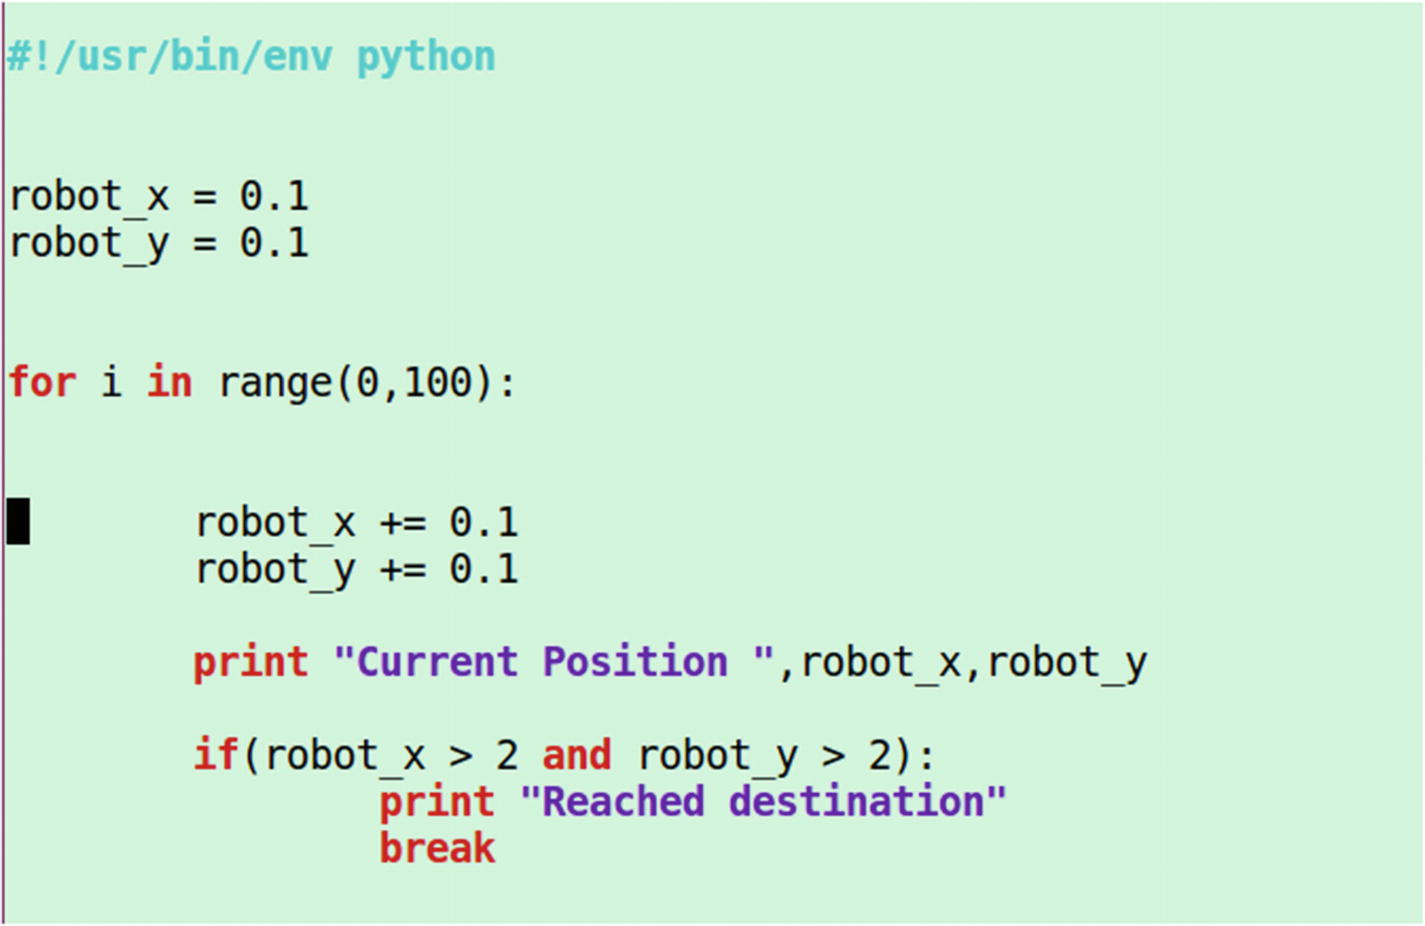
Figure 3-17 Python for loop code
In the preceding code, the for loop executes 0 to 100, increments robot_x and robot_y, and checks if the robot’s position is within limits. If the limit is exceeded, it prints the message and breaks the for loop.
The following shows for loop syntax in Python.
for iterating_var in sequence:statements(s)
Figure 3-18 is the output of the preceding code.

Figure 3-18 Output of python for loop code
Python: Functions
As you know, if you want to repeat a block of code with different data, you can write it as a function. Most programming languages have a feature to define a function.
The following is the format to define a function in Python.
def function_name(parameter):"function_docstring"function_code_blockreturn [expression]
The order of a function definition in Python is important. The function call should be after the function definition. The docstring function is basically a comment with a description of the function and an example of the function’s usage. Comments in Python use # on a single line, but if the comment is in a block of code or a docstring, use the following style.
'''<Block of code>'''
Figure 3-19 shows an example of a function in Python.
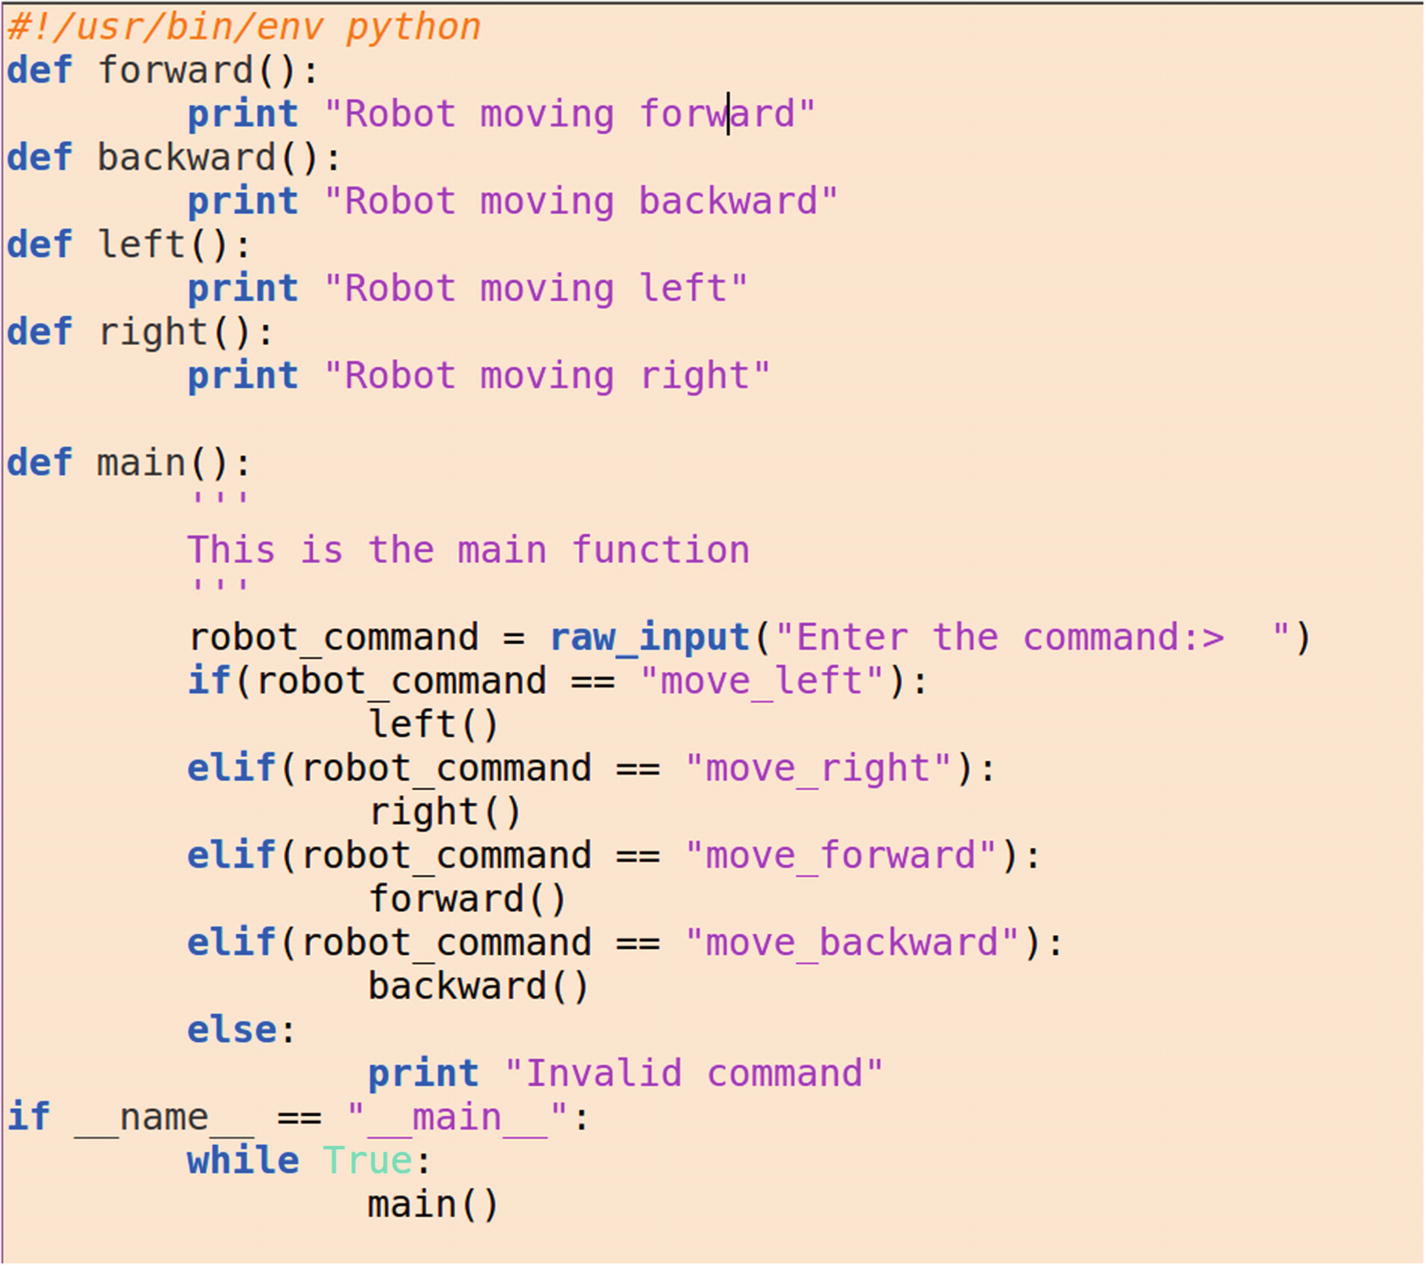
Figure 3-19 Example Python code for function
In Figure 3-19, you can see how to define a function in Python and how to call it. You may be confused with the usage of if __name__ == "__main__". It’s basically a common practice, like using int main() in C++. The program also works without this line.
If you enter any of the commands, it calls the appropriate function. The functions are defined at the top of the code. Also note the indentation in each block of code. The function defined in Figure 3-20 does not have any arguments, but you can pass an argument to a function if you want.

Figure 3-20 Output of Python function
Python: Handling Exception
An exception is an event that disrupts the normal flow of a program’s instruction. When Python encounters a problem, it raises an exception. If we caught an exception, it means the program encountered an error. If the code raises an exception, it can either handle the exception or terminate the program. In this section, we see how to handle an exception in Python.
A simple example of a try-except statement is division by zero. Figure 3-21 shows sample code for try-except.

Figure 3-21 Example Python try-except
Whenever the user input is zero, an exception is raised due to division by zero, and that exception is handling statements inside except.
Python: Classes
This section shows how to write a class in Python. As discussed, Python is an object-oriented programming language like C++. The OOP concepts are the same in both languages. The following is the syntax for a class definition.
class ClassName:'Optional class documentation string'class_suite
Here the docstring is an optional component and class_suite has the class members, data attributes, and functions. Class in Python is a vast concept. Let’s look at Figure 3-22 as a basic example to get started with classes.
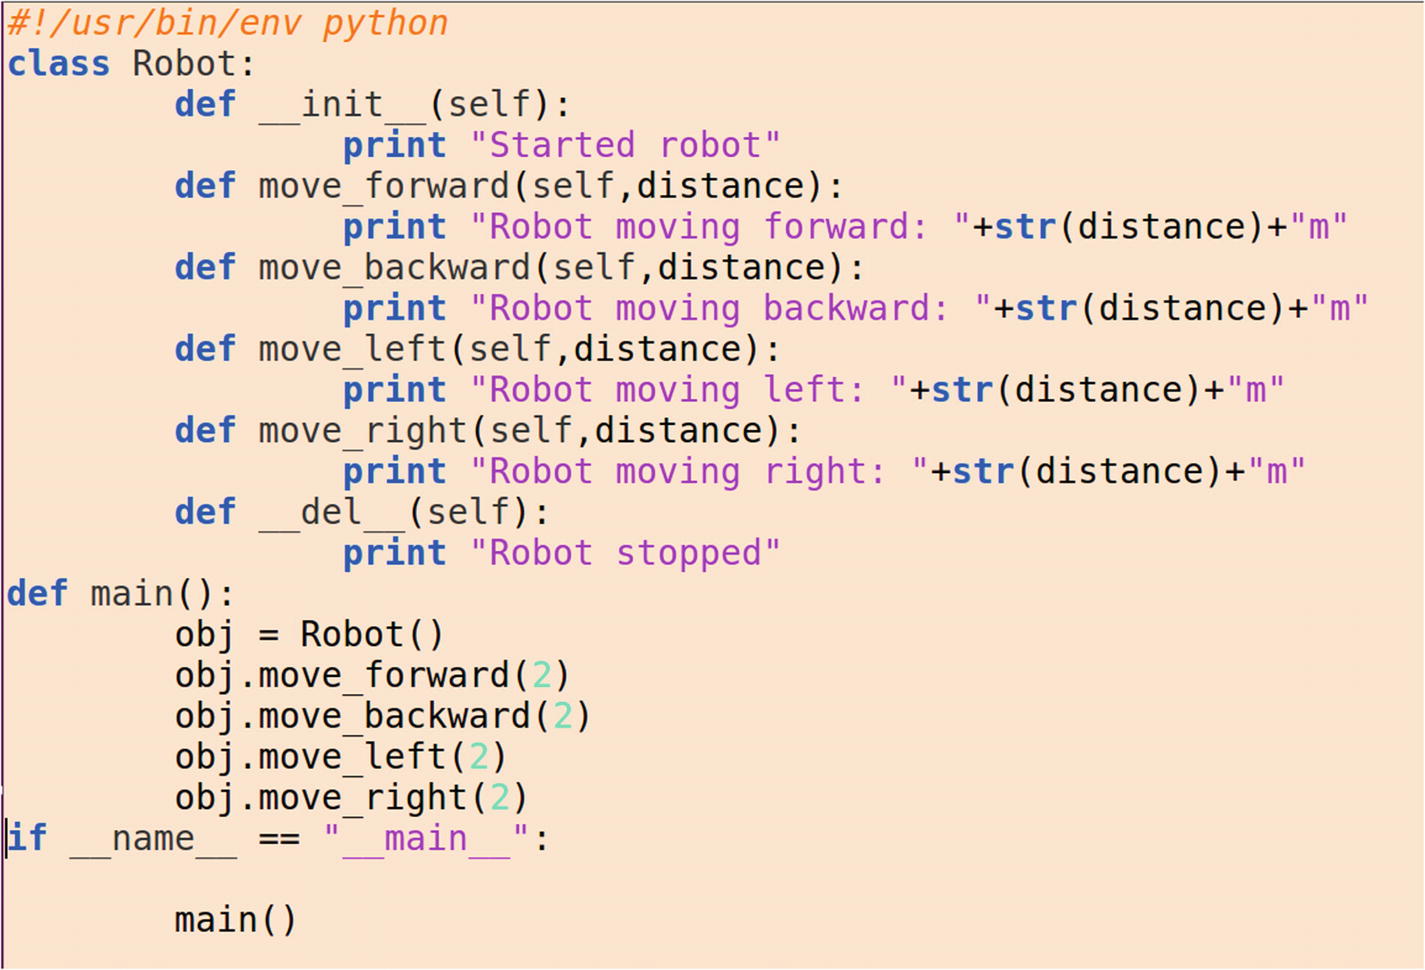
Figure 3-22 Python class example
Figure 3-22 shows an example of moving a robot forward, left, right, and backward. The program simply prints a message; it does not actually move a robot. Let’s analyze each part of the program.
The following code is the constructor of the Python class. Whenever we create an object of this class, it executes first. self refers to the current object.
def __init__(self):print "Started Robot"
The following function is the destructor of the class. Whenever an object is destroyed, the destructor is called.
def __del__(self):print "Robot stopped"
We can define methods inside the class, which is how we define it. In all methods, the first argument should be self, which makes the function inside the class. We can pass arguments in a function; in the following example, distance is the argument.
def move_forward(self,distance):print "Robot moving forward: "+str(distance)+"m"
In this function, there are functions to move back, right, and left.
Now let’s see how to create an object of the class. The following line creates the object. When an object is created, the constructor of the class is called.
obj = Robot()After initializing, we can call each function inside the class by using the following method.
obj.move_forward(2)obj.move_backward(2)obj.move_left(2)obj.move_right(2)
When the program terminates, the object calls the destructor.
Figure 3-23 shows the output of the preceding example.

Figure 3-23 Output of Python class example
In the next section, we learn how to handle files in Python.
Python: Files
Writing and reading from a file are important in a robotics application. You may have to log data from a sensor, or write a configuration file. This section provides an example program to write and read text to a file in Python(see Figure 3-24).

Figure 3-24 Python file I/O example
When we run the code, it asks to enter text. The text data saves to a file, and later it reads and prints on the screen. The explanation of Python code is given below.
The following command creates the file handler in reading and writing mode. Like C/C++, there are several file operation modes, such as reading, writing, and appending. In this case, we are using w+ mode, in which we can read/write to a file. If there is an existing file, it is overwritten.
file_obj = open("test.txt","w+")To write to a file, we can use the following command. It writes text into the file.
file_obj.write(text)To close the file, we can use following statement.
file_obj.close()To read the file again, we can use 'r' mode, like in the following statement.
file_obj = open("test.txt",'r')To read a line from a file, we can use readline() function.
text = file_obj.readline()Figure 3-25 shows the output of the preceding example.

Figure 3-25 Python file I/O output
Python: Modules
C++ uses header files to include a new class or a set of classes. In Python, instead of header files, we use modules. A module may contain a class, a function, or variables. We can include the module in our code using the import command. The following is the syntax of the import statement.
import <module_name>Example: import os; import sys
These are the standard modules in Python.
If there is a list of classes in a module, and we want only a specific class, we can use the following line of code.
from <module_name> import <class_name>Example: from os import system
A module is Python code, but we can create our own modules too. Figure 3-26 shows a test module, which can be imported to our code and execute the function inside it.
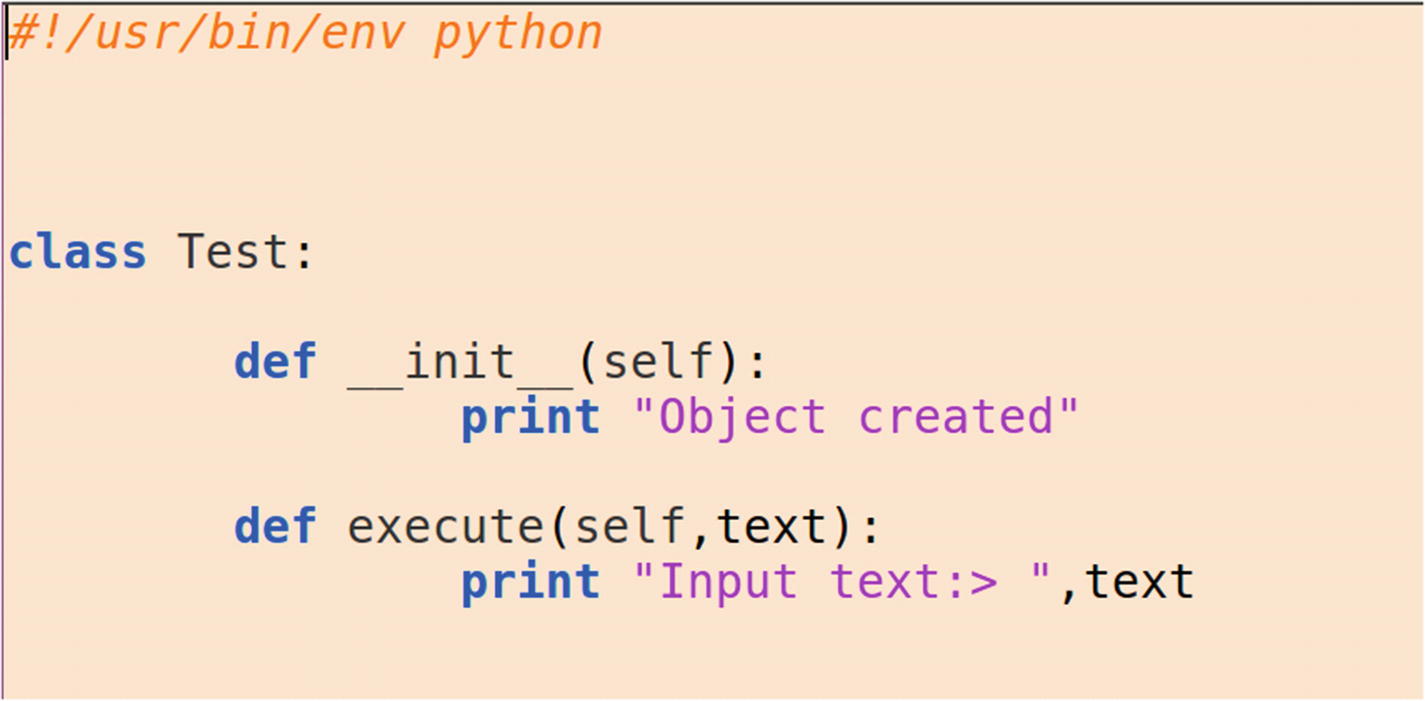
Figure 3-26 Custom Python test module
The test.py file has a function called execute() that prints the text passing as a function argument.
A line of code in Python interpreter shows how to use the test module (see Figure 3-27).
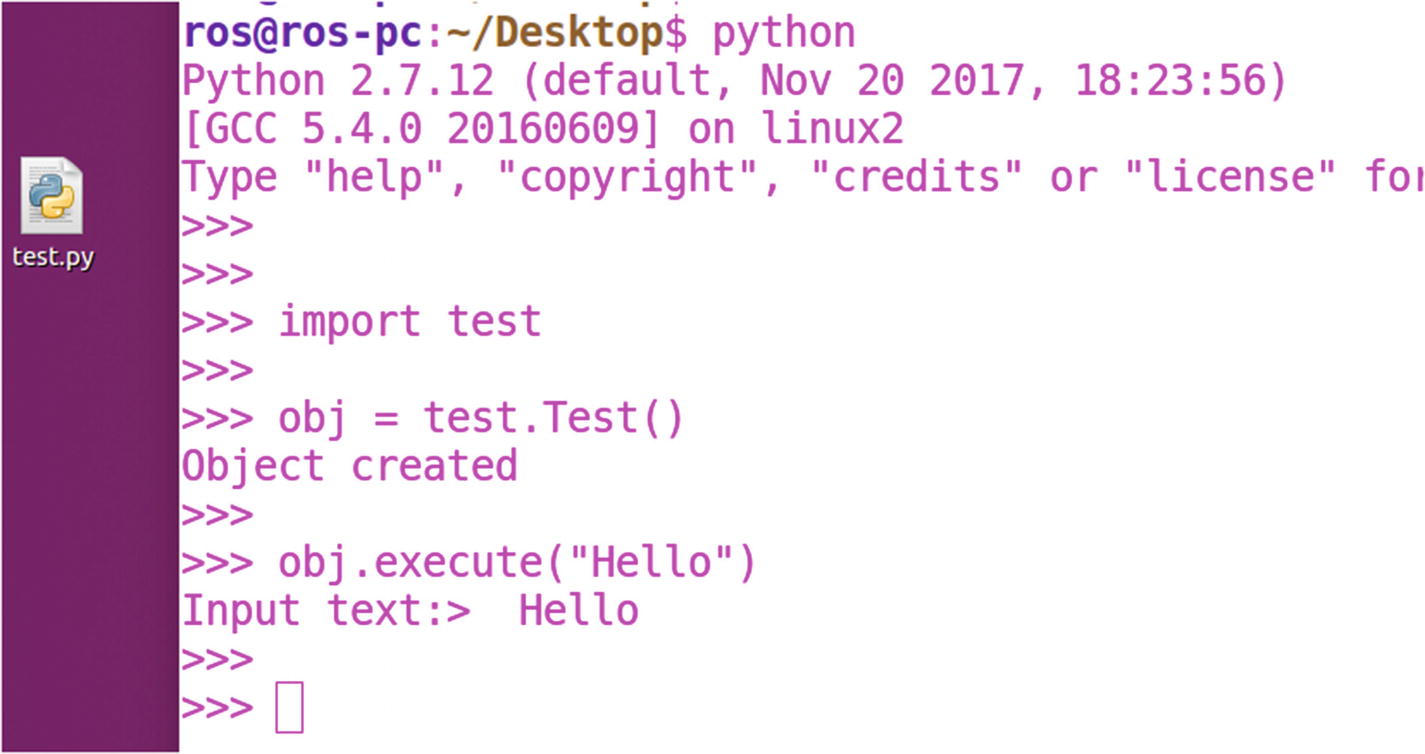
Figure 3-27 Python test module
It should be noted that the test.py file should be in the same path as the program or in the Python shell; for example, if test.py is in the Desktop folder, the current path of the shell should also be in the same folder.
When testing, we import the test module by using the import statement.
We create object called obj by using following statement.
obj = test.Test()This accesses the Test() class inside the test module. After creating the object, we can access the execute() function.
Simple Python tutorials are available at www.tutorialspoint.com/python/ .
Python: Handling Serial Ports
When we build robots, we may have to interface various sensors or microcontroller boards to a laptop or to single board computers such as the Raspberry Pi. Most of the interfacing is through USB or UART communication ( https://learn.sparkfun.com/tutorials/serial-communication ). Using Python, we can read/write to a serial port on the PC. This helps with reading data from sensors/actuators and writing control commands to the actuators.
Python has a module called PySerial to communicate with the serial port/com port on a PC ( https://pythonhosted.org/pyserial/ ). This module is very easy to use. Let’s look at how to read/write to a serial port in Ubuntu using Python.
Installing PySerial in Ubuntu 16.04
Installing PySerial is a very easy task in Ubuntu. Just follow these commands to install it:
$ sudo apt-get update$ sudo apt-get install python-serial
After installing the module, plug in your serial device; it can be a USB-to-serial device, or an actual serial device. The USB-to-serial device converts the USB protocol to UART protocol. The following are the two most popular USB-to-serial chips available on the market.
FTDI: www.ftdichip.com
Prolific: www.prolific.com.tw/US/company.aspx?id=1
When you plug in the devices with these chips in the Linux based system, it automatically loads the device driver and creates a serial device. The FTDI and Prolific device drivers are available in the Linux kernel. You get the serial device name by executing the dmesg command. This command shows the kernel message (also see Figure 3-28).
$ dmesg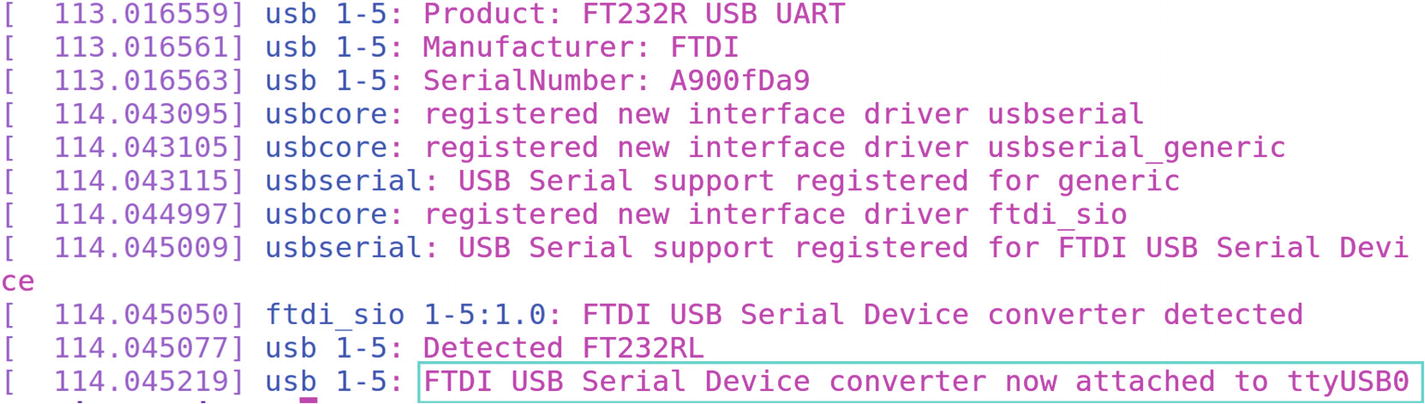
Figure 3-28 Output of dmesg shows the serial device name
When you plug the serial device to the PC and execute dmesg, you see the serial device name. In this case, it is /dev/ttyUSB0.
To communicate with the device, you may have to change the device permission. You can either use chmod to change the permission or you can add the current user to the dialout group, which gives access to the serial port.
Change the permission of the serial device.
$ sudo chmod 777 /dev/ttyUSB0Add a user to the dialout group.
$ sudo adduser $USER dialoutAfter doing this, use the code shown in Figure 3-29 to access the serial port.

Figure 3-29 Python example code of writing to a serial port
In the preceding code, you can see the importing serial module by using the following code.
import serial The following is the command to open the serial port with the given baud rate.
ser = serial.Serial('/dev/ttyUSB0',9600) The following is the command to write to the serial port.
ser.write('Hello') The following is how to read from the serial port.
text = ser.readline() You could also use the following command.
text = ser.read() #This will read 1 byte of datatext = ser.read(10) # read 10 bytes of serial data
The preceding code can interact with Arduino, Raspberry Pi, and other serial sensor devices. You can learn more about Python serial programming at http://pyserial.readthedocs.io/en/latest/shortintro.html .
Python: Scientific Computing and Visualization
In this section, you learn about some of the popular Python libraries for scientific computing and visualization.
Numpy ( www.numpy.org ): The fundamental package for scientific computing.
Scipy ( www.scipy.org ): An open source software for mathematics, science, and engineering.
Matplotlib ( http://matplotlib.org ): A Python 2D plotting library that produces publication-quality figures.
Python: Machine Learning and Deep Learning
Python is very famous for implementing machine learning and deep learning. The following are the popular libraries in Python.
TensorFlow ( www.tensorflow.org ): An open source library for numerical computation using data flow graphs.
Keras ( https://keras.io/ ): A high-level, neural networks API that is capable of using TensorFlow, Theano as a back end.
Caffe ( http://caffe.berkeleyvision.org ): A deep learning framework developed by Berkeley AI Research and community contributors.
Theano ( http://deeplearning.net/software/theano/ ): A Python library that allows you to efficiently define, optimize, and evaluate mathematical expressions involving multidimensional arrays.
Scikit-learn ( http://scikit-learn.org/ ): A simple machine learning library in Python.
Python: Computer Vision
There are two popular computer vision libraries compatible with Python.
OpenCV ( https://opencv.org ): Open Source Computer Vision is free for academic and commercial use. It has C++, C, Python, and Java interfaces and supports Windows, Linux, Mac OS, iOS, and Android.
PIL ( www.pythonware.com/products/pil/ ): Python Imaging Library adds image processing capabilities to your Python interpreter.
Python: Robotics
Python has a good interface for robotics programming using ROS. You can explore more about the capabilities of Python using ROS at http://wiki.ros.org/rospy .
Python: IDEs
There are some popular IDEs (integrated development environments) that make development and debugging faster. The following are three common IDEs.
PyCharm: www.jetbrains.com/pycharm/
Geany: www.geany.org
Spyder: https://github.com/spyder-ide
Summary
This chapter discussed the fundamentals of Python programming in Ubuntu Linux. Knowledge of Python programming is a prerequisite for working with ROS. We started with the Python interpreter in Ubuntu and saw how to work with it. After working with the interpreter, we saw how to create a Python script and run it on Ubuntu. Then we discussed the fundamentals of Python, such as handling input, output, Python loops, functions, and class operations. After these topics, we saw how to communicate with a serial device using a Python module. At the end of the chapter, we covered Python libraries for scientific computing, machine learning, deep learning, and robotics.
The next chapter discusses the basics of the Robot Operating System and its important technical terms.