
Now that our introductions are out of the way, let’s get down to business—making music. And what’s the first thing that most people want in their song, before they do anything? A beat, right? You want some drums! So, let’s start off with getting some drums into our song so that we can start singing, strumming, or whatever we want to do next.
Before beginning these drum exercises, make sure and start from the My Songs screen. This will guarantee that you’re in the right place at the right time. You can get to this screen by pressing the My Songs button in the upper-left corner of your screen (see Figure 1.1).
The virtual drummer within GarageBand is Apple supposing that not everybody necessarily wants to be a drummer; instead, people would like to direct what the drummer plays, how he plays, and at what moment he plays.
It puts you in the seat of the producer, where you can say, “I like that; now do this....”
Let’s take a look at how this works.
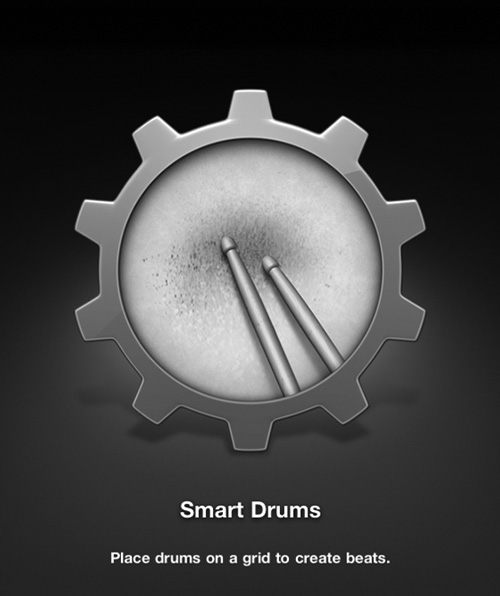
In the My Songs screen, start off by making a new song. When the new song is created, it will open up the instrument selection page. Choose Smart Drums from this page (see Figure 1.2).
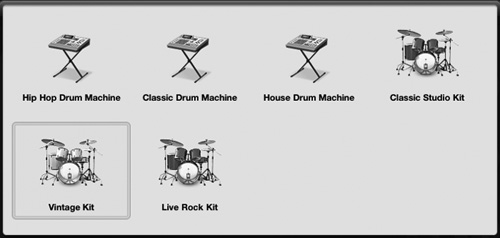
You may not want to do Hip Hop Drums at this point. If you do, just indulge me so that you learn how to change drum styles; you can always come back here later. Press the Hip Hop Drum Machine button, shown in Figure 1.3. This will bring up a menu. Within this menu, select the Vintage Kit, shown in Figure 1.4.
Now for the fun part! See the drum buttons over on the right of the page? These are the various drums from your chosen kit that you can drag into the Arrangement page in the middle of the screen (see Figure 1.5). The pane I’m referring to is the one that says Drag Drums Here. Drag the kick drum into this pane. Simply hold your finger on the kick drum and drag it to where it says Drag Drums Here.
Now that the kick drum is in the Arrangement page, you should hear it playing. You’ll notice that if you drag the kick up toward where it says Loud, the kick drum will play louder. If you drag the kick drum toward Complex, it will play more complex. Notice that you can drag it in between Complex and Loud, or Simple and Quiet (see Figure 1.6). Wherever you place it, it will still play in the style that a vintage drummer would play. You don’t have to do anything. Try dragging the kick drum around and see how it changes.
All right, you’re becoming an old hand already—but only with the kick drum. Now it’s time to add in some other drums. Try adding in some other drums and then drag them around where they play in a way that you like (see Figure 1.7). You can just leave the kick drum where it is, or you can move it around to see how it works with the other drums.
Okay, you’re a full-fledged drummer now. But you need to record your work. Try this out: Press the Record button at the top (see Figure 1.8).
While recording, try hitting the Dice button. This will drastically alter the current beat during recording, giving you multiple change-ups that you can arrange later.
When you’re finished, press the Stop button. At this point, you may decide that you’d like the drums to play faster or slower—whatever your preference is. Don’t worry; altering the speed does not affect your handiwork! Click on the Wrench in the upper-right corner, and a menu will appear, as shown in Figure 1.9.
In the Songs Setting menu, click the up or down arrow to increase or decrease the song’s tempo, or speed. You can also tap along to the beat of your favorite song to determine its original tempo.
When you’ve got the tempo set, press the button next to the Virtual Drummer button at the top to go to the Arrangement page (see Figure 1.10).


When you’re in the Arrangement page, you can start moving your new drum part around and much more. This also perfectly positions us to start taking a look at loops.
What are loops, anyway? This is a valid question. Loops, where GarageBand is concerned, are prerecorded drum beats, guitar rhythms, and melodies. Why they are called “loops” is simple:
These beats, rhythms, and so on are looped so that they can play over and over again. Because the loops seamlessly play over and over, you can drop them into a song, and they will play within your song as long as you like.
Also, because they were originally recorded by real musicians, they are, in fact, real and organic and can be cued whenever you want.
Bottom line: Loops allow real, studio-class musicians to play in your songs whenever you want. And, Apple gave you these loops for free—for your iPad.
So, how do you use them?
If you are continuing on from the Smart Drummer exercise, you’ll already be in the Arrangement page. If not, you can go to the Arrangement page in GarageBand, which looks like Figure 1.11, by pressing the highlighted button within the figure.

Within the Arrangement page, press the Loop button.
Tap the Instrument section at the top of the Apple Loops menu.
Tap All Drums in the Instrument menu.
Drag the Bar Band Basic Drumset 01 loop into the Arrangement page by simply pressing down and dragging.
That’s how easy it is to get studio-quality loops into your GarageBand song. But wait! It doesn’t stop with just drums. In the same Apple Loops window, press Instrument again where it currently says All Drums.
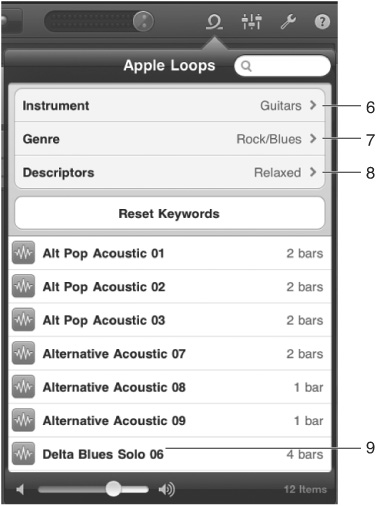
In the Instrument menu, select Guitars (see Figure 1.12).
Now, suppose you want a specific style of guitar playing. Press the Genre button. Within this menu, select Blues.
Now click the Descriptors button. Within this menu, select Relaxed. Notice we’re saying “Relaxed.” We’re telling the guitarist to be a little more laid back in his playing style. Cool, huh?
Now, drag Delta Blues Solo into your Arrangement page below the Bar Band Basic Drumset 01. Your Arrangement page should now closely resemble Figure 1.13.

See, it’s really easy to find the styles you’re looking for. Simply use the Genre and Descriptor buttons to tell GarageBand what kinds of rhythms, riffs, and so on you’re looking for, and it does the rest.
In this mode, GarageBand literally puts you behind drum sets that are highly produced and polished. This means that no matter what you play, it’s going to sound good. But the key phrase is “what you play.” You literally are the drummer here! You make beats of your own, play them out, and have fun.
Do you need experience? No—just play beats that are in your head or even emulate beats you’ve heard in songs that you like. The main thing is that you make a beat that you like.
Keep in mind that within this portion of GarageBand, Apple doesn’t hold your hand quite as much. Here is where you tap along a beat while recording. If this isn’t really your thing, don’t worry; we already know two great ways to get drums into GarageBand. However, I suggest giving it a try a couple of times. C’mon, you only live once, right?
Let’s try it out!
Picking up from the previous exercise, you should currently be in the Arrangement page of GarageBand. Press the + button in the lower-right corner, as shown in Figure 1.14.
The Instruments page will appear. Flick to the left or right until you see Drums. Press Drums, as shown in Figure 1.15.
Look at this amazing kit that appears before you. Trust me; this isn’t just a picture. Try tapping the cymbals, the drums, and the snare. Not only can you tap and have them react, but they also play different sounds based on where you tap the drums. Crazy, right?
All right, let’s check out a different kit. Press the button above the kit that says Classic Studio Kit (see Figure 1.16).
In the menu that appears, select House Drum Machine.
Now you’ll have a very different-looking drum device. This device looks like an electronic drum machine, not a real kit (see Figure 1.17). Tap the different buttons to trigger sounds as if you were playing a drum beat.
You’ll notice that there are some different knobs on this kit. You have one called Hi Pass—turn it up, and you’ll hear the bass get cut, and only the high frequencies pass through. There’s the Lo Pass—turn this up, and all the high frequencies get cut. There’s also Resolution and Lo-Fi. These do an effect called bit crushing, which basically makes your kit sound dirty and slightly computerized. This is a great effect for grungy, more raw drums. Try playing around with these.
You might discover that you really don’t have enough hands to be able to play all the drums at once, which is going to be a problem when you start recording. For example, how will you play the hi-hat, kick, and snare at the same time? It’s okay! Thankfully, Apple has a workaround for this oversight. It’s a feature called sections.
In the upper-left corner of the screen, you’ll notice a Sections button that has a puzzle-piece design on it. Press it!
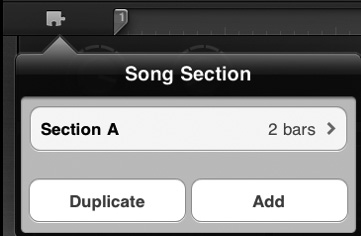
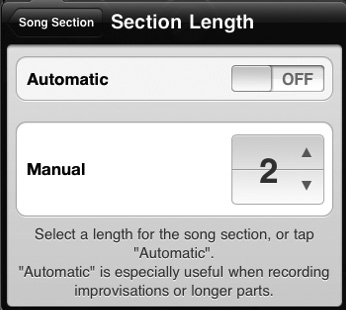
A menu will appear. Press Section A, as shown in Figure 1.18.
Use the arrows to lower the number 8 to the number 2, as shown in Figure 1.19.
What you’ve done is create a section that plays for only two measures. This is just enough time to craft a really cool initial drum beat. But, it will also continually loop, allowing you to add even more drums over it when it loops back around.
Press the Record button at the top and record a drum beat. You’ll notice as you finish your beat that it will automatically play again. This is good! Add more drums on each pass until you get in everything you want.
When you are finished recording, press the Play/Stop button (see Figure 1.20).
Do you like what you played? If not, you can press the Undo button and make another drum beat. If you want to make another drum beat, go back into the Sections menu (the puzzle-piece icon) and create another section by using the Add button. Set its length the way you did earlier with the numbers and then create another drum beat for your song.


Adding additional drum beats through the Sections function will help you quickly get all the drum beats together that you want. It also will help you get some variety together for when you start adding more elements to your song. In the next chapter, we’ll get into the next fun part of GarageBand: recording vocals!