
Chapter 2
A Toy App
In this chapter, we’ll develop a toy demo application to show off some of the power of Rails. The purpose is to get a high-level overview of Ruby on Rails programming (and web development in general) by rapidly generating an application using scaffold generators, which create a large amount of functionality automatically. As discussed in Box 2.1, the rest of the book will take the opposite approach, developing a full sample application incrementally and explaining each new concept as it arises, but for a quick overview (and some instant gratification) there is no substitute for scaffolding. The resulting toy app will allow us to interact with it through its URLs, giving us insight into the structure of a Rails application, including a first example of the REST architecture favored by Rails.
As with the forthcoming sample application, the toy app will consist of users and their associated microposts (thus constituting a minimalist Twitter-style app). The functionality will be utterly under-developed, and many of the steps will seem like magic, but worry not: The full sample app will develop a similar application from the ground up starting in Chapter 3, and I will provide plentiful forward-references to later material. In the meantime, have patience and a little faith—the whole point of this tutorial is to take you beyond this superficial, scaffold-driven approach to achieve a deeper understanding of Rails.
2.1 Planning the Application
In this section, we’ll outline our plans for the toy application. As in Section 1.2, we’ll start by generating the application skeleton using the rails new command with a specific Rails version number:
$ cd ~/environment
$ rails _7.0.4_ new toy_app --skip-bundle
$ cd toy_app/
If you’re using the cloud IDE as recommended in Section 1.1.1, note that this second app can be created in the same environment as the first. It is not necessary to create a new environment. In order to get the files to appear, you may need to click the gear icon in the file navigator area and select “Refresh File Tree”.
Next, we’ll use a text editor to update the Gemfile needed by Bundler with the contents of Listing 2.1.
Listing 2.1: A Gemfile for the toy app.
source "https://rubygems.org"
git_source(:github) { |repo| "https://github.com/#{repo}.git" }


ruby "3.1.2"

gem "rails",           "7.0.4"
gem "sassc-rails",     "2.1.2"
gem "sprockets-rails", "3.4.2"
gem "importmap-rails", "1.1.0"
gem "turbo-rails",     "1.1.1"
gem "stimulus-rails",  "1.0.4"
gem "jbuilder",        "2.11.5"
gem "puma",            "5.6.4"
gem "bootsnap",        "1.12.0", require: false

group :development, :test do
  gem "sqlite3", "1.4.2"
  gem "debug",   "1.5.0", platforms: %i[ mri mingw x64_mingw ]
end

group :development do
  gem "web-console", "4.2.0"
end

group :test do
  gem "capybara",           "3.37.1"
  gem "selenium-webdriver", "4.2.0"
  gem "webdrivers",         "5.0.0"
end

group :production do
  gem "pg", "1.3.5"
end

# Windows does not include zoneinfo files, so bundle the tzinfo-data gem.
# Uncomment the following line if you're running Rails
# on a native Windows system:
# gem "tzinfo-data", platforms: [:mingw, :mswin, :x64_mingw, :jruby]
Note that Listing 2.1 is identical to Listing 1.22.
As in Section 1.4.1, we’ll install the local gems while preventing the installation of production gems using bundle config set --local without ‘production’:
$ bundle _2.3.14_ config set --local without 'production'
$ bundle _2.3.14_ install
$ bundle _2.3.14_ lock --add-platform x86_64-linux
As in Chapter 1, we’ve included the bundle lock step from Listing 1.23 for completeness.
Finally, we’ll put the toy app under version control with Git:
$ git init
$ git add -A
$ git commit -m "Initialize repository"
You should also create a new repository at GitHub by following the same steps as in Section 1.3.3 (taking care to make it private as in Figure 2.1), and then push up to the remote repository:
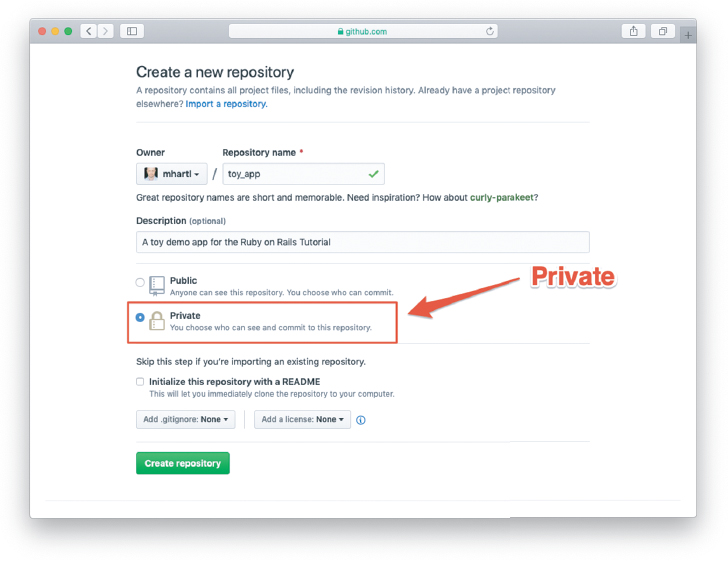
Figure 2.1: Creating the toy app repository at GitHub.
$ git remote add origin https://github.com/<username>/toy_app.git
$ git push -u origin main
Finally, it’s never too early to deploy, which I suggest doing by following the same “hello, world!” steps from Section 1.2.4, as shown in Listing 2.2 and Listing 2.3.
Listing 2.2: Adding a hello action to the Application controller.app/controllers/application_controller.rb
class ApplicationController < ActionController::Base

  def hello
    render html: "hello, world!"
  end
end
Listing 2.3: Setting the root route.config/routes.rb
Rails.application.routes.draw do
  root 'application#hello'
end
As in Chapter 1, we can run the local web server in a separate tab (Figure 1.15) to confirm that the app is working. Users of the cloud IDE should first add the same configuration as in Section 1.2.2 to allow the toy app to be served (Listing 2.4).
Listing 2.4: Allowing connections to the local web server.config/environments/development.rb
Rails.application.configure do
  .
  .
  .
  # Allow connections to local server on cloud IDE.
  config.hosts.clear
end
Then run the Rails server as in Section 1.2.2:
$ rails serverNow the toy application should be available on the local server as described in Section 1.2.2. In particular, if we visit the root URL at / (read “slash”, as noted in Section 1.2.4), we get the same “hello, world!” page shown in Figure 1.20.
Once you’ve confirmed that the app is working locally, deploy to production by committing the changes and pushing up to Heroku:
$ git commit -am "Add hello"
$ heroku create
$ git push && git push heroku main
Note that we simultaneously pushed the repository up to GitHub because it’s generally a good idea to keep the two copies in sync. In the third line, we’ve used the double ampersand operator && (read “and”) to combine the pushes to GitHub and Heroku; the second command will execute only if the first one succeeds.1
1. The && operator is described (https://www.learnenough.com/command-line-tutorial/directories#asidecombining_commands) in Chapter 4 of Learn Enough Command Line to Be Dangerous (https://www.learnenough.com/command-line).
As in Section 1.4, you may see some warning messages, which you should ignore for now. We’ll deal with them in Section 7.5. Apart from the URL of the Heroku app, the result should be the same as in Figure 1.33.
2.1.1 A Toy Model for Users
Now we’re ready to start making the app itself. The typical first step when making a web application is to create a data model, which is a representation of the structures needed by our application, including the relationships between them. In our case, the toy app will be a Twitter-style microblog, with only users and short (micro)posts. Thus, we’ll begin with a model for users of the app in this section, and then we’ll add a model for microposts (Section 2.1.2).
There are as many choices for a user data model as there are different registration forms on the Web; for simplicity, we’ll go with a distinctly minimalist approach. Users of our toy app will have a unique identifier called id (of type integer), a publicly viewable name (of type string), and an email address (also of type string) that will double as a unique username. (Note that there is no password attribute at this point, which is part of what makes this app a “toy”. We’ll cover passwords starting in Chapter 6.) A summary of the data model for users appears in Figure 2.2.
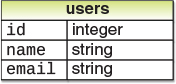
Figure 2.2: The data model for users.
As we’ll see starting in Section 6.1.1, the label users in Figure 2.2 corresponds to a table in a database, and the id, name, and email attributes are columns in that table.
2.1.2 A Toy Model for Microposts
Recall from the introduction that a micropost is simply a short post, essentially a generic term for the brand-specific “tweet” (with the prefix “micro” motivated by Twitter’s original description as a “micro-blog”). The core of the micropost data model is even simpler than the one for users: A micropost has only an id and a content field for the micropost’s text (of type text).2 There’s an additional complication, though: We want to associate each micropost with a particular user. We’ll accomplish this by recording the user_id of the owner of the post. The results are shown in Figure 2.3.
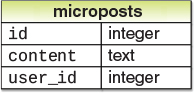
Figure 2.3: The data model for microposts.
2. Because microposts are short by design, the string type might actually be big enough to contain them, but using text better expresses our intent, while also giving us greater flexibility should we ever wish to relax the length constraint. Indeed, Twitter’s change from allowing 140 to 280 characters in English-language tweets is a perfect example of why such flexibility is important: A string typically allows 255 (28 − 1) characters, which is big enough for 140-character tweets but not for 280-character ones. Using text allows a unified treatment of both cases.
We’ll see in Section 2.3.3 (and more fully in Chapter 13) how this user_id attribute allows us to succinctly express the notion that a user potentially has many associated microposts.
2.2 The Users Resource
In this section, we’ll implement the users data model in Section 2.1.1, along with a web interface to that model. The combination will constitute a Users resource, which will allow us to think of users as objects that can be created, read, updated, and deleted through the web via the HTTP protocol. As promised in the introduction, our Users resource will be created by a scaffold generator program, which comes standard with each Rails project. I urge you not to look too closely at the generated code; at this stage, it will only serve to confuse you.
Rails scaffolding is generated by passing the scaffold command to the rails generate script. The argument of the scaffold command is the singular version of the resource name (in this case, User), together with optional parameters for the data model’s attributes:3
3. The name of the scaffold follows the convention of models, which are singular, rather than resources and controllers, which are plural. Thus, we have User instead of Users.
 $ rails generate scaffold User name:string email:string
      invoke  active_record
      create    db/migrate/<timestamp>_create_users.rb
      create    app/models/user.rb
      invoke    test_unit
      create      test/models/user_test.rb
      create      test/fixtures/users.yml
      invoke  resource_route
       route    resources :users
      invoke  scaffold_controller
      create    app/controllers/users_controller.rb
      invoke    erb
      create      app/views/users
      create      app/views/users/index.html.erb
      create      app/views/users/edit.html.erb
      create      app/views/users/show.html.erb
      create      app/views/users/new.html.erb
      create      app/views/users/_form.html.erb
      invoke    test_unit
      create      test/controllers/users_controller_test.rb
      create      test/system/users_test.rb
      invoke    helper
      create      app/helpers/users_helper.rb
      invoke      test_unit
      invoke    jbuilder
      create      app/views/users/index.json.jbuilder
      create      app/views/users/show.json.jbuilder
      create      app/views/users/_user.json.jbuilder
By including name:string and email:string, we have arranged for the User model to have the form shown in Figure 2.2. (Note that there is no need to include a parameter for id; it is created automatically by Rails for use as the primary key in the database.)
To proceed with the toy application, we first need to migrate the database using rails db:migrate, as shown in Listing 2.5.
Listing 2.5: Migrating the database.
$ rails db:migrate
== CreateUsers: migrating ======================================
-- create_table(:users)
   -> 0.0027s
== CreateUsers: migrated (0.0036s) =============================
The effect of Listing 2.5 is to update the database with our new users data model. (We’ll learn more about database migrations starting in Section 6.1.1.)
2.2.1 A User Tour
In generating the Users resource scaffolding in Section 2.2, Rails created a large number of pages for manipulating users. For example, the page for listing all users is at /users, and the page for making a new user is at /users/new. The rest of this section is dedicated to taking a whirlwind tour through these user pages. As we proceed, it may help to refer to Table 2.1, which shows the correspondence between pages and URLs.
Table 2.1: The correspondence between pages and URLs for the Users resource.
URL | Action | Purpose |
|---|---|---|
/users |
| page to list all users |
/users/1 |
| page to show user with id |
/users/new |
| page to make a new user |
/users/1/edit |
| page to edit user with id |
We start with the page to show all the users in our application, called index and located at /users. To navigate to this page, click in the address bar of your browser and add “/users” to the end of the root URL (Figure 2.4) so that the full URL is of the form https://www.example.com/users.
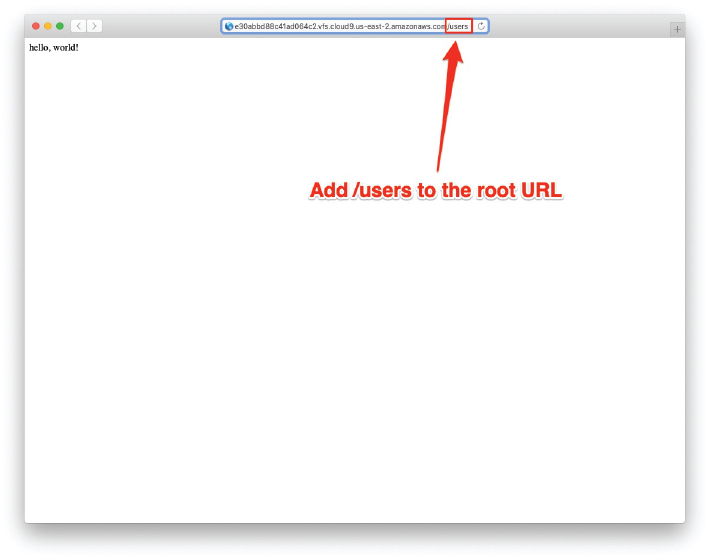
Figure 2.4: Adding /users to the root URL.
As you might expect, initially there are no users at all (Figure 2.5).
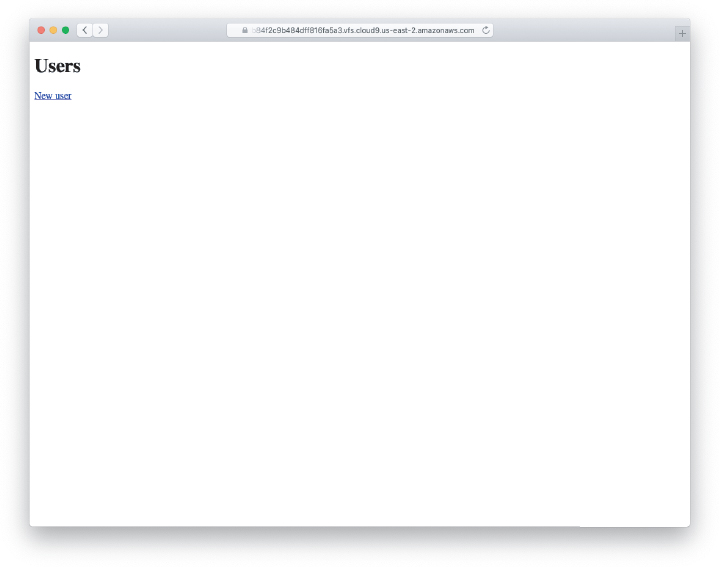
Figure 2.5: The initial index page for the Users resource (/users).
To make a new user, we can click on the New User link in Figure 2.5 to visit the new page at /users/new, as shown in Figure 2.6. In Chapter 7, this will become the user signup page.
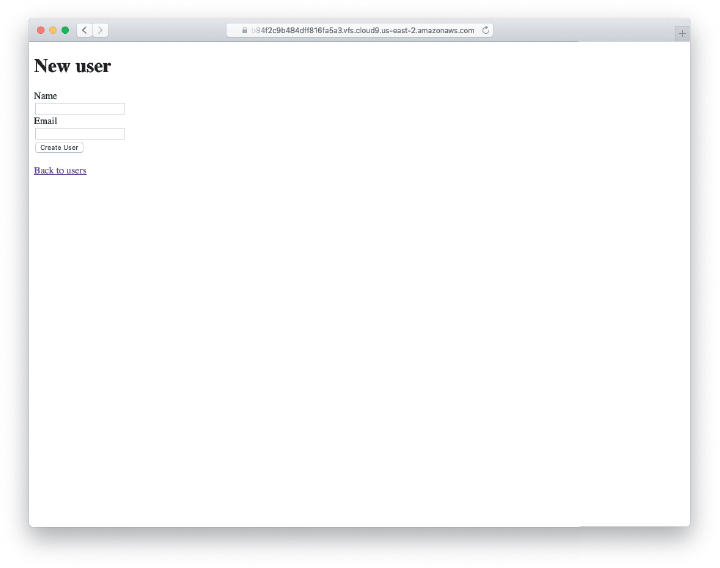
Figure 2.6: The new user page (/users/new).
We can create a user by entering name and email values in the text fields and then clicking the Create User button. The result is the user show page at /users/1, as seen in Figure 2.7. (The green welcome message is accomplished using the flash, which we’ll learn about in Section 7.4.2.) Note that the URL is /users/1; as you might suspect, the number 1 is simply the user’s id attribute from Figure 2.2. In Section 7.1, this page will become the user’s profile page.
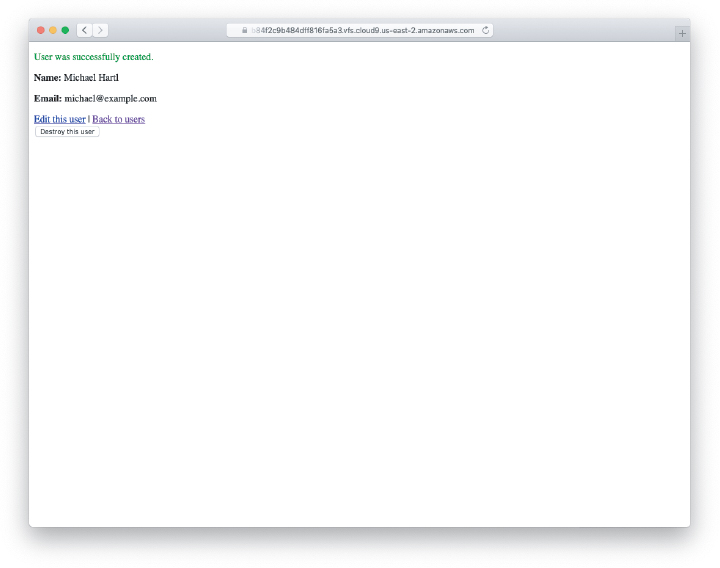
Figure 2.7: The page to show a user (/users/1).
To change a user’s information, we click the Edit link to visit the edit page at /users/1/edit (Figure 2.8). By modifying the user information and clicking the Update User button, we arrange to change the information for the user in the toy application (Figure 2.9). (As we’ll see in detail starting in Chapter 6, this user data is stored in a database back-end.) We’ll add user edit/update functionality to the sample application in Section 10.1.
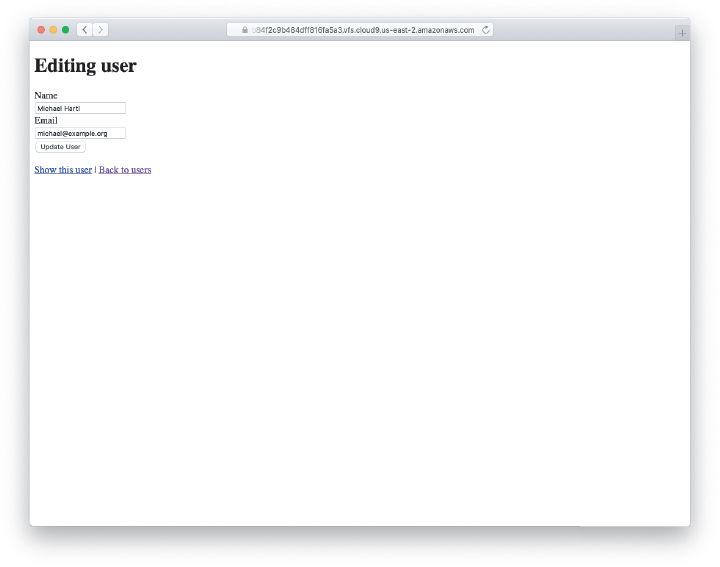
Figure 2.8: The user edit page (/users/1/edit).

Figure 2.9: A user with updated information.
Now we’ll create a second user by revisiting the new page at /users/new and submitting a second set of user information. The resulting user index is shown in Figure 2.10. Section 7.1 will develop the user index into a more polished page for showing all users.
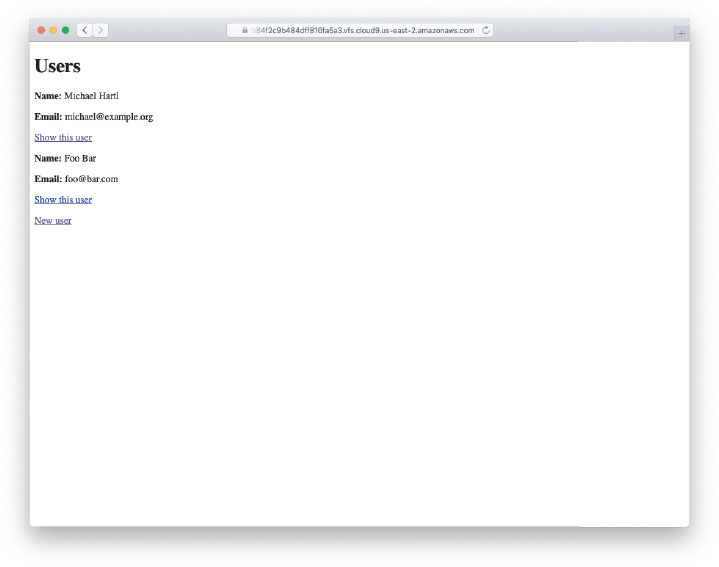
Figure 2.10: The user index page (/users) with a second user.
Having shown how to create, show, and edit users, we come finally to destroying them (Figure 2.9). You should verify that clicking on the link in Figure 2.9 destroys the second user, yielding an index page with only one user. (If it doesn’t work, be sure that JavaScript is enabled in your browser; Rails uses JavaScript to issue the request needed to destroy a user.) Section 10.4 adds user deletion to the sample app, taking care to restrict its use to a special class of administrative users.
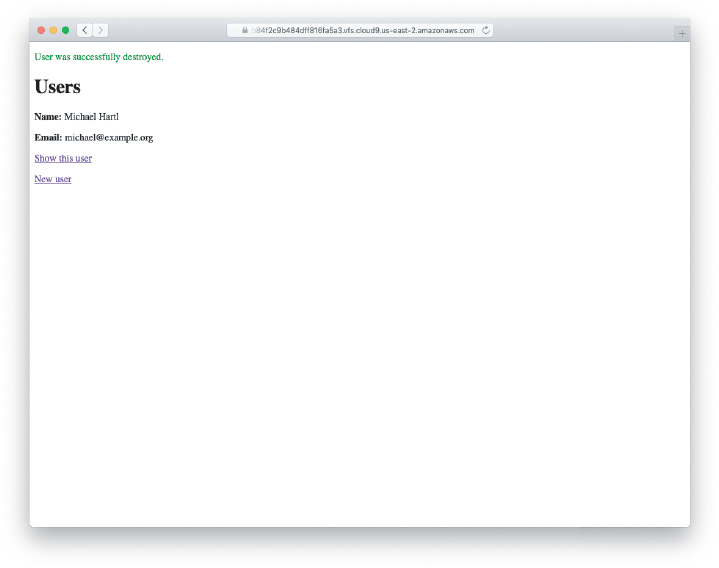
Figure 2.11: Destroying a user.
Exercises
To see other people’s answers and to record your own, subscribe to the Rails Tutorial course (https://www.railstutorial.org/) or to the Learn Enough All Access Subscription (https://www.learnenough.com/all-access).
What happens if you try to create a user with a name but no email address?
What happens if you try to create a user with an invalid email address, like “@example.com”?
Destroy each of the users created in the previous exercises. Does Rails display a message by default when a user is destroyed?
2.2.2 MVC in Action
Now that we’ve completed a quick overview of the Users resource, let’s examine one particular part of it in the context of the model-view-controller (MVC) pattern introduced in Section 1.2.3. Our strategy will be to describe the results of a typical browser hit—a visit to the user index page at /users—in terms of MVC (Figure 2.12).
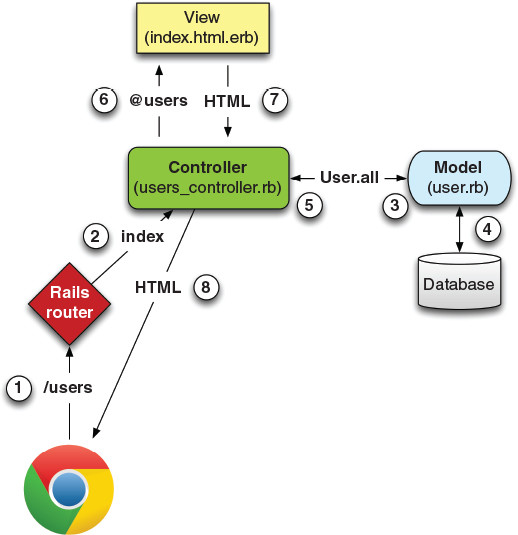
Figure 2.12: A detailed diagram of MVC in Rails.
Here is a summary of the steps shown in Figure 2.12:
The browser issues a request for the /users URL.
Rails routes /users to the
indexaction in the Users controller.The
indexaction asks the User model to retrieve all users (User.all).The User model pulls all the users from the database.
The User model returns the list of users to the controller.
The controller captures the users in the
@usersvariable, which is passed to theindexview.The view uses embedded Ruby to render the page as HTML.
The controller passes the HTML back to the browser.4
4. Some references indicate that the view returns the HTML directly to the browser (via a web server such as Apache or Nginx). Regardless of the implementation details, I find it helpful to think of the controller as a central hub through which all the application’s information flows.
Now let’s take a look at the above steps in more detail. We start with a request issued from the browser—i.e., the result of typing a URL in the address bar or clicking on a link (Step 1 in Figure 2.12). This request hits the Rails router (Step 2), which dispatches the request to the proper controller action based on the URL (and, as we’ll see in Box 3.2, the type of request). The code to create the mapping of user URLs to controller actions for the Users resource appears in Listing 2.6. This code effectively sets up the table of URL/action pairs seen in Table 2.1. (The strange notation :users is a symbol, which we’ll learn about in Section 4.3.3.)
Listing 2.6: The Rails routes, with a rule for the Users resource.config/routes.rb
Rails.application.routes.draw do
  resources :users
  root 'application#hello'
end
While we’re looking at the routes file, let’s take a moment to associate the root route with the users index, so that “slash” goes to /users. Recall from Listing 2.3 that we added the root route
root 'application#hello'so that the root route went to the hello action in the Application controller. In the present case, we want to use the index action in the Users controller, which we can arrange using the code shown in Listing 2.7.
Listing 2.7: Adding a root route for users.config/routes.rb
Rails.application.routes.draw do
  resources :users
  root 'users#index'
end
A controller contains a collection of related actions, and the pages from the tour in Section 2.2.1 correspond to actions in the Users controller. The controller generated by the scaffolding is shown schematically in Listing 2.8. Note the code class UsersController < ApplicationController, which is an example of a Ruby class with inheritance. (We’ll discuss inheritance briefly in Section 2.3.4 and cover both subjects in more detail in Section 4.4.)
Listing 2.8: The Users controller in schematic form.app/controllers/users_controller.rb
class UsersController  < ApplicationController
  .
  .
  .
  def index
    .
    .
    .
  end

  def show
    .
    .
    .
  end


  def new
    .
    .
    .
  end

  def edit
    .
    .
    .
  end

  def create
    .
    .
    .
  end

  def update
    .
    .
    .
  end

  def destroy
    .
    .
    .
  end
end
You might notice that there are more actions than there are pages; the index, show, new, and edit actions all correspond to pages from Section 2.2.1, but there are additional create, update, and destroy actions as well. These actions don’t typically render pages (although they can); instead, their main purpose is to modify information about users in the database.
This full suite of controller actions, summarized in Table 2.2, represents the implementation of the REST architecture in Rails (Box 2.2), which is based on the ideas of representational state transfer identified and named by computer scientist Roy Fielding.5 Note from Table 2.2 that there is some overlap in the URLs; for example, both the user show action and the update action correspond to the URL /users/1. The difference between them is the HTTP request method they respond to. We’ll learn more about HTTP request methods starting in Section 3.3.
Table 2.2: RESTful routes provided by the Users resource in Listing 2.6.
HTTP request method | URL | Action | Purpose |
|---|---|---|---|
GET | /users |
| page to list all users |
GET | /users/1 |
| page to show user with id |
GET | /users/new |
| page to make a new user |
POST | /users |
| create a new user |
GET | /users/1/edit |
| page to edit user with id |
PATCH | /users/1 |
| update user with id |
DELETE | /users/1 |
| delete user with id |
5. Fielding, Roy Thomas. Architectural Styles and the Design of Network-based Software Architectures. Doctoral dissertation, University of California, Irvine, 2000.
To examine the relationship between the Users controller and the User model, let’s focus on the index action, shown in Listing 2.9. (Learning how to read code even when you don’t fully understand it is an important aspect of technical sophistication (Box 1.2).)
Listing 2.9: The simplified user index action for the toy application.app/controllers/users_controller.rb
class UsersController < ApplicationController
  .
  .
  .
  def index
    @users = User.all
  end
  .
  .
  .
end
This index action has the line @users = User.all (Step 3 in Figure 2.12), which asks the User model to retrieve a list of all the users from the database (Step 4), and then places them in the variable @users (pronounced “at-users”) (Step 5).
The User model itself appears in Listing 2.10. Although it is rather plain, it comes equipped with a large amount of functionality because of inheritance (Section 2.3.4 and Section 4.4). In particular, by using the Rails library called Active Record, the code in Listing 2.10 arranges for User.all to return all the users in the database.
Listing 2.10: The User model for the toy application.app/models/user.rb
class User < ApplicationRecord
end
Once the @users variable is defined, the controller calls the view (Step 6), shown in Listing 2.11. Variables that start with the @ sign, called instance variables, are automatically available in the views; in this case, the index.html.erb view in Listing 2.11 iterates through the @users list and outputs a line of HTML for each one. (Remember, you aren’t supposed to understand this code right now. It is shown only for purposes of illustration.)
Listing 2.11: The view for the users index.app/views/users/index.html.erb
<p style="color: green"><%= notice %></p>

<h1>Users</h1>

<div id="users">
  <% @users.each do |user| %>
    <%= render user %>
    <p>
      <%= link_to "Show this user", user %>
    </p>
  <% end %>
</div>

<%= link_to "New user", new_user_path %>
The view converts its contents to HTML (Step 7), which is then returned by the controller to the browser for display (Step 8).
Exercises
To see other people’s answers and to record your own, subscribe to the Rails Tutorial course or to the Learn Enough All Access Subscription.
By referring to Figure 2.12, write out the analogous steps for visiting the URL /users/1/edit.
Find the line in the scaffolding code that retrieves the user from the database in the previous exercise. Hint: It’s in a special location called
set_user.What is the name of the view file for the user edit page?
2.2.3 Weaknesses of This Users Resource
Though good for getting a general overview of Rails, the scaffold Users resource suffers from a number of severe weaknesses.
No data validations. Our User model accepts data such as blank names and invalid email addresses without complaint.
No authentication. We have no notion of logging in or out, and no way to prevent any user from performing any operation.
No tests. This isn’t technically true—the scaffolding includes rudimentary tests—but the generated tests don’t test for data validation, authentication, or any other custom requirements.
No style or layout. There is no consistent site styling or navigation.
No real understanding. If you understand the scaffold code, you probably shouldn’t be reading this book.
2.3 The Microposts Resource
Having generated and explored the Users resource, we turn now to the associated Microposts resource. Throughout this section, I recommend comparing the elements of the Microposts resource with the analogous user elements from Section 2.2; you should see that the two resources parallel each other in many ways. The RESTful structure of Rails applications is best absorbed by this sort of repetition of form—indeed, seeing the parallel structure of Users and Microposts even at this early stage is one of the prime motivations for this chapter.
2.3.1 A Micropost Microtour
As with the Users resource, we’ll generate scaffold code for the Microposts resource using rails generate scaffold, in this case implementing the data model from Figure 2.3:6
6. As with the User scaffold, the scaffold generator for microposts follows the singular convention of Rails models; thus, we have generate Micropost.
 $ rails generate scaffold Micropost content:text user_id:integer

      invoke  active_record
      create    db/migrate/<timestamp>_create_microposts.rb
      create    app/models/micropost.rb
      invoke    test_unit
      create      test/models/micropost_test.rb
      create      test/fixtures/microposts.yml

      invoke  resource_route
       route    resources :microposts
      invoke  scaffold_controller
      create    app/controllers/microposts_controller.rb
      invoke    erb
      create      app/views/microposts
      create      app/views/microposts/index.html.erb
      create      app/views/microposts/edit.html.erb
      create      app/views/microposts/show.html.erb
      create      app/views/microposts/new.html.erb
      create      app/views/microposts/_form.html.erb
      invoke    test_unit
      create      test/controllers/microposts_controller_test.rb
      create      test/system/microposts_test.rb
      invoke    helper
      create      app/helpers/microposts_helper.rb
      invoke      test_unit
      invoke    jbuilder
      create      app/views/microposts/index.json.jbuilder
      create      app/views/microposts/show.json.jbuilder
      create      app/views/microposts/_micropost.json.jbuilder
To update our database with the new data model, we need to run a migration as in Section 2.2:
 $ rails db:migrate

 ==  CreateMicroposts: migrating ===============================================
 -- create_table(:microposts)
    -> 0.0023s
 ==  CreateMicroposts: migrated (0.0026s) ======================================
Now we are in a position to create microposts in the same way we created users in Section 2.2.1. As you might guess, the scaffold generator has updated the Rails routes file with a rule for the Microposts resource, as seen in Listing 2.12.7 As with users, the resources :microposts routing rule maps micropost URLs to actions in the Microposts controller, as seen in Table 2.3.
7. The scaffold code may have extra blank lines compared to Listing 2.12. This is not a cause for concern, as Ruby ignores such extra space.
Table 2.3: RESTful routes provided by the Microposts resource in Listing 2.12.
HTTP request method | URL | Action | Purpose |
|---|---|---|---|
GET | /microposts |
| page to list all microposts |
GET | /microposts/1 |
| page to show micropost with id |
GET | /microposts/new |
| page to make a new micropost |
POST | /microposts |
| create a new micropost |
GET | /microposts/1/edit |
| page to edit micropost with id |
PATCH | /microposts/1 |
| update micropost with id |
DELETE | /microposts/1 |
| delete micropost with id |
Listing 2.12: The Rails routes, with a new rule for the Microposts resource.config/routes.rb
Rails.application.routes.draw do
  resources :microposts
  resources :users
  root 'users#index'
end
The Microposts controller itself appears in schematic form in Listing 2.13. Note that, apart from having MicropostsController in place of UsersController, Listing 2.13 is identical to the code in Listing 2.8. This is a reflection of the REST architecture common to both resources.
Listing 2.13: The Microposts controller in schematic form.app/controllers/microposts_controller.rb
class MicropostsController < ApplicationController
  .
  .
  .
  def index
    .
    .
    .
  end

  def show
    .
    .
    .

  end

  def new
    .
    .
    .
  end

  def edit
    .
    .
    .
  end

  def create
    .
    .
    .
  end

  def update
    .
    .
    .
  end

  def destroy
    .
    .
    .
  end
end
To make some actual microposts, we click on New Micropost on the micropost index page (Figure 2.13) and enter information at the new microposts page, /microposts/new, as seen in Figure 2.14.
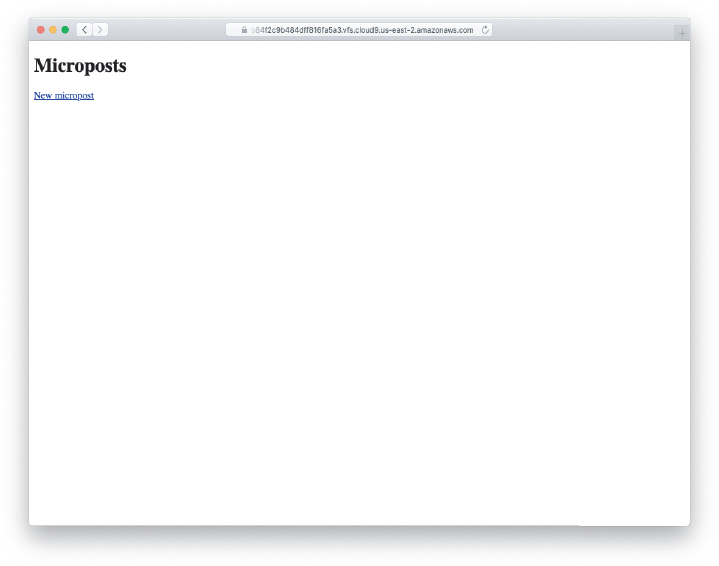
Figure 2.13: The micropost index page (/microposts).
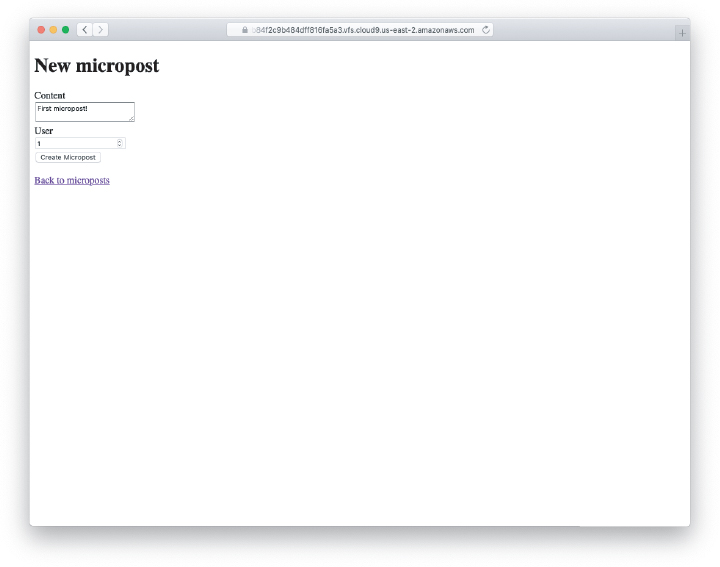
Figure 2.14: The new micropost page (/microposts/new).
At this point, go ahead and create a micropost or two, taking care to make sure that at least one has a user_id of 1 to match the id of the first user created in Section 2.2.1. The result should look something like Figure 2.15.
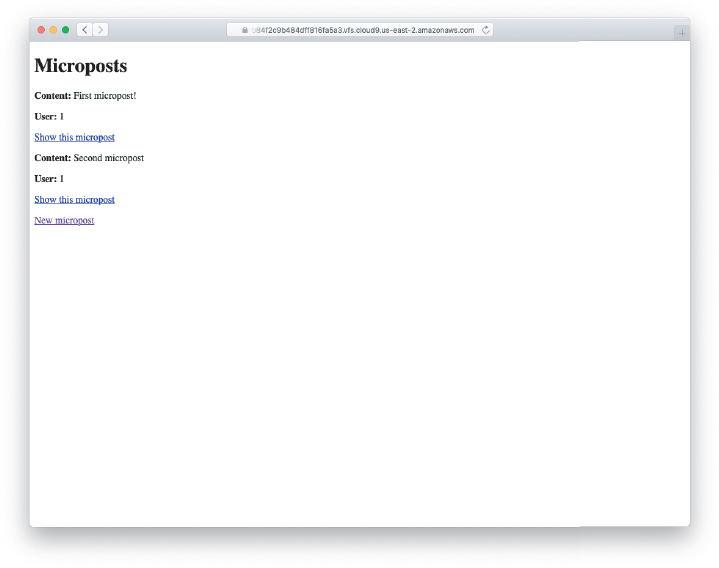
Figure 2.15: The micropost index page with a couple of posts.
Exercises
To see other people’s answers and to record your own, subscribe to the Rails Tutorial course or to the Learn Enough All Access Subscription.
Try to create a micropost with empty content and no user id.
Try to create a micropost with over 140 characters of content (say, the first paragraph from the Wikipedia article on Ruby).
Destroy the microposts from the previous exercises.
2.3.2 Putting the micro in Microposts
Any micropost worthy of the name should have some means of enforcing the length of the post. Implementing this constraint in Rails is easy with validations; to accept microposts with at most 140 characters (à la the original design of Twitter), we use a length validation. At this point, you should open the file app/models/micropost.rb in your text editor or IDE and fill it with the contents of Listing 2.14.
Listing 2.14: Constraining microposts to be at most 140 characters.app/models/micropost.rb
class Micropost < ApplicationRecord
  validates :content, length: { maximum: 140 }
end
The code in Listing 2.14 may look rather mysterious—we’ll cover validations more thoroughly starting in Section 6.2—but its effects are readily apparent if we go to the new micropost page and enter more than 140 characters for the content of the post. As seen in Figure 2.16, Rails renders error messages indicating that the micropost’s content is too long. (We’ll learn more about error messages in Section 7.3.3.)
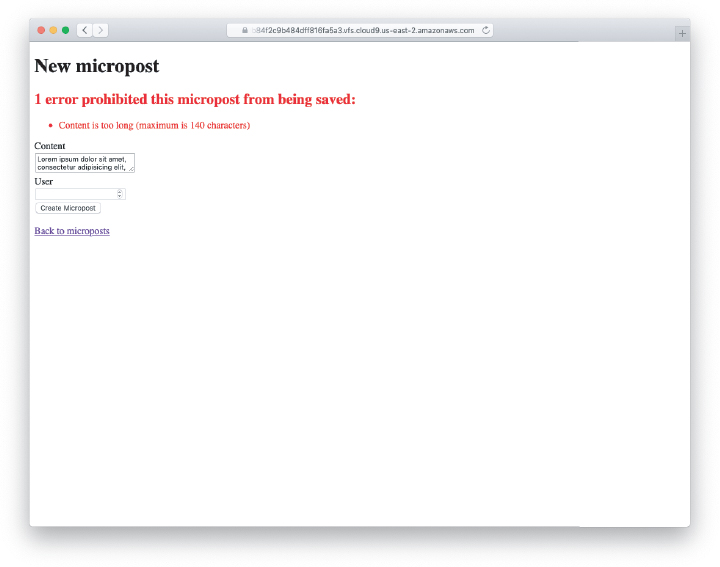
Figure 2.16: Error messages for a failed micropost creation.
Exercises
To see other people’s answers and to record your own, subscribe to the Rails Tutorial course or to the Learn Enough All Access Subscription.
Try to create a micropost with the same long content used in a previous exercise (Section 2.3.1). How has the behavior changed?
2.3.3 A User has_many Microposts
One of the most powerful features of Rails is the ability to form associations between different data models. In the case of our User model, each user potentially has many microposts. We can express this in code by updating the User and Micropost models as in Listing 2.15 and Listing 2.16.
Listing 2.15: A user has many microposts.app/models/user.rb
class User < ApplicationRecord
  has_many :microposts
end
Listing 2.16: A micropost belongs to a user.app/models/micropost.rb
class Micropost < ApplicationRecord
  belongs_to :user
  validates :content, length: { maximum: 140 }
end
We can visualize the result of this association in Figure 2.17. Because of the user_id column in the microposts table, Rails (using Active Record) can infer the microposts associated with each user.

Figure 2.17: The association between microposts and users.
In Chapter 13 and Chapter 14, we will use the association of users and microposts both to display all of a user’s microposts and to construct a Twitter-like micropost feed. For now, we can examine the implications of the user–micropost association by using the console, which is a useful tool for interacting with Rails applications. We first invoke the console with rails console at the command line, and then retrieve the first user from the database using User.first (putting the results in the variable first_user), as shown in Listing 2.17.8 (I include exit in the last line just to demonstrate how to exit the console. On most systems, you can also use Ctrl-D for the same purpose.)9
8. Your console prompt might be something like 3.1.2 :001 >, but the examples use >> since Ruby versions will vary.
9. As in the case of Ctrl-C, the capital “D” refers to the key on the keyboard, not the capital letter, so you don’t have to hold down the Shift key along with the Ctrl key.
Listing 2.17: Investigating the state of the application using the Rails console.
$ rails console
>> first_user = User.first
User Load (0.1ms) SELECT "users".* FROM "users" ORDER BY "users"."id"
ASC LIMIT ? [["LIMIT", 1]]
 =>
>> first_user
 =>
#<User:0x00007ffbf1331658
 id: 1,
 name: "Michael Hartl",
 email: "[email protected] ",
 created_at: Thu, 10 Mar 2022 00:23:31.441663000 UTC +00:00,
 updated_at: Thu, 10 Mar 2022 00:25:04.172206000 UTC +00:00>


#<User:0x00007ffbf1331658
>> first_user.microposts
  Micropost Load (0.2ms) SELECT "microposts".* FROM "microposts"
  WHERE "microposts"."user_id" = ? [["user_id", 1]]
 =>
[#<Micropost:0x00007ffbf16807a0
  id: 1,
  content: "First micropost!",
  user_id: 1,
  created_at: Thu, 10 Mar 2022 00:46:02.263125000 UTC +00:00,
  updated_at: Thu, 10 Mar 2022 00:46:02.263125000 UTC +00:00>,
 #<Micropost:0x00007ffbf1653a70
  id: 2,
  content: "Second micropost",
  user_id: 1,
  created_at: Thu, 10 Mar 2022 00:46:14.079131000 UTC +00:00,
  updated_at: Thu, 10 Mar 2022 00:46:14.079131000 UTC +00:00>]
>> micropost = first_user.microposts.first
 =>
#<Micropost:0x00007ffbf16807a0
...
>> micropost
 =>
#<Micropost:0x00007ffbf16807a0
 id: 1,
 content: "First micropost!",
 user_id: 1,
 created_at: Thu, 10 Mar 2022 00:46:02.263125000 UTC +00:00,
 updated_at: Thu, 10 Mar 2022 00:46:02.263125000 UTC +00:00>
>> micropost.user
 =>
#<User:0x00007ffbf1331658
 id: 1,post:0
 name: "Michael Hartl",
 email: "[email protected] ",
 created_at: Thu, 10 Mar 2022 00:23:31.441663000 UTC +00:00,
 updated_at: Thu, 10 Mar 2022 00:25:04.172206000 UTC +00:00>
>> exit
There’s a lot going on in Listing 2.17, and teasing out the relevant parts is a good exercise in technical sophistication (Box 1.2). The output includes the actual return values, which are raw Ruby objects, as well as the Structured Query Language (SQL) code that produced them.
In addition to retrieving the first user with User.first, Listing 2.17 shows two other things: (1) how to access the first user’s microposts using the code first_user.microposts, which automatically returns all the microposts with user_id equal to the id of first_user (in this case, 1); and (2) how to return the user corresponding to a particular post using micropost.user. We’ll learn much more about the Ruby involved in Listing 2.17 in Chapter 4, and more about the association facilities in Active Record in Chapter 13 and Chapter 14.
Exercises
To see other people’s answers and to record your own, subscribe to the Rails Tutorial course or to the Learn Enough All Access Subscription.
Edit the user show page to display the content of the user’s first micropost. (Use your technical sophistication (Box 1.2) to guess the syntax based on the other content in the file.) Confirm by visiting /users/1 that it worked.
The code in Listing 2.18 shows how to add a validation for the presence of micropost content in order to ensure that microposts can’t be blank. Verify that you get the behavior shown in Figure 2.18.
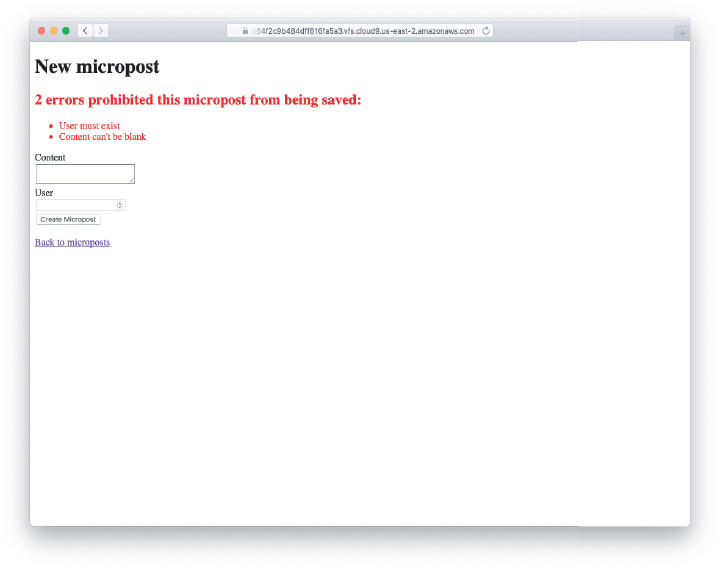
Figure 2.18: The effect of a micropost presence validation.
Update Listing 2.19 by replacing
FILL_INwith the appropriate code to validate the presence of name and email attributes in the User model (Figure 2.19).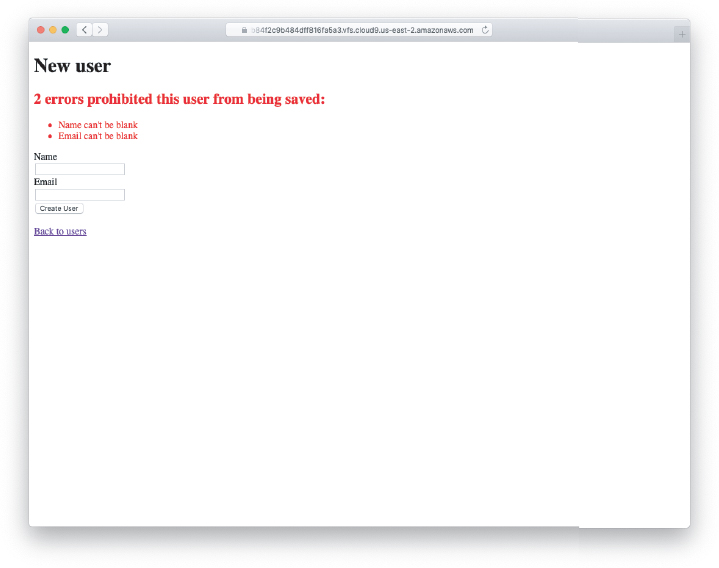
Figure 2.19: The effect of presence validations on the User model.
Listing 2.18: Code to validate the presence of micropost content.app/models/micropost.rb
class Micropost < ApplicationRecord
  belongs_to :user
  validates :content, length: { maximum: 140 },
                      presence: true
end
Listing 2.19: Adding presence validations to the User model.app/models/user.rb
class User < ApplicationRecord
  has_many :microposts
  validates FILL_IN, presence: true    # Replace FILL_IN with the right code.
  validates FILL_IN, presence: true    # Replace FILL_IN with the right code.
end
2.3.4 Inheritance Hierarchies
We end our discussion of the toy application with a brief description of the controller and model class hierarchies in Rails. This discussion will only make much sense if you have some experience with object-oriented programming (OOP), particularly classes. Don’t worry if it’s confusing for now; we’ll discuss these ideas more thoroughly in Section 4.4.
We start with the inheritance structure for models. Comparing Listing 2.20 and Listing 2.21, we see that both the User model and the Micropost model inherit (via the left angle bracket <) from ApplicationRecord, which in turn inherits from ActiveRecord::Base, which is the base class for models provided by Active Record; a diagram summarizing this relationship appears in Figure 2.20. It is by inheriting from ActiveRecord::Base that our model objects gain the ability to communicate with the database, treat the database columns as Ruby attributes, and so on.

Figure 2.20: The inheritance hierarchy for the User and Micropost models.
Listing 2.20: The User class, highlighting inheritance.app/models/user.rb
class User < ApplicationRecord
  .
  .
  .
end
Listing 2.21: The Micropost class, highlighting inheritance.app/models/micropost.rb
class Micropost < ApplicationRecord
  .
  .
  .
end
The inheritance structure for controllers is essentially the same as that for models. Comparing Listing 2.22 and Listing 2.23, we see that both the Users controller and the Microposts controller inherit from the Application controller. Examining Listing 2.24, we see that ApplicationController itself inherits from ActionController::Base, which is the base class for controllers provided by the Rails library Action Pack. The relationships between these classes are illustrated in Figure 2.21.
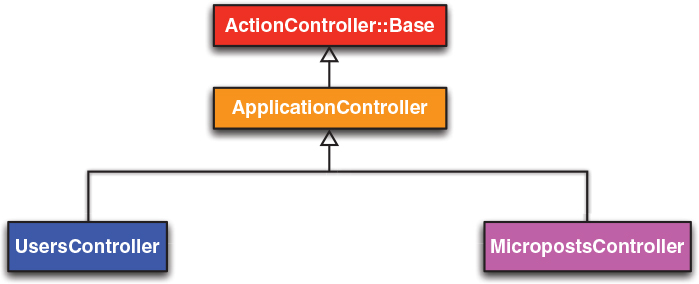
Figure 2.21: The inheritance hierarchy for the Users and Microposts controllers.
Listing 2.22: The UsersController class, highlighting inheritance.app/controllers/users_controller.rb
class UsersController < ApplicationController
  .
  .
  .
end
Listing 2.23: The MicropostsController class, highlighting inheritance.app/controllers/microposts_controller.rb
class MicropostsController < ApplicationController
  .
  .
  .
end
Listing 2.24: The ApplicationController class, highlighting inheritance.app/controllers/application_controller.rb
class ApplicationController < ActionController::Base
  .
  .
  .
end
As with model inheritance, both the Users and Microposts controllers gain a large amount of functionality by inheriting from a base class (in this case, ActionController::Base), including the ability to manipulate model objects, filter inbound HTTP requests, and render views as HTML. Since all Rails controllers inherit from ApplicationController, rules defined in the Application controller automatically apply to every action in the application. For example, in Section 9.1 we’ll see how to include helpers for logging in and logging out of all of the sample application’s controllers.
Exercises
To see other people’s answers and to record your own, subscribe to the Rails Tutorial course or to the Learn Enough All Access Subscription.
By examining the contents of the Application controller file, find the line that causes
ApplicationControllerto inherit fromActionController::Base.Is there an analogous file containing a line where
ApplicationRecordinherits fromActiveRecord::Base? Hint: It would probably be a file called something likeapplication_record.rbin theapp/modelsdirectory.
2.3.5 Deploying the Toy App
With the completion of the Microposts resource, now is a good time to push the repository up to GitHub:
$ git status    # It's a good habit to check the status before adding
$ git add -A
$ git commit -m "Finish toy app"
$ git push
Ordinarily, you should make smaller, more frequent commits, but for the purposes of this chapter a single big commit at the end is fine.
At this point, you can also deploy the toy app to Heroku as in Section 1.4:
$ git push heroku(This assumes you created the Heroku app in Section 2.1. Otherwise, you should run heroku create and then git push heroku main. Also recall from Section 1.4.1 that you can get the Web URL for your Heroku app by running heroku apps:info (Listing 1.26).)
At this point, visiting the page at Heroku yields an error message, as shown in Figure 2.22.
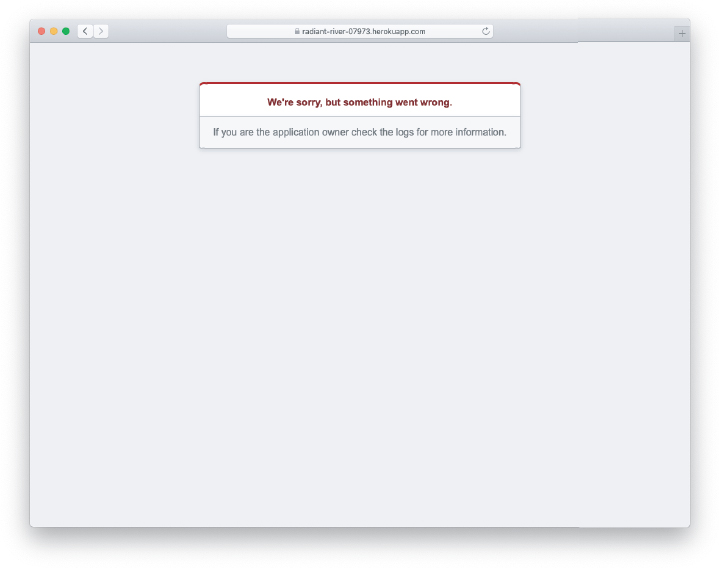
Figure 2.22: An error page at Heroku.
We can track down the problem by inspecting the Heroku logs:
$ heroku logsScrolling up in the logs, you should see a line that includes something like this:
ActionView::Template::Error (PG::UndefinedTable: ERROR: relation "users" does
not exist
This is a big hint that there is a missing users table. Luckily, we learned how to handle that way back in Listing 2.5: All we need to do is run the database migrations (which will create the microposts table as well).
The way to execute this sort of command at Heroku is to prefix the usual Rails command with heroku run, like this:
$ heroku run rails db:migrateThis updates the database at Heroku with the user and micropost data models as required. After running the migration, you should be able to use the toy app in production, with a real PostgreSQL database back-end (Figure 2.23).10
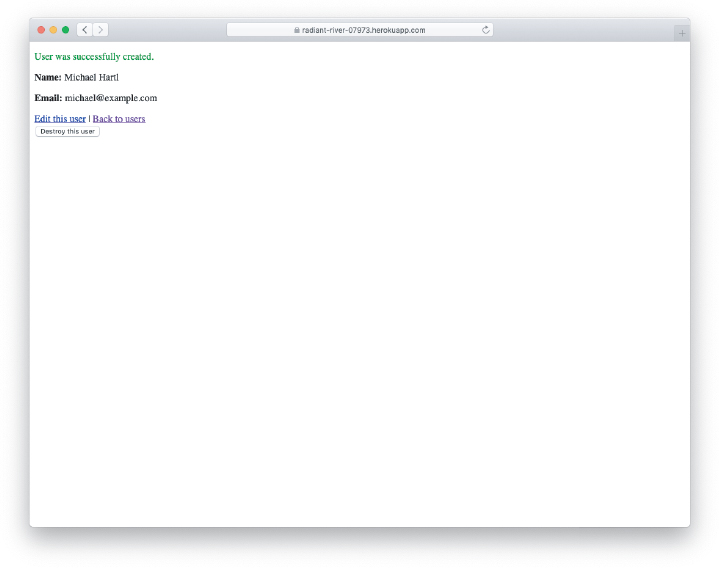
Figure 2.23: Running the toy app in production.
10. The production database should work without any additional configuration, but in fact some configuration is recommended by the official Heroku documentation. We’ll take care of this detail in Section 7.5.3.
Finally, if you completed the exercises in Section 2.3.3, you will have to remove the code to display the first user’s micropost in order to get the app to load properly. In this case, simply delete the offending code, make another commit, and push again to Heroku.
Exercises
To see other people’s answers and to record your own, subscribe to the Rails Tutorial course or to the Learn Enough All Access Subscription.
Create a few users on the production app.
Create a few production microposts for the first user.
By trying to create a micropost with content over 140 characters, confirm that the validation from Listing 2.14 works on the production app.
2.4 Conclusion
We’ve come now to the end of the high-level overview of a Rails application. The toy app developed in this chapter has several strengths and a large number of weaknesses.
Strengths
High-level overview of Rails
Introduction to MVC
First taste of the REST architecture
Beginning data modeling
A live, database-backed web application in production
Weaknesses
No custom layout or styling
No static pages (such as “Home” or “About”)
No user passwords
No user images
No logging in
No security
No automatic user/micropost association
No notion of “following” or “followed”
No micropost feed
No meaningful tests
No real understanding
The rest of this tutorial is dedicated to building on the strengths and eliminating the weaknesses.
2.4.1 What We Learned in This Chapter
Scaffolding automatically creates code to model data and interact with it through the web.
Scaffolding is good for getting started quickly but is bad for understanding.
Rails uses the model-view-controller (MVC) pattern for structuring web applications.
As interpreted by Rails, the REST architecture includes a standard set of URLs and controller actions for interacting with data models.
Rails supports data validations to place constraints on the values of data model attributes.
Rails comes with built-in functions for defining associations between different data models.
We can interact with Rails applications at the command line using the Rails console.