

|
MATH |
MOST PEOPLE THINK OF MATHEMATICS AS A METHOD OF CALCULATION. IN FACT, MATH IS A SOURCE OF ENORMOUS INSPIRATION FOR CONCEPTS THAT CAN BE APPLIED TO ART, ENGINEERING, PHYSICS, TECHNOLOGY, MEDICINE, AND MUSIC—TO NAME ONLY A FEW.
Almost everything in the universe can be described by mathematical equation, and once something has been described by math, it’s only a matter of time until someone finds ways to apply it to a question or a problem.
For example, the Ancient Greeks came up with the concept of the atom by thinking about number sequences and fractions. Once you start dividing something, like an apple, it gets smaller and smaller: 1/2, 1/4, 1/8, 1/16, 1/32, 1/64, and so on. Do you see the pattern? Each number in the denominator is twice the number in the previous fraction, and the Greeks imagined that, at some point, you would create a piece so tiny it couldn’t be divided any more. The Greek philosopher Democritus described this “uncuttable,” or “atomos,” piece of matter as an “atom.”
In this unit, you’ll make a Möbius strip, cut up apples to learn about fractions, try your hand at creating cubist art, play with patterns and fractals, and draw a Fibonacci spiral.
“When I’m not making music, I’m doing tech stuff at my day job. And half the time when I am making music, I’m doing tech stuff, too. In the meantime, all the logic I picked up in math classes and in the programming I’ve done is constantly echoing and bleeding into all the problem solving that is songwriting, arranging, and recording. Art, science, math, music, design, chemistry, emotions, biology. It’s all one thing.”
—Matt Wilson, singer-songwriter and producer with the bands Trip Shakespeare and The Twilight Hours

|
CUBIST CREATIONS |

Cubist artists were interested in showing objects in new ways, often drawing them from several angles or perspectives at the same time, in an attempt to capture their essence rather than create an exact replica. Here, we’ll rearrange the geometric shapes you find in animals to make cubist art.
SAFETY TIPS AND HINTS
![]() Let your imagination go wild!
Let your imagination go wild!
MATERIALS
![]() Printer or magazine with photos of animals
Printer or magazine with photos of animals
![]() Scissors
Scissors
![]() Pencil
Pencil
![]() Markers or paint
Markers or paint
![]() Paper
Paper
![]() Sculpting material such as clay or playdough
Sculpting material such as clay or playdough
PROTOCOL
1. Print out a photograph of an animal or cut one out of a magazine (fig. 1).

Fig. 1: Print out a photo of an animal and find geometric shapes.
2. Find the geometric shapes in the animal, like circles, ovals, triangles, rectangles, and squares.
3. Use markers to draw the same shapes on another piece of paper, but reorganize them. Try to arrange them in a way that represents something about how the animal behaves, or how it hunts, or how it moves. You can change the size of the shapes (fig. 2).
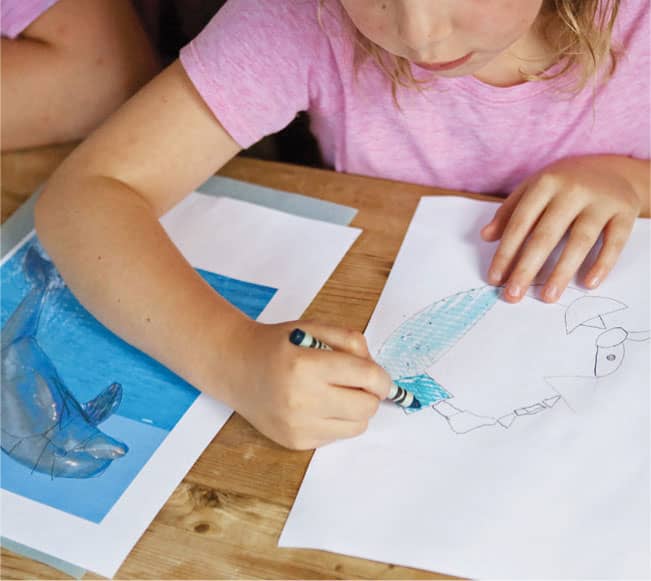
Fig. 2: Draw the shapes in a different order.
4. Re-create the original animal and the reconstructed one you drew using sculpting material (figs. 3 and 4).

Fig. 3: Re-create your design in sculpting clay.
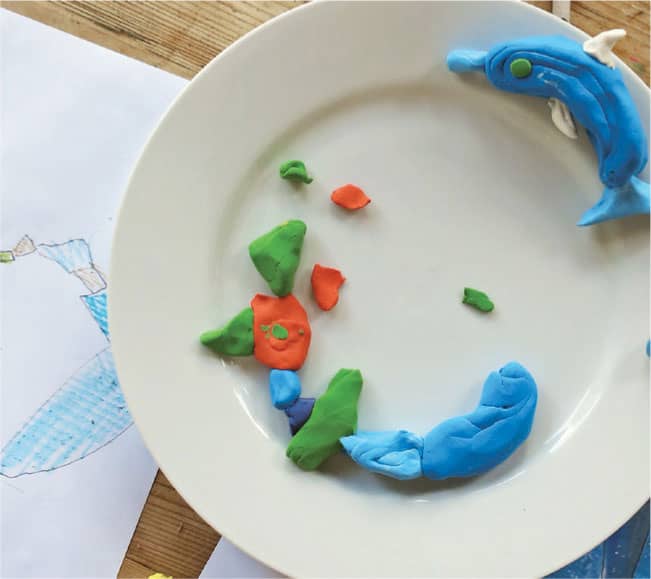
Fig. 4: Be creative!
5. Draw or paint a second cubist animal. This time, look at the sculpted forms you made and draw the shapes you see as though you’re looking at them from more than one angle at the same time (fig. 5).
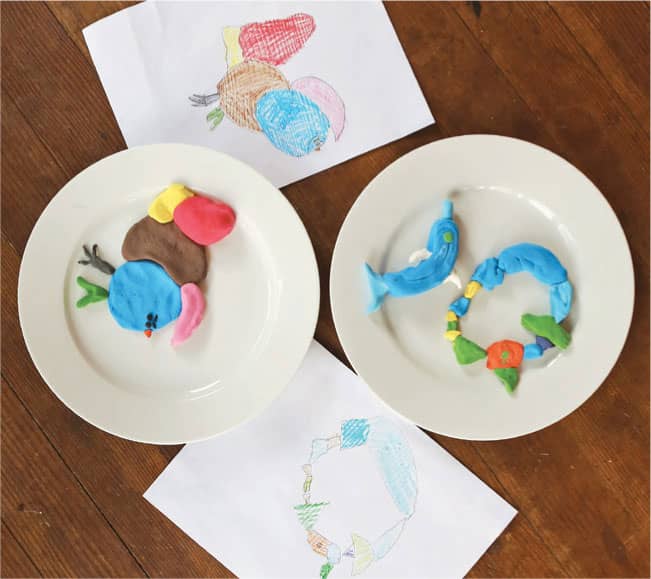
Fig. 5: Can you still recognize the animal?
CREATIVE ENRICHMENT
![]() Make a cubist collage of the animal, incorporating paper and textiles that say something about the animal or seem interesting.
Make a cubist collage of the animal, incorporating paper and textiles that say something about the animal or seem interesting.
![]() Look up a recipe online for conductive playdough and use it to create cubist playdough animals that can light an LED.
Look up a recipe online for conductive playdough and use it to create cubist playdough animals that can light an LED.
|
PATTERN STYLE |

Tape together some fashion-forward fun.
SAFETY TIPS AND HINTS
![]() Get creative with color!
Get creative with color!
MATERIALS
![]() Duct tape (2 or more colors)
Duct tape (2 or more colors)
![]() Scissors
Scissors
![]() Key chain loop or jewelry hardware (optional)
Key chain loop or jewelry hardware (optional)
PROTOCOL
1. Tear off a square of duct tape. Fold two corners to the middle to create a triangle (fig. 1).

Fig. 1: Tear off a square of duct tape. Fold two corners down to the middle.
2. Smooth the tape down (fig. 2).

Fig. 2: Smooth the tape.
3. Create another tape triangle (in a different color). Put one triangle sticky-side down and put another one on top of it, pointing in the same direction, so the one below sticks out by about 1/4 inch (6 mm). The tape will make them stick together.
4. Repeat with several more triangles, creating repeating patterns (fig. 3).
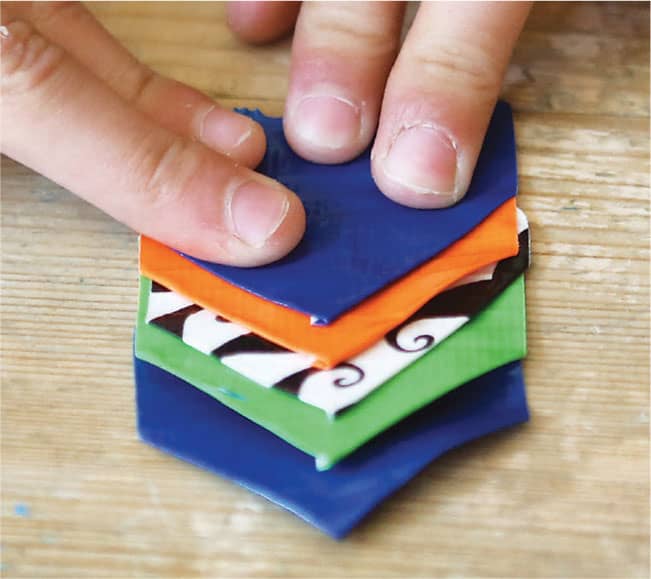
Fig. 3: Tape triangles to form a repeating pattern.
5. When your pattern is complete, trim the sides and use the tape art to create a bookmark, keychain, earrings, or other item (fig. 4).

Fig. 4: When you're done, trim the sides and create bookmarks and accessories.
6. If you don’t have pierced ears, use a piece of tape to attach the earrings.
7. What else could you make (fig. 5)?

Fig. 5: What else could you create?
CREATIVE ENRICHMENT
![]() Invent a new way to fold duct tape to create an original design.
Invent a new way to fold duct tape to create an original design.
|
FRACTAL GEOMETRY |

Repeat a simple shape to create a beautiful, branching tree.
SAFETY TIPS AND HINTS
![]() For young children, it may help to draw an example for them to follow. Let them take it from there!
For young children, it may help to draw an example for them to follow. Let them take it from there!
MATERIALS
![]() Paper
Paper
![]() Pencil or pen
Pencil or pen
![]() Paint (optional)
Paint (optional)
PROTOCOL
1. Draw 2 or 3 large Y shapes on a piece of paper to form the trunk of a tree (fig. 1).
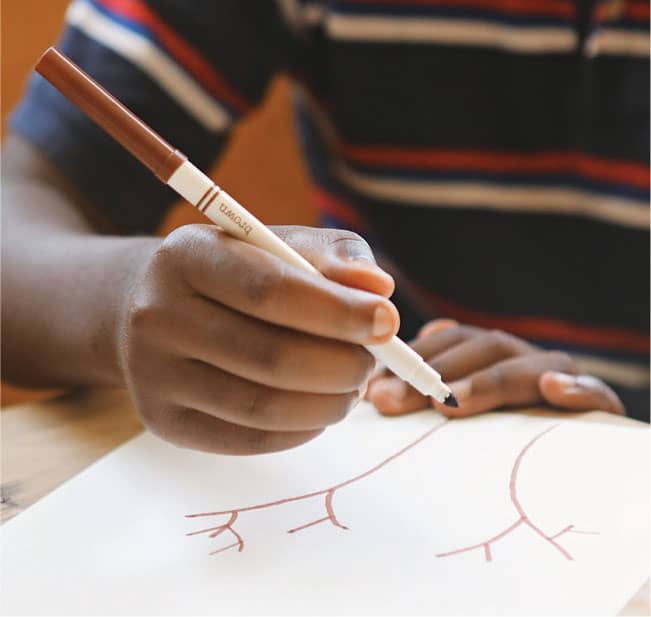
Fig. 1: Draw 2 or 3 large Y shapes to create a tree trunk.
2. Create new branches extending from the first ones by drawing more, smaller Y shapes (fig. 2).
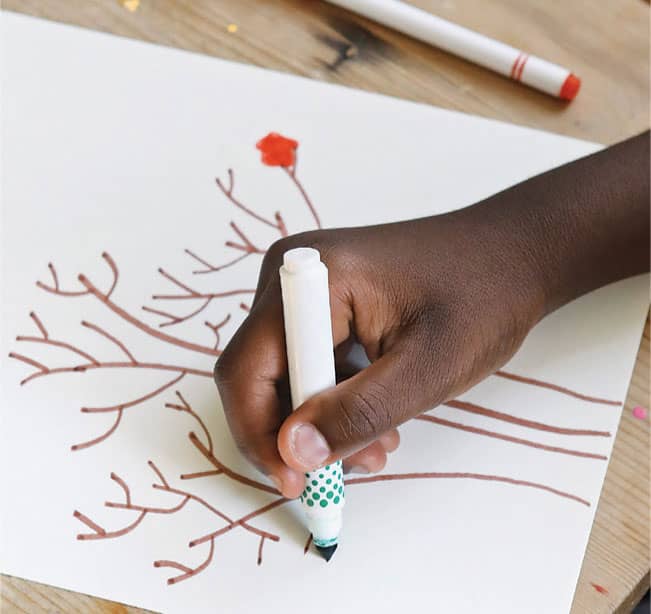
Fig. 2: Branch out with smaller and smaller Ys.
3. Keep going until your tree has branched out into tiny twigs at the perimeter (fig. 3).

Fig. 3: Create smaller and smaller branches.
4. Add some color and details to your drawing to bring the tree to life (fig. 4).

Fig. 4: Add color to your drawing.
CREATIVE ENRICHMENT
![]() Look up more complicated fractals to draw. For example, you can draw a Koch snowflake using triangles.
Look up more complicated fractals to draw. For example, you can draw a Koch snowflake using triangles.
|
PERSPECTIVE PAINTING |

Divide paper into four similar triangles, with an imaginary vanishing point at the center to create the illusion of distance.
SAFETY TIPS AND HINTS
![]() For inspiration, look at some images of roads and receding landscapes before you begin. Check out Vincent van Gogh’s masterpiece The Bedroom and Berthe Morisot’s painting The Harbor at Lorient for ideas. What tricks do the artists use to make things appear close up or far away?
For inspiration, look at some images of roads and receding landscapes before you begin. Check out Vincent van Gogh’s masterpiece The Bedroom and Berthe Morisot’s painting The Harbor at Lorient for ideas. What tricks do the artists use to make things appear close up or far away?
MATERIALS
![]() Ruler
Ruler
![]() Pencil
Pencil
![]() A square piece of paper or canvas, any size
A square piece of paper or canvas, any size
![]() Eraser
Eraser
![]() Paint or markers
Paint or markers
PROTOCOL
1. Use a ruler to guide you as you draw diagonal lines from corner to corner on a square piece of paper.
2. Draw a small dot where the lines meet in the center. This dot is the vanishing point, where everything will recede away into the distance in the scene you’re about to draw.
3. If you’re making a room, draw a square in the center of the canvas to represent the back wall. Draw a door in the wall (figs. 1 and 2).

Fig. 1: Use a ruler to guide you as you draw.

Fig. 2: Draw a room by creating a square in the center with a door in the middle.
4. If you’re drawing a road receding into the distance, draw a triangle from the vanishing point at the middle of the painting to the center of the bottom of the painting. Make it wider as it gets farther from the vanishing point and closer to the bottom of the page. (fig. 3).
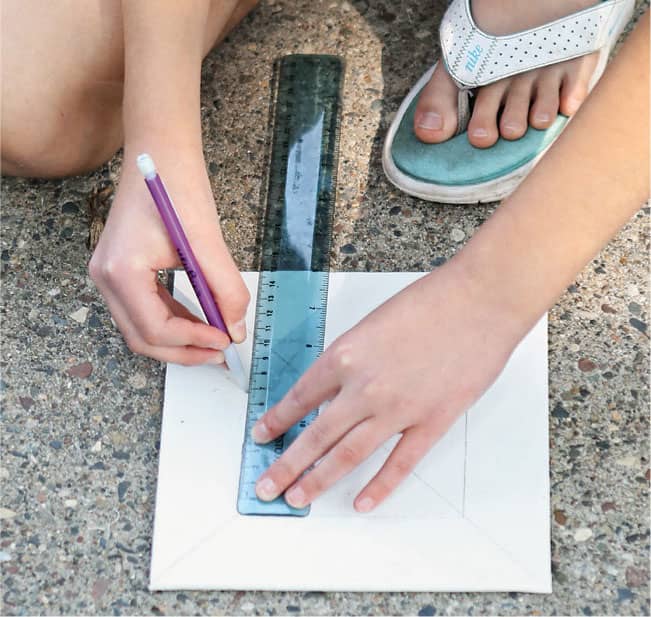
Fig. 3: Or, make a road disappear into the distance.
5. Use a pencil to add detail to your drawing, and an eraser to erase any mistakes. Objects near the edge of the page should be bigger and they should get smaller and smaller as they approach the vanishing point in the center. Use lots of lines that are parallel to the sides of your paper or to the diagonal lines you drew on the page.
6. If you drew a room, try adding a painting or two to the walls of your drawing, keeping them in perspective, too.
7. Add color to your perspective drawing using paint or markers (fig. 4).

Fig. 4: Add lots of color and detail to your painting.
CREATIVE ENRICHMENT
![]() Create another perspective painting of a room on a large piece of paper. Can you use one of the paintings on the wall to draw a room within a room? Don’t forget to use perspective in the miniature room, too!
Create another perspective painting of a room on a large piece of paper. Can you use one of the paintings on the wall to draw a room within a room? Don’t forget to use perspective in the miniature room, too!
|
FIBONACCI SPIRAL |

Create a perfect spiral using mathematics.
SAFETY TIPS AND HINTS
![]() Using a compass takes practice. Don’t get frustrated!
Using a compass takes practice. Don’t get frustrated!
![]() Start by writing the Fibonacci sequence, so you’ll know how big to make your squares. Just add each number in the sequence to the previous one to get the next number: 1, 1, 2, 3, 5, 8, 13, 21, 34, 55, and so on.
Start by writing the Fibonacci sequence, so you’ll know how big to make your squares. Just add each number in the sequence to the previous one to get the next number: 1, 1, 2, 3, 5, 8, 13, 21, 34, 55, and so on.
MATERIALS
![]() Large piece of paper, at least 15 inches x 22 inches (38 x 55 cm) or tape together pieces of paper to create 1 large sheet
Large piece of paper, at least 15 inches x 22 inches (38 x 55 cm) or tape together pieces of paper to create 1 large sheet
![]() Pencil
Pencil
![]() Ruler or yardstick (meter stick)
Ruler or yardstick (meter stick)
![]() Compass
Compass
PROTOCOL
1. Orient your paper in a horizontal position.
2. Use a ruler to measure and draw two adjacent 1/2 x 1/2 inch (1 x 1 cm) squares. Place the squares approximately 7 inches (18 cm) from the left side and 43/4 inches (12 cm) down from the top of the paper (fig. 1).

Fig. 1: Draw two adjacent 1/2 x-1/2 inch (1 x 1 cm) squares.
3. Add an adjacent 3/4 x 3/4 inch (2 x 2 cm) square directly below the first two squares (fig. 2).

Fig. 2: Add adjacent 3/4 inch (2 cm) squares, 11/4 inch (3 cm), 2 inch (5 cm), and 3 inch (8 cm) squares.
4. Draw a 11/4 inch (3 cm) square to the right of the previous squares.
5. Add a 2 inch (5 cm) square above the other squares.
6. Draw a 3 inch (7.5 cm) square to the left, a 5 inch (13 cm) square below that, and, finally, an 81/2 inch (21 cm) square on the right of everything.
7. Use your compass to draw connecting arcs in the 1/2 inch (1 cm) squares on the right by placing the compass point on the connecting point at the bottom of the two squares and the pencil on the lower right corner before sweeping it to the left to create a semicircle.
8. Put the compass point on the upper right-hand corner of the 3/4 inch (2 cm) square and continue the arched line.
9. Use the compass to connect all the squares with an unbroken curved line until you’ve created a spiral that runs through all the squares (figs. 3 and 4).

Fig. 3: Use a compass to draw connecting arcs in each square.
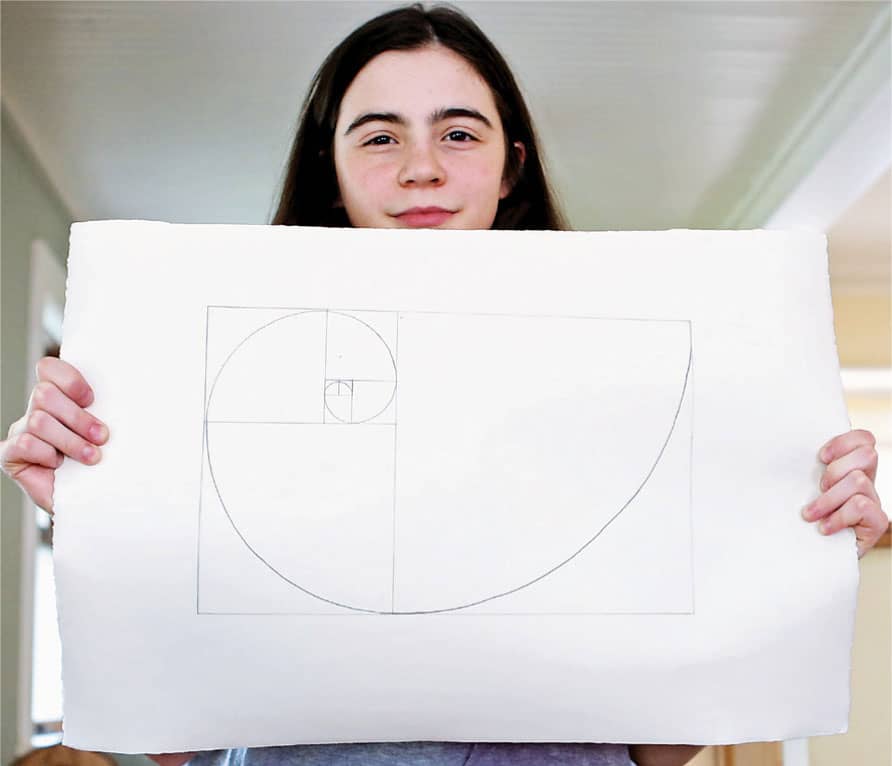
Fig. 4: You've drawn a Fibonacci spiral.
CREATIVE ENRICHMENT
![]() Look up images of Fibonacci spirals in nature and decorate your spiral to look like one of them (figs. 5 and 6).
Look up images of Fibonacci spirals in nature and decorate your spiral to look like one of them (figs. 5 and 6).
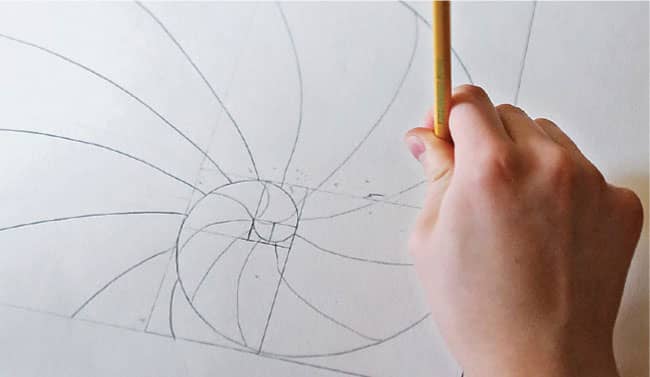
Fig. 5: Turn your spiral into a natural design.

Fig. 6: Add some color to your design.
|
TESSELLATIONS |

Tile poster board with gum or pasta to create a mathematical mosaic.
SAFETY TIPS AND HINTS
![]() Adult supervision is required when using a glue gun.
Adult supervision is required when using a glue gun.
MATERIALS
![]() Several packs of gum (optional)
Several packs of gum (optional)
![]() Pasta, bow tie and penne work well (optional)
Pasta, bow tie and penne work well (optional)
![]() Glue (school glue or a glue gun and glue sticks)
Glue (school glue or a glue gun and glue sticks)
![]() Sturdy paper surface, such as poster board or foam-core board
Sturdy paper surface, such as poster board or foam-core board
PROTOCOL
1. If making a gum tessellation, decide whether to use wrapped or unwrapped gum.
2. Start in one corner of the board’s surface and use glue to create a tightly interlocking, repeating pattern of gum or pasta. Unwrapped gum makes your art project smell great (figs. 1, 2, and 3)!
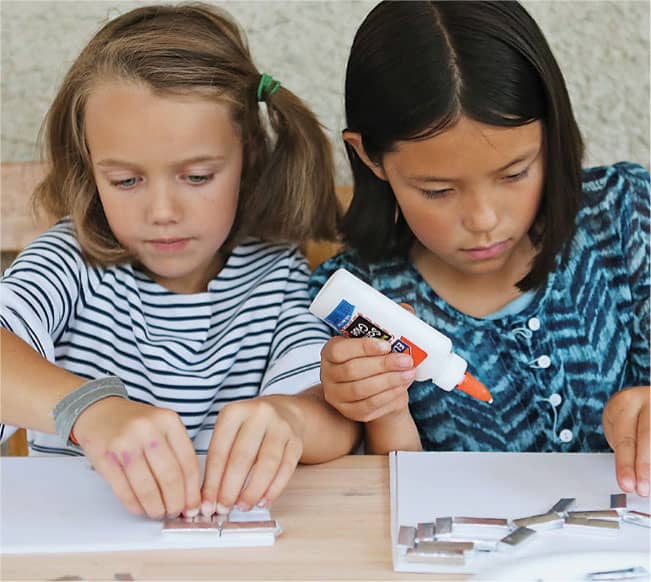
Fig. 1: Glue gum to the poster board in repeating patterns that cover the paper.
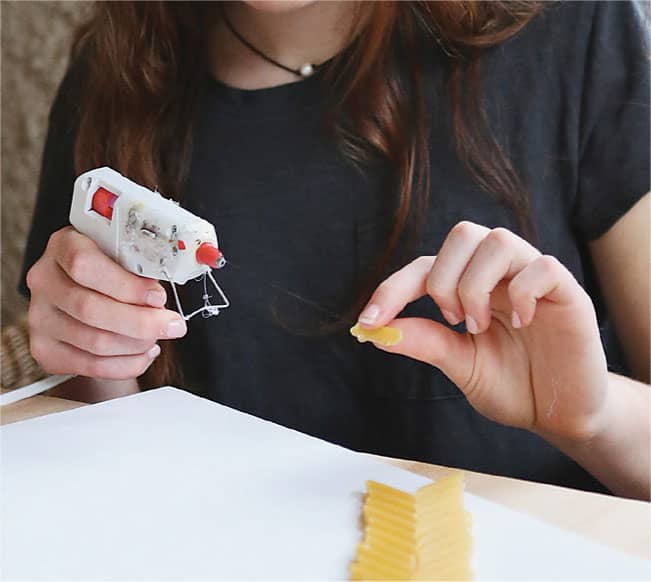
Fig. 2: Try doing the same thing using pasta.
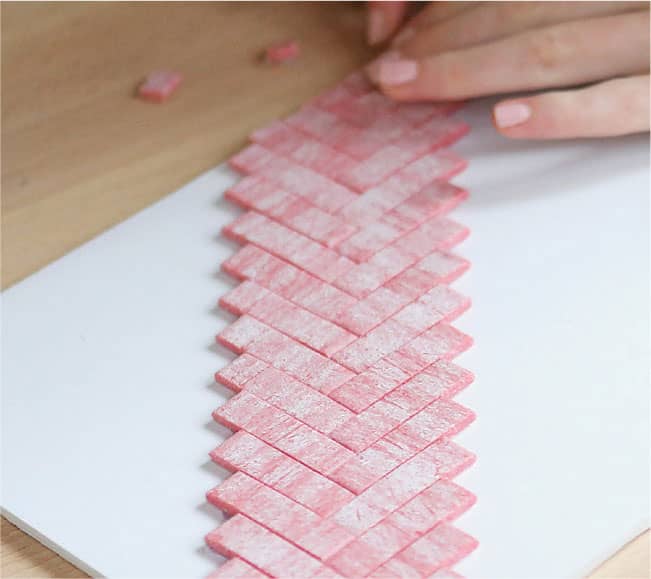
Fig. 3: Unwrapped gum makes your art smell good.
3. Keep gluing gum or pasta on the board until it’s completely covered (figs. 4 and 5).
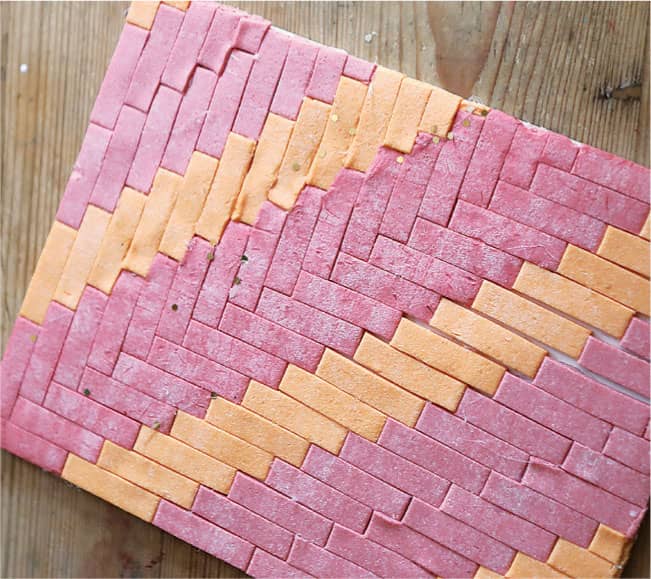
Fig. 4: Create patterns as you go.

Fig. 5: Try to fill in all the empty space.
4. Try using different, interlocking pasta shapes.
5. How many different patterns can you create?
CREATIVE ENRICHMENT
![]() Look online for some tessellations created by M. C. Escher.
Look online for some tessellations created by M. C. Escher.
![]() Find other shapes you could use to make tessellations or find an item to trace and use it to draw tessellations. You could also create a new form to use for making tessellated patterns.
Find other shapes you could use to make tessellations or find an item to trace and use it to draw tessellations. You could also create a new form to use for making tessellated patterns.
|
SERIAL DILUTIONS |

Use cereal and food coloring to learn a laboratory technique.
SAFETY TIPS AND HINTS
![]() This is a great project to do at snack time. Don’t waste the milk and cereal. Eat it!
This is a great project to do at snack time. Don’t waste the milk and cereal. Eat it!
MATERIALS
![]() 21/2 cups (570 ml) milk
21/2 cups (570 ml) milk
![]() 5 clear plastic cups or small cereal bowls
5 clear plastic cups or small cereal bowls
![]() 1/4 cup (weight varies) breakfast cereal
1/4 cup (weight varies) breakfast cereal
![]() 5 cups (1.2 L) water
5 cups (1.2 L) water
![]() Food coloring
Food coloring
![]() Measuring spoons
Measuring spoons
![]() Measuring cups
Measuring cups
PROTOCOL
1. Add 1/2 cup (120 ml) of milk to each of the five cups.
2. Add the cereal to the first cup (fig. 1).
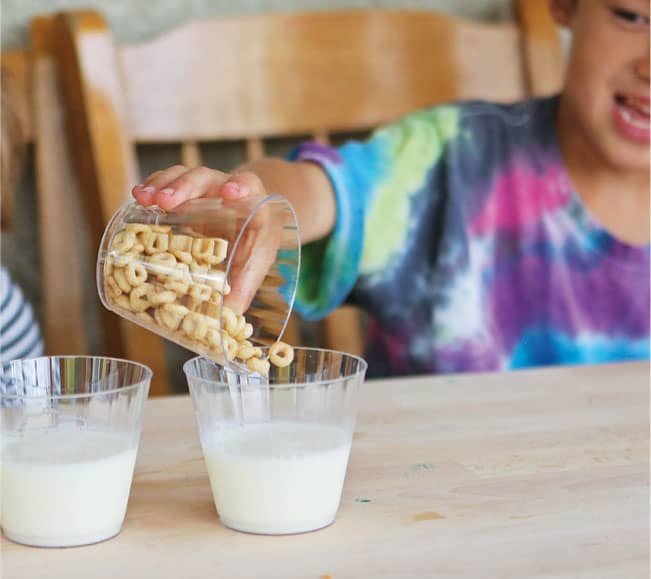
Fig. 1: Add 1/2 cup (120 ml) of milk to each of the five cups. Add cereal to the first cup.
3. Mix the cereal and milk in the cup. Take a spoonful of milk and cereal out of the first cup to put it into the second cup.
4. Mix up the milk and cereal in the second cup and repeat—taking a spoonful of mixed up milk and cereal to put in the next cup in line (fig. 2).

Fig. 2: Mix and scoop a spoonful of cereal to the next cup. Repeat 3 more times.
5. Compare how many pieces of cereal are in each cup.
6. Eat the cereal and wash the cups to reuse.
7. For the second part of the experiment, add 1 cup (235 ml) of water to each cup.
8. To the first cup, add several drops of food coloring and stir (fig. 3).

Fig. 3: Add 1 cup (235 ml) of water to each of the five cups and add food coloring to the first cup.
9. To make a 1 to 10 dilution, measure 5 teaspoons (25 ml) of colored water and add it to the second cup (fig. 4).
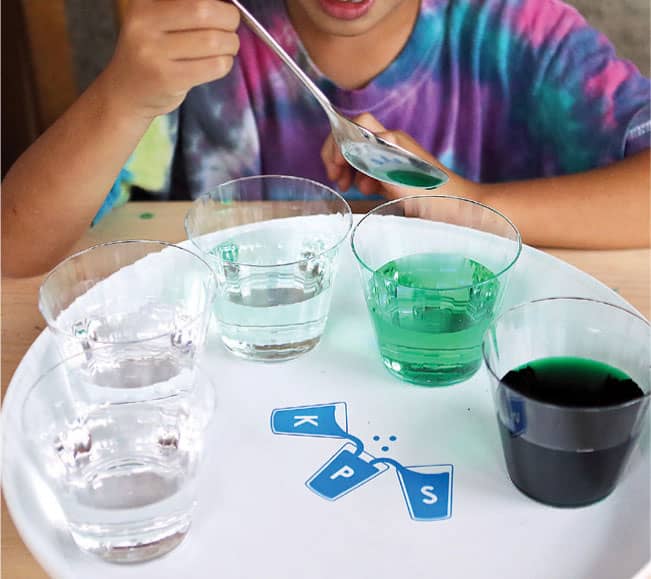
Fig. 4: Add 5 teaspoons (25 ml) of colored water to the second cup.
10. To make a 1 to 100 dilution, take 5 teaspoons (25 ml) of colored water from the second cup and put it in the third cup and so on. Repeat until you have diluted colored water in all the cups.
11. Congratulations! You’ve made serial dilutions (fig. 5).
Cup 1 = undiluted
Cup 2 = 1 to 10 dilution
Cup 3 = 1 to 100 dilution
Cup 4 = 1 to 1,000 dilution
Cup 5 = 1 to 10,000 dilution
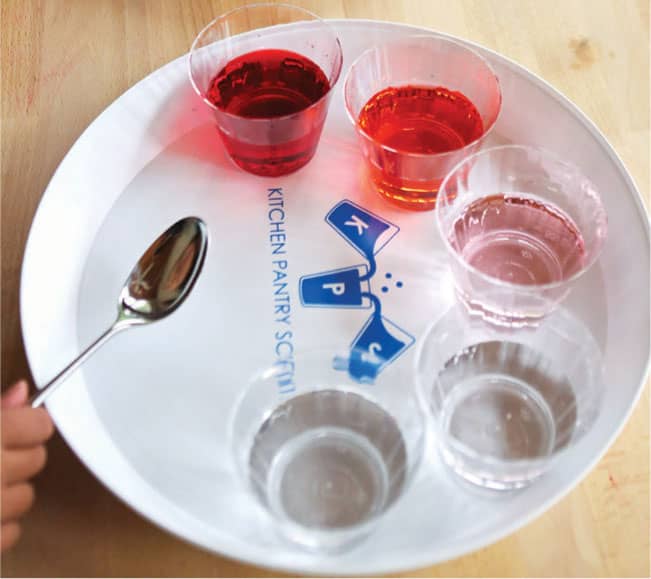
Fig. 5: You've made 1:10 serial dilutions!
CREATIVE ENRICHMENT
![]() Instead of adding plain water, add water containing a color, like yellow, to each cup. Do serial dilutions with another color to see how color mixing works with different dilutions.
Instead of adding plain water, add water containing a color, like yellow, to each cup. Do serial dilutions with another color to see how color mixing works with different dilutions.
|
MATH-TOOL ART |

Practice using math tools and transform your lines, circles, and arcs into a work of art.
SAFETY TIPS AND HINTS
![]() Protractors have sharp points, so younger children should use them under adult supervision.
Protractors have sharp points, so younger children should use them under adult supervision.
MATERIALS
![]() Pencil
Pencil
![]() Ruler
Ruler
![]() Paper
Paper
![]() Protractor
Protractor
![]() Compass
Compass
![]() Markers
Markers
![]() Paint
Paint
PROTOCOL
1. Practice drawing straight lines with a ruler. Draw some parallel lines and use the ruler to make some squares, triangles, and other polygons (fig. 1).

Fig. 1: Use math tools like rulers, compasses, and protractors to make a design.
2. Trace a protractor. Mark some angles and use a ruler to draw them.
3. Try to make a circle with a compass. It can take some practice (fig. 2)!
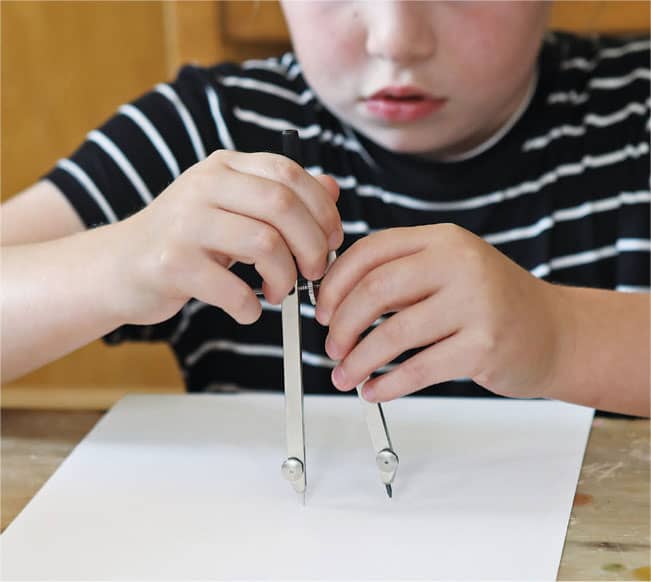
Fig. 2: Using a compass can take practice!
4. Turn the lines and shapes you created into a piece of art. Be creative (fig. 3)!

Fig. 3: Be creative with your mathematical art!
5. Add color to your mathematical masterpiece (fig. 4).

Fig. 4: Use color to enhance the shapes and lines you created.
CREATIVE ENRICHMENT
![]() Make a giant compass in the driveway using a string (or jump rope) and a piece of chalk. Have one person stand in the middle holding the string. Tie the chalk to the other end and draw a giant circle. Pull the string straight and use it to draw a hopscotch grid.
Make a giant compass in the driveway using a string (or jump rope) and a piece of chalk. Have one person stand in the middle holding the string. Tie the chalk to the other end and draw a giant circle. Pull the string straight and use it to draw a hopscotch grid.
![]() Use a compass to draw flower petals on paper or the driveway. Use the drawing of the fan blade design in Lab 18 (Wind Turbine) as a starting point.
Use a compass to draw flower petals on paper or the driveway. Use the drawing of the fan blade design in Lab 18 (Wind Turbine) as a starting point.
|
MÖBIUS STRIP MOBILE |

Engineer a mobile using two-sided paper strips twisted into odd, single-surface loops.
SAFETY TIPS AND HINTS
![]() You may have to slide things around on the mobile to balance them, once you have it put together.
You may have to slide things around on the mobile to balance them, once you have it put together.
MATERIALS
![]() Paper or card stock
Paper or card stock
![]() Scissors
Scissors
![]() Markers, crayons, or paint
Markers, crayons, or paint
![]() Tape
Tape
![]() Straws (the paper kind work best)
Straws (the paper kind work best)
![]() String or fishing line
String or fishing line
![]() Paper clips
Paper clips
PROTOCOL
1. Cut some strips of paper around 2/3 inch (1.5 cm) wide and 6 inches (15 cm) long. Once you get the hang of making Möbius strips, you can cut paper strips of any dimension.
2. If the paper is white, add some color or design to the strips.
3. Make each paper strip into a loop. Flip one of the ends over and tape the ends together. You may need to work the paper with your fingers to smooth out any bends. This odd twisted loop is called a Möbius strip (fig. 1).
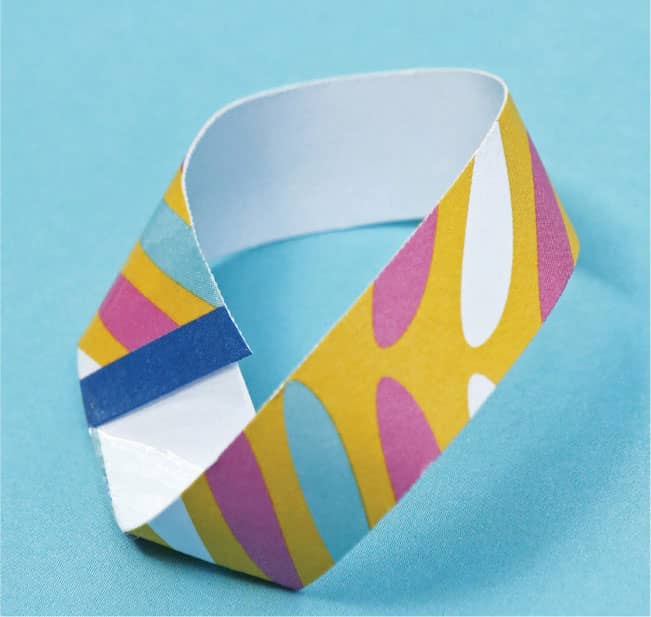
Fig. 1: Cut thin strips of paper and tape opposite sides of the ends together to form twisted loops.
4. Make several more Möbius strips for the mobile.
5. For fun, make a white Möbius strip. Using a marker, start drawing a line around the strip. Without lifting your pen, you will end up in the same spot where you started!
6. Tape two straws together as a perpendicular cross to create a mobile frame (fig. 2).
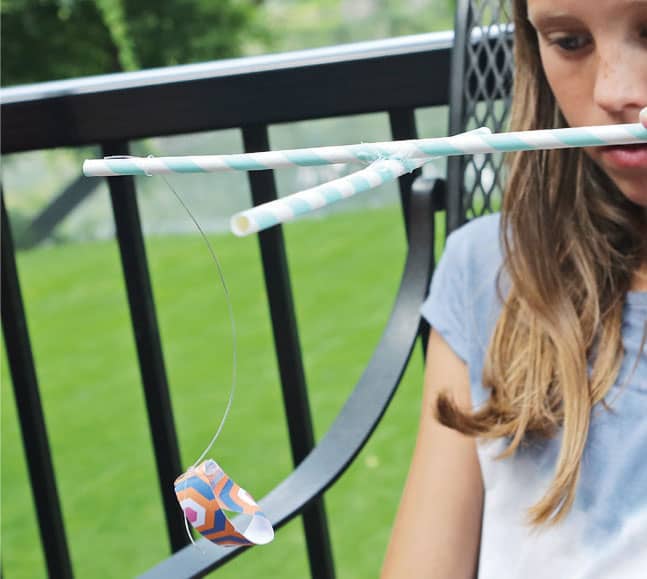
Fig. 2: Tape two straws together to create a mobile frame.
7. Attach the Möbius strips to the frame using paper clips and fishing line (fig. 3).
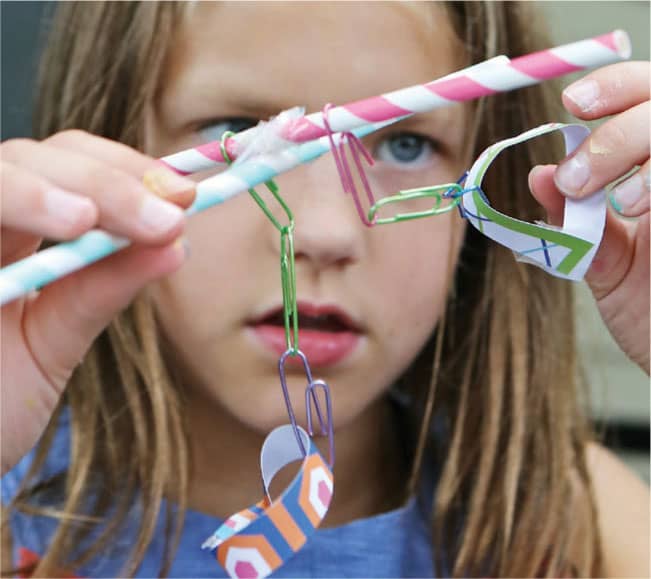
Fig. 3: Attach the Möbius strips to the frame using paper clips and fishing line.
8. Balance the mobile and find a place to hang it (figs. 4 and 5).
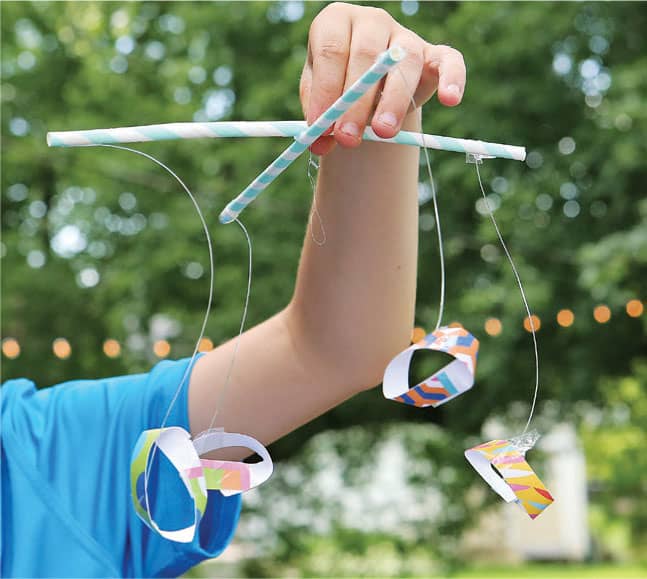
Fig. 4: Balance the mobile.
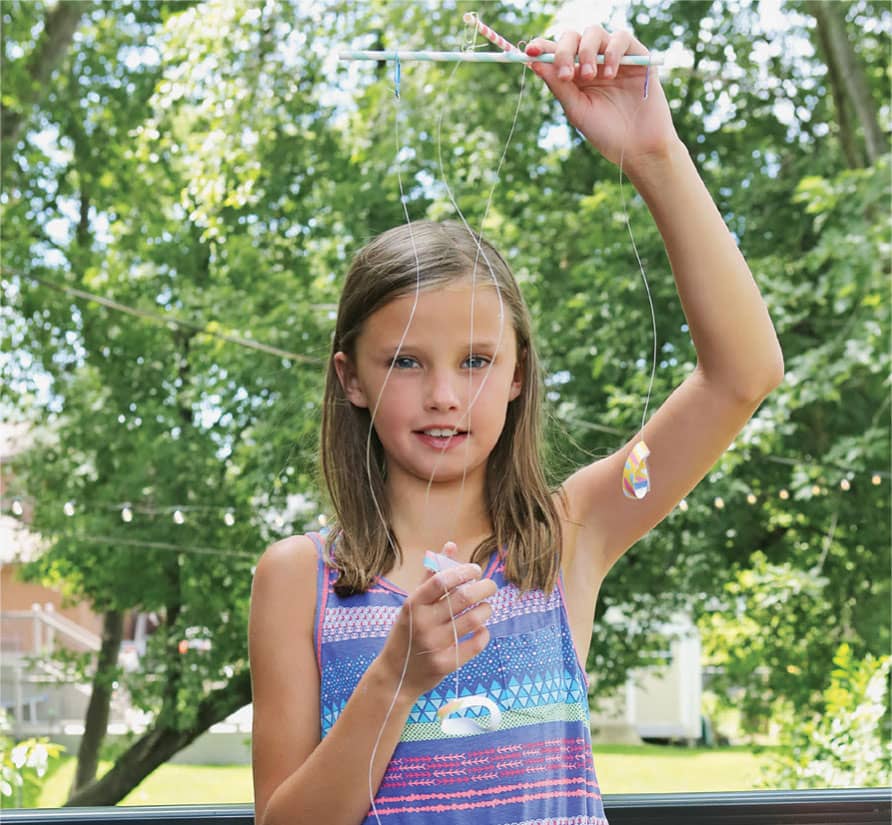
Fig. 5: Hang it to display.
CREATIVE ENRICHMENT
![]() Make a large Möbius strip and cut it down the center line. What happens?
Make a large Möbius strip and cut it down the center line. What happens?
![]() Make a Möbius strip and attempt to draw it from several angles. If it’s casting a shadow, draw the shadow, too.
Make a Möbius strip and attempt to draw it from several angles. If it’s casting a shadow, draw the shadow, too.
|
FRUIT FRACTION ANIMALS |

Learn about fractions and eat your creative math project.
SAFETY TIPS AND HINTS
![]() Adult supervision is required for cutting.
Adult supervision is required for cutting.
MATERIALS
![]() Paring knife or plastic cutting knife
Paring knife or plastic cutting knife
![]() Fresh fruit
Fresh fruit
![]() Cutting board
Cutting board
![]() Toothpicks
Toothpicks
PROTOCOL
1. Use a paring knife to cut a piece of fruit in half or use a plastic knife if the fruit is soft (fig. 1).

Fig. 1: Cut a piece of fruit in half.
2. Cut the same piece of fruit in half again to make 4 quarters (fig. 2).

Fig. 2: Cut it in half again to make quarters.
3. Cut up other pieces of fruit into fractions, including thirds, fourths, sixths, and eighths (fig. 3).

Fig. 3: Cut other fruit into fractions.
4. Use toothpicks to create animals and other creatures from the fractioned fruit (fig. 4).

Fig. 4: Use toothpicks to create creatures from the fruit fractions.
5. What else could you create (fig. 5)?

Fig. 5: What else could you create?
CREATIVE ENRICHMENT
![]() Look at the fruit you’ve cut in half and try to find symmetry. Use some of it to make fruit stamps (see Lab 36).
Look at the fruit you’ve cut in half and try to find symmetry. Use some of it to make fruit stamps (see Lab 36).
|
STRING ART |

Make geometric shapes, beautiful patterns, and even colorful curves using a series of straight lines created by winding string around pins.
SAFETY TIPS AND HINTS
![]() Young children should have adult supervision around pushpins, which have sharp points and are a choking hazard.
Young children should have adult supervision around pushpins, which have sharp points and are a choking hazard.
![]() Adult supervision is required when using a glue gun.
Adult supervision is required when using a glue gun.
MATERIALS
![]() Pushpins or toothpicks that have been cut in half
Pushpins or toothpicks that have been cut in half
![]() Cork or foam-core board
Cork or foam-core board
![]() Ruler (optional)
Ruler (optional)
![]() Colorful string, yarn, or embroidery thread
Colorful string, yarn, or embroidery thread
![]() Pipe cleaners
Pipe cleaners
![]() School glue or glue gun and glue sticks (optional)
School glue or glue gun and glue sticks (optional)
PROTOCOL
1. Push the pushpins or toothpicks into cork or a foam-core board. Older kids can use a ruler to make them the same distance apart for more complicated designs (fig. 1).

Fig. 1: Put pushpins in to cork or foam-core board. Use a ruler to make them equal distances apart, if you like.
2. Make a geometric shape or repeating pattern by wrapping string around one pin and then connecting it to other pins (fig. 2).
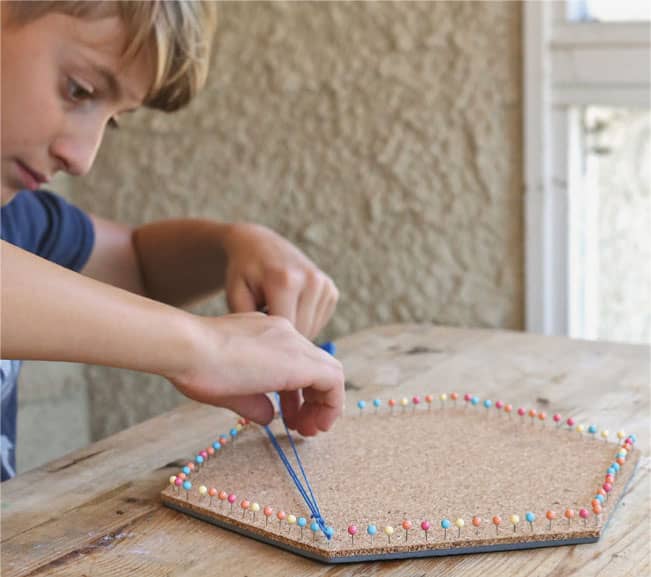
Fig. 2: Make shapes and patterns using a piece of string, thread, or yarn.
3. Create a design by repeating patterns (fig. 3).
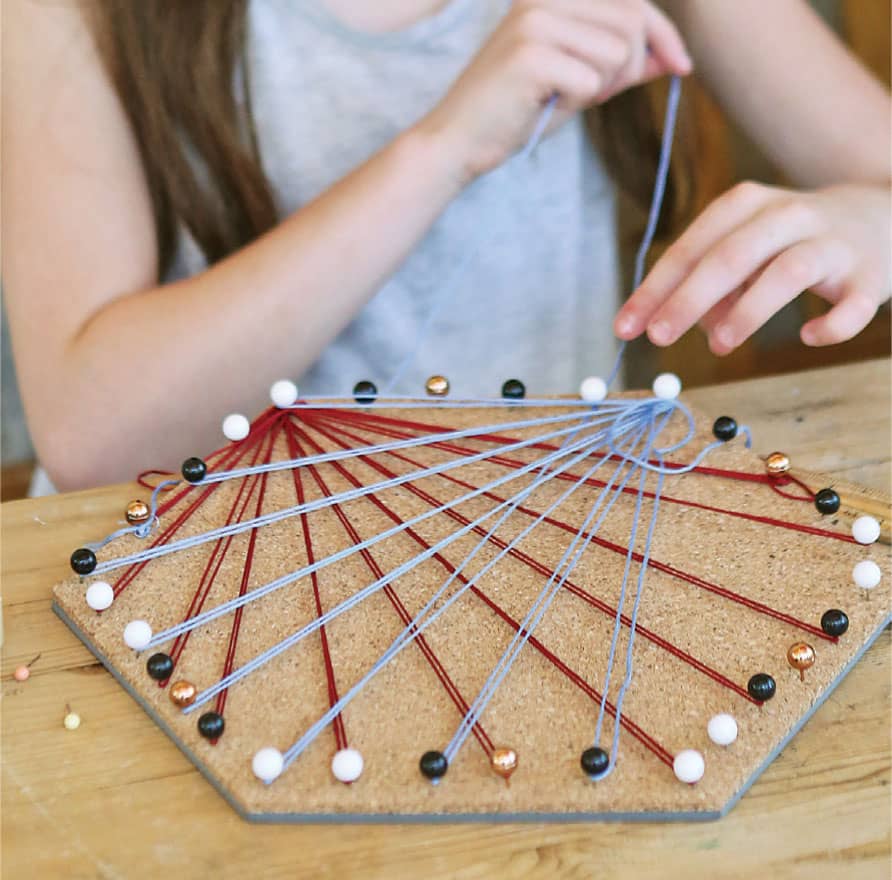
Fig. 3: Create a design by repeating patterns.
4. Try using toothpicks and pipe cleaners to make shapes (fig. 4).
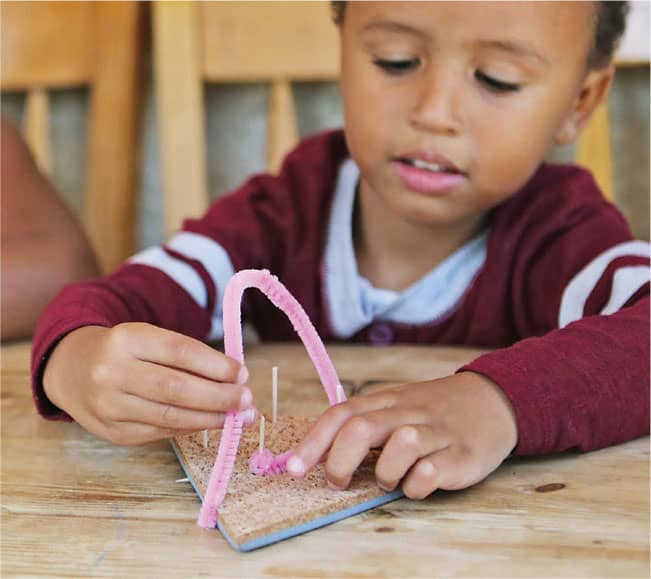
Fig. 4: Or use toothpicks instead of pins and make shapes using pipe cleaners.
5. After completing your design, secure the string with glue (fig. 5).
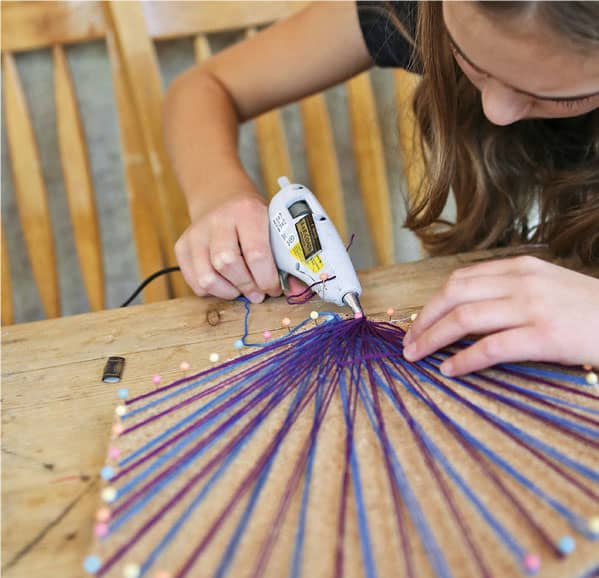
Fig. 5: After wrapping the string around the pins, secure it with glue.
CREATIVE ENRICHMENT
![]() Figure out how to create a parabolic curve using string art (see STEAM Behind the Fun following).
Figure out how to create a parabolic curve using string art (see STEAM Behind the Fun following).
![]() Engineer a frame that allows you to make three-dimensional geometric designs from string. Consider using wood and nails to build a sturdier frame.
Engineer a frame that allows you to make three-dimensional geometric designs from string. Consider using wood and nails to build a sturdier frame.