

|
SCIENCE |

ALTHOUGH CURIOUS MINDS HAVE BEEN ASKING QUESTIONS AND PURSUING KNOWLEDGE SINCE THE TIME OF ANCIENT CIVILIZATIONS, SCIENCE, AS WE KNOW IT TODAY, MOSTLY TOOK FORM IN THE SEVENTEENTH CENTURY. THE WORD SCIENTIST WAS COINED IN 1834. UNTIL THEN, PEOPLE WHO STUDIED NATURE AND HOW THINGS WORKED WERE CALLED “NATURAL PHILOSOPHERS” AND “CULTIVATORS OF SCIENCE,” AMONG OTHER THINGS.
For a long time, science was mostly the pursuit of a very small group of people who had the time, opportunity, education, and money to do it. In England in the 1700s, wealthy families would invite friends over to observe scientific parlor tricks. Clergy, inventors, politicians, and writers gathered in coffee shops to talk about ideas they were experimenting with, and great discoveries were made in kitchen sinks.
Today, science is for everyone—and kitchen sinks are still a great place to start. To follow the scientific method, you simply have to ask a question, build a hypothesis, test your hypothesis, and draw a conclusion from the results. This unit is packed with experiments that explore the creative side of science. Scientists use models to illustrate how things work, and, as scientific knowledge advances, models are improved.
“I love neuroscience and theater because they ask the same questions: Why do we do what we do? What are we doing here? What is our relationship to each other, to this planet, to the universe? I decided to study both subjects to give them equal love and attention. I’m so glad I did because now I’ve created a career for myself that combines them in a fun, new way. By imagining possibilities and working hard to make them happen, I can bring something different to the table, a skill set unique to me that can make the world a better place and help answer some of those big questions.”
—Sophie Shrand, science educator, comedian, actor, singer, and creator and host of Science With Sophie

|
CRUSHED CANDY STAINED GLASS |

Create gorgeous, edible art by melting hard candy.
SAFETY TIPS AND HINTS
![]() Adult supervision is required for this experiment. Melted candy is very hot and sticky and can cause burns.
Adult supervision is required for this experiment. Melted candy is very hot and sticky and can cause burns.
![]() Wear protective eyeware when hammering the candy.
Wear protective eyeware when hammering the candy.
![]() Cookie cutters with simple shapes that sit flat on a baking sheet work best for this project.
Cookie cutters with simple shapes that sit flat on a baking sheet work best for this project.
MATERIALS
![]() Oven
Oven
![]() Clear, colorful, hard candy
Clear, colorful, hard candy
![]() Small zippered plastic bags (1 bag for each color of candy)
Small zippered plastic bags (1 bag for each color of candy)
![]() 1 large zippered plastic bag
1 large zippered plastic bag
![]() Protective glasses
Protective glasses
![]() Hammer
Hammer
![]() Baking sheet
Baking sheet
![]() Nonstick cooking spray
Nonstick cooking spray
![]() 5 to 10 cookie cutters
5 to 10 cookie cutters
PROTOCOL
1. Preheat the oven to 350°F (180°C, or gas mark 4).
2. Unwrap the hard candy and sort it by color (fig. 1).

Fig. 1: Sort your hard candy by color.
3. Put each color of candy in its own small zippered plastic bag and seal the bags. Put all the small bags into one larger zippered bag. Seal the larger bag.
4. Put on your protective glasses and crush the candy with a hammer (fig. 2).
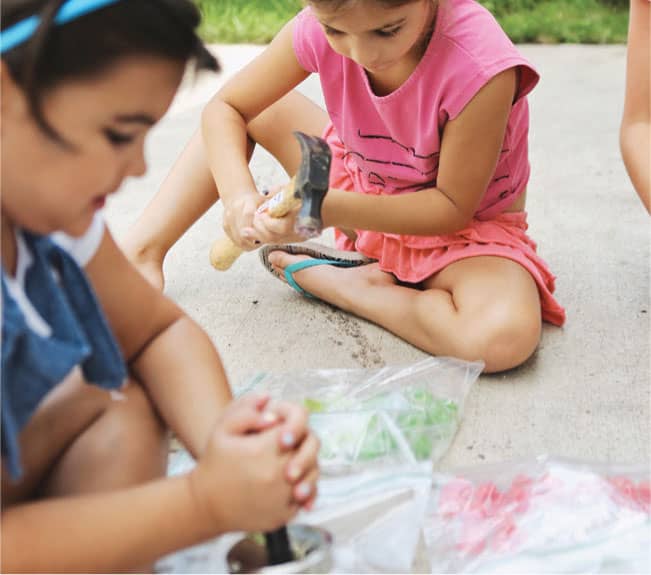
Fig. 2: Double bag the candy and crush it with a hammer.
5. Store the crushed candy in the freezer until you’re ready to use it.
6. Coat a baking sheet with cooking spray.
7. Arrange the cookie cutters on the prepared baking sheet and spray them lightly with cooking spray.
8. Fill the cookie cutters with different colors of crushed candy until about 1/2 inch (1.5 cm) thick (fig. 3).
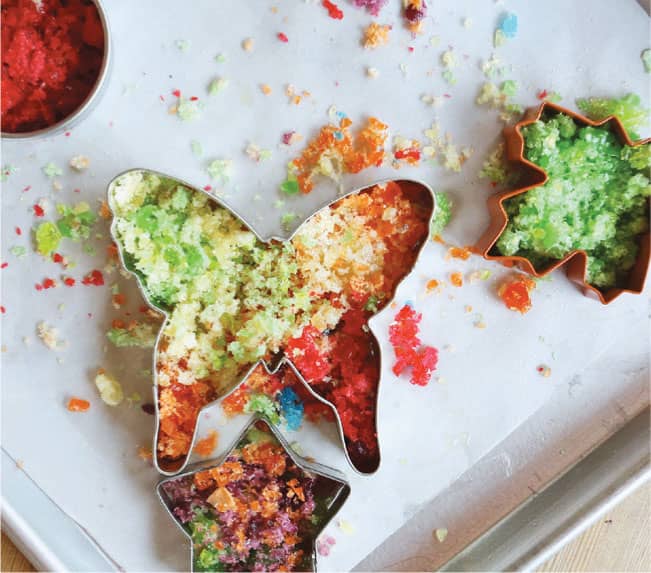
Fig. 3: Add crushed candy to the cookie cutters.
9. Put the baking sheet in the oven for 5 minutes or until the candy melts and looks like stained glass (fig. 4).

Fig. 4: Bake the crushed candies until melted. Cool.
10. Remove the baking sheet from the oven and let the candy cool completely.
11. Carefully remove the candy stained glass from the cookie cutters (fig. 5).

Fig. 5: Remove the candy stained glass from the cookie cutters.
12. Eat your creation (fig. 6).

Fig. 6: Eat your creation.
CREATIVE ENRICHMENT
![]() Try melting different kinds of candy to see what happens.
Try melting different kinds of candy to see what happens.
|
HOMEMADE CHIA PETS |

Sculpt creatures with living “fur” to learn about plant germination.
SAFETY TIPS AND HINTS
![]() If you use regular clay for this project, it may fall apart if it gets wet (fig. 1).
If you use regular clay for this project, it may fall apart if it gets wet (fig. 1).

Fig. 1: You can use regular clay, but it may fall apart if it gets too wet.
MATERIALS
![]() Sculpting clay or regular clay
Sculpting clay or regular clay
![]() 5 fluid ounce (150 ml) paper cups, one cup for each pet you want to make
5 fluid ounce (150 ml) paper cups, one cup for each pet you want to make
![]() Potting soil or dirt from a yard, garden, or park
Potting soil or dirt from a yard, garden, or park
![]() Spoon
Spoon
![]() 1 teaspoon sproutable chia seeds (not irradiated)
1 teaspoon sproutable chia seeds (not irradiated)
![]() Toothpick or fork
Toothpick or fork
PROTOCOL
1. Shape sculpting clay around a paper cup (fig. 2).
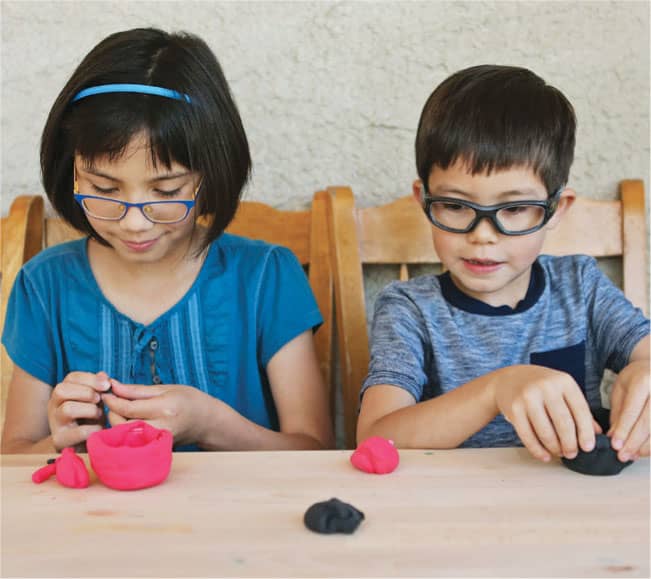
Fig. 2: Begin your creature by shaping sculpting clay around a paper cup.
2. Use more clay to transform the cup into the shape of an animal, monster, or fantastical creature (fig. 3).
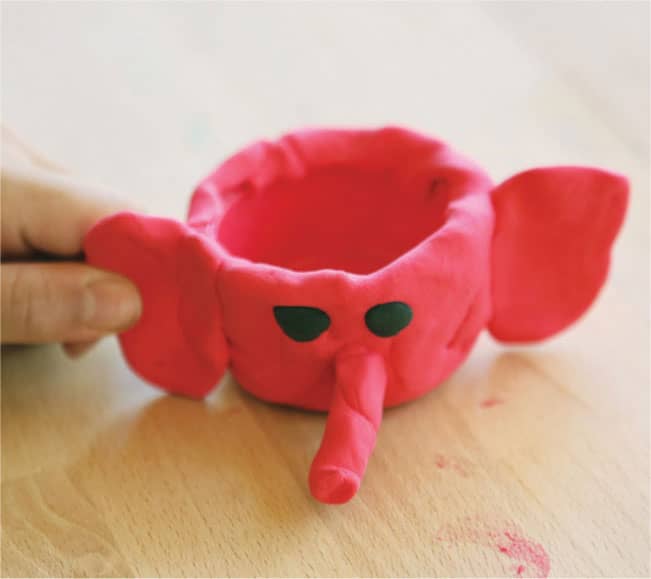
Fig. 3: Transform the cup into an animal or other figure.
3. Add soil to fill the chia pet so it’s level with the top of the inner cup. (Make sure you have permission to dig, if you’re not getting the soil from your own yard.)
4. Add the chia seeds to the dirt and mix them into the top of the soil using a toothpick or fork (fig. 4).

Fig. 4: Add chia seeds to the dirt.
5. Water the chia seeds until the dirt feels damp, but not soaked (fig. 5).
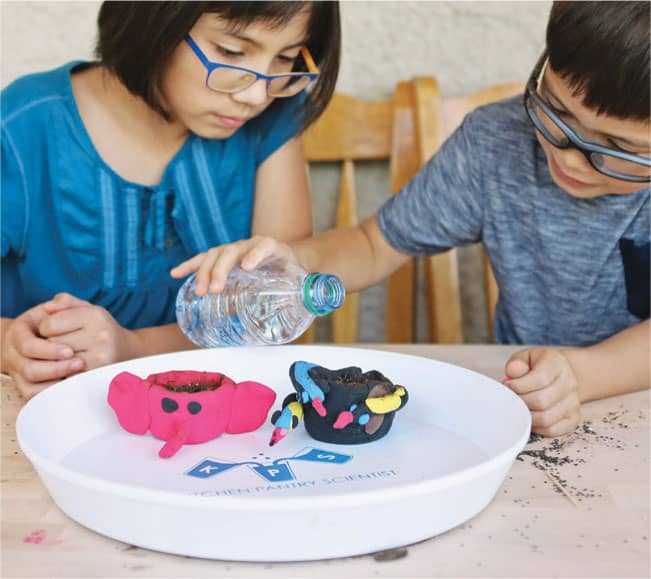
Fig. 5: Water the chia seeds.
6. Check the seeds every day and add water as needed to keep the soil damp (fig. 6).
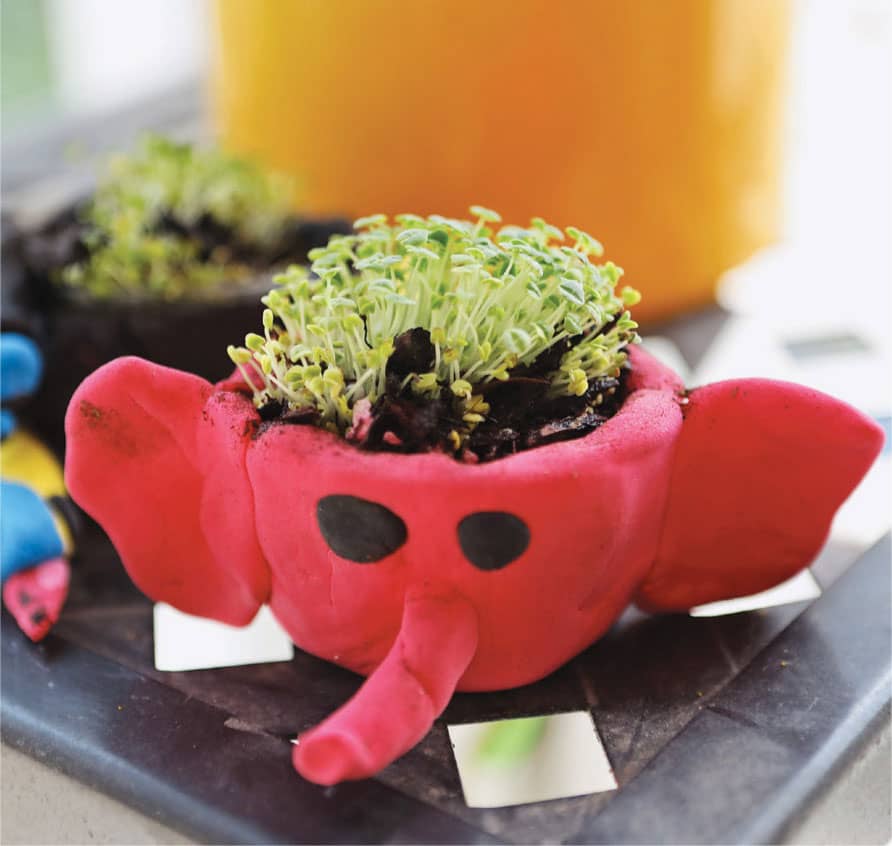
Fig. 6: Watch the seeds sprout and grow.
7. Draw a picture of your chia pet when the seeds have fully sprouted.
CREATIVE ENRICHMENT
![]() Record how long it takes the seeds to sprout and measure how tall they get. Make a graph with days on the X-axis and sprout height on the Y-axis.
Record how long it takes the seeds to sprout and measure how tall they get. Make a graph with days on the X-axis and sprout height on the Y-axis.
![]() Create a larger piece of art using chia seeds and soil. You could incorporate recycling or create a design or maze using the seeds to create contrast between the brown soil and the green sprouts.
Create a larger piece of art using chia seeds and soil. You could incorporate recycling or create a design or maze using the seeds to create contrast between the brown soil and the green sprouts.
|
CRYSTAL CREATURES |

Grow beautiful crystalline sculptures using pipe cleaners, Epsom salt, and water.
SAFETY TIPS AND HINTS
![]() Young children should have adult supervision around hot liquids and Epsom salt.
Young children should have adult supervision around hot liquids and Epsom salt.
MATERIALS
![]() Pipe cleaners (1 to 2 per creature)
Pipe cleaners (1 to 2 per creature)
![]() 2 or 3 (5 to 10 ounce, or 150 to 285 ml) clear glass jars (if you don’t have these, any size should work)
2 or 3 (5 to 10 ounce, or 150 to 285 ml) clear glass jars (if you don’t have these, any size should work)
![]() 3 cups (720 g) Epsom salt
3 cups (720 g) Epsom salt
![]() Large pan or microwaveable container
Large pan or microwaveable container
![]() Magnifying glass (optional)
Magnifying glass (optional)
![]() 2 cups (475 ml) water
2 cups (475 ml) water
![]() Food coloring (optional)
Food coloring (optional)
![]() Pencil or wooden skewer
Pencil or wooden skewer
PROTOCOL
1. Twist the pipe cleaners into interesting shapes. Make sure they’re small enough to fit into the jar (fig. 1).
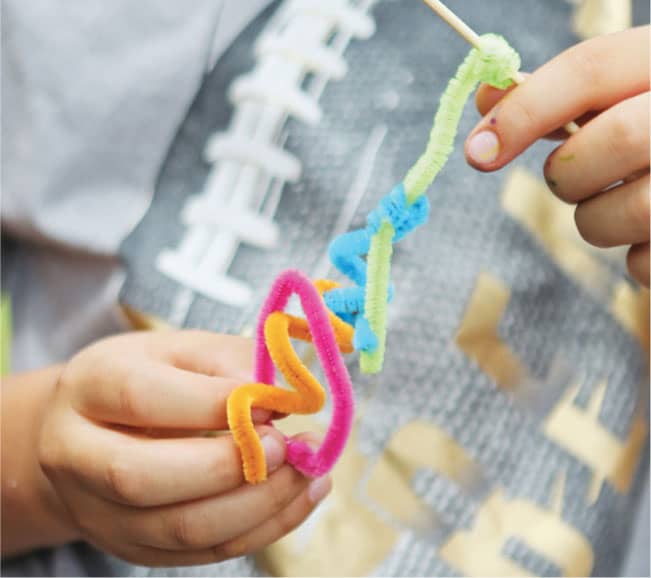
Fig. 1: Twist the pipe cleaners into cool shapes.
2. Pour the Epsom salt into a large pan or microwaveable container. Look at a few crystals under a magnifying glass. What do you see?
3. Add the water to the Epsom salt.
4. Heat and stir the solution in the microwave on high power or on the stovetop on high heat until the Epsom salt completely dissolves, about 2 to 3 minutes.
5. Remove from the microwave or stovetop and let the salt solution cool.
6. Pour the salt solution into the jars.
7. Add food coloring, if you want to (fig. 2).

Fig. 2: Dissolve the Epsom salt in water and add food coloring, if desired.
8. Hang your pipe cleaner from a pencil or wooden skewer so it is suspended in the salt solution (fig. 3).

Fig. 3: Suspend your pipe cleaners in the salt solution.
9. Let the crystals grow overnight (fig. 4).
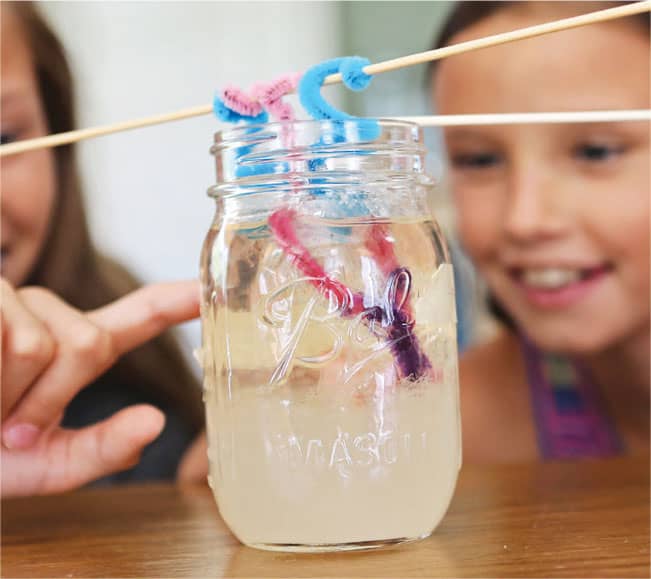
Fig. 4: Let the crystals grow on the countertop overnight.
10. Remove the crystal creature from the jar (fig. 5).
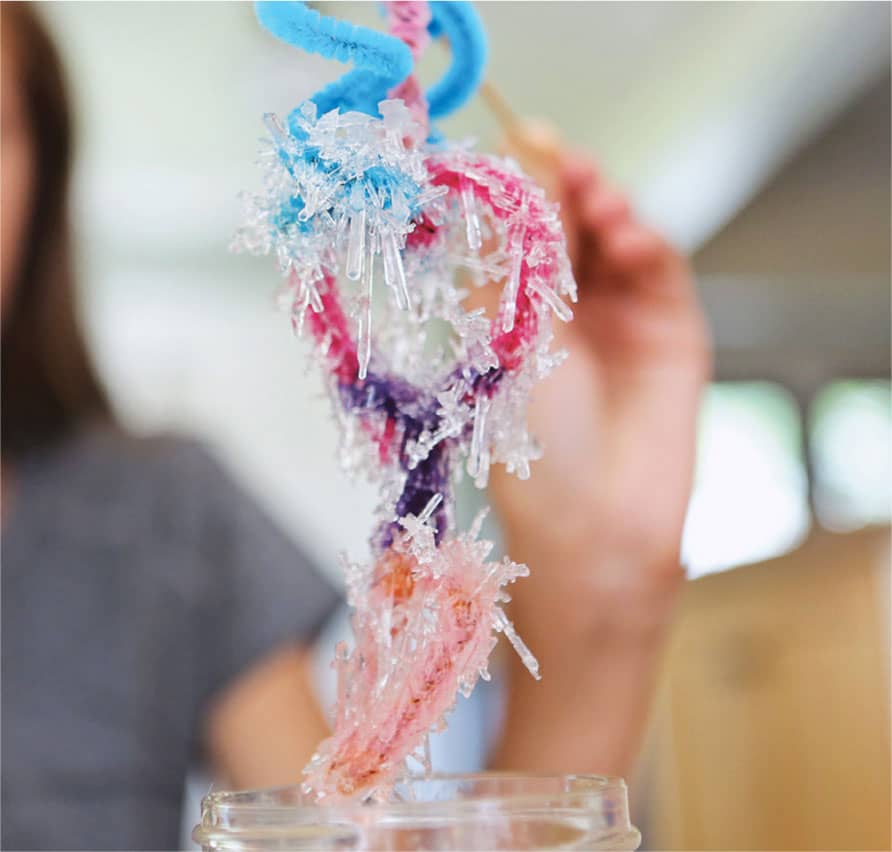
Fig. 5: Remove the crystal creature from the jar.
CREATIVE ENRICHMENT
![]() Draw or photograph the crystals. Look at them under a magnifying glass.
Draw or photograph the crystals. Look at them under a magnifying glass.
![]() Try to grow some Epsom salt crystals on another object, like an eggshell.
Try to grow some Epsom salt crystals on another object, like an eggshell.
|
TIE-DYED FIDGET SPINNERS |

Make a super-cool spinning toy using skateboard bearings, Super Glue, and physics. Customize your design with a marker tie-dyed shoelace.
SAFETY TIPS AND HINTS
![]() This lab is not for recommended for kids under age 5.
This lab is not for recommended for kids under age 5.
![]() Adult supervision is required when using super glue, sharp points, rubbing alcohol, and a glue gun.
Adult supervision is required when using super glue, sharp points, rubbing alcohol, and a glue gun.
![]() If you add too much glue, the bearings will stick to the paper.
If you add too much glue, the bearings will stick to the paper.
MATERIALS
![]() 4 skateboard bearings (available online or at a skateboard store)
4 skateboard bearings (available online or at a skateboard store)
![]() Sheet of paper
Sheet of paper
![]() Pencil
Pencil
![]() Ruler
Ruler
![]() Super Glue or Krazy Glue
Super Glue or Krazy Glue
![]() 1 white shoelace
1 white shoelace
![]() Permanent markers, like Sharpies, in different colors
Permanent markers, like Sharpies, in different colors
![]() Tray or colander
Tray or colander
![]() Rubbing alcohol (isopropanol)
Rubbing alcohol (isopropanol)
![]() Glue gun and glue sticks
Glue gun and glue sticks
PROTOCOL
1. Use a sharp point to remove the cover from one of skateboard bearings so you can see the ball bearings inside (fig. 1).
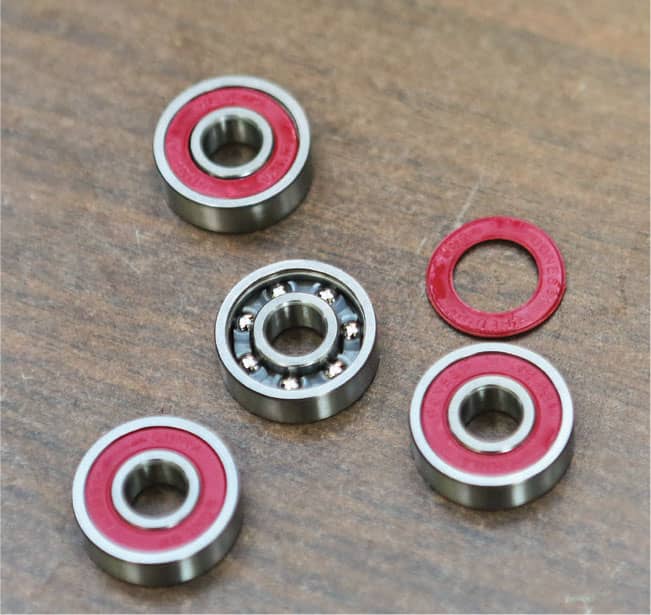
Fig. 1: Remove the cover of the center bearing to expose the ball bearings inside.
2. On your paper, draw a 21/3 x 21/3 inch (6 x 6 cm) square with an X through it and put one of the bearings in the middle. Place the other 3 bearings in a circle around the one in the middle so they're evenly spaced. Use a ruler to check your spacing (fig. 2).

Fig. 2: Center the bearings and Super Glue them together. Be careful not to get any glue onto the moving parts of the bearings.
3. Add a single drop of Super Glue to the junction between each bearing to connect them. Let the glue dry.
4. Turn the spinner over and place another drop of glue at each junction.
5. When the glue is dry, prop the spinner up on its side and add glue to the junctions on each side.
6. Make dots with permanent markers on the shoelace.
7. In a well-ventilated area, suspend the shoelace over a tray or colander and drip rubbing alcohol onto it (fig. 3). Dry completely.
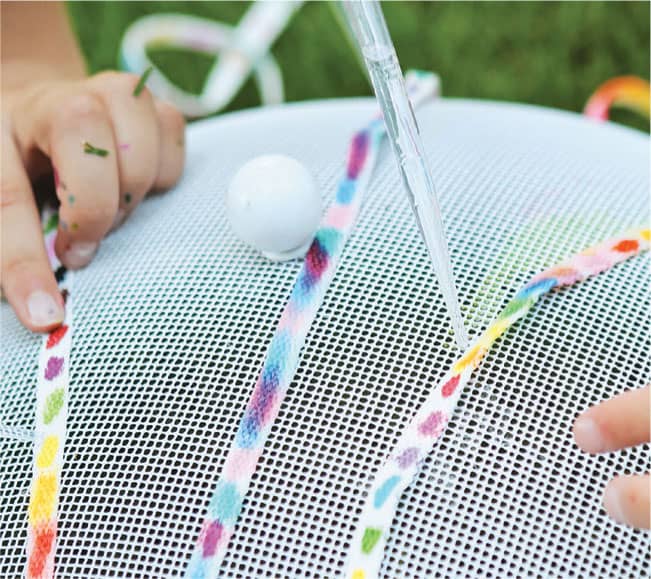
Fig. 3: Drip alcohol onto marker dots on the shoelace to create your design.
8. Use the glue gun to attach the shoelace to the outside edges of the spinner. Fill in the gaps between the lace and bearings with hot glue (fig. 4).

Fig. 4: Use a glue gun to attach the shoelace to the spinner.
9. Spin away (fig. 5)!

Fig. 5: Try your spinner.
CREATIVE ENRICHMENT
![]() Find other objects that would work well to make a spinner with a skateboard bearing at its center. Can you cast your own spinner from hot glue (see Lab 34)?
Find other objects that would work well to make a spinner with a skateboard bearing at its center. Can you cast your own spinner from hot glue (see Lab 34)?
|
LEMON-PAINTED EGGS |

Paint pink designs on cabbage-dyed eggs to learn about acid–base indicators.
SAFETY TIPS AND HINTS
![]() Adult supervision is required for chopping and boiling the cabbage and eggs.
Adult supervision is required for chopping and boiling the cabbage and eggs.
MATERIALS
![]() 1 red (purple) cabbage, halved
1 red (purple) cabbage, halved
![]() Large pot
Large pot
![]() Water
Water
![]() 12 eggs with white shells
12 eggs with white shells
![]() Cotton swabs
Cotton swabs
![]() Lemon juice or vinegar
Lemon juice or vinegar
PROTOCOL
1. Chop up 1/2 of a head of red cabbage and add it to a large pot (fig. 1).
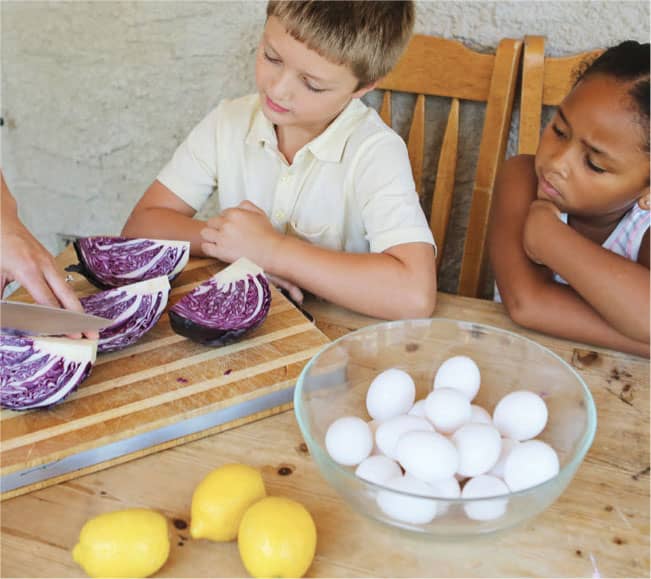
Fig. 1: Cut up 1/2 of a head of red cabbage.
2. Add eggs to the cabbage and fill the pot with water until the cabbage and eggs are just covered (fig. 2).

Fig. 2: To dye eggs, add white-shelled raw eggs to the red cabbage, add water, and boil.
3. Bring the water to a boil over high heat. Cook the eggs and cabbage for 10 minutes, uncovered. Remove from the heat.
4. With a slotted spoon, remove the eggs from the purple cabbage juice and let them dry.
5. Return the eggs to the pot and let them soak in the juice. Repeat until the shells have a nice blue or purple color.
6. Dip a cotton swab in lemon juice or vinegar and use it to paint designs on the purple eggshells (figs. 3 and 4).
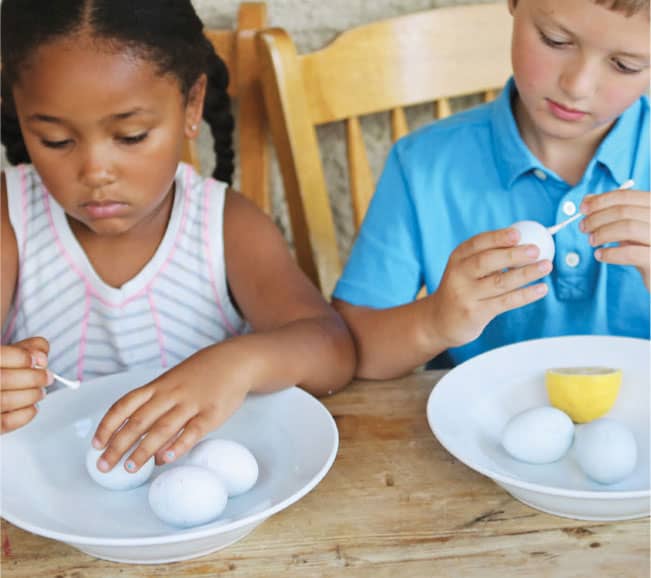
Fig. 3: Use lemon juice on a cotton swab to paint designs on the eggs.
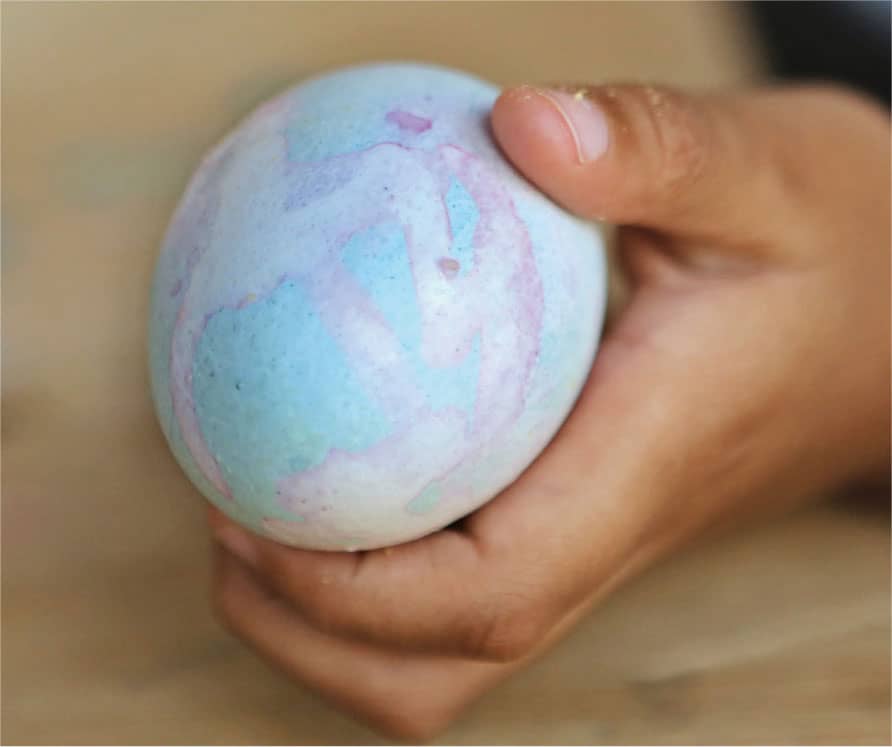
Fig. 4: The acid in the lemon juice turns the cabbage juice dye pink!
7. Peel the eggs and eat your experiment (fig. 5). Any leftover eggs can be refrigerated, unpeeled, for about 1 week to enjoy later.
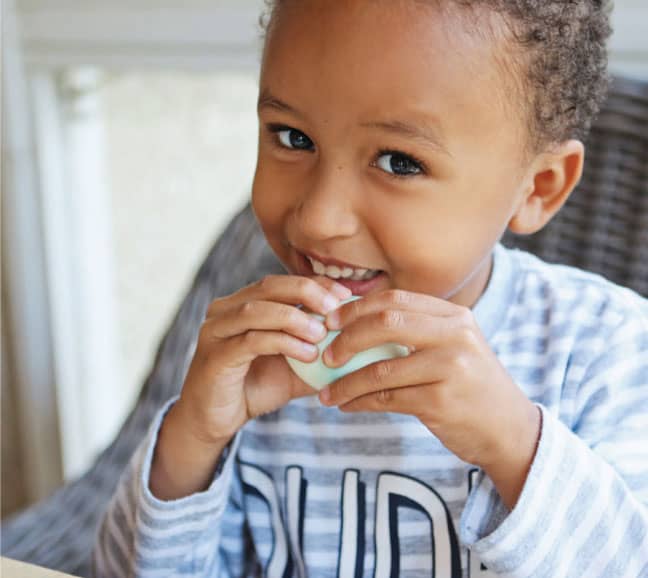
Fig. 5: Peel the egg and eat your experiment!
CREATIVE ENRICHMENT
![]() Mix a spoonful of baking soda into a small cup of water and use a cotton swab to apply it to one of the purple eggs. What color does it turn?
Mix a spoonful of baking soda into a small cup of water and use a cotton swab to apply it to one of the purple eggs. What color does it turn?
![]() Dye coffee filters in the leftover cabbage juice and use them as homemade litmus paper or draw designs on them using lemon juice.
Dye coffee filters in the leftover cabbage juice and use them as homemade litmus paper or draw designs on them using lemon juice.
|
TABLETOP AQUATIC ECOSYSTEM |

Create a self-contained living ecosystem in a jar.
SAFETY TIPS AND HINTS
![]() Wear protective eyeware when making a hole in the jar lid.
Wear protective eyeware when making a hole in the jar lid.
![]() Keep your aquatic ecosystem out of direct sunlight to prevent overgrowth of algae.
Keep your aquatic ecosystem out of direct sunlight to prevent overgrowth of algae.
MATERIALS
![]() Protective glasses
Protective glasses
![]() Hammer
Hammer
![]() Nail
Nail
![]() Large glass jar with metal lid
Large glass jar with metal lid
![]() Clean (rinsed) gravel (enough to cover the bottom of the jar and the roots of the plants, about 2 to 3 inches, or 5 to 7.5 cm)
Clean (rinsed) gravel (enough to cover the bottom of the jar and the roots of the plants, about 2 to 3 inches, or 5 to 7.5 cm)
![]() Aquatic plants: Collect your own from a pond or buy some at a pet store. We used elodea pondweed, Java fern, Anacharis, Dwarf Anubias, Java moss, and moss ball.
Aquatic plants: Collect your own from a pond or buy some at a pet store. We used elodea pondweed, Java fern, Anacharis, Dwarf Anubias, Java moss, and moss ball.
![]() Chlorine-free water (let water sit in a pitcher overnight or use bottled filtered water)
Chlorine-free water (let water sit in a pitcher overnight or use bottled filtered water)
![]() Aquatic snail (optional)
Aquatic snail (optional)
![]() Aquatic shrimp (optional)
Aquatic shrimp (optional)
![]() Algae pellets (for shrimp and snail)
Algae pellets (for shrimp and snail)
PROTOCOL
1. Put on your protective glasses. Use a hammer and nail to make a hole in the jar’s lid.
2. Add rinsed gravel to the bottom of the jar (fig. 1).

Fig. 1 Add rinsed gravel to a jar.
3. Add the aquatic plants, covering their roots with gravel so they’ll be anchored when you add water (fig. 2).

Fig. 2: Add your aquatic plants.
4. Fill the jar with chlorine-free water. Re-anchor the plants in the gravel as needed (fig. 3).

Fig. 3: Fill the jar with chlorine-free water.
5. Gently add the moss ball, snail, and shrimp to the water in the jar, if using (fig. 4).
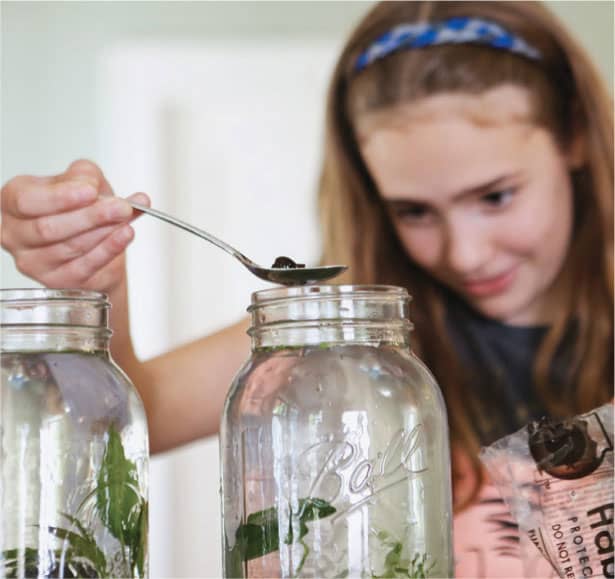
Fig. 4: Gently add the snail and shrimp to the ecosystem.
6. Add 1 or 2 algae pellets and put the lid on the jar.
7. Enjoy your countertop aquatic ecosystem (fig. 5).
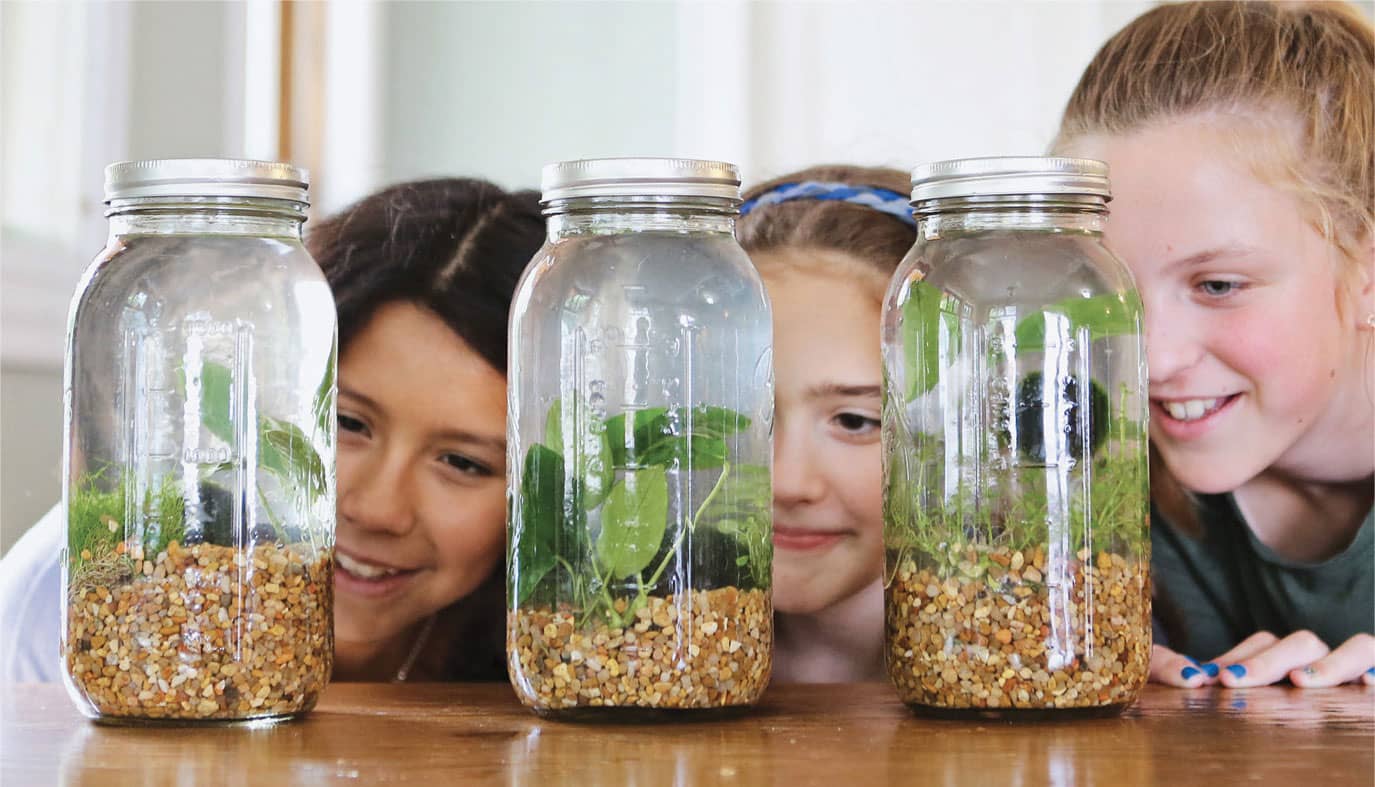
Fig. 5: Enjoy!
CREATIVE ENRICHMENT
![]() Draw a diagram showing how nutrients and gases cycle through the aquatic system you created. Build a terrarium and draw a similar diagram. How do they compare?
Draw a diagram showing how nutrients and gases cycle through the aquatic system you created. Build a terrarium and draw a similar diagram. How do they compare?
![]() Learn about the water cycle and write a story or draw a comic strip about a water molecule’s journey around the world via the water cycle.
Learn about the water cycle and write a story or draw a comic strip about a water molecule’s journey around the world via the water cycle.
|
WILDFLOWER PAPER |

Mix up some living paper using a blender, some paper, and a few seeds.
SAFETY TIPS AND HINTS
![]() Adult supervision is required when using the blender and paper shredder.
Adult supervision is required when using the blender and paper shredder.
![]() Dry your wildflower paper immediately and do not seal it in plastic bags or it may sprout and mold.
Dry your wildflower paper immediately and do not seal it in plastic bags or it may sprout and mold.
MATERIALS
![]() Shredded paper (inexpensive heavyweight construction paper, card stock, or watercolor paper works well)
Shredded paper (inexpensive heavyweight construction paper, card stock, or watercolor paper works well)
![]() Bowl
Bowl
![]() Water
Water
![]() Blender
Blender
![]() Wildflower seeds, collected from outside or from a seed pack
Wildflower seeds, collected from outside or from a seed pack
![]() 12 jar lids and screw bands from canning jars
12 jar lids and screw bands from canning jars
![]() Screen
Screen
![]() Fresh flower petals, leaves, or fresh herbs (optional)
Fresh flower petals, leaves, or fresh herbs (optional)
![]() Hole puncher (optional)
Hole puncher (optional)
PROTOCOL
1. Shred your paper by hand or use a paper shredder. Keep shredding until you have 4 cups (enough to fill 950 ml) of scraps.
2. Place the paper in a bowl, add enough water to cover it, and let it soak for 1 hour or more.
3. Put the soaked paper and some water in a blender and blend it to a fine pulp (fig. 1). Add more water to the paper as needed while blending so the paper forms a wet, but not runny, mixture.

Fig. 1: Blend soaked paper strips into a wet mixture.
4. Stir in some of the wildflower seeds. Save a few for decoration (fig. 2).

Fig. 2: Stir in the wildflower seeds.
5. Arrange your jar lids on a screen, top down. Press the paper pulp into the lids to cover the screen (fig. 3).

Fig. 3: Press the paper pulp with seeds into a jar lid on the screen.
6. Add extra seeds and flower petals (if using) for decoration (fig. 4).
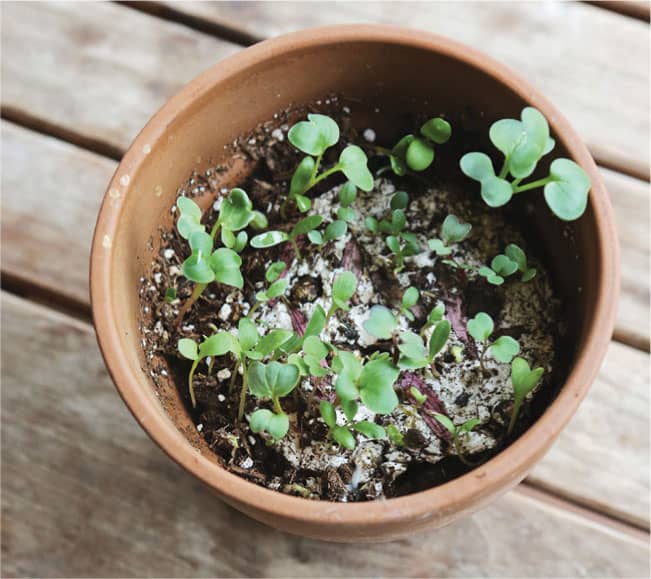
Fig. 5: Watch your wildflowers grow!
7. Let the paper disks dry. Remove them from the jar lids.
8. Punch holes in the paper if you’d like to use them as gift tags.
9. Plant the disks by setting them in soil. Water them as needed and watch them grow (fig. 5).

Fig. 4: Add extra seeds and petals for decoration.
CREATIVE ENRICHMENT
![]() Fill in cookie cutters instead of jar lids to create interesting shapes.
Fill in cookie cutters instead of jar lids to create interesting shapes.
![]() Use wildflower paper to create living designs in a garden or container.
Use wildflower paper to create living designs in a garden or container.
|
RAINBOW SLIME |

Use glue and contact lens solution to create a palette of colorful slime.
SAFETY TIPS AND HINTS
![]() Play with the slime, but don’t eat it!
Play with the slime, but don’t eat it!
![]() Adult supervision is required for this project.
Adult supervision is required for this project.
MATERIALS
![]() 1 (5 fluid ounce, or 150 ml) bottle of clear school glue (or white glue, if you can’t find clear)
1 (5 fluid ounce, or 150 ml) bottle of clear school glue (or white glue, if you can’t find clear)
![]() 6 small cups or jars
6 small cups or jars
![]() Baking soda
Baking soda
![]() Food coloring in different colors
Food coloring in different colors
![]() Contact lens solution containing boric acid or sodium borate
Contact lens solution containing boric acid or sodium borate
![]() Craft sticks or plastic spoons
Craft sticks or plastic spoons
PROTOCOL
1. Divide the glue equally among the small cups or jars (fig. 1).

Fig. 1: Add glue to small containers.
2. Add a pinch of baking soda to each cup and stir to mix (fig. 2).
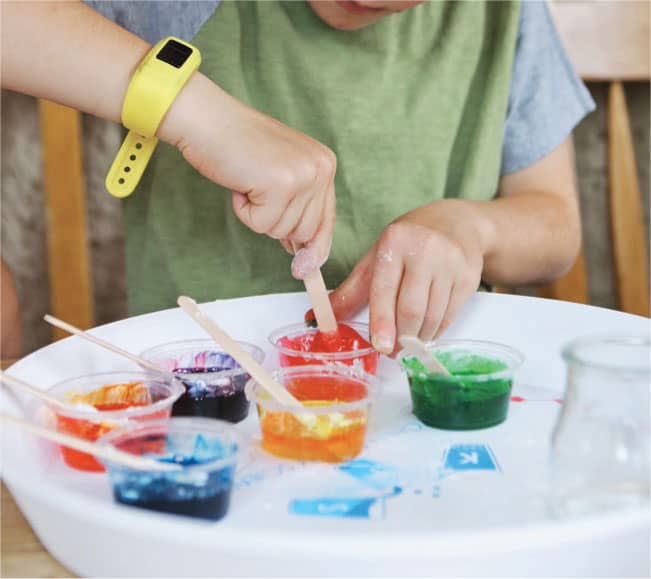
Fig. 2: Stir in a pinch of baking soda and some food coloring.
3. Use food coloring to add color to each cup—yellow, orange, red, purple, blue, and green. Mix any colors you don’t have: Blue mixed with yellow makes green; red mixed with blue creates purple.
4. Add a large squirt of contact lens solution to each cup and stir (fig. 3).
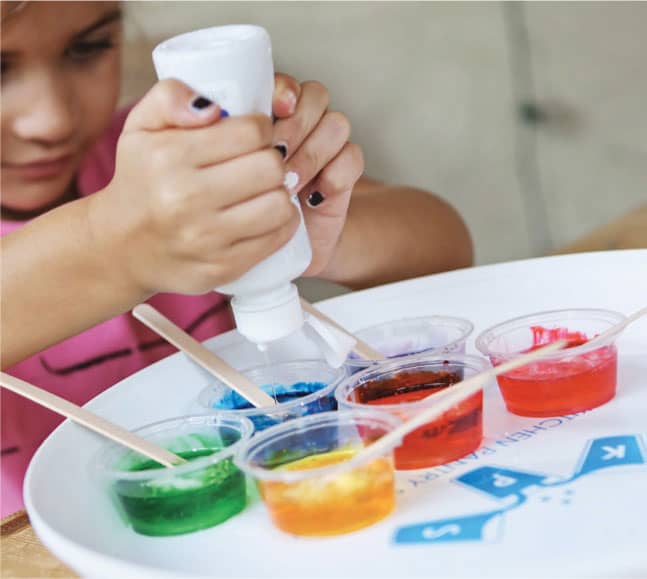
Fig. 3: Add contact lens solution to each cup.
5. Check the slime. If it is too sticky, add more contact lens solution and stir again until it feels squishy, but not sticky. You can pick it up and massage it with your fingers to help mix it better.
6. When your slime is ready, use it to create a rainbow (fig. 4).

Fig. 4: Layer slime in a jar or create a rainbow.
7. Store the slime in covered cups, jars, or zippered plastic bags (fig. 5).

Fig. 5: Store your slime covered.
CREATIVE ENRICHMENT
![]() Make more slime and create more colors by mixing different ratios of the primary colors—red, yellow, and blue. Add shaving cream or lotion to the slime to create new textures.
Make more slime and create more colors by mixing different ratios of the primary colors—red, yellow, and blue. Add shaving cream or lotion to the slime to create new textures.
|
CONFETTI SNACK |

Learn how chefs create edible spheres when you try this tasty experiment.
SAFETY TIPS AND HINTS
![]() Adult supervision is required with the hot gelatin and agar mix. Make sure the gelatin and agar are cooled to a safe temperature before handing them to kids.
Adult supervision is required with the hot gelatin and agar mix. Make sure the gelatin and agar are cooled to a safe temperature before handing them to kids.
![]() Keep the vegetable oil on ice as you create the agar confetti to avoid having to re-chill it frequently.
Keep the vegetable oil on ice as you create the agar confetti to avoid having to re-chill it frequently.
MATERIALS
![]() Tall jar filled to the top with vegetable oil
Tall jar filled to the top with vegetable oil
![]() Gelatin dessert mix, like Jell-O (a light color works best)
Gelatin dessert mix, like Jell-O (a light color works best)
![]() 6 to 12 clear glass or plastic cups
6 to 12 clear glass or plastic cups
![]() Small saucepan or microwaveable bowl
Small saucepan or microwaveable bowl
![]() 1/4 cup (20 g) agar flakes (usually found in the Asian food section of a grocery store or online)
1/4 cup (20 g) agar flakes (usually found in the Asian food section of a grocery store or online)
![]() 21/2 cups (570 ml) water
21/2 cups (570 ml) water
![]() 1 cup (235 ml) full-fat coconut milk (not light)
1 cup (235 ml) full-fat coconut milk (not light)
![]() 1/4 cup (50 g) sugar
1/4 cup (50 g) sugar
![]() Squeeze bottles with caps
Squeeze bottles with caps
![]() Food coloring
Food coloring
![]() Medium bowl filled with ice
Medium bowl filled with ice
![]() Slotted spoon
Slotted spoon
PROTOCOL
1. Put the jar with the vegetable oil in the freezer or in a bucket of ice to chill it until it is thick and ice cold, but not frozen solid.
2. Follow the directions on the gelatin dessert package for the speed-set method. When it cools to a safe temperature, pour most of it into the cups, filling each about halfway. Reserve about 1/2 cup (120 ml) in a microwavable container (fig. 1).
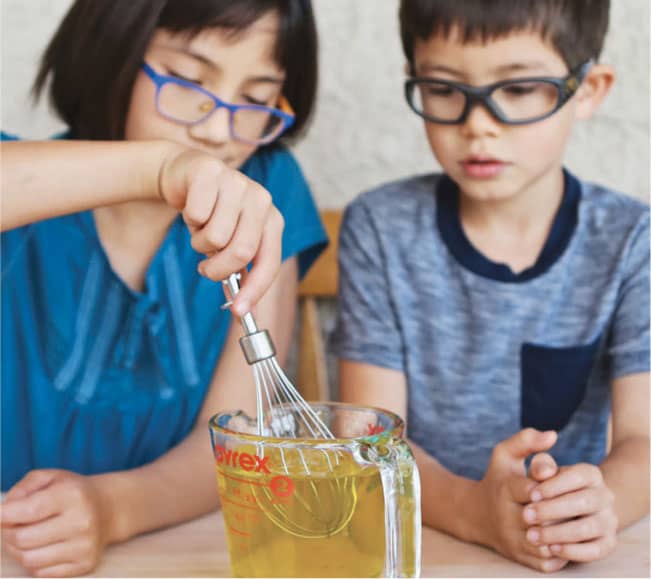
Fig. 1: Mix up a batch of gelatin and reserve 1/2 cup (120 ml).
3. Boil the agar flakes and water until the agar dissolves, stirring occasionally.
4. Stir in the coconut milk and sugar, mixing well.
5. Remove from the heat and let cool. Divide the mixture among the squeeze bottles. Color each batch with food coloring (fig. 2).
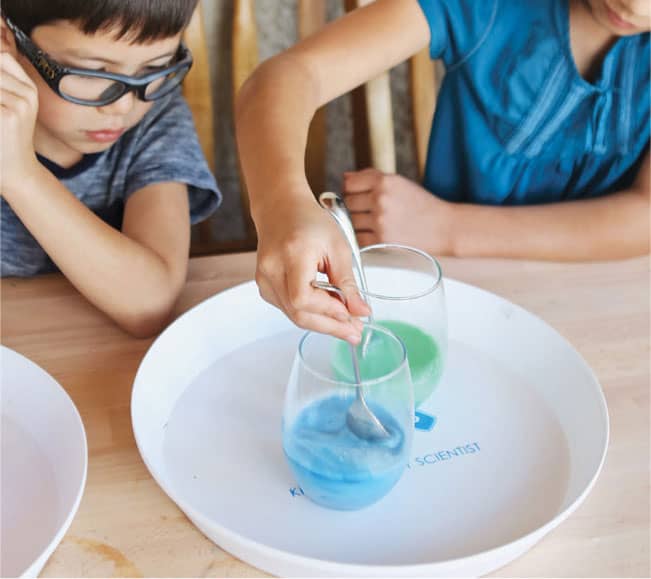
Fig. 2: Make the agar and coconut milk mixture. Transfer it to the squeeze bottles and color each batch with food coloring.
6. Place the jar with the cold oil in a bowl of ice or onto a flat surface. Slowly drip the coconut-agar mixture through the cold oil to create orbs (fig. 3).

Fig. 3: Drip the agar through ice-cold oil to make spheres.
7. Using a slotted spoon, collect the orbs.
8. Rinse the confetti orbs with water and add some to each cup of gelatin dessert. Microwave the reserved gelatin and pour it over the orbs to trap them in the dessert (fig. 4). Cool and enjoy (fig. 5)!

Fig. 4: Add the confetti spheres to the gelatin.

Fig. 5: Let it cool.
CREATIVE ENRICHMENT
![]() Let one of the cups of confetti snacks dry out to see what happens.
Let one of the cups of confetti snacks dry out to see what happens.
|
SWEET MOLECULES |

Use candy “atoms” to build model molecules you can eat.
SAFETY TIPS AND HINTS
![]() Young children should have adult supervision around candy that may be a choking hazard.
Young children should have adult supervision around candy that may be a choking hazard.
MATERIALS
![]() Different colors and types of soft candy, such as gumdrops and gummy bears
Different colors and types of soft candy, such as gumdrops and gummy bears
![]() Toothpicks
Toothpicks
![]() Wooden skewers (optional)
Wooden skewers (optional)
![]() Apples (optional)
Apples (optional)
PROTOCOL
1. Look at illustrations in science books or on the internet of molecules like water, ammonia, carbon dioxide, benzene, and DNA.
2. Choose which candy will represent different atoms and molecules (fig. 1).

Fig. 1: Choose soft candy to represent atoms and molecules.
3. Using the illustrations as guides, use toothpicks to connect the candies and create models of the molecules. One toothpick can represent a single bond, and two toothpicks can depict a double bond (fig. 2). Choose a different color candy for each atom type you represent.
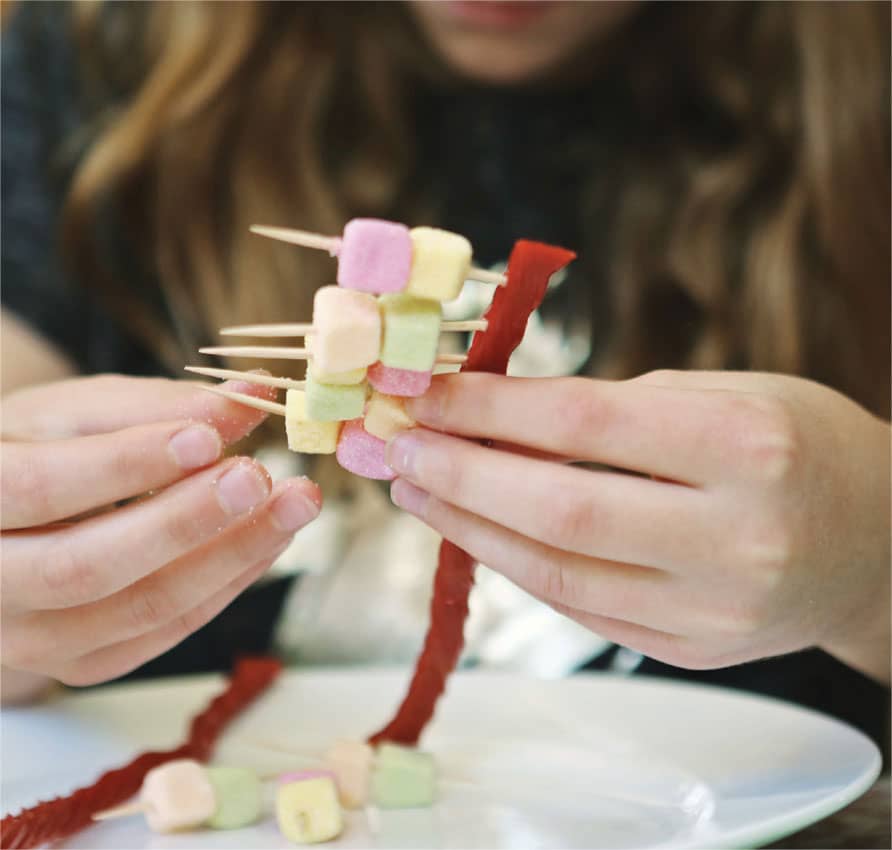
Fig. 2: Use toothpicks to connect candy and create new molecules.
4. Large molecules can be assembled on skewers and anchored onto apples, if desired (fig. 3).

Fig. 3: Anchor large molecules using skewers.
5. How many kinds of molecules can you create (figs. 4 and 5)?
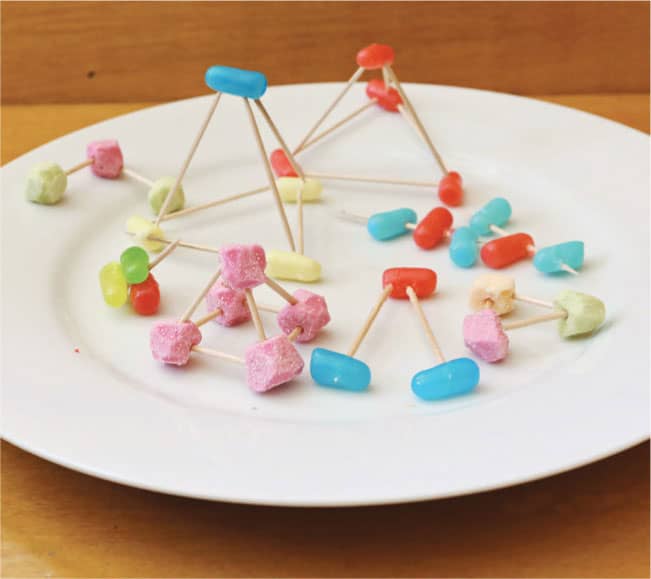
Fig. 4: How many kinds of molecules can you make?

Fig. 5: Here’s a candy DNA strand.
CREATIVE ENRICHMENT
![]() Conduct some research on how water molecules interact with one another. Make lots of water molecule models from candy. Put them on a cookie sheet or large sheet of paper and assemble them to look like water vapor, then liquid water, and then ice. Take photos of each and compare.
Conduct some research on how water molecules interact with one another. Make lots of water molecule models from candy. Put them on a cookie sheet or large sheet of paper and assemble them to look like water vapor, then liquid water, and then ice. Take photos of each and compare.