Lesson 2. Working with Google+ Profiles
In this lesson, you learn how to edit and manage your Google+ profile.
Understanding Google+ Profiles
When you first sign up for Google+, your profile contains only basic information. Figure 2.1 shows a sample profile for a new Google+ user.
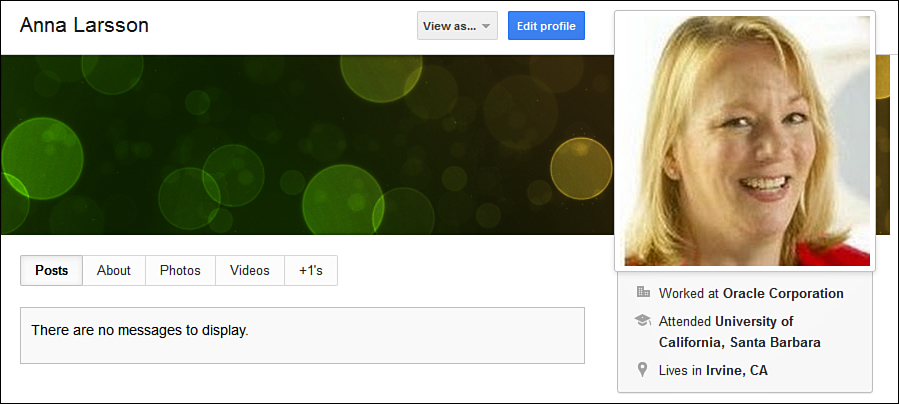
Figure 2.1. Your profile is a blank canvas when you first sign up for Google+.
Figure 2.2 shows a sample completed Google+ profile.
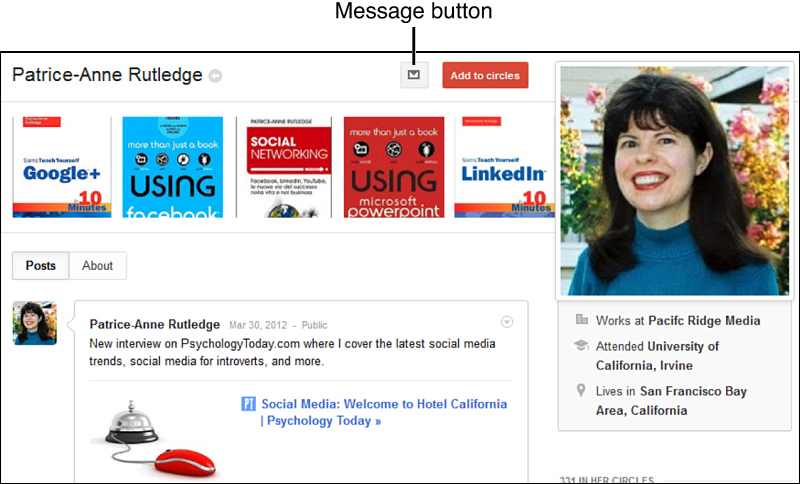
Figure 2.2. A complete profile lets people know who you are and generates better results.
Note: Why Does My Profile Already Contain Content?
If you created a profile using Google Profiles (https://profiles.google.com) before the launch of Google+, Google uses this content as the basis for your initial Google+ profile.
Although you can customize your profile content, all Google+ profiles follow the same basic layout:
• The left column displays the person’s name, an optional cover photo (or scrapbook of up to five individual photos), and profile tabs with custom content. If you’ve added this person to a circle, the name of the circle displays; otherwise the Add to Circles button displays. Optionally, the Message button (small envelope) displays if the profile owner accepts messages on Google+.
• The right column displays a profile photo and basic information, photos of people from their circles, and links to send an email, block this person, or report this profile to Google+.
Before sharing content on Google+ and adding people to circles, you should enhance your profile with more detailed content and specify your preferred profile privacy settings.
As you add more content to your profile, consider carefully how you plan to use Google+. Do you want to communicate primarily with family and friends? Are you sharing content with professional colleagues? Or are you using your personal profile to promote your business? Thinking about your goals and target audience can help you determine what to post on your profile and which privacy settings to select.
Caution: Don’t Use a Personal Profile to Create a Business Presence
Google+ profiles are designed for individuals using their own name. If you want to create a Google+ presence for a business, brand, or organization, you should create a Google+ page. See Lesson 3, “Creating a Google+ Page for Your Business,” for more information.
Google+ enables you to edit your profile; you can choose the exact content to display on it and specify who can view it.
Adding a Profile Cover Photo
Google+ enables you to add an optional cover photo at the top of your profile. There are two options for your cover photo:
• A single photo, 940px by 180px in size.
• A scrapbook with five individual photos, sized at 110px by 110px each (refer to Figure 2.2).
If you don’t add your own cover photo or scrapbook, Google+ adds a default single photo to your profile (refer to Figure 2.1 for an example).
Adding a Single Cover Photo
To add a single cover photo to your profile, follow these steps:
1. Click the Profile icon on the Google+ ribbon.
2. Click the Edit Profile button at the top of the page.
3. Click the Change Your Cover Photo link at the top of your profile.
4. Select the single photo template (on the left), as shown in Figure 2.3.
Figure 2.3. Choose the template to upload a single cover photo.
5. Click the Change Your Cover Photo link to open the Select Cover Photo dialog box.
6. Click the Select a Photo from Your Computer button to select photos to upload.
7. In the File Upload dialog box, select a file to upload, and click the Open button. Depending on your operating system and browser, the name of this dialog box and button could vary.
8. In the Select Cover Photo dialog box, shown in Figure 2.4, drag the four white squares that surround your photo to crop it to the desired size.
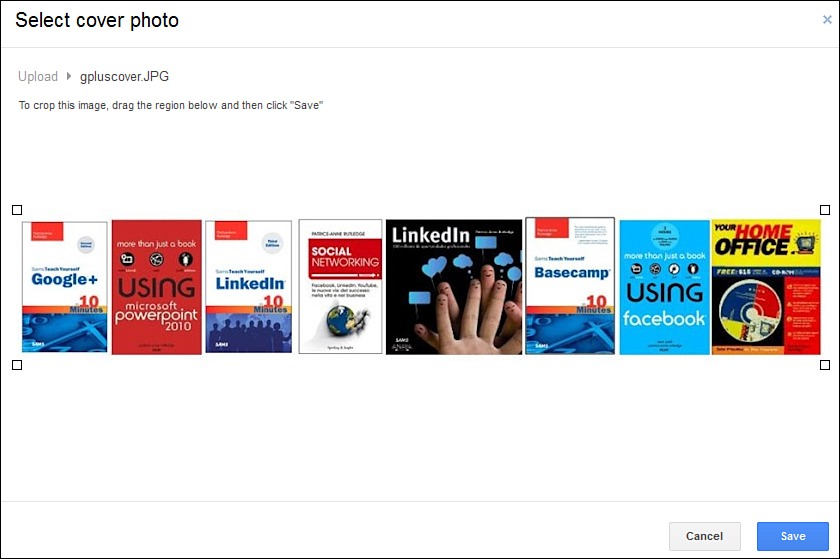
Figure 2.4. Display a cover photo that tells your story.
9. Click the Save button.
10. Click the Done Editing button at the top of your profile.
Your cover photo now displays on your photo and is available in the Scrapbook Photos album on the Albums tab of the Photos page.
Adding a Photo Scrapbook to Your Profile
To add a photo scrapbook to your profile, follow these steps:
1. Click the Profile icon on the Google+ ribbon.
2. Click the Edit Profile button in the upper-right corner of the page.
3. Click the Change Cover Photo link at the top of your profile.
4. Select the scrapbook photo template (on the right).
5. Click the Add Photo link (see Figure 2.5) to open the Add Photos to Scrapbook dialog box.
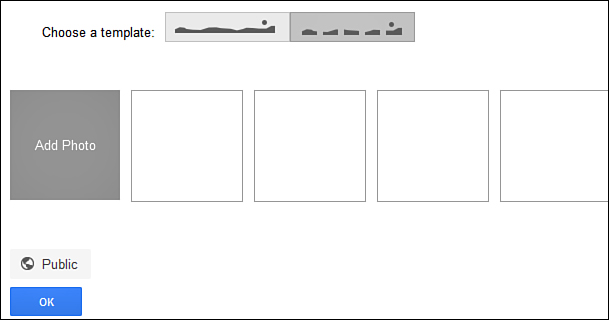
Figure 2.5. Add photos you already uploaded to your scrapbook or upload new photos.
Caution: Consider Carefully Which Photos Are Appropriate for Your Scrapbook
Displaying a public photo scrapbook at the top of your profile is optional. If you do decide to use this feature, consider carefully the photos you want to represent you and display to the public. For example, I use my profile photo scrapbook to display cover photos of my recent books.
6. Click the Select a Photo from Your Computer button to select photos to upload. You can upload photos in the following formats: JPG, GIF, or PNG.
Tip: Add Existing Google+ Photos to Your Scrapbook
To add any of your existing photos on Google+ to your scrapbook, click the Your Photos tab on the Add Photos to Scrapbook dialog box, select a photo, and click the Add Photos to Scrapbook button.
7. In the File Upload dialog box, select a file to upload, and click the Open button. Depending on your operating system and browser, the name of this dialog box and button could vary.
8. Continue uploading any additional photos. Google+ can display up to five photos on your profile.
9. Click the OK button to close the scrapbook area.
10. Click the Done Editing button at the top of your profile.
Your scrapbook photos now display on your photo and are available in the Scrapbook Photos album on the Albums tab of the Photos page.
To rearrange the display order of your photos, click the Manage Photos link. See Lesson 10, “Working with Photos,” for more information.
Deleting a Photo
To delete a cover or scrapbook photo, follow these steps:
1. Click the Profile icon on the Google+ ribbon.
2. Click the Edit Profile button in the upper-right corner of the page.
3. Click the Change Photos link.
4. To delete a cover photo, click the Delete Photo link and click the Delete button in the confirmation dialog box. From here, you can add a new cover photo, add a photo scrapbook, or use the Google+ default cover.
5. To delete an individual scrapbook photo, select the photo you want to delete, click the Delete Photo link that displays (see Figure 2.6), and click the Delete button in the confirmation dialog box. After deleting a photo, you can add a new photo to replace it.

Figure 2.6. Delete scrapbook photos if you want to add new ones.
6. Click the OK button to close the photo area.
7. Click the Done Editing button at the top of your profile.
Changing Your Profile Photo
When you signed up for Google+, you were prompted to add a profile photo. This photo, sized at 250px by 250px, displays on the right side of your profile (refer to Figures 2.1 and 2.2).
To change your profile photo, click the Profile icon on the Google+ ribbon, click the Edit Profile button, and click the Change Profile Photo link. The Select Profile Photo dialog box opens, where you can choose a new photo. See Lesson 1, “Introducing Google+,” if you need a reminder about how to use the options in the Select Profile Photo dialog box.
Editing Your Name
Google+ enables you to edit your name if you don’t want to display the first and last name you used when you signed up. To edit your profile name, follow these steps:
1. Click the Profile icon on the Google+ ribbon.
2. Click the Edit Profile button in the upper-right corner of the page.
3. Click your name to open a pop-up box where you can edit your first and last name. Optionally, you can click the More Options link to add a nickname and specify exactly how you want Google+ to display it.
Caution: Read Google+ Naming Rules Before Using a Nickname
Be sure to review Google+’s detailed naming guidelines before changing the name on your Google+ personal profile: http://support.google.com/plus/bin/answer.py?hl=en&answer=1228271. Google+ has very specific rules regarding the use of nicknames on your profile.
4. Click the Save button to save your changes and close the pop-up box.
5. Click the Done Editing button at the top of the Google+ page.
Editing Your Profile’s About Tab
To edit your profile’s About tab, follow these steps:
1. Click the Profile icon on the Google+ ribbon.
2. Click the Edit Profile button in the upper-right corner of the page.
3. On the About tab, which opens by default, click the section you want to edit and enter your content. Only sections for which you add content display on your profile. Figure 2.7 shows the sections available for edit on the About tab. The content you entered when you signed up for Google+ already displays here. Optionally, you can complete any additional fields you also want to display on your profile.
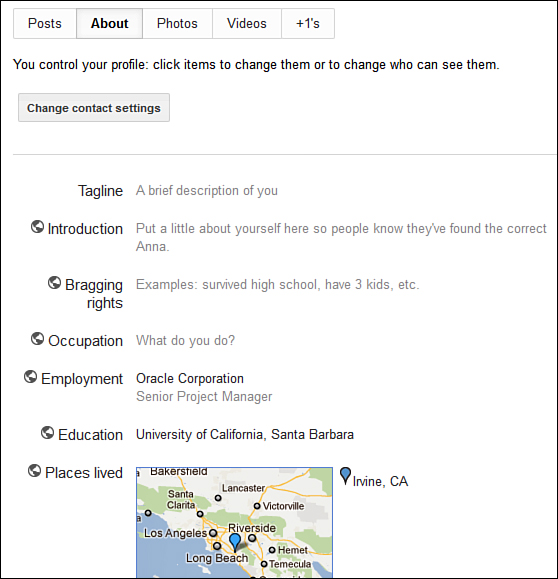
Figure 2.7. Choose the sections you want to display on your About tab.
These sections include the following:
• Tagline. Enter a tagline to display at the top of your About tab. Consider carefully what you want to display here. It’s often the first impression people have about who you are. Think of this text as a headline. By default, your tagline is always public.
• Introduction. Add a paragraph or two about yourself. The Introduction dialog box includes buttons that enable you to bold, italicize, and underline text; add bulleted and numbered lists; and add links to external websites. If you make a mistake, click the Remove Formatting button to remove any formatting you applied. Figure 2.8 shows the Introduction dialog box.
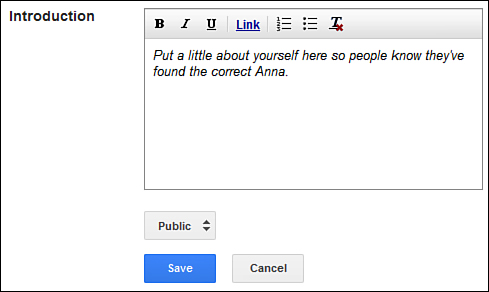
Figure 2.8. You can format text and add links to your introduction.
• Bragging Rights. Let people know about accomplishments you’re proud of—both personal and professional.
• Occupation. Enter your occupation or professional headline in the text box.
• Employment. Start typing your company name and Google+ displays potential matches from existing profiles. For example, if you work for Pearson Education, a drop-down list displays this company when you start to type its name (see Figure 2.9). Optionally, enter your title and employment dates for each job and click the Current check box if you’re currently employed with that company. If you make a mistake, click the Remove Item button (X) to delete a row.
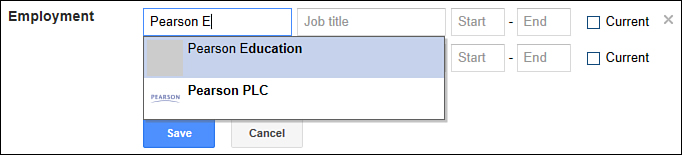
Figure 2.9. Google+ displays potential employer matches in a drop-down list.
• Education. Start typing your school name and Google+ displays potential matches from existing profiles. For example, if you attended Stanford University, a drop-down list displays this school when you start to type its name. Optionally, enter your major and attendance dates for each school and click the Current check box if you’re a current student. If you make a mistake, click the Remove Item button (X) to delete a row.
• Places Lived. Type the names of cities where you’ve lived to display them on a map on your profile.
• Home. Enter your home contact information, such as your home phone number, mobile phone number, email address, and so forth. If you choose to enter data in this section, be sure to consider your privacy options carefully.
• Work. Enter your work contact information, such as your work phone number, mobile phone number, email address, and so forth. If you choose to enter data in this section, be sure to consider your privacy options carefully.
• Relationship. Select one of ten relationship status options if you want to broadcast your personal status to your Google+ friends.
• Looking For. Select one of the following relationship goals if you want to let others know what you’re looking for: friends, dating, a relationship, or networking.
• Gender. Select one of the three options Google+ provides: male, female, or other.
• Other Names. Enter other names, such as a maiden name.
• Profile Discovery. Specify whether you want to make your profile available in search results, such as on Google, Yahoo!, or Bing. This option is most useful if you want to use your profile to promote a business or your expertise as a job candidate.
• Other Profiles. Display links to your website and your profiles on other social sites. See “Adding Links on Your Google+ Profile” later in this lesson for more information about adding links.
• Contributor To. Display links to sites you contribute to.
• Recommended Links. Display links to interesting websites you would recommend to others.
4. Select your privacy options for each section from the drop-down list. See “Specifying Profile Privacy by Section” next in this lesson for more information.
5. Click the Save button to save your changes for each section.
6. Click the Done Editing button at the top of the Google+ page.
Specifying Profile Privacy by Section
To specify who can view a profile section, click the drop-down list on that section to display the privacy options available (see Figure 2.10).
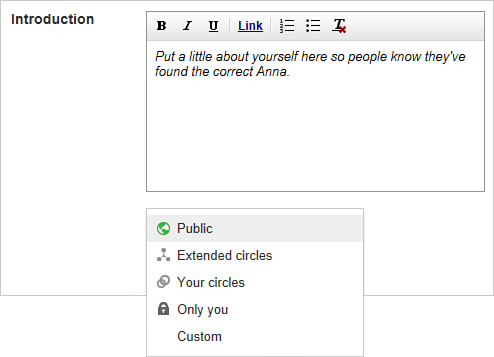
Figure 2.10. You have control over who sees each section of your profile.
Your options include the following:
• Public. Make the section public, available to anyone on the Web whether or not they are in your circles. This option is most suited to public figures or those who want to use their profile for marketing purposes.
• Extended Circles. Share with the people who are in your circles’ circle. For example, if your friend Sara is in one of your circles, the people in her circles would also be able to view your content.
• Your Circles. Share with people in your own circles. This is the default selection.
• Only You. Ensure maximum privacy for this data. You’re the only person who can view it. You can also simply delete the content in a section to remove it from your profile.
• Custom. Specify exactly who can view this section. For example, you could display a section to your “Family” and “Friends” circles, but not to your “Business” circle.
Tip: Review Your Profile Privacy Any Time You Create New Circles
If you want to restrict access to profile sections by circle, edit your profile again after creating new circles. See Lesson 4, “Managing Your Network with Circles,” for more information about creating circles.
See Lesson 5, “Managing Google+ Settings and Privacy,” for information about additional Google+ privacy options.
Adding Links on Your Google+ Profile
Adding links on your Google+ profile can help drive traffic to your other sites. You can add links to your profiles on sites such as Facebook, LinkedIn, or Twitter; sites you contribute to; or sites you recommend.
To add links on your Google+ profile, follow these steps:
1. Click one of the following About tab sections to open the related dialog box: Other Profiles, Contributor To, or Recommended Links. For example, if you click the Other Profiles section, the Other Profiles dialog box opens. The process for adding links to each of these sections is the same.
2. Click the Add Custom Link link (see Figure 2.11).
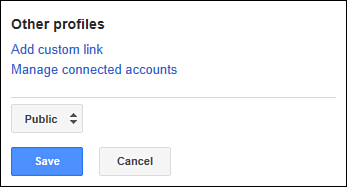
Figure 2.11. Link to your website, blog, or other social site.
Tip: Let Google+ Find Potential Profile Links for You
If you have profiles on other sites, you can let Google find them for you and add a link on your Google+ profile automatically. To do so, click the Manage Connected Accounts link on the Other Profiles dialog box to open the Connected Accounts page. On this page, you can connect Google+ with your profile on sites such as Facebook, Yahoo!, Flickr, LinkedIn, Quora, Twitter, Yelp, Hotmail, MySpace, Plaxo, and last.fm. For more information about connecting accounts, see Lesson 5.
3. Enter the name for your link in the first text box. For example, if you want to link to your website or blog, enter its name.
4. Enter the complete URL of your website, such as www.patricerutledge.com.
5. Repeat steps 2 through 4 until you finish adding links. You can reposition links by dragging the bar to the left of a link name (see Figure 2.12).
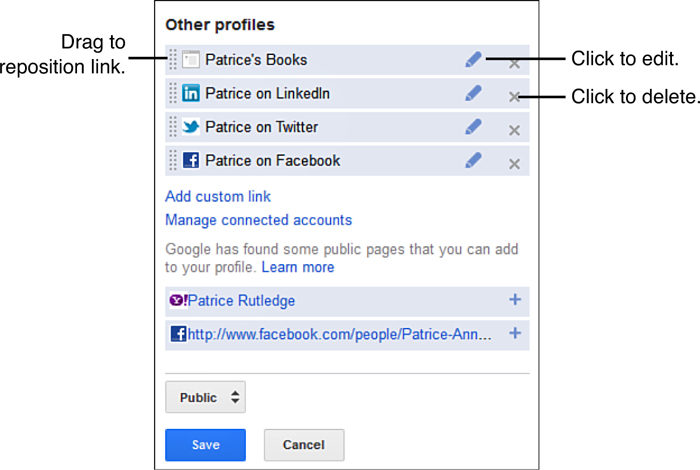
Figure 2.12. You can reposition, edit, or delete links in the Other Profiles dialog box.
6. Select your privacy options from the drop-down list. See “Specifying Profile Privacy by Section” earlier in this lesson for more information.
7. Click the Save button to save your changes and close the dialog box.
8. Click the Done Editing button at the top of the Google+ page.
Figure 2.13 shows an example of links on a Google+ profile.
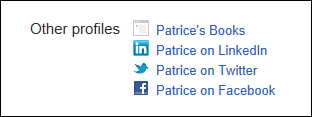
Figure 2.13. Some sample links on a Google+ profile.
After adding links to your Google+ profile, you can:
• Change a link’s display order by dragging the handle to the left of its name in the dialog box (refer to Figure 2.12).
• Edit the link content by clicking the Edit Link button.
• Delete the link by clicking the Remove Item button.
Specifying the Tabs to Display on Your Profile
In addition to the About tab, Google+ profiles display several other tabs. You can choose which tabs to display and who can view them.
To specify which tabs to display on your profile, follow these steps:
1. Click the Profile icon on the Google+ ribbon.
2. Click the Edit Profile button in the upper-right corner of the page.
3. Select the tab you want to edit and make any changes. These include the following:
• Posts. Google+ requires you to display the Posts tab, so there are no edit options for posts. When people click this tab, they view your Google+ posts based on the security settings you applied to them.
• Photos. The Photos tab displays photos you uploaded to Google+. If you don’t want to display this tab, remove the check mark next to the Show This Tab on Your Profile check box and click the Save button (see Figure 2.14). The tab also enables you to:
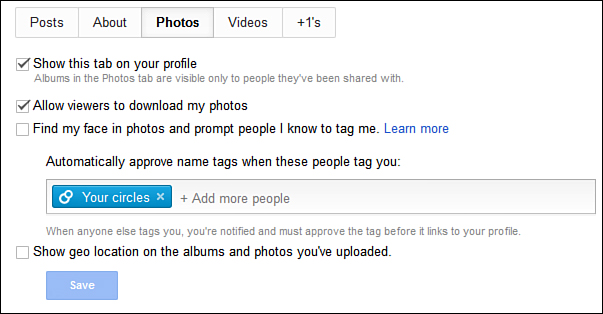
Figure 2.14. Control how photos display on your profile.
• Allow viewers to download your photos
• Find your face in photos, prompt the people in your circles to tag you, and specify whose tags to approve automatically. See Lesson 10, for more information about photo tagging.
• Show a geographic location on the albums and photos you uploaded.
• Videos. The Videos tab displays videos you uploaded to Google+. If you don’t want to display this tab, remove the check mark next to the Show This Tab on Your Profile check box and click the Save button. See Lesson 6, “Sharing Content on Google+,” for more information about posting videos on Google+.
• +1’s. The +1’s tab displays your +1 activity across the Web. For example, if you read an interesting blog post on another website and clicked the post’s +1 button to show your support, it would display on this tab. If you don’t want to display the +1’s tab, remove the check mark next to the Show This Tab on Your Profile check box and click the Save button.
4. Click the Done Editing button at the top of the Google+ page.
Specifying Your Contact Settings
Optionally, you can allow your profile visitors to contact you on Google+ in two ways. You can display the:
• Message button at the top of your profile, to the right of your name (refer to Figure 2.2). When someone sends you a message, Google+ sends you a notification. See Lesson 7, “Viewing Your Google+ Stream,” for more information about notifications. No one else can view a message another user sends just to you.
• Send [First Name] an Email link at the bottom of the right profile column, below the photos of people in your circles. When someone sends you an email (to the email address associated with your Google+ account), Google doesn’t reveal your actual email address.
Google+ enables you to control who sees these contact options on your profile: the public, people in your circles, people in your extended circles, a custom group of people, or no one.
To specify who can view these contact options on your profile, follow these steps:
1. Click the Profile icon on the Google+ ribbon.
2. Click the Edit Profile button in the upper-right corner of the page.
3. Click the About tab.
4. Click the Change Contact Settings button.
5. If you want to let people send you a message on Google+, select the Allow People to Send You a Message from a Link on Your Profile check box (see Figure 2.15).
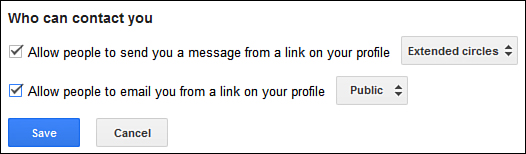
Figure 2.15. You can specify who can send you a message on Google+.
6. If you want to receive email from your Google+ profile visitors, select the Allow People to Email You from a Link on Your Profile check box.
7. From the drop-down lists next to each option, specify who can view these contact options on your profile. See “Specifying Profile Privacy by Section” earlier in this lesson for more information about each option.
8. Click the Save button to save your changes.
9. Click the Done Editing button at the top of the page.
Specifying the People to Display on Your Profile
When someone visits your Google+ profile, the right column displays photos of the people you share in common, the people in your circles, and the people who have you in their circles. Hovering over someone’s photo opens a pop-up box with more information about that person. If you want to restrict who can view your Google+ network or remove this section from your profile completely, you can do so.
To specify the people who display on your profile and who can view them, follow these steps:
1. Click the Profile icon on the Google+ ribbon.
2. Click the Edit Profile button in the upper-right corner of the page.
3. Click the In Your Circles text on the right column of your profile.
4. Verify that the In Your Circles check box is selected if you want to display people in your circles on your profile (see Figure 2.16). Otherwise, remove the check mark next to this check box and skip to step 7.
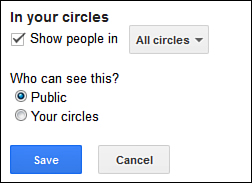
Figure 2.16. Determine which people display on your profile.
5. From the drop-down box, select which circles you want to display. You can display people in all circles or only selected circles. For example, you might want to display business associates but not family members.
6. Specify who can see this section on your profile: anyone on the Web (public) or only people in your circles.
7. Click the Save button to save your changes.
8. Click the Have You in Circles text on the right column of your profile.
9. Verify that the Have You in Circles check box is selected if you want to display the people who have you in circles on your profile. Otherwise, remove the check mark next to this check box.
10. Click the Save button to save your changes.
11. Click the Done Editing button at the top of the page.
Viewing Your Profile as Others See It
After you finish making edits to your page, you might want to see how your profile changes display to others.
To view your Google+ profile as others see it, follow these steps:
1. Click the Profile icon on the Google+ ribbon.
2. Click the View As button at the top of the page.
3. Click the Public button to view the public version of your profile (see Figure 2.17).
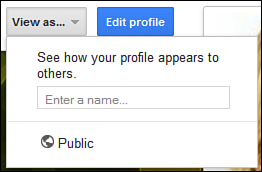
Figure 2.17. You can preview how your profile looks to the world—or to a specific person.
4. If you want to preview how your profile displays to a specific person (such as someone in one of your circles), start typing that person’s name in the text box. Google+ searches for and displays matches in your circle. Click the name of a person to view your profile as that person sees it.
5. If your profile displays unexpected results, click the Edit Profile button to make profile changes.
6. When you’re finished previewing your profile, select Stop Viewing as Public from the Viewing as Public drop-down menu.
Adding a Google+ Profile Button to Your Website
If you want to attract more people to your Google+ profile, you can add a Google+ profile button to your website or blog. Adding this button is also a good way to identify site ownership so that your website content displays on the +1’s tab of your Google+ profile. To do so, visit the Google Profile Button page at www.google.com/webmasters/profilebutton. If you use WordPress, consider adding a googleCard to your sidebar using the googleCards plugin (http://plusdevs.com/google-wordpress-plugin).
Summary
In this lesson, you learned how to edit and manage your profile. Next, learn how to create a Google+ page for a business, a brand, or an organization.