
Welcome to Day 9! Today you're going to start learning how to create your own custom JSP tags. So far, you've used the built-in tags in JSP, like <% ... %> or <jsp:getProperty>. Today, you'll start going beyond that and begin creating your own JSP tags—and connecting Java code to those tags. Here are today's topics:
Understanding and installing custom JSP tags
Using the available Jakarta tag libraries
Using the
Requesttag library in depthCreating a simple tag
Creating tag descriptor files
Installing tag libraries using
web.xmlWriting Java code for a simple tag
Using the simple tag you've created
You'll see what custom tag libraries are available already, and how to put one of them—the Jakarta Request tag library—to work. You'll see that it takes a little extra work to install and use tag libraries, even more work than installing and using a bean.
That raises the question—why not just use beans in the first place, instead of custom tags? To some degree, it's a matter of taste—the reason usually given to use custom tags instead of beans is that bean code doesn't have direct access to the request and response objects, and custom tag code does. However, you can pass those objects to bean methods, so that's not an insurmountable complaint. On the other hand, after you've installed a custom tag library, custom tags can be a lot easier to use in JSP than continual <jsp:useBean>, <jsp:getProperty>, and <jsp:setProperty> elements. Custom tags also do a better job than beans of separating your code from your data, which is a big topic in JSP programming these days.
The biggest reason why custom tags are becoming popular is that no programming is involved to use them—you don't have to interface to a bean, and you don't have to use any Java code at all. That makes it easier to bring newcomers to JSP, which is one of the reasons why the creators of JSP like custom tags. As you master both beans and custom tags, you'll see that some applications are better suited to one or the other technique. And it's certainly true that knowing how to create custom tags is something you need to know if you want to be a JSP programmer.
In fact, creating your own tags can seem to be a formidable task at first—you have to modify Tomcat configuration files, write the Java code, create a tag library descriptor, and more. The work you'll see today will take you through the process; after you get used to it, it's not so difficult. Today's discussion will start with an overview of tag libraries, which is how you support custom tags.
Tag libraries are composed of a set of custom tags. JSP custom tags were introduced in JSP version 1.1, and new features were added in JSP version 1.2. When you create a custom tag, you really have a great deal of freedom—you can access the contents of the tag in Java code and work with it just as any other JSP tag. You'll see how that works at the end of today and the beginning of tomorrow's material.
On the other hand, there are many JSP tag libraries that contain custom tags that already exist. The Jakarta Apache project (the same people who bring you the Tomcat server) has a substantial collection of tag libraries available for free download, and you can find them at http://jakarta.apache.org/taglibs.
Here are the Jakarta tag libraries that have been released as final:
Application Taglib—. This custom tag library contains tags that can be used to access information contained in Web applications.DateTime Taglib—. Contains tags that can be used to handle date- and time-related functions. Tags are supported for formatting dates, generating aDatefrom HTML form input, using time zones, and localization.Mailer Taglib—. You can use this custom tag library to send email.Page Taglib—. Contains tags that can be used to access all the information about the JSP page itself.Random Taglib—. TheRandomtag library creates code that creates random strings and random numbers.Regexp Taglib—. TheRegexpcustom tag library contains tags that can be used to perform regular expressions in Perl syntax that are used in search text for matches to text patterns you specify.Request Taglib—. Contains tags that can be used to access all the information about the HTTP request for a JSP page.Response Taglib—. Contains tags that can be used to set all the information for an HTTP response for a JSP page.Session Taglib—. Contains tags for reading or modifying session information.XSL Taglib—. This tag library can perform XSL Transformations, with which you can translate XML documents into other formats, such as HTML, plain text, and more.
Besides these well-established tag libraries, Apache is putting together the JSP Standard Tag Library (JSTL), which is in the testing stages (beta version 2) as of this writing. JSTL might become a built-in part of future JSP versions, and you can find a tutorial on it at http://java.sun.com/webservices/docs/ea1/tutorial/doc/JSTL.html. Here's what Apache says about JSTL on that page:
JSTL has support for common, structural tasks such as iteration and conditionals, tags for manipulating XML documents, internationalization tags, and tags for accessing databases using SQL. It also introduces the concept of an expression language to simplify page development and includes several experimental languages. JSTL also provides a framework for integrating existing custom tags with JSTL tags.
Tip
You can also download the JSTL specification at http://jcp.org/aboutJava/communityprocess/first/jsr052/.
To get an idea of how custom JSP tags work and what they can do, you'll work with the Jakarta Request tag library today.
As you might expect, the Request tag library lets you work with the request object. For example, this tag library includes tags that you can use to call most request object methods (see Tables 4.1 and 4.2 in Day 4, “Reading Data from Web Pages: Buttons and Text Fields,” for those methods). After installing this library, you'll work through one of the Request tag library examples here:
<req:existsHeader name="User-Agent">
   User-Agent=<req:header name="User-Agent"/>
</req:existsHeader>
In this case, the <req:existsHeader> and <req:header> elements are made with custom tags from the Request library. The <req:existsHeader> tag checks to see whether a particular header exists in the request object—here, the code is checking for the User-Agent header, which tells you what browser the user is using (as discussed in Day 4). The <req:header> tag gets the actual text in the header itself.
You don't have to use these custom tags, of course—you could use code like this to perform the same action:
<%
if(request.getHeader("User-Agent") != null) {
   out.println("User-Agent=" + request.getHeader("User-Agent");
}
%>
This points out the biggest reason to use custom tags—they let you avoid writing and debugging Java code in your JSP pages. If you don't know how to write this Java code, but you do know how to use the custom tags, you're still able to accomplish the same tasks.
To find out how to install and use a tag library, download the Jakarta Request tag library at http://jakarta.apache.org/builds/jakarta-taglibs/releases/request/.
Tip
If for some reason the Request tag library has been moved by the time you read this, go to http://jakarta.apache.org/taglibs/index.html and click the link for the Request Taglib, which should take you to that library.
Downloading the Request tag library means downloading a compressed file such as jakarta-taglibs-request-1.0.zip for Windows, or jakarta-taglibs-request-1.0.tar.gz for Unix. To unzip those files, you'll need an unzipping utility program that can handle compressed files.
When you unzip the compressed Request tag library file, you'll get four files:
request.tld—. The tag library descriptor file for this custom tag library. This file will normally be copied to the/WEB-INFsubdirectory within your Web application.request.jar—. A Java Archive (JAR) file containing the Java classes for this custom tag library. This file will normally be copied to the/WEB-INF/libsubdirectory within your Web application.request-doc.war—. A Web Archive (WAR) file containing developer documentation describing how to use the tags in this custom tag library in your own application.request-examples.war—. A WAR file containing examples that illustrate the use of this custom tag library.
The next step is to install these files.
To use the Request tag library, follow these steps (these steps are already done in the downloadable code for this book):
Create the
webappsch09directory.Copy the
request.tldfile to a directory namedwebappsch09WEB-INF.Copy the
request.jarfile to a directory namedwebappsch09WEB-INFlib.
The Request tag library comes with a set of examples, and you'll see one of those examples at work here. To access the examples, unzip the file request-examples.war. You can use a standard zip utility to do this, such as WinZip for Windows (www.winzip.com/). Alternatively, you can use the JAR tool that comes with Java:
C:directory>jar xvf request-examples.war
Included in the unzipped files are the ones you'll need to run the Request tag library example—index.html, request.jsp, and web.xml. Here's how to install these files (this is already done in the downloadable code for this book):
Copy
index.htmlandrequest.jsptowebappsch09.Copy the
web.xmlfile to thewebappsch09WEB-INFsubdirectory.
Note that in the downloadable code, the Jakarta examples index.html and request.jsp are renamed ch09_01.html and ch09_02.jsp for consistency with the standard numbering throughout the book.
Now start Tomcat—if it's already running, shut it down and start it again (as you must do when you install newly compiled Java code you want to use). Navigate to index.html if you've gotten this example from the Apache Web site, or ch09_01.html if you've downloaded the code for the book—you should see the results in Figure 9.1.
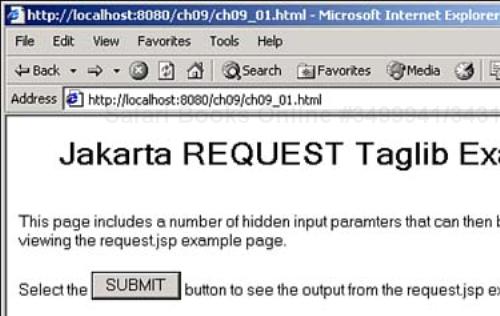
You can see this page's HTML in Listing 9.1. The page you see in Listing 9.1 will send its data—including that in several hidden controls—to another page, which will use Request tag library tags to decipher what's going on in the request object.
Example 9.1. The Jakarta Request Tag Library Example (ch09_01.html)
<!doctype html public "-//w3c//dtd html 4.0 transitional//en">
<html>
<head>
   <meta http-equiv="Content-Type" content="text/html; charset=iso-8859-1">
</head>
<body bgcolor="#FFFFFF">

<center>
<h1>
Jakarta REQUEST Taglib Example</h1></center>
<br>
<p>This page includes a number of hidden input paramters that can then
be seen when viewing the request.jsp example page.<br><br>
<form action="request.jsp" method="POST">
<input type="hidden" name="test1" value="This is a test">
<input type="hidden" name="test2" value="This is another test">
<input type="hidden" name="test3" value="This is a third test">
<input type="hidden" name="test3" value="Third test with multiple values">
<input type="hidden" name="test4" value="AAbb">

Select the <input type="submit" name="submit" value="SUBMIT"> button to
see the output from the request.jsp example page.
</form>
<br>
See the source from the <a href="request.html">request.jsp</a> example page.
</body>
</html>
Click the Submit button in Figure 9.1—you should see the new page that appears in Figure 9.2 (and if you don't, you might download the code for this book and use that, which already has request.jar and so on installed).
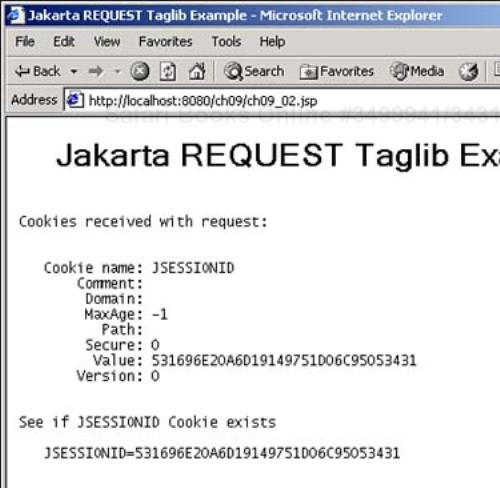
As you can see in Figure 9.2, the target JSP page has decoded the request header and displayed its contents. Only a little of that information is visible in Figure 9.2, so here's the whole thing—you'll be seeing more on this output in a few pages as you work through the code that produced it:
Jakarta REQUEST Taglib Example
Cookies received with request:

   Cookie name: JSESSIONID
       Comment:
        Domain:
        MaxAge: -1
          Path:
        Secure: 0
         Value: 44454937C05623D4121E3B8ED9F36C75
       Version: 0

See if JSESSIONID Cookie exists
   JSESSIONID=44454937C05623D4121E3B8ED9F36C75

HTTP Headers received with request:
   accept = image/gif, image/x-xbitmap, image/jpeg,
   image/pjpeg, application/msword, application/vnd.ms-excel,
application/vnd.ms-powerpoint, */*
   referer = http://localhost:8080/ch09/ch09_01.html
   accept-language = en-us
   content-type = application/x-www-form-urlencoded
   accept-encoding = gzip, deflate
   user-agent = Mozilla/4.0 (compatible; MSIE 6.0;
   Windows NT 5.0; COM+ 1.0.2204; .NET CLR 1.0.3512)
   host = localhost:8080
   content-length = 137
   connection = Keep-Alive
   cache-control = no-cache
   cookie = JSESSIONID=44454937C05623D4121E3B8ED9F36C75

See if User-Agent Header exists
   User-Agent=Mozilla/4.0 (compatible; MSIE 6.0;
   Windows NT 5.0; COM+ 1.0.2204; .NET CLR 1.0.3512)

GET or POST Parameters received with request:

   test4 = AAbb
   test3 = This is a third test
   test2 = This is another test
   test1 = This is a test
   submit = SUBMIT

GET or POST Parameters received with request for test3:
   test3 = This is a third test
   test3 = Third test with multiple values

See if test1 parameter exists
   test1=This is a test

See if parameter test4 equals "aabb"
  Parameter test4 does not equal "aabb".

See if test4 equals "aabb", ignoring case
  test4=AAbb

Set an attribute named "myatt"

See if myatt attribute exists
   myatt=AAbb

Set an attribute named "myatt2" to the Header User-agent

See if myatt equals "aabb"
  Attribute myatt does not equal "aabb".

See if myatt equals "aabb", ignoring case
  myatt=AAbb

Now loop through all the attributes
   myatt2 = Mozilla/4.0 (compatible; MSIE 6.0; Windows NT 5.0;
   COM+ 1.0.2204; .NET CLR 1.0.3512)
   myatt = AAbb

Now remove the attribute myatt

See if myatt attribute exists
   Attribute myatt does not exist.

Request Information:
AuthType:
ContextPath: /ch09
Method: POST
PathInfo:
PathTranslated:
QueryString:
RemoteUser:
RequestedSessionId: 44454937C05623D4121E3B8ED9F36C75
RequestURI: /ch09/ch09_02.jsp
RequestURL: http://localhost:8080/ch09/ch09_02.jsp
ServletPath: /ch09_02.jsp
CharacterEncoding:
ContentLength: 137
ContentType: application/x-www-form-urlencoded
Protocol: HTTP/1.1
RemoteAddr: 127.0.0.1
RemoteHost: 127.0.0.1
Scheme: http
ServerName: localhost
ServerPort: 8080
IsSecure? Session is not using HTTPS.
IsSessionFromCookie? Session is using a cookie.
IsSessionFromURL? Session is not using a URL.
IsSessionValid? Session is not valid.
IsUserInRole "admin"? User is not in role admin.
Log a message to the servlet context log.
This output is created by ch09_02.jsp using custom tags from the Request tag library. You can see how this works in ch09_02.jsp, which appears in Listing 9.2.
Example 9.2. The Jakarta Request lib Example (ch09_02.jsp)
<!doctype html public "-//w3c//dtd html 4.0 transitional//en"> <html> <head> <title>Jakarta REQUEST Taglib Example</title> </head> <body bgcolor="white"> <center> <h1> Jakarta REQUEST Taglib Example</h1></center> <br> <%@ taglib uri="http://jakarta.apache.org/taglibs/request-1.0" prefix="req" %> <p> <pre> Cookies received with request: <req:cookies id="oatmeal"> Cookie name: <jsp:getProperty name="oatmeal" property="name"/> Comment: <jsp:getProperty name="oatmeal" property="comment"/> Domain: <jsp:getProperty name="oatmeal" property="domain"/> MaxAge: <jsp:getProperty name="oatmeal" property="maxAge"/> Path: <jsp:getProperty name="oatmeal" property="path"/> Secure: <jsp:getProperty name="oatmeal" property="secure"/> Value: <jsp:getProperty name="oatmeal" property="value"/> Version: <jsp:getProperty name="oatmeal" property="version"/> </req:cookies> See if JSESSIONID Cookie exists <req:existsCookie name="JSESSIONID"> JSESSIONID=<req:cookie name="JSESSIONID"/> </req:existsCookie> <req:existsCookie name="JSESSIONID" value="false"> Cookie JSESSIONID does not exist. </req:existsCookie> HTTP Headers received with request: <req:headers id="hdrs"> <jsp:getProperty name="hdrs" property="name"/> = <jsp:getProperty name="hdrs"property="header"/> </req:headers> See if User-Agent Header exists <req:existsHeader name="User-Agent"> User-Agent=<req:header name="User-Agent"/> </req:existsHeader> <req:existsHeader name="User-Agent" value="false"> Header User-Agent does not exist. </req:existsHeader> GET or POST Parameters received with request: <req:parameters id="param"> <jsp:getProperty name="param" property="name"/> = <jsp:getProperty name="param"
Now let's take a closer look at the code in Listing 9.2.
<%@ taglib uri="http://jakarta.apache.org/taglibs/request-1.0" prefix="req" %>
<req:headers id="hdrs">
        .
        .
        .
</req:headers>
This is much like using jsp in tags like <jsp:forward>; jsp is the prefix there, and the prefix is set to req for the Request tag library's tags in this example. The URI and prefix attributes are the only two attributes that the taglib directive has. You'll see how to connect a URI to a tag library later today.
Now that you've indicated that you want to use a tag library, you can put the tags in it to work.
The Jakarta Request tag library supports a tag named <req:headers> that lets you loop over all request headers automatically. Here's what that looks like in code, where the <req:headers> tag creates an object with the ID hdrs that you can use with the <jsp:getProperty> element to get both the name and the value of each header:
HTTP Headers received with request: <req:headers id="hdrs"> <jsp:getProperty name="hdrs" property="name"/> = <jsp:getProperty name="hdrs"
Pretty useful, isn't it? You can loop over all request headers without even using any code. Here's what the output looks like in the created Web page:
HTTP Headers received with request: accept = image/gif, image/x-xbitmap, image/jpeg, image/pjpeg, application/msword,
The Request tag library also supports an element named <req:existsHeader> that checks whether a header exists, and an element named <req:header> (not <req:headers>) to get the value of a single header. These elements are used to check whether the User-Agent header exists, and if so, to display its value:
See if User-Agent Header exists
<req:existsHeader name="User-Agent">
   User-Agent=<req:header name="User-Agent"/>
</req:existsHeader>
<req:existsHeader name="User-Agent" value="false">
   Header User-Agent does not exist.
</req:existsHeader>
Here's the result, where you can see that the user has Microsoft Internet Explorer version 6.0:
See if User-Agent Header exists User-Agent=Mozilla/4.0 (compatible; MSIE 6.0; Windows NT 5.0; COM+ 1.0.2204; .NET CLR 1
The biggest reason JSP programmers work with the request object is to get request parameters that the user has sent using HTML controls, of course. This example has a few hidden controls that it sends to the server:
<input type="hidden" name="test1" value="This is a test">
<input type="hidden" name="test2" value="This is another test">
<input type="hidden" name="test3" value="This is a third test">
<input type="hidden" name="test3" value="Third test with multiple values">
<input type="hidden" name="test4" value="AAbb">
To read request parameters, you can use the <req:parameters> element to loop over all parameters, just as the <req:headers> element looped over all headers. Here's what the code looks like to display all request parameters:
GET or POST Parameters received with request: <req:parameters id="param"> <jsp:getProperty name="param" property="name"/> = <jsp:getProperty name="param"
You can also handle multiple values for a parameter, as with the test3 parameter, which has two values. In that case, you can use the <req:parameterValues> element to loop over all parameter values, and use the <jsp:getProperty> element to get the parameter values:
GET or POST Parameters received with request for test3: <req:parameters id="param" name="test3"> <req:parameterValues id="pv"> <jsp:getProperty name="param" property="name"/> = <jsp:getProperty name="pv"
As you'd expect, you can also access individual parameter values, for which you use the <req:parameter> element. You can also test whether a parameter exists with the <req:existsParameter> element:
See if test1 parameter exists
<req:existsParameter name="test1">
   test1=<req:parameter name="test1"/>
</req:existsParameter>
<req:existsParameter name="test1" value="false">
   Parameter test1 does not exist.
</req:existsParameter>

See if parameter test4 equals "aabb"
<req:equalsParameter name="test4" match="aabb">
  test4=<req:parameter name="test4"/>
</req:equalsParameter>
<req:equalsParameter name="test4" match="aabb" value="false">
  Parameter test4 does not equal "aabb".
</req:equalsParameter>
See if test4 equals "aabb", ignoring case
<req:equalsParameter name="test4" match="aabb" ignoreCase="true">
  test4=<req:parameter name="test4"/>
</req:equalsParameter>
<req:equalsParameter name="test4" match="aabb" value="false" ignoreCase="true">
  Parameter test4 does not equal "aabb", ignoring case.
</req:equalsParameter>
Here's the result of all this code that works with the data in the hidden controls:
GET or POST Parameters received with request:

   test4 = AAbb
   test3 = This is a third test
   test2 = This is another test
   test1 = This is a test
   submit = SUBMIT

GET or POST Parameters received with request for test3:
   test3 = This is a third test
   test3 = Third test with multiple values

See if test1 parameter exists
   test1=This is a test

See if parameter test4 equals "aabb"
  Parameter test4 does not equal "aabb".

See if test4 equals "aabb", ignoring case
  test4=AAbb
Note that it's actually not much easier to use <req:parameter> and <req:parameters> than to use getParameter and getParameter. The main advantage is that you don't have to use any Java code.
The Jakarta Request tag library also lets you set request object attributes of the kind you saw at the end of Day 8, “Handling Errors.” To set an attribute, you use the <req:setAttribute> element; to check whether an attribute exists, you use <req:existsAttribute>; and to get an attribute's value, you use the <req:attribute> element. Here's how this example creates attributes named myatt and myatt2 and tests them:
Set an attribute named "myatt" <req:setAttribute name="myatt">AAbb</req:setAttribute> See if myatt attribute exists <req:existsAttribute name="myatt"> myatt=<req:attribute name="myatt"/> </req:existsAttribute> <req:existsAttribute name="myatt" value="false"> Attribute myatt does not exist. </req:existsAttribute> Set an attribute named "myatt2" to the Header User-agent <req:setAttribute name="myatt2"> <req:header name="User-Agent"/></req:setAttribute> See if myatt equals "aabb" <req:equalsAttribute name="myatt" match="aabb"> myatt=<req:attribute name="myatt"/> </req:equalsAttribute> <req:equalsAttribute name="myatt" match="aabb" value="false"> Attribute myatt does not equal "aabb". </req:equalsAttribute> See if myatt equals "aabb", ignoring case <req:equalsAttribute name="myatt" match="aabb" ignoreCase="true"> myatt=<req:attribute name="myatt"/> </req:equalsAttribute> <req:equalsAttribute name="myatt" match="aabb" value="false" ignoreCase="true"> Attribute myatt does not equal "aabb", ignoring case. </req:equalsAttribute> Now loop through all the attributes <req:attributes id="att"> <jsp:getProperty name="att" property="name"/> = <jsp:getProperty name="att"
And here's what the output looks like:
Set an attribute named "myatt" See if myatt attribute exists myatt=AAbb Set an attribute named "myatt2" to the Header User-agent See if myatt equals "aabb" Attribute myatt does not equal "aabb". See if myatt equals "aabb", ignoring case myatt=AAbb Now loop through all the attributes myatt2 = Mozilla/4.0 (compatible; MSIE 6.0; Windows NT 5.0; COM+ 1.0.2204; .NET CLR 1.0
The Request tag library also lets you call request object methods like getMethod, getRemoteUser, and so on using properties instead of actually calling those methods. To do that, you use the <req:request> element, setting its ID attribute, and then use <jsp:getProperty> elements inside the body of the <req:request> element. Here's what it looks like in code:
<req:request id="rq"/>
Request Information:
AuthType: <jsp:getProperty name="rq" property="authType"/>
ContextPath: <jsp:getProperty name="rq" property="contextPath"/>
Method: <jsp:getProperty name="rq" property="method"/>
PathInfo: <jsp:getProperty name="rq" property="pathInfo"/>
PathTranslated: <jsp:getProperty name="rq" property="pathTranslated"/>
QueryString: <jsp:getProperty name="rq" property="queryString"/>
RemoteUser: <jsp:getProperty name="rq" property="remoteUser"/>
RequestedSessionId: <jsp:getProperty name="rq" property="requestedSessionId"/>
RequestURI: <jsp:getProperty name="rq" property="requestURI"/>
RequestURL: <jsp:getProperty name="rq" property="requestURL"/>
ServletPath: <jsp:getProperty name="rq" property="servletPath"/>
CharacterEncoding: <jsp:getProperty name="rq" property="characterEncoding"/>
ContentLength: <jsp:getProperty name="rq" property="contentLength"/>
ContentType: <jsp:getProperty name="rq" property="contentType"/>
Protocol: <jsp:getProperty name="rq" property="protocol"/>
RemoteAddr: <jsp:getProperty name="rq" property="remoteAddr"/>
RemoteHost: <jsp:getProperty name="rq" property="remoteHost"/>
Scheme: <jsp:getProperty name="rq" property="scheme"/>
ServerName: <jsp:getProperty name="rq" property="serverName"/>
ServerPort: <jsp:getProperty name="rq" property="serverPort"/>
Request Information:
AuthType:
ContextPath: /ch09
Method: POST
PathInfo:
PathTranslated:
QueryString:
RemoteUser:
RequestedSessionId: 44454937C05623D4121E3B8ED9F36C75
RequestURI: /ch09/ch09_02.jsp
RequestURL: http://localhost:8080/ch09/ch09_02.jsp
ServletPath: /ch09_02.jsp
CharacterEncoding:
ContentLength: 137
ContentType: application/x-www-form-urlencoded
Protocol: HTTP/1.1
RemoteAddr: 127.0.0.1
RemoteHost: 127.0.0.1
Scheme: http
ServerName: localhost
ServerPort: 8080
There's one question that is still unanswered, however—how are the <req:xxxx> tags connected to the Java code needed to support them?
As you've seen, the Jakarta Request library example indicates that it wants to connect the prefix req to the URI http://jakarta.apache.org/taglibs/request-1.0 using the taglib directive:
<%@ taglib uri="http://jakarta.apache.org/taglibs/request-1.0" prefix="req" %>
When JSP comes across this directive, it looks in the web.xml file in the WEB-INF directory to try to resolve this URI (you'll see another way of doing this without a web.xml file tomorrow). There it finds a <taglib> element connecting the URI http://jakarta.apache.org/taglibs/request-1.0 to a tag library descriptor (TLD) file named request.tld:
<taglib>
    <taglib-uri>http://jakarta.apache.org/taglibs/request-1.0</taglib-uri>
    <taglib-location>/WEB-INF/request.tld</taglib-location>
</taglib>
Note that you use the <taglib-uri> element to specify the URI for the custom tags you want to use, and the <taglib-location> element to specify the location of their TLD file.
In this case, the TLD file is named request.tld, and the following is an excerpt from that file (the whole file is very long; you'll see how to write TLD files yourself tomorrow):
<?xml version="1.0" encoding="UTF-8"?>

<!DOCTYPE taglib PUBLIC
"-//Sun Microsystems, Inc.//DTD JSP Tag Library 1.1//EN"
"http://java.sun.com/j2ee/dtds/web-jsptaglibrary_1_1.dtd">
<taglib>
  <tlibversion>1.0</tlibversion>
  <jspversion>1.1</jspversion>
  <shortname>request</shortname>
  <uri>http://jakarta.apache.org/taglibs/request-1.0</uri>
  <info>The REQUEST custom tag library contains tags which can be used to
      access all the information about the HTTP request for a JSP page.
      Tags are provided to access information in the HTTP request for
      HTTP input parameters from a POST or GET, HTTP Headers, Cookies,
      request attributes, and session information related to this request.</info>
  <tag>
    <name>log</name>
    <tagclass>org.apache.taglibs.request.LogTag</tagclass>
    <bodycontent>JSP</bodycontent>
  </tag>
        .
        .
        .
  <tag>
    <name>existsQueryString</name>
    <tagclass>org.apache.taglibs.request.ExistsQueryStringTag</tagclass>
    <bodycontent>JSP</bodycontent>
    <attribute>
      <name>name</name>
      <required>yes</required>
      <rtexprvalue>no</rtexprvalue>
    </attribute>
    <attribute>
      <name>value</name>
      <required>no</required>
      <rtexprvalue>no</rtexprvalue>
    </attribute>
  </tag>
</taglib>
Tip
It turns out that there are two ways to write many of the elements you'll find in TLD files—with and without hyphens. For example, <tlibversion> is also written <tlib-version>, <jspversion> is also written as <jsp-version>, <tagclass> as <tag-class>, and so on. This book will stick to the more common hyphenated versions, but the request.tld file uses the non-hyphenated versions.
Take a look at the second <tag> element here, which creates the <req:existsQueryString> tag, as you see in the preceding <name> element. Beneath the <name> element comes the <tagclass> element, which connects a Java class to this element.
In this case, the class that supports the <req:existsQueryString> tag is named org.apache.taglibs.request.ExistsQueryStringTag. That class actually exists in request.jar—it's the ExistsQueryStringTag class in the org.apache.taglibs.request package. Java finds this class when it needs it by searching the classes directory first, and then the lib directory. Because org.apache.taglibs.request.ExistsQueryStringTag is in request.jar, Java is able to find it with no trouble, and you're all set.
Tip
Note also that this tag has two attributes, name and value, which are defined using the <attribute> element; you'll see more on creating attributes yourself tomorrow.
So far, you've just seen what other programmers have done. But now you've been introduced to custom tags, and you have an idea of what they can do. So what about creating such tags yourself? That's coming up next.
It's not that hard to create your own custom JSP tag, as you'll see now; this will give you a start on the process, which you'll see in more depth tomorrow.
This first simple tag will show how to create a custom tag, and it'll connect such a tag to Java code. The Java code will just print a simple message to the server console—Hello!. For that reason, you might call this tag log. If you wanted to use this custom tag in a JSP page, you could use a taglib directive similar to the following, in which we're using a fictitious URI and giving the custom tags the prefix "l":
<%@ taglib uri="http://starpowder.com/taglibs" prefix="l"%>
Now you can use the <l:log> element like this:
<l:log>
    I'm sending some text to the server console!
</l:log>
This element doesn't make use of the text I'm sending some text to the server console! here—that's simply so the user knows what's happening (this text will appear in the browser). As soon as JSP sees this element, it will execute the associated Java code. You can see this new element at work in Listing 9.3.
To connect the URI http://starpowder.com/taglibs to a tag library using web.xml, you have to add a <taglib> element to web.xml in the ch09WEB-INF directory. The web.xml file from the Jakarta Request tag library is still in that directory, so just modify it to include this <taglib> element (this is already done in the downloadable code for this book):
<?xml version="1.0" encoding="ISO-8859-1"?>
<!DOCTYPE web-app PUBLIC "-//Sun Microsystems, Inc.//DTD Web Application 2.2//EN"
    "http://java.sun.com/j2ee/dtds/web-app_2_2.dtd">
<web-app>
        <description>
  Example web application illustrating the use of tags in the
  "request" custom tag library, from the JAKARTA-TAGLIBS project.
  </description>
        <mime-mapping>
                <extension>txt</extension>
                <mime-type>text/plain</mime-type>
        </mime-mapping>
        .
        .
        .
    <taglib>
        <taglib-uri>
           http://jakarta.apache.org/tomcat/examples-taglib
        </taglib-uri>
        <taglib-location>
           /WEB-INF/example-taglib.tld
        </taglib-location>
    </taglib>
    <taglib>
        <taglib-uri>http://starpowder.com/taglibs</taglib-uri>
        <taglib-location>/WEB-INF/ch09_04.tld</taglib-location>
     </taglib>
        .
        .
        .
This connects the URI for the custom tag you're using to the tag library descriptor file, ch09_04.tld.
What's inside the tag library descriptor file, ch09_04.tld? This is the file that connects the <l:log> tag to a Java class. You start with a standard <!DOCTYPE> element of the kind you use in HTML. Here's what the standard <!DOCTYPE> element looks like in a TLD file:
<?xml version="1.0" encoding="ISO-8859-1" ?>
<!DOCTYPE taglib
    PUBLIC "-//Sun Microsystems, Inc.//DTD JSP Tag Library 1.2//EN"
    "http://java.sun.com/dtd/web-jsptaglibrary_1_2.tld">
Note the <?xml version="1.0" encoding="ISO-8859-1" ?> element, which specifies that this is an XML document (more on XML in Day 18, “Using XML and XSLT in JSP”). These lines indicate you're creating a custom tag library. To actually create that library, you use the <taglib> element:
<?xml version="1.0" encoding="ISO-8859-1" ?>
<!DOCTYPE taglib
    PUBLIC "-//Sun Microsystems, Inc.//DTD JSP Tag Library 1.2//EN"
    "http://java.sun.com/dtd/web-jsptaglibrary_1_2.tld">
<taglib>
        .
        .
        .
</taglib>
First, you describe the new tag, using the <tlib-version>, <jsp-version>, <short-name> (a short name for the tag library), <uri>, and <description> elements:
<taglib>

  <tlib-version>1.0</tlib-version>
  <jsp-version>1.2</jsp-version>
  <short-name>ch09_05</short-name>
  <uri>http://starpowder.com/taglibs</uri>
  <description>
    A simple tag
  </description>
        .
        .
        .

</taglib>
Now you can create the <l:log> tag with the <tag> element. In this element, you use the <name> element to name the tag, the <tag-class> element to connect it to a Java class, the <body-content> element to indicate how to handle the element's body, and the <description> element to add a descriptive comment to the tag. Here's what that looks like:
<taglib>

  <tlib-version>1.0</tlib-version>
  <jsp-version>1.2</jsp-version>
  <short-name>ch09_05</short-name>
  <uri>http://starpowder.com/taglibs</uri>
  <description>
    A simple tag
  </description>

  <!-- log tag -->
  <tag>
    <name>log</name>
    <tag-class>taglib.ch09_05</tag-class>
    <body-content>TAGDEPENDENT</body-content>
    <description>
    Log a message.
    </description>
  </tag>

</taglib>
You can see the complete TLD file (ch09_04.tld) in Listing 9.4.
Example 9.4. The TLD File (ch09_04.tld)
<?xml version="1.0" encoding="ISO-8859-1" ?>
<!DOCTYPE taglib
    PUBLIC "-//Sun Microsystems, Inc.//DTD JSP Tag Library 1.2//EN"
    "http://java.sun.com/dtd/web-jsptaglibrary_1_2.tld">

<taglib>

  <tlib-version>1.0</tlib-version>
  <jsp-version>1.2</jsp-version>
  <short-name>ch09_05</short-name>
  <uri>http://starpowder.com/taglibs</uri>
  <description>
    A simple tag
  </description>

  <!-- log tag -->
  <tag>
    <name>log</name>
    <tag-class>taglib.ch09_05</tag-class>
    <body-content>TAGDEPENDENT</body-content>
    <description>
    Log a message.
    </description>
  </tag>

</taglib>
This TLD file connects the <l:log> element to the Java class ch09_05.class. So how do you create that class file and where do you store it?
To create the Java support for this first custom tag, you need to write ch09_05.java. You'll see more on the details of writing this kind of Java class tomorrow, but here's what goes on in overview—you specify the package you want this class to be part of, which will be taglib here, and include these Java packages:
package taglib;

import javax.servlet.jsp.*;
import javax.servlet.jsp.tagext.*;
import java.io.IOException;
        .
        .
        .
The ch09_05 class itself is based on the Java TagSupport class, which you can indicate with the Java extends keyword. Basing your class on the TagSupport class means that certain methods will be called automatically as JSP processes your tag. For example, when the tag is first encountered, the doStartTag method is called. In this case, the code will just return the constant (defined in the TagSupport class) EVAL_BODY_INCLUDE, which will cause the contents of the <l:log> element to appear in the output:
package taglib;

import javax.servlet.jsp.*;
import javax.servlet.jsp.tagext.*;
import java.io.IOException;

public class ch09_05 extends TagSupport
{
    public int doStartTag() throws JspException
    {
        return EVAL_BODY_INCLUDE;
    }
        .
        .
        .
}
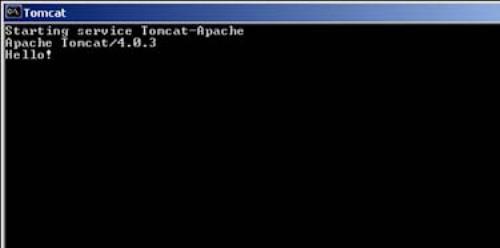
The work this tag will do takes place in the doAfterBody method, which is called after the body of the <l:log> element has been evaluated. In this case, the code will just display the message Hello! in the server console, as shown in Listing 9.5.
Example 9.5. A Simple Custom Tag (ch09_05.java)
package taglib;

import javax.servlet.jsp.*;
import javax.servlet.jsp.tagext.*;

import java.io.IOException;

public class ch09_05 extends TagSupport
{
    public int doStartTag() throws JspException
    {
        return EVAL_BODY_INCLUDE;
    }

    public int doAfterBody() throws JspException
    {
            System.out.println("Hello!");
            return SKIP_BODY;
    }
}
And that's all you need. To compile this class, you need to include servlet.jar in the Java classpath. As discussed in Day 1, that file comes with Tomcat in the jakarta-tomcat-4.0.3commonlib directory; to access servlet.jar, you have to set the CLASSPATH environment variable, also discussed in Day 1. For example, here's how you can set the CLASSPATH variable to include servlet.jar in Windows (change the path to servlet.jar as needed):
C:>SET CLASSPATH=C: omcatjakarta-tomcat-4.0.3commonlibservlet.jar
Then you just compile ch09_05.java using javac as before, which creates ch09_05.class. Store ch09_05.class in a directory you create named taglib (to match the package the code made it a part of) as a subdirectory of the classes directory—that is, in webappsch09WEB-INFclasses aglib. Then restart Tomcat so it knows about this new class, and navigate to http://localhost:8080/ch09/ch09_03.jsp, as you see in Figure 9.3.
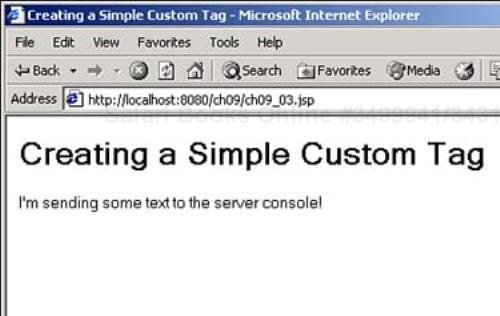
Just opening ch09_03.jsp runs the Java code you've developed for the <l:log> tag. In this case, that code simply displays the message Hello! in the server console, as you see in Figure 9.4.
And that's it—you've developed your first custom tag, and got it working! But that's just the beginning, as you'll see tomorrow. There's plenty more to come.
Today you got an introduction to custom JSP tags—how they work, and what they can do. A major attraction of custom tags is that you don't have to use Java code when you use these tags (only when you create them!). However, it takes a little effort to install them, involving the creation or editing of a web.xml file (although you'll see how to avoid this tomorrow), along with installing a TLD file and the Java .class or .jar file.
In addition, you use the taglib directive to let JSP know you're using custom tags. This directive lets you associate a URI that uniquely identifies a tag library with a prefix that you use in the tags themselves.
As an example, you learned how to use the Jakarta Request tag library, which supports tags to work with the request object. You also learned how to create a simple tag yourself. That involves using the taglib directive to associate the tag library's URI identifier with a prefix, then using that prefix in the tags in JSP code. You also learned how to add a <taglib> element in the web.xml file to connect the tag library's URI with a Java class.
In the Java class, you learned how to extend the TagSupport class and handle one or two methods called as JSP encounters your new tag. Finally, you sent some text to the server console when that tag was evaluated.
Which should I use, Java code in scriptlets, or custom tags? | |
A1: | That depends—programmers often develop custom tags for others (that is, non-programmers) to use, such as the Jakarta tag libraries. If you can write the code yourself, you might find yourself using Java in your JSP pages for shorter applications, but if you need to extend the same functionality to many pages, custom tags are a good option. |
I see that some JSP programmers are developing tag libraries and then donating them to the Apache project for use by others. How can I do that? | |
A2: | Take a look at http://jakarta.apache.org/taglibs/—in particular, the “Getting Involved” section, which will tell you all you need to know. |
This workshop tests whether you understand all the concepts you learned today. It's a good idea to master today's concepts by honing your knowledge here before starting tomorrow's material. You can find the answers to the quiz questions in Appendix A.