1. Use the tap in your kitchen sink to fill a balloon with water until it is 4 or 5 inches (10 or 12 cm) wide. Tie the end and place the balloon in a freezer. Fill more balloons and add them to the freezer as well. Try to position the balloons so that they aren’t touching each other. FIG. 2.
FIG. 2 Fill water balloons and freeze them until they are hollow globes.
2. Check the balloons periodically by tapping on the surface. When you feel a thick, solid shell of ice, remove one of the balloons from the freezer.
3. Place the balloon on a sheet pan or in a sink and use scissors to cut away the rubber.
4. Break through the weakest part of the ice to create a hole. An adult may have to help with this step if the ice is too thick to break easily.
5. Pour out the water in the middle of the globe. Check the ice for holes and return it to the freezer until you’re ready to use it. FIG. 3.
FIG. 3 Peel the balloon off the ice globes and drain out water.
6. If the ice froze evenly, you will have created a hollow globe that holds water without leaking. If it leaks, leave the balloons in the freezer for another hour or so before testing another one.
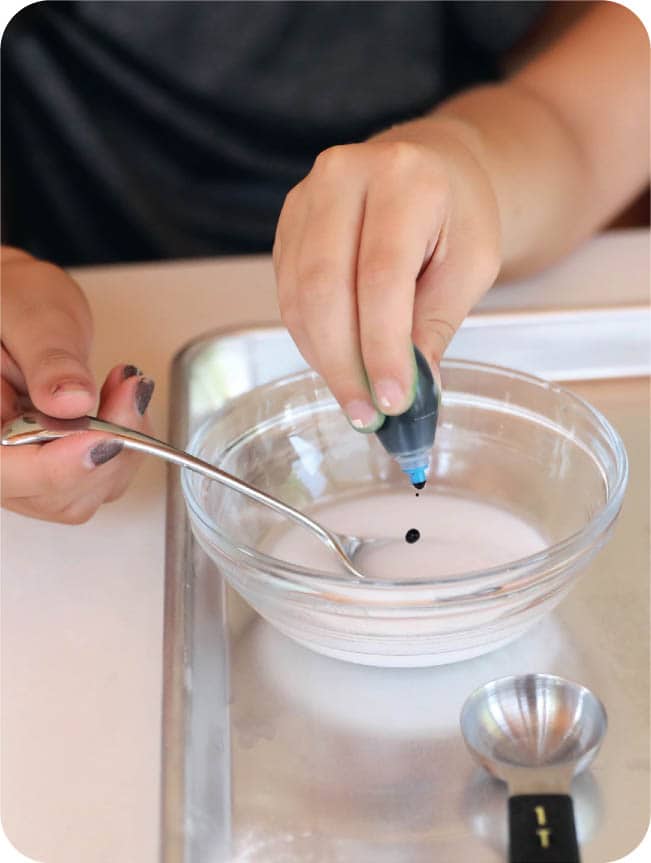
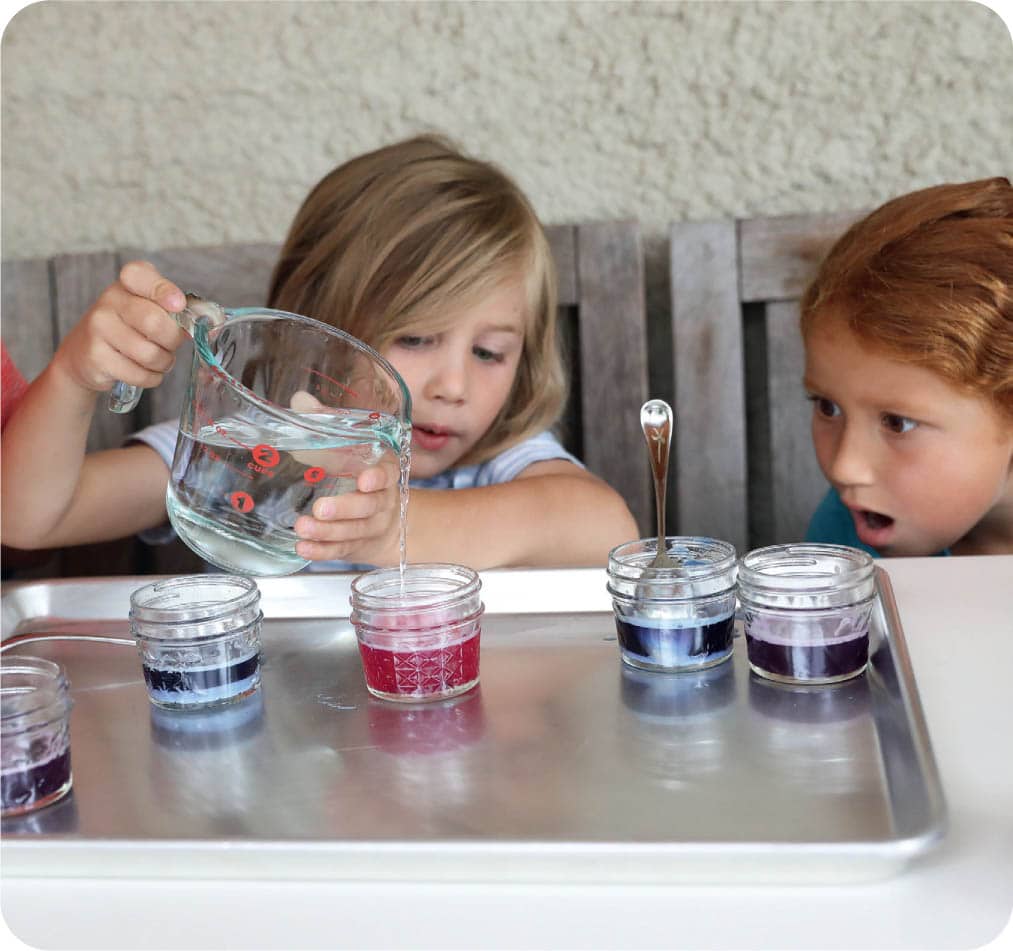
7. When you have some ice globes ready in the freezer, make “lava” solution by mixing 2 tablespoons (30 ml) water, ¼ cup baking soda, and several drops of food coloring together in a jar or glass. Make one jar of “lava” solution for each ice globe. FIG. 4.
FIG. 4 Mix water, baking soda, and food coloring.
8. Set small jars or glasses on a sheet pan to hold the ice globes. Position ice globes on the jars, hole-side up.
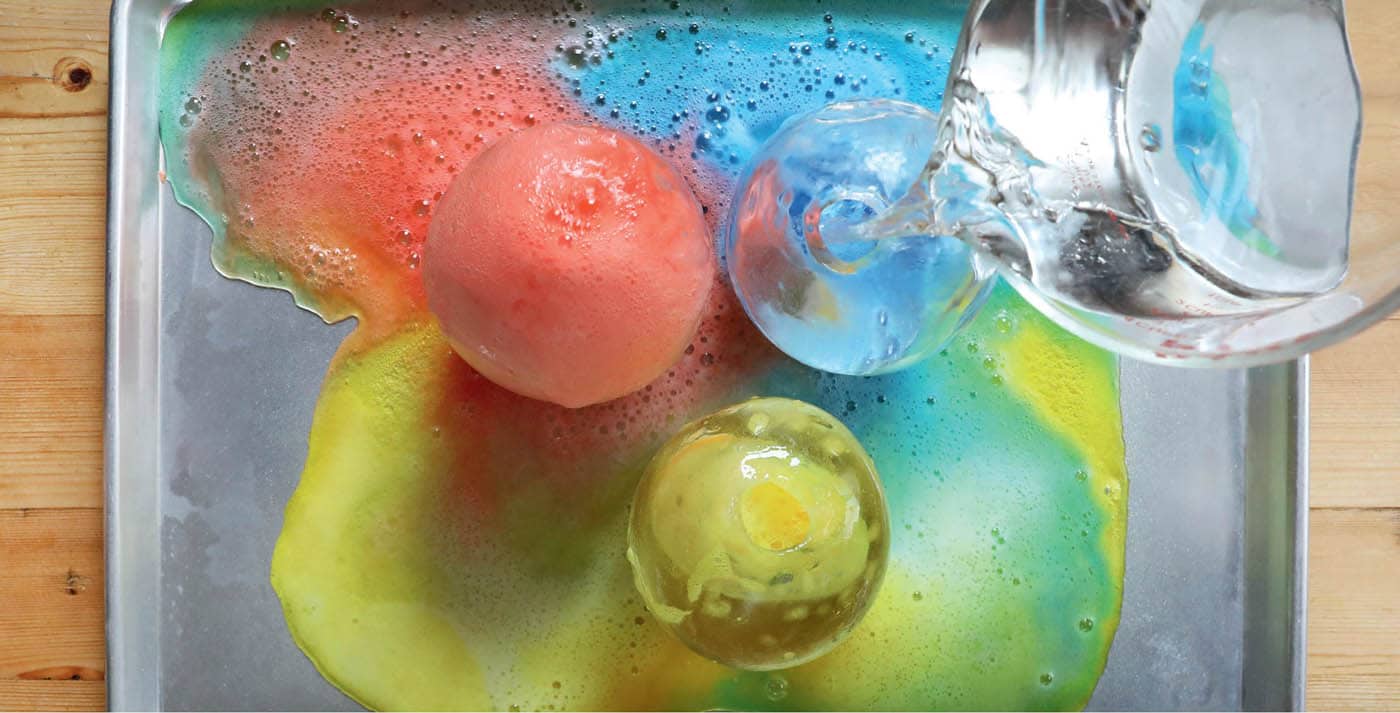
9. Fill each ice globe with “lava” solution. FIG. 5.
FIG. 5 Pour baking soda mixture into an ice globe.
10. Add vinegar to a pouring vessel such as a liquid measuring cup.
11. Make the ice globe volcanoes erupt by pouring ½ to 1 cup (120 to 240 ml) vinegar into each globe. FIG. 6.
FIG. 6 Add vinegar to the globe.
12. If there is lava solution left inside, pour more vinegar into the globes to create a second eruption of carbon dioxide bubbles. FIG. 7.
FIG. 7 Add more vinegar!
13. Try it again! Repeat the experiment using other colors. FIG. 8.
FIG. 8 Repeat the experiment using other colors.
PROTOCOL
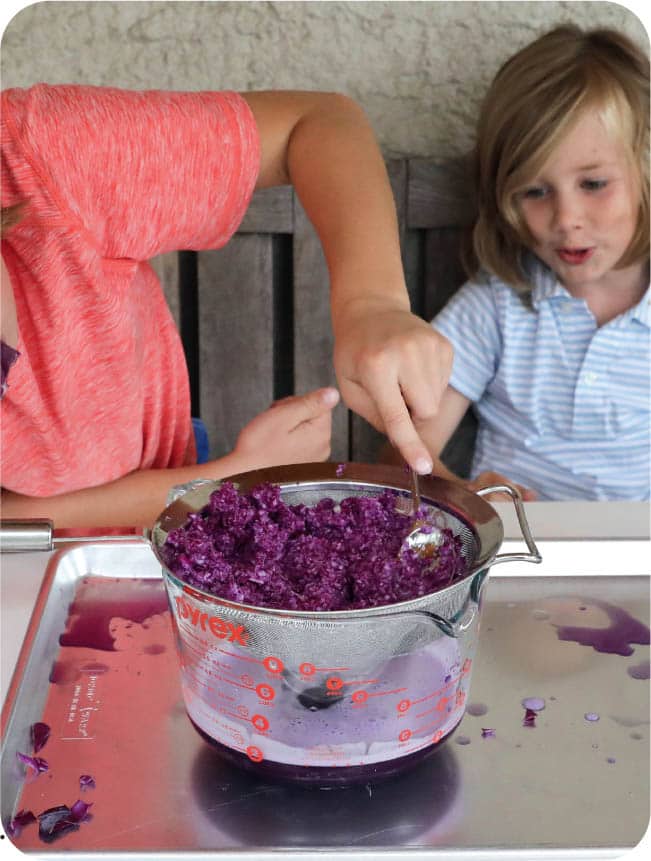
1. Chop up half a red cabbage and put it in a blender.
2. Cover the cabbage with water and blend. (If you don’t have a blender, cook the cabbage and save the purple cooking water.) FIG. 2.
FIG. 2 Blend red cabbage with water.
3. Strain out the liquid and save it. Discard the solids or cook something with them. Save the purple juice. FIG. 3.
FIG. 3 Strain out the cabbage leaves.
4. Place two clear cups or jars on a sheet pan. Add around ¼ cup (60 ml) cabbage juice to each jar or cup. FIG. 4.
FIG. 4 Pour cabbage juice into two cups or jars.
5. To one cup, add baking soda and stir. Observe the color change. FIG. 5.
2. Think about where you found the rocks. Were there any geologic structures nearby, such as hills, bluffs, valleys, cliffs, rivers, or lakes? For example, most of the rocks in these photos were found on the shore of Lake Superior, and the limestone was found on a bluff in Kansas.
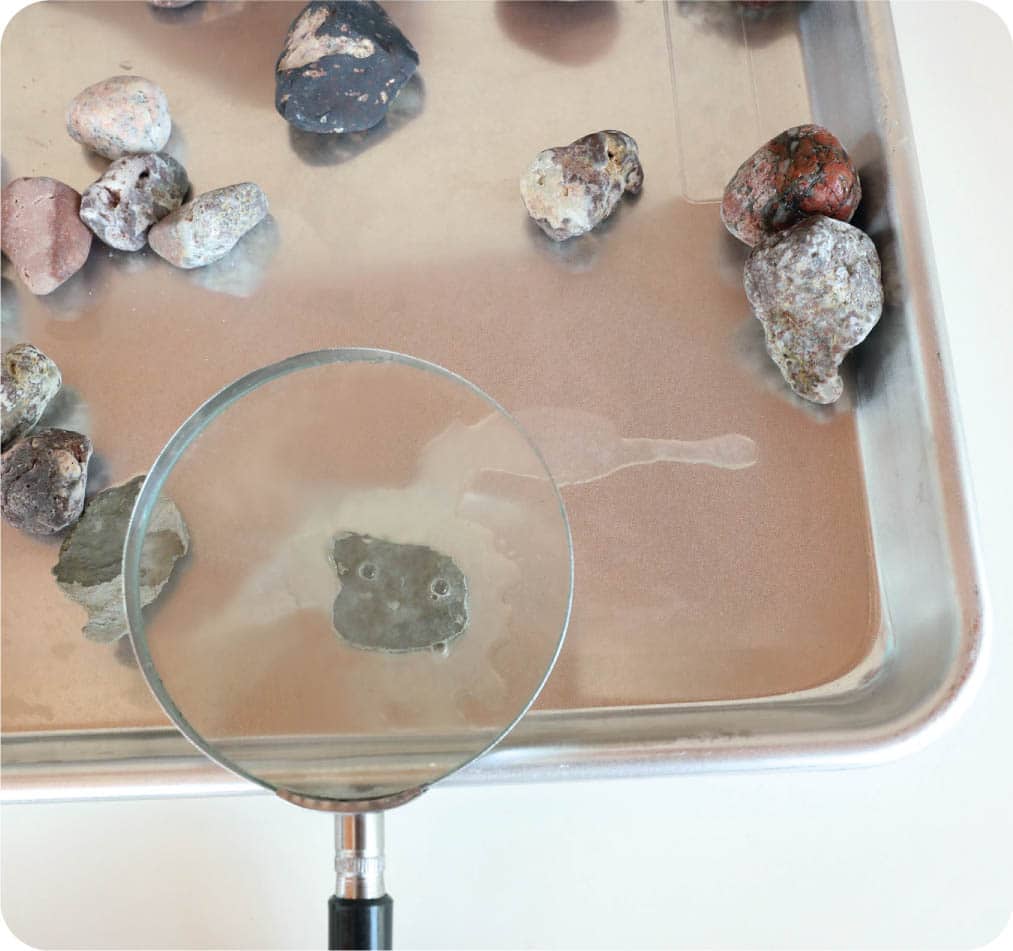
3. Observe each rock under a magnifying glass. FIG. 3.
FIG. 3 Use a magnifying glass to study the rocks.
4. Sort rocks into groups according to similar characteristics such as color, size, and surface texture.
5. Test rocks to see whether you can scratch them with a penny. FIG. 4.
FIG. 4 Use a penny to test the hardness of different rocks.
6. Squeeze lemon juice into a small bowl.
7. Scratch the rocks with the sharp point of a paper clip to expose the minerals below the surface. FIG. 5.
FIG. 5 Scrape rocks with a metal paper clip and drip lemon juice onto the scraped area.
8. Using an eyedropper, drip lemon juice on the scratches and use a magnifying glass to look for bubbles. If you see bubbles, the rock probably contains limestone. FIG. 6.
FIG. 6 Look for carbon dioxide bubbles, which indicate the presence of limestone.
9. Test rocks with a magnet to see whether they contain magnetic material.
10. Place a rock containing limestone in a jar filled with vinegar to make the limestone dissolve. FIG. 7, FIG. 8.
FIG. 7 Place a rock containing limestone in vinegar.
FIG. 8 Bubbles will form as vinegar dissolves the limestone.
11. Try to identify the rocks using a book, website, or app. Record your notes in a notebook or on a note card.
PROTOCOL
1. To contain the mess, place your measuring cup on a sheet pan. Mix cornstarch and water together. Add remaining ingredients. Stir gently and let the mixture sit while you construct bubble wands. FIG. 2.
FIG. 2 Mix up bubble solution.
2. Cut several plastic straws into short, even pieces, each 2 to 3 inches (5 to 7.5 cm) long. FIG. 3.
FIG. 3 Cut straws into equal lengths around 2 to 3 inches (5 to 7.5 cm) long.
FIG. 4 Build a bubble wand. Add three straws to a pipe cleaner and bend into a triangle. Twist and add two more straws. Attach another pipe cleaner, form a second triangle, and then complete the pyramid using one more straw. Run the pipe cleaner back through the straws and twist to finish.
4. Put three short straws on a pipe cleaner. Leaving one end of the pipe cleaner sticking out a little bit, bend it into a triangle. Twist the short and long end of the pipe cleaner together to hold the triangle.
5. Twist a second pipe cleaner onto the long end of the first one. Add two more straws to the pipe cleaner and use them to make a second triangle.
6. Thread the pipe cleaner back through one of the straws.
7. Add one more straw to complete the pyramid and push the pipe cleaner through a second straw so that it comes out near the short piece of pipe cleaner. Twist the ends together so you have a handle for the bubble wand.
8. Submerge the wand in the bubble solution to experiment with the shape of bubbles made by a pyramid.
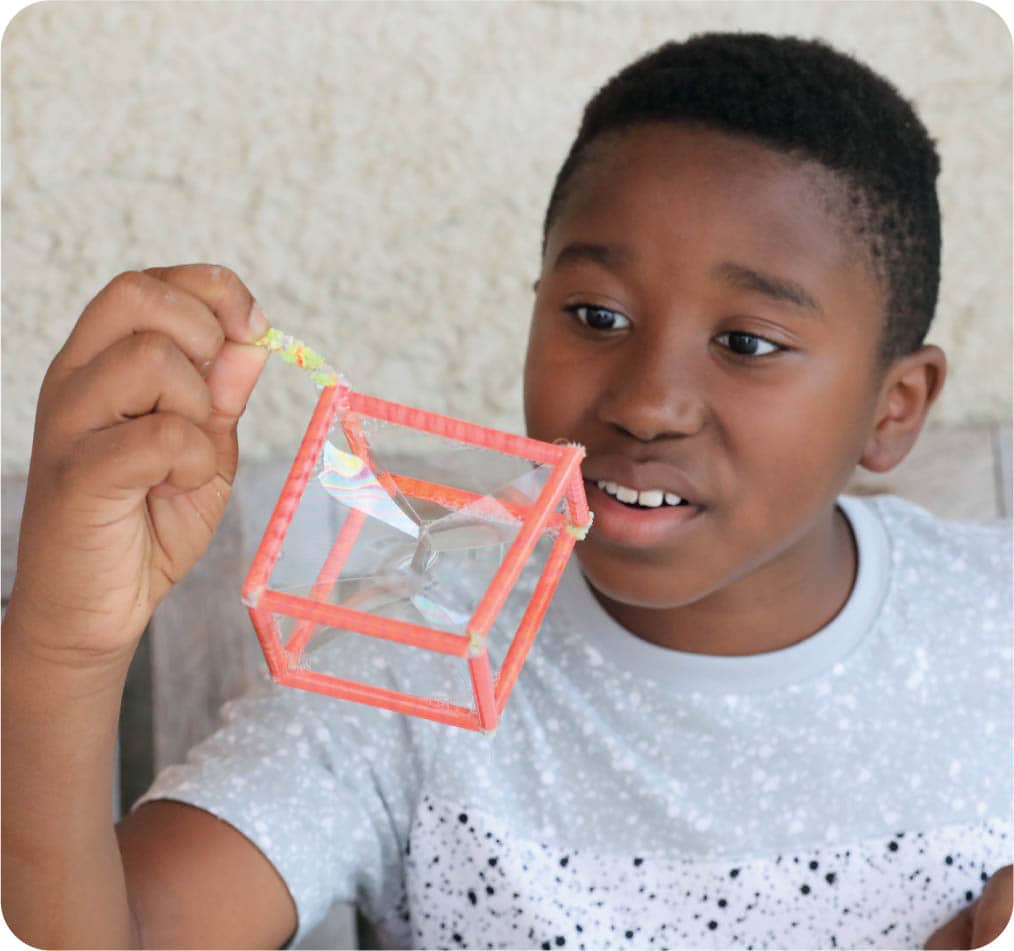
9. Use the same technique, starting with four short straws, to make a square and build a cubic bubble wand. Test the bubble shapes it creates. FIG. 5.
FIG. 5 Use the same wand-building technique to build a cubic wand, starting with a square.
10. Take a normal-size straw, dip it in bubble solution, and blow bubbles inside the geometric bubbles. Try to make the bubbles expand beyond their usual geometry. FIG. 6, FIG. 7.
FIG. 6 Dip wands in bubble mix and observe the bubbles.
FIG. 7 Compare the triangular and cubic bubbles that form.
FIG. 8 Take the wands and bubble solution outdoors to blow larger bubbles.
PROTOCOL
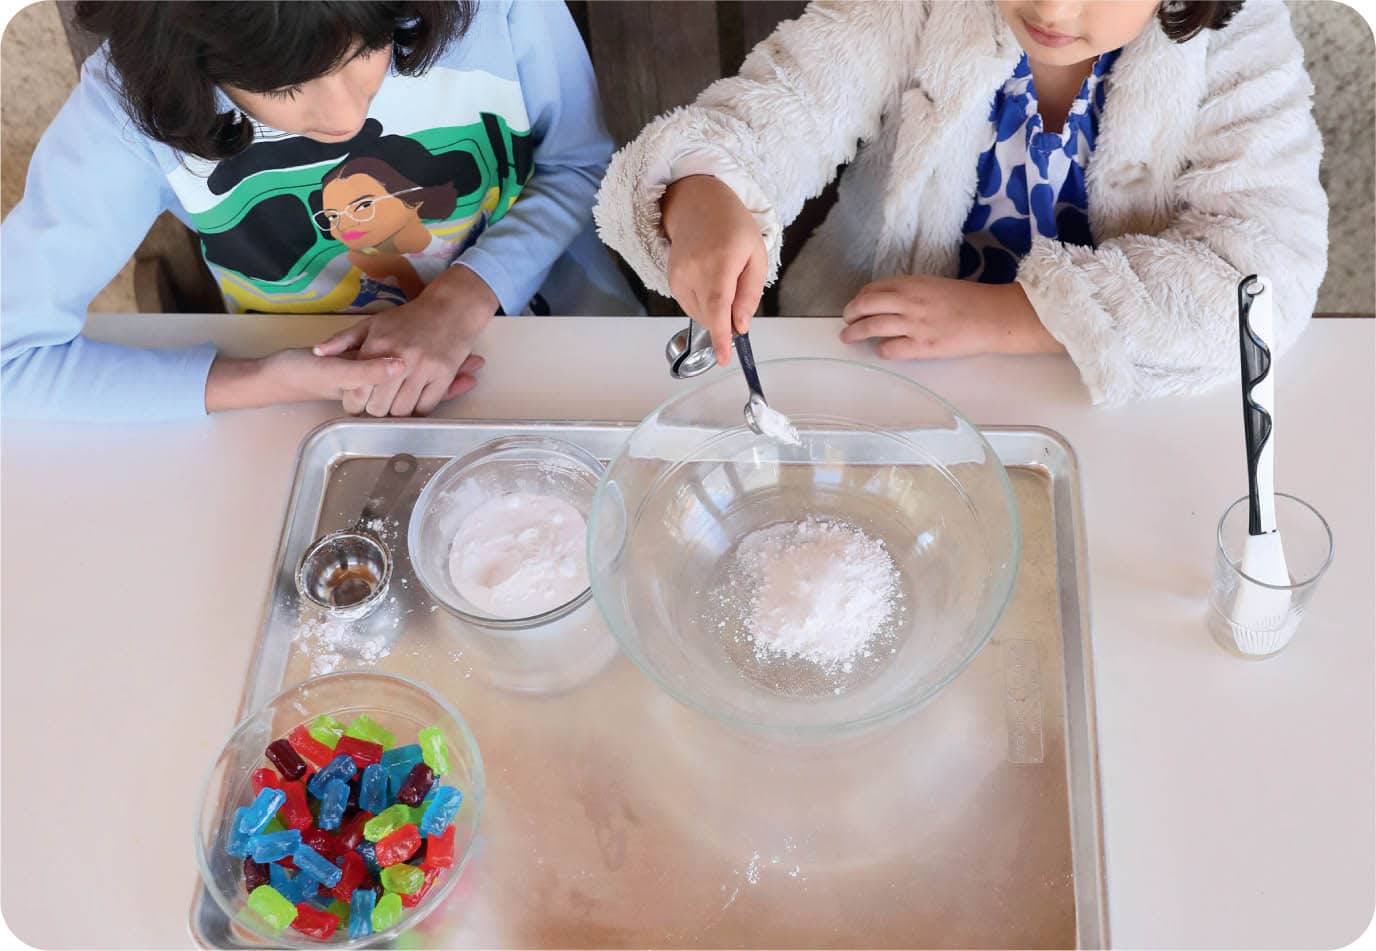
1. In a small bowl, mix together confectioners’ sugar, citric acid, and baking soda. FIG. 2.
FIG. 2 Mix confectioners’ sugar, citric acid, and baking soda.
2. Set the sugar mixture and a small bowl of water on a sheet pan.
3. Lay hard candy on parchment paper or foil on a sheet pan. FIG. 3.
FIG. 3 Spread hard candy out on a piece of parchment paper or foil.
4. Use a pastry brush or cotton swab to brush the candy with water so that it is damp but not soaking wet. FIG. 4.
FIG. 4 Brush a light coating of water onto the candy.
5. Sprinkle both sides of the candy with the sugar mixture. FIG. 5.
FIG. 5 Dust the candy with a generous amount of sugar mixture.
6. Put some sugar mixture on your tongue to taste it. FIG. 6, FIG. 7.
FIG. 6 Put some sugar mixture on your tongue to taste it. Acids taste sour.
FIG. 7 The citric acid and baking soda will foam when they mix with saliva.
7. When the candy is coated, store it in a candy bowl or a plastic zipper bag.
8. Measure 2 tablespoons (16 g) of the sugar mixture into another plastic zipper bag. Add ¼ cup (60 ml) water to see what happens when the mixture reacts with the saliva in your mouth. FIG. 8.
FIG. 8 Add a few tablespoons of sugar mixture to ¼ cup (60 ml) water and look for bubbles.
9. Note the temperature of the bag where the chemical reaction occurred. Does it feel warm or cold?
10. Create new mixtures of confectioners’ sugar, citric acid, and baking soda using different ratios of the three ingredients to maximize flavor and fizziness. Test the mixtures in plastic zipper bags and on candy.