
Chapter 25. Using Office on a Tablet PC
In this chapter
Using the Pen as a Pointing Device
Entering and Editing Text on a Tablet PC
Adding, Viewing, and Printing Ink Annotations
Office 2007 and the Tablet PC
On most desktop and notebook computers, you enter text with a keyboard and manipulate onscreen objects with a mouse. But those traditional input devices take a backseat when you use a Tablet PC with a compatible version of Windows and Office 2007.
In design, a Tablet PC is a notebook computer with a few hardware twists. When you use a Tablet PC, you typically hold it so the screen appears in portrait orientation rather than the landscape mode you’re used to on conventional hardware. Instead of using a keyboard and mouse, you control Windows and Office using a pen-shaped stylus—oh, let’s just call it a pen—that takes the place of a mouse and allows you to select and manipulate text and objects, make menu selections, and click buttons by tapping the touch-sensitive screen. The pen also serves as a way to draw lines, sketch diagrams, and tap out text using an onscreen keyboard. Most importantly, you can use the pen to scribble your own notes, just as if you were jotting them down on a piece of paper. In all these cases, your data appears on the screen as ink, a special type of data we’ll discuss in much more detail shortly.
You can’t turn just any old notebook into a Tablet PC; the screen has to be capable of accepting digitized input from the pen. Along with the input hardware, you need an operating system that supports these alternative input methods. Tablet PCs built before early 2007 came with Windows XP Tablet PC Edition, a customized version of Windows XP Professional sold only with Tablet PC hardware. Tablet PCs sold after the beginning of 2007 with Windows Vista preinstalled already support Tablet PC features. In broad terms, the Tablet-centric features available in Office 2007 are similar in Windows XP Tablet PC Edition and Windows Vista, although Vista is much more polished, accurate, and usable. In this chapter, we assume you’re running Office 2007 on Windows Vista Home Premium, Business, or Ultimate edition, all of which support Tablet features.
Note
Do you have an older Tablet PC? If it’s running Windows XP Tablet PC Edition, make sure you install Windows XP Service Pack 2, which includes a significant upgrade to all Tablet-specific features. Better yet, consider upgrading that older Tablet PC to Windows Vista. For an online evaluation of your hardware and to determine whether it’s suitable for the upgrade, see Microsoft’s website or check with your PC’s manufacturer.
Office 2007 recognizes when it has been installed on a computer running a Tablet-compatible version of Windows and automatically enables features that take advantage of the hardware.
Most Tablet PCs are convertible models, where you can choose between Tablet mode and conventional mode, with a keyboard and pointing device. When creating Word documents, Excel workbooks, and PowerPoint presentations, you’ll probably use the PC in that mode most often, to quickly enter text and numbers using the keyboard and perform basic formatting and organization tasks. Tablet mode is more comfortable and effective when you’re reading and reviewing documents that have already been created. The pen makes it easier to mark up the page with circles, underlines, and handwritten comments or changes. (If you’re a teacher and your students create their assignments in Word format, you can strike fear into your students’ hearts by grading their papers with a virtual red felt pen.)
What if you want to use the pen to jot down notes of phone conversations, meeting minutes, shopping lists, and other sorts of random, free-form text? Don’t even think about pressing Word into service for an occasional handwritten document of this sort—it’s ill-suited to this task on a day-to-day basis. Word’s drawing layer greatly limits your ability to enter and edit text, and you’re still faced with the dilemma of how to save, organize, and search multiple documents containing ink-based text that isn’t typically included in Windows searches.
Use OneNote instead. Although you can use OneNote on a desktop PC and type notes onto pages, it’s especially effective on a Tablet PC, thanks to its capability to store ink and its versatile selection of pens and other writing and drawing tools. You don’t need to convert your notes into text; OneNote automatically recognizes ink-based content and adds it to its searchable index, making it possible for you to quickly locate handwritten words and phrases anywhere within a notebook. And it’s easy to send Word documents to OneNote and OneNote pages back to Word.
A Tablet PC isn’t for everyone, but if you’re attracted to the idea of taking handwritten notes and adding annotations to documents, you should take a close look at a Tablet PC running Office. And if you like OneNote, we predict you’ll love it on a Tablet PC, where you can freely mash up just about any type of data with hand-drawn annotations and sketches.
Using the Pen as a Pointing Device
In Word, Excel, and PowerPoint, the Tablet pen normally acts as a pointer, which you can use to point and click or—with the help of the onscreen keyboard—to enter text.
In this, its most basic mode, the pen functions as a substitute for the mouse. As you move the pen tip just above the screen, the pointer moves along the same path. Instead of clicking, you tap the pressure-sensitive pen tip using any of the following techniques:
- Tap once—This has the same effect as clicking the left mouse button to select an object.
- Tap twice in quick succession—This works the same as double-clicking the left mouse button.
- Press and hold—This displays shortcut menus and other actions normally triggered by clicking the right mouse button.
- Press, hold, and drag—This is equivalent to holding down the left mouse button; drag the pen tip to select a group of objects or block of text, lifting it off the screen at the end of the selection.
On a Tablet PC running Windows Vista, you have an additional option called Pen Flicks. These are mouse gestures that allow you to perform common navigation or editing tasks by flicking the pen tip in any of eight directions. Using the default settings, for example, flicking the pen tip up and to the right (NE on the compass) copies the current selection to the Clipboard. A flick toward the upper left deletes the current selection. You can change actions assigned to each of the eight Pen Flicks actions: Open the Customize Flicks dialog box (Control Panel, Pen and Input Devices, Flicks tab), choose (add) from the top of the menu for the direction you want to change, and then type a name and a key combination to assign to that pen flick. In Figure 25.1, for instance, we’ve assigned the Add Hyperlink (Ctrl+K) shortcut to the leftward flick (due west on the compass). Now, in any Office document, we can call up the Add Hyperlink dialog box with alacrity.
Figure 25.1. Remember that pen flicks are used in all Windows programs, not just in Office, so customize carefully.

Using the Ribbon in Word, Excel, or PowerPoint is particularly easy on a Tablet PC. Tap any heading to display the choices on that tab, and then tap commands, menus, or gallery items just as if you were pointing and clicking with a mouse. For basic reading and formatting, where no text entry is required, this option is extremely effective. You can also use the pen to create SmartArt graphics and drag the pieces around, using the onscreen keyboard to add small amounts of text.
All About Ink
When you use the Tablet PC’s pen to draw, sketch, or write in an Office document editing window, the data you create is called ink. In Office, ink is a full-fledged object type with its own properties and behaviors, just like AutoShapes and pictures.
In OneNote, ink can be used almost anywhere in the program, alongside text, graphics, screen clippings, hyperlinks, and even synchronized with recorded voice or video recordings. In Word, Excel, and PowerPoint, ink sits in the drawing layer, and you can use the Format Ink dialog box and options on the Ink Tools tab (see Figure 25.2) to change the color and width of the ink. (The Ink Tools tab is visible only when you select an existing ink object or click Start Inking on the Review tab.) You can select an ink annotation, copy it to the Clipboard, and then paste it into another Office program—or into any application that supports ink.
Figure 25.2. These Ink Tools are visible only when you’re working with ink.

![]() For more details on how to work with items on the drawing layer, see “Working with the Drawing Layer,” p. 109.
For more details on how to work with items on the drawing layer, see “Working with the Drawing Layer,” p. 109.
What makes ink different from the kind of scribbling you might do with the Windows Paint program? One huge difference is handwriting recognition. Although ink sits in the drawing layer, it actually contains some attributes normally associated with text. You can use the surprisingly accurate handwriting recognition capabilities in any Tablet-compatible Windows version to convert your scribbled notes into text, which can then be pasted into a document.
When you write something that Windows recognizes as text, it stores the recognized text in the background, without changing the ink version displayed on the screen. This stored text is searchable, which means you can find notes fast in OneNote even if you wrote them by hand. In the three Ribbon-based programs, you can convert the recognized ink to its text equivalent by selecting the inked text, right-clicking (press the pen tip and hold it down briefly), and choosing Copy as Text from the shortcut menu, at which point you can paste the copied text into the text portion of the document. (You have to manually delete the ink from the drawing layer.) With OneNote, you can select inked text, right-click, choose Convert Handwriting to Text from the shortcut menu, and complete the transformation in one step.
Tip
You need a Tablet PC to create ink in an Office document. (The one exception is in Slide Show view in PowerPoint, where you can create ink annotations using any computer.) However, you don’t need any special hardware to work with ink that has been saved in a document. The ink is treated as an object, the same as a drawing object. If Windows XP Tablet PC Edition or a Tablet-aware version of Windows Vista is running, you can work with the ink as ink; on all other Windows versions, the ink behaves as if it were a drawing.
Adding Ink to an Office Document
To begin adding ink in Word, Excel, or PowerPoint, click the Start Inking button on the Review tab. This action reveals the Ink Tools add-in with the Pens tab shown earlier in Figure 25.2. When you ink using these tools, your scribbles appear as annotations over or under typed text and graphics—essentially, freeform objects in the drawing layer. When you press the pen tip against the screen and begin drawing, that marks the beginning of a new stroke, which ends when you lift the pen off the screen. A drawing typically contains many strokes, and so can text: depending on your penmanship, a word or even a single letter might be made up of multiple strokes.
You can mark up a Word document, an Excel worksheet, or a PowerPoint slide using your own handwriting or freehand illustration. While delivering a PowerPoint presentation, you can take notes directly on the slides and then save the results.
In Word, but not in PowerPoint or Excel, you can add handwritten comments to a document in addition to adding annotations directly on the document. Click the Ink Comment command on the Review tab to open the Comment pane. These notes appear in comment balloons and can be tracked on a per-user basis. Figure 25.3 shows a marked-up Word document that contains an ink comment.
Figure 25.3. Ink comments use the same format as typed comments in Word’s Review pane.

Changing the Look of Ink
On the Ink Tools tab, the Pens group allows you to select from four virtual pens. The Ballpoint and Felt Tip options produce similar results, with a slightly thicker stroke for the latter. The Highlighter adds a color marking over any portion of the screen, similar to the results you use to mark up a magazine or book with a yellow highlighter. With any of these three virtual pens, you can change the color and line width at any time.
Tip
If you use the Highlighter pen to mark a word, phrase, or value, or if you use one of the other pens to underline a similar block of typed text, Office is smart enough to link the ink with the beginning of the text. If you insert or delete text (in Word or PowerPoint) or cells (in Excel) above the highlighted/underlined portion, your ink travels with the text to which it’s attached. This technique is less effective with circles, however, or with drawn arrows and lines that point to typed text or numbers.
The final option in the Pens section is the Eraser. This one doesn’t work quite the same way as its Ribbon-mates to the left. When you click the Eraser option, the pen pointer changes shape and immediately deletes any ink stroke it touches. No rubbing required. (In OneNote, the Stroke Eraser works exactly like the single Eraser in the Ribbon-based Office programs, or you can shave smaller pieces off of strokes using the Small, Medium, and Large Eraser tools.)
Entering and Editing Text on a Tablet PC
On a Tablet PC, the standard way to enter text into dialog boxes and programs that don’t recognize ink (such as Notepad) is to use the Tablet PC Input Panel. To make the Input Panel appear, use one of the following techniques:
- In Windows XP Tablet PC Edition, you can summon this box by using a pen gesture, which consists of holding the pen tip over the bottom of the screen and moving it quickly back and forth.
- In Windows Vista, the Input Panel tucks into the left side of the screen with only a small stub sticking out. Click that stub to reveal the Input Panel, or drag it to slide up and down the screen.
- When you hover the pen point just above any point on the screen where you can enter text, a small icon appears, as shown in Figure 25.4.

The Input Panel floats over the current window (you can dock it to the top or bottom of the screen if you prefer, or click the Close button to slide it back into its hiding place along the left side of the screen). The three icons on the left allow you to select one of its three text entry options: Writing Pad, Character Pad, and Onscreen Keyboard. When you use the Writing Pad (shown in Figure 25.5), you write just as if you were using a piece of paper. The ink recognizer interprets your letters at the bottom of the panel, and if you reach the end of the input box it helpfully adds another line. You can click the recognized word to correct a single character or to choose a different word from the recognizer’s dictionary. If the results are acceptable, click Insert to add the text at the current insertion point, just as if you had typed it.
Figure 25.5. When you use the Writing Pad, the Tablet PC Input Panel turns handwriting into text and sends it to the current insertion point.

For some tasks, the handwriting recognition offered by the Input Panel actually gets in the way. This might be the case if you’re entering scientific terms that aren’t in the dictionary. In that case, you can click the Keyboard icon in the Input Panel and use the onscreen keyboard to fill in precise values (see Figure 25.6). In this mode, the Input Panel enters the “typed” text one character at a time and responds to function keys and keyboard shortcuts just as if you had used a real keyboard.
Figure 25.6. Using the Onscreen Keyboard is a more accurate way to enter text that isn’t included in a standard dictionary.

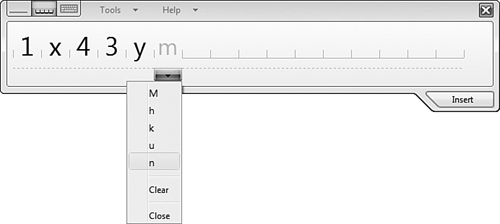
The third variation of the Input Panel is the Character Pad, shown in Figure 25.7, which allows you to enter or change one character at a time using a fill-in-the-blank text form. In this mode, you enter characters one at a time, and each character is recognized independently; the ink recognizer doesn’t try to match your input with its dictionary. This tool is most useful when filling in dialog boxes and password prompts.
Figure 25.7. Use the Character Pad to enter text one letter of number at a time.
In Office 2007, you’ll typically use the Input Panel to make minor edits to a document or to fill in a dialog box. (We can’t imagine using the Input Panel to enter more than a paragraph of text.) For long blocks of text, use a keyboard or the Ink tools.
As we noted in the previous section, you begin entering ink by clicking the Start Inking button on the Review tab. In Word, you can begin writing anywhere on the current page. When you add ink writing to an Excel worksheet or PowerPoint slide, the ink appears in the drawing layer, directly on top of the current work surface. As with any drawing object, you can select, move, copy, delete, resize, or format the ink.
Adding, Viewing, and Printing Ink Annotations
You can use annotations to make editing marks (drawing a line through text you want deleted, for instance), scribble short questions, highlight words and phrases, or add drawings. By default, annotations appear in a red felt-tip pen. As with ink writing, you can change the pen style to a ball point or a highlighter, and you can change the color as well.
Figure 25.8 shows a marked-up PowerPoint slide.
Figure 25.8. Use ink annotations to suggest changes in an Office document without affecting the document’s content.

One big advantage of ink annotations is that anyone—with or without a Tablet PC—can remove them with just a few mouse clicks. If users embed comments directly with a document, you risk inadvertently leaving a comment behind, with potentially embarrassing effects. But after dealing with all ink annotations, you can remove them using the following techniques:
- In Word, display the Review tab, click Start Inking, and click Delete All Ink. All ink in the drawing layer of the current document is deleted instantly, with no confirmation. You can undo this action. (Note that ink in text boxes or in comments is untouched by this command.)
- In Excel, display the Review tab, click Start Inking, and click Delete All Ink. You are prompted to confirm that you want to delete all ink annotations on all worksheets in the current workbook. You can undo this action until you save and close the workbook.
- In PowerPoint, you can remove markup from a single slide or the entire presentation. Click Delete in the Comments group on the Review tab and choose Delete All Markup on the Current Slide or Delete All Markup in This Presentation.
 If ink annotations won’t stay put within a Word document, see “Locking Documents When Using Annotations” in the “Troubleshooting” section at the end of this chapter.
Anyone who can read an Office document—with or without a Tablet PC—can view and manage ink annotations with just a few mouse clicks. To show or hide ink, click the Review tab and select or clear the Ink option on the Show Markup list.
To show or hide ink annotations when printing a copy of a document, worksheet, or presentation, choose Print from the Office menu. In Word, choose Document Showing Markup from the Print What box to show annotations; choose Document (the default) to hide annotations. In PowerPoint, select or clear the Print Comments and Ink Markup option on the Print dialog box. In Excel, ink annotations appear on printed pages if the annotations are visible on the screen; you can’t control print options separately.
Troubleshooting
Locking Documents When Using Annotations
I added some annotations to a Word document and then made some edits. Now some, but not all, of the annotations are in the wrong place. How can I keep this from happening?
When you insert annotations, they appear in the drawing layer and “float” on the page. When possible, Office programs anchor the annotations to the adjacent text, but this doesn’t work consistently. If you draw a circle around an object on the page and then add a new sentence before the portion you circled, the text shifts down the page, but the ink might stay where you originally added it. To ensure that your annotations stay in sync with your document’s content, you need to lock the document’s layout. Click Protect Document on the Review tab and then click Restrict Editing and Formatting. Select the check box under Editing Restrictions, and select either Comments or No Changes (Read-Only). Click Yes, Start Enforcing Protection to make your changes effective.