
Session
2
Make It Sing:
Programmable Musical Creations
New makers will create musical projects using everyday materials connected to a computer with a MaKey MaKey board. In the process, they will experiment to figure out which materials are conductive and learn to code a simple computer program using the Scratch programming environment.
Session Goals
In this session, makers will
- Build music-making projects using a pencil sketch and other conductive materials connected to a MaKey MaKey board.
- Get started with computer coding by remixing a Scratch musical project.
- Explore and become curious about the electrical properties of everyday materials.
✓ Getting Ready
Get ready for a playful session experimenting with sounds and music!
For this session, you’ll need the MaKey MaKey invention kit. You’ll also need a computer running Scratch, a free creative programming environment. Watch the introductory videos for MaKey MaKey and Scratch, and try exploring the “getting started” guides for each of the tools.
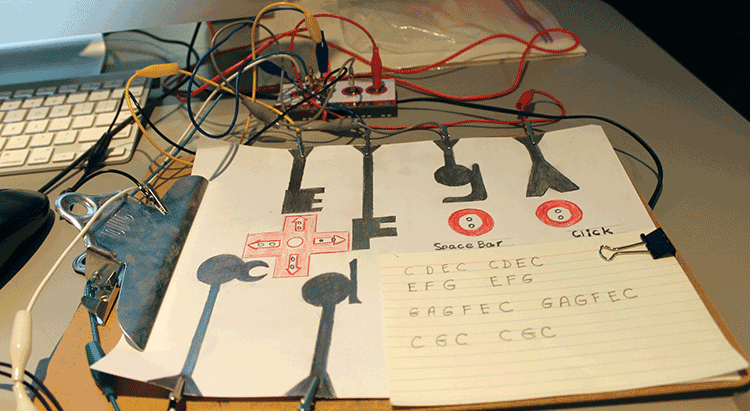
Build your own musical drawing using the steps described for the first project.
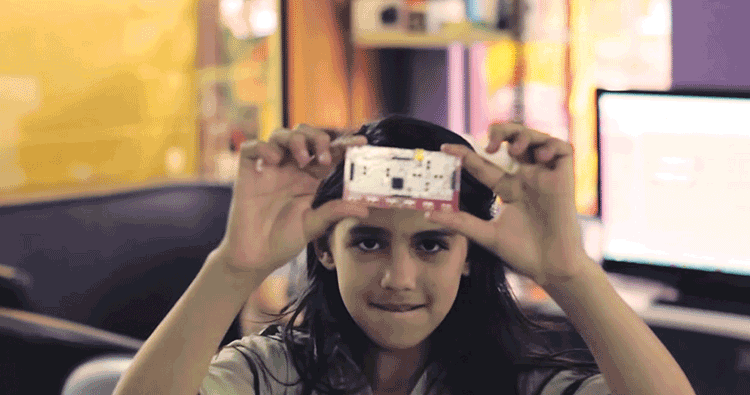
Looking at a MaKey MaKey (Casa de La Juventud Clubhouse, Mora, Costa Rica)

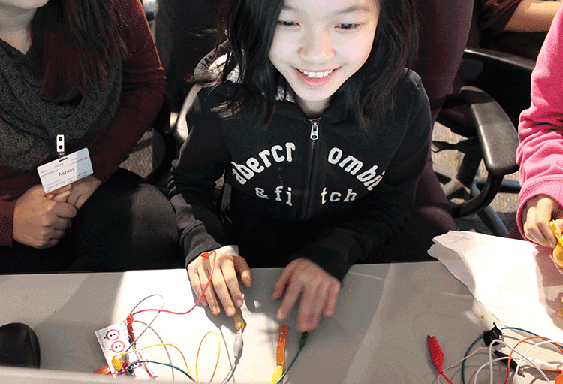
Making arrows to connect to a MaKey MaKey (Boys & Girls Clubs of Metro West Clubhouse, Framingham, MA)
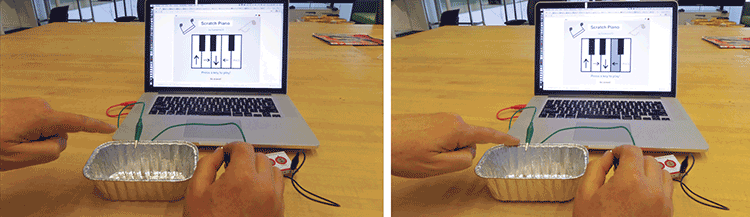
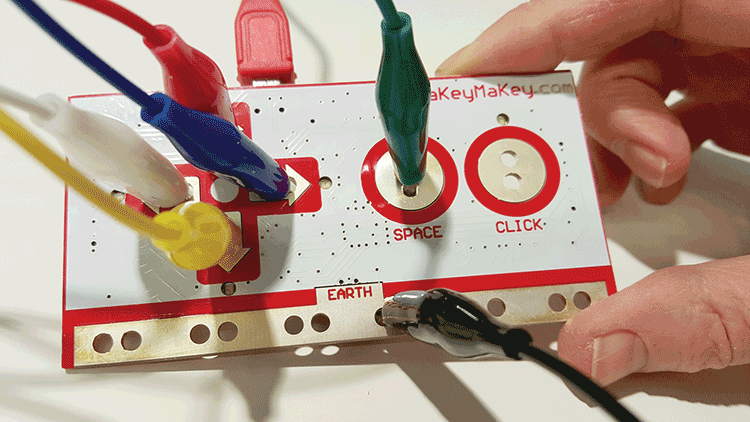
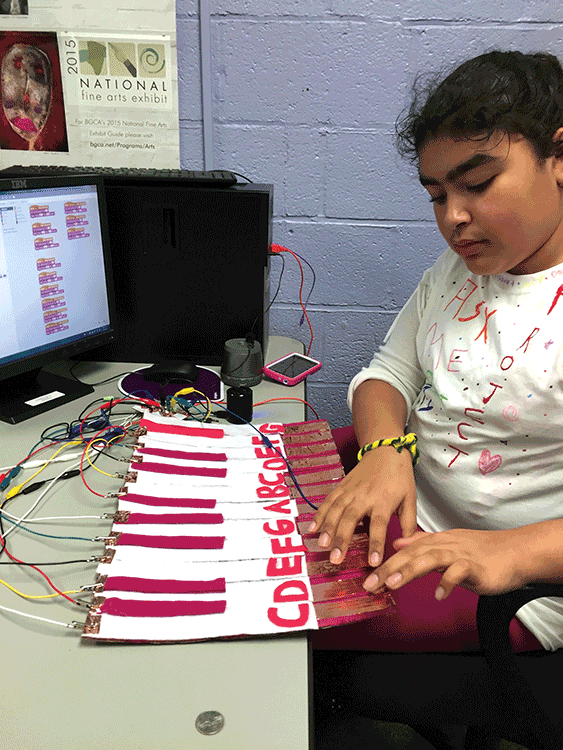
Pressing a key using a MaKey MaKey board with Scratch
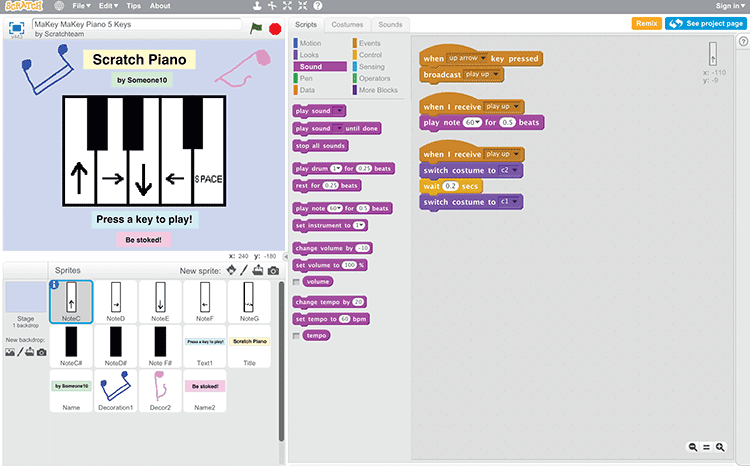
A Scratch piano project to play with the MaKey MaKey
Materials

- MaKey MaKey kits, which include a circuit board, alligator clips, and a USB cable, are available at makeymakey.com.
- Computers with Scratch. You can use the online version of Scratch at scratch.mit.edu or download and install the offline editor from scratch.mit.edu/scratch2download.
- Scratch piano project: scratch.mit.edu/makeypiano
- Clipboards with metal clips
- Pencils, #2 or softer (graphite, not color)
- Blank paper
- Conductive materials, such as bananas, apple slices, gum drops, or other moist foods; Play-Doh or other water-based clays; aluminum foil, spoons, copper tape, or other metal objects
- Non-conductive materials, such as plastic, electrical tape, and cardboard
Space and Tools Setup
- Arrange the materials. Lay out paper, pencils, and clipboards on a table for the first activity. In addition, for the Open Make time, set up a side table with a variety of conductive and nonconductive materials.
- Set up the computer stations. Plug the MaKey MaKey board into each computer using the USB cable.
- Open Scratch with the MaKey MaKey piano project running: scratch.mit.edu/makeypiano. (If you plan to use the offline version of Scratch, download the project and open a copy on each computer.)
- For the demo computer, attach alligator clips to each of the MaKey MaKey arrow key ports (up, down, left, right) and one to the Space key port. In addition, attach one alligator clip to one of the ports labeled Earth. (You may want to use the black wire for Earth so that you can remember which wire is ground.)
 Opening
You may want to begin with an icebreaker or a group activity to help makers get to know each other better. For example, in the spirit of this session’s focus on music, you could have each person in the circle act out playing a musical instrument, and have the others guess what instrument it is and then pretend to play it themselves.
 Demoing
Introduce the MaKey MaKey to spark interest and show the makers how they can make their own musical drawings.
- Show a musical drawing. Demonstrate a simple musical drawing project connected to MaKey MaKey and Scratch. Show how you can play it, and ask one of the makers to try playing it, too.
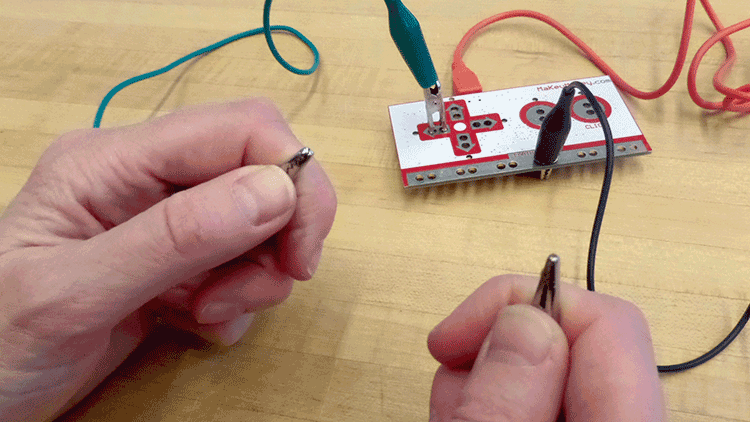
Completing a circuit by holding alligator clips
- Point out how you need to ground yourself by touching the metal clip that attaches to the Earth port on the MaKey MaKey. Then touch the thick pencil lines in order to complete the circuit and make it play.
- Complete the circuit with just your body. Show how you can create a circuit with the MaKey MaKey by using your body to conduct electricity. Hold the metal part of the clip attached to Earth on the MaKey MaKey board in one hand. With your other hand, touch the metal part of another clip. You should hear a different piano note each time you complete the circuit with your body depending on which clip you touch: up arrow, down arrow, left arrow, right arrow, and Space key.
- Complete the circuit with more than one person. You can also have the makers try activating the MaKey MaKey together by holding hands. Ask one person to touch the Earth port and another person to touch the Space key port. When they touch hands the circuit should play.
- Ask the makers these questions: Why does this work when I just use my hands? Am I conductive? What other objects are conductive? What makes them conductive?
- You may want to raise these questions now, and then discuss them at the end of the session, after the makers get a chance to experiment and explore different materials.
 Building a First Project
For their first project, makers can sketch and then play a musical drawing.
This activity was developed by Jay Silver, one of the creators of the MaKey MaKey, and was featured in Intel’s Sketch It, Play It guide. For inspiration, you can show a video of the activity, available at start-making.org.

How to make a simple musical drawing to attach to a MaKey MaKey
Here are steps for making a musical drawing that connects to the Scratch piano project.
- Draw.
- Insert a piece of paper into the clipboard.
- Use a pencil to draw a star or other solid shape on the paper.
- Draw a thick, dark line from the shape to the paper’s edge.
- Connect.
- Attach a wire from Earth on the MaKey MaKey to the metal clip on the clipboard.
- Clip one of the wires from a MaKey MaKey port, such as the up arrow, to the end of the line you drew.
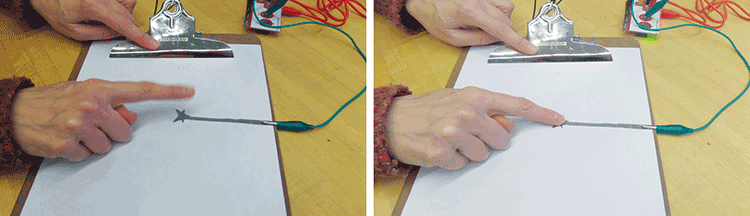
Touching the metal clip to play the musical drawing
- Test.

- Touch the metal clip with one hand, then touch the shape to hear the note play.
If the note doesn’t play, see the Troubleshooting Tips on page 66.
- Add more.
- Now draw more shapes so that you can attach each shape to one of the MaKey MaKey ports (the up, down, left, and right, arrows and Space).

- Now draw more shapes so that you can attach each shape to one of the MaKey MaKey ports (the up, down, left, and right, arrows and Space).
- Play.
Now you can play your musical drawing.
 Taking It Further
Introduce the concept of conductive materials by demonstrating how a banana, a foil pan, or modeling clay can be connected to the MaKey MaKey board; then touch the conductive object (while also touching the Earth port) to trigger a sound in the Scratch program.
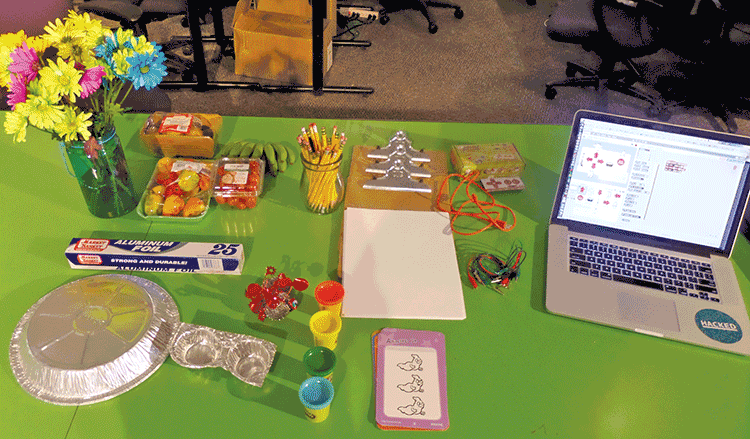
Table laid out with conductive and nonconductive materials (Flagship Clubhouse, Museum of Science, Boston, MA)
Suggest that makers work in pairs to experiment with using conductive (and nonconductive) materials. They can disconnect their musical drawings and experiment with using other materials to trigger the sounds on the Scratch piano.
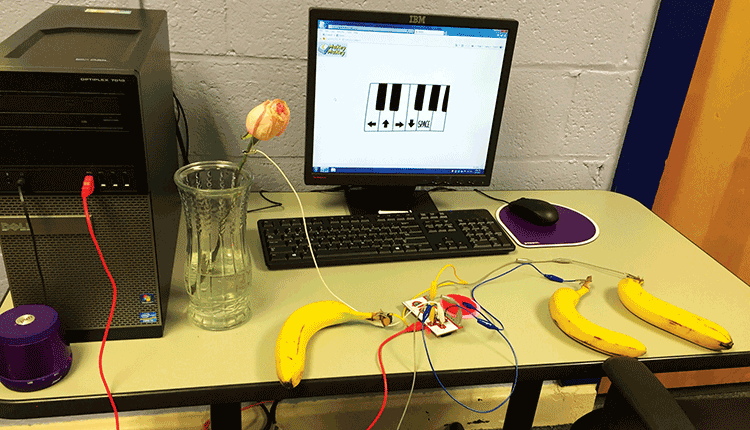
Bananas and a flower interface to a Scratch piano project
 Open Make

Using conductive materials to connect to a MaKey MaKey (Youth Connections Clubhouse, Lismore, Australia)
Now makers can expand their musical projects.
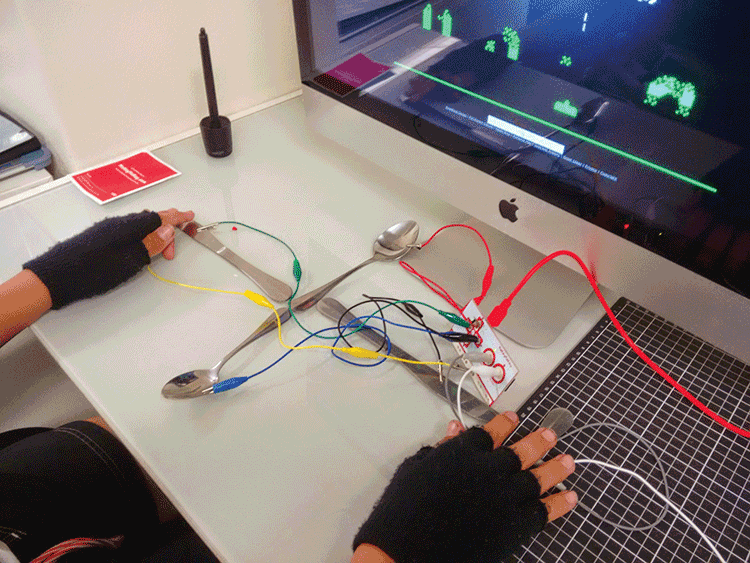
To spark ideas, play with other materials that can trigger keys on the computer. Make a bigger instrument out of a foam board and other materials, such as spoons! For inspiration, watch the MaKey MaKey Music Examples video created by Eric Rosenbaum (bit.ly/makeymusicvideo).
Circulate among the groups and prompt the makers to keep experimenting, building, and taking their play in new directions. Encourage ways for more than one person to interact with the musical project.
Hack Your Musical Instrument Program

Using Play-Doh to connect to a MaKey MaKey (Flagship Clubhouse)
Suggest editing and remixing the Scratch piano to play different sounds. Or, try using the Scratch MaKey MaKey drum project: scratch.mit.edu/makeydrum.
A MaKey MaKey board can control anything on the computer that is triggered by the keyboard. What other software programs move or make noise on the computer when you press a key?
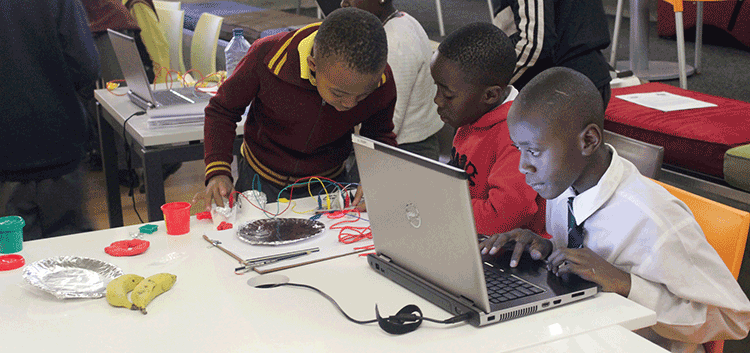
Experimenting with conductive materials (Sci-Bono Clubhouse, Johannesburg, South Africa)
Here are some of the Open Make projects created by Clubhouse makers. Do you see anything you want to try?

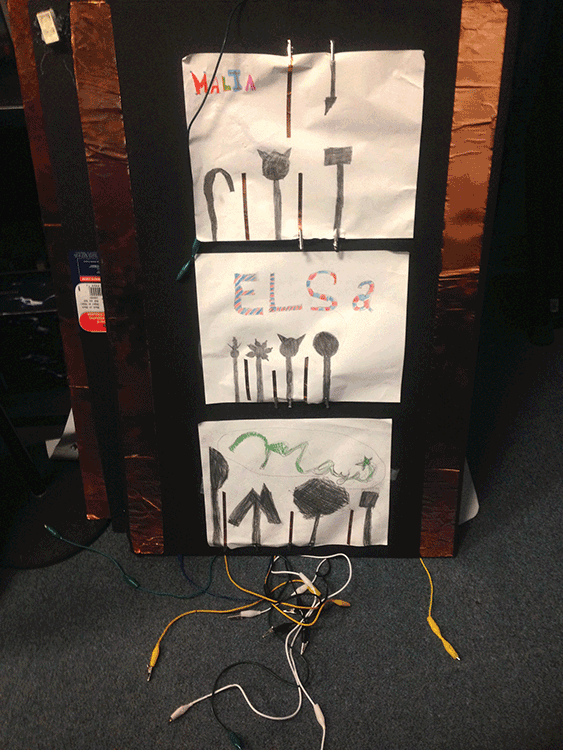
Arrow key interface made with copper tape (Youth Connections Clubhouse)
Learn How to Play Piano project (Boys & Girls Clubs of Metro West Clubhouse)

Playing a dance game made using a MaKey MaKey (CEDES Clubhouse in Alajuelita, San José, Costa Rica)

Ice-Cube Keyboard (Sorenson Unity Center Clubhouse, Salt Lake City, UT)
Interface made with spoons (Youth Connections Clubhouse)
 Sharing and Reflecting

Sketch of ideas for connecting to MaKey MaKey
Provide time for the makers to share what they noticed and made during their explorations. Ask them to jot down their reflections in their journals.
 Documenting and Displaying
Don’t forget to document these projects as you go along! Some projects may literally get eaten or dry up, but reflections can live on through photos or videos, online posts, or journal entries.
What name do you want to give to your musical project? What instructions will you provide for playing it?
Interactive display board of Make It Sing projects for Clubhouse community showcase (East Palo Alto Boys & Girls Club Clubhouse, East Palo Alto, CA)
You can also help the makers save and present their musical projects during the final Show & Share sessions. Friends and family members love playing with MaKey MaKey projects!
Story from the Clubhouse Network: The City That Speaks
The makers at the East Palo Alto Boys & Girls Club Clubhouse in California used their MaKey MaKey boards not only to learn about conductivity and play with musical interfaces and coding, but to use them as tools for storytelling and community-building.
They started by creating a LEGO model of the White House and other famous places around Washington, D.C. The Clubhouse members then embedded a MaKey MaKey board in the city diorama to make parts of it interactive. They used Scratch to record and import sounds. The sounds included their own voices, lines from President Obama’s speeches, police sirens, and even Sunny, the White House puppy, barking. They called the project The City That Speaks.
The City That Speaks made its way to Maker Faires in the San Francisco Bay Area and Washington, D.C., where Faire goers were encouraged to help build more of the city.
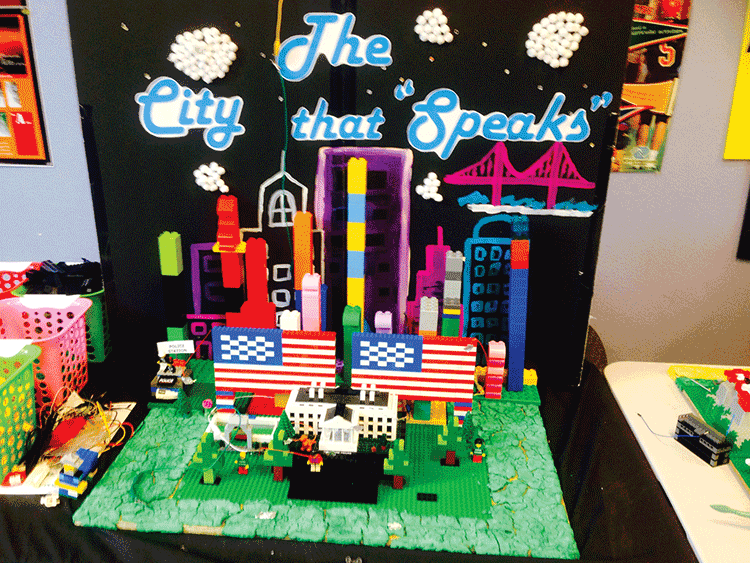
The City That Speaks model (East Palo Alto Boys & Girls Club Clubhouse)
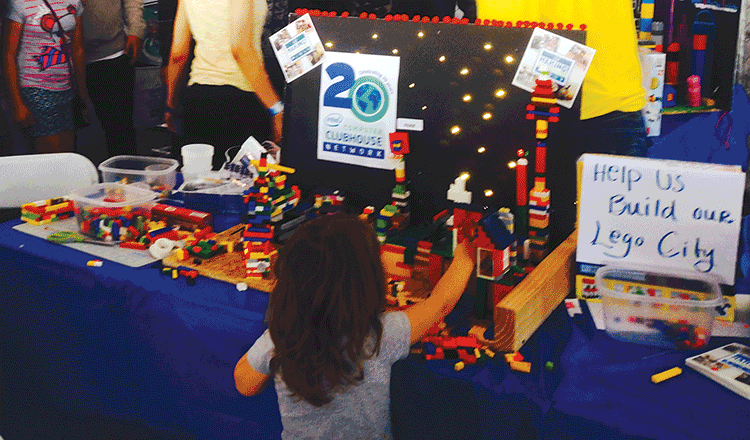
Adding on to the city model at the Bay Area Maker Faire
Additional Resources
- MaKey MaKey group activity guides: makeymakey.com/guides/
- MaKey MaKey video gallery: makeymakey.com/gallery
- Scratch learning resources and support: scratch.mit.edu/help
