Make and Manage Notes
In this chapter, we cover the very basics of making and managing notes—feel free to skip ahead if you don’t need help here, but there are some tricks you may not be aware of, such as creating notes from the Lock screen, importing notes from other note apps, and setting your default sort order. You can also lock notes so that a passcode, Touch ID, or Face ID is required to unlock them.
Choose Where to Put Notes
There are three places where you can store notes:
In iCloud: By default, Notes are stored in whatever iCloud account you’re logged into. On a Mac, you can find that in System Preferences > Internet Accounts > iCloud and in iOS under Settings > Your Name. For most people, this is the best choice.
On the device: You can choose to save notes directly on your device. This offers the best privacy, but has two major drawbacks: notes stored locally do not sync and if your device is lost or erased you could lose those notes if you’re not regularly backing up the device.
This option is disabled by default. To enable it on a Mac, open Notes > Preferences and select “Enable the On My Mac account.” On iOS, go to Settings > Notes and turn on “On My iPhone” Account (or “On My iPad” Account).
On an IMAP server: If you’ve set up an IMAP mail account on your device, you can store notes there and they will sync between the devices linked to that account. The upside is that this provides cross-platform sync. The downside is that notes stored in an IMAP account have limited formatting options.
To sync notes with IMAP, you must make sure that service is enabled. On a Mac, go to System Preferences > Internet Accounts > Email Provider Name and check Notes. In iOS, visit Settings > Passwords & Accounts > Email Provider Name and enable Notes.
Make a New Note
To create a new note, tap the Create a New Note ![]() icon (⌘-N). That’s all! Okay, not quite all—there are several alternative ways to create a new note:
icon (⌘-N). That’s all! Okay, not quite all—there are several alternative ways to create a new note:
With an Apple Pencil: If you have an Apple Pencil and a compatible iPad, tapping the tip of the Apple Pencil on the Lock screen while the iPad is awake creates a new note. Be sure to tap straight down on the screen without moving the tip of the pencil—it may take more than one tap. If just isn’t working, make sure your Apple Pencil is charged.
From iOS/iPadOS Control Center: Tapping the Notes
 button in the iOS or iPadOS Control Center makes a new note. Touch and hold that button to see options to make a new note, create a new checklist (see Work with Lists), take a photo and insert it in a new note (see Add Photos or Videos), or scan a document and make a new note with it (see Scan Documents).
If that button isn’t in Control Center:
Go to Settings > Control Center > Customize Controls.
Scroll down to Notes.
Tap the add
 button next to Notes. You can drag the drag
  handle to adjust the button’s placement in Control Center.
To change the behavior of the Control Center Notes button, go to Settings > Notes > Access Notes from the Lock Screen—despite the name of that setting, it still applies even if your device is unlocked. The default is Always Create New Note, but you can also set it to Resume Last Note, which opens up two more options:
Resume Last Note: You have two options here: Created on Lock Screen or Viewed in Notes App. Personally, I think the latter option makes more sense, but that’s your call.
Create New Note: This determines how long iOS waits until after the last note was created from Control Center or with an Apple Pencil until Notes creates a new note when you perform one of those actions. The default is after 5 minutes, but you can have it return to that note for up to an entire day. Lower settings are better for security, but longer settings are often more convenient.
With Siri: Siri for both macOS and iOS can make a new note. Tell Siri “Make a note.” It will then ask you what the note should say. Dictate your note. This is handy for taking notes on the go.
From the activity view: When you send an item to Notes from the activity view, you have the option to place the item in a new note. See Share to Notes.
Import Notes from Other Services
If you have notes in existing apps or services, you might be able to import them into Apple’s Notes, which can import files in .txt, .rtf, .rtfd, .html, and .enex (Evernote) formats.
Check with the app developer to learn how to export notes from your existing notes app. Apps like Evernote and OneNote make export easy. Once you’ve exported your notes, here’s how you can bring them into Apple’s Notes on a Mac:
Open Notes.
Choose File > Import to Notes.
Select the file you want to import.
Click Import.
When asked if you want to continue, click Import Notes.
Organize Notes
It’s easy enough to create notes. It can sometimes feel a little too easy, and next thing you know you’ve got a mess on your hands. Here are some ways you can organize and manage your notes.
Choose a View
In iOS 13, iPadOS 13, and macOS 10.15 Catalina, you have the option to view your notes as a gallery of thumbnails, each showing a preview of the note (Figure 1).
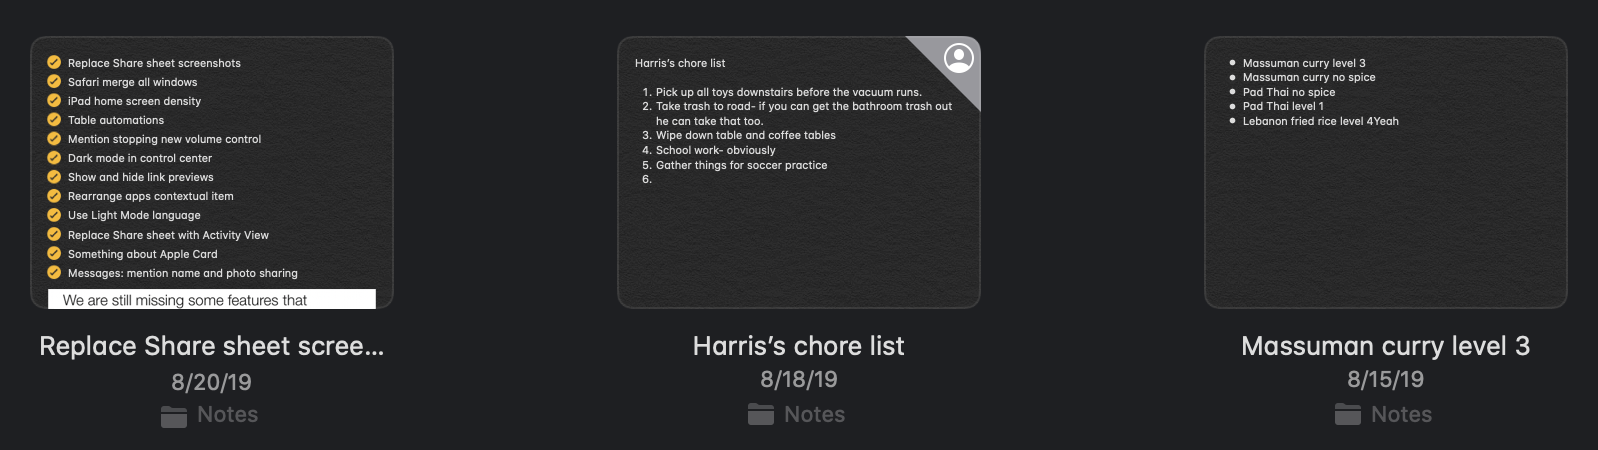
To see this view, click or tap the gallery ![]() button. On an iPad, you may have to swipe down on the sidebar to reveal the gallery
button. On an iPad, you may have to swipe down on the sidebar to reveal the gallery ![]() button. Tap the list
button. Tap the list ![]() button to switch back to list view.
button to switch back to list view.
Create and Rename Note Folders
The main tool you have to organize notes is folders. They’re easy to create on a Mac: choose File > New Folder (⌘-Shift-N) or click New Folder in the sidebar. You can also Control-click on an existing folder and choose New Folder from the contextual menu. After you create the new folder, enter a name for a folder (the default is New Folder) and press Return.
In iOS and iPadOS:
Tap the back
 icon until you’re at the Folders screen.
Tap New Folder.
If you have more than one account configured, you’ll be prompted to tap the name of the account you want to create the new folder in.
Enter a name for the folder.
Tap Save.
To create a new folder in iCloud, click the plus ![]() icon in the lower-left corner.
icon in the lower-left corner.
Notes creates new notes in whichever folder is selected when you create the new note.
To rename folders:
macOS: Click a folder name to highlight it, and then click it again. Or Control-click a folder and choose Rename Folder.
iOS/iPadOS: Tap the back
icon until you’re at the Folders screen, tap Edit, tap a folder’s name, enter a new name, and tap Save.iCloud: Click the gear
 icon in the lower-left corner and click the name of the folder you want to change.
Move Notes
On a Mac, moving a note to a different folder is as easy as dragging the note from the notes list to a folder in the sidebar. You can even drag notes from one account to another, or from On My Mac to iCloud. Moving multiple items works the same way as it does elsewhere in macOS: hold Shift to select a series of notes or hold ⌘ to select individual notes.
There’s another way to move notes in macOS: click a note, Control-click the note, and hover over Move To to choose a new folder from the menu.
On a Mac, you can also drag one folder into another to nest a folder. You can’t do that in iOS 12, but you can in iOS 13 and iPadOS 13. Folders in iOS and iPadOS display a small ![]() arrow if there are any subfolders, which you can tap to expose those subfolders.
arrow if there are any subfolders, which you can tap to expose those subfolders.
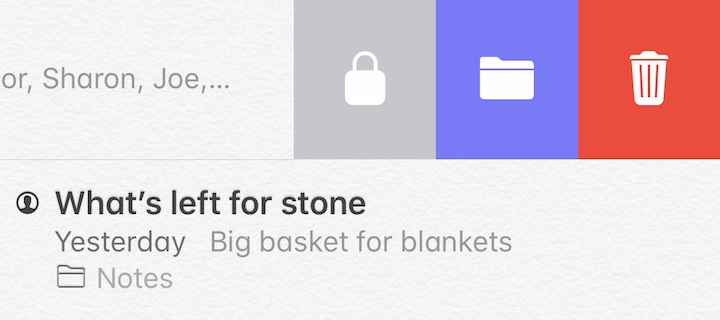
There are two ways to move a note in iOS and iPadOS. You can move a single note by swiping it from right to left until a folder  icon appears (Figure 2). Tap that, and then tap a folder on the Select a Folder screen.
iOS and iPadOS also let you move several notes at once:
While viewing a folder, tap the ellipsis
 icon.
icon.Tap Select Notes.
Tap a note to select it. A checkmark
 denotes that a note has been selected. Repeat with each additional note you want to move.
Tap Move To in the lower-left corner.
Tap a folder on the Select a Folder Screen.
To move a folder on iCloud, click and drag the folder you want to move and drop it where you want it to go.
Delete Notes and Folders
Getting rid of unnecessary notes, especially temporary ones you take in a hurry, is essential to keeping your notes list manageable.
On a Mac, deleting notes is as easy as selecting them and pressing Delete, and the same goes for folders. You can also Control-click a file or folder and choose Delete.
You don’t lose deleted files right away—they’re moved to a Recently Deleted folder, where they remain for 30 days before being permanently purged. Unfortunately, that doesn’t apply to folders—they’re deleted immediately.
As with moving notes, iOS and iPadOS offer two ways to delete them: swipe from right to left and tap the trash  icon to delete a single note. To delete several notes at once:
While viewing a folder, tap the ellipsis
icon.Tap Select Notes.
Tap a note to select it. A checkmark
denotes that a note has been selected. Repeat with each additional note you want to delete.Tap Delete in the lower-right corner.
As on a Mac, deleted notes are held in a Recently Deleted folder for 30 days before vanishing forever. Folders, however, are deleted immediately.
To delete folders in iCloud, click the folder you’d like to delete, click the gear ![]() icon in the lower-left corner, and click the delete
icon in the lower-left corner, and click the delete ![]() icon next to the folder.
icon next to the folder.
Sort Notes in Folders
By default, notes are listed in the order of date edited, with the most recently edited notes at the top. You have two other options to sort notes by: date created, and alphabetically by title. Note that you can’t sort notes in the built-in All iCloud folder (if it appears on your device) or in an IMAP account.
While viewing a note in iOS or iPadOS, you can tap “Sort by” at the top (pull down if you don’t see it) to switch between viewing the creation date and last edited date. On a Mac running Catalina, choose View > Sort Folder By.
On a Mac, you can change this in Notes > Preferences by using the “Sort notes by” pop-up menu. In iOS, go to Settings > Notes > Sort Notes By.
Pin Notes
No matter how you sort notes, it’s easy for one to get lost in the list. If you have a note you use often, but perhaps not every day, it’s useful to pin a note to keep it at the top of the list.
To pin a note:
macOS or iOS: While viewing a folder, swipe from left to right on the note (assuming you’re using a trackpad or Magic Mouse on macOS) to reveal the pin
 icon. Either tap that or keep swiping to pin the note.
macOS: Select a note and choose File > Pin Note or Control-click on a note and choose Pin Note from the contextual menu.
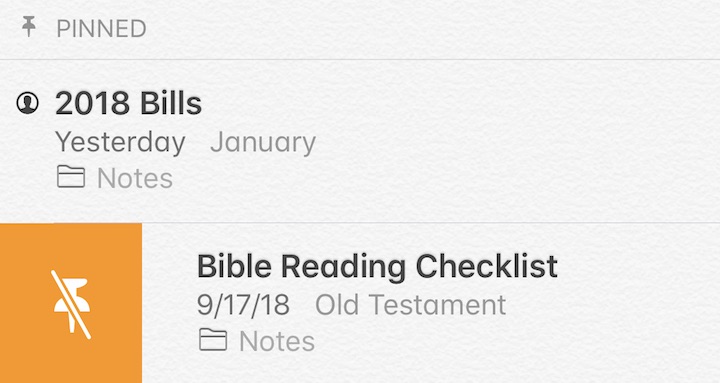
To unpin a note, follow the same instructions as pinning a note, except you either tap the unpin ![]() icon or choose Unpin Note (Figure 3).
icon or choose Unpin Note (Figure 3).
Search Notes
No matter how organized you may be (I’m not), sooner or later you’ll find yourself struggling to find a specific note. That’s where search comes in handy.
On a Mac, click the Search field in the upper-right corner and type your query to begin searching notes. You can also choose one of the suggested searches, such as Shared Notes, Locked Notes, Notes with Checklists, Notes with Drawings, Notes with Scanned Documents, and Notes with Attachments. This searches all of your notes in all of your accounts and folders. The search results appear in the middle notes column. Click one, just like any other note, to open it.
In iOS and iPadOS, the Search field is at the top of a folder listing. If you don’t see it, make sure you’re in a folder and scroll up. Tap the field and start typing to see results. You can filter results to the current account by tapping Current Account below the Search field—tap All Accounts to see results from all Notes accounts.
If you scroll down below the note results, you might also see search results for attachments. Notes has limited and inconsistent support for searching in attachments, and I don’t recommend relying on it. If you embed something like a business card in a note, it’s a good idea to also add some text to the note that you can search on (Figure 4).

Password-Protect Notes
Do you have a sensitive note that you don’t want others to see? Notes lets you lock a note with a password. (And for the crypto geeks: those notes are encrypted with AES-GCM.)
Create a Notes Password
With a single (odd) exception I point out shortly, one password is used to encrypt all the notes in the app.
To create a Notes password in macOS, go to Notes > Preferences, and then next to Locked Notes, click Set Password. Enter the password twice and, optionally, a hint.
In iOS and iPadOS, go to Settings > Notes > Password, enter the password twice and a hint if you like. You can also opt to unlock notes with Touch ID or Face ID, which I recommend leaving enabled.
I urge you to store this password somewhere secure, like 1Password or another password manager. If you lose the password, notes protected with it are locked forever. Even if you change the Notes password after the fact, you can’t unlock previously encrypted notes without the original password.
Lock and Unlock a Note
There are several ways to lock a note:
In macOS, iOS, and iPadOS, you can lock a note by swiping from right to left on its listing (assuming you’re using a trackpad on a Mac) and clicking the Lock
 icon.
icon.On a Mac, while a note is selected, you can also choose File > Lock Note or Control-click and choose Lock Note from the contextual menu.
Another way to lock a note in iOS is to open the note, tap the Share
 icon, and then tap Lock Note in the activity view.
When locking a note you’ll have to either provide your Notes password or use Touch/Face ID authentication to complete the process. A lock ![]() icon appears to the left of a locked note’s title.
icon appears to the left of a locked note’s title.
When you open a locked note, you’re presented with a message telling you that the note is locked (Figure 5).
Here’s how to unlock it:
macOS: Click the Enter Password field, enter your Notes password, and press Return to unlock it. If available, you can also use Touch ID, Face ID, or an Apple Watch to unlock your notes.
iOS: Tap View Note and authenticate with your Notes password, Touch ID, or Face ID.
When you unlock one note on a device, you unlock every locked note on that device. Here’s how to re-lock all your notes:
macOS: Choose Notes > Close All Locked Notes.
iOS/iPadOS: From the folder view, tap Lock Now at the very bottom of the screen. Alternatively, you can tap the lock
 icon while viewing a locked note.
Notes also re-lock automatically after about an hour of inactivity.
To remove a note lock entirely, follow the above instructions for locking a note, except that the Lock Note icon becomes a Remove Lock  icon and File > Lock Note becomes File > Remove Lock.
Reset a Notes Password
If you ever forget your Notes password, the good news is that you can reset it. The bad news is that the notes locked with your forgotten password will remain locked forever unless you recover that password (or delete the notes).
Here’s how to reset your Notes password on macOS:
Choose Notes > Preferences and click Reset Password.
Enter your iCloud password and click OK.
Click Reset Password at the prompt.
Enter the new password twice, enter a hint if you like, and click Set Password.
To reset your Notes password on iOS:
Go to Settings > Notes > Password > Account.
Tap Reset Password.
Enter your iCloud password and tap OK.
Tap Reset Password at the prompt.
Enter the new password twice, enter a hint if you like, and click Set Password.