Chapter 6
Performing Day-to-Day Tasks with Apps
You can use the Windows apps to perform many useful tasks, including searching for apps, settings, and files; getting directions; looking up a weather forecast; performing calculations; and setting alarms and timers.
Configure the Cortana Voice Assistant
Search Your PC
After you have used your PC for a while and have created many documents, you might have trouble locating a specific file. You can save a great deal of time by having Windows search for your document.
You can use the Search feature to look for apps, system settings, and documents on your PC, as well as websites on the Internet. If you are working with File Explorer, you can also perform document searches using the Search box in a folder window.
Search Your PC

Search from the Taskbar
![]() Click inside the Search box and type your search text.
Click inside the Search box and type your search text.
![]() Windows displays the top apps, settings, and documents with names that include your search text.
Windows displays the top apps, settings, and documents with names that include your search text.
![]() Windows displays other search results here, organized by category (such as Folders).
Windows displays other search results here, organized by category (such as Folders).
![]() If you see the app, setting, or document that you want, you can click it.
If you see the app, setting, or document that you want, you can click it.
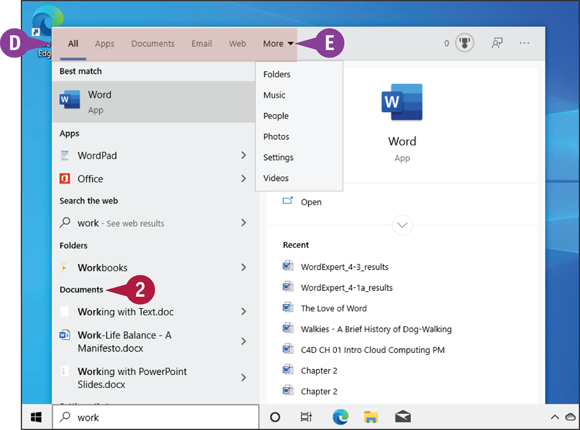
![]() To see results from a specific category, click a heading, such as Documents.
To see results from a specific category, click a heading, such as Documents.
![]() You can also click a category.
You can also click a category.
![]() You can click the More
You can click the More ![]() to see extra categories, as shown here.
to see extra categories, as shown here.
Windows displays the category items that match your search text.
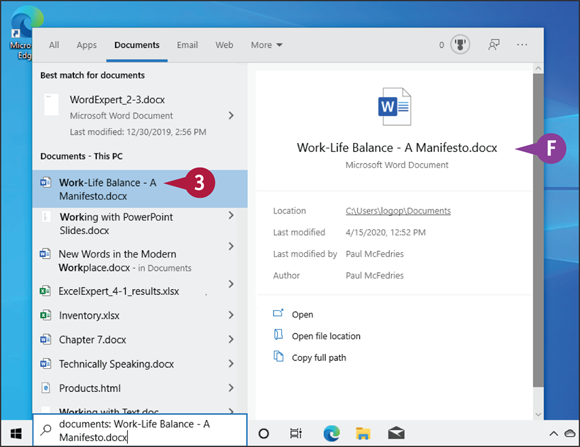
![]() Windows displays details and related tasks for the selected search item here.
Windows displays details and related tasks for the selected search item here.
![]() Click the item you want.
Click the item you want.
Windows opens the app, setting, document, or website.
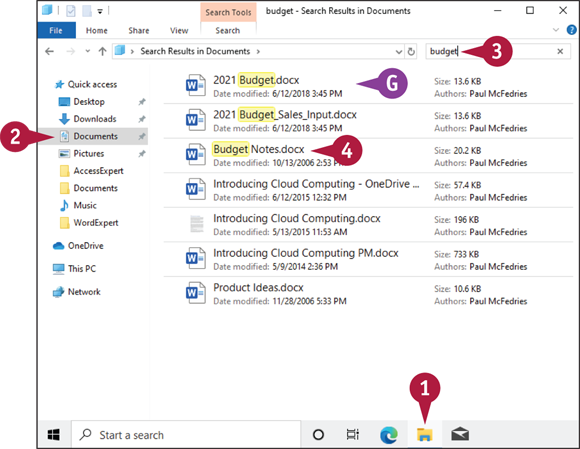
Search from a Folder Window
![]() Click File Explorer (
Click File Explorer (![]() ).
).
![]() Open the folder you want to search.
Open the folder you want to search.
![]() Type your search text in the Search box.
Type your search text in the Search box.
![]() As you type, Windows displays the folders and documents in the current folder with names, contents, or keywords that match your search text.
As you type, Windows displays the folders and documents in the current folder with names, contents, or keywords that match your search text.
![]() If you see the folder or document that you want, double-click it.
If you see the folder or document that you want, double-click it.
The folder or document opens.
Configure the Cortana Voice Assistant
If you have a microphone attached to your PC, you can use it to search for information on your computer and on the web by using voice commands. To set up this feature, you need to configure Cortana, the Windows 10 voice assistant. Cortana knows what is on your PC and what is available on the web. Although you can still type searches as described in the previous section, “Search Your PC,” once Cortana is configured you can run searches and other tasks using verbal commands that you speak into your microphone.
Configure the Cortana Voice Assistant
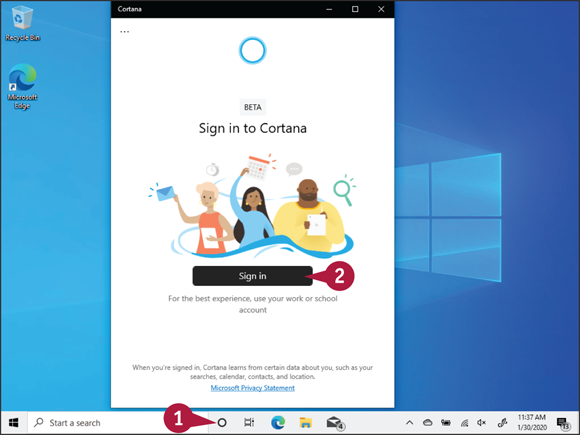
![]() Click Talk to Cortana (
Click Talk to Cortana (![]() ).
).
![]() Click Sign in.
Click Sign in.

Windows asks you to choose an account to sign in to Cortana.
![]() Click your Microsoft account.
Click your Microsoft account.
Note: See Chapter 1 to learn how to switch to a Microsoft account.
![]() Alternatively, you can click one of these options to use a different account.
Alternatively, you can click one of these options to use a different account.
![]() Click Continue.
Click Continue.
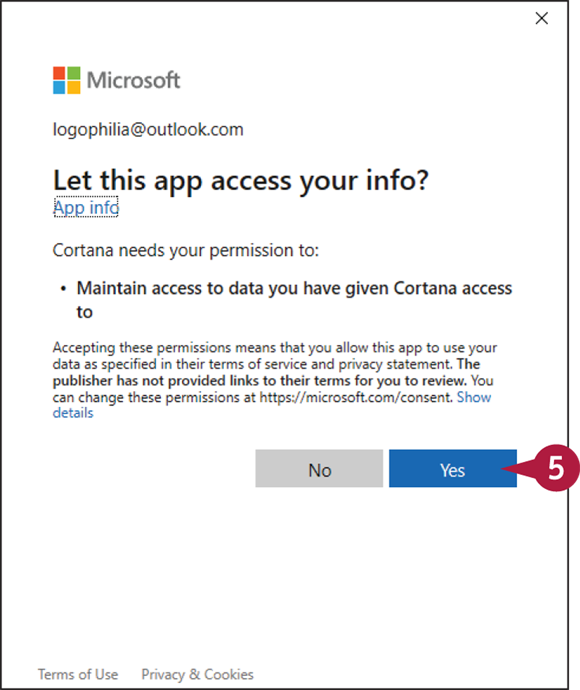
Windows asks if you want to allow Cortana to access your account data.
![]() Click Yes.
Click Yes.
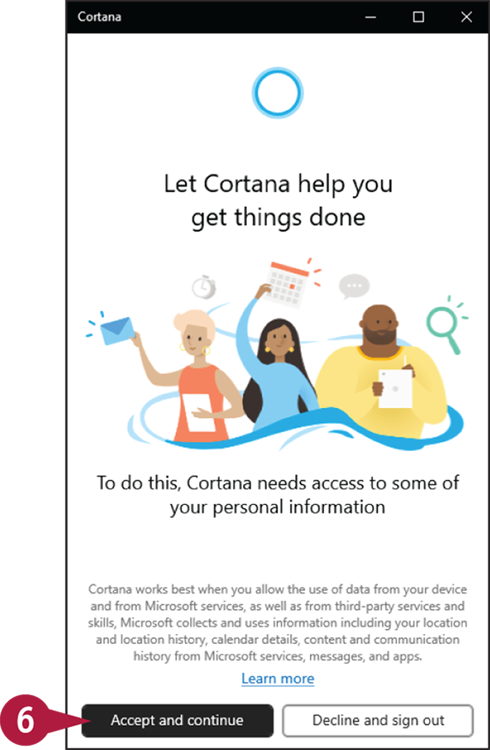
Windows asks if you want to allow Cortana to access your personal data.
![]() Click Accept and continue.
Click Accept and continue.
You can now use Cortana to search and control your PC.
Control Your PC with Cortana
You can use the Cortana voice assistant to control various aspects of your PC. These tasks include running apps and opening specific pages of the Settings app. You can also use Cortana to streamline aspects of your life. For example, you can use Cortana to set up reminders, create lists, send email, or access your calendar. You can perform any of these using either keyboard or voice instructions.
Note, too, that Cortana gets more powerful with each new update of Windows 10, so the list of tasks you can perform with Cortana will grow over time.
Control Your PC with Cortana
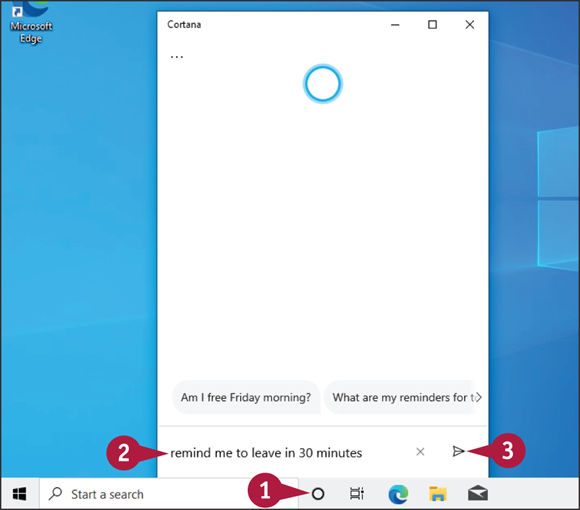
Via Keyboard
![]() Click Talk to Cortana (
Click Talk to Cortana (![]() ).
).
You can also activate Cortana by pressing ![]() +
+ ![]() .
.
Cortana opens and places the typing cursor in the Ask Cortana box.
![]() Type your command or search text.
Type your command or search text.
![]() Click Send (
Click Send (![]() ) or press
) or press ![]() .
.

Cortana carries out your request.
![]() Cortana shows your command.
Cortana shows your command.
![]() Cortana displays its response.
Cortana displays its response.
![]() Cortana displays the results of your request, if any.
Cortana displays the results of your request, if any.
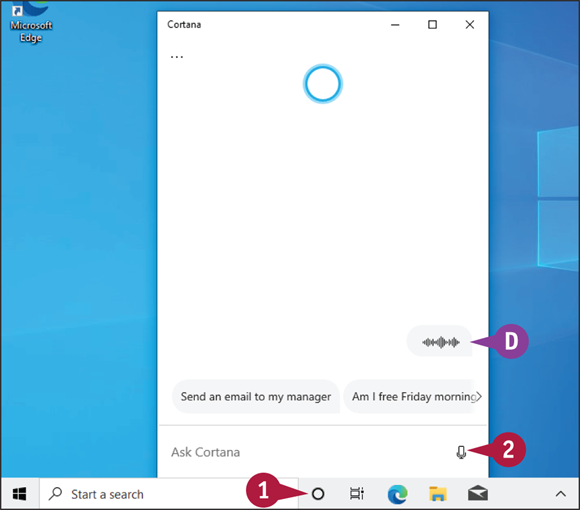
Via Voice
![]() Click Talk to Cortana (
Click Talk to Cortana (![]() ).
).
Cortana opens.
![]() Click Speak to Cortana (
Click Speak to Cortana (![]() ).
).
![]() Cortana displays this animation to let you know it is listening for your voice command.
Cortana displays this animation to let you know it is listening for your voice command.
![]() Speak your command or search text into your PC’s microphone.
Speak your command or search text into your PC’s microphone.
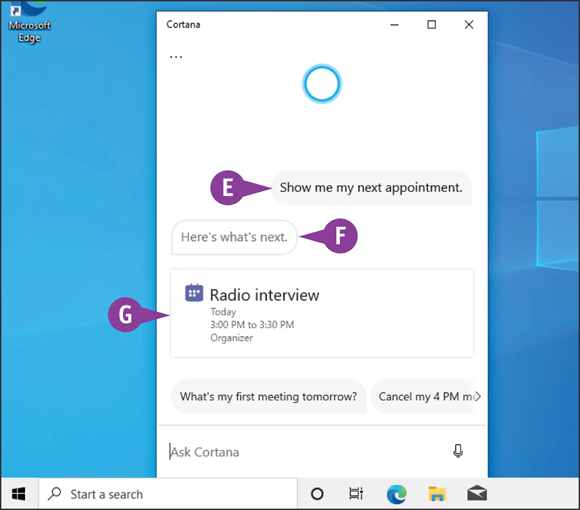
Cortana carries out your request.
![]() Cortana shows your command.
Cortana shows your command.
![]() Cortana displays its response.
Cortana displays its response.
![]() Cortana displays the results of your request, if any.
Cortana displays the results of your request, if any.
Configure Skype
You can use the Skype app to place calls to friends and family using your Internet connection. Unlike regular phone calls, Skype lets you place video calls, which means you hear and see the other person. If either you or the person you call does not have a video camera, then Skype also enables you to place voice calls over the Internet.
Although you can sign up for a Skype account separately, this is not necessary because Windows assigns you a Skype account automatically using your Microsoft account. This section assumes you are using a Microsoft account (see Chapter 1).
Configure Skype
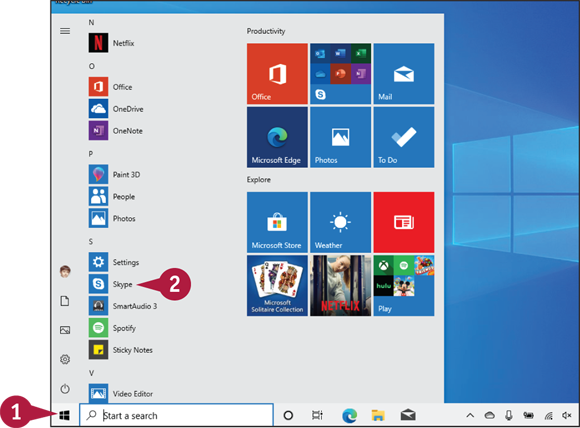
![]() Click Start (
Click Start (![]() ).
).
![]() Click Skype.
Click Skype.
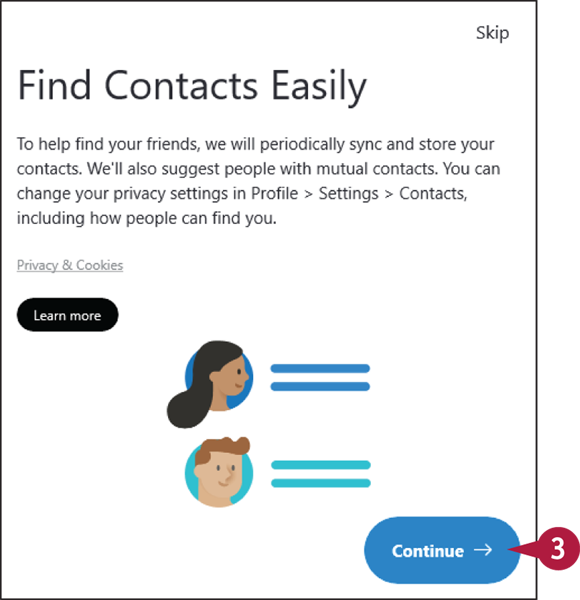
The Find Contacts Easily screen appears.
![]() Click Continue.
Click Continue.
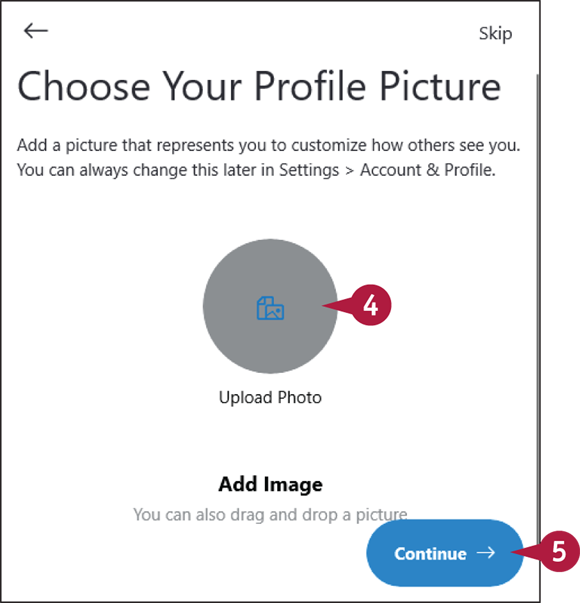
The Choose Your Profile Picture screen appears.
![]() Click Upload Photo, use the Open dialog box (not shown) to select a photo, and then click Open.
Click Upload Photo, use the Open dialog box (not shown) to select a photo, and then click Open.
![]() Click Continue.
Click Continue.
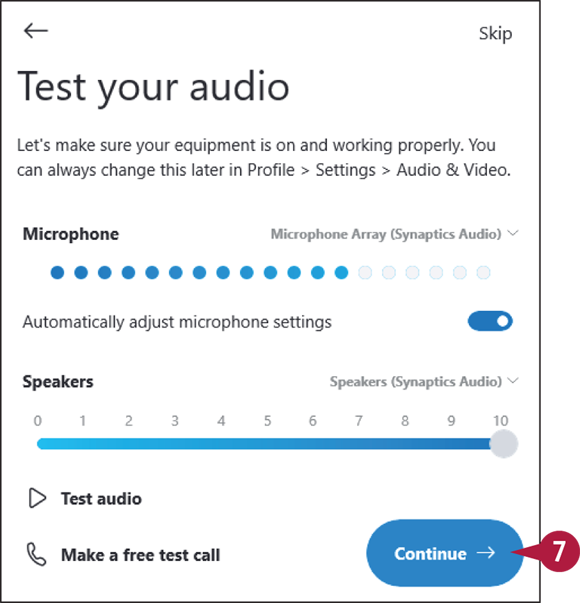
The Test Your Audio screen appears.
![]() Speak normally into your PC’s microphone.
Speak normally into your PC’s microphone.
Skype automatically adjusts the microphone volume as you speak.
![]() Click Continue.
Click Continue.
Skype displays your PC’s camera feed.
![]() Click Continue (not shown).
Click Continue (not shown).
Skype completes the configuration and displays its main window.
Call Someone Using Skype
Once you have Skype set up on your PC, as described in the previous section, “Configure Skype,” you are ready to make and accept video calls. When you make a call, note that the other person has to accept the call before the conversation can begin. Similarly, when someone calls your PC, you can either accept or decline the incoming call. This means you do not have to answer a call if you are too busy or otherwise occupied.
Call Someone Using Skype

Initiate a Call
![]() Click the Calls tab.
Click the Calls tab.
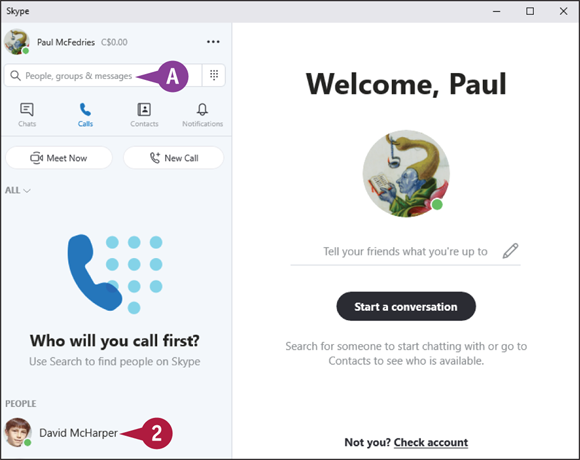
![]() Click the name of the person you want to call.
Click the name of the person you want to call.
![]() If your list of Skype contacts is long, you can use this Search box to type the name of the person you want to call.
If your list of Skype contacts is long, you can use this Search box to type the name of the person you want to call.
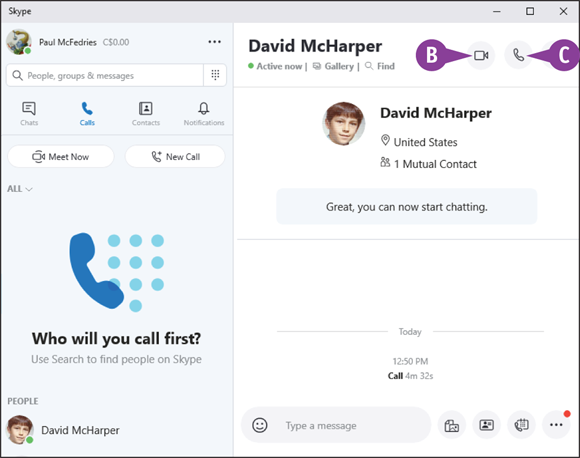
![]() Click the type of call you want to make:
Click the type of call you want to make:
![]() You can click Video Call (
You can click Video Call (![]() ) to make a video call.
) to make a video call.
![]() You can click Audio Call (
You can click Audio Call (![]() ) to make a voice call.
) to make a voice call.
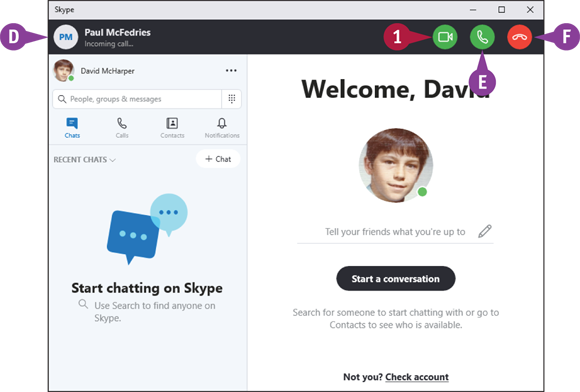
Accept a Call
![]() This bar appears when Skype detects an incoming call.
This bar appears when Skype detects an incoming call.
![]() Click Video (
Click Video (![]() ).
).
![]() If you want to use voice only, you can click Audio (
If you want to use voice only, you can click Audio (![]() ), instead.
), instead.
![]() To decline the call, you can click Decline (
To decline the call, you can click Decline (![]() ).
).
![]() When you are finished with the call, click the Skype window to display the controls, and then click End Call (
When you are finished with the call, click the Skype window to display the controls, and then click End Call (![]() ) (not shown).
) (not shown).
Display a Location on a Map
You can use the Maps app to display a location on a map. Maps is an app that displays digital maps that you can use to view just about any location by searching for an address or place name.
When you first start the Maps app, Windows asks if it can turn on location services, which are background features that help determine your current location and offer this information to apps such as Maps. For the best results with Maps, you should allow Windows to turn on location services.
Display a Location on a Map
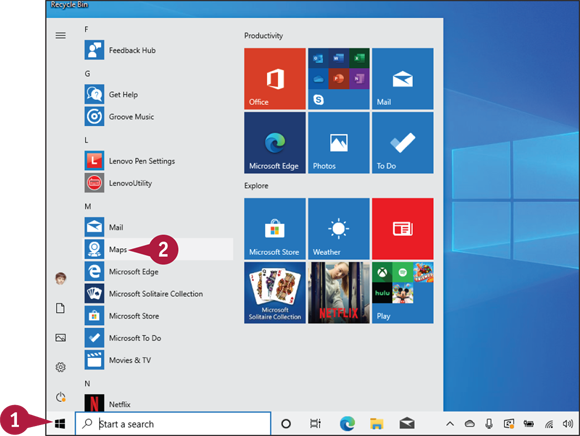
![]() Click Start (
Click Start (![]() ).
).
![]() Click Maps.
Click Maps.
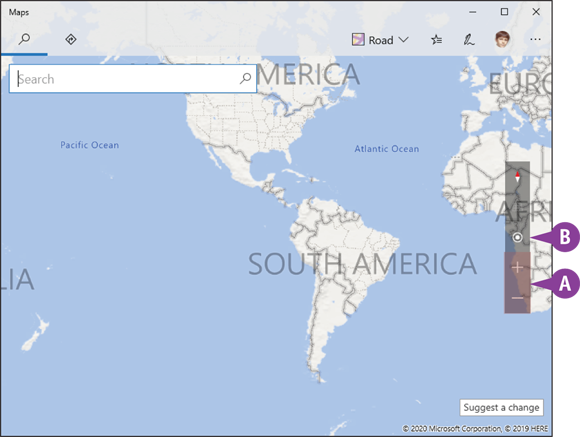
The Maps window appears.
![]() In the Navigation toolbar, you can click Zoom in (
In the Navigation toolbar, you can click Zoom in (![]() ) and Zoom out (
) and Zoom out (![]() ) to see more or less map detail.
) to see more or less map detail.
![]() You can click Show my location (
You can click Show my location (![]() ) to see your current location.
) to see your current location.
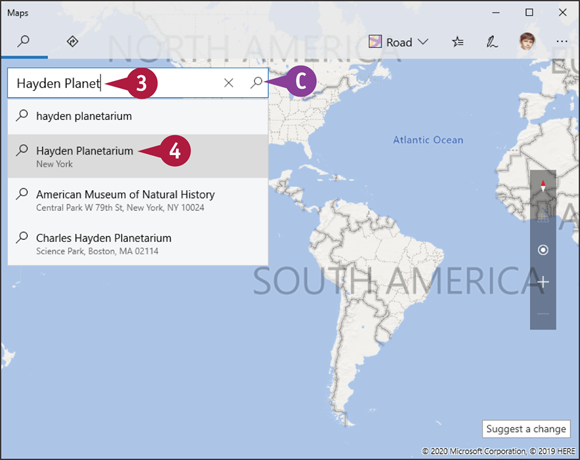
![]() Type the address or the name of the location.
Type the address or the name of the location.
![]() Click the location in the search results.
Click the location in the search results.
![]() To see a list of matching locations, you can click Search (
To see a list of matching locations, you can click Search (![]() ) and then click the location you want.
) and then click the location you want.
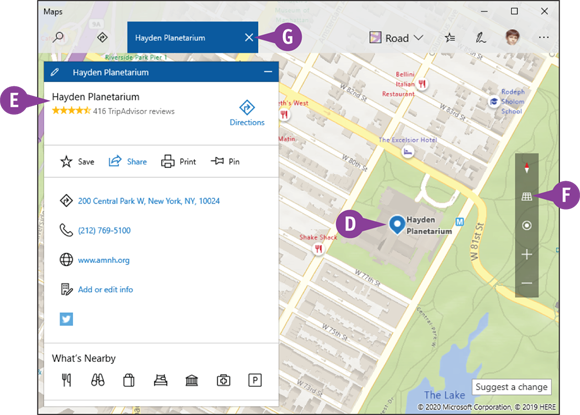
![]() Maps displays the location on the map.
Maps displays the location on the map.
![]() Maps displays information about the location.
Maps displays information about the location.
![]() You can click Tilt (
You can click Tilt (![]() ) to tilt the map vertically.
) to tilt the map vertically.
![]() You can click Close (
You can click Close (![]() ) to hide the location information.
) to hide the location information.
Get Directions to a Location
Besides displaying locations, Maps also recognizes the roads and highways found in most cities, states, and countries. This means that you can use the Maps app to get specific directions for traveling from one location to another.
You specify a starting point and destination for a trip, and Maps then provides you with directions for getting from one point to the other. Maps highlights the trip route on a digital map and also gives you specific details for negotiating each leg of the trip.
Get Directions to a Location
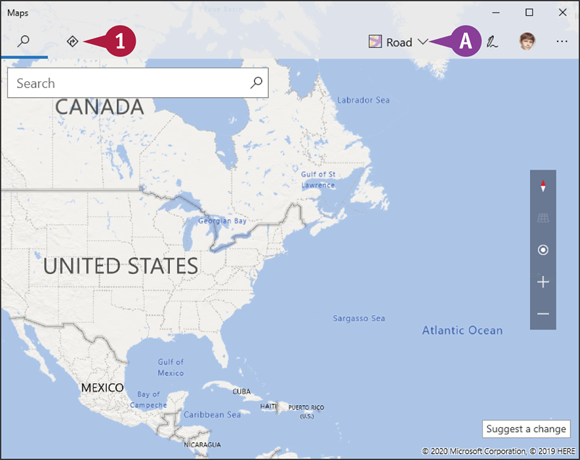
![]() Click Directions (
Click Directions (![]() ).
).
![]() The Map Views list appears (see the tip in this section).
The Map Views list appears (see the tip in this section).
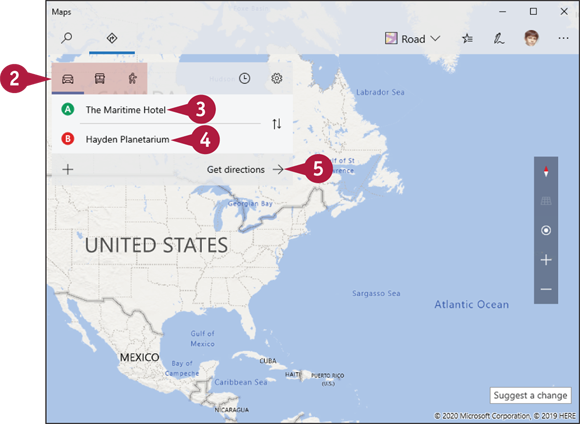
![]() Click the travel method: Driving (
Click the travel method: Driving (![]() ), Transit (
), Transit (![]() ), or Walking (
), or Walking (![]() ).
).
Note: Maps assumes that you want to start at your current location. If that is true, skip step 3.
![]() Type the name or address of the location where your journey will begin.
Type the name or address of the location where your journey will begin.
![]() Type the name or address of your destination.
Type the name or address of your destination.
![]() Click Get directions.
Click Get directions.
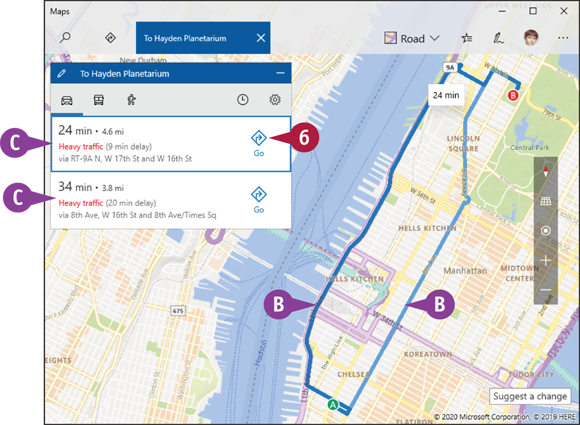
![]() Maps displays overviews of the available routes.
Maps displays overviews of the available routes.
![]() These boxes show the distance and approximate traveling time for each route.
These boxes show the distance and approximate traveling time for each route.
![]() Click Go for the route you want to take.
Click Go for the route you want to take.

Maps zooms in on the route.
![]() Maps displays the route instructions here.
Maps displays the route instructions here.
![]() Maps tells you how much time and distance are remaining to your destination.
Maps tells you how much time and distance are remaining to your destination.
Note: As you travel along the route, the instructions and the remaining time and distance change accordingly.
Check Your Weather Forecast
You can use the Weather app to view your city’s current conditions and five-day forecast. The Weather app takes advantage of several online weather resources to obtain up-to-the-minute conditions and forecasts.
The Weather app can check the forecast for a default location that you specify, or for your current location, which uses Windows location services to determine your location and display the forecast. If you would prefer to see the forecast for some other location, see the next section, “Check Another City’s Weather Forecast.”
Check Your Weather Forecast
Create a Default Location Forecast
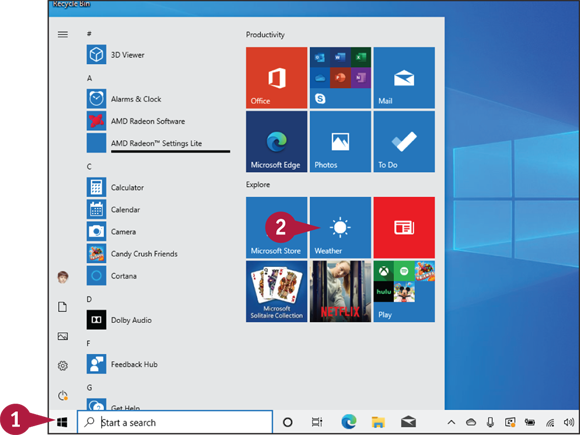
![]() Click Start (
Click Start (![]() ).
).
![]() Click Weather.
Click Weather.
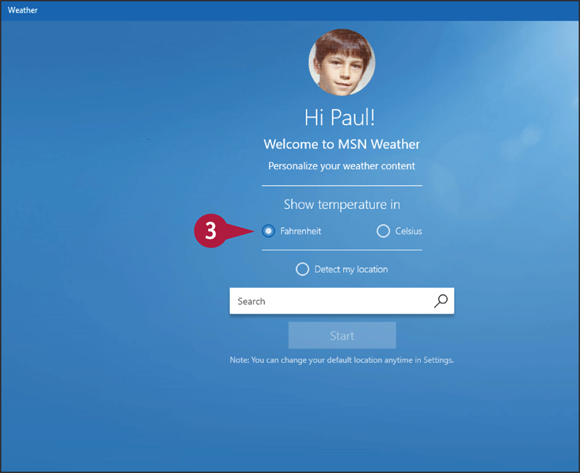
The Weather app appears. The first time you start the program, it asks you to specify a default temperature unit and location.
![]() Click Fahrenheit or Celsius (
Click Fahrenheit or Celsius (![]() changes to
changes to ![]() ).
).
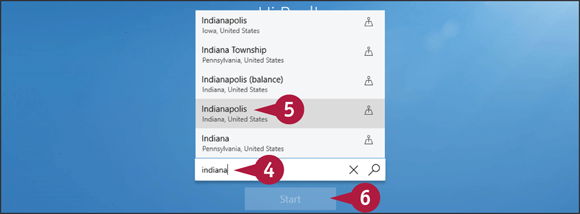
![]() Begin typing the name of the default location you want to use in the Search box.
Begin typing the name of the default location you want to use in the Search box.
![]() When you see the location in the list, click it.
When you see the location in the list, click it.
![]() Click Start.
Click Start.
Weather displays the location’s current conditions and forecast.
Check Your Current Location Forecast
![]() Click Settings (
Click Settings (![]() ).
).

![]() Click Always detect my location (
Click Always detect my location (![]() changes to
changes to ![]() ).
).
Weather asks for permission to use your location.
![]() Click Yes.
Click Yes.
Weather determines your current location.
![]() Close and restart the Weather app.
Close and restart the Weather app.
Weather displays your current location’s conditions and forecast.
Check Another City’s Weather Forecast
You can use the Weather app to view another city’s current conditions and five-day forecast. The Bing Weather service uses online resources to obtain up-to-the-minute information on the current conditions and weather forecasts for hundreds of locations around the world. If you are going to be traveling to another city or if you are simply curious about the weather conditions elsewhere, you can use Weather to look up the weather forecast for most cities around the world.
Check Another City’s Weather Forecast
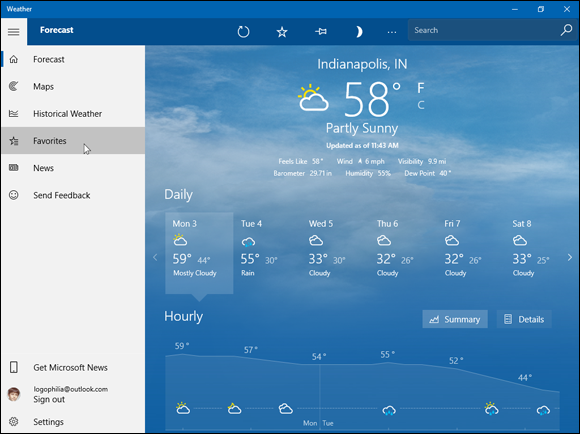
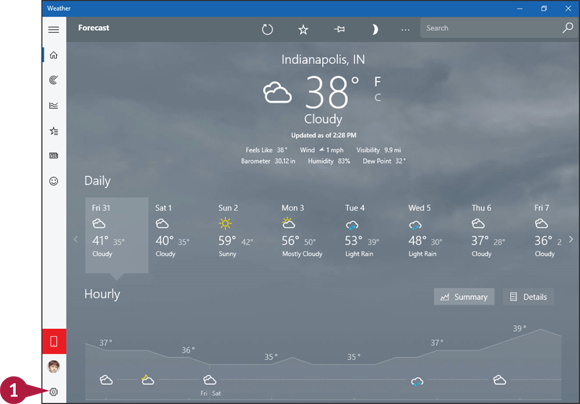
![]() In the Weather app, click Menu (
In the Weather app, click Menu (![]() ).
).
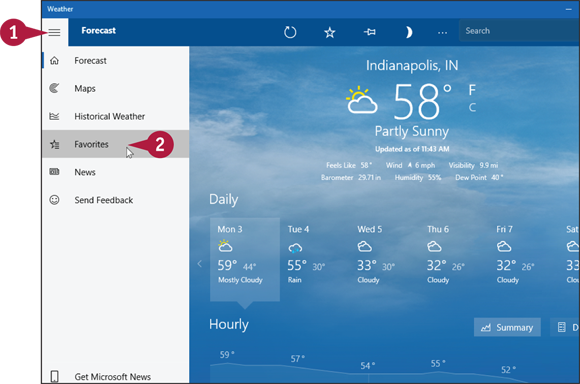
The menu appears.
![]() Click Favorites.
Click Favorites.
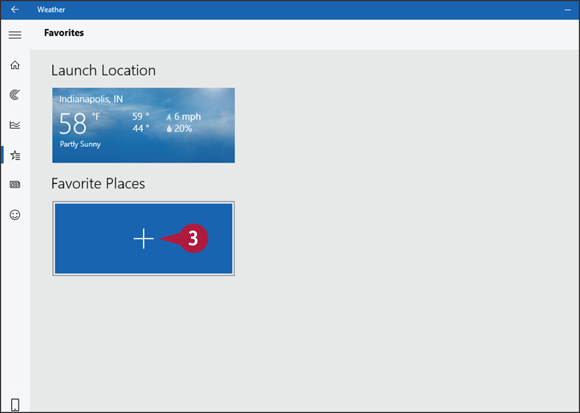
The Favorites screen appears.
![]() Click Add (
Click Add (![]() ).
).
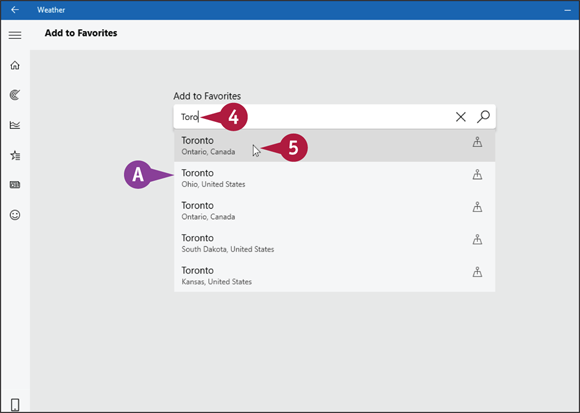
![]() Type the name of the city whose weather you want to view.
Type the name of the city whose weather you want to view.
![]() As you type, Weather displays place names that match.
As you type, Weather displays place names that match.
![]() When you see the location that you want, click it.
When you see the location that you want, click it.
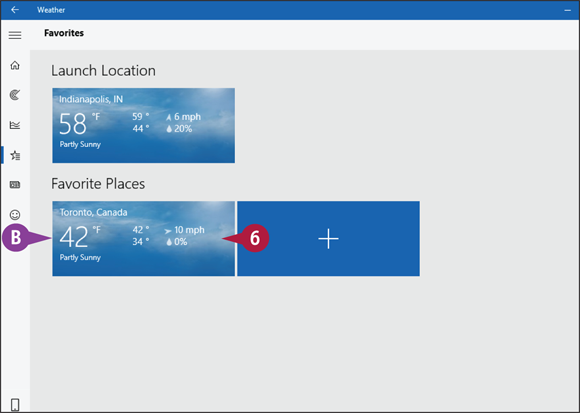
![]() Weather adds the location to the Favorites screen.
Weather adds the location to the Favorites screen.
![]() Click the location.
Click the location.
Weather displays the city’s current conditions and forecast.
Perform Calculations
You can use the Calculator app to make calculations and to convert numbers from one unit to another. The app comes with a Standard calculator that you can use for basic calculations such as addition, subtraction, multiplication, and division. For more advanced calculations, use either the Scientific or the Programmer calculator.
Calculator also comes with a number of converters that you can use to change one value to a different unit. For example, you can use the Length converter to change centimeters to inches, or the Weight and Mass converter to change kilograms to pounds.
Perform Calculations
Start the Calculator
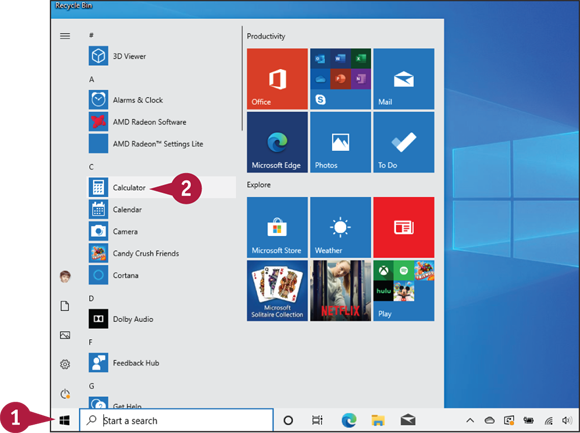
![]() Click Start (
Click Start (![]() ).
).
![]() Click Calculator.
Click Calculator.
The Calculator app appears.
Select a Calculator or Converter
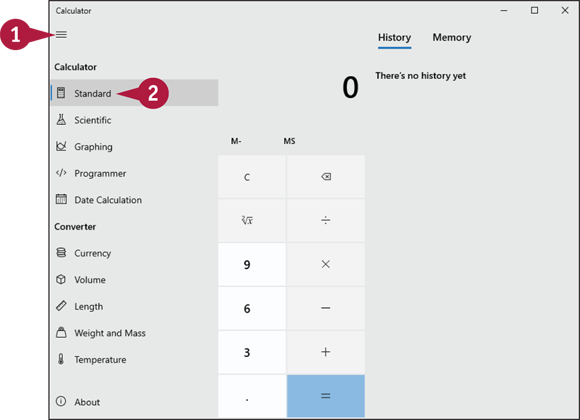
![]() Click Menu (
Click Menu (![]() ).
).
![]() Click the calculator or converter you want to use.
Click the calculator or converter you want to use.
Perform a Calculation
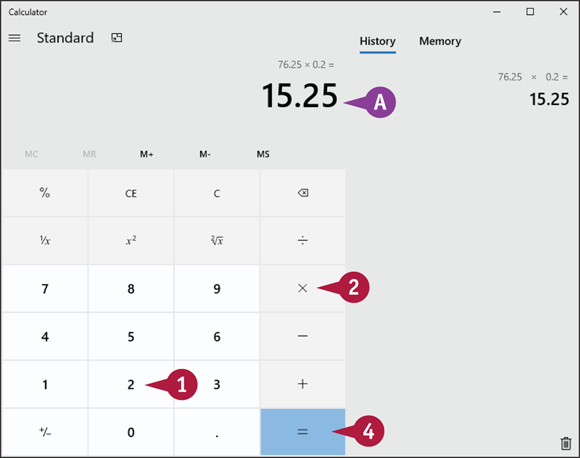
![]() Click the numeric buttons to enter a number.
Click the numeric buttons to enter a number.
![]() Click an operator.
Click an operator.
![]() Repeat steps 1 and 2 as needed.
Repeat steps 1 and 2 as needed.
![]() Click Equals (
Click Equals (![]() ).
).
![]() Calculator displays the result.
Calculator displays the result.
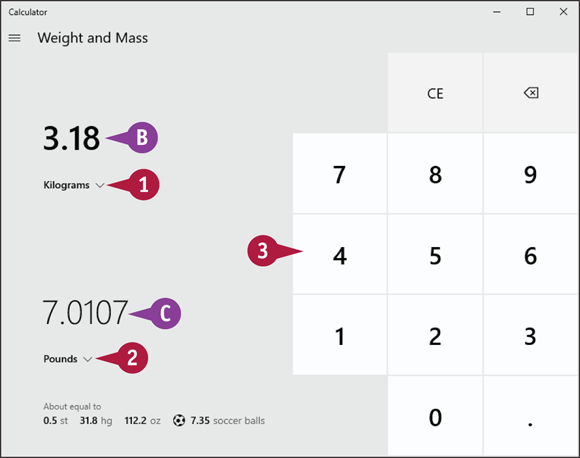
Perform a Conversion
![]() Click the top
Click the top ![]() and then click the unit you want to convert from.
and then click the unit you want to convert from.
![]() Click the bottom
Click the bottom ![]() and then click the unit you want to convert to.
and then click the unit you want to convert to.
![]() Click the numeric buttons to enter the value you want to convert.
Click the numeric buttons to enter the value you want to convert.
![]() Calculator displays the value you want to convert.
Calculator displays the value you want to convert.
![]() Calculator displays the converted value.
Calculator displays the converted value.
Record a Voice Memo
If you want to remember an idea or an inspiration, you could jot it down with pen and paper or use the Notepad program as described later in this chapter (see the section “Write a Note”). An alternative is to record a voice message using the Voice Recorder app. This is particularly handy if you are already using a microphone to send commands to the Cortana voice assistant. Voice Recorder also includes a feature that enables you to share your recordings with other people via email or instant messaging. To use Voice Recorder, you must have a microphone connected to your PC.
Record a Voice Memo
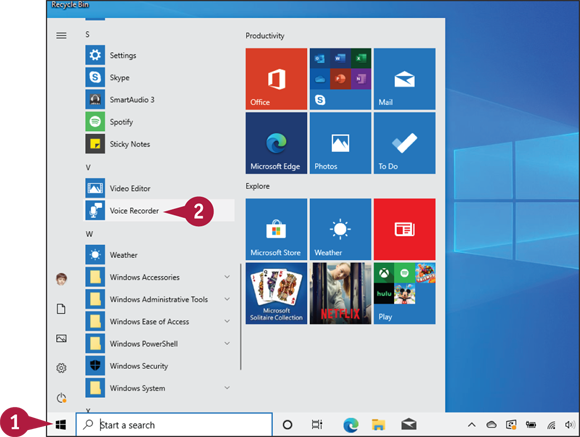
![]() Click Start (
Click Start (![]() ).
).
![]() Click Voice Recorder.
Click Voice Recorder.
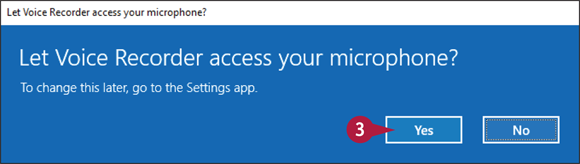
The first time you launch Voice Recorder, the app asks for permission to use your PC’s microphone.
![]() Click Yes.
Click Yes.

The Voice Recorder app appears.
![]() Click Record (
Click Record (![]() ) or press
) or press ![]() +
+ ![]() .
.
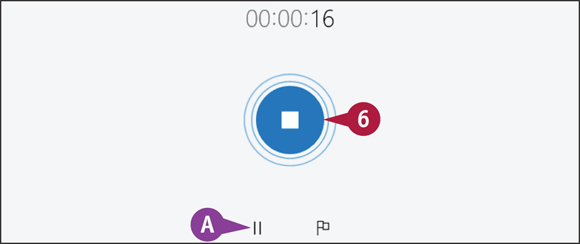
Voice Recorder begins the recording.
![]() Speak your message into your PC’s microphone.
Speak your message into your PC’s microphone.
![]() You can click Pause (
You can click Pause (![]() ) to temporarily stop the recording.
) to temporarily stop the recording.
![]() When the recording is complete, click Stop recording (
When the recording is complete, click Stop recording (![]() ).
).
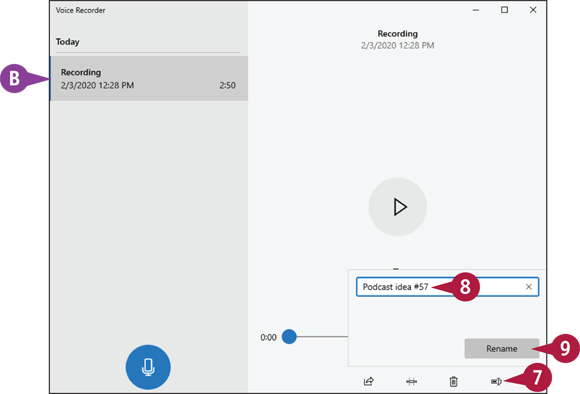
![]() Voice Recorder adds the recording.
Voice Recorder adds the recording.
![]() Click Rename (
Click Rename (![]() ).
).
![]() Type a name for the recording.
Type a name for the recording.
![]() Click Rename.
Click Rename.
Voice Recorder saves the recording under the new name.
Set an Alarm
You can use the Alarms & Clock app to set an alarm to play at a specific time. You can set up the alarm to play once, or you can have it repeat on specified days. You can also choose the sound that Windows plays when the alarm goes off. Note that your PC must be turned on and awake for the alarm feature to work.
You can also use the Alarms & Clock app to set up a timer that counts down from a specified number of hours, minutes, and seconds, and to run a stopwatch for timing an event.
Set an Alarm
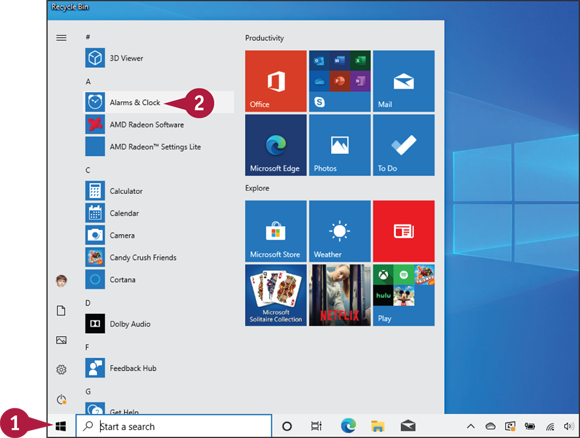
![]() Click Start (
Click Start (![]() ).
).
![]() Click Alarms & Clock.
Click Alarms & Clock.

The Alarms & Clock app appears.
![]() Alarms & Clock comes with a default alarm already added. To modify this alarm, you can click it and then follow steps 4 to 9.
Alarms & Clock comes with a default alarm already added. To modify this alarm, you can click it and then follow steps 4 to 9.
![]() You can click On/Off to toggle the alarm on or off.
You can click On/Off to toggle the alarm on or off.
![]() Click Add new alarm (
Click Add new alarm (![]() ).
).
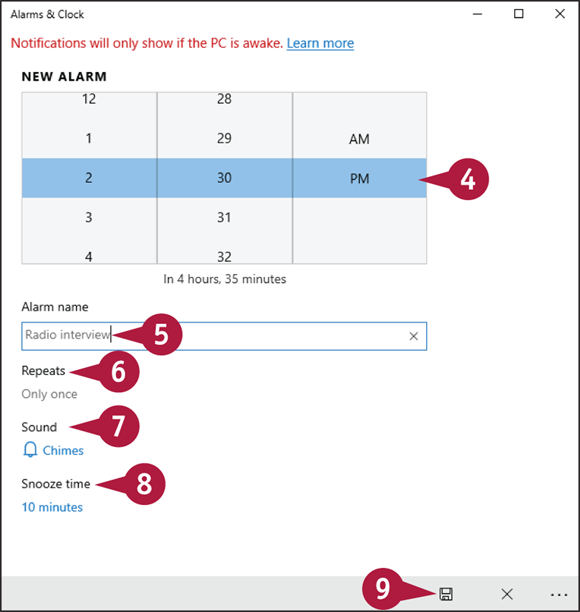
![]() Set the time of the alarm.
Set the time of the alarm.
![]() Type a name for the alarm.
Type a name for the alarm.
![]() Click Repeats and then click the check box beside each day you want the alarm to ring (
Click Repeats and then click the check box beside each day you want the alarm to ring (![]() changes to
changes to ![]() ).
).
![]() Click Sound and then click a sound to play.
Click Sound and then click a sound to play.
![]() Click Snooze time and then click the interval the app uses when you select Snooze.
Click Snooze time and then click the interval the app uses when you select Snooze.
![]() Click Save (
Click Save (![]() ).
).
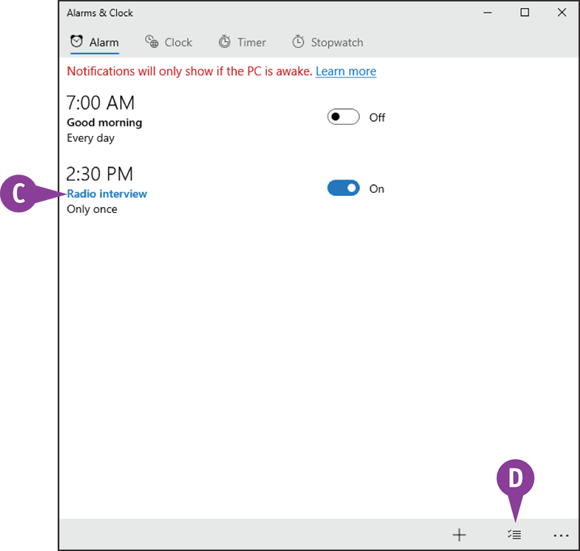
![]() Alarms & Clock adds and activates the alarm.
Alarms & Clock adds and activates the alarm.
![]() To delete an alarm, you can click Select alarms (
To delete an alarm, you can click Select alarms (![]() ), click the alarm check box (
), click the alarm check box (![]() changes to
changes to ![]() ), and then click Delete (
), and then click Delete (![]() ).
).
Write a Note
You can use the Notepad app to create simple text documents for things such as to-do lists and meeting notes. Word processing programs such as WordPad, as well as powerful note-taking apps such as the OneNote app covered in Chapter 9, are useful for creating complex and lengthy documents, but they feel like overkill when all you want to do is jot down a few simple notes. For these more basic text tasks, the Notepad app that comes with Windows is perfect because it offers a simple interface that is easy to learn and use.
Write a Note
Start Notepad
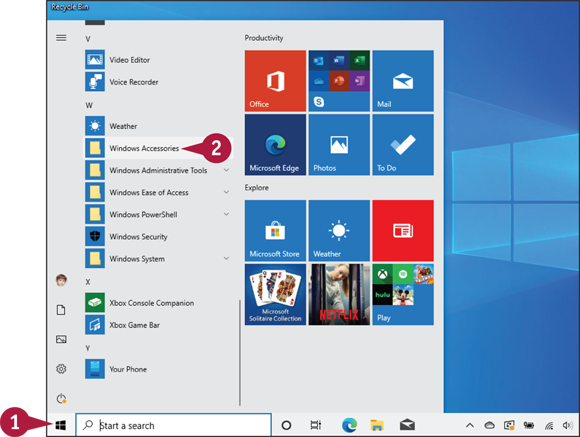
![]() Click Start (
Click Start (![]() ).
).
The Start menu appears.
![]() Click Windows Accessories.
Click Windows Accessories.
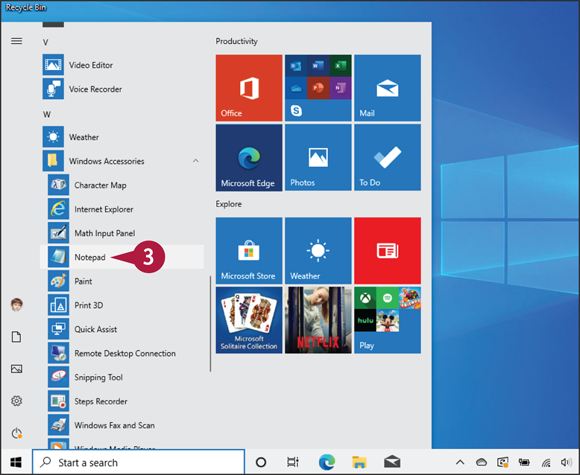
![]() Click Notepad.
Click Notepad.
Notepad opens.
Write and Save a Note
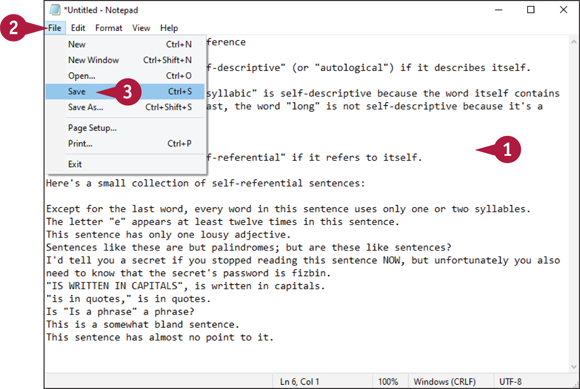
![]() Type your note text.
Type your note text.
![]() Click File.
Click File.
![]() Click Save.
Click Save.
The Save As dialog box appears.
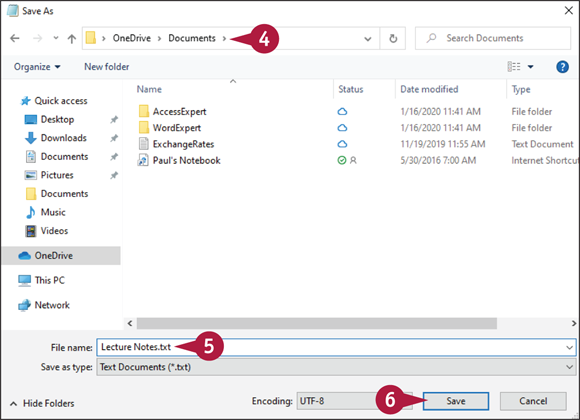
![]() Select the folder in which you want to save the file.
Select the folder in which you want to save the file.
![]() Type a name for the file.
Type a name for the file.
![]() Click Save.
Click Save.
Notepad saves the file.