
Chapter 13
Implementing Security
Threats to your computing-related security and privacy often come from the Internet and from someone simply using your computer while you are not around. To protect yourself and your family, you need to understand these threats and know what you can do to thwart them.
Understanding Windows Security
Configure Your PC to Lock Automatically
Understanding Windows Security
Before you get to the details of securing your computer, it helps to take a step back and look at the security and privacy tools that Windows makes available.
These tools include your Windows user account password, User Account Control, locking your PC, Windows Defender, Windows Defender Firewall, and the private browsing feature in Microsoft Edge. Taken all together, these features represent a defense-in-depth security strategy that uses multiple layers to keep you and your data safe and private.
User Account Password
Windows security begins with assigning a password to each user account on the computer. This prevents unauthorized users from accessing the system, and it enables you to lock your computer. For more information, see the section “Lock Your Computer,” later in this chapter.
User Account Control
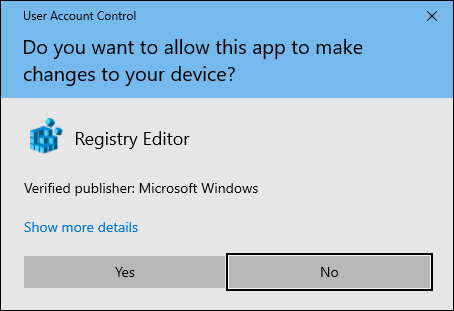
User Account Control asks you to confirm certain actions that could conceivably harm your system. When you are using your main Windows user account, which is your computer’s administrative account, you click Yes to continue; for all other accounts, you must enter the administrative account’s username and password to continue.
Locking Your PC
Protecting your PC with a password prevents unauthorized access, but what happens when you leave your desk? If you remain logged on, a person who sits down at your computer can view and work with your files. Instead of shutting down your computer when you leave your desk, you can lock your system. Anyone who tries to use your computer must first enter your password.
Windows Defender
Spyware is a software program that installs itself on your computer without your knowledge or consent. This type of program surreptitiously gathers data from your computer, steals your passwords, displays advertisements, and hijacks your web browser. To prevent spyware from installing on your computer, Windows includes the Windows Defender program.
Windows Defender Firewall
When your computer is connected to the Internet, it is possible for another person to access your computer and infect it with a virus or cause other damage; as a result, Windows comes with its Windows Defender Firewall feature turned on. This prevents intruders from accessing your computer while you are online.
InPrivate Web Browsing
The Microsoft Edge Explorer web browser normally collects data as you navigate from site to site. Most of this data is used to improve your browsing experience, but it can also be used to track your online activities. If you plan on visiting private or sensitive sites, you can turn on InPrivate browsing, which tells Microsoft Edge not to collect any data during your browsing session. For more information, see the section “Browse the Web Privately,” later in this chapter.
Reset Your PC
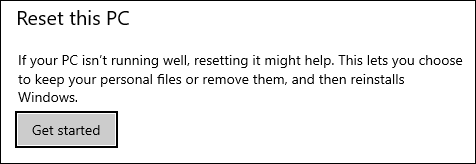
Your computer contains a lot of information about you, including your personal files, your Microsoft Edge favorites, your email messages, and your Windows settings. If you plan on selling or donating your computer, you can use the Reset Your PC feature to securely remove your data while installing a fresh copy of Windows.
Check for Security Problems
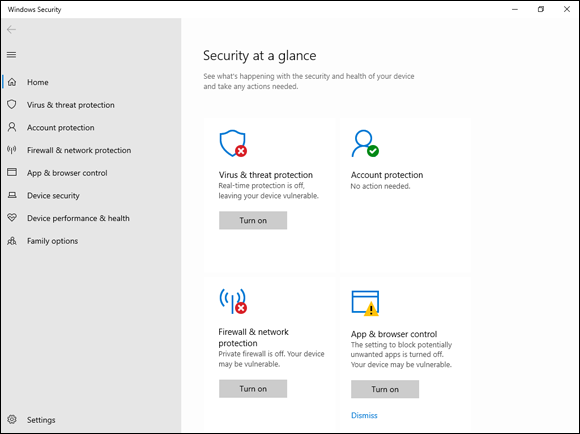
The Windows Security app displays messages about the current state of your computer. In particular, it warns you if your computer has any current security problems. For example, Windows Security tells you if your computer does not have virus protection installed or if the Windows Defender spyware database is out of date. Windows Security will also warn you if your computer is not set up to download updates automatically and if important security features such as User Account Control are turned off.
Check for Security Problems
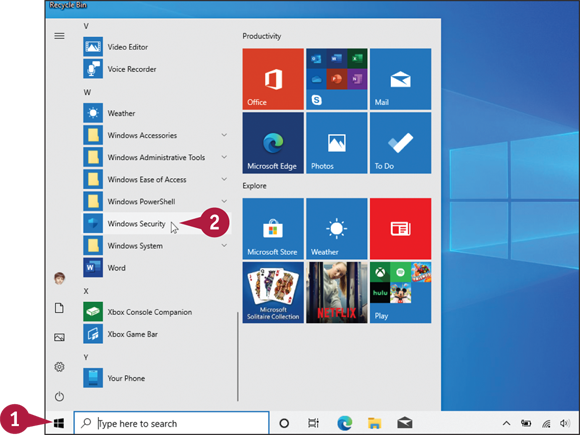
![]() Click Start (
Click Start (![]() ).
).
![]() Click Windows Security.
Click Windows Security.
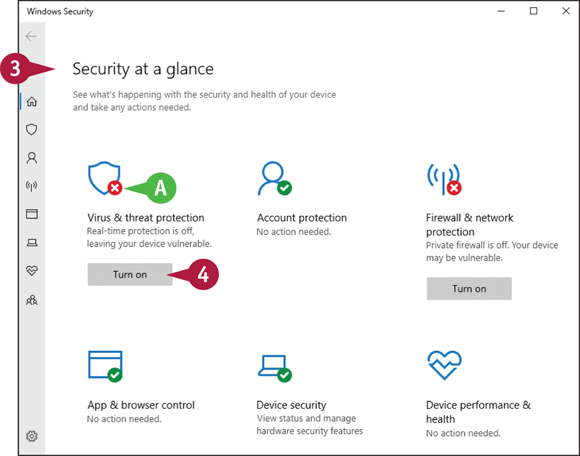
The Windows Security app appears.
![]() Review the messages in the Security at a Glance section.
Review the messages in the Security at a Glance section.
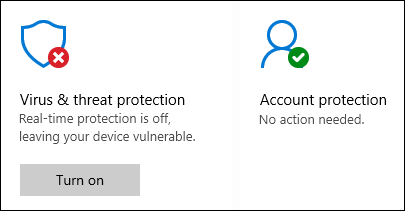
![]() A white X in a red circle indicates a security problem.
A white X in a red circle indicates a security problem.
![]() Click a message button to resolve the security issue, such as clicking Turn on if virus and threat protection (that is, Windows Defender) is turned off.
Click a message button to resolve the security issue, such as clicking Turn on if virus and threat protection (that is, Windows Defender) is turned off.
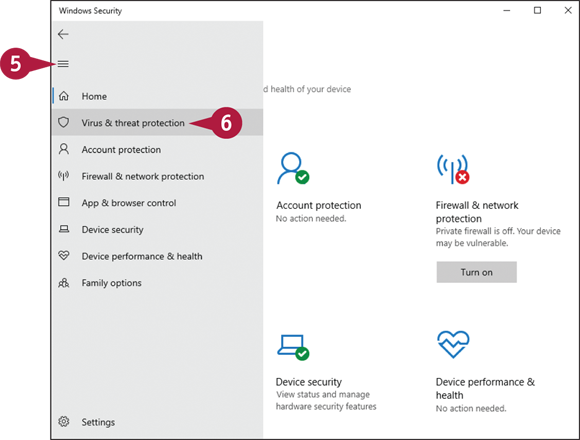
![]() Click Open Navigation (
Click Open Navigation (![]() ).
).
![]() Click a security category.
Click a security category.

Windows Security displays more detailed security information related to that category.
Create a Picture Password
You can make it easier to sign in to your Windows computer by creating a picture password. This is particularly true for a tablet PC. If you find that it is taking you a long time to sign in to Windows using your tablet’s touch keyboard, you can switch to a picture password instead. In this case, your “password” is a series of three gestures — any combination of a click, a straight line, or a circle — that you apply to a photo. Windows displays the photo at startup, and you repeat your gestures, in order, to sign in.
Create a Picture Password
Display the Sign-In Options
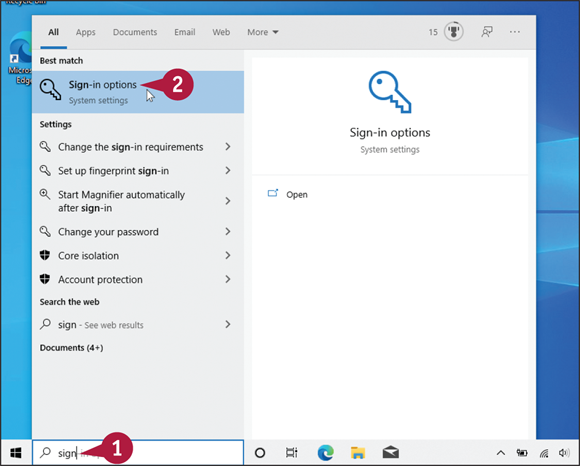
![]() In the taskbar’s Search box, type sign.
In the taskbar’s Search box, type sign.
![]() Click Sign-in options.
Click Sign-in options.
The Settings app appears and displays the Sign-in Options screen.
Create a Picture Password
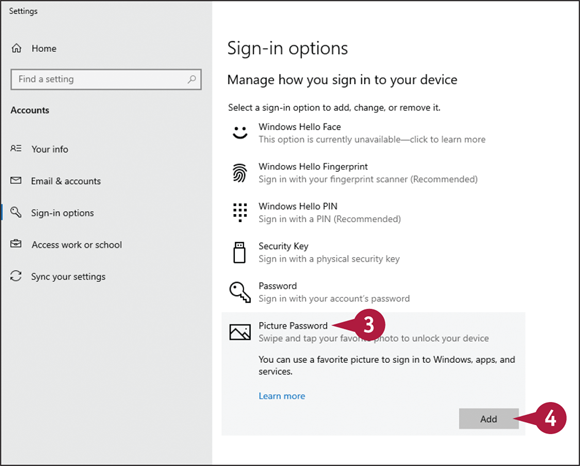
![]() Click Picture Password.
Click Picture Password.
![]() Click Add.
Click Add.
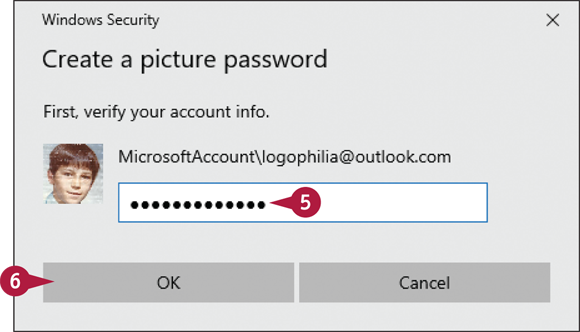
Windows prompts you for your account password.
![]() Type your password.
Type your password.
![]() Click OK.
Click OK.
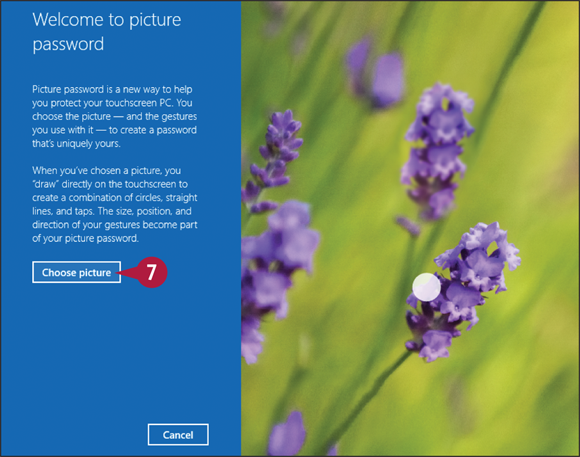
The Welcome to Picture Password screen appears.
![]() Click Choose picture.
Click Choose picture.
In the same way that you should not choose a regular account password that is extremely obvious, such as the word password or your username, you should take care to avoid creating an obvious picture password. For example, if you are using a photo showing three faces, an obvious picture password would be a click on each face.
A good picture password not only uses all three available gestures, but also uses them in nonobvious ways. To ensure that you have memorized your picture password, you should sign out of your account a few times and then sign back on using the picture password.

The Pictures screen appears.
![]() Click the picture that you want to use.
Click the picture that you want to use.
![]() Click Open.
Click Open.
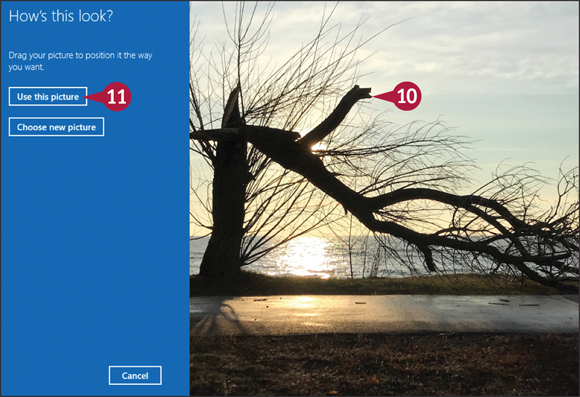
The How’s This Look screen appears.
![]() Drag the picture so that the image is positioned where you want.
Drag the picture so that the image is positioned where you want.
![]() Click Use this picture.
Click Use this picture.
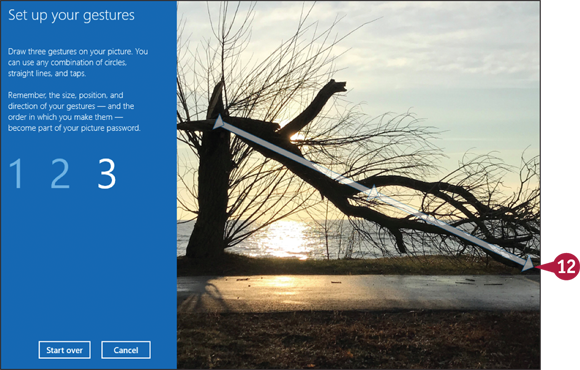
The Set Up Your Gestures screen appears.
![]() Click and drag (or, if you have a Touch PC, use your finger or a stylus to draw) three gestures.
Click and drag (or, if you have a Touch PC, use your finger or a stylus to draw) three gestures.
![]() Repeat the gestures to confirm.
Repeat the gestures to confirm.
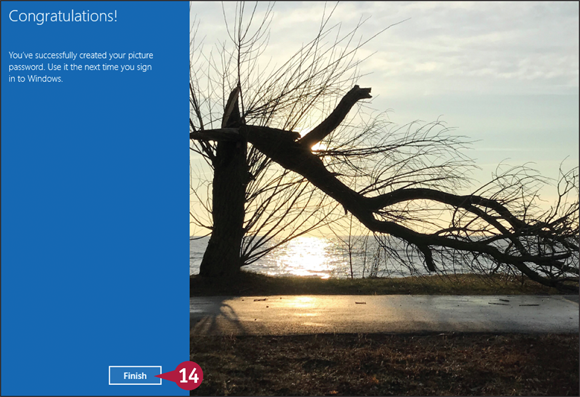
![]() Click Finish.
Click Finish.
The next time that you sign in to Windows, you will be prompted to enter your picture password gestures.
Sign In with a PIN
You can make it easier to sign in and you can enhance the security of your PC by using a Windows Hello PIN (personal identification number). A PIN makes it easier to sign in because most PINs use only four digits, which is much faster to type than a strong password that might have a dozen characters, including uppercase and lowercase letters, numbers, and symbols. A PIN enhances the security of your device because the PIN is a device-specific security measure. Unlike a password, which is sent to and stored on a server, your PIN is associated only with your device.
Sign In with a PIN
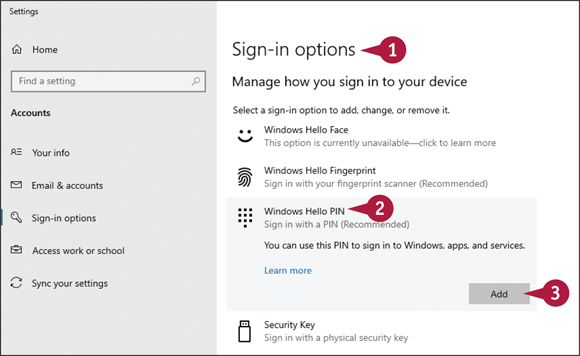
![]() Display the Settings app’s Sign-in Options screen.
Display the Settings app’s Sign-in Options screen.
Note: To learn how to get to Windows’ sign-in options, follow the steps in the subsection “Display the Sign-In Options” of the section “Create a Picture Password.”
![]() Click Windows Hello PIN.
Click Windows Hello PIN.
![]() Click Add.
Click Add.
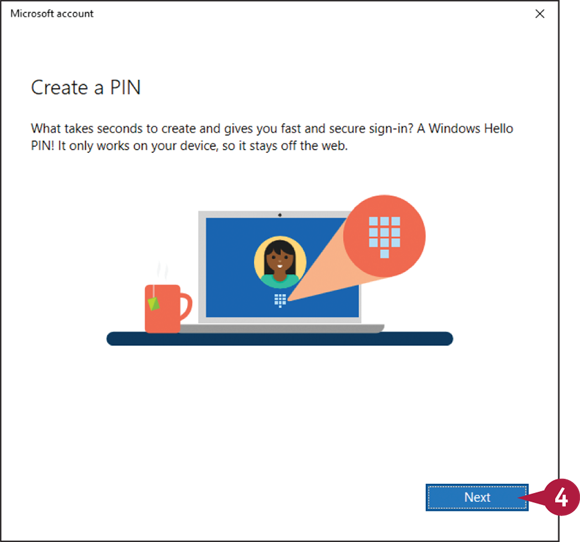
The Create a PIN screen appears.
![]() Click Next.
Click Next.
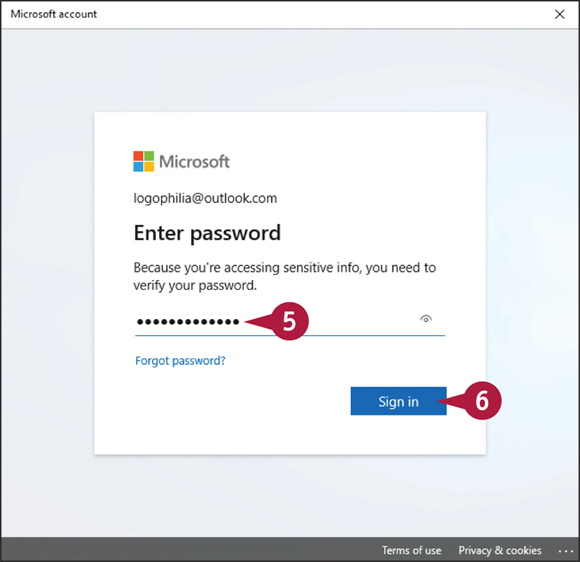
Windows prompts you for your account password.
![]() Type your password.
Type your password.
![]() Click Sign in.
Click Sign in.
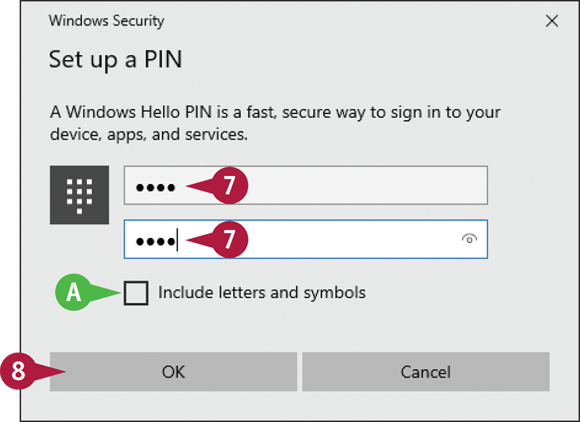
The Set Up a PIN dialog box appears.
![]() Type your PIN twice.
Type your PIN twice.
![]() If you want to use letters and symbols in your PIN, you can click Include letters and symbols (
If you want to use letters and symbols in your PIN, you can click Include letters and symbols (![]() changes to
changes to ![]() ).
).
![]() Click OK.
Click OK.
The next time that you start your PC, you will be prompted to enter your PIN to sign in.
Set Up a Fingerprint Sign-In
You can ensure that only you can access your PC and you can avoid the insecurity of using passwords and gestures in public, by using your fingerprint to sign in to Windows.
If your PC comes with a built-in fingerprint reader, or you have an external reader attached to your PC, you can use the Windows Hello feature to teach Windows your fingerprint and use it to sign in. Because your fingerprint is unique, this ensures that only you can access your PC. Also, if you are in a public place, you do not have to enter a password or use sign-in gestures that could be observed by a nearby snoop.
Set Up a Fingerprint Sign-In
![]() Display the Settings app’s Sign-in Options screen.
Display the Settings app’s Sign-in Options screen.
Note: To learn how to get to Windows’ sign-in options, follow the steps in the subsection “Display the Sign-In Options” of the section “Create a Picture Password.”
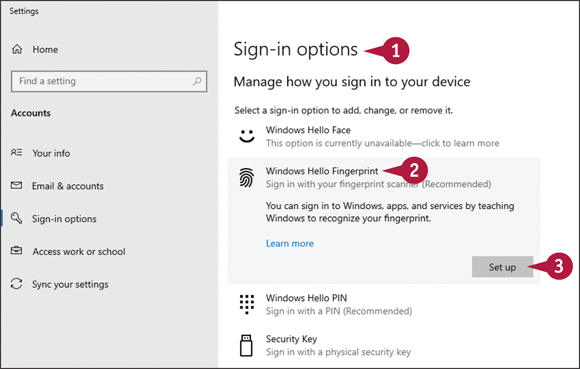
The Settings app appears and displays the Sign-in Options screen.
![]() Click Windows Hello Fingerprint.
Click Windows Hello Fingerprint.
![]() Click Set up.
Click Set up.

The Windows Hello Setup dialog box appears.
![]() Click Get started.
Click Get started.
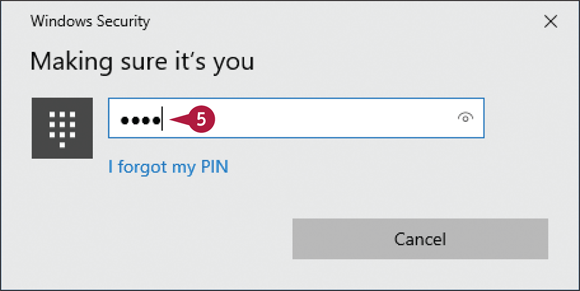
Windows prompts you for your account PIN.
![]() Type your PIN.
Type your PIN.
Note: If you do not have a PIN, see the previous section, “Sign In with a PIN.”
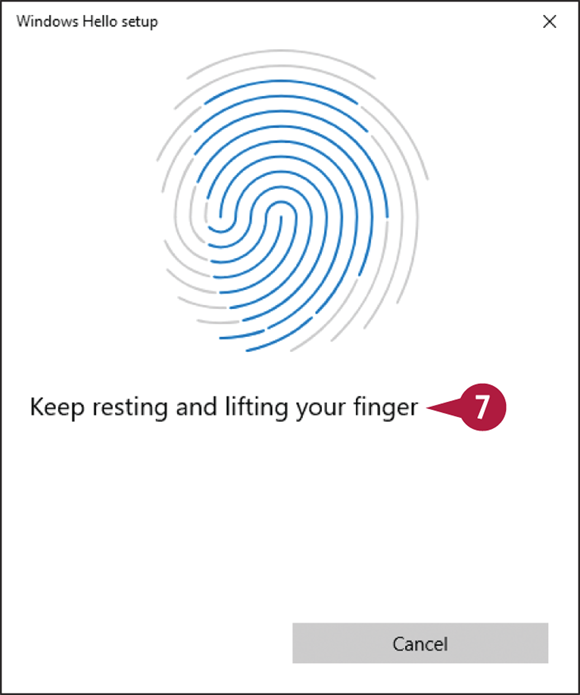
Windows Hello prompts you to scan your fingerprint.
![]() Briefly place your finger on, and then lift your finger off, your PC’s fingerprint reader.
Briefly place your finger on, and then lift your finger off, your PC’s fingerprint reader.
![]() Follow the prompts to repeat step 6 until the scan is complete.
Follow the prompts to repeat step 6 until the scan is complete.
![]() Click Close (not shown).
Click Close (not shown).
The next time that you start your PC, you can click Sign-in options and then click Fingerprint (![]() ) to sign in by placing your finger on the fingerprint reader.
) to sign in by placing your finger on the fingerprint reader.
Lock Your Computer
You can enhance your computer’s security by locking the device when you leave it unattended. Protecting your account with a password prevents someone from logging on to your account, but what happens when you leave your computer unattended? If you remain logged on to the system, any person who picks up your computer can use it to view and change files.
To prevent this, you can lock your computer. After your computer is locked, anyone who tries to use your computer will first have to enter your password.
Lock Your Computer

Lock Your Computer
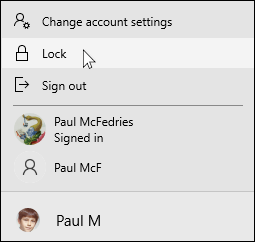
![]() Click Start (
Click Start (![]() ).
).
![]() Click your user account.
Click your user account.
![]() Click Lock.
Click Lock.
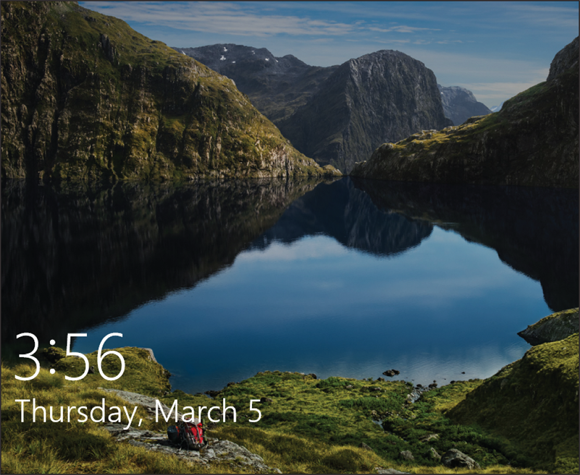
Windows locks your computer and displays the Lock screen.
Unlock Your Computer
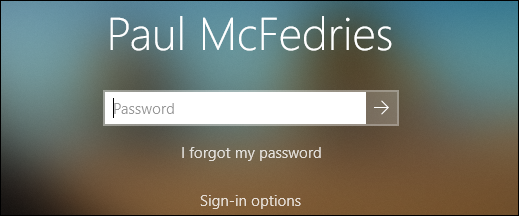
![]() On the Lock screen, press
On the Lock screen, press ![]() to display the sign-in screen.
to display the sign-in screen.
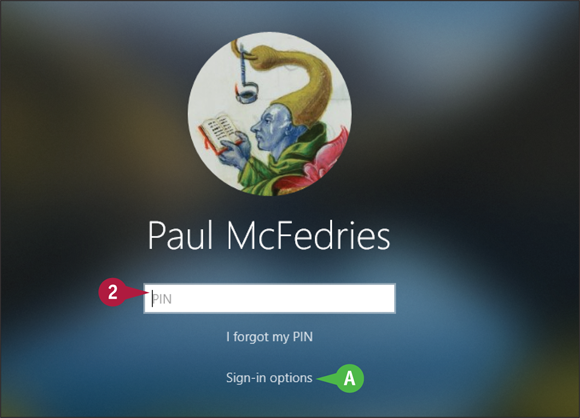
![]() Click inside the PIN text box.
Click inside the PIN text box.
Note: If you have not yet set up a Windows Hello PIN, then your password will be your default sign-in method instead of your PIN.
![]() If you want to sign in using a different method, you can click Sign-in options.
If you want to sign in using a different method, you can click Sign-in options.
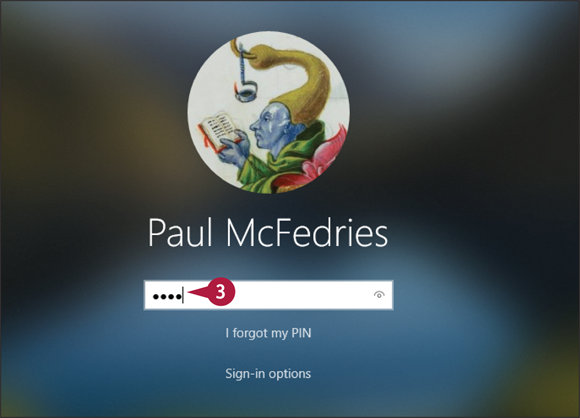
![]() Type your PIN.
Type your PIN.
Windows unlocks your computer and restores your desktop.
Configure Your PC to Lock Automatically
You can use Windows’ Dynamic Lock feature to automatically lock your computer after a connected mobile device is no longer in range.
The hard part of locking your PC is remembering to do it. If you are late for a meeting or other appointment, locking your machine is probably the last thing on your mind as you dash out the door. To ensure that some snoop cannot access your PC if you forget to lock it, you can configure Windows to lock automatically when a connected mobile device, such as your smartphone, is no longer within range of the PC.
Configure Your PC to Lock Automatically
Connect a Bluetooth Mobile Device
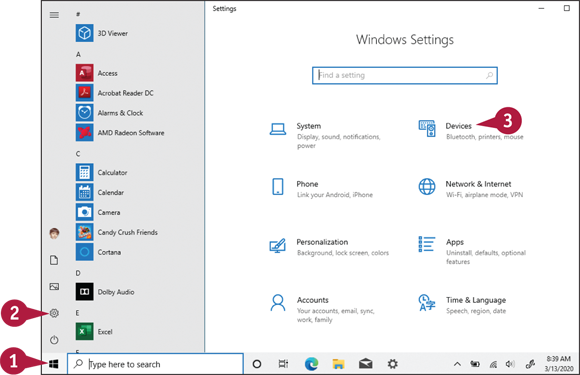
![]() Click Start (
Click Start (![]() ).
).
![]() Click Settings (
Click Settings (![]() ).
).
Note: You can also open Settings by pressing ![]() +
+ ![]() .
.
The Settings app appears.
![]() Click Devices.
Click Devices.

The Bluetooth & Other Devices screen appears.
![]() Click Add Bluetooth or other device.
Click Add Bluetooth or other device.
The Add a Device screen appears.
![]() Click Bluetooth.
Click Bluetooth.
![]() On your mobile device, make sure Bluetooth is turned on.
On your mobile device, make sure Bluetooth is turned on.
Windows begins looking for Bluetooth-enabled devices that are within range.
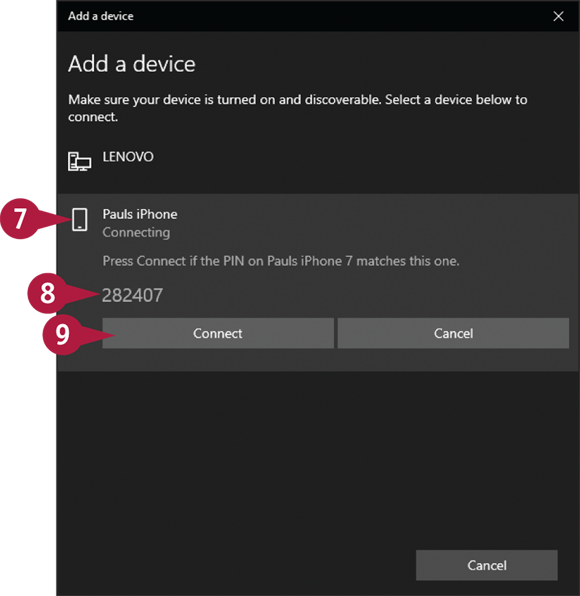
![]() When your device appears, click it.
When your device appears, click it.
![]() On your mobile device, check that this PIN number is displayed. In most cases, you also have to tap Pair on the device.
On your mobile device, check that this PIN number is displayed. In most cases, you also have to tap Pair on the device.
![]() Click Connect.
Click Connect.
Windows pairs with your device.
![]() Click Done (not shown).
Click Done (not shown).
Activate Dynamic Lock
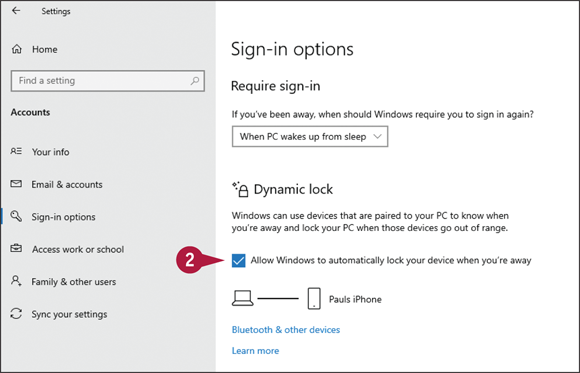
![]() Display the Settings app’s Sign-in Options screen.
Display the Settings app’s Sign-in Options screen.
Note: To learn how to get to Windows’ sign-in options, follow the steps in the subsection “Display the Sign-In Options” of the section “Create a Picture Password.”
The Settings app appears and displays the Sign-in Options screen.
![]() Click Allow Windows to automatically lock your device when you’re away (
Click Allow Windows to automatically lock your device when you’re away (![]() changes to
changes to ![]() ).
).
Windows now automatically locks your PC when you take your mobile device more than 33 feet away from your PC.
Browse the Web Privately
If you visit sensitive or private websites, you can tell Microsoft Edge not to save any browsing history for those sites. If you regularly visit private websites or websites that contain sensitive or secret data, you can ensure that no one else sees any data for such sites by deleting your browsing history, as described in the tip section. However, if you visit such sites only occasionally, deleting your entire browsing history is overkill. A better solution is to turn on the InPrivate browsing feature in Microsoft Edge before you visit private sites. This tells Microsoft Edge to temporarily stop saving any browsing history.
Browse the Web Privately
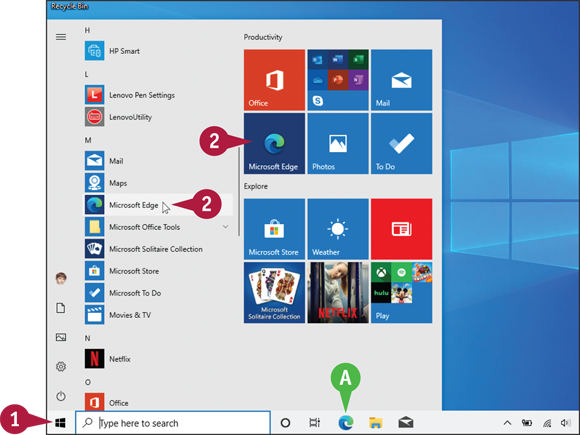
![]() Click Start (
Click Start (![]() ).
).
![]() Click Microsoft Edge.
Click Microsoft Edge.
![]() Alternatively, you can click Microsoft Edge (
Alternatively, you can click Microsoft Edge (![]() ) if you see it in the taskbar.
) if you see it in the taskbar.
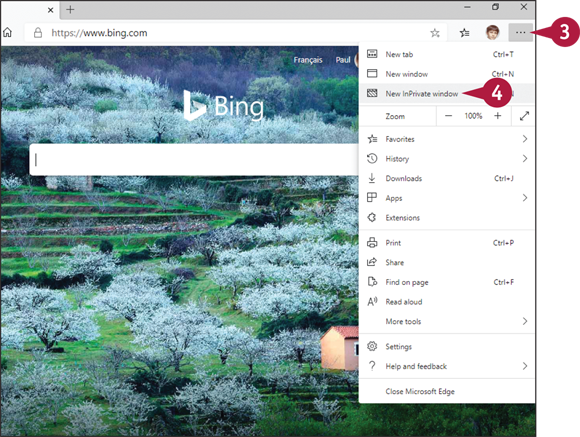
![]() Click More (
Click More (![]() ).
).
![]() Click New InPrivate window.
Click New InPrivate window.
You can also activate InPrivate by pressing ![]() +
+ ![]() +
+ ![]() .
.

A new Microsoft Edge window appears.
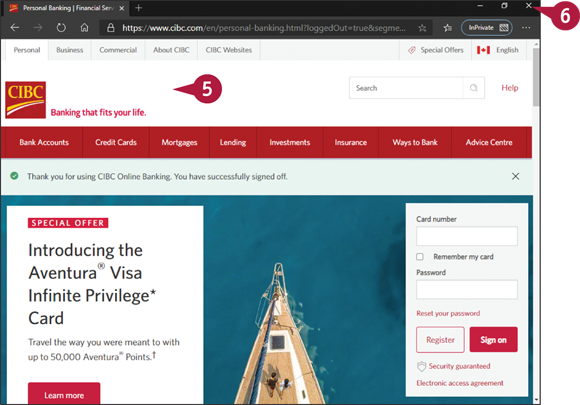
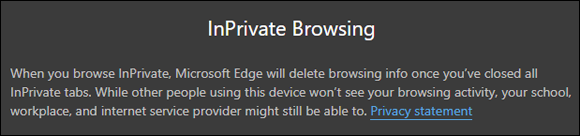
![]() The InPrivate indicator appears near the upper-right corner of the window.
The InPrivate indicator appears near the upper-right corner of the window.
![]() Surf to and interact with websites as you normally would, such as the banking site shown here.
Surf to and interact with websites as you normally would, such as the banking site shown here.
![]() When you are done, click Close (
When you are done, click Close (![]() ).
).
Microsoft Edge closes the InPrivate window and turns off InPrivate browsing.
Control Your Private Information
By default, Windows enables apps to access many aspects of your system, such as the camera, microphone, and internal antennas such as Wi-Fi and Bluetooth. Windows also enables apps to access personal information such as your location, account information, contacts, and calendar. This access improves your app experience in most cases, but you might be uncomfortable sharing so much with apps, particularly third-party apps. In that case, you can turn off access to your system resources and to your private information, either globally or just for specific apps.
Control Your Private Information
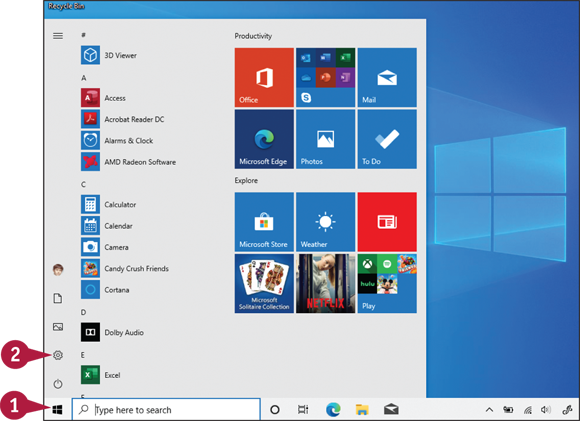
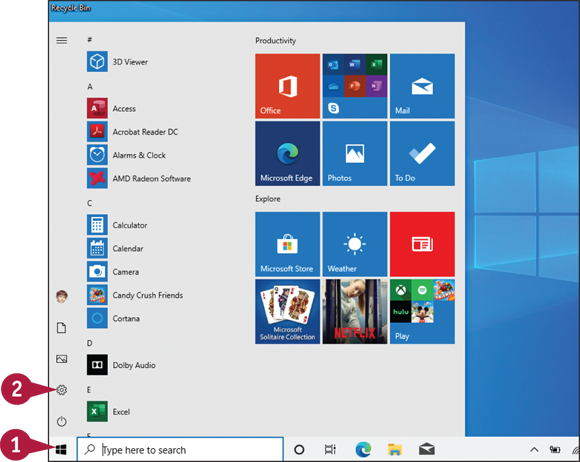
![]() Click Start (
Click Start (![]() ).
).
![]() Click Settings (
Click Settings (![]() ).
).
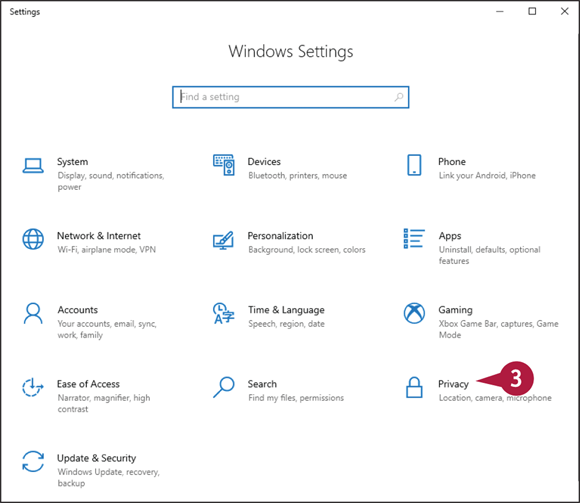
The Settings app appears.
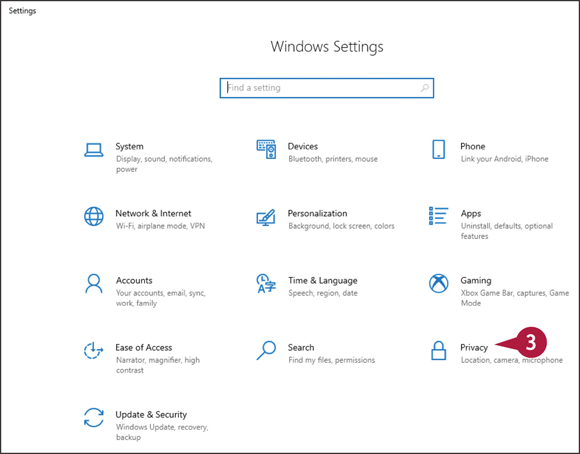
![]() Click Privacy.
Click Privacy.
The Privacy screen appears.
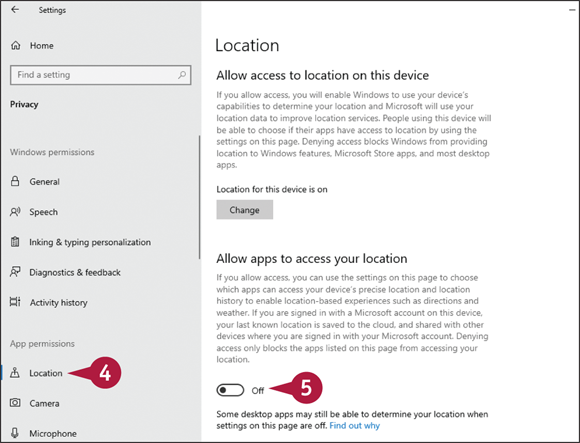
![]() Click Location.
Click Location.
![]() Click the Allow apps to access your location switch to Off to prevent apps from using your location.
Click the Allow apps to access your location switch to Off to prevent apps from using your location.
![]() To remove all location information from your PC, scroll down to the Location History section and click Clear (not shown).
To remove all location information from your PC, scroll down to the Location History section and click Clear (not shown).
Windows removes all your location information.
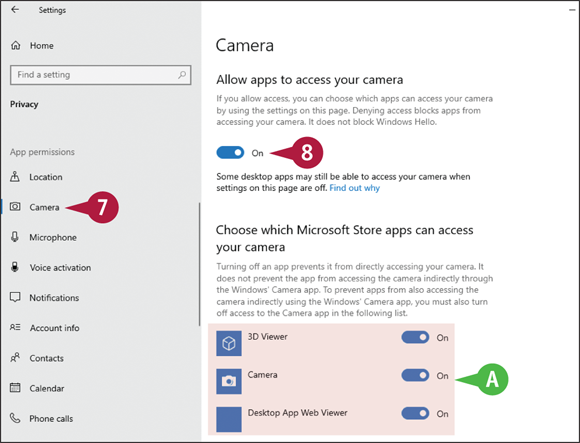
![]() For each resource that you no longer want to allow apps to access, click the resource tab.
For each resource that you no longer want to allow apps to access, click the resource tab.
![]() Click the switch that controls global access to Off.
Click the switch that controls global access to Off.
![]() Alternatively, you can use the app-specific switches to turn off access for individual apps.
Alternatively, you can use the app-specific switches to turn off access for individual apps.
The next time you display the Start menu, you will not see any personal information in the tiles.
Clear Your Activity History
As you use your computer, Windows keeps track of various activities you perform: the apps you use, the documents you open, and the websites you visit. This activity is easily accessible by clicking Task View (![]() ) in the taskbar. That is convenient, but it also means that other people who have access to your PC can also easily view your recent activities. To avoid this privacy violation, you can tell Windows to clear all your recent activities. Optionally, you can also configure Windows to not track your activities at all.
) in the taskbar. That is convenient, but it also means that other people who have access to your PC can also easily view your recent activities. To avoid this privacy violation, you can tell Windows to clear all your recent activities. Optionally, you can also configure Windows to not track your activities at all.
Clear Your Activity History
![]() Click Start (
Click Start (![]() ).
).
![]() Click Settings (
Click Settings (![]() ).
).
The Settings app appears.
![]() Click Privacy.
Click Privacy.
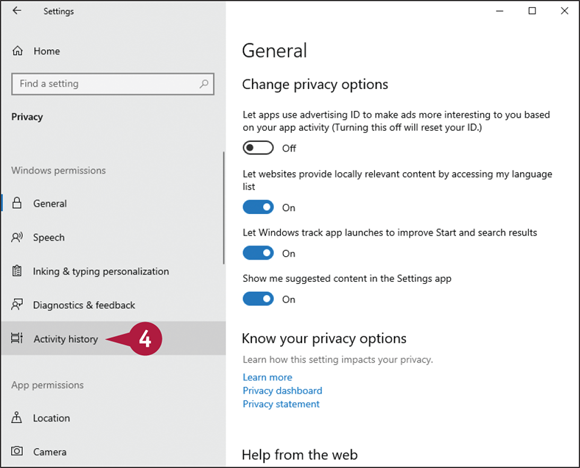
The Privacy screen appears.
![]() Click Activity history.
Click Activity history.
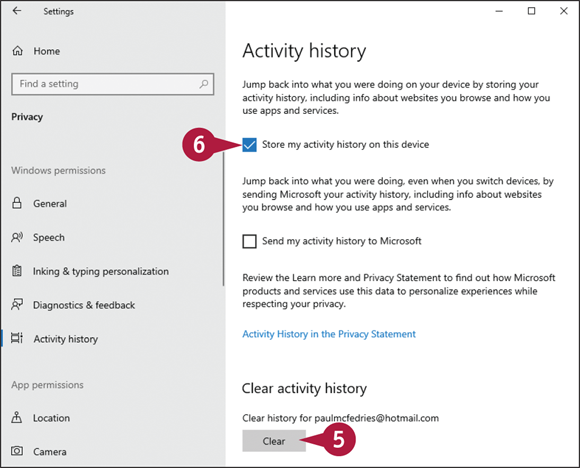
![]() To remove all activity history from your PC, scroll down to the Clear Activity History section and click Clear.
To remove all activity history from your PC, scroll down to the Clear Activity History section and click Clear.
Windows removes all your activity history.
![]() If you do not want Windows to track your activities, click Store my activity history on this device (
If you do not want Windows to track your activities, click Store my activity history on this device (![]() changes to
changes to ![]() ).
).
Windows stops tracking your activity.