Chapter 14
Maintaining Windows
To keep your system running smoothly, maintain top performance, and reduce the risk of computer problems, you need to perform some routine maintenance chores. This chapter shows you how to delete unnecessary files, check for hard drive and other device errors, back up your files, and more.
Restore a File from Your History
Check Hard Drive Free Space
To ensure that your PC’s hard drive does not become full, you should periodically check how much free space it has left. This is important because if you run out of room on your hard drive, you cannot install more programs or create more documents, and your PC’s performance will suffer.
Of particular concern is the hard drive on which Windows is installed, usually drive C. If this hard drive’s free space becomes low — say, less than about 20 or 25GB — Windows runs slowly. With normal computer use, you should check your hard drive free space about once a month.
Check Hard Drive Free Space

Note: You can also check the free space on a memory card or flash drive. Before you continue, insert the card or drive.
![]() Click File Explorer.
Click File Explorer.
File Explorer appears.
![]() Click This PC.
Click This PC.

The This PC folder appears.
![]() Click the View tab.
Click the View tab.
![]() Click Tiles.
Click Tiles.
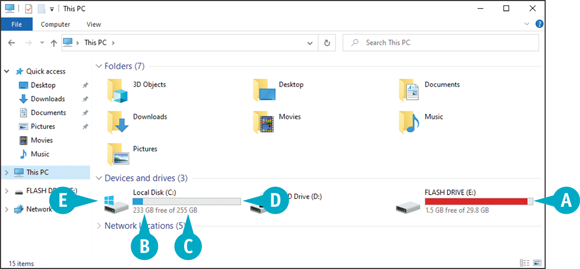
![]() Information about each drive appears along with the drive icon.
Information about each drive appears along with the drive icon.
![]() This value tells you the amount of free space on the drive.
This value tells you the amount of free space on the drive.
![]() This value tells you the total amount of space on the drive.
This value tells you the total amount of space on the drive.
![]() This bar gives you a visual indication of how much disk space the drive is using.
This bar gives you a visual indication of how much disk space the drive is using.
![]() Windows is installed on the drive with the Windows logo (
Windows is installed on the drive with the Windows logo (![]() ).
).
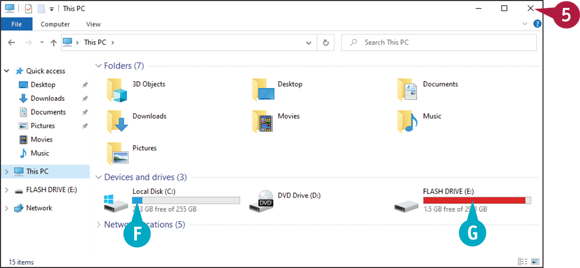
![]() The used portion of the bar appears blue when a drive still has sufficient disk space.
The used portion of the bar appears blue when a drive still has sufficient disk space.
![]() The used portion of the bar turns red when a drive’s disk space becomes low (typically, less than 10 percent of the drive’s total capacity).
The used portion of the bar turns red when a drive’s disk space becomes low (typically, less than 10 percent of the drive’s total capacity).
![]() Click Close (
Click Close (![]() ) to close the This PC window.
) to close the This PC window.
Delete Unnecessary Files
To free up hard drive space on your computer and keep Windows running efficiently, you can use the Disk Cleanup program to delete files that your system no longer needs. Although today’s hard drives are quite large, it is still possible to run low on disk space, particularly because today’s applications and media files are larger than ever.
Run Disk Cleanup any time that your hard drive free space becomes too low. If hard drive space is not a problem, run Disk Cleanup every two or three months.
Delete Unnecessary Files
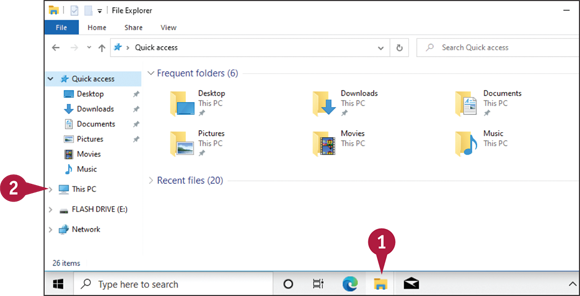
![]() Click File Explorer.
Click File Explorer.
File Explorer appears.
![]() Click This PC.
Click This PC.
The This PC folder appears.
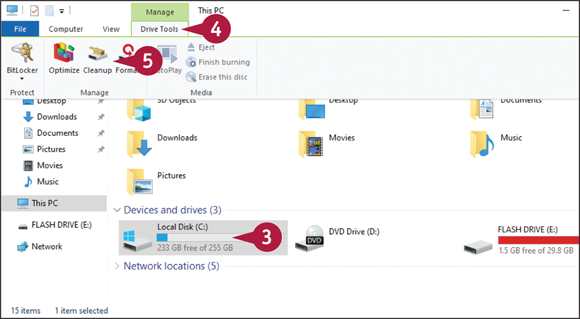
![]() Click the hard drive you want to clean.
Click the hard drive you want to clean.
![]() Click the Drive Tools tab.
Click the Drive Tools tab.
![]() Click Cleanup.
Click Cleanup.
After a few moments, the Disk Cleanup dialog box appears.
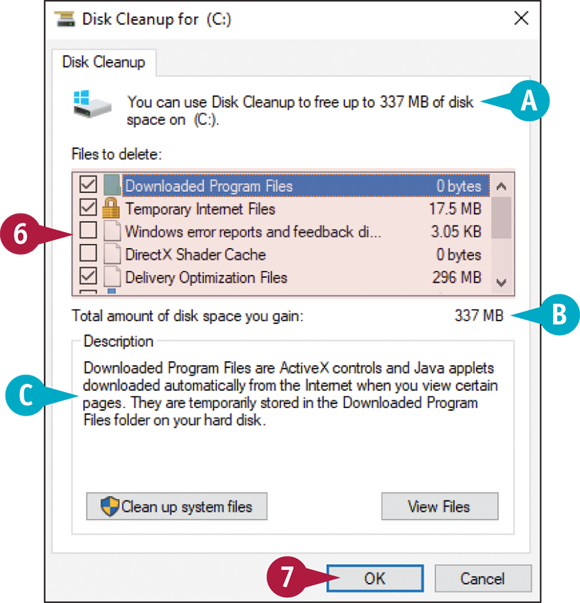
![]() This area displays the total amount of drive space you can free up.
This area displays the total amount of drive space you can free up.
![]() This area displays the amount of drive space the activated options will free up.
This area displays the amount of drive space the activated options will free up.
![]() Click the check box (
Click the check box (![]() changes to
changes to ![]() ) for each file type that you want to delete.
) for each file type that you want to delete.
![]() This area displays a description of the highlighted file type.
This area displays a description of the highlighted file type.
![]() Click OK.
Click OK.
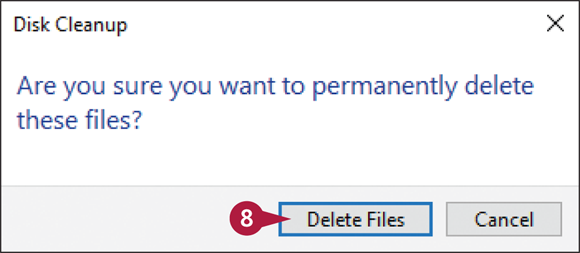
Disk Cleanup asks you to confirm that you want to delete the file types.
![]() Click Delete Files.
Click Delete Files.
Refresh Your Computer
If you find that your computer is running slowly or that frequent program glitches are hurting your productivity, you can often solve these problems by resetting your PC’s system files. The Reset this PC feature reinstalls a fresh copy of Windows. It also saves the documents, images, and other files in your user account, some of your settings, and any Windows apps that you have installed. However, Reset this PC does not save any other PC settings (which are reverted to their defaults) or any desktop programs that you installed.
Refresh Your Computer

![]() In the taskbar’s Search box, type reset.
In the taskbar’s Search box, type reset.
![]() Click Reset this PC.
Click Reset this PC.
The Settings app runs and selects the Recovery tab.
![]() Under Reset this PC, click Get started.
Under Reset this PC, click Get started.
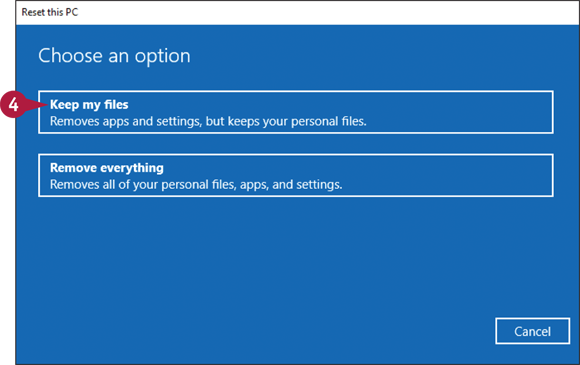
Reset this PC asks you to choose a reset option.
![]() Click Keep my files.
Click Keep my files.
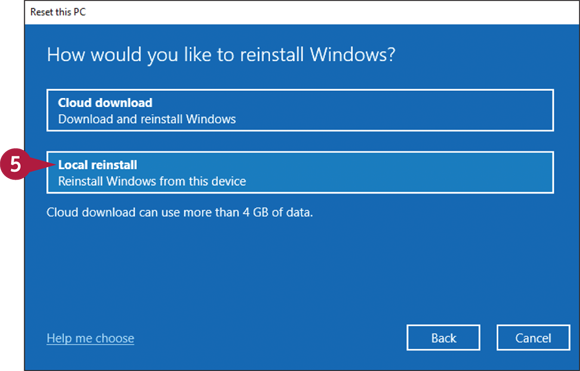
Reset this PC asks how you would like to reinstall Windows.
![]() Click Local reinstall.
Click Local reinstall.
Reset this PC displays a summary of your settings.
![]() Click Next (not shown).
Click Next (not shown).
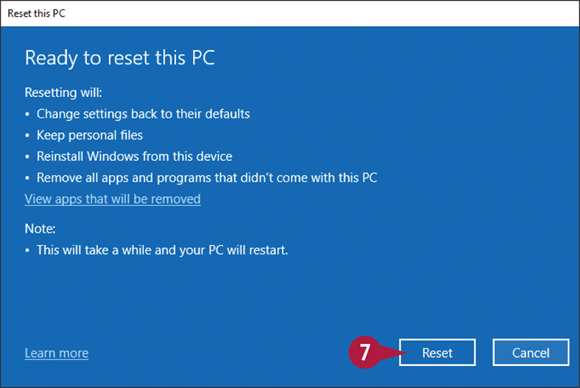
Reset this PC tells you it is ready to proceed.
![]() Click Reset.
Click Reset.
Reset this PC reboots the computer and refreshes the system files.
Create a Recovery Drive
You can make it easier to troubleshoot and recover from computer problems by creating a USB recovery drive. If a problem prevents you from booting your computer, then you must boot using some other drive. If you have your Windows installation media, you can boot using that drive. If you do not have the installation media, you can still recover if you have created a recovery drive. This is a USB flash drive that contains the Windows recovery environment, which enables you to refresh or reset your PC, recover a system image, and more.
Create a Recovery Drive

![]() Insert the USB flash drive you want to use.
Insert the USB flash drive you want to use.
![]() In the taskbar’s Search box, type recovery.
In the taskbar’s Search box, type recovery.
![]() Click Recovery Drive.
Click Recovery Drive.
The User Account Control dialog box appears.
![]() Click Yes.
Click Yes.
Note: If you are using a standard account, enter your PC’s administrator credentials to continue.
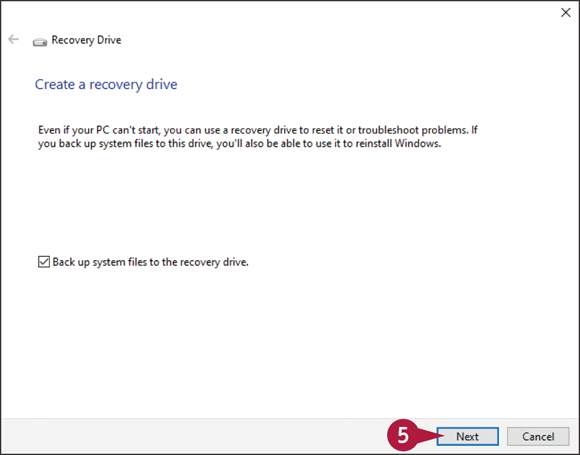
The Recovery Drive Wizard appears.
![]() Click Next.
Click Next.
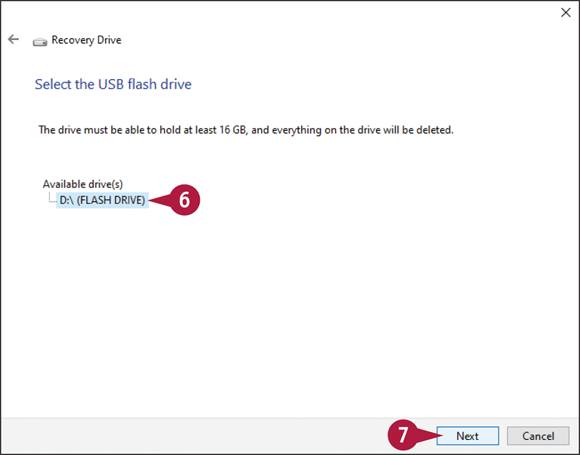
The Recovery Drive Wizard prompts you to choose the USB flash drive.
![]() Click the drive if it is not selected already.
Click the drive if it is not selected already.
![]() Click Next.
Click Next.
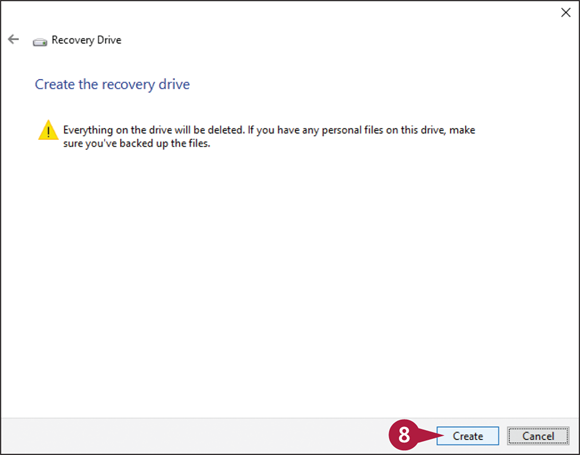
The Recovery Drive Wizard warns you that all the data on the drive will be deleted.
![]() Click Create.
Click Create.
The wizard formats the drive and copies the recovery tools and data.
![]() Click Finish (not shown).
Click Finish (not shown).
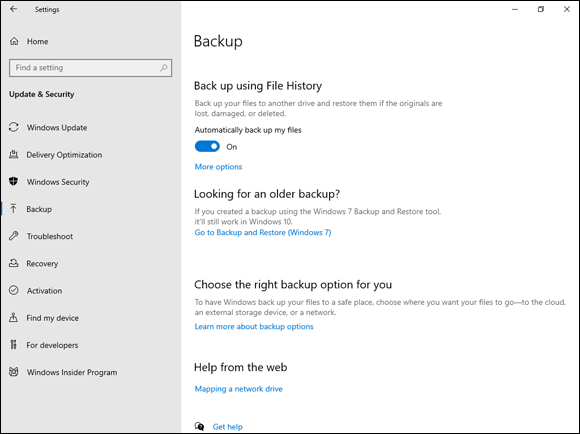
Keep a History of Your Files
There may be times when backing up a file just by making a copy is not good enough. For example, if you make frequent changes to a file, you might want to copy not only the current version, but also the versions from an hour ago, a day ago, a week ago, and so on. In Windows, these previous versions of a file are called its file history, and you can save this data for all your documents by activating a feature called File History.
Keep a History of Your Files
Set the File History Drive
![]() Connect an external drive to your PC.
Connect an external drive to your PC.
Note: The drive should have enough capacity to hold your files, so an external hard drive is probably best.
Note: If you see a notification, click it, click Configure this drive for backup, and then skip steps 3 and 4.
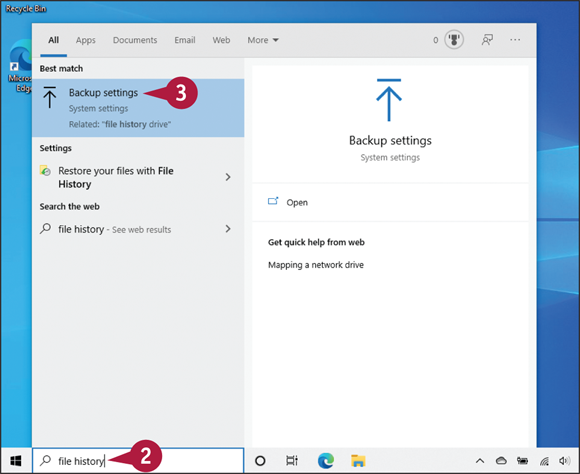
![]() In the taskbar’s Search box, type file history.
In the taskbar’s Search box, type file history.
![]() Click Backup settings.
Click Backup settings.

The Settings app runs and displays the Backup tab.
![]() Click Add a drive.
Click Add a drive.
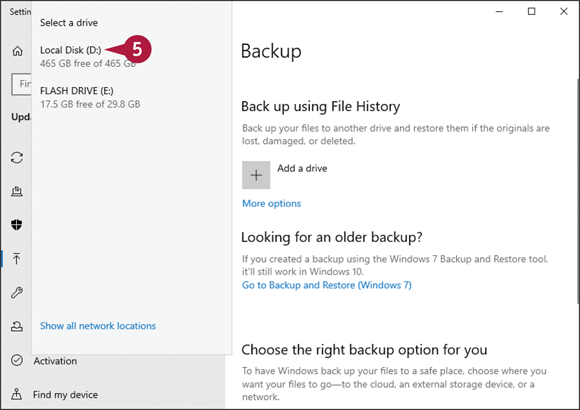
The Select a Drive window appears.
![]() Click the drive you want to use.
Click the drive you want to use.
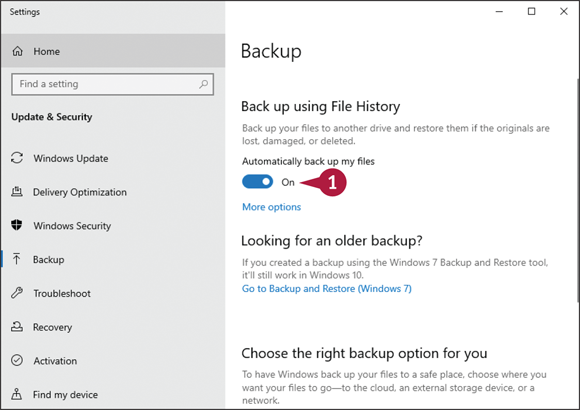
Activate File History
![]() Click the Automatically back up my files switch to On.
Click the Automatically back up my files switch to On.
Note: Windows activates File History automatically, so in most cases you can skip step 1.
Windows activates File History and begins saving copies of your files to the external drive.
Restore a File from Your History
If you improperly edit, accidentally delete, or corrupt a file through a system crash, in many cases you can restore a previous version of the file. Why would you want to revert to a previous version of a file? One reason is that you might improperly edit the file by deleting or changing important data. In some cases, you may be able to restore that data by going back to a previous version of the file. Another reason is that the file might become corrupted if the program or Windows crashes. You can get a working version of the file back by restoring a previous version.
Restore a File from Your History
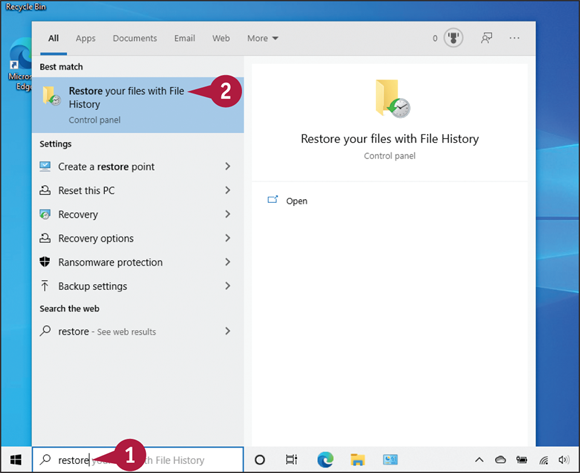
![]() In the taskbar’s Search box, type restore.
In the taskbar’s Search box, type restore.
![]() Click Restore your files with File History.
Click Restore your files with File History.

The Home - File History window appears.
![]() Double-click the library or folder that contains the file you want to restore.
Double-click the library or folder that contains the file you want to restore.
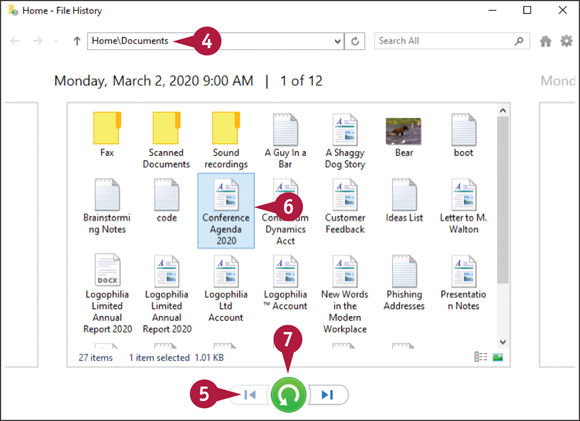
![]() Open the folder that contains the file.
Open the folder that contains the file.
![]() Click Previous Version (
Click Previous Version (![]() ) until you open the version of the folder you want to use.
) until you open the version of the folder you want to use.
![]() Click the file you want to restore.
Click the file you want to restore.
![]() Click Restore to Original Location (
Click Restore to Original Location (![]() ).
).
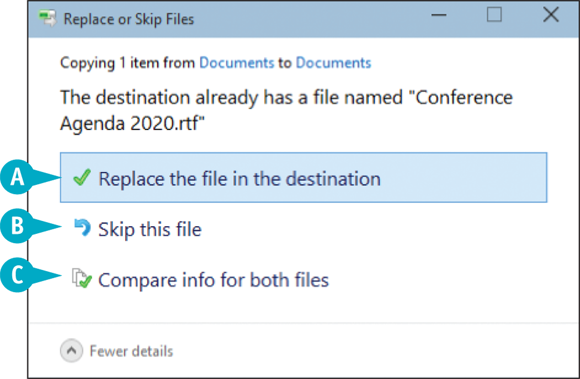
If the original folder has a file with the same name, File History asks what you want to do.
![]() Select an option:
Select an option:
![]() You can click Replace the file in the destination to overwrite the existing file with the previous version.
You can click Replace the file in the destination to overwrite the existing file with the previous version.
![]() You can click Skip this file to do nothing.
You can click Skip this file to do nothing.
![]() You can click Compare info for both files to decide which file you prefer to keep.
You can click Compare info for both files to decide which file you prefer to keep.
Windows restores the previous version.
Check Your Hard Drive for Errors
To keep your system running smoothly, you should periodically check your hard drive for errors and fix any errors that come up. Because hard drive errors can cause files to become corrupted, which may prevent you from running a program or opening a document, you can use the Check Disk program to look for and fix hard drive errors.
Check Your Hard Drive for Errors
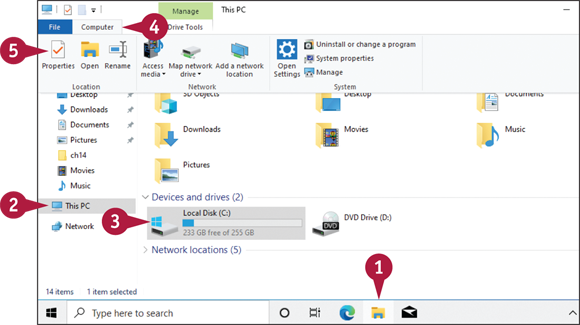
![]() Click File Explorer.
Click File Explorer.
File Explorer appears.
![]() Click This PC.
Click This PC.
![]() Click the hard drive that you want to check.
Click the hard drive that you want to check.
![]() Click the Computer tab.
Click the Computer tab.
![]() Click Properties.
Click Properties.
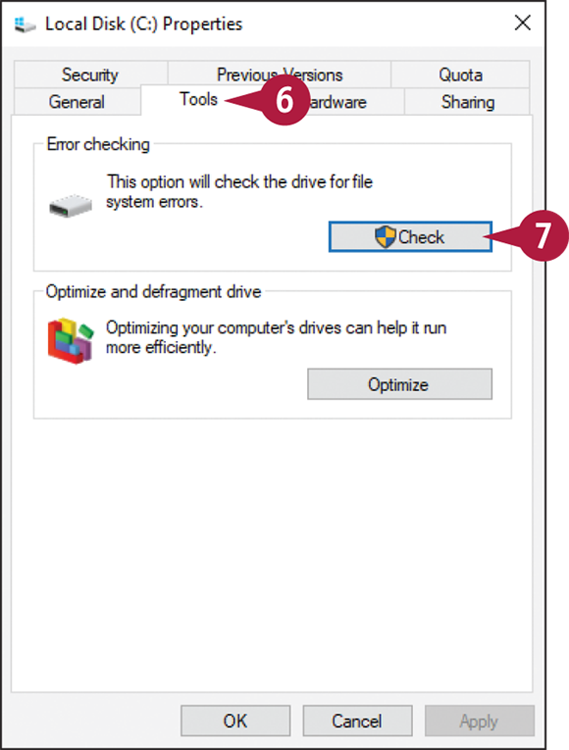
The hard drive’s Properties dialog box appears.
![]() Click the Tools tab.
Click the Tools tab.
![]() Click Check.
Click Check.

![]() If Windows tells you that the drive has no errors, you can click Cancel and skip the rest of these steps.
If Windows tells you that the drive has no errors, you can click Cancel and skip the rest of these steps.
![]() Otherwise, click Scan drive.
Otherwise, click Scan drive.
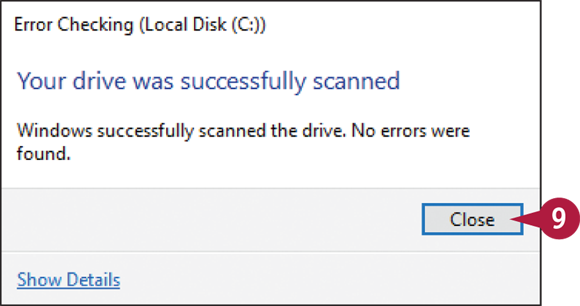
Windows checks the hard drive.
![]() When the check is complete, click Close.
When the check is complete, click Close.
Note: If Check Disk finds any errors, follow the instructions the program provides.
Check Your Devices for Errors
To help ensure that your system is operating smoothly and efficiently, you should periodically check for errors associated with the devices attached to your computer. Device errors usually mean either that you cannot work with a device entirely, or that the device behaves erratically or unexpectedly. You can use the Windows Devices and Printers feature to check your installed devices for errors. You can also use Devices and Printers to troubleshoot your problem devices, and in most cases, Windows will be able to fix the problem automatically.
Check Your Devices for Errors

Check for Devices with Errors
![]() In the taskbar’s Search box, type control panel.
In the taskbar’s Search box, type control panel.
![]() Click Control Panel.
Click Control Panel.
![]() Click View devices and printers.
Click View devices and printers.

The Devices and Printers window appears.
![]() Examine the device icons for errors.
Examine the device icons for errors.
![]() Windows indicates devices with errors using this icon:
Windows indicates devices with errors using this icon: ![]() .
.

Begin Device Troubleshooting
![]() Click a device that has an error.
Click a device that has an error.
![]() Click Troubleshoot.
Click Troubleshoot.
Devices and Printers displays a list of devices that have errors.
![]() Click your device.
Click your device.
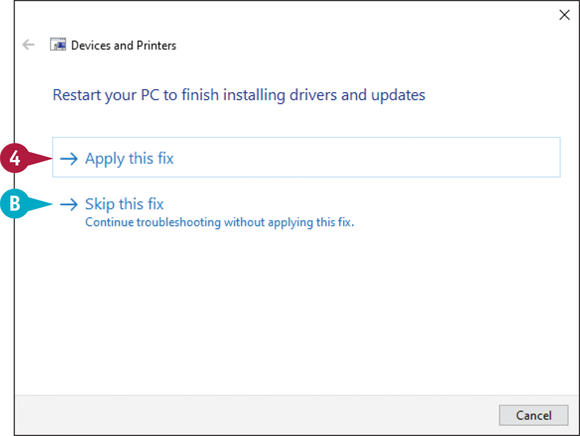
The Devices and Printers troubleshooting wizard appears and displays the first fix.
![]() Click Apply this fix.
Click Apply this fix.
Devices and Printers applies the fix. If this does not solve the problem, Devices and Printers displays the next fix.
![]() If you are certain this fix is not the solution, you can click Skip this fix instead.
If you are certain this fix is not the solution, you can click Skip this fix instead.
![]() Repeat step 4 until the problem is resolved.
Repeat step 4 until the problem is resolved.