
Chapter 6
FULL SCENES


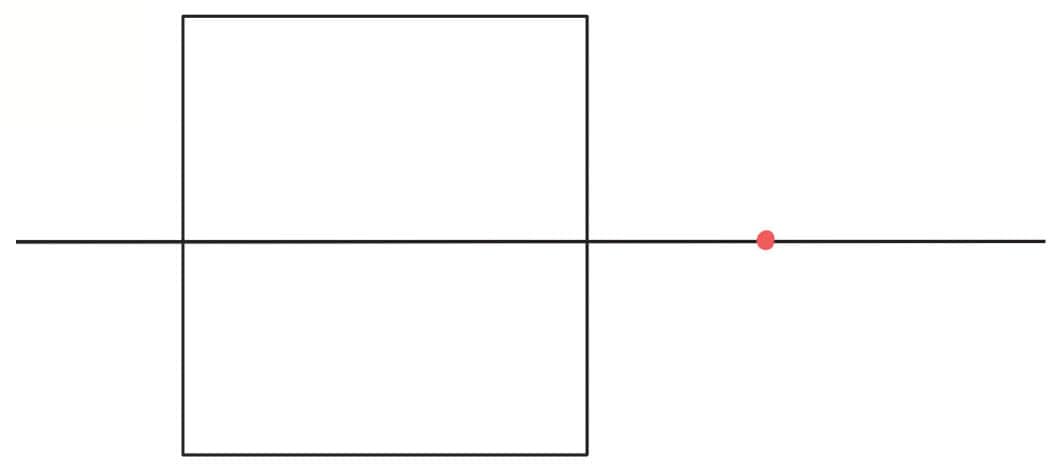
It will take time to be able to correctly apply perspective in your own work, so be patient with yourself. The key is to practice and draw from life as much as possible to understand objects in three-dimensional space. 1 2 3 4 5 One-point perspective includes a horizon line and one vanishing point (step 1). A vanishing point is a point where perspective lines converge, “vanishing” over the horizon. If you place a square onto your scene (step 2), it still looks like a flat shape. Draw lines from each corner that all meet at the vanishing point (step 3) and you can start to build the square into a cube. Draw another smaller square that follows the lines you drew (step 4) and finish off your cube by connecting both squares and erasing the extra guidelines (step 5). 1 2 3 4 Two-point perspective introduces two vanishing points to allow the viewer to see two sides of an object receding to each vanishing point. This is a popular perspective type when drawing objects and scenery. Keep in mind that both vanishing points should be spaced far from one another to allow for the most natural and pleasing angles. 1 2 3 Three-point perspective is the most challenging but dynamic perspective. The more notable feature of this perspective is you don’t have to include a horizon line. Use this perspective when viewing something from above or below. Like with two-point perspective, space each vanishing point far away to avoid the perspective looking cramped or unrealistic. The bottom vanishing point governs the height, while the left and right vanishing points govern the depth of the object to their respective sides. Regardless of the genre of manga you create, you will eventually need to draw your characters interacting with objects—otherwise your manga would look boring! Here are some everyday objects you could include in your story. Bags are easier to render if you can draw a rectangle in two-point perspective. This bag design is common for Japanese high school students. Books are great for practicing perspective. Once you can draw one book, all you need to do to create a stack of books is to pile them on top one another! If you’re having trouble keeping the perspective correct, draw each book fully, and then erase the overlapping lines. Electronics, such as phones and laptops, begin with very thin rectangular prisms. Umbrellas, while not something you may need to draw a lot of, are great objects to practice drawing from photo references showing different angles. It comes with its own set of challenges as it is a peculiar shape to draw. Magical objects can include staffs, orbs, seals, and shields. They can be used for adding to the design. In the manga world, anything ordinary can become extraordinary. Consider the character and purposed of the object, and design accordingly.
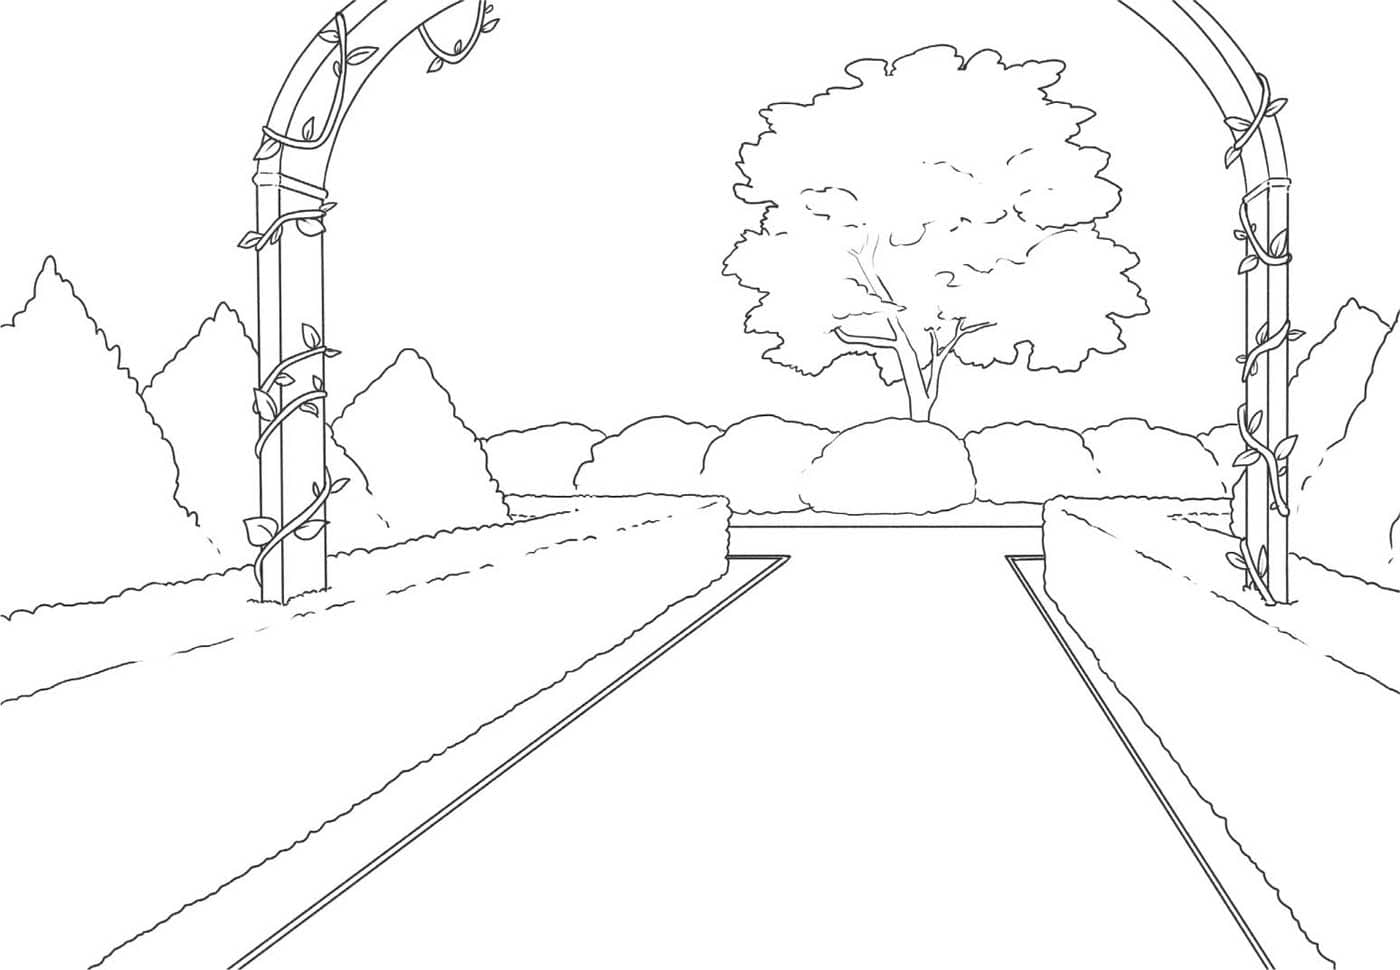
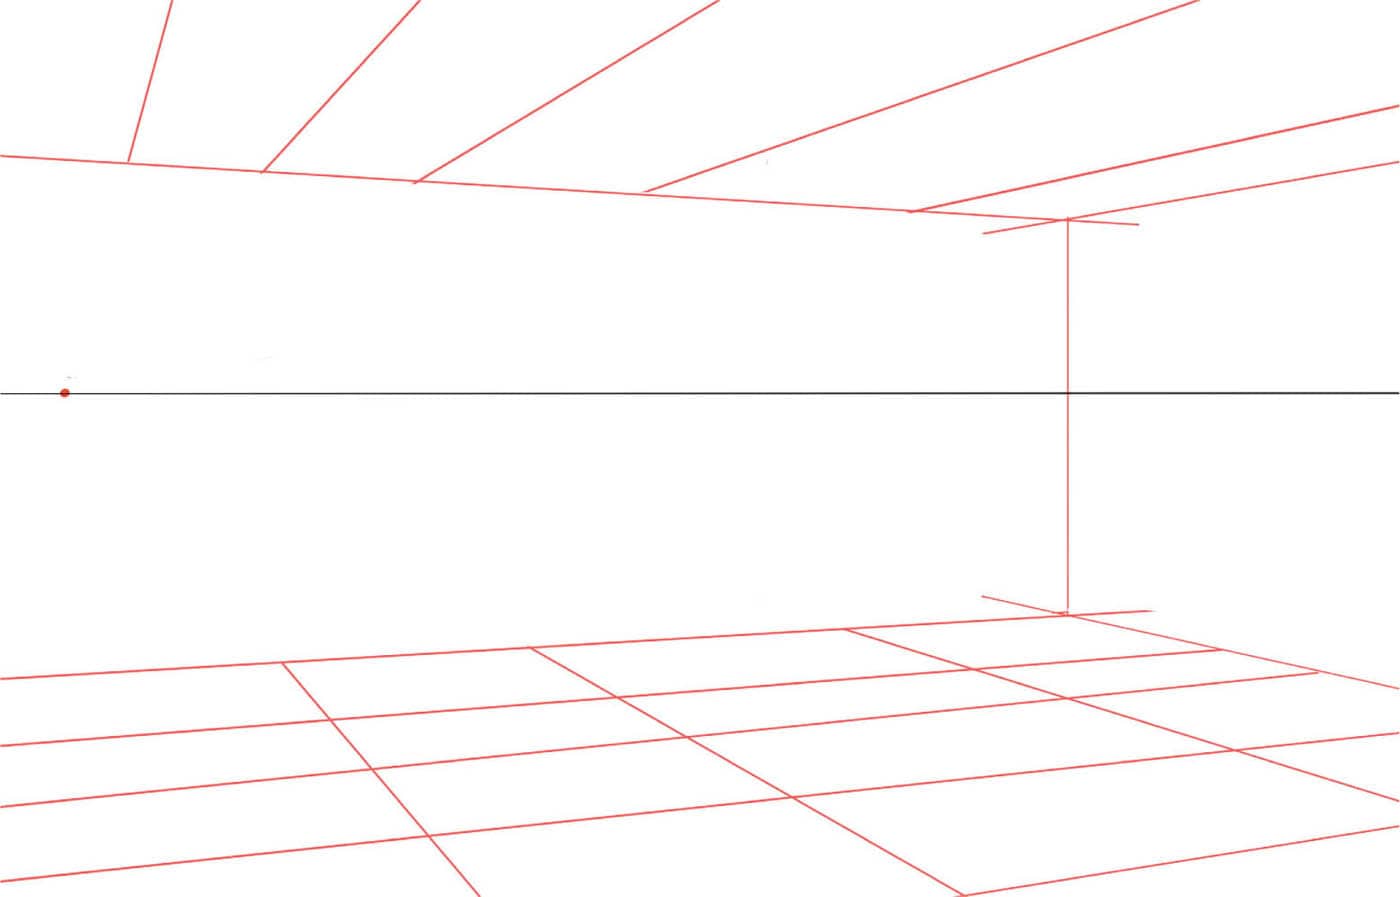
Start with this outdoor setting in one-point perspective. This example is a garden, but these steps can also be used to draw suburban or cityscapes too. 1 Draw the horizon line across the center of your page and place the vanishing point just off-center toward the right. From the vanishing point, draw lines to follow before you start adding the garden details. 2 Referencing those lines, start to draw in the bushes, trees, archway, and path. During this drafting stage, keep to basic shapes and avoid going into detail just yet. 3 Now it’s time to add the details! Instead of straight, stiff bushes, use the shape you drew as a guide and draw in the bushes using wavy and bouncy lines to suggest leaves. Add details to the arch, such as a vine growing around it. At the end of the path, add more bushes and a nice big tree to give the scene a focal point. 4 Using a black ink pen, outline your setting and erase the perspective guidelines. Go in with color and have fun experimenting with a color palette. This scene is colored in a spring palette with multicolored flowers filling the different bushes, but you can get an autumnal feel by changing the leaves from green to orange. Using two-point perspective now, move indoors and draw a bedroom scene. You can use this process to make any room. Note that because of the close-up nature of the scene, the second (right side) vanishing point isn’t visible on the page, as the vanishing points are spaced far apart. When drawing your room, feel free to place the points closer together when practicing, but keep in mind that doing so will change the perspective to the one shown here. 1 Draw the horizon line through the middle of the page and adding the vanishing points spaced far apart. The crucial first step is to build the foundations of the room—the walls, floor, and ceiling—using both vanishing points as a guide. A great way to get a sense of floor space is to draw a grid pattern on the ground that follows the vanishing points. This will help you see the perspective as you add features to the room. 2 Now design the room! When adding windows, pictures, and other items on the walls, place them in the upper-middle part of the walls, not too high or low. Keep everything to basic shapes at this stage to help connect them to the vanishing points and remain in perspective. While drawing furniture, keep in mind the size you draw it. Make sure that a desk and chair, for example, doesn’t look too tall or too short. 3 Bring it all together! If you used many guidelines and perspective lines while drawing, it’s a good idea to get a fresh piece of paper and use a light box to trace the main lines onto the new paper. Now add the fine details into the room. If you want the room to reflect the character of the person who lives there, make sure to add things that tell a story about them. You could add trophies on a bookshelf, photographs of family on a desk, or band posters on the wall. A great way for a reader to learn about a character is by seeing that character’s bedroom! 4a When shading black-and-white scenes, the most important thing to keep in mind is the light source. In this scene, the light is coming from the slightly open window, which is reflected in the shadows that extend from things like the desk and bed. Make sure the shading makes sense with the direction of the light source. 4b Color choice is important in indoor scenes, as these spaces are usually decorated for a specific reason or by a specific person. When coloring your piece, consider playing around with different color combinations and see what atmosphere it creates. For this bird’s-eye view, you will use the more challenging three-point perspective. A great way to make any scene look exciting is by using an uncommon perspective to view an environment. This environment is a town where the action will unfold. 1 For this perspective, there isn’t a horizon line. Instead there are three vanishing points spaced far apart in a “Y” shape. There is one point in the top, left corner; one in the top, right corner; and one at the bottom, slightly off-center to the right. From each vanishing point, draw lines out to help get an idea of the perspective space you will be drawing in. Note in this example, the vanishing points are too far apart to be shown in the scene. 2 Referencing each vanishing point when needed, draw the basic shapes of the buildings. In this example, all of the green lines go toward the left vanishing point, all the blue lines go toward the right vanishing point, and the red lines go down toward the bottom vanishing point. Drafting in these different colors can sometimes help you get a better understanding of how the buildings should look in three-point perspective. 3 From those lines, begin adding the important details such as paths around the buildings, windows, and any greenery you may want to add. 4 Line the drawing with a fine-line pen and begin coloring. Note that buildings usually take on various shades of warm and cool grays and browns. Color the windows whatever color the sky is in your scene. If it’s sunny, the glass with reflect blue. If it’s rainy, the glass will reflect gray. 5 (Optional) If you want to add action to the scene, draw in a dramatic event! In this case, a dragon is climbing over the building while two heroes arrive to try and stop it. For those drawing digitally, you can add a layer over your environment layers and draw in your characters. (The key to merging characters and environment is to draw them all in the same perspective! Don’t forget about perspective when you’re adding the people.) For those drawing on paper, sketch out any characters or creatures you want to add before the lining stage.PERSPECTIVE


COMMON OBJECTS IN MANGA


OUTDOOR GARDEN SCENE


INDOOR BEDROOM SETTING


BIRD’S-EYE VIEW