Chapter 2
FACES & HAIR

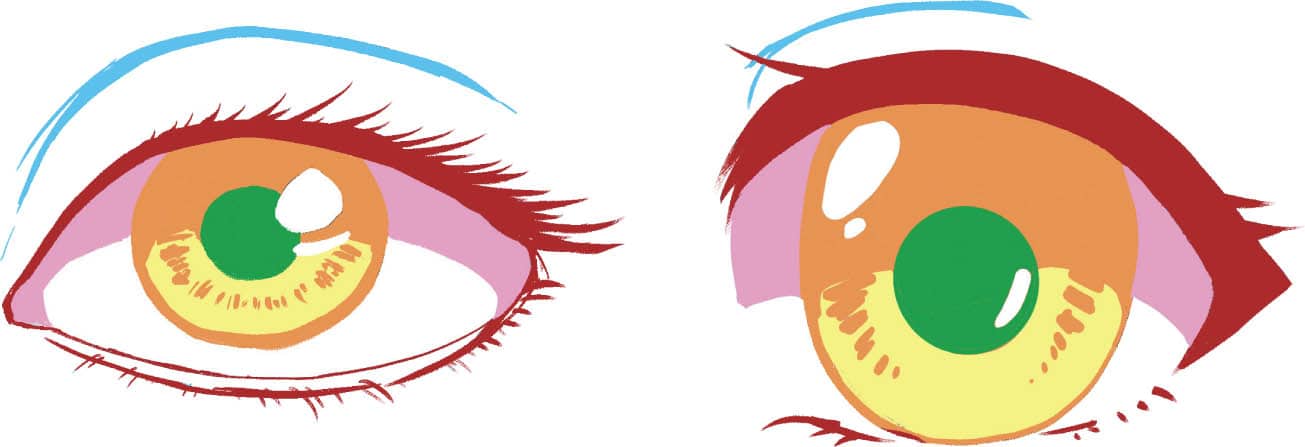
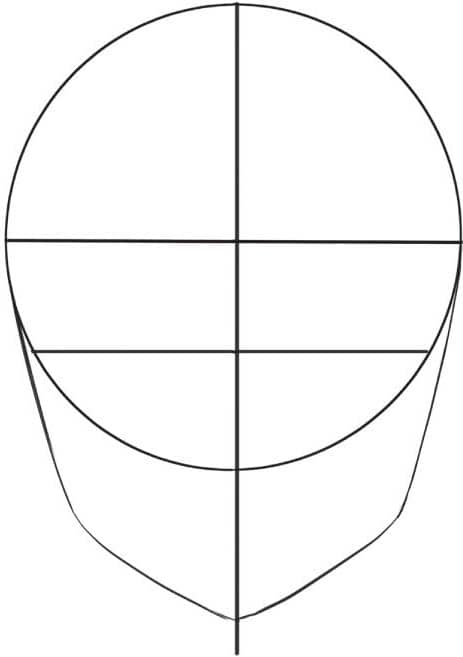
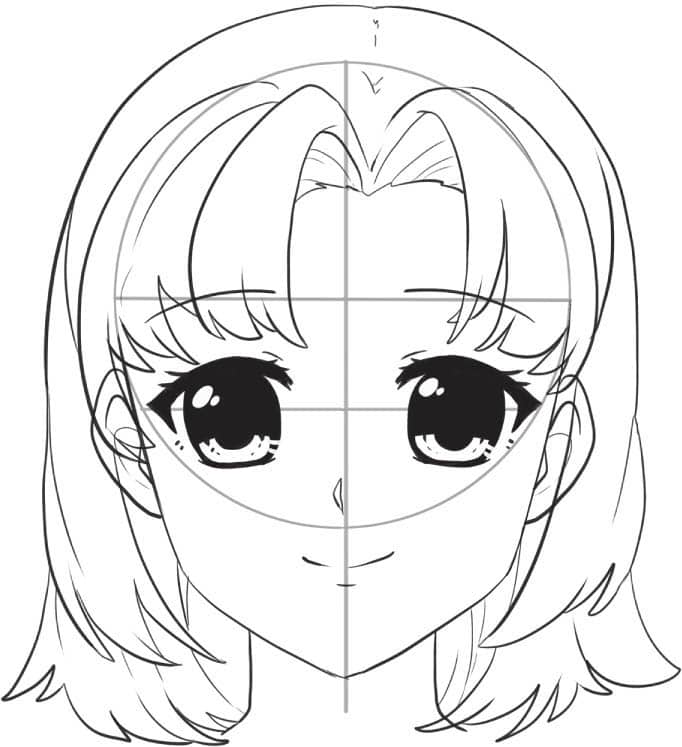
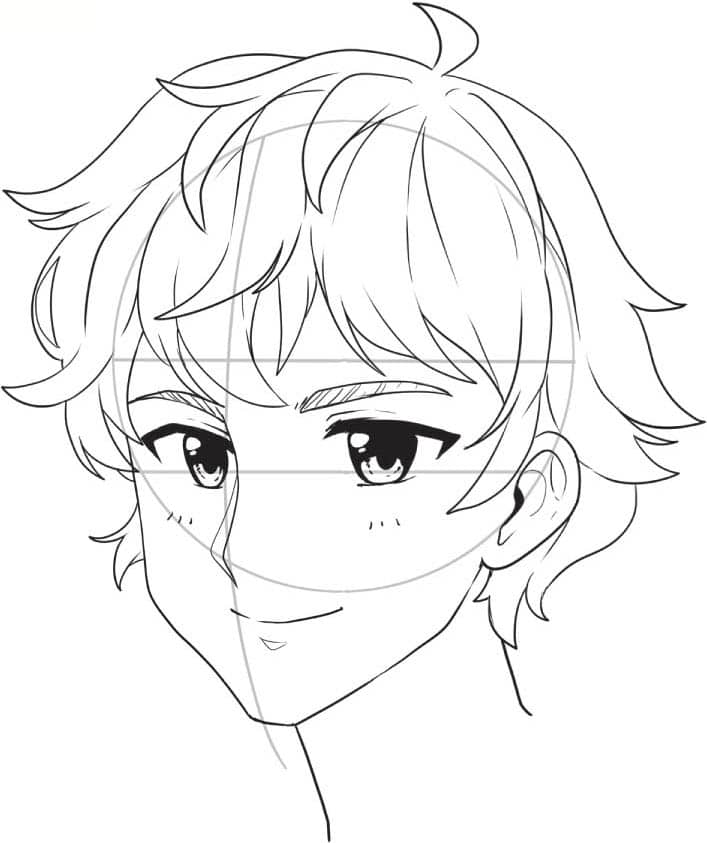
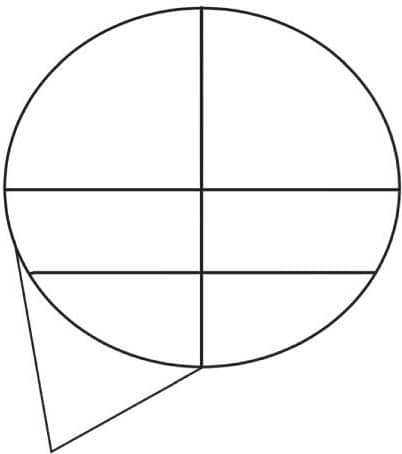
It’s crucial to know what something looks like in real life and to understand how it works before stylizing it. This is especially true for eyes because they are so expressive. Study how a real eye looks at different angles, and your manga eyes will improve! Once you understand these elements, have some fun! Play around with the size and shape of the eyes, and try to draw different emotions or expressions. Make expressions in a mirror, and pay close attention to what you see and what muscles you feel in your face. Large, expressive eyes have become one of the most notable features of the manga drawing style. See what makes a manga-style eye by comparing the eyes above. The parts of the eye are color-coded to show how all the elements of a realistic eye remain on the manga eye and how they change shape when stylized. Cute eyes should be round and big with large highlights. Keep edges rounded and soft, which make characters look vulnerable, innocent, young, or beautiful. Mysterious eyes have sharper features with limited larger highlights. Avoid overly rounded edges. Darkening the eye color can give off a more mysterious vibe. Kind eyes are relaxed and soft, with pupils that are round and inviting. If you have a friendly character, start with this eye style. Determined eyes or even angry eyes, are small and sharp. Having the eyes partly closed but fixed intently on something makes the character look unyielding. The head may be pointing down slightly with the eyes still looking forward. Keep highlights small or avoid them altogether. When creating manga, you will draw the same face in many different positions and from many different angles. Once you learn basic drawing steps, and with some practice, you’ll be an expert in no time! Jump in by starting with this simple forward-facing character. 1 Start sketching with light pencil lines. First draw a circle. Add guidelines as shown above to help you place the facial features. Draw the bottom half of the face by extending lines down at a slight angle from the bottom horizontal line to the chin. Roughly halfway between the bottom of the circle and the chin, angle the lines in so they meet at the middle. 2 Plot in the main facial features. The top horizontal line is where the eyebrows sit. The line under that is where the eyes are located. Draw the nose in the area where the vertical line and the bottom of the circle intersect. The mouth is halfway between the nose and the chin. 3 Detail the pupils and then place the ears, which also sit on the eye line. To estimate the neck width, trace a line down from centers of the pupils, and that thickness is a good guide. Add a thicker neck for more masculine characters. 4 Now draw the hair. Make sure when drawing hair to leave a space between the head and the hair to give it volume. Drawing hair straight onto the head guideline will make the hair appear matted down or wet. (Learn more about drawing hair on these pages.) 5 Line the final parts of your drawing and then erase. Practice makes perfect, so if you don’t like how your drawing turned out, find where you can improve and try again! 6 Now add shading and color! Review these pages for tips on coloring. The three-quarter view is in between a front and profile view. Take this view step by step to draw this slightly trickier pose. 1 Start off similarly to drawing a face in the front view, except curve the vertical line and shift it off-center to the direction you want your character facing. 2 This is probably the trickiest part, drawing the bottom of the face in this view. The side farther away from the viewer will be more rounded, as the cheek can be seen from this angle. We only see one ear in this view. Reference real-life photos of this angle to become comfortable with the perspective. 3 The eyes sit on the lower horizontal line, and the eyebrows somewhere between the eyes and the upper horizontal line. The nose sits in the area where the vertical guideline line and the circle intersect. The mouth is roughly in the middle between the nose and chin. 4 Draw the hair. Notice that at this angle a small part of the back of the hair can be seen where the neck and head meet. 5 Ink the final parts of your drawing and erase the guidelines. 6 Add shading and color. Congratulations! You have drawn a three-quarter-view manga face. In the side or profile view, the nose and mouth take center stage, which makes this angle a bit tricky at first. Thankfully, as always, guidelines help when drawing this perspective. Once you are comfortable with drawing simple faces, try different facial expressions (see here-here) or making a character younger or older (see next page). 1 Start by drawing a slightly wide oval. Draw guidelines in the oval, and on the side the character is facing, draw a triangular shape, the point of which will be the chin. 2 Using the lines drawn in step 1 as a guide, draw the nose and lips. The bridge of the nose starts in line with the lower horizontal guideline, and the mouth sits between the nose and the chin. Place the ear slightly behind the vertical guideline and on the lower horizontal guideline. 3 Place the eyes, eyebrows, and mouth. Refer back to here if you find drawing an eye from the side tricky. 4 Draw the hair. Because you can see the back of the character’s hairstyle at this angle, it’s a great way to show off what their hair looks like. 5 Ink the final parts of your drawing, and erase the guidelines. 6 Add color and shading, and you now have a side view of a manga face. Knowing how to draw characters of all ages gives you more creative freedom when making your own manga and designing characters. Here are some subtle and obvious changes to make when drawing a character’s face at different phases in their life. Stage 1: Baby to Toddler Stage 2: Child to Preteen to Teen Stage 3: Older Teen to Young Adult Stage 4: Adult to Middle Age Stage 5: Mature to Old AgeEYES


FRONT VIEW


THREE-QUARTER VIEW


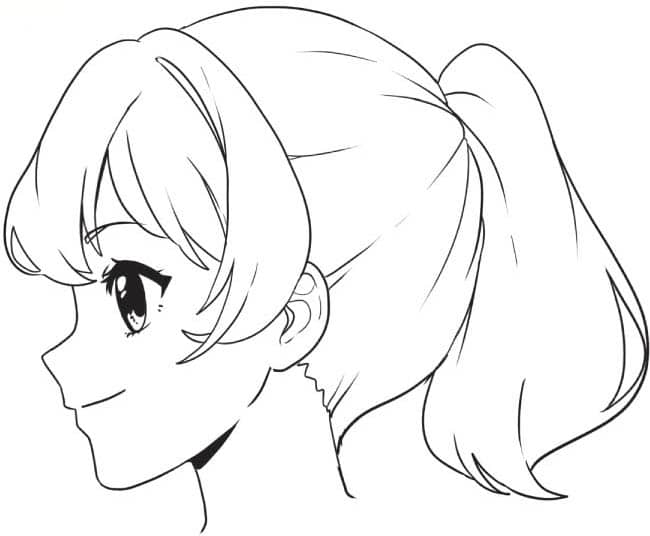
SIDE VIEW


AGING FACES
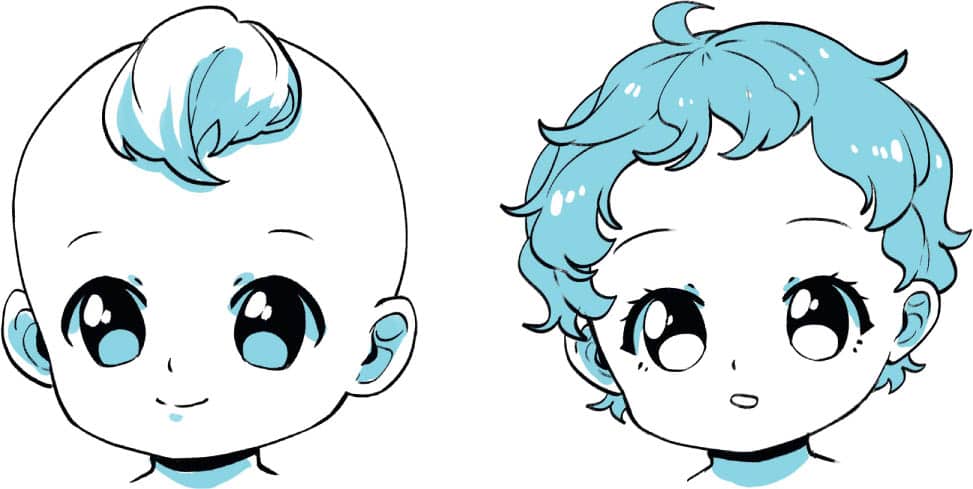
When drawing babies and young kids, think round (round head, round eyes, and round and chubby bodies and cheeks). The proportions at this stage favor the eyes, so make them nice and big to enhance the “cute factor.” The facial features sit lower on the head, giving them a large forehead.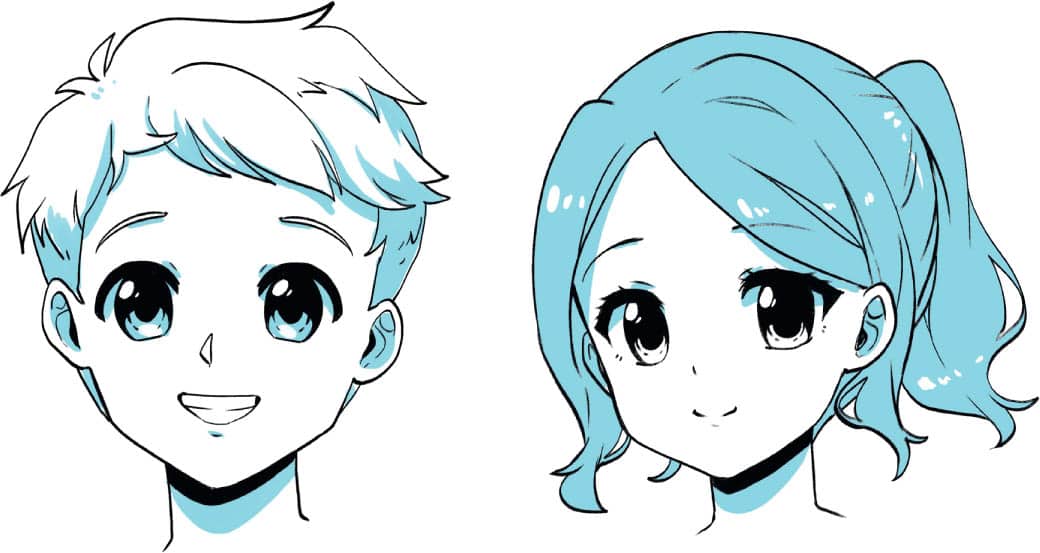
As the character grows up, the face lengthens out and facial features sit higher up on the face. Keep eyes and ears fairly big, as the characters are still growing into their bodies. Heads remain pretty round at this stage but with a more defined jawline.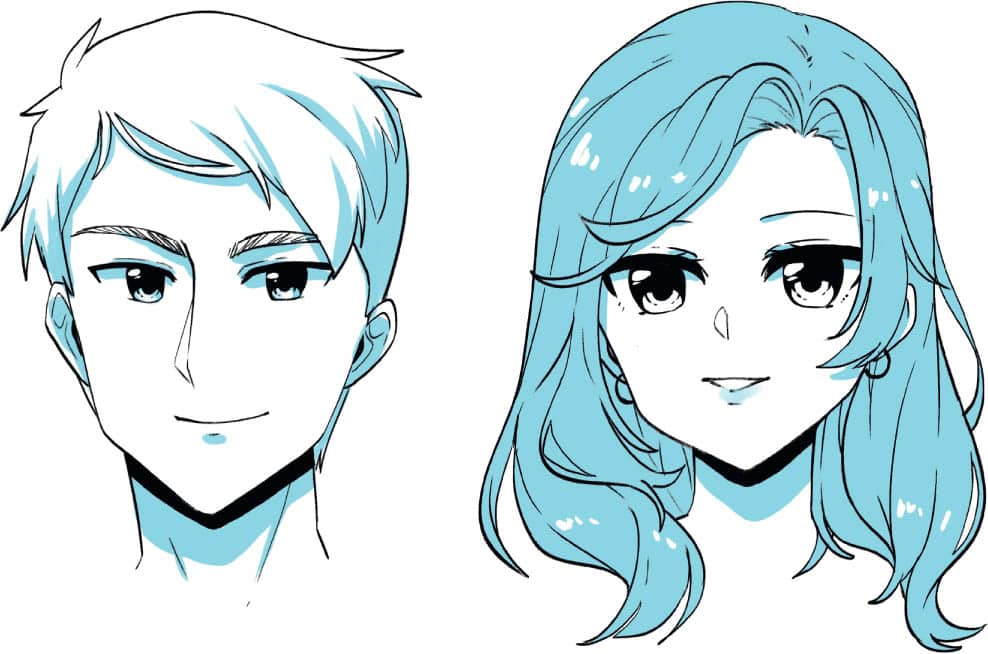
As a character reaches adulthood, lengthen out the head and define the jawline even more. Men usually have longer faces and more defined jaws than women, but of course this isn’t always the case. Eyes are also smaller and sit slightly higher on the face to compensate for the longer head length.
At this age, which spans for several decades (late 30s to 50s), characters gain a few wrinkles and aging lines. Small lines under the eyes and around the mouth hint to this aging. Also consider the hair as it thins and grays. Jawlines also become less defined and faces round out slightly.
As characters reach their golden years, proportions start to mimic stage 1. Heads grow rounder and facial features sit lower, but this time with wrinkles. At this age, men may be balding or be completely bald, and women usually sport more conservative and simple hairstyles. It’s common in manga to draw older characters with their eyes shut as a symbol of advanced age rather than a literal depiction.
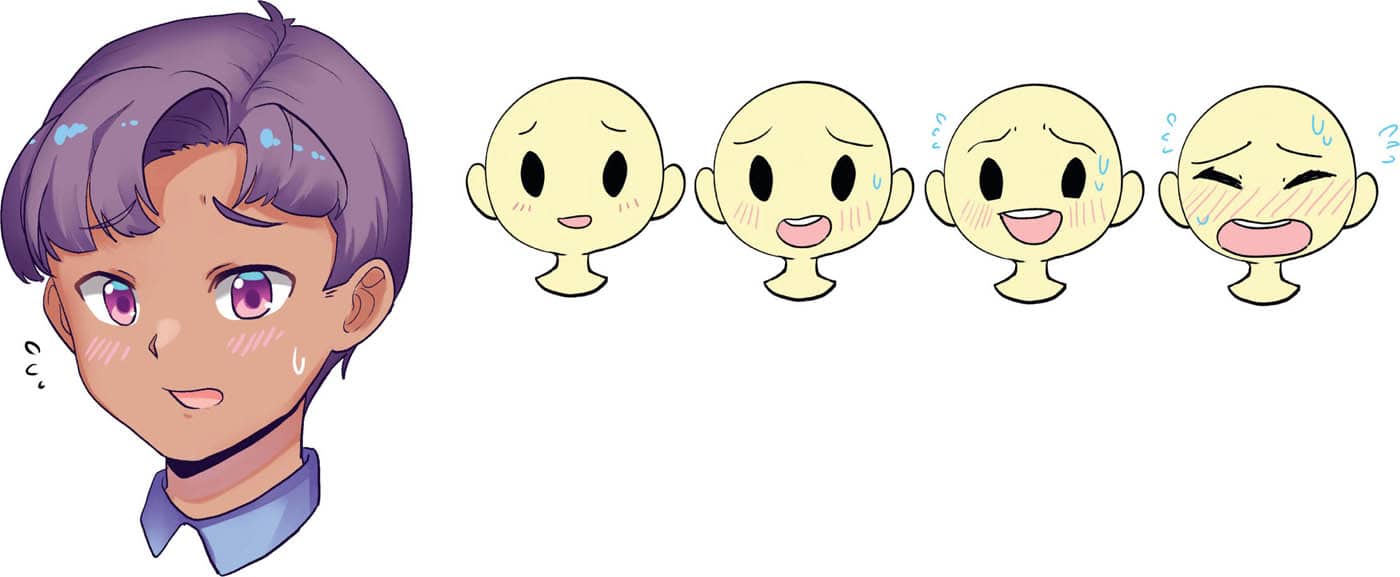
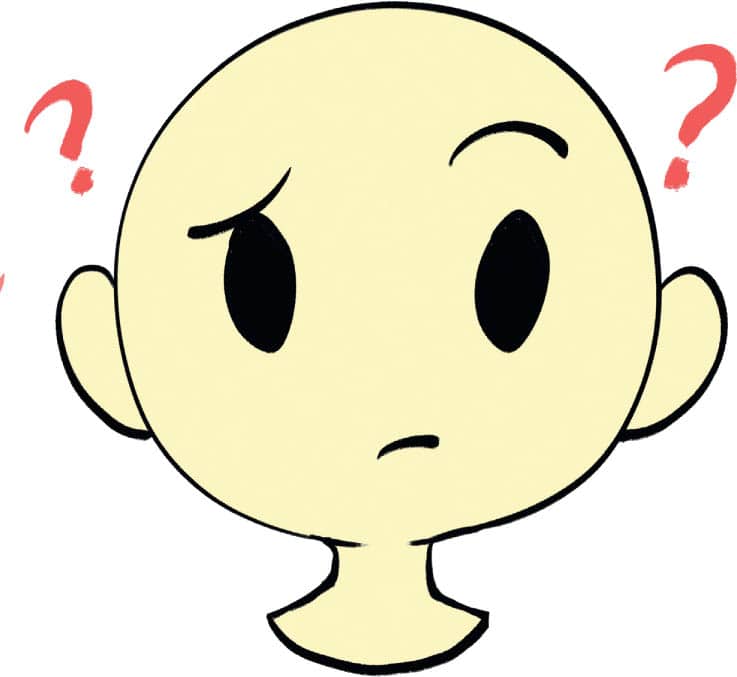
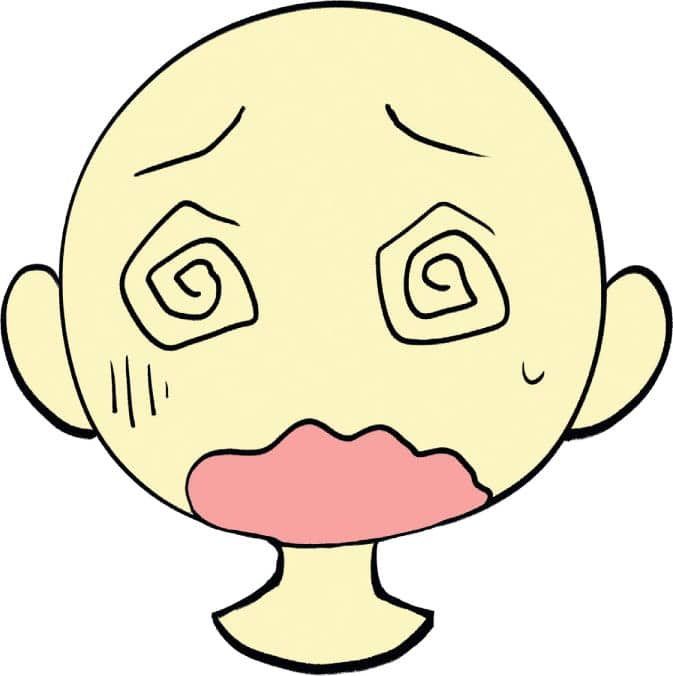
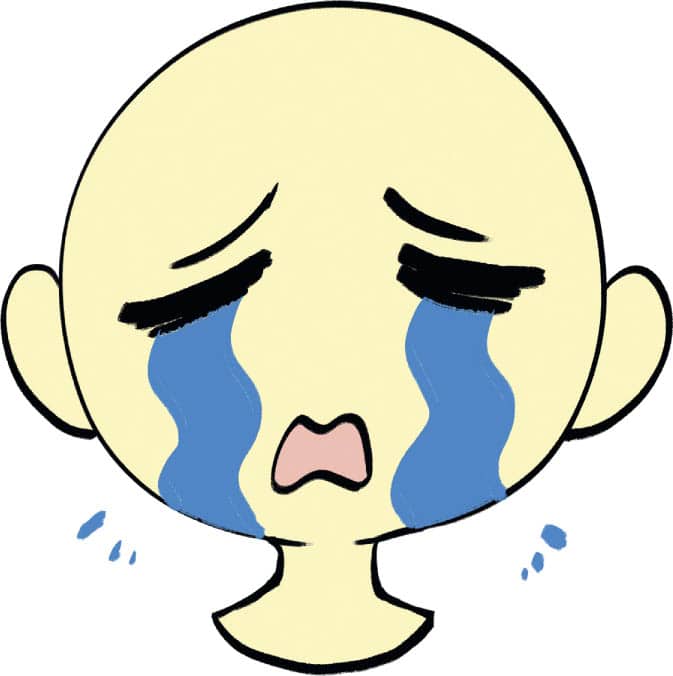
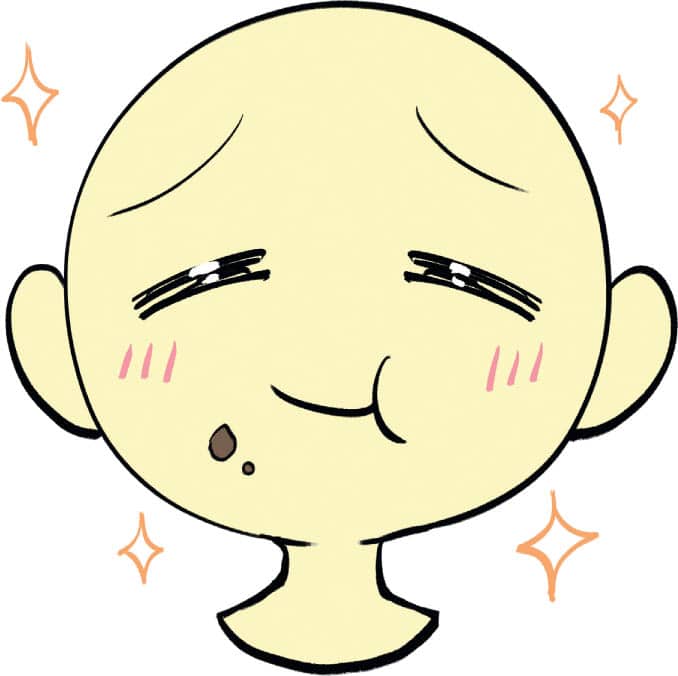
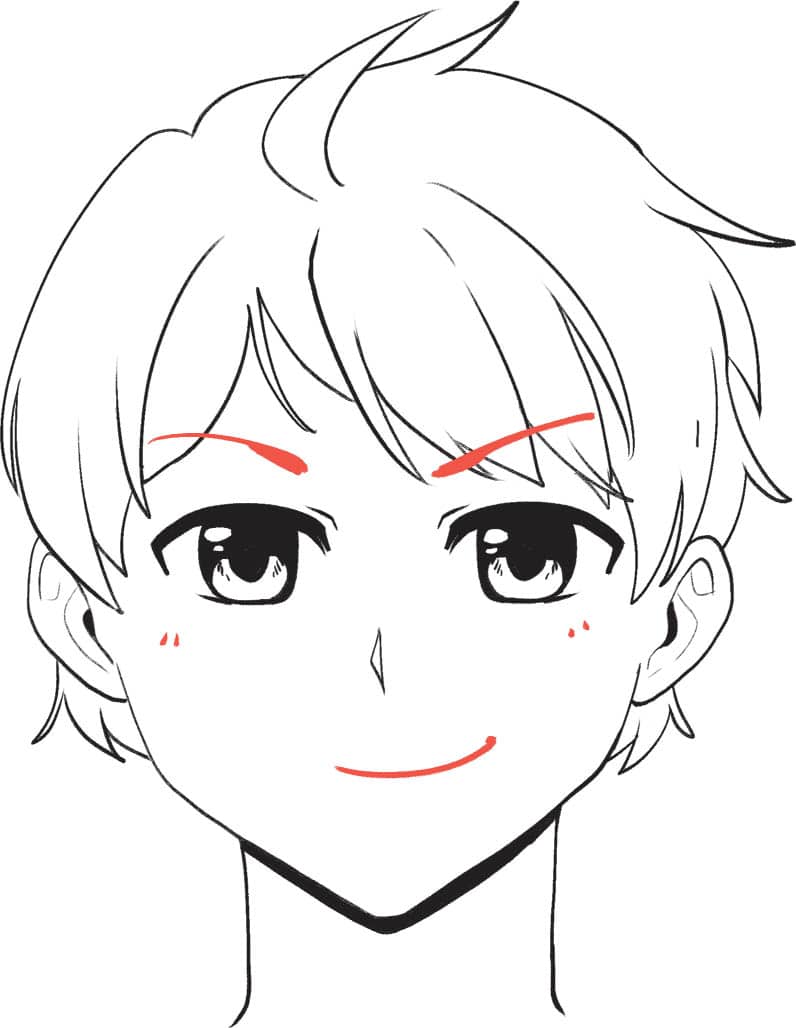
Joyful expressions tend to be the default when drawing characters. The wider the smile, the more emphasis there is on the emotion. If a character is extremely happy, they may even have their eyes closed because their smile is so big. Pay attention to the eyebrows when drawing a sad character. A character can be smiling, but if the eyebrows are low and furrowed in the middle, the emotion changes dramatically. If the character is crying, the nose and cheeks become red as a result. Eyes that are about to cry or are crying will have lots of white highlights to represent the tears building and making the eyes wet. Anger appears in the mouth and eyebrows especially, but there are many ways to show anger on a face. The character could be quietly scowling in the corner or in the middle of the action, yelling at someone. The stronger the anger, the redder the face, as blood rushes to the head. A common way to show frustration and anger in manga is including the stylized vein throb on the head. Shyness is a more subtle emotion and can combine with other feelings, such as being anxious, nervous, flustered, or embarrassed. A shy character is usually blushing and will have furrowed eyebrows. They also may be smiling or frowning, depending on the situation. The shocked or scared expression is a fun one to draw in the manga style. To depict these expressions, focus on making things big. Give your character an open mouth and wide eyes, and for added flair, make the hair jump up too. A common stylization choice used in manga is to shade the top part of the face to show fear, uncertainty, or disgust. You will see this expression a lot in romance manga stories. Similar to the shy expression, the embarrassed expression relies on lines on the face. For extra effect, these sometimes cover the entire face and even the ears! Here are a few more popular expressions to try out on your next drawing. Angry Blush Confused Fear Happy Panic Sad Unsure Yummy To see how important the eyebrows and mouth are in a drawing, look at this example of a face that just has these two elements change. The shape and placement of these features greatly affect the expression. By altering the eyebrows and mouth only, you can achieve many different emotions. Disgusted expressions display the eyebrows close to the eyes and the mouth farther down on the face than usual. Two common manga emotion symbols are also on this face, the sweat drop, used to show emotions such as nervousness and uncertainty, and lines under the eye, which can portray fear or sickness. Jealous faces feature angry and determined-looking eyebrows with the inner corners lowered toward the eyes. There are blush lines in reference to being angry, upset, or embarrassed. The mouth is a small frown and drawn higher than usual. This effect is similar to a character who is pouting or feeling wronged. Smug looks pair downward-slanting eyebrows with a crooked smile. Prideful and egotistical characters often wear this facial expression. Surprised expressions often have high eyebrows and a wide-open mouth. The three lines coming from the side of the head represent that something has gotten his attention, which we can assume is the reason for his expression.HAPPY

SAD

ANGRY

SHY
SHOCKED OR SCARED

EMBARRASSED

EXTRA EXPRESSIONS


MOUTH & EYEBROW IMPORTANCE


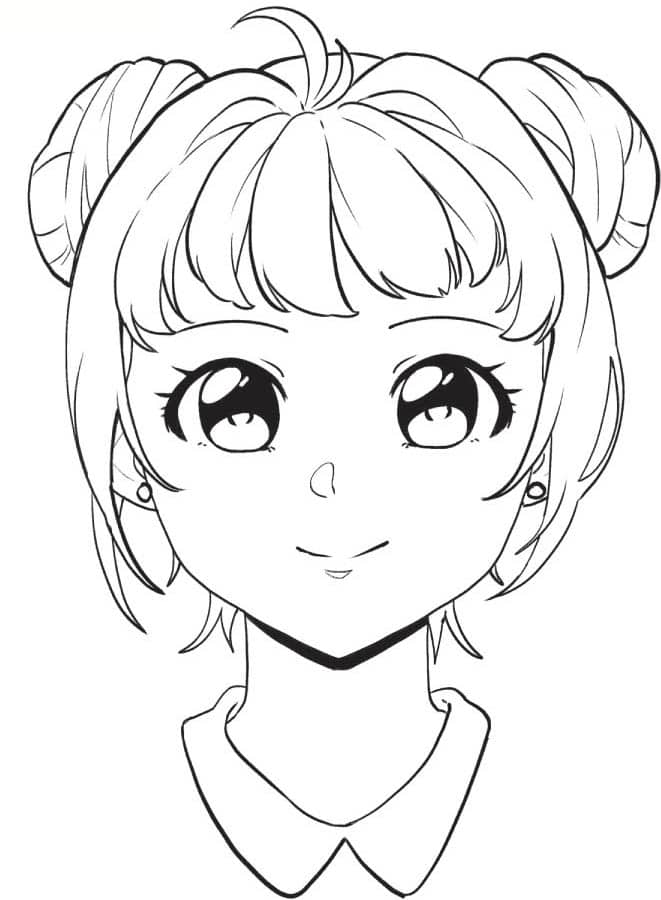
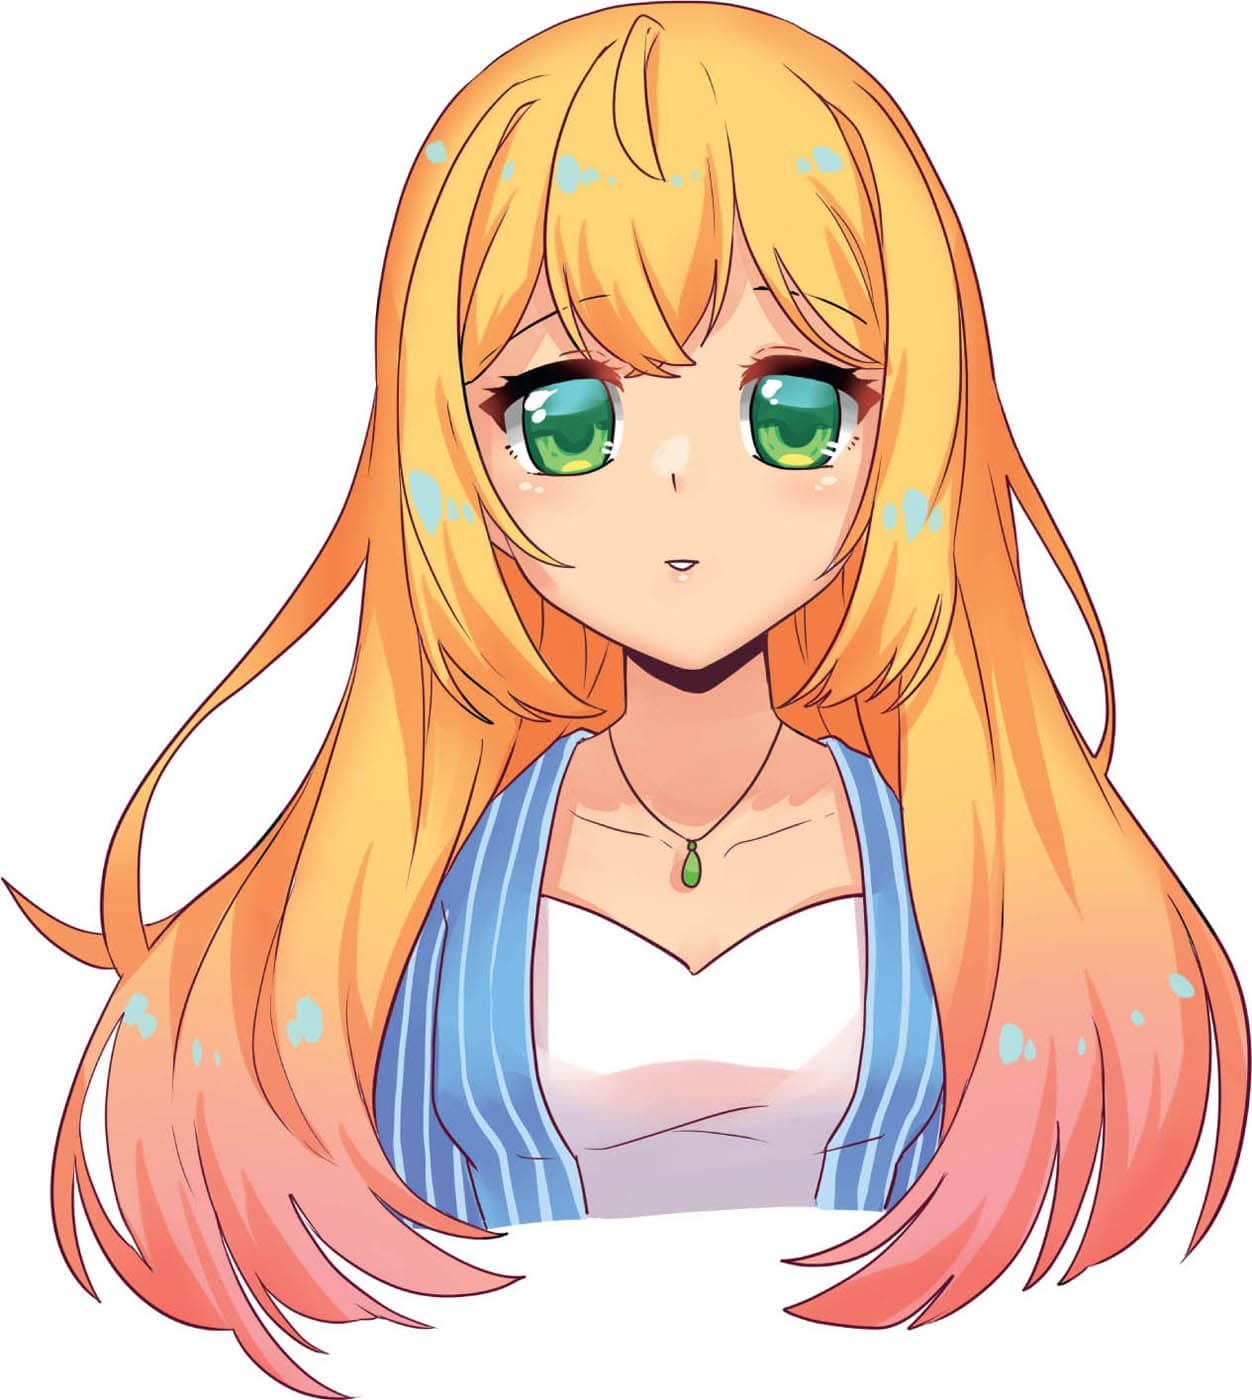
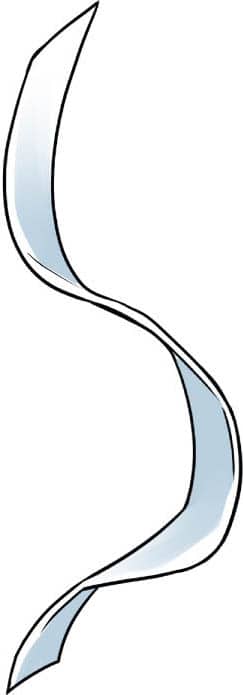
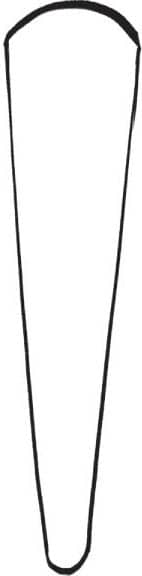
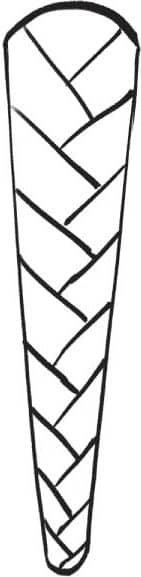
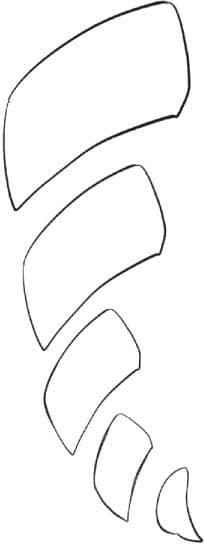
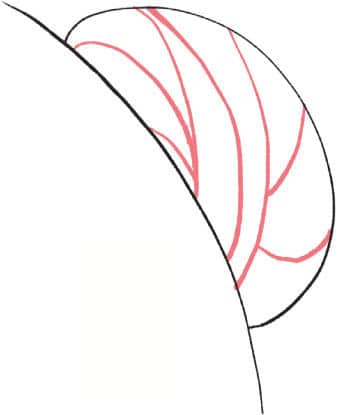
When first drawing hair, many artists tend to want to draw every little hair on the head. Doing this will only make the hair look messy and will be a visual overload for the viewer. Instead, imagine hair sections as if they were ribbons. Study how a ribbon falls and curls, and you’ll see that this is very similar to how hair also falls and curls. Draw in some stray hairs as well as some negative space within the ribbon shapes, as hair isn’t one big mass, and before you know it, you will have drawn believable and visually pleasing hair! 1 2 1 2 3 4 5 1 2 3 4 1 2 3 4 Long hair looks beautiful, but sometimes artists can get carried away and get lost in all that hair! Break it down and focus on smaller sections one at a time. Have the odd strand come away from the main group and then reconnect farther down to add intrigue and motion to the hairstyle. Short hair, while there is less of it to draw, can sometimes still be challenging to understand and draw. First recognize specific elements of the hairstyle. Is it spiky, curly, or straight? Does it sweep to one side, have bangs, and is the hair thick or thin? Once you note these things, you will be better able to tackle the lines and shapes needed for your character’s short hair. Ponytails and twin tails will have tight hair in the back section directed to the point where the hair is tied up. When there is more than one point, such as in twin tail styles, there is a part in the hair, usually down the middle, to separate both sides. After the tie, hair can fall downward as long hair does. Plaits and buns are also easier to draw when broken down into smaller sections and then built on top of those guidelines. Here is a simple way to approach drawing hair and how you can build many different hairstyles off of the same base. 1 Start with a character with the facial features already placed. 2 Make a note, either on your paper or mentally, where the main part of hair will originate and what way the hair will sit on the head. 3 Draw in the fringe or bangs. 4 Move on to the midsection and draw the hair that sits at the side of the face. Also draw in the small part of the back of the head that’s visible. 5a Variation 1 Now draw the back of the hair. This is the first variation, which consists of two cute buns. 5b Variation 2 If the character has short hair, draw it simply falling onto the shoulders. 5c Variation 3 To show off long hair, draw it pulled over one or both shoulders so it is visible to the viewer.DRAWING HAIR


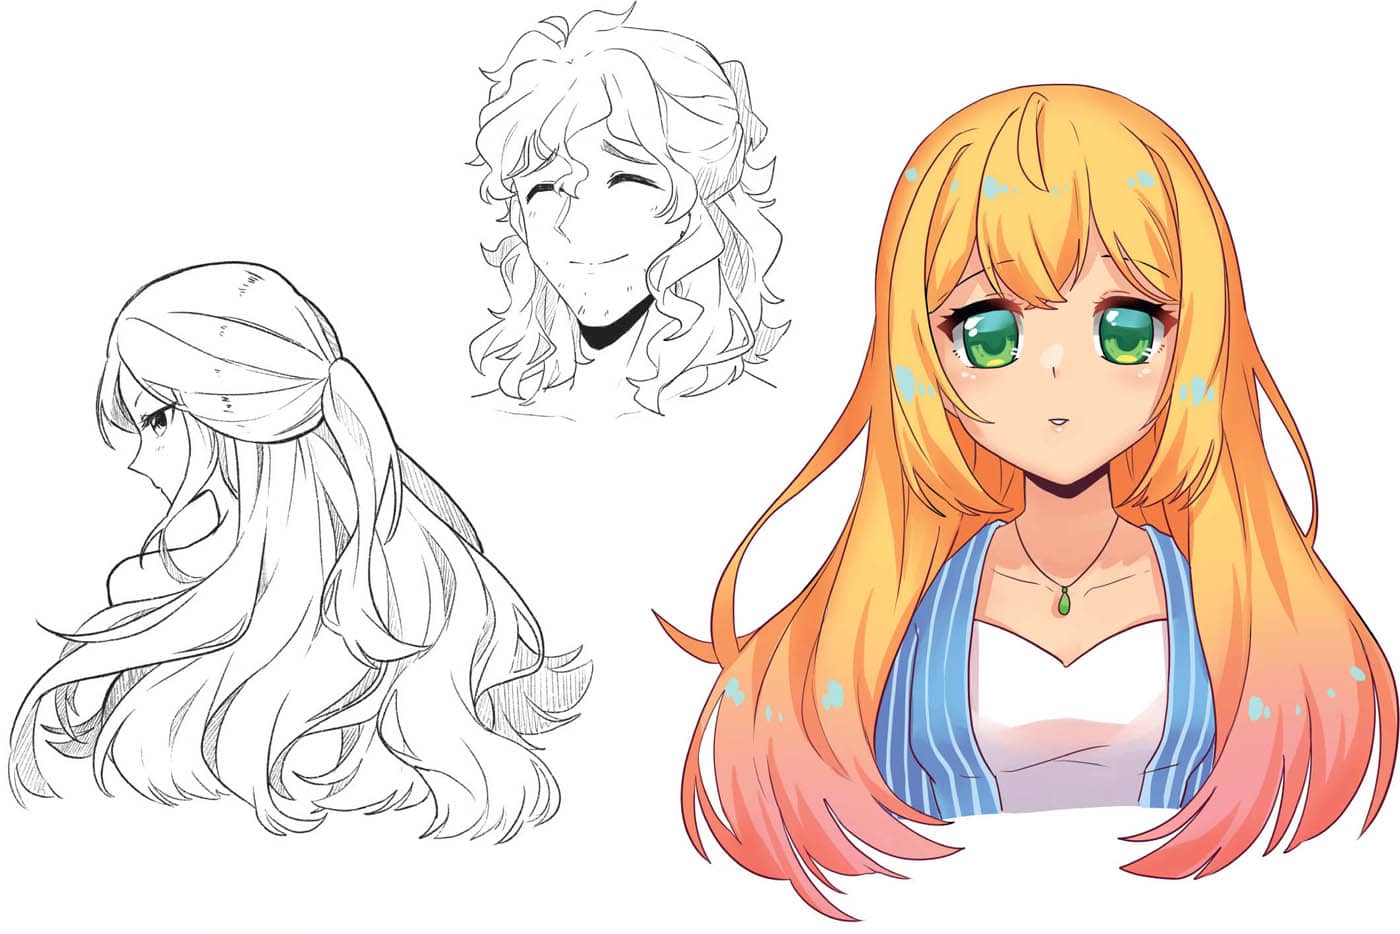


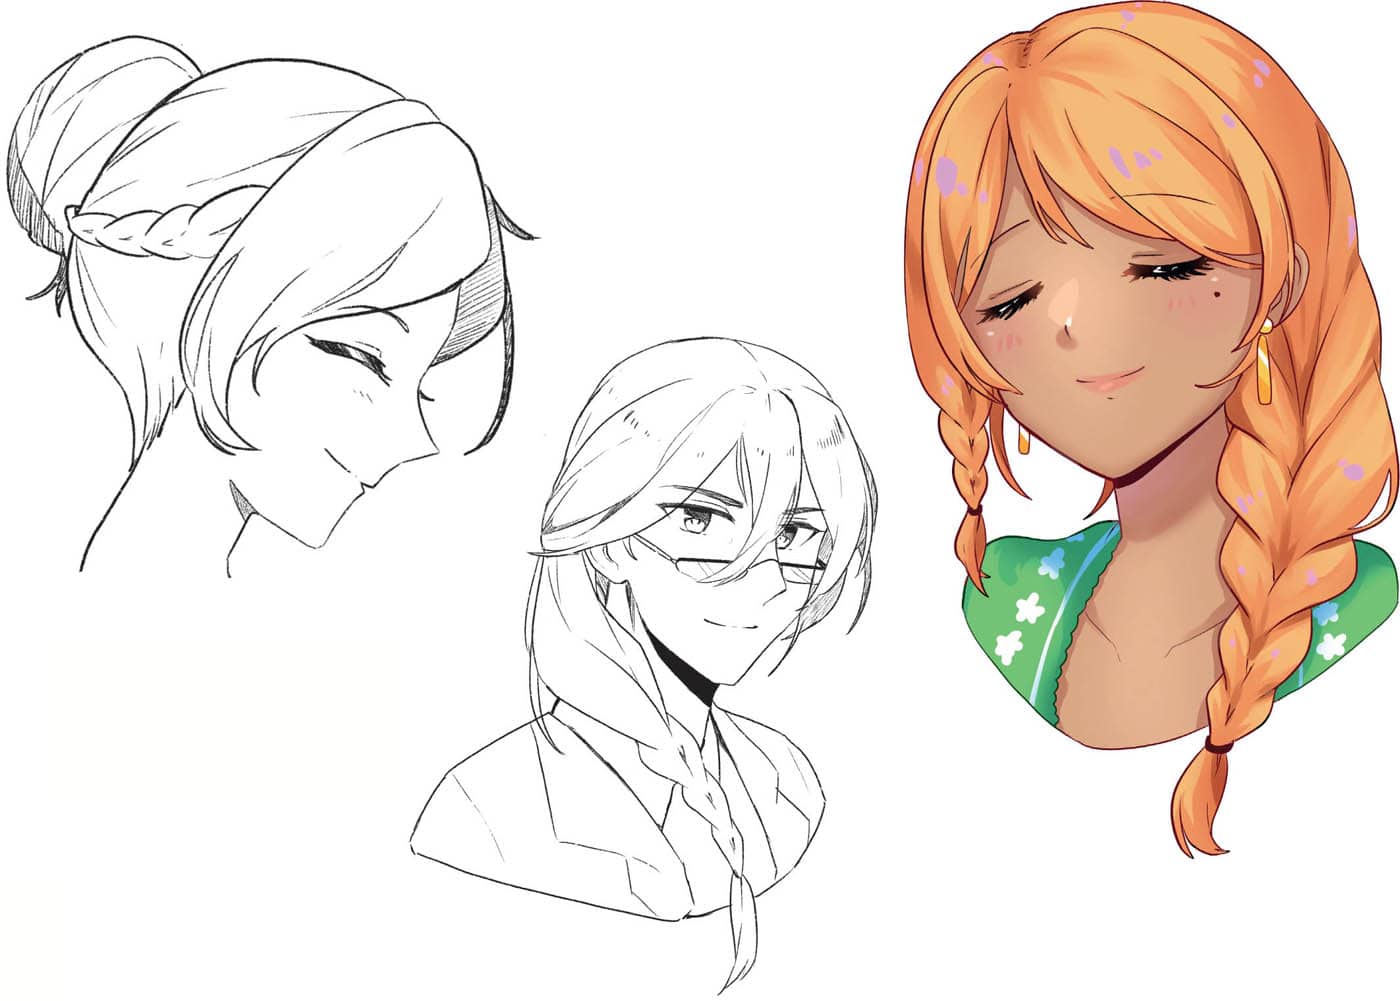
HAIRSTYLE VARIATIONS