I admit I did not have healthy work or personal habits when I found clay, and for the first few years I pursued it with a blinding passion. Unfortunately, I ended up doing a lot of harm to myself. I learned hard lessons when my mental and physical health suffered. I reached a breaking point where I almost gave up my clay career. From the outside, it might have looked like I was thriving in my profession (teaching workshops and selling ceramics), but I was miserable, unhealthy, exhausted, and had another year planned like the past one that had just broken me. Something had to change, and it wasn’t the clay—it was me. I realized my personal well-being wasn’t even on my to-do list. I had used the excuse that I didn’t have time for things like eating right or exercising. I realized it wasn‘t that I didn’t have the time; it was that it wasn’t a priority. That realization helped me sort out what my priorities should be. I changed things dramatically, putting my well-being first, making changes to my personal life, and implementing new boundaries around my clay practice and career. Once I made these changes, there was no going back. My life and my work life got right-sized, and I am 100 percent better for it. I hope you will take a few of my suggestions in the spirit they are shared. Armed with basic information and good habits from the get-go, you will keep coming back to your clay practice happily and healthfully. I want you set up for success, and taking care of yourself is priority one. When you are hand building, it’s important that you work from a place of comfort, stability, and knowledge. In developing this book, it is important to me that you know how much I value your effort and participation in clay and, ultimately, the commitment you have made to yourself. There is safety and trust here in these pages for you. When people embark on a creative journey, it is truly an investment in themselves. Growing and connecting to a creative practice is one of the things that makes life worth living, in my experience. If you drop in to your local studio, keep in mind every studio setup is different, and they are often not set up with comfort, ergonomics, or the differently abled in mind. Setup is often centered around equipment, tables, shelving, and how many bodies can fit. Community studios can be physically uncomfortable, as tables and chairs may be the wrong size for your body or wrong for how you like to work. Equipment is designed to be one size fits all. (I still haven’t met the person for whom it fits perfectly!) With more than twenty years working in clay, traveling far and wide, and through trial and error, I learned what will keep my body and brain happy in the studio. In this section is the knowledge I have gleaned along the way, questions I have asked myself, and behaviors that have helped keep me healthy and sane. As we are all different, take what works for you and leave the rest. As with anything, if you have concerns with your own body and your physical and mental practice, consult a trusted resource. NOTEBesides physical conditions and materials, there are toxic attitudes and practices that can come along with shared spaces. Racism, sexism, ablism, elitism, and entitlement are all things we have not escaped in the ceramics field. Sometimes, because of the nature of a small business, those behaviors have been left unchecked. We, as a community, have a very long way to go toward inclusive and equitable spaces. There has been a pay-your-dues mentality when it comes to those -isms, and even learning ceramics information and technology, meaning those who came before suffered so those coming after should as well. I reject that practice. Find your community (even if it’s just in these pages). Don’t let the fact that it is not perfect stop you in your creative journey. If you are setting up your own space, or even if you are part of a community studio, these are a few things to think about when prioritizing your comfort and well-being. Ask yourself this series of questions. The answers will steer you toward finding a good space to work and identify what modifications you might need to be comfortable. Trigger warning! We are inundated with ridiculous amounts of diet culture nonsense. My advice is to be well. I have had my own journey with diet and exercise, and it would fill up a novel (a messy, heartbreaking, trauma-filled novel). My journey now is about well-being. Those hard lessons I mentioned before have helped me know what works for my body physically and, most important, mentally. It has taken a lot of work to get to where I am with my well-being. This is more important than anything else in my life. It is how I show up and care for myself, which is reflected in all the things I do out in the world, including my studio practice. Know that how you care for yourself will affect how you are able to work in your studio. I encourage you to find a balance and rhythm in your self-care routine that incorporates your studio time. Being creative and finding flow in your creative space requires freedom from distraction, and taking care of yourself shouldn’t be the distraction that impedes you—instead, it should support you in the journey. NOTEStay hydrated! This is a really important factor in both studio and non-studio life. There have been so many times when I forget to drink water while working. I end up battling a headache and fatigue and lose my ability to focus on details. I usually leave the studio because I am miserable. Keep that water bottle nearby, and hopefully your studio has a bathroom! One of the most effective ways to reduce stress is to do some box breathing. It is really simple. Breathe in (four count), hold (four count), breathe out (four count), hold (four count), repeat. This practice, or some variation of it, can greatly reduce your anxiety and stress and increase your focus. I try to remind myself to take some deep breaths whenever I find myself tensed up or just doing nothing, such as sitting in traffic or sitting at my studio table contemplating my next move. Many people normally breathe quite shallowly; however, it is great for our bodies and mindset to do some deep breathing, even if it is just a minute or two a few times a day. Give it a try. Don’t be afraid to take a break. Some of the best advice I received from a mentor was that time spent out of the studio can be more important than time spent in the studio. This is how we refresh, as well as get new ideas and experiences that we can draw on for our art practice. Grab a coffee with a friend, take a walk—taking a physical and mental break can help change your mindset, and reconnecting with your body can add to your productivity and focus back in the studio. Whether you sit or stand while working, we all have postural tendencies. We tense in concentration or hunch to get closer to what we are doing. We hold ourselves in all kinds of uncomfortable ways. When working, try to be mindful of your body. Discomfort is your body telling you there is something wrong. Common complaints by those working in ceramics spaces are lower back pain, neck cramps, and carpal tunnel symptoms. Watch how you pivot, hold your arms and hands, and stand or sit. Remember, you are moveable in this situation; notice your body and see whether you can move to better suit your workspace. In my studio, I am always adjusting the height of my chair, or even my table, while working to keep myself in a comfortable space. Working with clay can be tiring and difficult, especially in the beginning. You are working and developing new muscles—both mental and physical. In the excitement and passion for this new journey, there is a danger of exhausting or hurting yourself. Be sure to rest and recuperate. You’ll find recommended stretches on these pages, most of which are what I call “opposite work.” They help you open yourself back up after all the hunched or closed-in postures you’ll get into while working. If you can remember, drop your shoulders, move your hands and fingers around, and stand up and move at a minimum of every hour. When working with clay or glaze, we frequently wash our hands. Clay also draws moisture from your hands, which can be rough on your skin (especially in the winter months). Find a good lotion; I prefer barrier-type creams, as they help protect my hands while I work and last a good while. Avoid direct contact with the caustic materials sometimes found in some clay or glazes (perlite or wood ash are a couple common ones). These can cause burns to the skin when mixed with clay or glaze. There are other materials usually found in raw state in a glaze lab that you should also avoid direct contact with; they should be marked clearly. Check the resource section under the online databases—the ones to do with glazing will have a list of hazardous materials. I recommend doing these stretches intermittently throughout your studio time, more often if you are just beginning. So much of what you are learning will be building new muscles in places you may not have been using before. Also if you are cramping up or easily fatigued, take a few minutes every hour to take care of your hands. Take a break and give yourself a little hand massage. At a minimum you should get up and walk around every hour. I suggest a series of stretches as part of your studio practice. For each person this will be different. Age and mobility are big factors in your range of motion. If you want to keep using your body freely, practice some restorative stretching after and during your clay sessions. The goal is to get your spine activated and the blood flowing back to all your extremities, especially if you have been hunched over a studio table. If you have a full day in the studio (eight hours), take a midday break and move your body. Create a short studio routine for yourself. If you have the space and time to create a full stretching routine, great, but the studio is not usually a place you want to be on the floor. Create a routine that is quick and easy to remember. It should be a way to maintain, loosen, and open your body back up after sitting or standing in a making session. Hold hands in prayer fashion, a little away from the body and gently twist hands (tips of fingers) towards your body. You should feel a gentle stretch. Hold for 30 seconds. With gentle pressure, use your hand to articulate your fingers and thumb on the opposite hand, working both away from the heart and towards the heart. Repeat for the other hand. Extend your arm in front of you palm up. Use your opposite hand to gently stretch the hand down. Hold for 30 seconds. Repeat for your other arm. Place fingertips together, spread out a bit, and gently press fingers together. Then, bring your palms together. Move them together and apart. This is the “zombie arms” stretch. Extend both arms in front of you, and fold hands forward. Hold for 30 seconds. The passion of learning new creative skills can take us a long way down the making path. I want to touch on bumps on the road you may encounter. Things happen, and life priorities get in the way of your art practice. Perhaps you have some failures in the studio that deflate your energy and your desire and ability to get back to the studio. One of the most difficult things in any studio practice is getting started. When we have limited creative time, starting can be especially difficult if you are the type of person who needs momentum. The start-and-stop moments of life sometimes prevent us from pursuing our creative practices. Even though I call clay time my job, I face distractions and my own tendency to procrastinate. It’s human nature. Without you, nothing is going to happen. Set regular time aside for yourself to be in your studio (even if that is at your kitchen table). Take that commitment seriously. If you don’t have time to break out all your clay gear, draw in your notebook, read some of the projects in this book, or find the next thing you want to make when you have the space and time. Show up for yourself when you say you are going to. Doing so helps your clay practice become a regular event. It also shows family and friends that you are making time for yourself in this particular way. Remove distractions if you can. Leave your phone in another room or off your body. If people are distracting you, plug in your headset and listen to some music. Make a bubble around yourself so you can find some focus and energy to play with clay. Failure is a part of this process. This book and the projects in it are about skill building. They are meant to slow you down and help you focus on each of the small steps to get you to a finished object. These fun, playful projects will help you build foundational skills, but they also may be challenging, and some will test the limits of your patience. Clay is a medium that engages the moment. It wants your time, your energy, and your focus—and if you don‘t give it those things, it will teach you some difficult lessons. Every person brings a different set of skills; your hands are different than mine. The functionality of your body is different. How you interpret the photographs will vary. Be patient with yourself and the process. You are going to work to solve the creative problems in front of you. Remember, you are the adventurer here; you chose this journey. Part of the reason you have chosen this path is because it is fun and joyful, but in that joy can also be struggle and challenges. At some point, you might throw your hands up in defeat. Rest before you give up or quit. I have found if thing after thing isn’t working and I’m just getting angry, frustrated, and disappointed, it’s time to get out of the studio. Go out and experience the world. Think of this practice as research. What do you enjoy? Take pictures, try new things, find new hobbies or interests. When we engage with our interests, we can bring that engagement back to a studio practice. In the studio, practice is what helps build and develop our skills, this also applies to practicing mindfulness in our time outside of the studio. (Checklist ideas: Did you eat? Are you distracted? Are you tired? Did you exercise? Do you need a walk in the sun?)BODY AND MIND
Body
Studio Setup
Best Practices
(Inside and Outside the Studio)EXERCISE, EAT WELL, AND GET YOUR REST
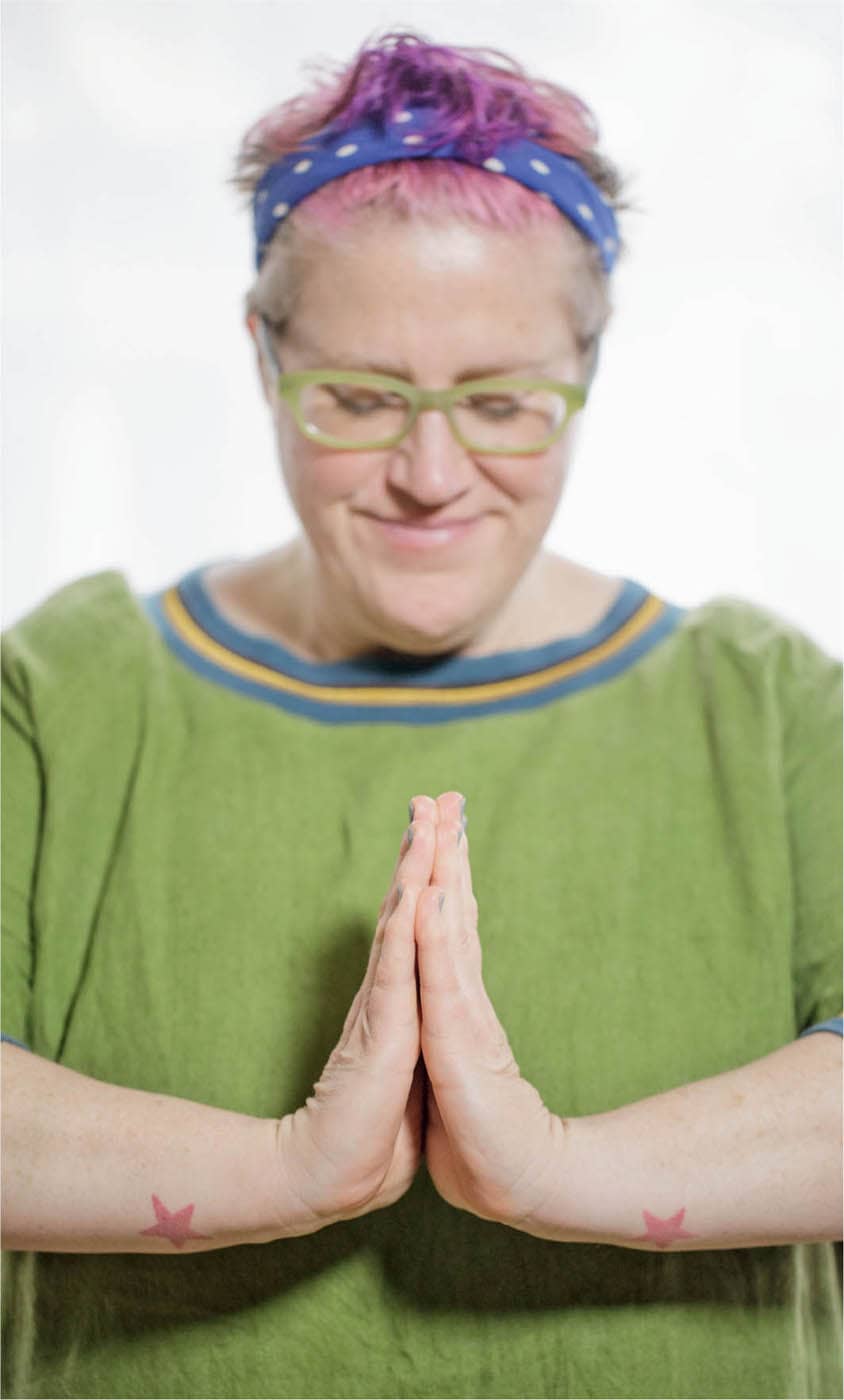
BREATHE
TAKE BREAKS
CONSIDER POSTURE
MIND YOUR HANDS AND SKIN
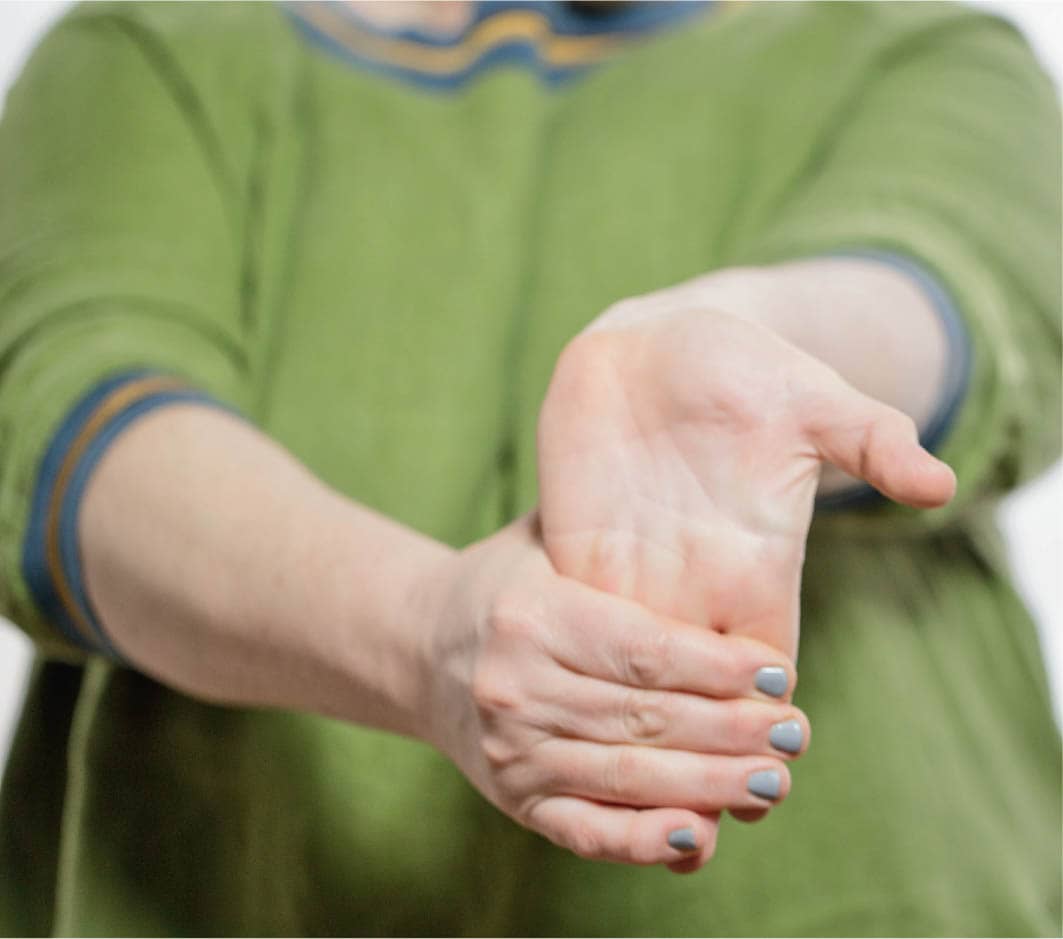
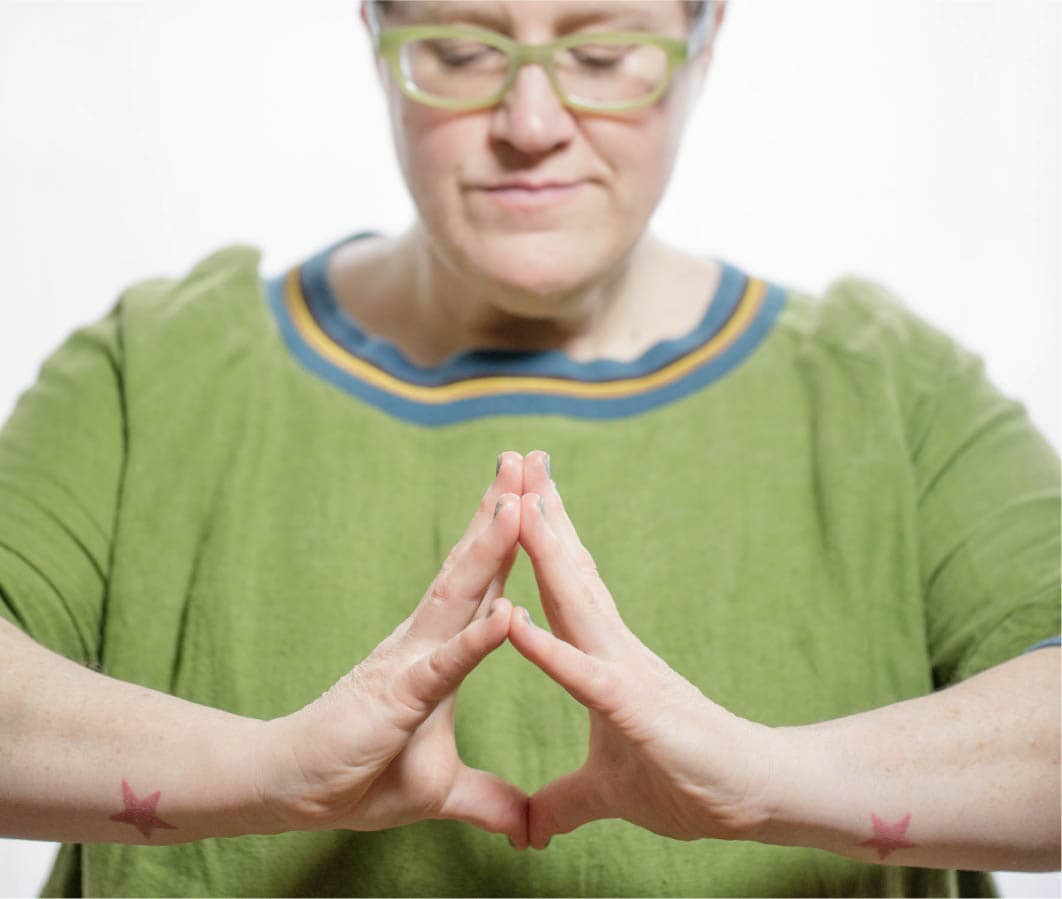
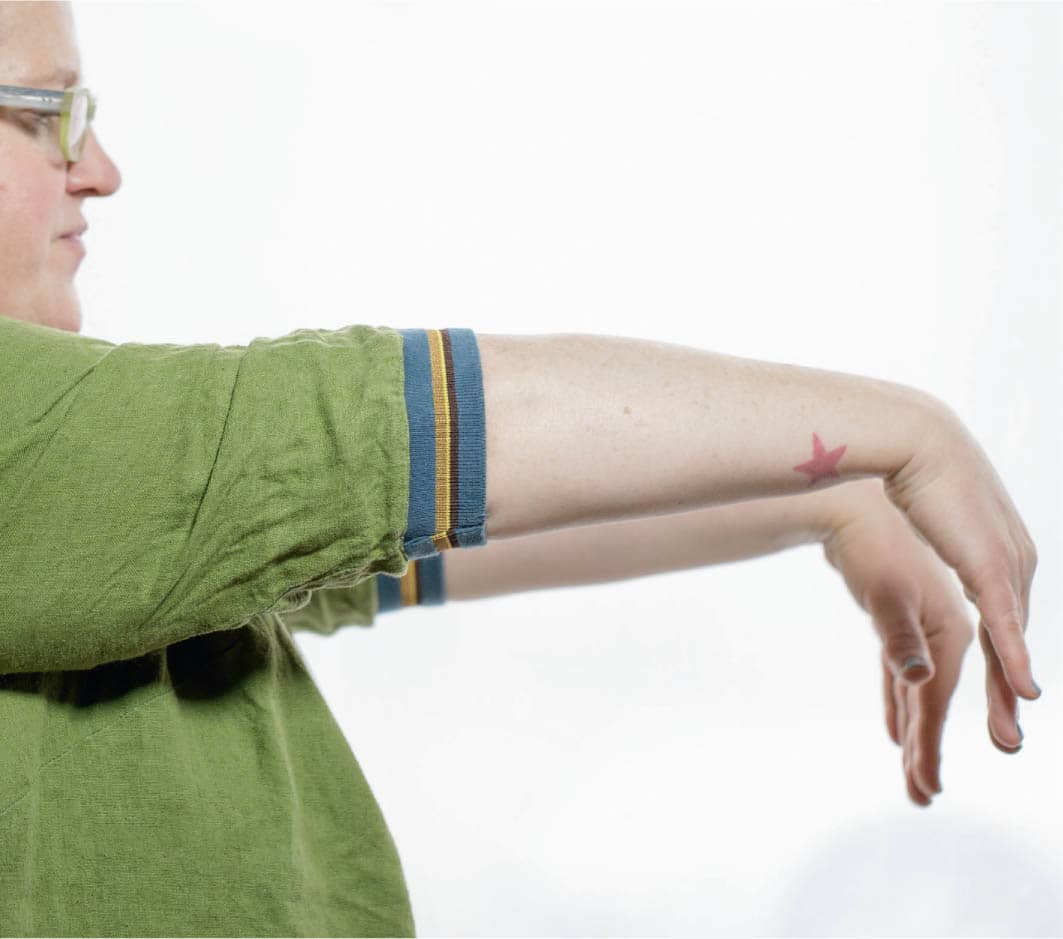
Stretches
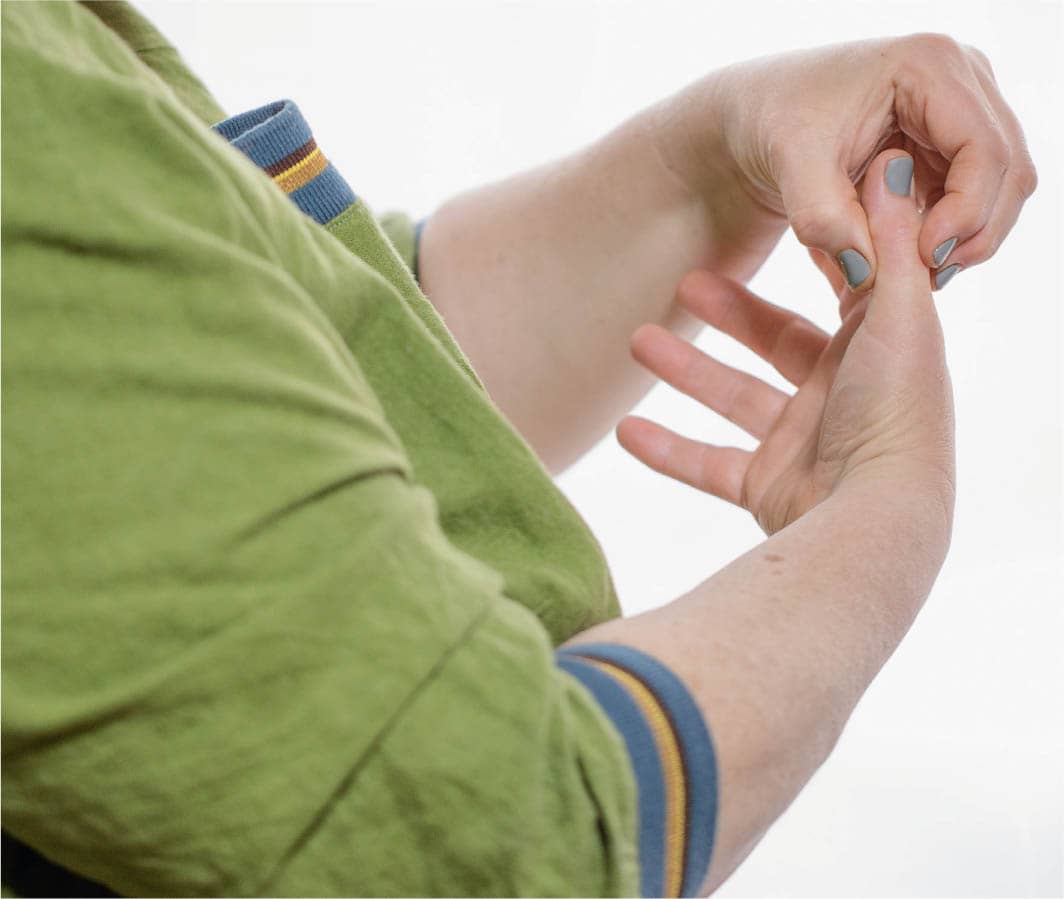
HAND STRETCHES
STRETCH YOUR BODY
Mind/Mindset
RECOGNIZE THAT YOU ARE THE MOST IMPORTANT PART OF YOUR STUDIO PRACTICE
BE OPEN TO THE POSSIBILITY OF FAILURE
HAVE A WELL-BEING CHECKLIST
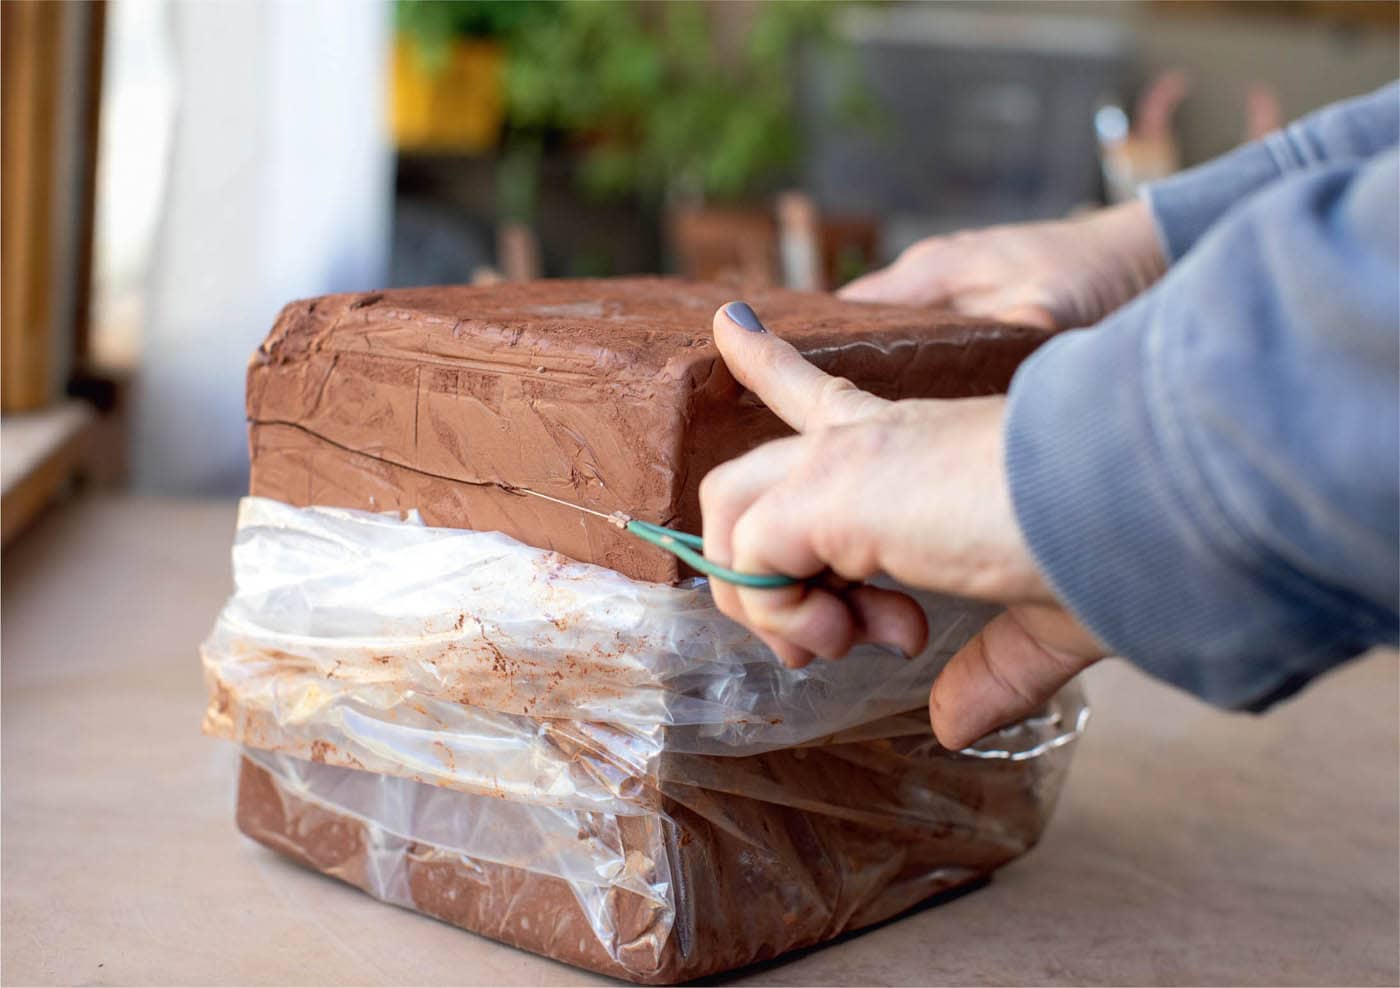
I like to think of all ceramics knowledge and skill as a pie, and that whole pie is way too much for me to eat. Just as I am never going to sit down and eat a whole pie, I will never know all there is to know in the clay realm. I only fancy myself an expert in one tiny sliver of the clay knowledge pie, and I have been working in that sliver for the past twenty-plus years. This book and the projects within are your beginning introduction to ceramics. My goal is to give you a taste of some of the possibilities of clay. The galleries are meant to show you a small glimpse of what’s possible with hand-building skills. I want to add to your toolbox of skills while trying to excite your creative mind. Not every project will be your kind of project, and that’s okay. I urge you give them all a try: you will learn some new skills, and maybe surprise yourself with a new interest. (I did when coming up with the projects for this book. I would have never imagined how much fun it was to make little clay creatures. I had a blast, and it engaged a whole playful part of myself I didn’t realize was just beneath the surface of my self-imposed seriousness!) This is your adventure, so you can always skip ahead to a section that really sparks your interest. That excitement is a great place to start. My last thought is just a general philosophy you might keep in mind. This clay thing is really about the journey and not the destination (or object). When we make things, in the early days we can sometimes get caught up in the objects, which is totally understandable—it’s a celebration every time you open a kiln. Don’t forget that we spend more time making and remaking (the journey), and in thinking only about how to achieve an end goal (the destination), we can lose sight of just how important and meaningful that making (journey) time is. It is a privilege to carve out studio time, to spend your moments in a creative endeavor. In reality, we quickly move on from the shiny, beautiful thing we have created to make the next object, because there is joy in the making. Just remember to enjoy those moments sitting at your table, lost in the making—it is a rare and beautiful gift. With that in mind, go forth and enjoy. Remember to have fun. Remember that failure is part of the process. Remember to rest. Be present. Enjoy your clay adventure! There’s just something satisfying about cutting a fresh piece of clay straight from the bag!HOW TO USE THIS BOOK
It’s about the Journey
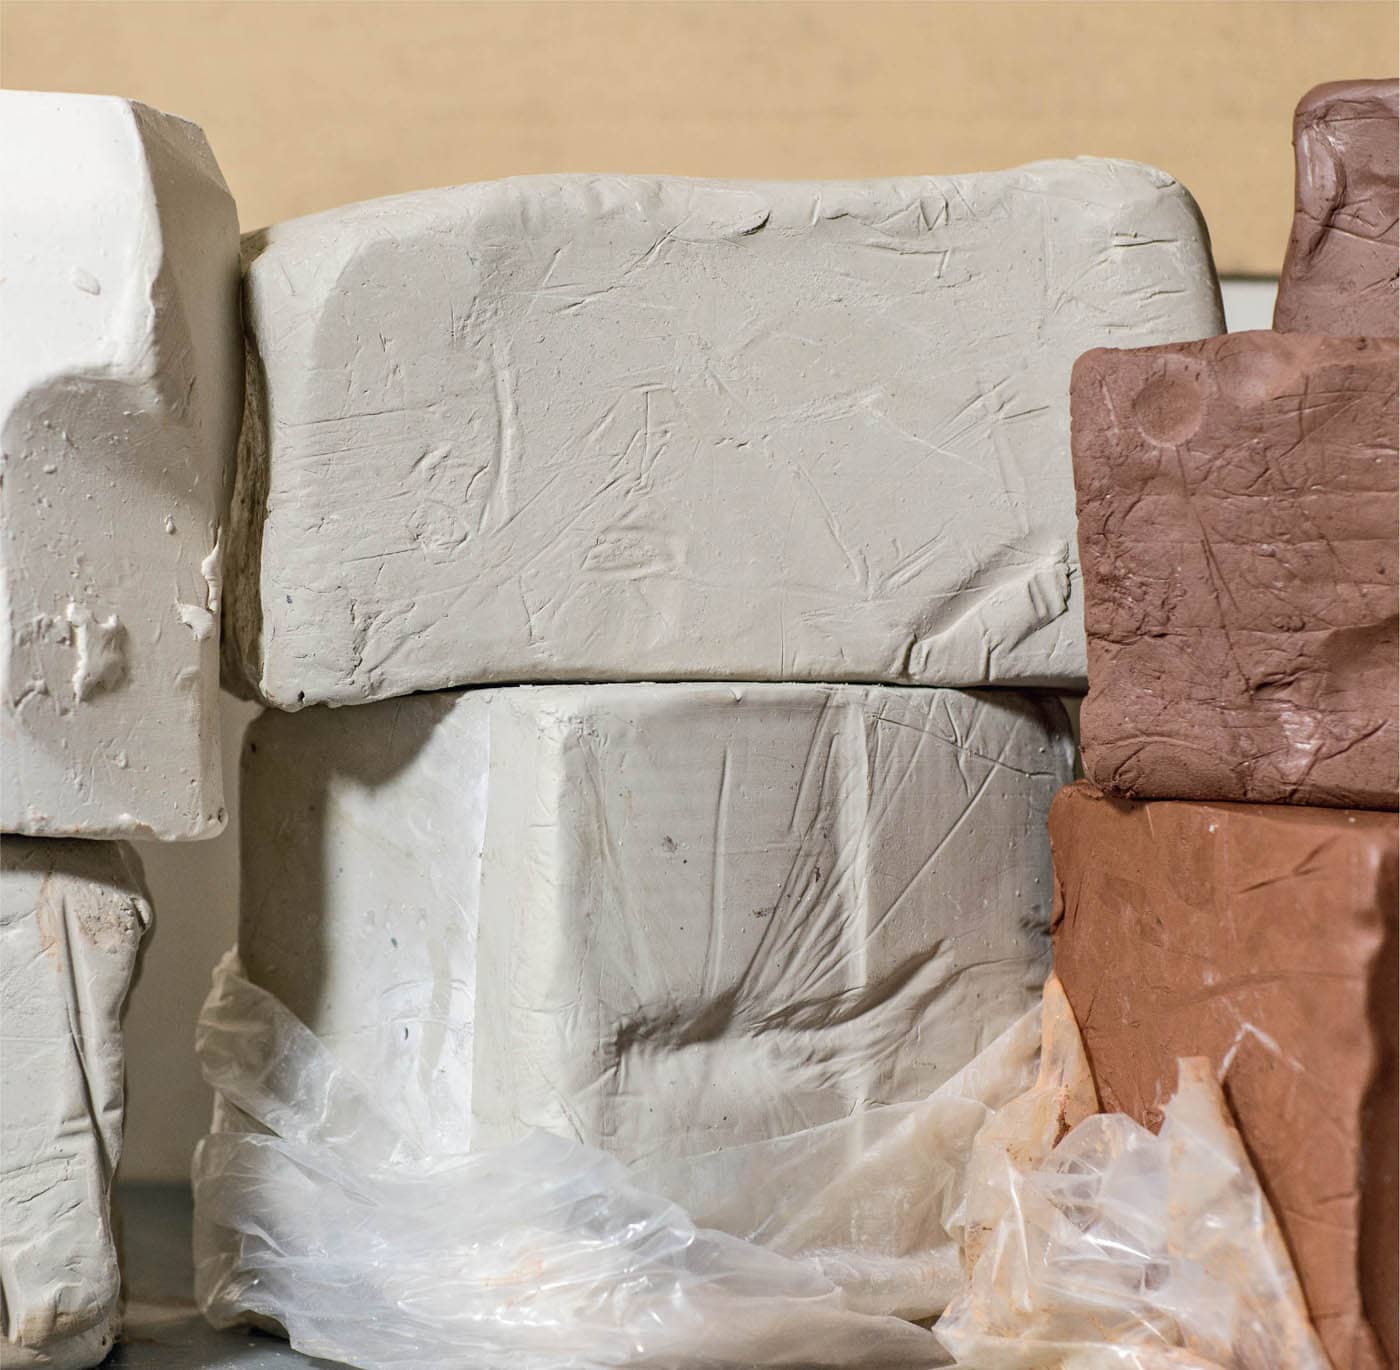
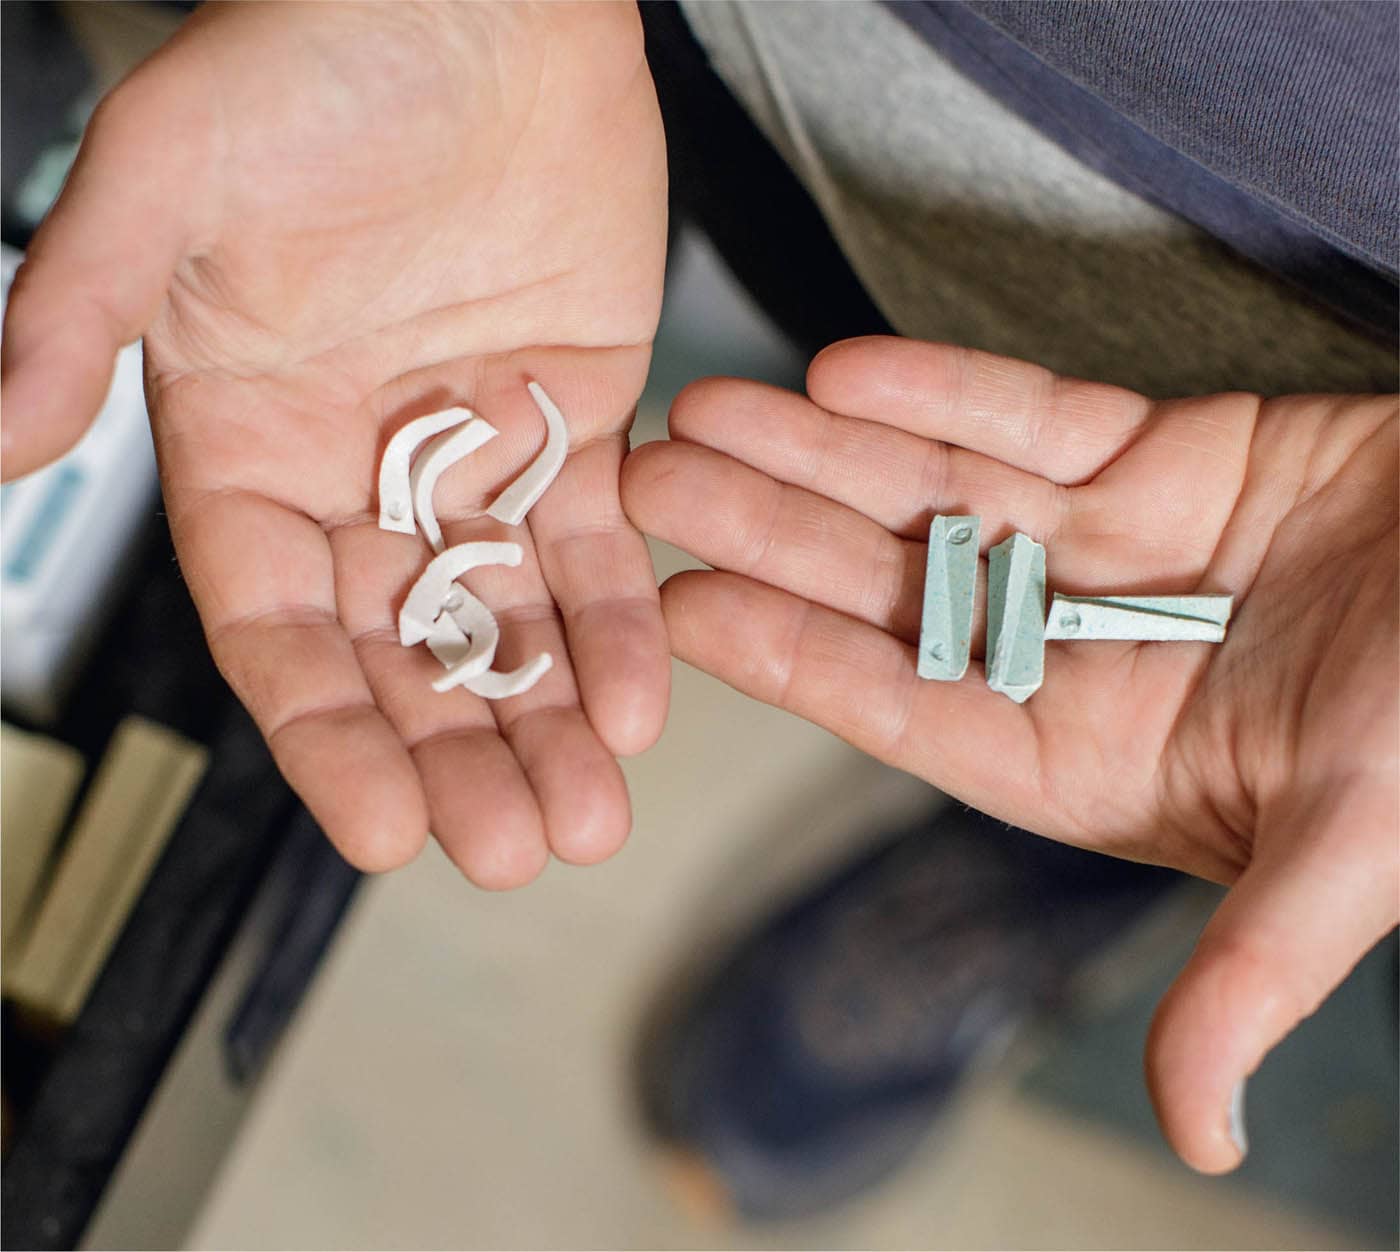
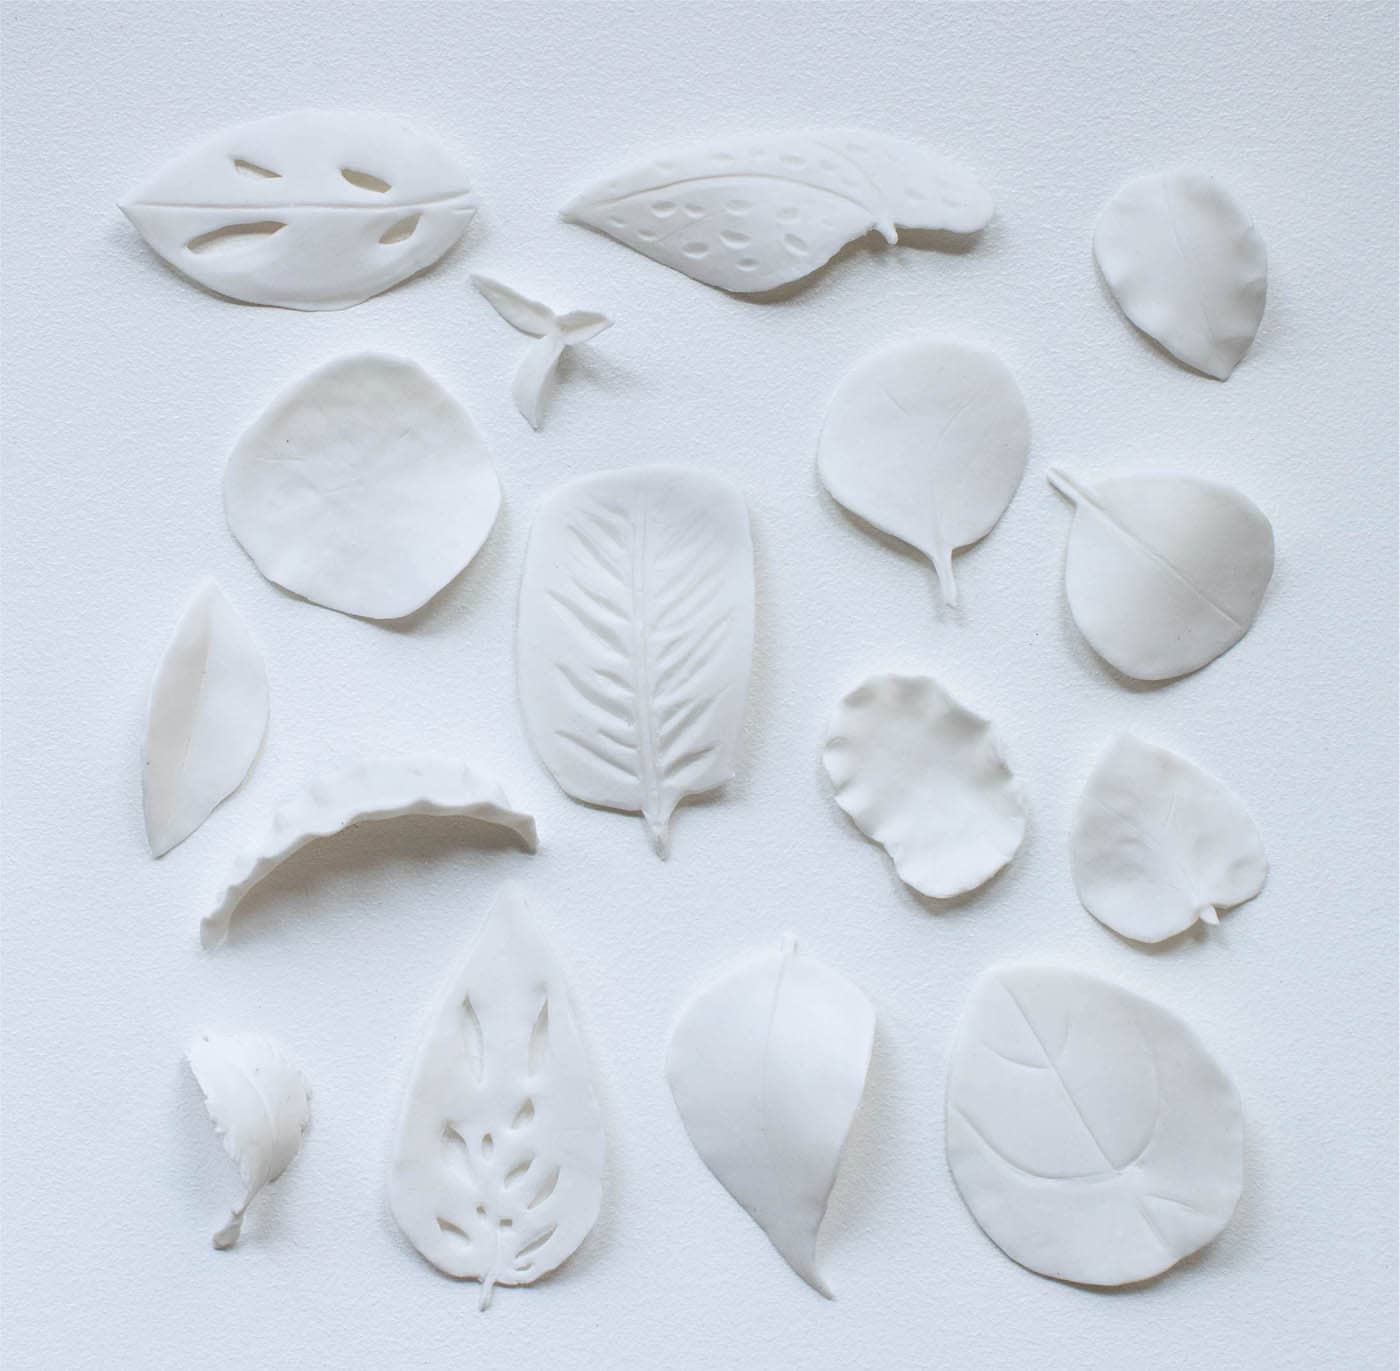
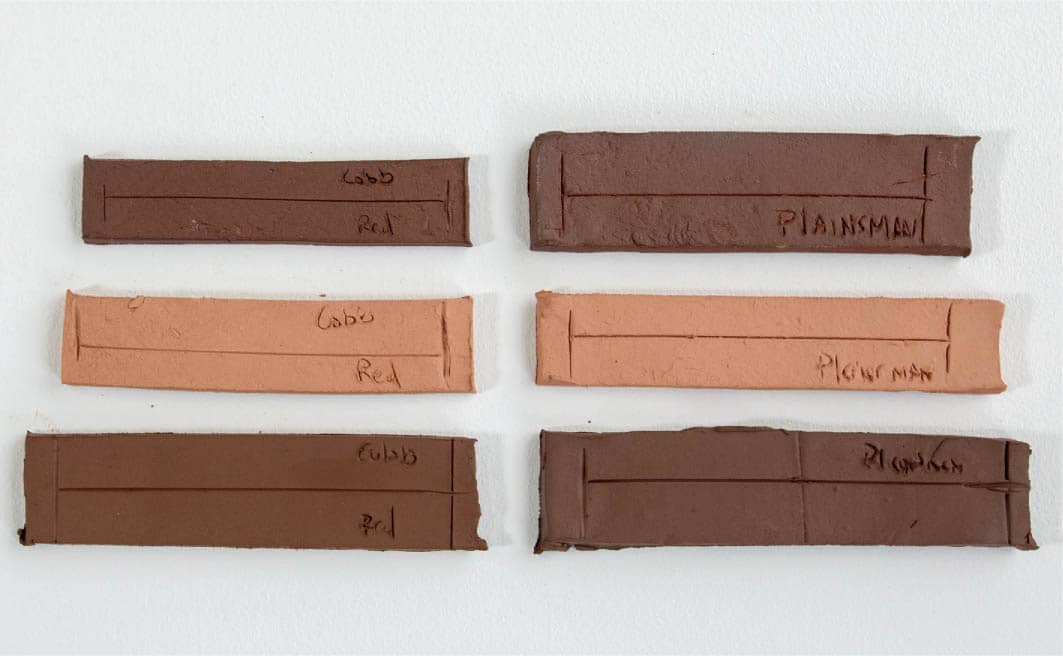
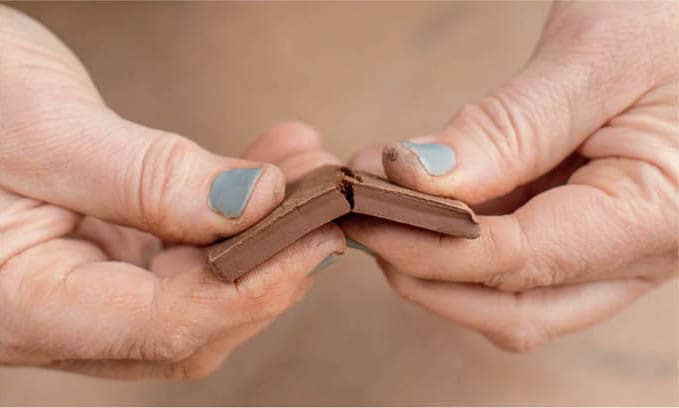
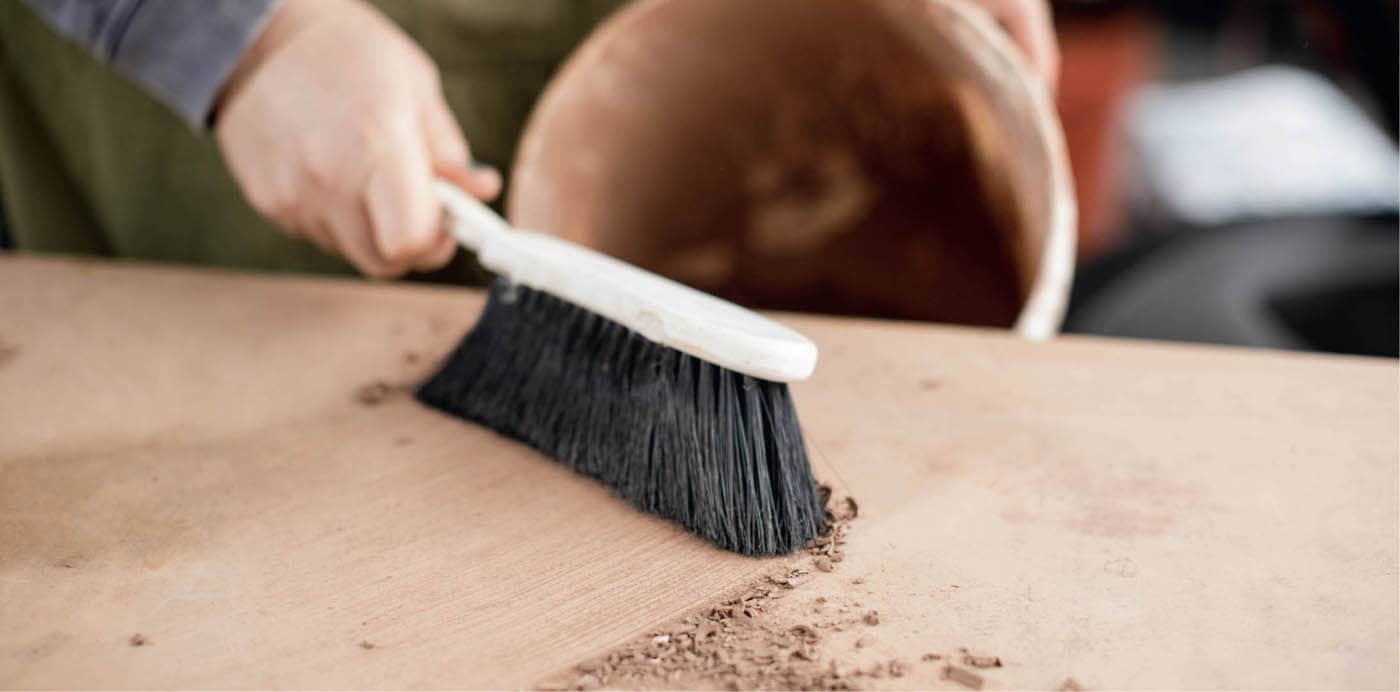
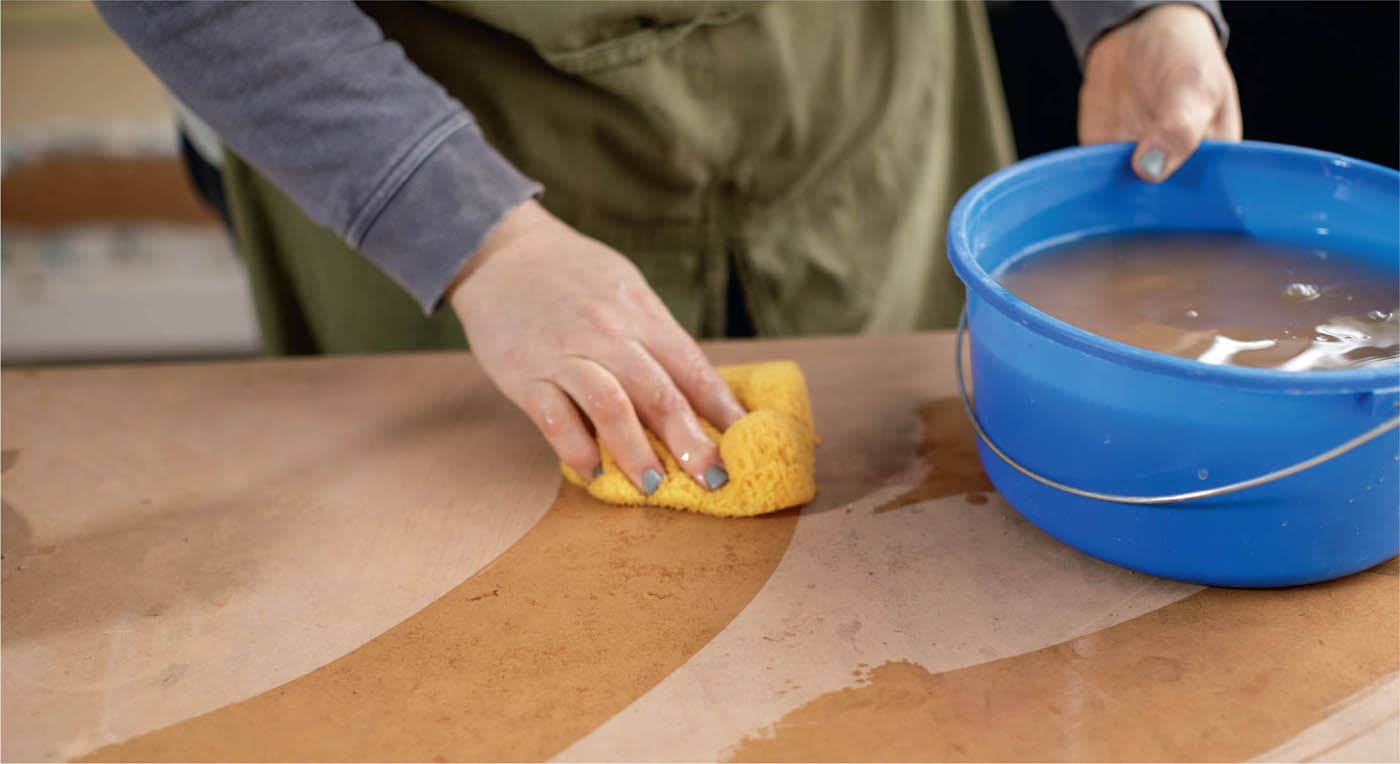
Clay is where we start. If we were painters, it would be a blank canvas. To start, I recommend you try all the clays that excite you. Like with everything in life, you will find your preferences—some aesthetic and some technical. The magic of making is not in the clay; the magic is in me and you. My dexterity and competency with clay comes from years of playing around with many different clays, learning the various properties and rules for certain clays, and most important, from knowing how I prefer to work with clay. We all have tendencies that become apparent when we work. By choosing certain types of clay to work with, you can lean into your strengths and increase your chances of successful outcomes. That “magic” comes with trial and error and experience. In the beginning of this clay journey, you might run into a language barrier. In grad school, we would sometimes gather for a dinner party, and it inevitably happened that one of the grads would start talking clay, and you could almost hear the inward groan of the significant others in attendance. Just like any subculture, the language around the topic can seem very mysterious and technical and, at times, alienating. In this section, I want to give an overview and foundation of the language around clay and its properties in layman’s terms, so you don’t get lost when folks start talking clay. Clay chemistry is not what excites me . . . I love making. I am not a clay technology person; I learn what I need to and leave the rest until I have a need to learn it. If the technical stuff excites and interests you, there are lots of resources out there for you. I feel lucky to have had two kinds of teachers, one of whom had amazing technical knowledge and interest. He forced me to learn enough to ask smart questions and problem-solve when I had technical difficulty. The second was a teacher/mentor who wondered why I was spending all my time making clay instead of making with clay. He helped me get out of the bog that can be the technical side of ceramics. Although there is a place for learning the technical stuff, you can easily head to the clay store, grab a bag of clay, and start making! Part of this journey is to find a balance between the technical and the artistic and how you want to participate. My hope is that with a cursory understanding of the language used around clay spaces, you will have a good foundation to start understanding what is possible with clay, and the confidence to navigate deeper, if you so desire. You have probably experienced digging in the dirt or maybe walking near a river and finding some clay: it presents as sticky, slimy, and very compact dirt. Although technically clay, this is not what we work with in the modern studio practice. Today most commercial clays and clay recipes are formulated to have more plastic qualities, making the clay very workable in most hand-building or throwing situations. Historically most clays were what we call short—they lacked some of the materials that make the clay more elastic (plastic). The difficulty of working with shorter clays is why most early pottery was made with hand-building techniques, as it was not possible to stretch the clay (as desired with wheel throwing) like we do nowadays with most commercial clays. You may have heard folks throw around the term “cone” and some number that may or may not have made sense, such as “cone 6” or “cone 04.” What the heck are cones? you might have wondered. Long before thermocouples and digital readouts, cones were used to read the temperature inside kilns. We still use them today. Pyrometric cones are of ceramic material that soften, bend, and eventually small pieces melt and when exposed to heat and time soften and bend, according to the silica and alumina rations in the cones. Cones are placed in a kiln near a peephole and are checked visually throughout the firing process. (Never look into a kiln without proper protective eyewear.) Although most kilns have thermocouples and digital readouts now, it is good practice to have witness cones in kilns to verify whether the kiln has reached the correct temperature for your clay body and glaze. Some electric kilns are set up with a cone sitter, where a small cone for your goal temperature is placed. Once the goal temperature is hit, the kiln shuts off; cone sitters are a great safety feature to save you from overfiring. For gas or atmospheric firing, cones are more commonplace. You need to know the current temperature range and when to adjust it. Learning to fire kilns is very daunting—it is a raging inferno in there! If you are interested in learning more about electric, gas, or atmospheric firings, there are many book resources out there. I also advise finding an experienced teacher who is willing to teach you. Kiln firing is something that requires practice and problem-solving, so having firsthand guidance is really the way to go. For our purposes, I want you to understand that cone numbers, such as cone 6 or cone 04, refer to a predetermined temperature range, and it is important to know in what range you are working regarding clay and glaze. My practice has been geared toward working in electric kilns; they can work in all the temperature ranges, so there are lots of options, and electric kilns tend to be very accessible and ubiquitous in most ceramics spaces. For more information on the actual temperatures in Celsius and Fahrenheit and what a cone chart looks like, look up an Orton cone chart. Cones before and after firing. These are cone 5, you can see a small stamp at the bottom of the cone that has a number in it indicating the cone or firing temperature. These were fired in an older test kiln with a cone sitter, when the cone starts to get soft and bend the kiln shuts off and the firing is finished. The bright white clay you see in projects such as Flora (here) is porcelain. There are three basic categories of clay: earthenware, stoneware, and porcelaneous. Earthenware is ceramic ware made of slightly porous opaque clay fired at low heat. A common misconception about earthenware is that it is always red, or that all red clay is earthenware. Terra-cotta planters are what spring to mind. Earthenware clay can be red or white, depending on the types of materials used to create the clay body. One of the main drawbacks of earthenware clay is that if it is fired over 04 it turns into a puddle or bloats or some other undesirable outcome! Another quality to consider is that earthenware remains somewhat porous after it’s fired, meaning it will still absorb water. I call this feature punky. Earthenware is not vitrified clay; once a piece is fired to completion, a vitrified clay body will ring if you flick it with your finger. If you perform the same action on an earthenware pot it often sounds hollow or makes a “thunk” sound. One of the great qualities about earthenware is that it’s usually quite smooth in texture. Traditionally, earthenware has been used for flowerpots and cookware, most notably. Earthenware’s openness means it has the ability to expand and contract in heat, which makes it a very good clay for cookware. Some of my favorite pots in the world are Spanish earthenware cookware. One of the perks of this low-fire clay body is its ability to develop brightly colored glazes at low temperatures. Earthenware is a great clay and has lots of wonderful attributes, but also a couple of drawbacks. Because of its porosity, it can break down more than other clay bodies that are more vitrified, or impermeable to water. That bit of punkiness means the fired clay body can chip more easily, and regular use can wear down the strength of the clay. The fact that it’s porous means whatever glaze you use on it needs to be non-crazing (no breaks in the glaze surface) and nontoxic, especially if it’s going to be used for food service. If it’s not going to be used for food, a wider variety of glazes can be applied. Another drawback is that earthenware tends to not have very good greenware (unfired pottery) strength, meaning it can become brittle when it is drying and bone dry. The next type of clay, and I dare say a most versatile clay, is a stoneware body. This clay body typically has grog (basically crushed-up bisqueware, defined on the next page) or sand (variable mesh) added to it. This changes the particle size and density of the clay. Varied particle size can help with the greenware and fired strength of the clay and its workability. The varied particle size makes stoneware bodies wonderful to hand build or throw. This style of clay is usually mid-range to high-fire clay and comes in all kinds of colors (think earth tones). Stoneware has great greenware strength. Because these clays fire in a hotter temperature range, they are typically all fired to vitrification. This makes a piece less likely to be good bakeware because there‘s no expansion and contraction when heated. It is great for making all other functional ware and sculpture work. It is also more likely to be used in atmospheric firings. Porcelain is typically the whitest clay and contains the finest particle density, making it possible to achieve amazing thinness and strength. It is available in mid-range to high-fire porcelain bodies. Depending on oxidation or reduction, during firings, you’ll get either a yellow or blue hue. This clay body is used not for cookware, but it is really wonderful for dishware and sculpture work. It’s a beautiful material and fun to work with. One of porcelain’s amazing attributes is its ability to achieve translucency, meaning you can see shapes and light through it. Translucent porcelain is thin and has been fired at high temperatures. It is also extremely strong and versatile, used in dishware and even in space shuttles! Get ready for a challenge, though. Porcelain can soften and warp during firings. It is prone to developing cracks. If you choose to explore porcelain, be patient as there is a learning curve. Porcelain can be challenging to work with, but its beauty is rewarding. Greenware refers to any clay object that has not been fired yet and is still in its raw state. It can be broken up and slaked down and made into workable clay again. Bisque or bisqueware is how we refer to clay objects once they have gone through the first firing. A chemical change occurs, changing clay into ceramic material. This means that it can no longer be broken down into a raw, workable clay material. This is also the point when glazing happens in most ceramic work. The clay is much less fragile than when it is in its greenware state, but it’s still porous, which makes it perfect for applying glaze. Glazeware is the finished product of the ceramics process. Traditionally and simply put, glaze is a mix of chemical materials suspended in water that is applied to bisqueware and then fired to completion based on the clay and glaze temperature requirements. Those chemicals change to become a glass on the surface of the object. Untraditionally, glaze surface can also mean any kind of coating on your ceramic work. Room-temperature glaze: paint! After your final firing, paint or other materials like flocking can be applied. Usually this is used for sculpture or nonfunctional work. This is more in the realm of mixed-media surface design. It is possible to leave clay unglazed and fired to completion and have a food-safe/vitreous surface. This is dependent on your clay; some clays fired to completion are still porous and, therefore, are not recommended to be left unglazed for food/functional purposes. Often, raw clay surfaces are found in higher temperature ranges (i.e., cone 5 and above). Usually, stoneware or porcelain clay bodies are your best bet when leaving a surface that will come into contact with food. For sculpture, almost anything goes—just make sure your clay is vitrified and strong enough to survive installation and transport. NOTEA word on shrinkage. Every clay body shrinks as it goes from its wet state to greenware to bisque to glaze fired. Most clays have a shrinkage rate of around 10 percent, plus or minus. It’s something to think about, but not worry about. If you are curious, make some shrink bar tests. Roll out a small slab, measure out a 5 inch (12.7 cm)-long line (ten ½ inch [26.7 cm]-long segments), and make vertical marks at the ends. Then fire to the desired temperature and measure it again. That is a really quick way to find out how much your clay shrinks. Learning what’s possible at the various workability stages is something you’ll master through experience. The good news is this means projects will get easier and easier with practice! This stage is when the clay remains extremely workable, but it is firmed up enough to softly hold its shape. In the ceramics world, we often use types of cheese as a descriptor for clay. Imagine a ball of mozzarella that, if cut into a single slice, can be bent so the ends almost touch without it breaking, and when released, it mostly snaps back to its flat shape. This is the last stage of workability. Imagine a hard cheddar cheese. If you try to bend a slice, it snaps in half. This is the stage when a lot of refinement will happen, as the clay is set in its form and only surface manipulation can occur. It is also still possible to slip and score (see here) like-temperature pieces together. They often need a little bit of care during the drying process. You don’t want to add fresh clay directly to leather-hard clay; it will often not stay together, and this is how cracks happen. Remember the clay has dried significantly at this stage (and shrunk), so fresh clay, which still has a lot of drying to do, will shrink at a different rate than the leather-hard object. Using like temperature to like temperature of clay is the best chance of success. In the bone-dry stage, the clay is no longer workable; at its most fragile and is ready to be bisque fired. This is a Sunshine word. I use it often to refer to the wetness of the clay and the workability. It comes from my perception and understanding of the clay going through a temperature change as the water leaves the clay (as it dries). It is at room temperature when sitting in a bag ready to be worked with, even though it feels colder than room temperature (due to the water in the clay), but it is the ambient temperature of the room. It starts to get warmer as you work with it, from your energy and body heat. It also starts to dry the moment it leaves the bag. When the object is finished and put on the shelf to dry, the water migrates to the surface and evaporates, and the clay starts to feel cold. It keeps feeling colder and colder as it dries until it is bone dry and becomes the ambient temperature of the room again. To test this, hold a piece next to your cheek at different points during the drying process. It is a good practice, when learning to load a bisque kiln, to test the pieces before they go in the kiln— they should feel warm (room temp) against your skin. If they feel cold, leave them on the shelf until the next firing. Clay in its wet state clay is mostly inert. But there are a couple things to keep in mind. Mold can be present in wet clay, especially if the clay has been sitting for awhile in a bag. Also, recycled clay can be filled with skin particles, hair, or particulates floating around the studio. Much of those particulates will grow mold, fungus, or who knows what— again, not a science person. If you are prone to skin allergies, be mindful of what clay you are using. I know folks who can work in latex/nitrate gloves. I don’t find them comfortable or easy when working with clay. Instead, I tend to use more barrier creams/lotions to protect my hands. They help a little and are especially important in the winter. Some raw material ceramic ingredients can also be hazardous. It is recommended when working with dry ingredients in clay or glaze mixing to wear a respirator. Most ceramic supply stores will have them available. Remember to change the filter cartridges regularly if using a lot and store in a dust-free container. Studios with access to raw materials should have hazardous materials marked. Check the list of online resources (here) to find lists of particularly hazardous materials. A serious health hazard in regular studio life is silica dust. This is problematic if it is airborne and breathed into the lungs. Serious health problems (such as silicosis) can result with long-term exposure. The following are two easy safety precautions: A few best practices for cleaning up. Sweeping up bits and pieces at the leather hard stage can easily go into a reclaim bucket. Using a sponge and bucket of water is the best way to clean your space and avoid creating a dust storm.CLAY
Cones
Types of Clay
EARTHENWARE
STONEWARE
PORCELANEOUS
States of Clay
GREENWARE
BISQUEWARE
GLAZEWARE
CLAY SURFACE: FIRED UNGLAZED
Workability Stages
SOFT/MEDIUM LEATHER HARD
LEATHER HARD
BONE DRY
TEMPERATURE
Health Hazards
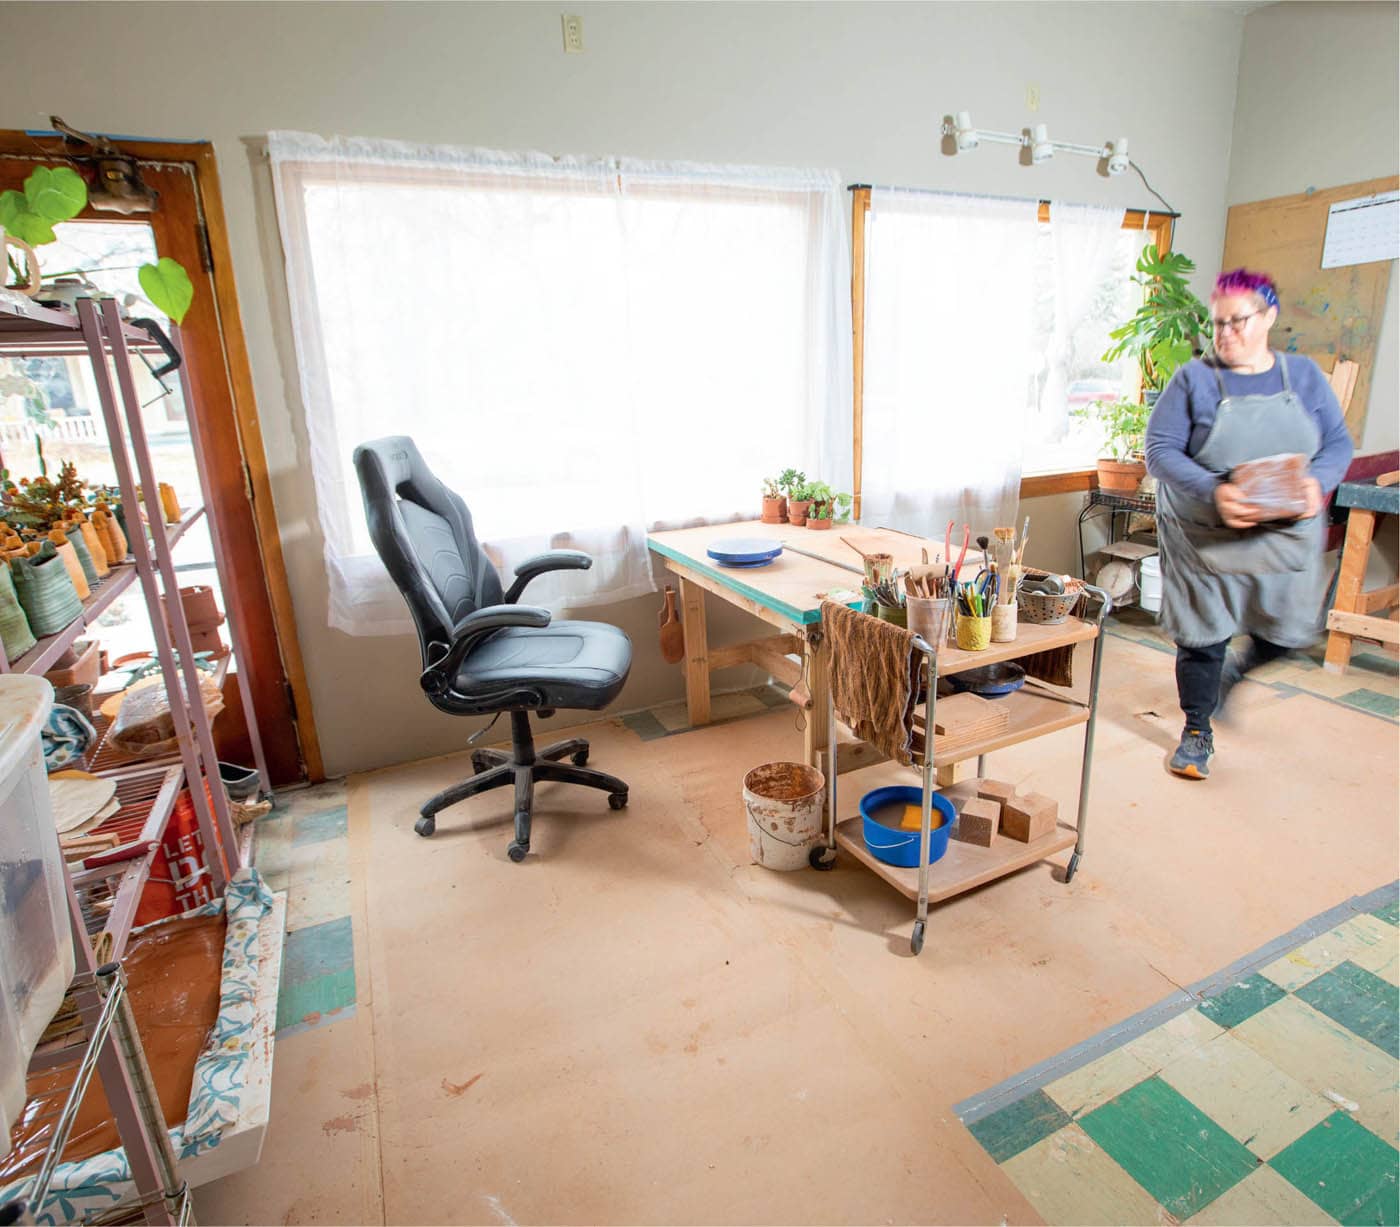
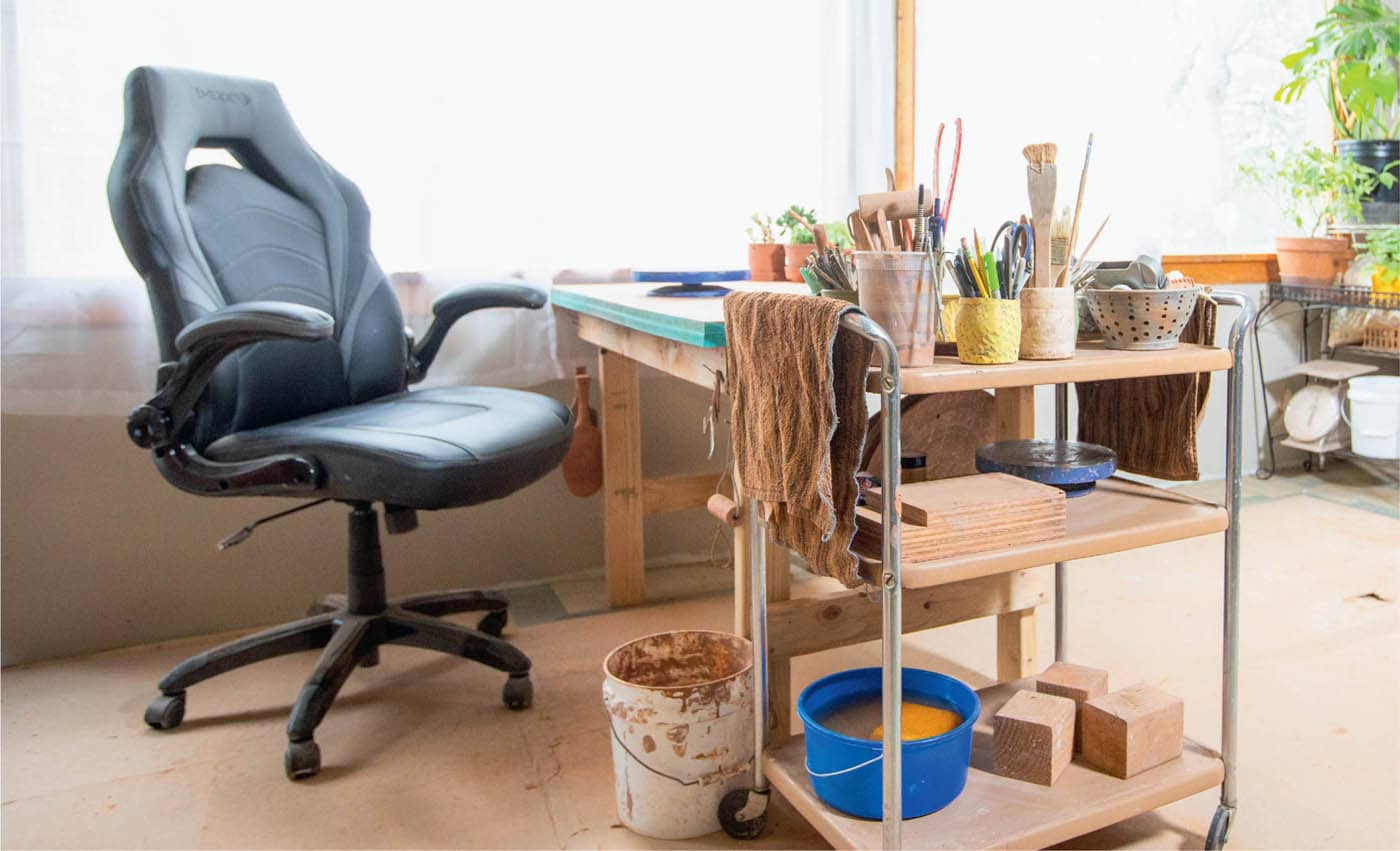
Sometimes not having the right tool keeps us from getting started. How often have you been about to get something started and then realized you need something to get that chore or project off your list? How about the home project that requires seven trips to the hardware store? It is beyond frustrating. I don’t want that to be your experience playing in clay. I am frequently asked about my tools or what my favorite tool is in my collection. We ceramic folks tend to be tool addicts. Although I have a few essential tools, and definitely a few I rely on heavily in my clay practice, I realized something a long while ago when I was asked to write out a response to a question about what my most essential tool was in the studio. My answer was me. I am the most important tool in my studio. If I don’t show up, nothing happens. Just like the magic is not in the clay, the magic is also not in the tools you use. The most essential tool in your studio practice is you! I want you to remember that when that procrastination chatter starts in your head or when you see a new intimidating skill in this book or demonstrated elsewhere. There are lots of ways to do things and a very few essential tools that will get you started. I have whittled down the number of tools in my studio over the past twenty years. That doesn’t mean I don’t have a plethora of tools in my studio—I hate to throw them away, as I might need them. Here I have tried to keep the tool list to the minimum types of tools you might need to get started, i.e., the stuff you need to be productive but can put in one box and stash easily when you are not using it. Not all of us have access to studios or the space to set up a home studio. I don’t want that to be a limiting factor for you. We are often presented with images of folks in picture-perfect studios, and lament that our workspace is so shabby. Let me tell you, I have had countless studios over the years . . . some have been picture-perfect, but many more have been less than perfect, especially in the beginning of my clay journey. Early on in my career, I was traveling to three different adjunct teaching jobs, each more than an hour apart from the other, and I didn’t have a studio of my own. One of the ways I made that work was to have a “portable studio” in the car—a box with my essential tools and a bag of clay. I could work anyplace I was. I was my studio, and the resources I needed could be pieced together within the community spaces in which I was teaching. I promise you can get started with just the bare minimum of tools and some clay, because you already have the most important element: you! In the beginning, your good, old kitchen table will work— you want something that is easy to clean. Even a small folding table will work and can easily be stored with your tools when you are not making. Consider putting some craft paper down to protect your tabletop and make it easier to clean up. Use a good chair you don’t mind getting dirty. It is great if you can adjust the height and positioning of the chair. I work sitting down; some folks like standing and working—adjust your table height accordingly. If you prefer standing, be mindful of the flooring. You may want to invest in some mats that make it more comfortable to stand for extended periods. Keeping a tall stool nearby might also be a good idea. We sometimes assume all light is the same. But if you are sensitive to lighting, it can really affect your mood, eyes, and the duration you can spend in a space. Be aware of your lighting situation and adjust where you work if you can’t adjust the light. Make sure your workspace fits your body and your needs.
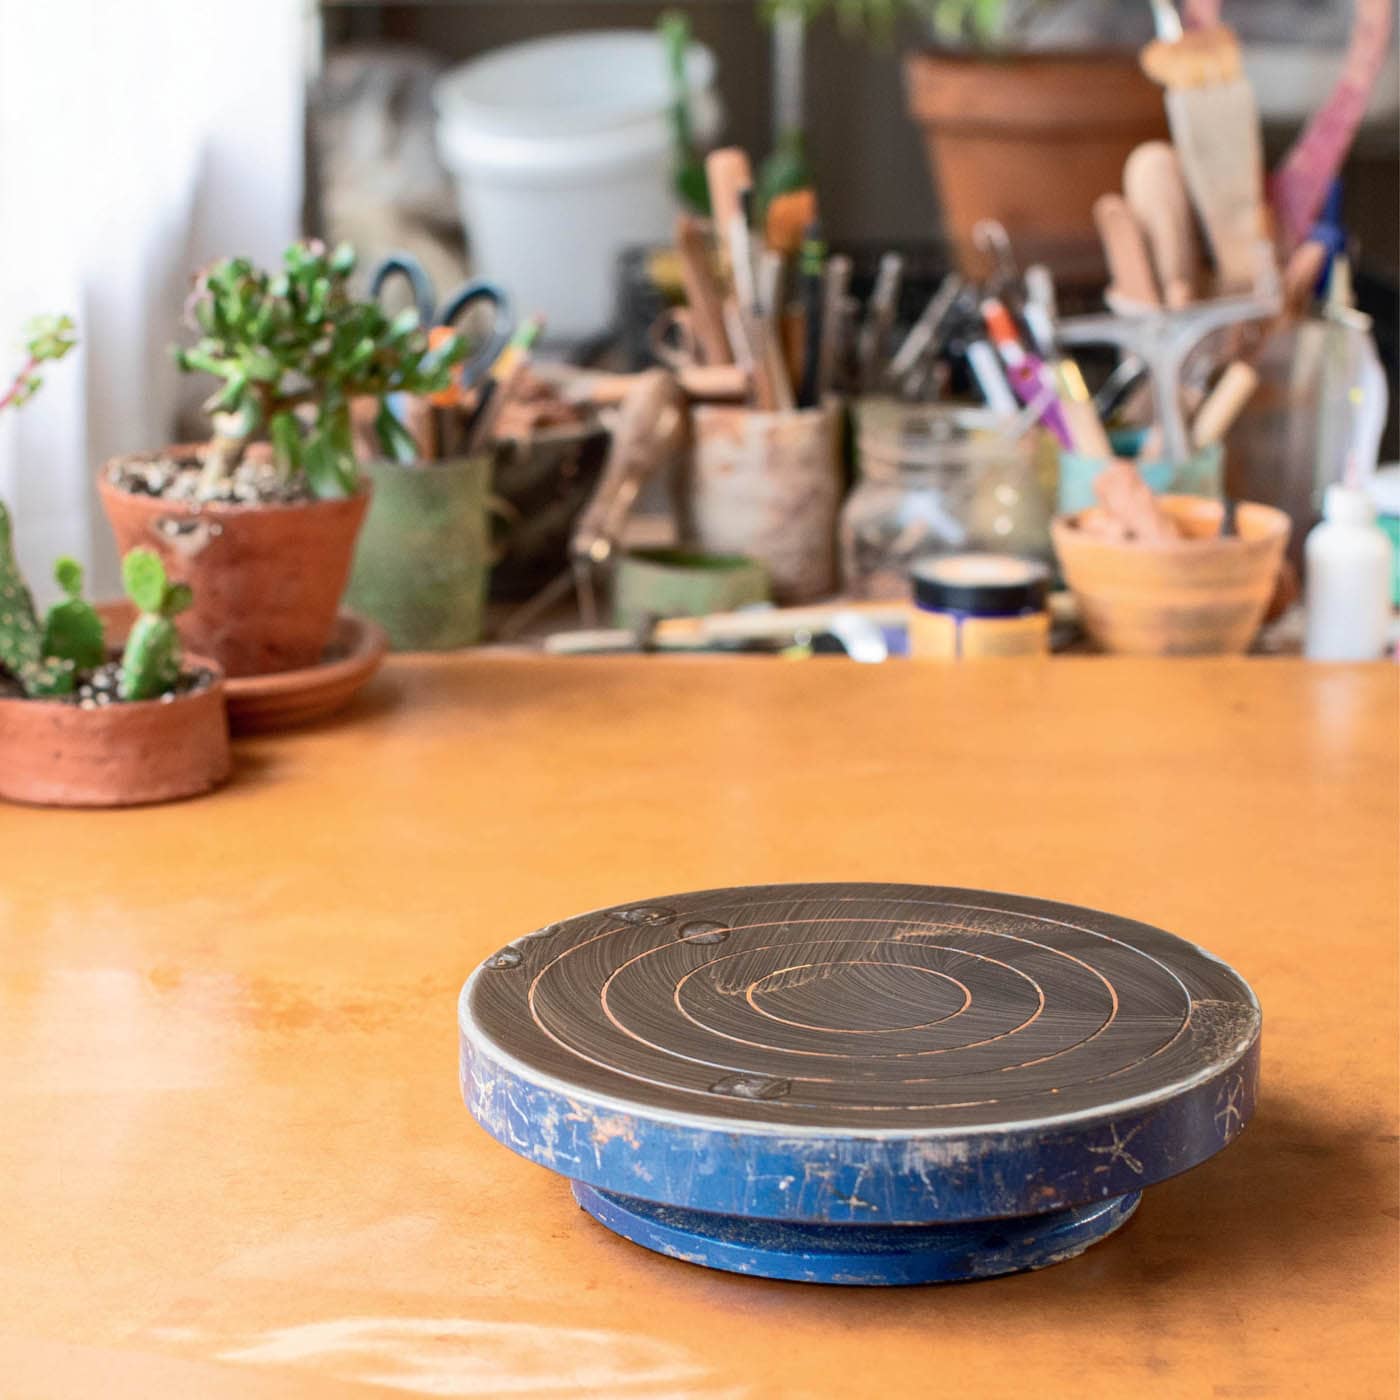
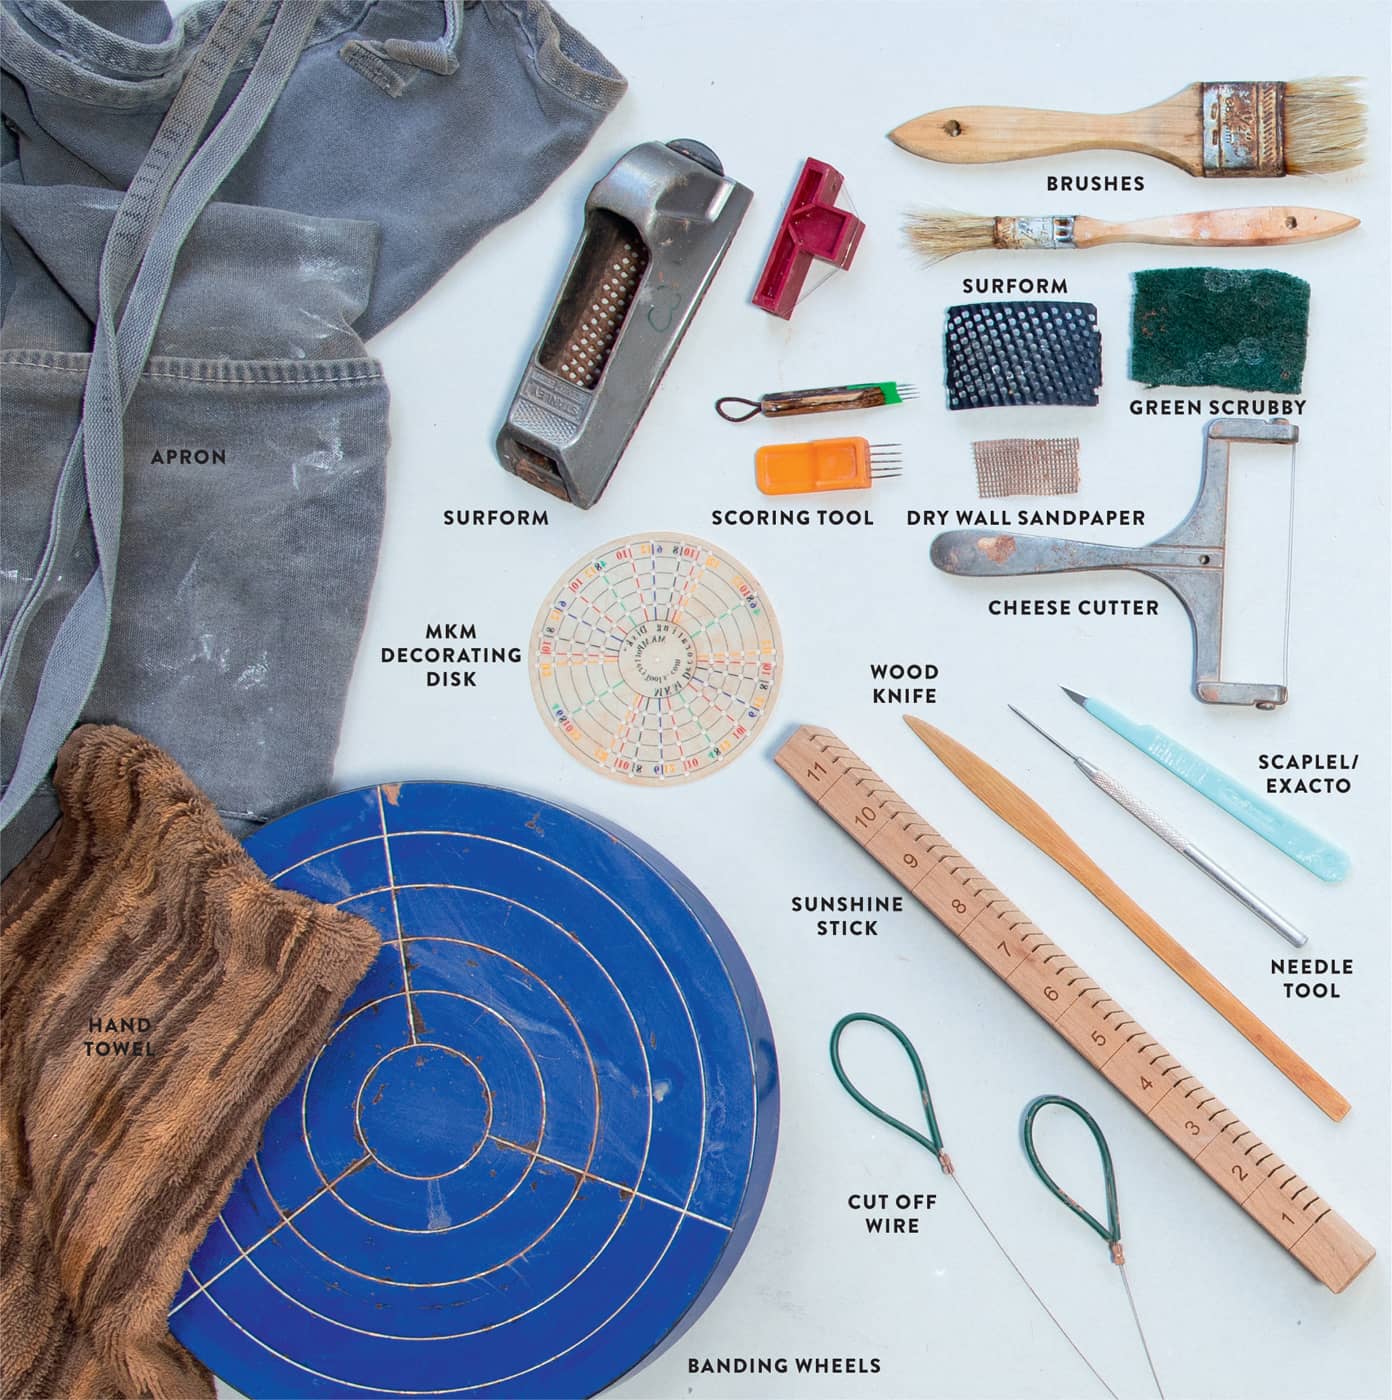
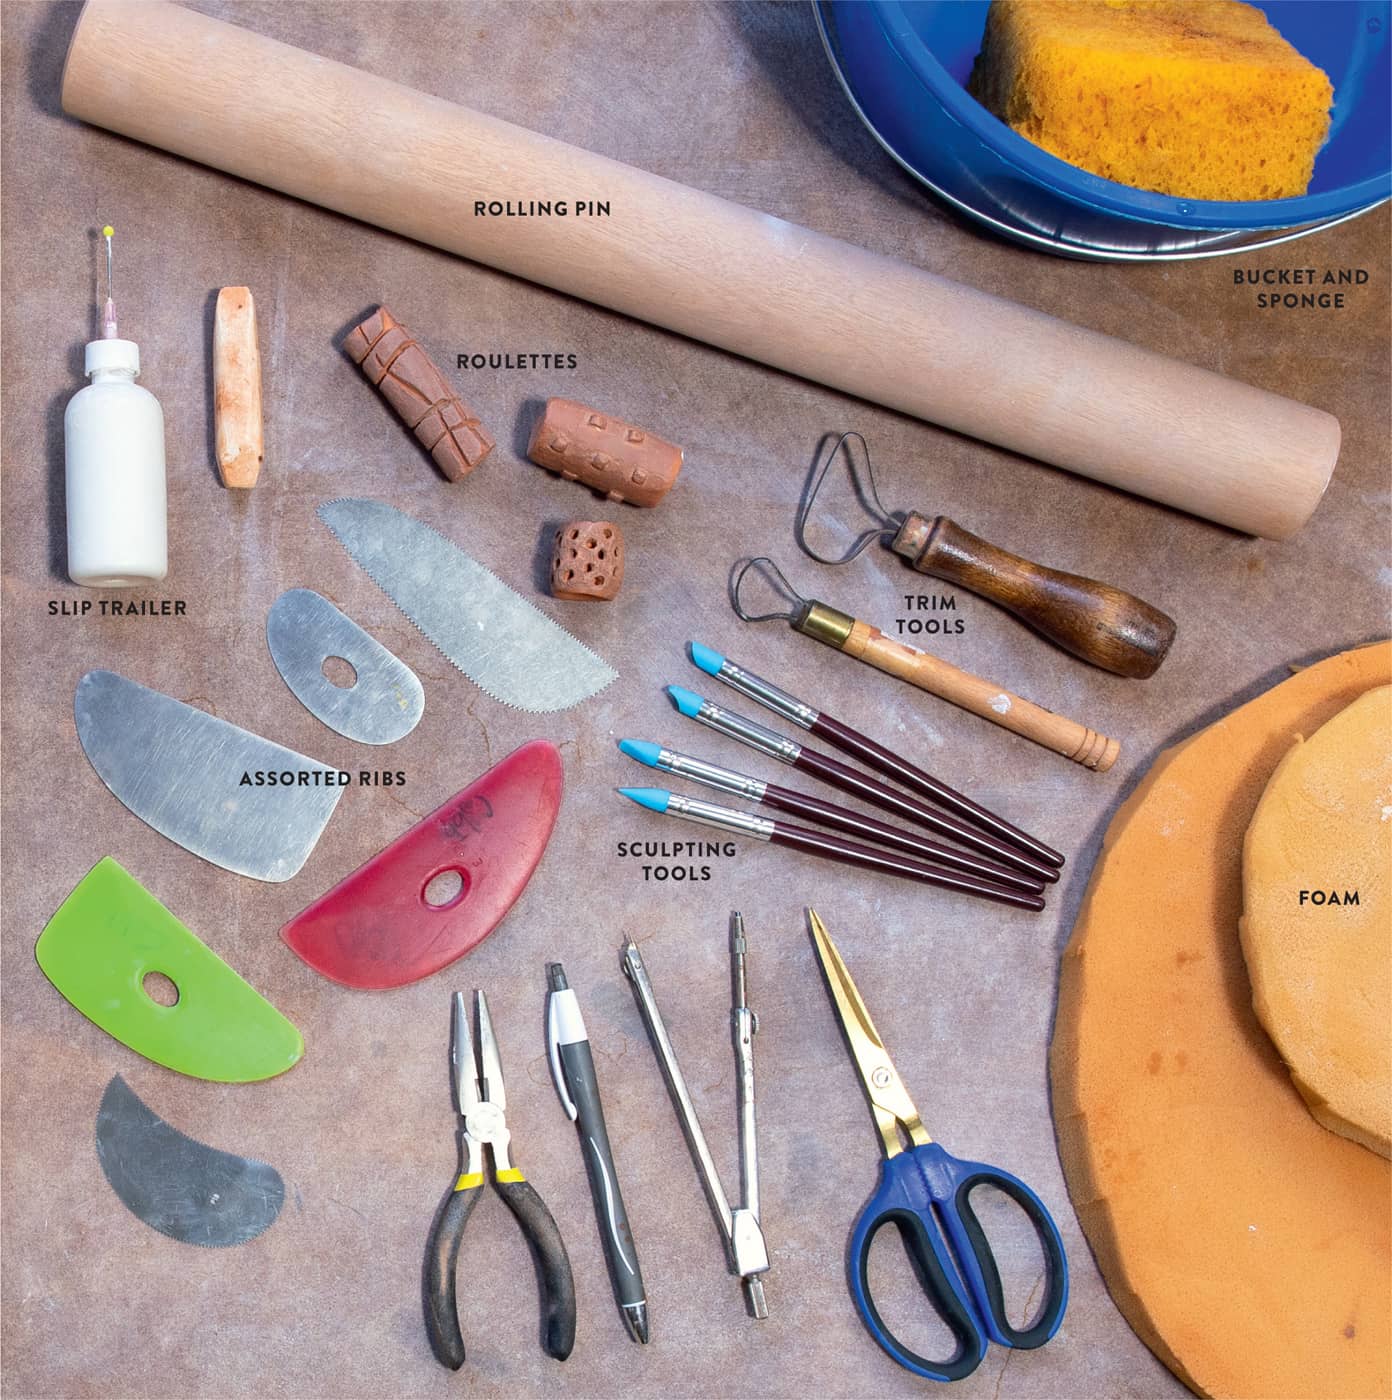
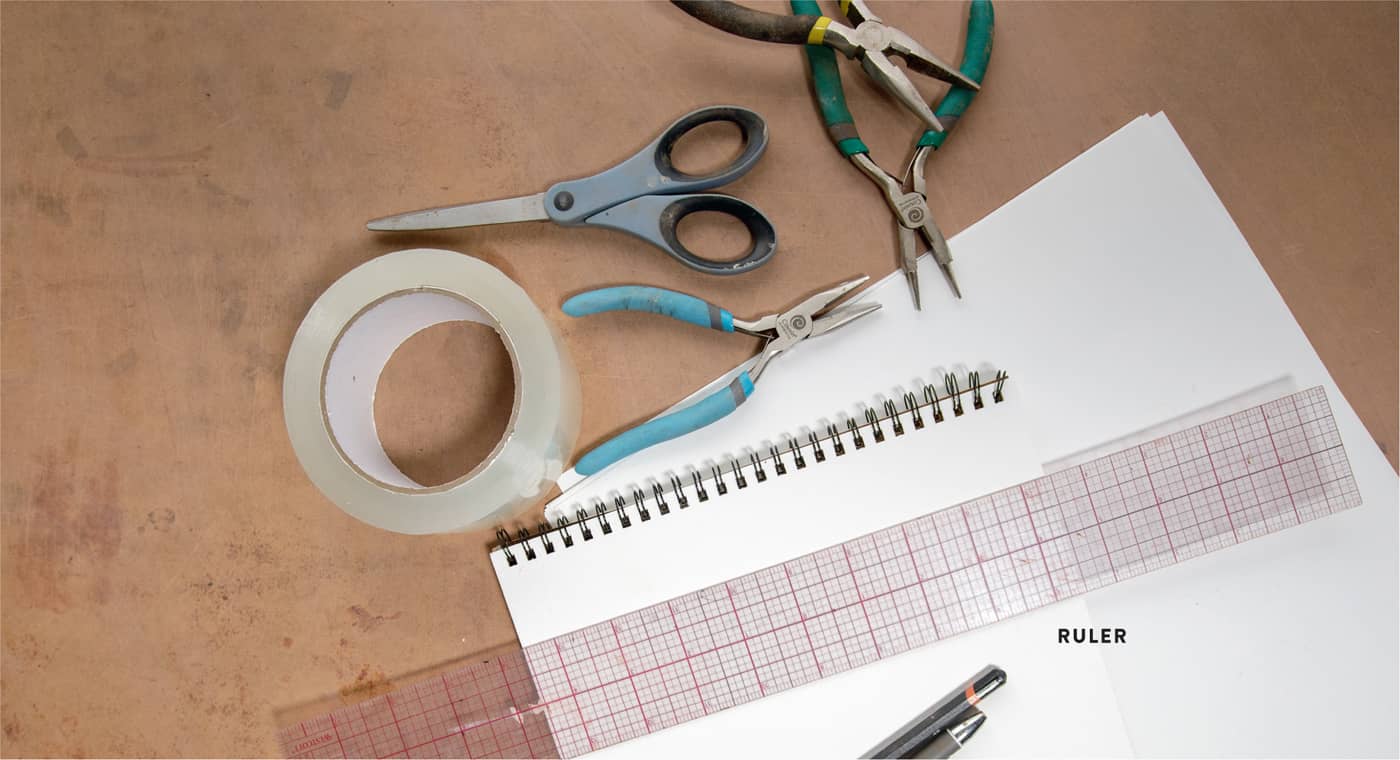
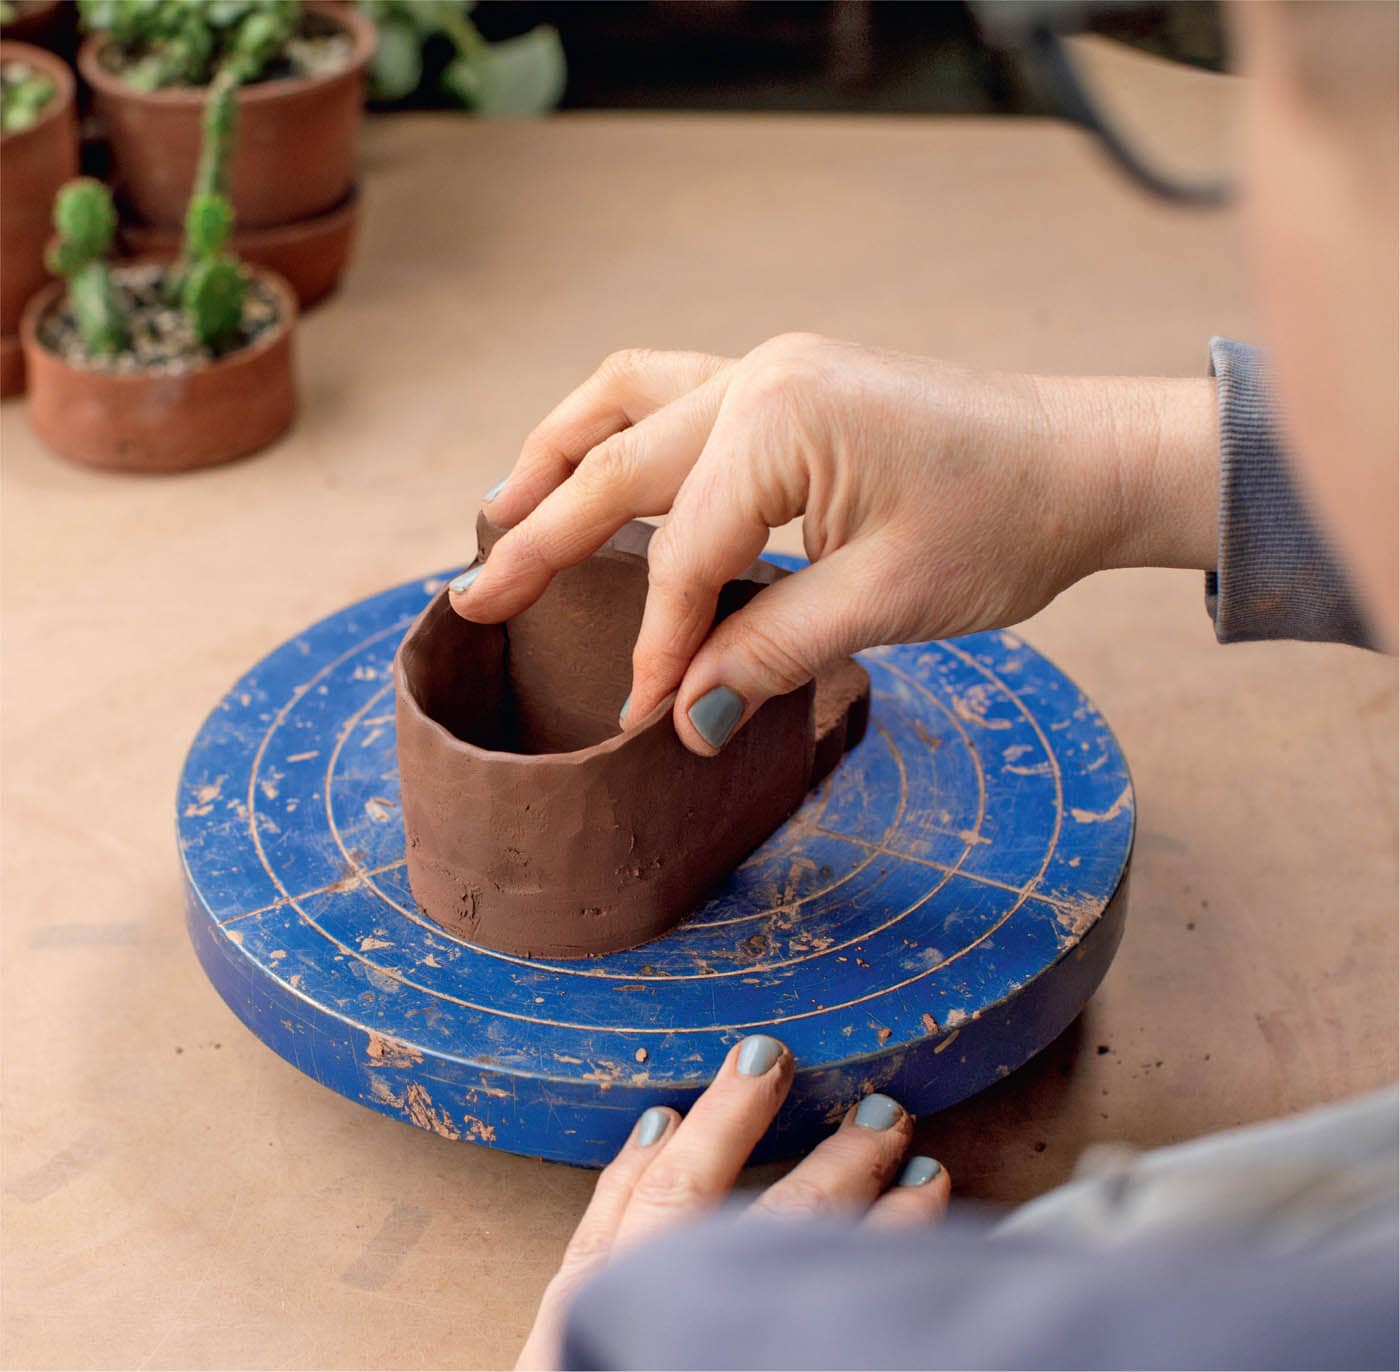
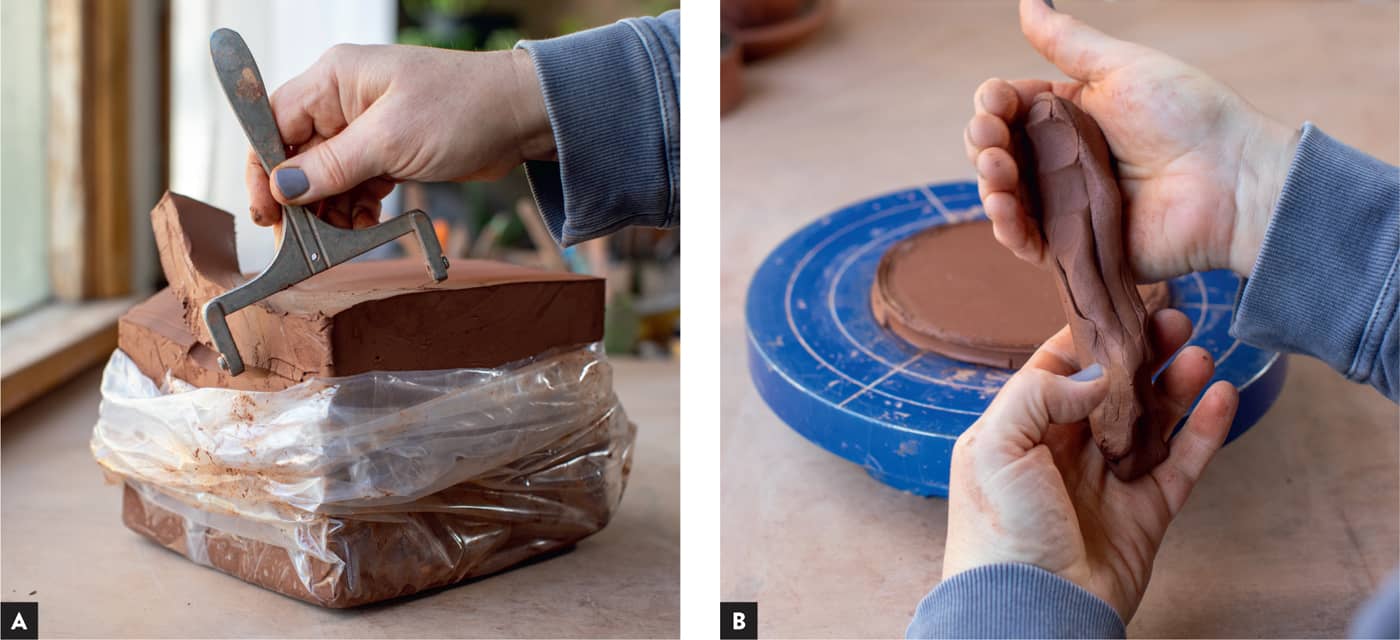
BANDING WHEEL: The banding wheel is the best friend of the hand builder. With practice, it is a tool of efficiency and flexibility. When you are just starting, it can seem like a clunky, spinning mess. Slow down and try a few skills, such as centering, keeping the work in the middle of the wheel. It should look still when spinning, that’s how you know its centered. Collaring in, after you have managed centering and a bit of coil building. Collaring is using your hands or a rib and the spinning of the wheel to bring the top of your wall more towards the center. Tapering it and narrowing the opening. It takes some practice but is doable, it is a skill more common in wheel throwing. Also, you can center a cup or bowl on the wheel head and slow trimming feet with the aid of trim tools. Use a bat on top if you are not comfortable working directly on the wheel head. Play around, and eventually this insanely heavy tool will be indispensable to your practice. NOTEThis is the one item in the basic kit that is an investment. Buying it can wait, or it can be made on the cheap with some materials from the hardware store. A good banding wheel will last you a lifetime and make your time as a hand builder much easier, so save your pennies and when you’re ready, invest in a nice heavy-duty banding wheel. No need to go big—I have an 8" (20.3 cm) tabletop Shimpo banding wheel that I use for everything! APRON: An apron is very useful for keeping your clothes from getting dirty or stained, especially if you are using dark-colored clay bodies that are rich in iron. Be sure to wash it regularly; you don’t want lots of dried clay on your apron creating dust. See the Health Hazards section (here) for more information on silica dust. BUCKET AND SPONGE: A bucket and sponge are essential for cleaning up your space, and the bucket can also be used to store your tools. WOOD KNIFE: A wood knife is a must-have in my hand-building tool kit. It can be used as a refinement tool and for ribbing and compressing the interior of forms. SCALPEL OR UTILITY KNIFE: A scalpel or utility knife (such as an X-ACTO knife) is a helpful tool for cutting and trimming clay. TRIM TOOLS: A refinement and reductive carving tool originally used for “trimming” feet on a potter’s wheel, is a must-have. METAL RIBS/PLASTIC SHERRILL RIBS: Having a few different styles of ribs on hand will help you master the ribbing action. Ribs come in all shapes and sizes and are surprisingly handy for cleaning up your work, compressing the clay, and texture application—they are a general must-have in the studio. Sherrill Mudtool ribs are a brand of plastic ribs that come in various shapes, and the colors indicate the firmness. I really like the yellow and green in shape 1 and 4. Also a small, red, shape 0 is really handy. MKM DECORATING DISK: Measuring tool to use when dividing up makes for carving or decorating round objects. CHEESE CUTTER: If I was to tattoo a tool onto my skin, this would be it. Unassuming in design, this is a wonderful tool for doing edge work, leveling off the clay, and getting clay out of the bag. It takes some practice to use, but when students watch me with my cheese cutter, they say it’s like I draw in the air with it. CUT-OFF WIRE: Useful for cutting work off your banding wheel or getting clay out of your bag, this is an important tool to have. SCORING TOOL: This is a really small but important tool used for making hatch marks that make it possible to create strong connections between clay attachments (e.g., attaching handles to scoops). SEVERAL BRUSHES: Brushes are essential for glazing and applying water for attachments. Dry brushes are great at removing burrs and loose bits of clay on work. NEEDLE TOOL: A needle tool is great for cutting out clay shapes. It’s not, I repeat, not a scoring tool, but it can be used as a surface decoration tool. ROLLING PIN: Any kind of wooden rolling pin will work. I really like a pastry rolling pin (more like a large dowel). It offers a bit more length than your traditional rolling pin. If you are applying pressure with a regular rolling pin, you can have issues with the handles bending, as there is metal rod running through the center. Traditional rolling pins are more commonly used for cookies or pie dough, which has a lot more give than clay. RULER: A general studio tool, a clear, wide ruler is handy because of its straight edge, but it’s also essential for making templates. SUNSHINE STICK: This tool works both as a ruler and a leveling cut-off tool, when used with the cheese cutter. HAND TOWELS: I use old bath towels cut into smaller tea-towel sizes. They’re good for cleaning up and drying your hands. Be sure to wash them often. PROPANE TORCH/HEAT GUN: This is a great tool to have on hand, and it’s not a huge investment. I prefer the torch, as I pay attention to fire. With the heat gun option, I burn myself, the table, ware boards, plastic, and the floor. Be aware that the heat gun is intense, and the heat lasts a bit longer than the torch. It also lays flat when not in use (hence the burning everything), whereas the torch tends to sit upright on a base. Use caution and be aware of your surroundings when using either tool. [NOT PICTURED] DRYWALL SANDPAPER: Drywall sandpaper comes in large sheets. Cut off 1" x 1" (2.5 x 2.5 cm) sections, crumple up to remove the grit, and it’s ready to go. GREEN SCRUBBY SPONGE: Cut 1" to 2" (2.5 to 5 cm) strips of this sponge to have on hand. MISTER (SPRAY BOTTLE): Check out Flairosol mist bottles. They create a fine mist of water and spray more evenly than a traditional spray bottle (but those will also work). [NOT PICTURED] SURFORM: Grab one from the hardware store with some back up blades. This tool is traditionally a rasp used in woodwork. DRYWALL BOARD/DIY WARE BOARDS: Some hardware stores have ready-made 3' (0.9 m) squares, which is awesome! If not, a regular-sized drywall board will go a very long way. I bring a utility knife with me to the hardware store to cut down the board to more manageable pieces to fit in my vehicle to get it to my studio. (Remember to place duct tape on the edges of the board to keep plaster from getting into your clay.) Same goes for plywood ware boards; have the hardware store cut them down to size—into thirds usually works—so you can get them home.Then you can cut them down for your specific needs. It’s a good idea to cut them to similar measurements, which helps for storage as well as placement on shelving. Ware boards are used to make on, transport, or store your work. Kind of a mini table to keep you works safe and stable. They can come in a variety of sizes, ones that you make on will be smaller than ones you use to store work. But it is a comfort thing, make ones that fit your making style, and your storage and shelving space. I have roughly 15–25 different ware boards in the studio, that is after 20 years of accumulation. Drywall boards are typically larger, 3" x 3" (7.6 x 7.6 cm) squares, and used for wedging or rolling out slabs. I usually have a couple for different clay bodies, they get tossed out after the paper starts ripping off and plaster is exposed. Don’t leave wet clay on drywall boards for extended periods of time to extend the life of the board. These are a few things you might need for making templates, and a few different types of pliers make playing with wire a bit easier. FOAM: Pick up some foam from the fabric store. A 1' (30.5 cm) square that is 1" to 2" (2.5 cm to 5 cm) thick will make a great resting surface for work. You can cut it into a circle shape (the size of your studio bats) with a pair of scissors. It is always handy to have a couple of pieces of foam around . . . you never know when you might need them. PENCIL/PEN, PAPER, SCISSORS: These tools are all handy for working out ideas and designing templates. TAPE: Clear packing tape or masking tape is always handy in the studio. PLIERS: I have a large toolbox in my studio with an assortment of tools (hand drills, screwdrivers, wrenches, Dremel tool and bits), but for the projects in this book I reached for several needle-nose pliers, which are handy for shaping and cutting wire. EPOXY/MOLDABLE GLUE, SUCH AS SUGRU: Optional. Epoxy is sometimes used to piece together work after the firing, or even on some tools with unwanted sharp edges (rasps). There are lots of types of epoxy. PC-7 is a heavy-duty, two-part epoxy that is great for strong structural applications. Products such as Sugru (a colored epoxy-type material) are more decorative and elastic feeling. Explore the hardware store to get an idea of what might work for your needs. DRILL BITS: I have a dedicated set of drill bits specifically for clay use. Once they have touched clay, they are often not great for other applications, as they become dull and worn down by the clay. I have used the same set for a decade in my clay practice. Find an inexpensive set and label it for clay use. If I don’t use the bits with a drill, which is totally an option, I add some epoxy to the ends to make them more comfortable for hand use. FIRING STILTS: Firing Stilts are basically a tripod of Kanthol/Nichrome wire in which you can balance work during a glaze firing. Typically used for work that has glaze on the bottom like the Scoops or Reamers projects. The marks left behind can be filed or dremeled off. Firing Stilts can be purchased, or you can make ones with Cone 6-10 clay and Kanthol/Nichrome wire. NICHROME OR KANTHAL WIRE: You’ll see Nichrome and Kanthal wire photographed in a few of the projects in this book. They come in several gauges and will survive the firing process. Not all wire will survive the heat of the kiln. Be very cautious of wire not labeled for ceramic use. Some of the tools in this list are readily available in community studios. Borrow what you can. It is really nice to have your own set of tools once you know what you like. Pay attention to what you use and what feels good for your hands, and the tools that are essential to you will present themselves. Label your tools with your name! You will see from a lot of the images in this book that even though I have my own space, my tools all have my last name on them. When I teach workshops, my tools tend to walk away; folks like to try them out—no problem with that. But I would miss some of them greatly. Tools, besides being useful, can have sentimental value. Some of my tools were gifts, or I made them and they are specific to me and my needs. Writing my name on them with a permanent marker helps me keep track of them and leaves no question to whom the tools belong. They are an investment in your studio practice and tell the story of your journey, so keep hold of them! Edge work can dramatically change the look and feel of a project.TOOLS
Essentials for the Body
COMFORTABLE TABLE
COMFY CHAIR
GOOD LIGHT
Tools and Materials
BASIC TOOLS
HELPFUL TOOLS FROM YOUR LOCAL HARDWARE/CRAFT STORE AND DIY TOOLS
TOOLS NEEDED FOR FIRING PROJECTS IN THIS BOOK
KEEPING TRACK OF YOUR TOOLS.
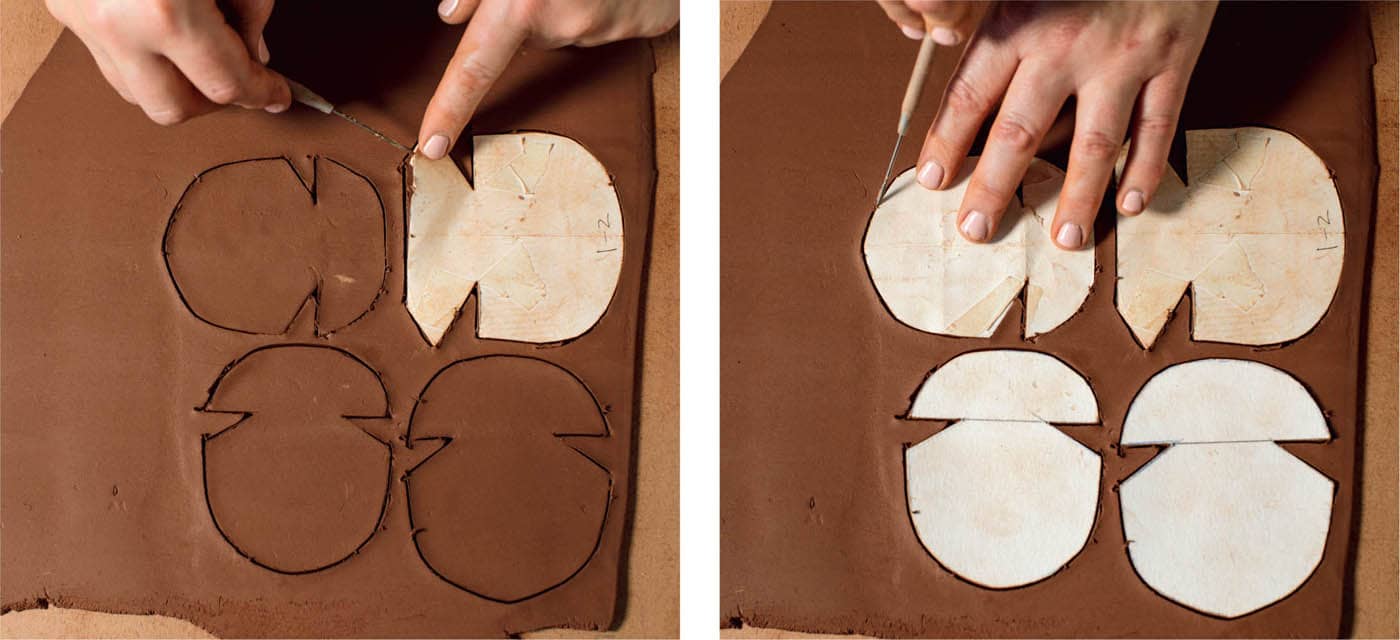
When you first start working in clay, it can feel like you signed up for a foreign language class and didn’t realize it. There are so many new terms and ideas that it can be difficult to understand. Don’t worry—you will learn as it applies to you. If you are anything like me, if you don’t need to know the information, you won’t commit it to memory. When your interest starts to grow, and as you gain more experience, the more you will hold on to the information you need! What follows are some of those terms and concepts that don’t link directly to a specific foundational skill but are used often in reference to making with clay. This knowledge will help you navigate this new world of clay. NOTEIf I’ve covered a term in another section, it will not appear here (e.g., for states of clay information, turn to here). Also, I have tried to link connecting terms and concepts to foundational skills. Turn to here for more information. ADDITIVE: Additive refers to any process in which clay is added to an object. An easy example is scoring and slipping a handle to a mug. Most hand-building techniques are additive: coil building, slab building, and so on. Also, any accoutrements, such as handles or knobs, are additive, as well as greenware decorative techniques, such as under-glaze or slip. DESIGN: This is a big concept in a tiny word. In the context of clay and making, it can refer to both form and surface development. It is frequently used in reference to the function of objects, but it can also be used in discussion about abstract sculpture. There are lots of books and essays out there on theories of design. You can dive deep into the education of the design world, if so inclined. For this book, we mostly use this term with regard to using your senses and your aesthetic eye to develop a pleasing, useful, (fill in the blank) object, be it functional or abstract. EDGE WORK: Edge work refers to how you choose to finish an edge. It can be soft or tooled, meaning you can use your fingers or a sponge or a sharper tool, such as a scalpel or cheese cutter. All edges (termination points) should be considered and refined, but it is a choice left to the maker. Time and practice will help guide your aesthetic choices. PINCHED EDGE: This refers to using your fingers and thumb to finish the edge of a form, leaving a softer, less sharp look to the lip of an object. This technique can be used directionally to give a very different effect to the edge of an object, making it appear more open or more enclosed. TOOLED EDGE: Tooled edge refers to a finished edge with sharp, clean marks made by an implement, rather than a softer edge that has been obviously worked by hand. GRIDDING: Gridding is the practice of using some kind of measuring tool (such as a ruler or measuring disc) to make lines on your form to create concentric circles or lines. This technique is often used to decorate or cut out shapes in an object. REDUCTIVE: Reductive refers to any process, such as carving, scraping, surforming, or trimming, that removes clay from an object. This term is often used to describe refining shape or form, or as a decorative surface technique. ROUGH OUT: A rough out is the quick pulling together of a general shape that will be refined later, when the clay is more amenable to detail work. TEMPLATE: A template, usually some kind of paper shape that begins the building process, helps build a form or provide a footprint for building objects. It can be used multiple times to create the same object. A template often starts as a general idea and is then modified and refined as the object develops. In the prototype stage, it is often made with craft paper and then once refined and modified, transferred to a more resilient material, such as a heavyweight watercolor paper.MISCELLANEOUS TERMS AND CONCEPTS
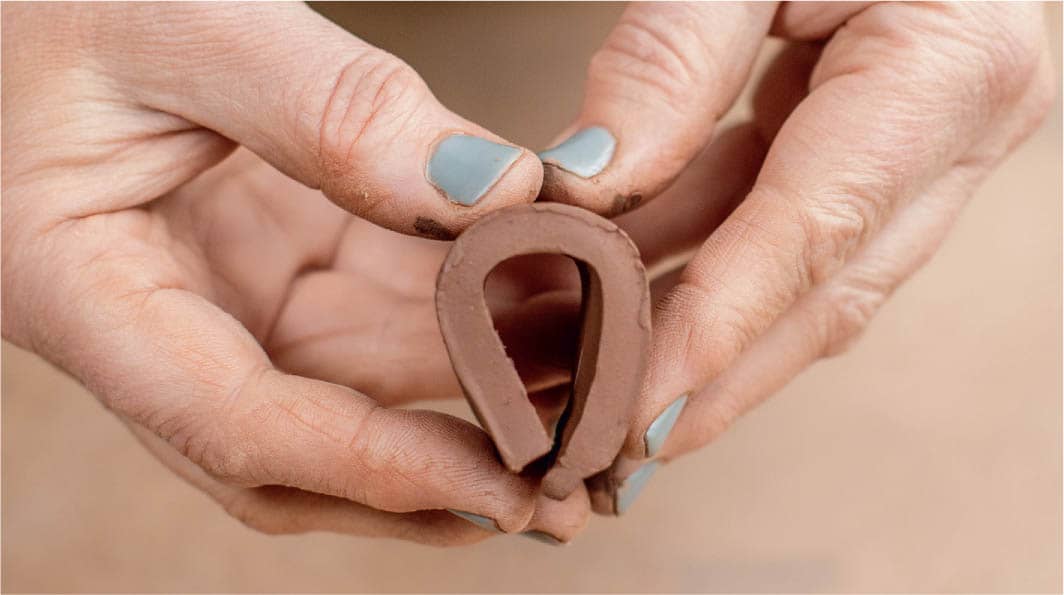
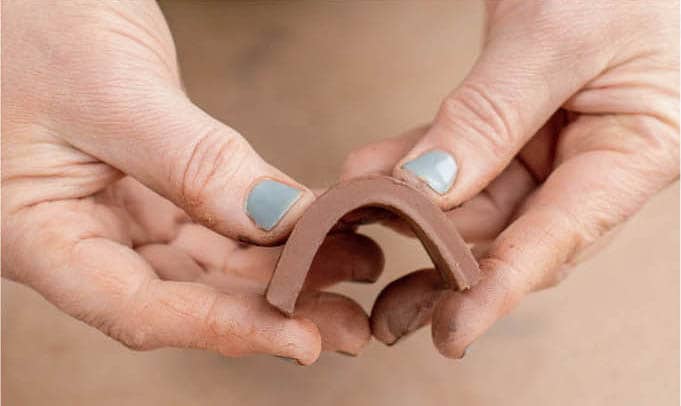
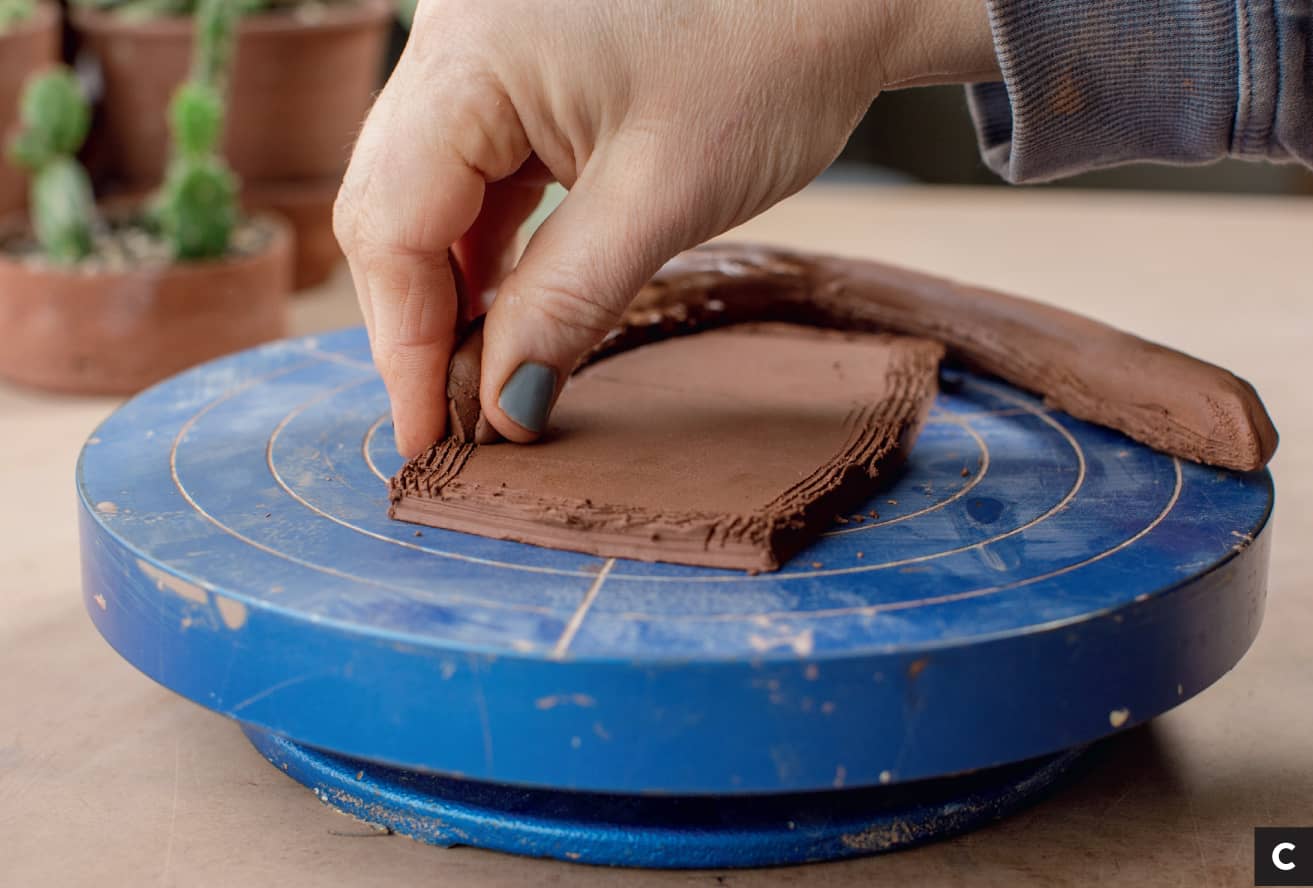
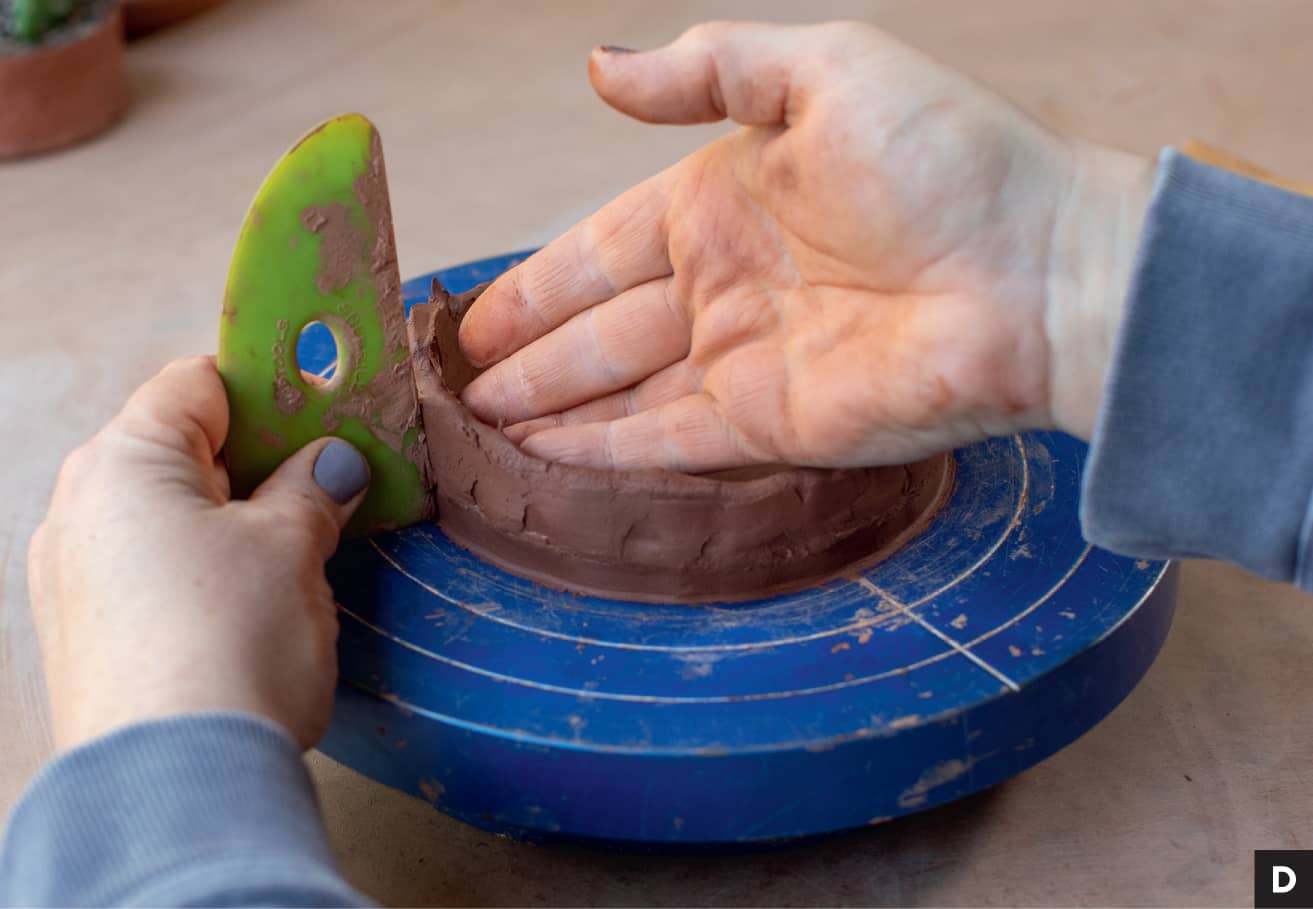
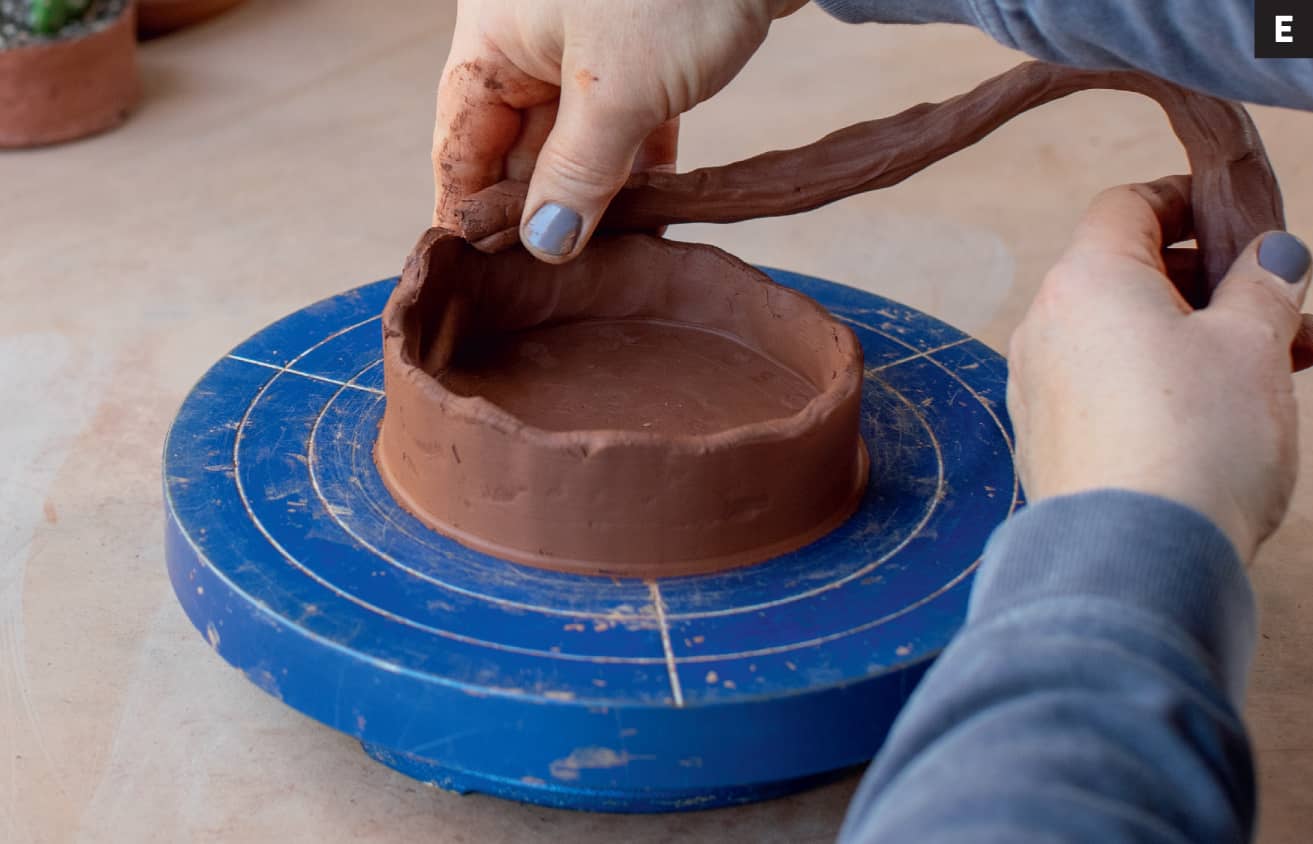
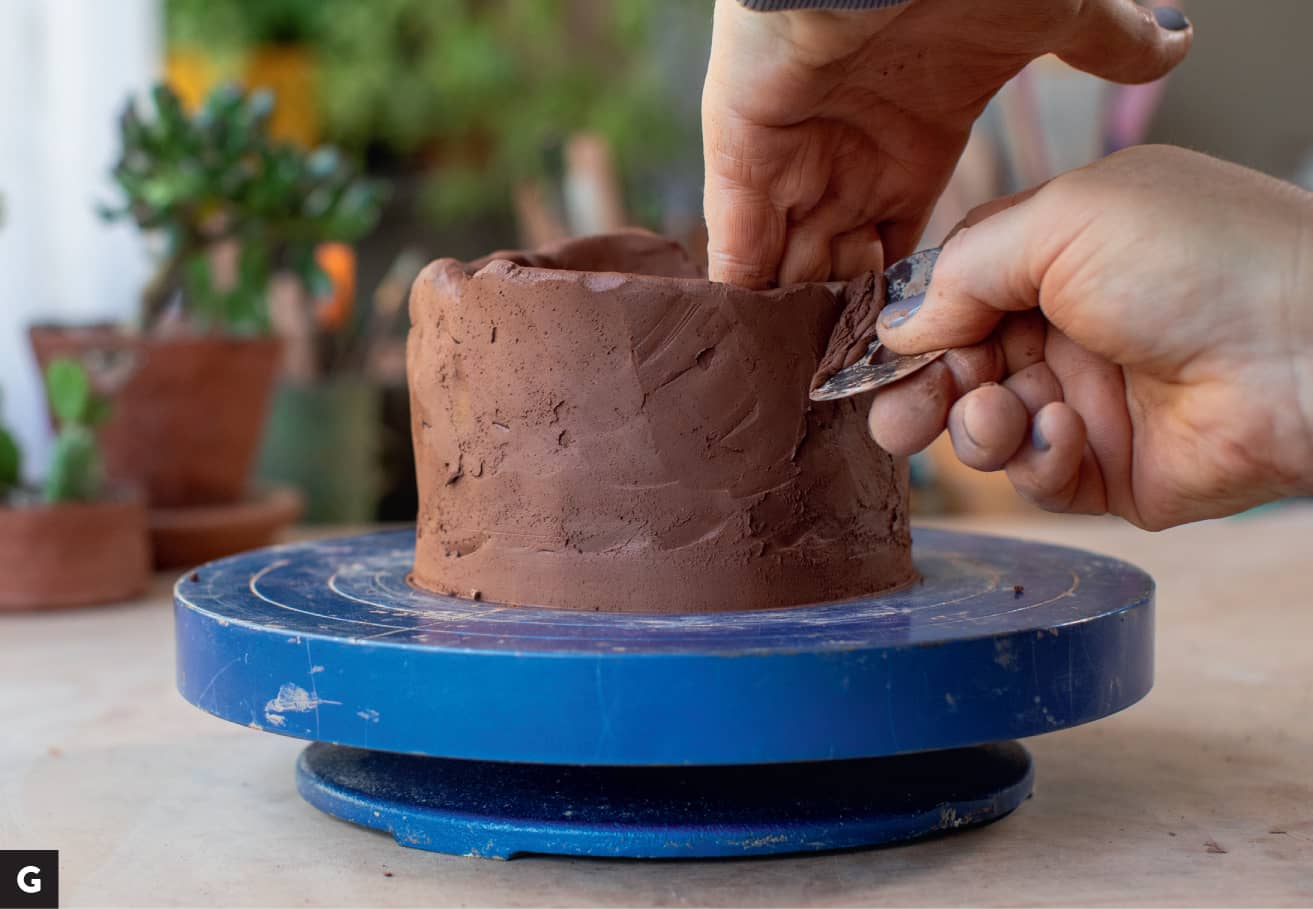
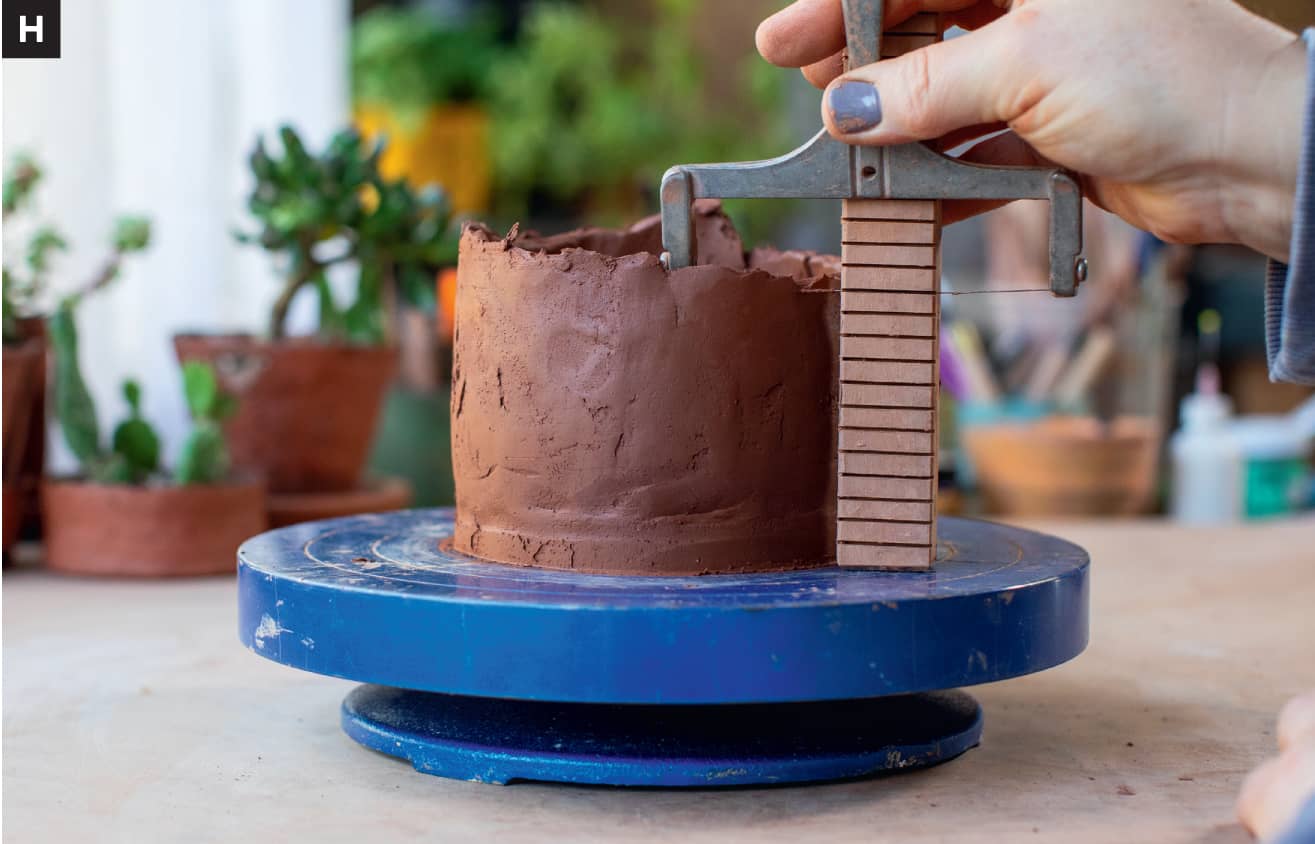
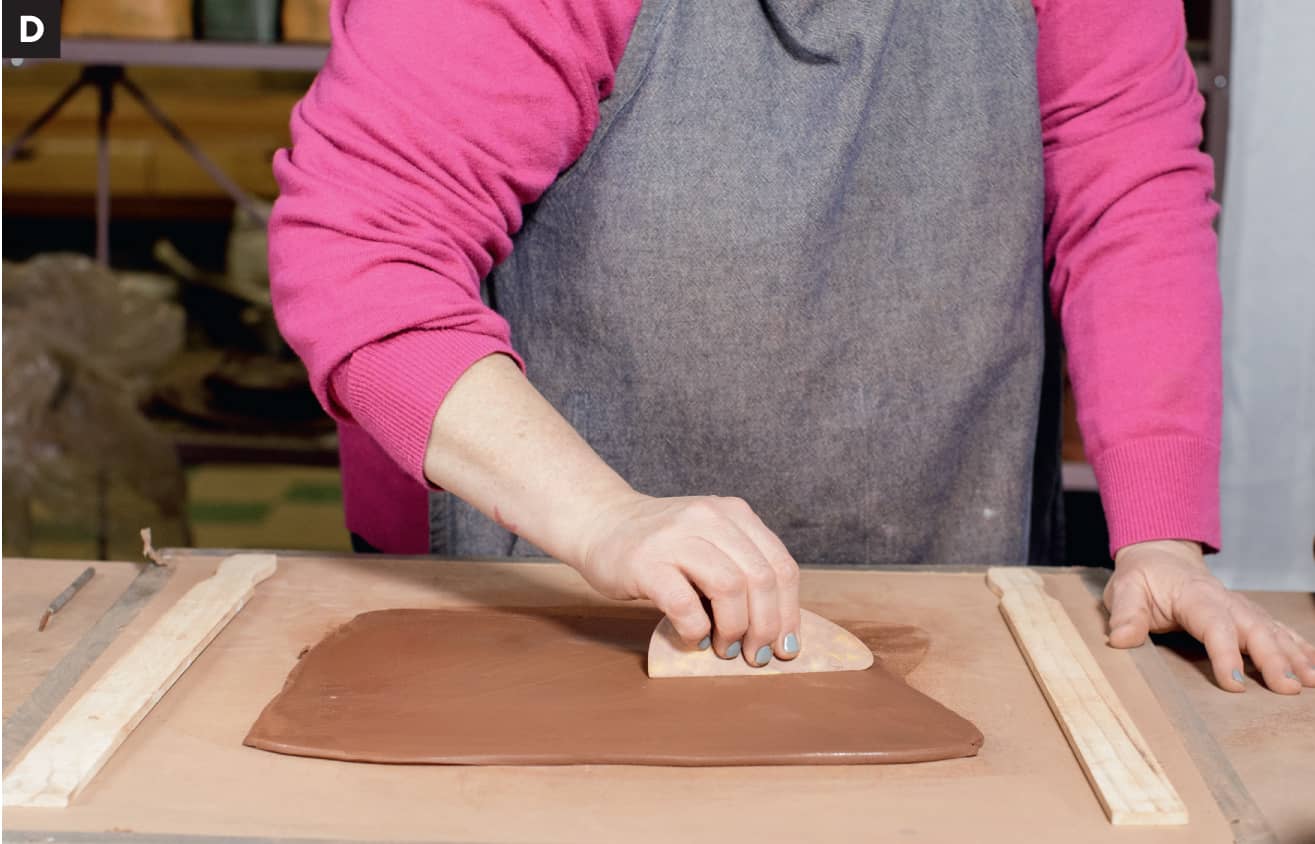
These are some of the skills you will run across in the project sections of the book. Refer back to these pages if you need a refresher. Using clay straight from your bag, squish out a coil in your hands. Depending on the size of your hand, your coil may vary in size a bit. Aim to have a workable size of coil for your hands, and err on the smaller, versus larger, side. [A] [B] Score the coil. Using a paintbrush, wet the scored coil sparingly. (It shouldn’t be dripping wet.) With your left hand, use your pointer and middle fingers and thumb to begin to attach the coil to the scored footprint. Work your way all around the footprint and pinch off the excess coil when you meet the beginning of your attachment. Avoid starting at a corner because they are harder to compress and that can lead to cracking. Starting someplace mid-wall is a good practice. [C] Using a right-angled rib, clean up and firm up your attachment on the inside and outside of the form. Pay special attention to the connecting seams. Be sure to use your footprint edge as a guide to maintain the shape. [D] The thickness of your wall should be about ¼" (.63 cm). The goal of this ribbing action is to make sure your attachment is solid, to get the thickness of the wall consistent, and to get your form on point. Do not move on until all three of these goals are accomplished for every coil attachment. This usually take me about three passes inside and out. Make another coil, following the same method, and aim for the same size as your first coil. Attach the new coil to the existing wall. No scoring is necessary if the clay is the same consistency/temperature. Using the pointer and middle fingers of your left hand on the outside of the form and your thumb on the inside, attach (squish) the coil to the wall; you want about ½" (1.3 cm) of overlap. [E] Allow the coil to grow and twist as you continue attaching it; this is completely normal. Make sure you move in half measures; your thumbprints should overlap and leave a flatter surface. [F] Avoid laying the coil on top of the wall and then squishing down. This distorts the wall, and the low surface area attachment can lead to cracking. It also adds way too much clay to the form, prolonging ribbing, increasing the need for darting (see here), and creating distortion in the form. Overlapping increases the surface area of the attachment, which means it is stronger and less likely to crack. Rib the form. Use a small metal rib to clean up the inside and outside of your form. Make small ribbing movements in the direction you want your form to grow, working your way around the form inside and out until you are ready for your next coil. The goal is to remove any evidence of the connection seams. [G] Continue to add coils in this method until the lowest point of your wall (it will be uneven) measures 4" (10 cm) from the working surface. [H] TIPWhile attaching coils and ribbing, you might run into a few problems. See the Skills section on this page to troubleshoot. Dry your clay pieces slowly and evenly, always avoiding directional air (from a heating source or a fan), as this can cause your object to dry unevenly, which can lead to warping and cracking. Drying slowly can mean leaving a piece out in the open air of your studio or under plastic. Every studio climate is different, and some objects need special care when drying. Pay close attention to your environment and how the clay reacts. You may save yourself some heart-ache if you have some plastic handy. Following is my guide of what to use and when, but first a word on plastic, which you’ll be using to cover your work. Not all wrapping plastic is created equal. I often see old clay bags used in studios, but although these bags are great to store raw clay in, their stiff nature tends to mar freshly made work. I also often see large black trash bags in use. Although these will get the job done because they are soft and large enough to wrap whole ware boards, you can’t see through the plastic. This can be a problem when you are working in a community space and storing your work in a generalized area, because your work may be hard to find again or easily accidently damaged by a neighbor or even yourself as you put work on the shelf. Plastic shopping bags, while ubiquitous, are one of the worst plastic bags for wrapping work. The plastic is so thin that it “breathes,” so objects you intend to work on later become too dry. My best recommendation is dry-cleaning plastic. It’s soft, not breathable, clear, and it comes in large sheets and is reusable forever (maybe not forever . . . but close!). Hit up a dry cleaner or friends who have clothing dry-cleaned— a few sheets last a long time. UNDER PLASTIC OR GENTLE DRAPE: Place your piece under gently draped plastic when you want to slow-dry it but protect it from any directional air that would dry the form unevenly. You can do this as soon as you are finished with a piece, or you can let the piece become set up (dried slowly and evenly) a bit before draping it. Gently draping plastic over a piece is the closest step to leaving it uncovered. WRAPPED IN PLASTIC: The goal in wrapping your work completely is to allow the work to set a smidge but also remain workable so that you can return and keep working. An example is a large vessel that needs to be made in sections, or a piece with several parts that will need to be scored together at the right stage. Wrapping it in plastic allows you to keep the clay workable, while allowing it to set up at the same time. DOUBLE-WRAPPED IN PLASTIC: Double-wrap your work when you know you need to come back to your project and don’t want any chance of it drying out. Using this method hopefully keeps the project the exact same temperature (dryness/wetness) as when you wrapped it. When double-wrapping work, it’s a good idea to place it on a bat or ware board, as you can wrap the board and object together with plastic without damaging the object. My bats are plastic or Masonite, and my ware boards are plywood. AVOID wrapping work on a plaster bat; it will suck moisture out of the work way too fast. Once the work is wrapped up tight once, mist it with water just enough to see some condensation on the plastic. Now wrap it again in plastic, trapping the moisture in there. This is really handy if your time in the studio is intermittent, and you need to make sure your work remains workable after several days away, SHEET DRAPE: Not much work in this book will benefit from sheet draping. This method is often used for larger pieces that need to slow dry and remain covered and protected from directional air, but still have air flow. Sheet draping is one of the better ways to slow dry work in more humid climates. NOTEIf you would like to see how I make a damp box, check out my YouTube Channel: Sunshine Cobb Ceramics. I have a quick tutorial posted there. This is one of the most important skills to learn. Like making pie crust, you’re going to have to practice a bit before you get it right. Following is a list of items you need for rolling out clay slabs. DRY RELEASABLE SURFACE: I use large squares of drywall board on my workbench or table. Make sure the edges of the drywall board are covered with duct tape; if the plaster gets into your clay, it will pop out of the clay during the firing process and leave holes or cracks in your piece. (My tabletop is MDF wood and is a good releasable surface, but it will warp and break down if water is left on it for prolonged periods.) ROLLING PIN: I prefer a pastry-style rolling pin (no handles)—it’s like a very large dowel. PAINT STIR STICKS: You’ll need a few paint stir sticks or a couple of yardsticks cut in half—something thin and flat that is stackable, so you can adjust the height of your slabs. You need an equal amount for two sides of your slab. I make do with two large and two small paint stir sticks. CLAY: Clay fresh from a bag is easiest to learn with! Before getting started, ensure you have a clean drywall board and rolling pin. Cut off a section of clay, about 1" (2.5 cm) thick. Place the clay in the center of your working board and, using the rolling pin, gently roll the clay, working from one end to the other. (If you cut out a large, thick piece, you may need to gently pound out the clay, using the rolling pin like a hammer on the clay in overlapping motion, just until the clay is thin enough to start rolling.) You will be making several passes, so don’t push down super hard. Just stretch a little at a time. [A] After each pass with the rolling pin, lift the clay and give it a quarter turn. This does two important things. First, it separates the clay from the working surface, which makes it easier to stretch and roll with the next pass. Second, it ensures the clay shrinks in every direction evenly. It may sound strange, but clay has a memory—if it was a slab, it remembers it wants to be flat; if it was a pinch pot, it remembers how and in which directions the fingers pinched the clay. So, if a slab gets stretched in only one direction, it often leads to excessive shrinking in that direction. If you have assembled an object with multiple slab cutouts, that could lead to warping and cracks. [B] After a few passes, lay your paint sticks next to the right and left sides of the clay at the desired thickness of clay; the rolling pin should reach both sides easily. Continue rolling, lifting the clay off the surface and giving it a quarter turn with each pass. The sticks will be your guide to know when the slab is even and has reached your desired thickness. [C] Time to compress. Spritz the slab with a little water and, using a stiff rib, make overlapping passes across the slab in three different directions: horizontal, vertical, and diagonal. Gently lift the slab on one end and flip it over and repeat on the other side. This ensures your slab is well-worked, compressed, and will remember it is a slab. [D] Your slab is ready. Here are additional tips:FOUNDATIONAL SKILLS
Coiling

How to Dry Your Pieces
USING PLASTIC TO PROTECT YOUR WORK
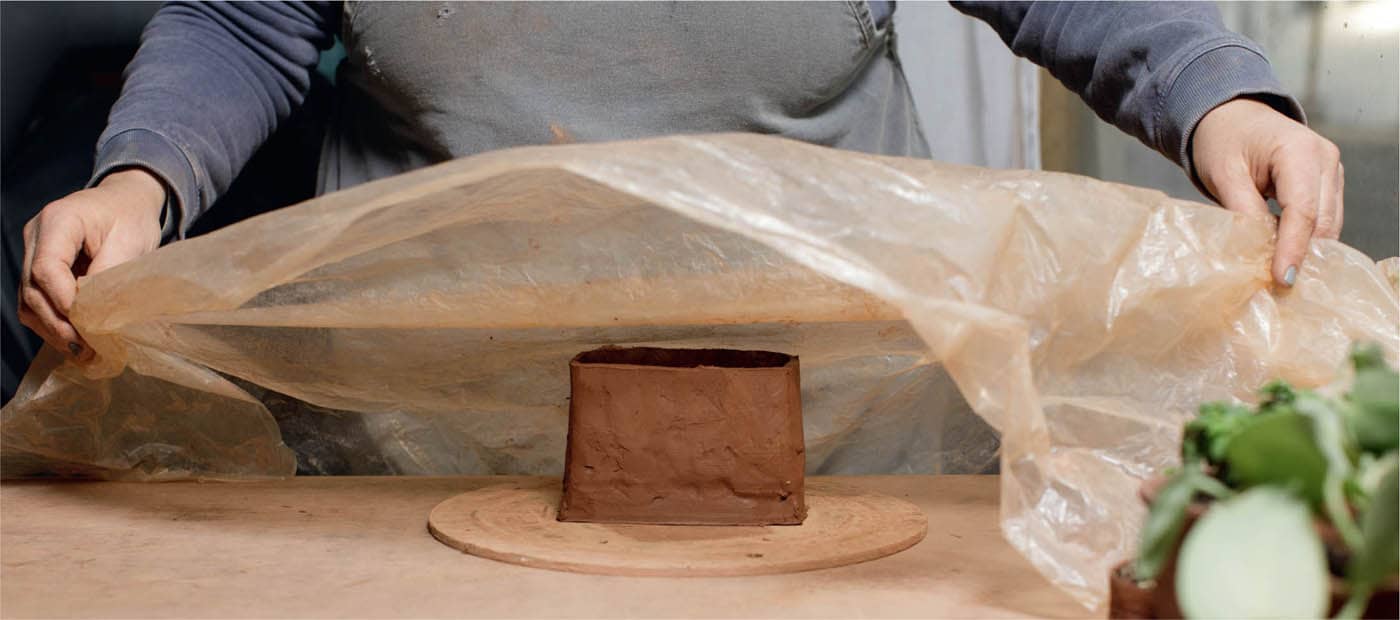
PLASTIC WRAPPING METHODS
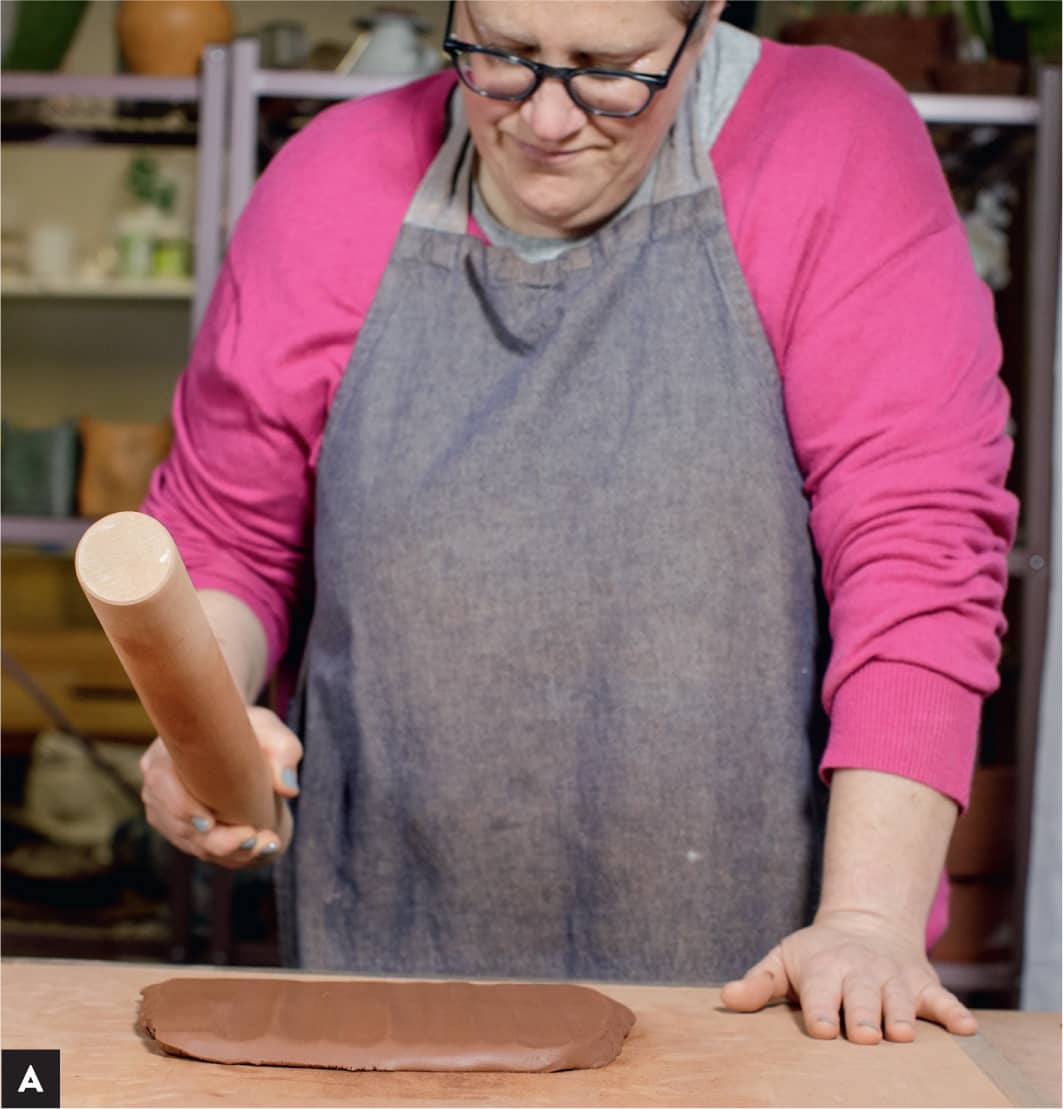
Rolling Out a Slab
STEPS


Unloading a glaze firing can be like opening presents on your birthday with so many unexpected surprises. Sometimes it’s the worst possible outcome. I have unloaded whole kiln loads directly into the dumpster after some glaze and firing fails! Although I considered including a few glaze recipes and a firing chart in this book, ultimately my feeling is that the beginning of a journey in clay is something one book isn’t supposed to do start to finish. Diving into glazing is overwhelming, even to the seasoned professional. Glazing is an art unto itself, and I am still learning. I have been using the same commercial glazes in my personal work for the past ten years, and recently a couple of my glazes stopped working predictably. Once you think you have things figured out, your interest takes you in a new direction, or maybe materials change and what worked no longer works the way it did. This change has nudged (actually shoved) me to start testing and developing new glazes for my work. Color and surface are very important and create a lot of feels in my body. Glazing and surface development are a very slow and methodical part of the clay journey involving so much testing and so much failure. They are ultimately rewarding, but hard to do when you are in love with the making process. In this section, I want to share a few ideas about where glazing may take you, as well as a few pieces of advice I wish I knew when I was starting out. I’ll also try to point you in the direction of some additional resources available to you. NOTEFor the finished work you see in this book, I used either commercial glazes, underglazes, or no glaze at all. All the work was fired either to cone 3 or cone 5. Specific glaze information can be found in each project, so you can get an idea of how the finished object was achieved. My first bit of advice is to take copious notes when you are glazing! Create a dedicated notebook for this purpose. Draw a little picture of the object to be glazed, note which glazes you are using, and detail whether you do a 1-2-3 count when dipping, or how many layers you paint on. This will help you duplicate your successes and learn from your failures. Keeping notes will also help you locate your work on shelves loaded with multiple people’s work, as you have an idea of what and how many pieces you are searching for! This process may seem tedious, and you may decide to ignore my advice . . . but I warn you, these words may come back to haunt you if you ignore them. We all know what’s it like to think we will remember some important detail, but then we forget. This isn’t just a new-potter issue. At some point while writing this book, I grabbed a bucket of what I thought was a liner glaze and lined a whole kiln load of my pots. It turned out to be a bucket of slip a friend had given me to try. If I had double-checked the bucket label and taken notes about how I was applying it, I probably would have caught the mistake quickly. After throwing all my ruined pots in the trash, I reminded myself to take notes— and also to label all my buckets clearly. Lesson learned, again! I occasionally forget to practice what I preach, and the clay process is a cruel mistress. The reminders are harsh. Also, there is nothing so frustrating as getting an amazing object out of the kiln with no idea how to duplicate the results. Take notes—it will prove handy, I promise. It is always a good idea to have your own set of test tiles, made with the clay you are using. There are many test tile shapes; figure out which one works for you. I like to have a box of bisque test tiles handy for when I’m ready to test glazes. I usually commit to making fifty to one hundred at a time. They will last me a good long while. After making test tiles, it’s a good idea to make a larger object, such as a slab cup or something simple and quick. This helps you understand how the glaze looks on a more 3D object. It is really helpful to know how the glaze and clay interact in a more representational way than on a test tile—it’s always surprising how different a glaze can look on an object compared to a small tile. Whether you are working in a community studio or have a small kiln at home, glaze a few pots at a time. Glaze spaces and ceramic supply stores often have test tiles hanging from the walls. Besides being overwhelming, they are sometimes misleading. That little square of color may not translate to your object as you imagine it will. Talk to other folks in the studio about the glazes you might have access to. Ask a studio manager or class instructor for guidance. Chat with the people at your local ceramics shop about commercial glazes that would work for you in your firing range. Don’t blindly trust that a glaze will work for you. Test the glazes on a few objects before you glaze all your work. Glazing is chemistry in an art space. This means there can be a lot of misleading or downright incorrect information and glaze recipes. Testing is essential to the glazing process. Glazing for food safe wares has very different requirements than glazing for sculptural work. Here’s a quick note on asking folks about their glazes and/or techniques: Some people are happy to share what they have learned to some degree. The clay community prides itself on sharing knowledge. However, glazing takes a lot of practice and development. Hours and hours of trial and error to get successful results. People have a right to keep some information to themselves. Especially if they have developed their own glazes or techniques that they rely on to sell their wares. Don’t take it personally if someone doesn’t want to share their hard-won information. There are many resources for you to glean and develop your own skills and techniques. Check out Publications and Artists Resources (here). In this book for a few places to start. Don’t be afraid to ask for help, but don’t expect everyone to be able to help you. You need to do enough of the work and research to be able ask good questions! Glazing is sometimes treated as an afterthought, and then folks wonder why they are not getting awesome results. In order to get good at glazing, you have to spend as much time glazing and testing as you do making the objects. It is easy to get lost in the making process—it is perfectly normal and part of why we chose to explore clay! Truthfully, making things is where I would most like to spend my time. There will come a time when your bisque-fired work starts to fill your shelves and you need to do some glazing. Please make time to glaze. What took you weeks, or possibly months, to accumulate shouldn’t be glazed in a few hours. The results may disappoint you if you treat glazing as an afterthought. I know you want more for your finished pieces than just glazing them in a rush or in a thoughtless fashion. You need to commit the time to think about what you want for your objects. Research ideas and glaze possibilities and collect images of what interests you. Pick up some glaze books or look at some ceramics magazines (see Publications and Artist Resources on this page). Even Pinterest or a Google image search is a good place to look for possible glaze ideas. Take images of your work and do some coloring on them. Go old-school with a printout and some crayons or, if you’re hip to the technology, make some digital magic. Know what you have access to or what is within your scope of ability to test your ideas. Make some test tiles or test objects to go through the process. Save your favorite pieces until your research and testing matches your vision for your work. I sometimes think we procrastinate thinking about glazing because we are afraid to be disappointed by the results. We live in the joy of making and we delay the inevitability of the finished object and a possible negative outcome. I guarantee if you don’t devote some energy to glazing, it will be a negative experience. Approach the process with baby steps; the time commitment may surprise you. In the end, you will learn about the glazing process and, more important, what interests you for your own work. You will experience more positive than negative outcomes and hopefully a vison and direction for your own work. Using studio glazes or commercial glazes is a great place to start. You need to learn as you go. Applying glazes takes practice. Understanding what appeals to you in the variety of glazes will vary. You can work slowly toward honing your palette and getting consistent results. When you are ready, you can move toward a deeper understanding of glaze and surface treatment. One of my favorite glaze books is Ceramic Glazes: The Complete Handbook by Brian Taylor and Kate Doody. What I think is great about this book, besides being organized by color (which is awesome), is that they ask the contributing ceramic artists to contribute glaze recipes and ask them why they use the colors they do for their work. While we are often seeking a specific color, there can be a lot of thought behind why we are drawn to certain colors or surfaces. The glaze journey, while tactile and visual, can be emotionally driven. I often respond to glaze tests with, “Mmm, this doesn’t feel right,” and then a huge “Yes!” when it connects with me in the right way. I want my surfaces to connect to people, and because I don’t work narratively (with imagery), I focus on color and surface to draw people in. I have found that is more of an unconscious emotional connection. Look for and collect images of non-ceramic surfaces you love and that inspire you on your quest for the perfect surface treatment. This can lead you down a path that digs a bit deeper than the “I like blue” conversation. When you are ready, you can take that leap into glaze chemistry and color theory. Check Publications and Artist Resources in this book (here). There are several books listed and an online class taught by Rose and Matt Katz that I recommend as a great next step if you hunger for more glaze knowledge. Happy test tiling!SURFACE DEVELOPMENT
Glazing Tips
KEEP A GLAZE JOURNAL
MAKE SOME TEST TILES
DON’T PUT ALL YOUR EGGS IN THE SAME BASKET
SPEND TIME ON YOUR GLAZING PRACTICE.
GETTING STARTED
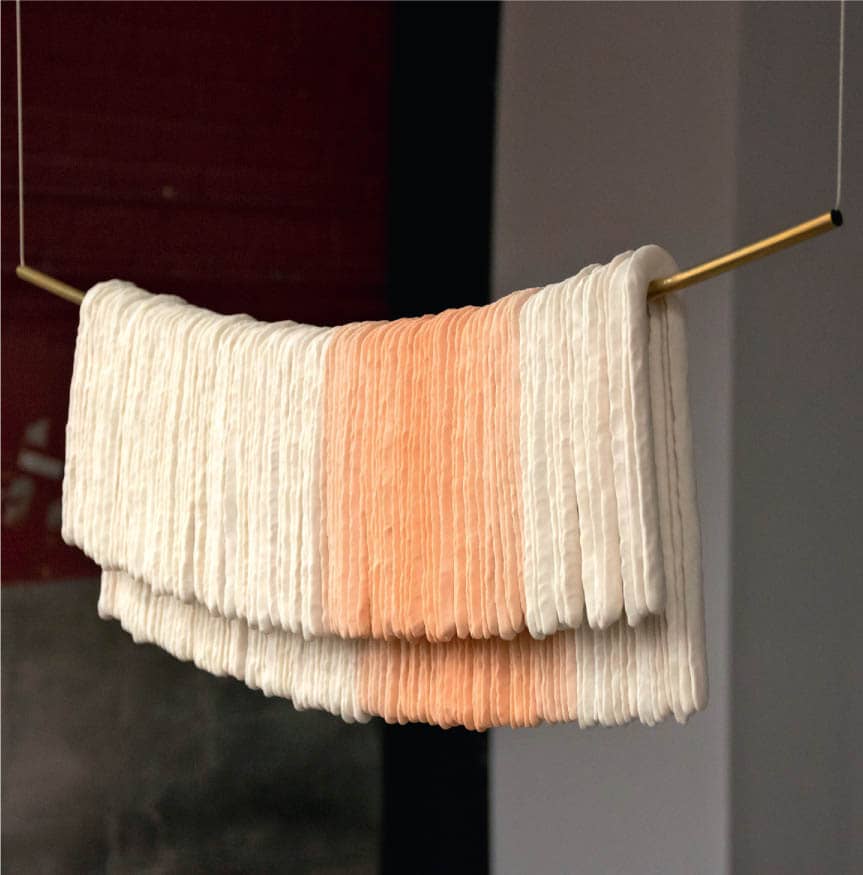
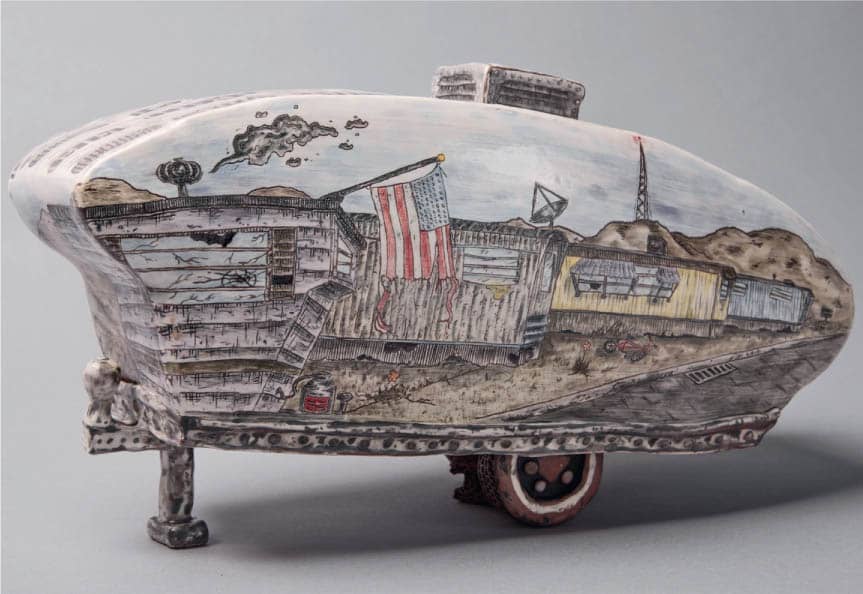
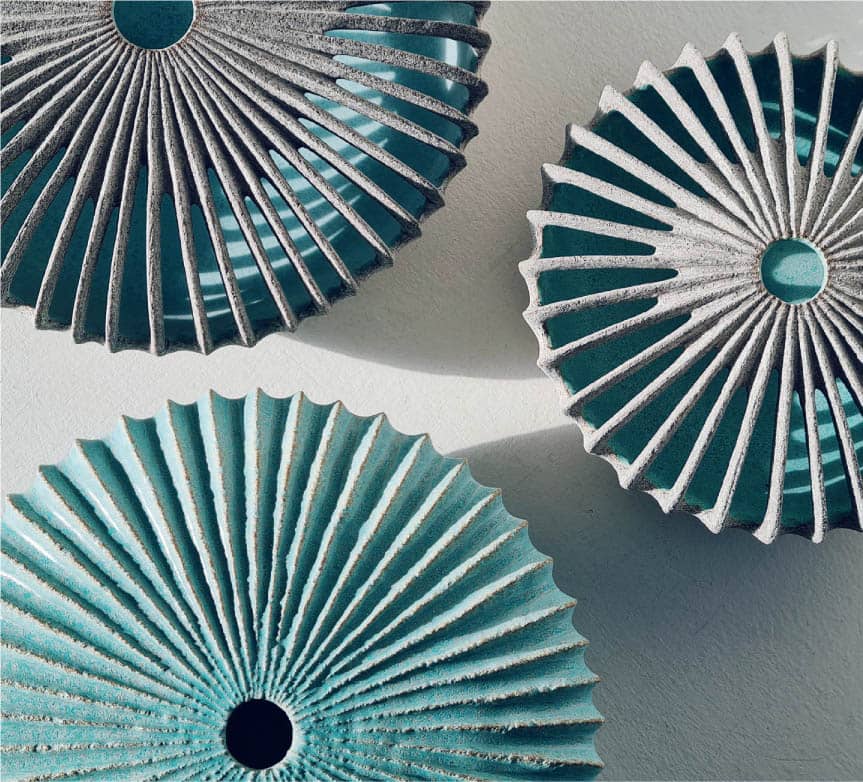
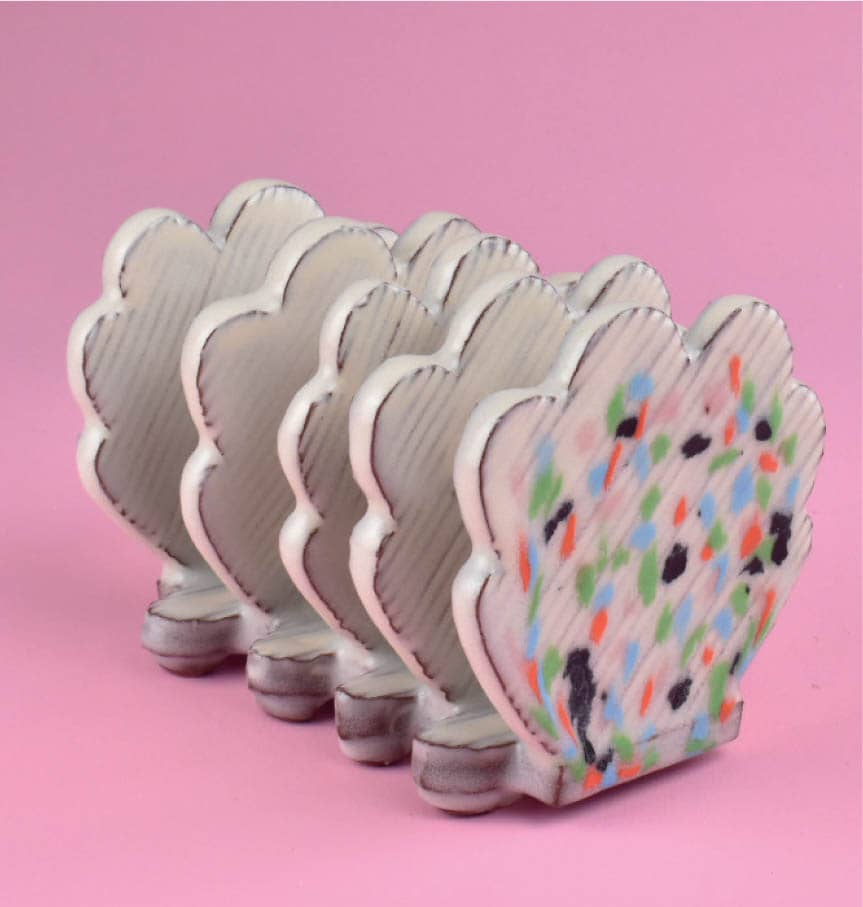
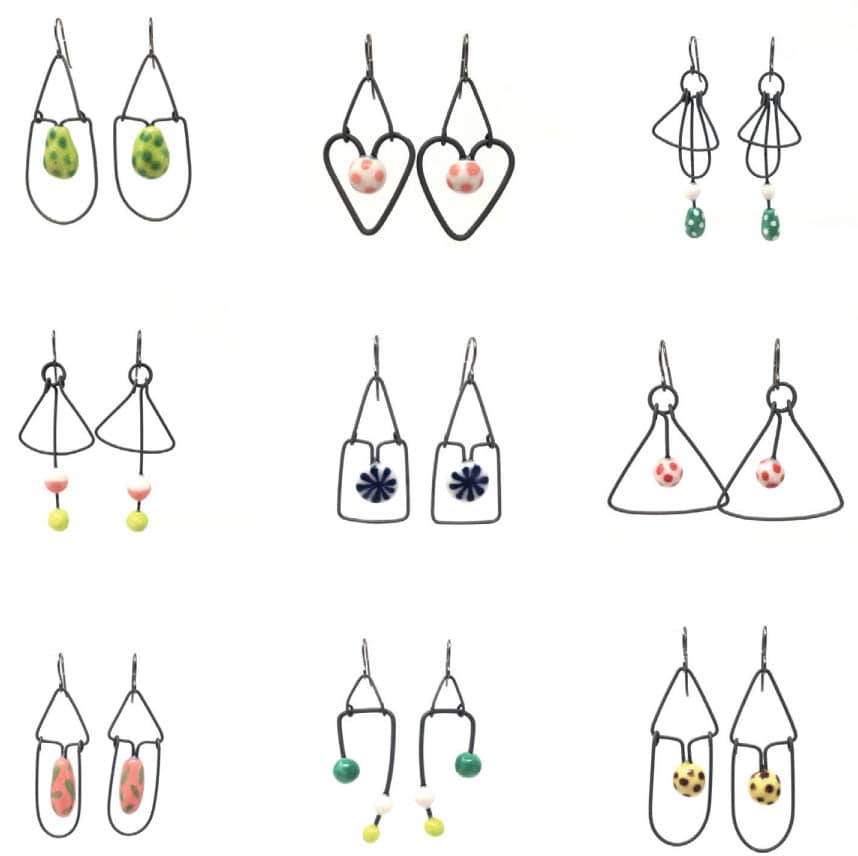
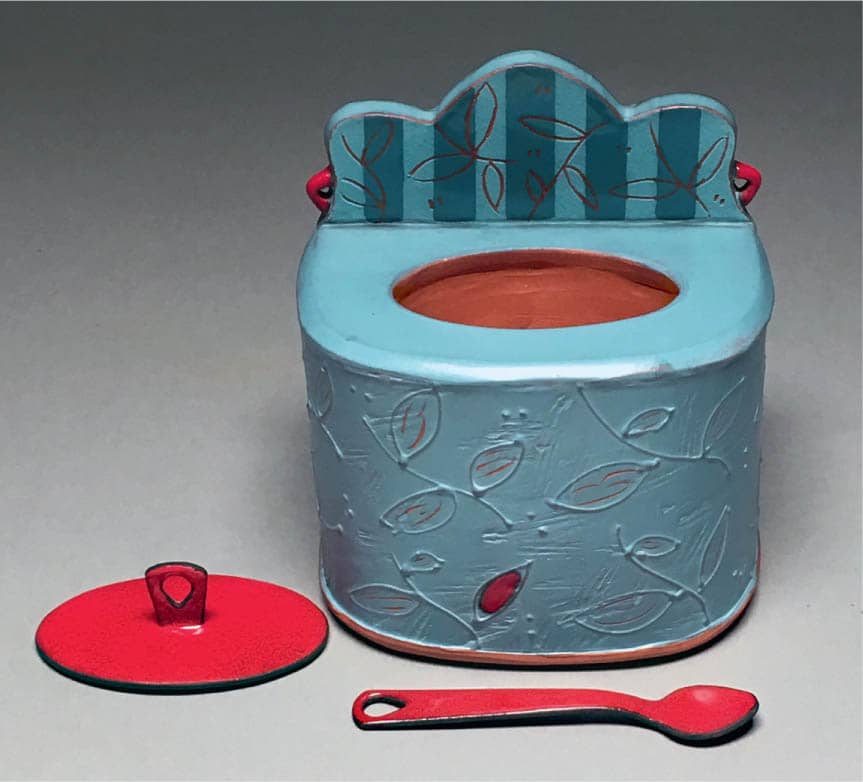
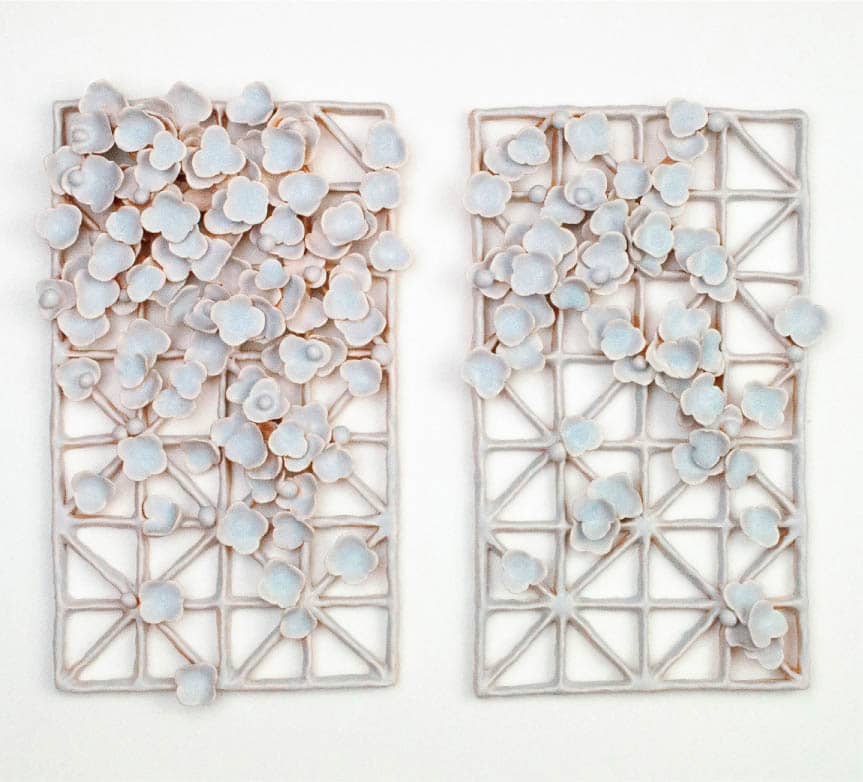
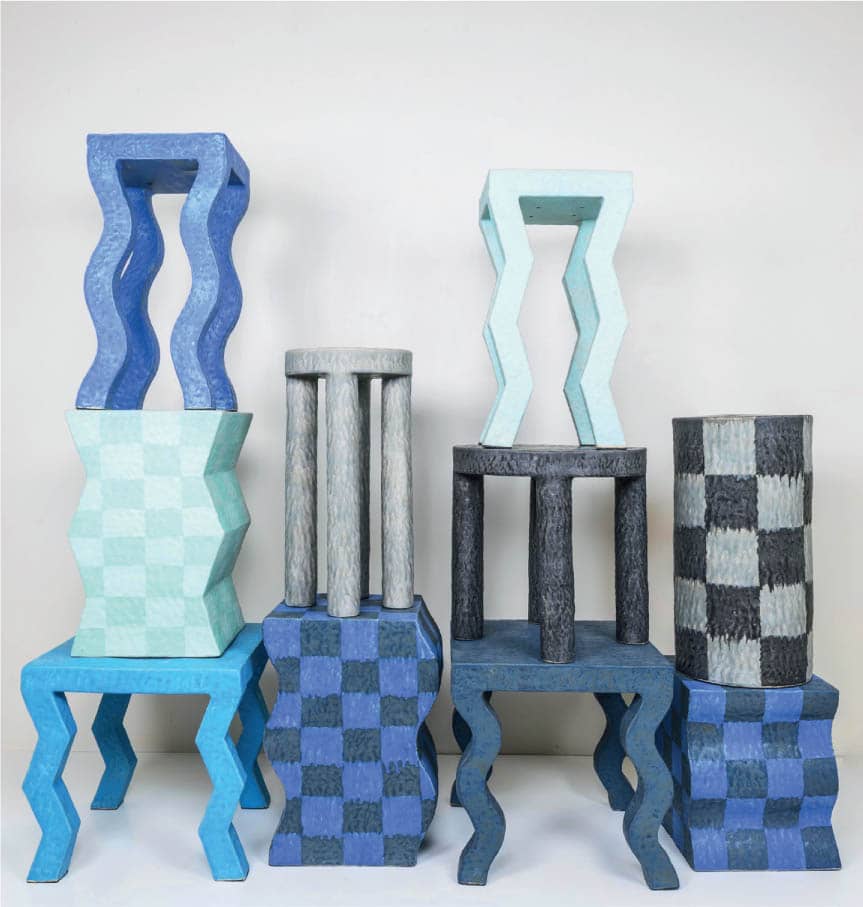
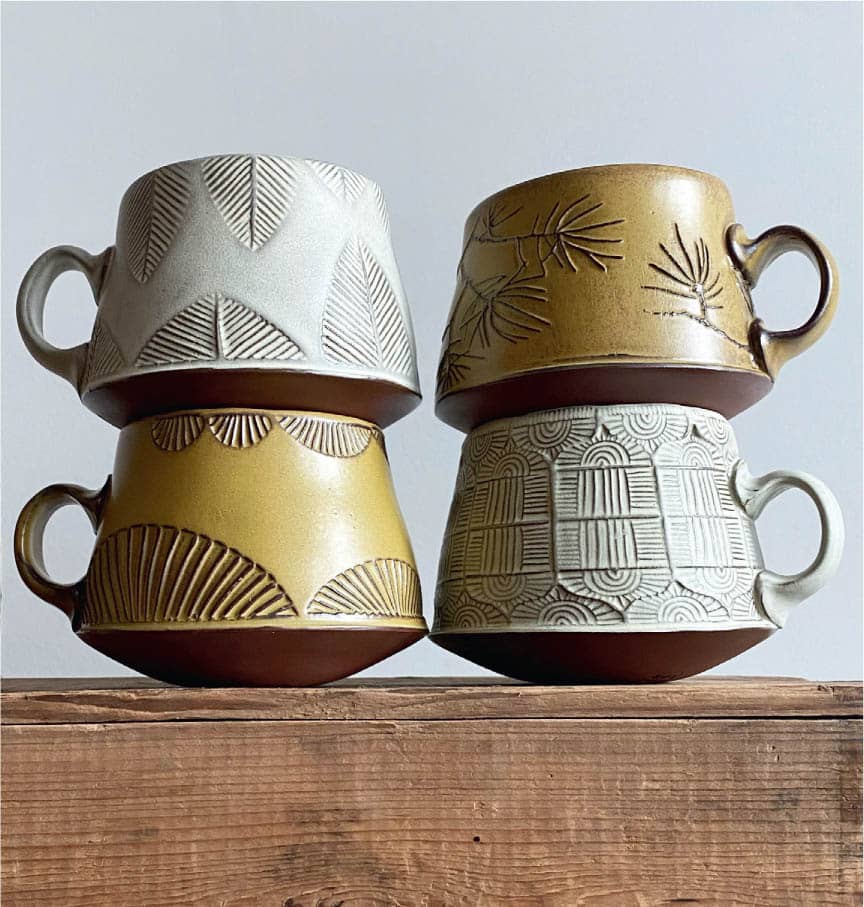
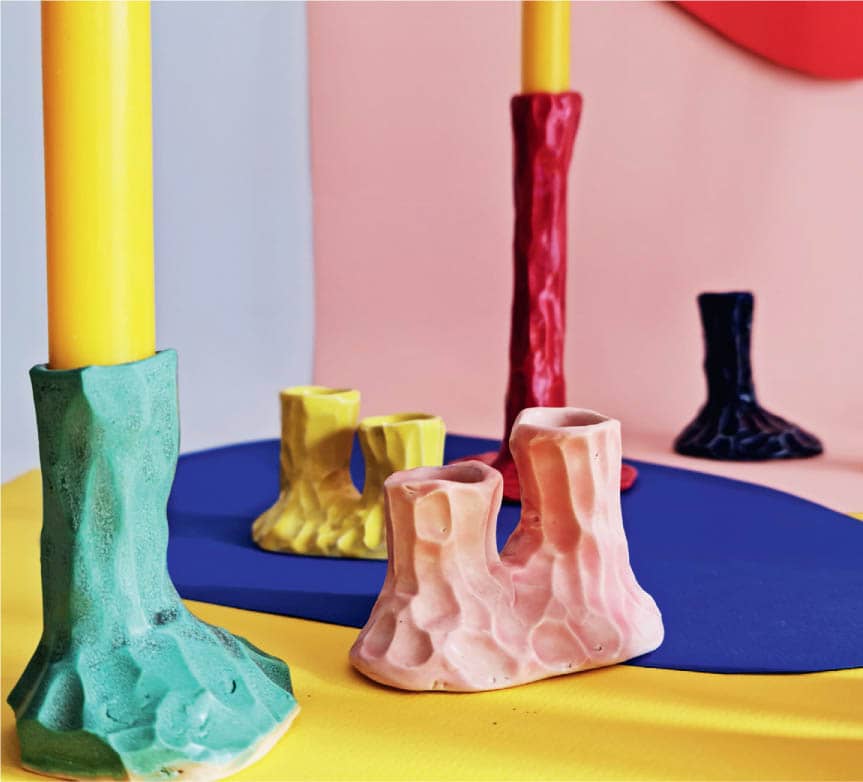
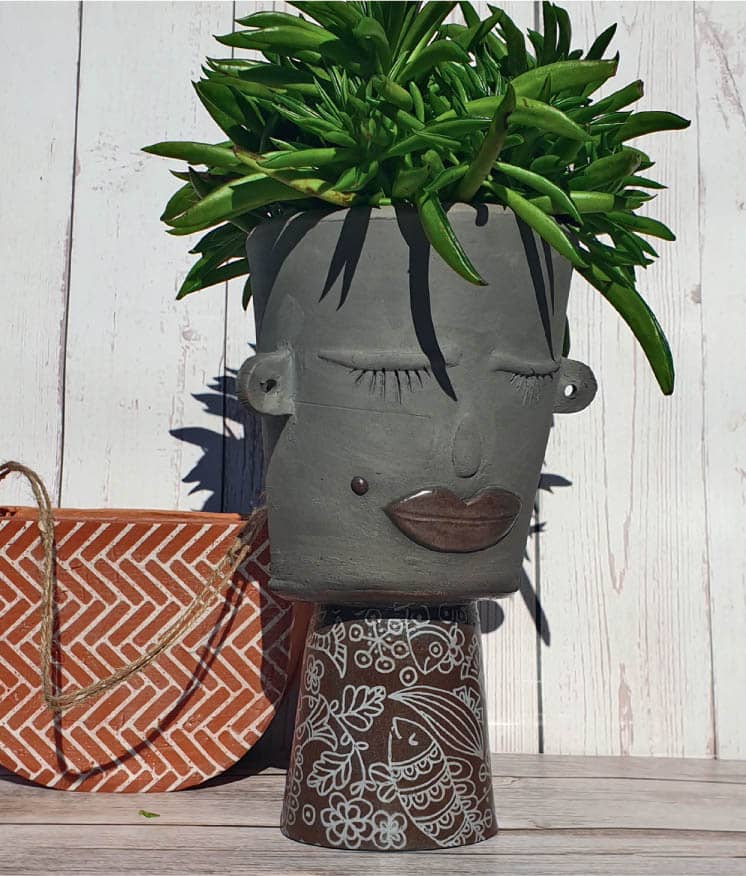
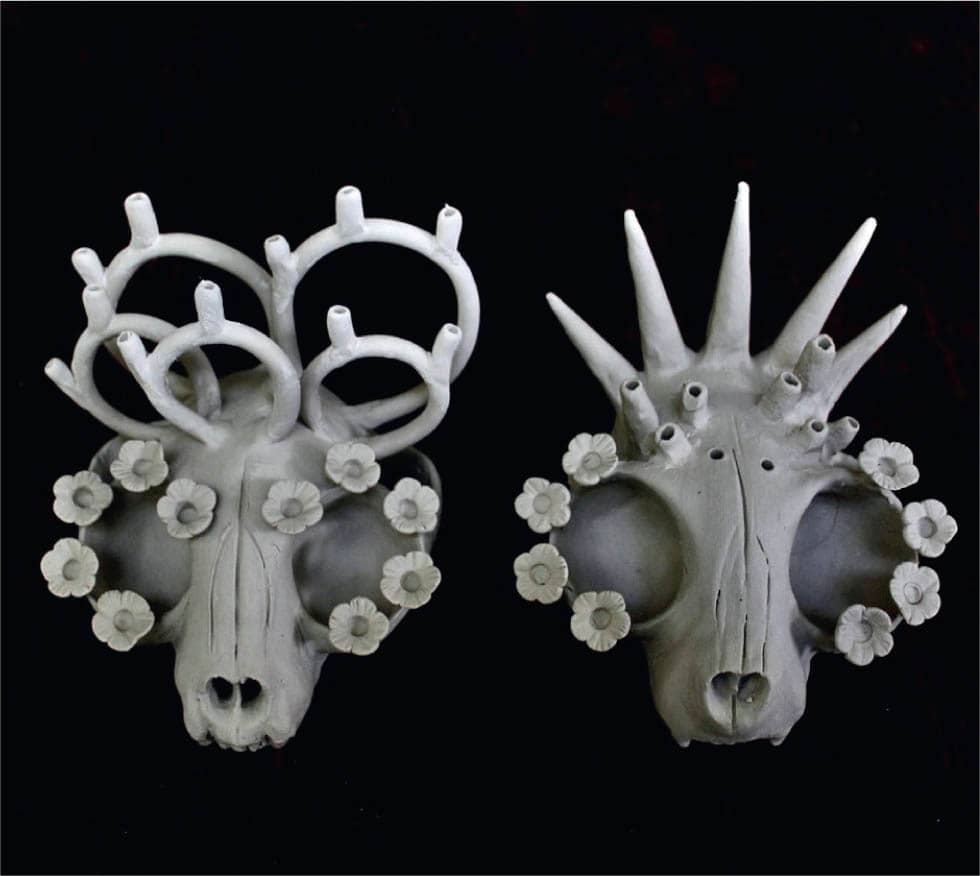
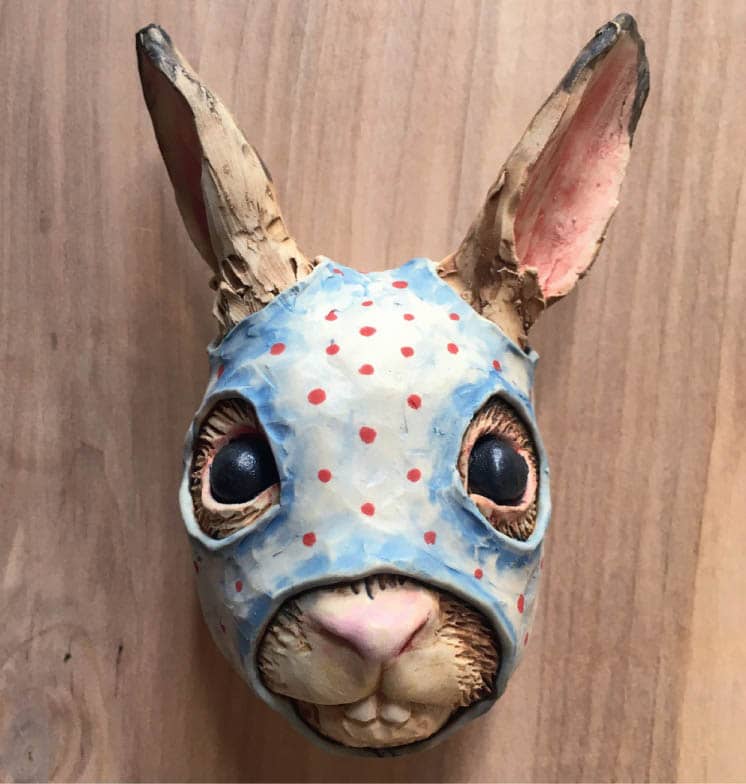
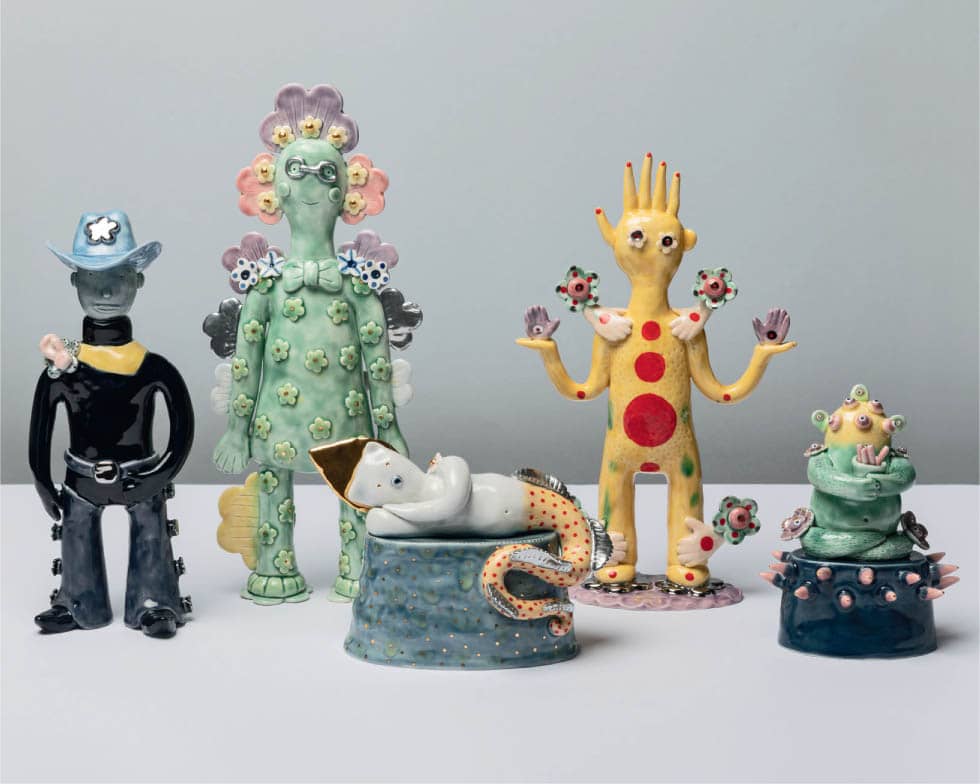
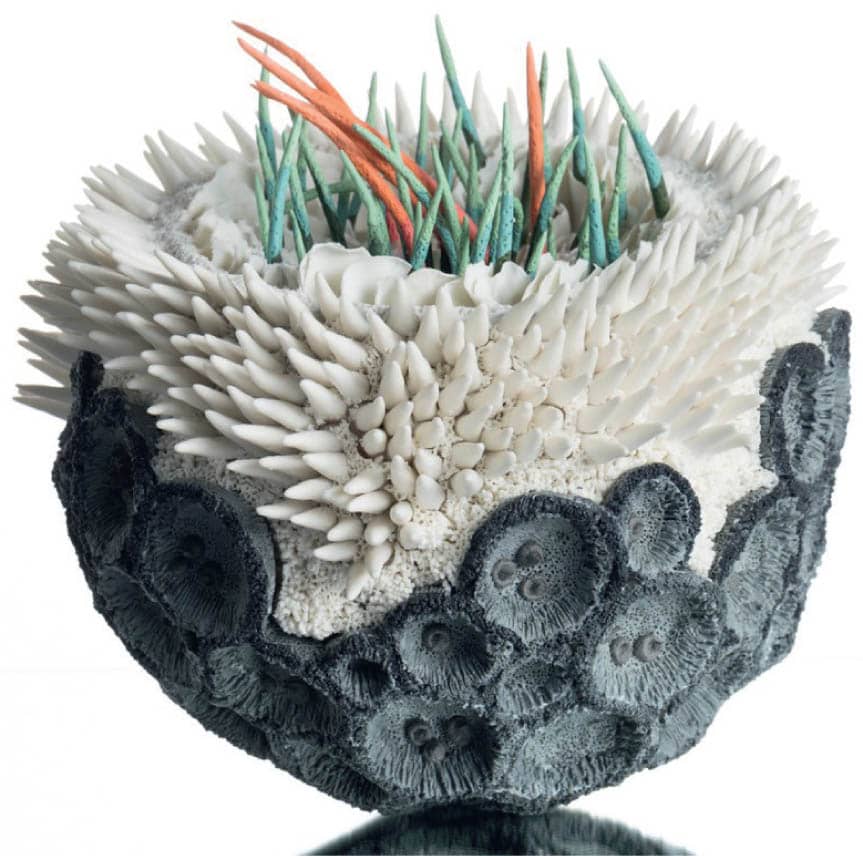
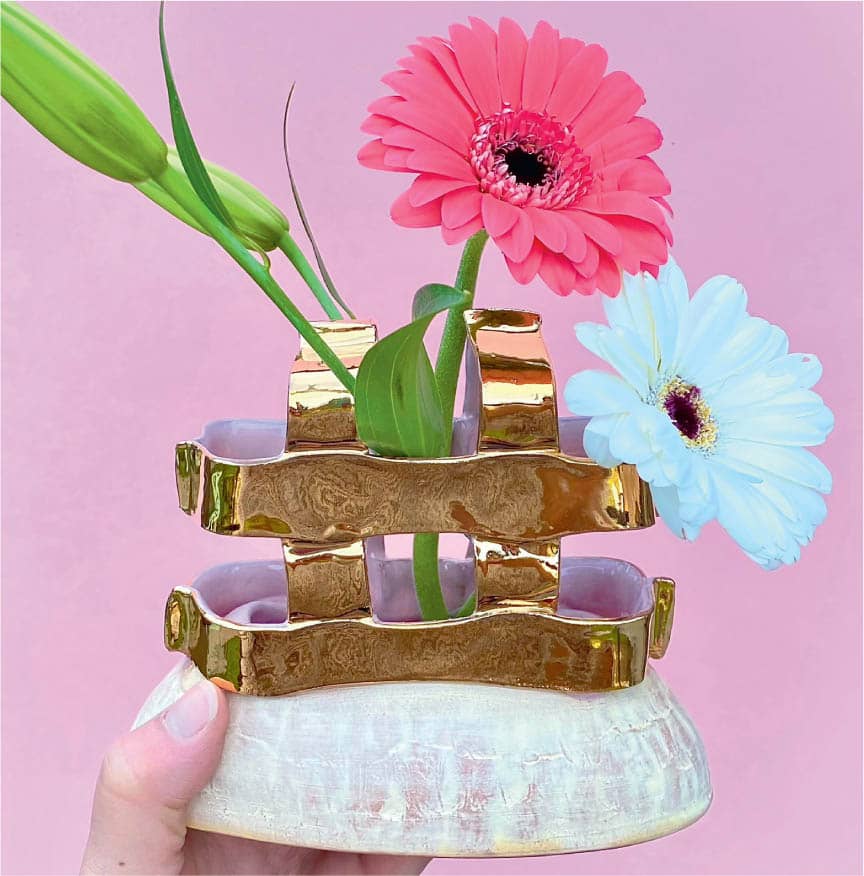
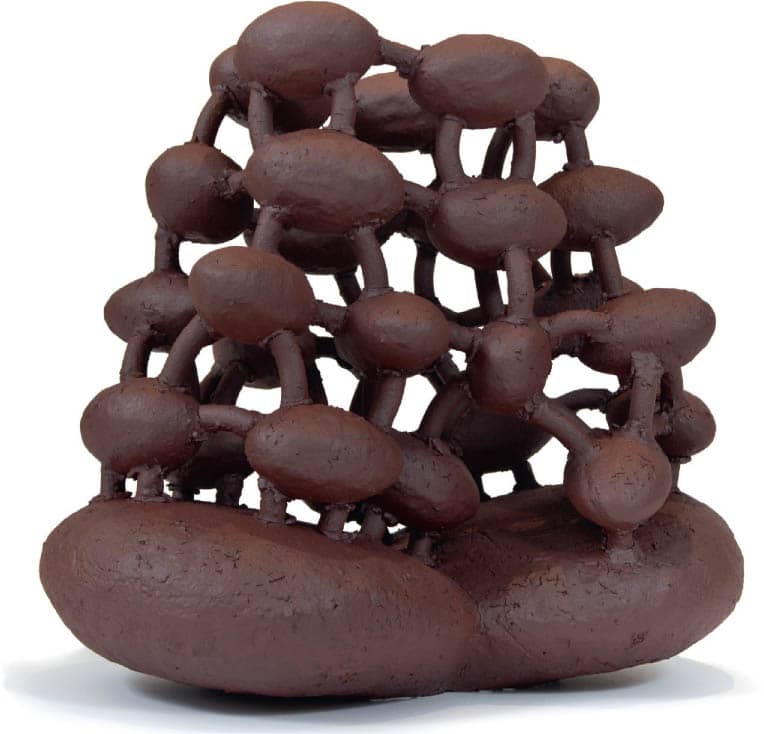
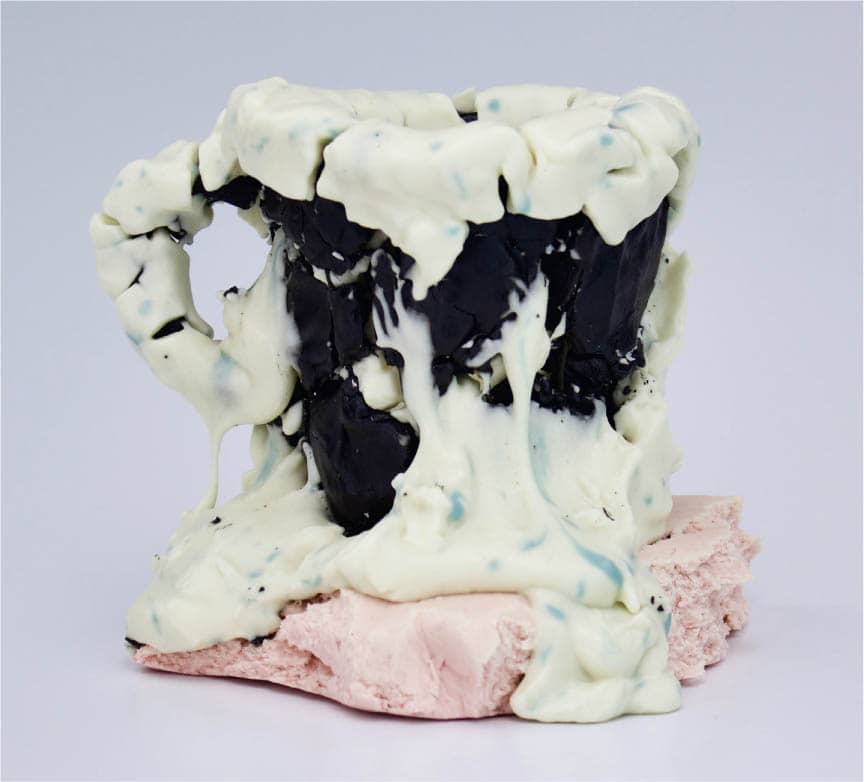
Amanda Salov,Morning Light, pinch and assemblage. Photo Courtesy of the Artist Lauren Mabry,Molten Veil with Irregular Forms. Photo Courtesy of the Artist Richard Peterson,Trailer, 1-800 Leave the USA, slab built and sgraffito decoration. Photo Courtesy of the Artist Michele Bianco,Vessels with Gills, slab built and hand carved. Photo Courtesy of the Artist Brian Jones,Toast Rack, slab built. Photo Courtesy of the Artist Jennifer Allen,Earrings, pinched and hand shaped. Photo Courtesy of the Artist Liz Zlot Summerfield,Salt Box, slab built. Photo Courtesy of the Artist Joanna Poag,Wallflower: Dirzies, pinch, coil, and assemblage. Photo Courtesy of the Artist Kelsie Rudolph,Table Stack, pinch and slab. Photo Courtesy of the Artist Sarah Pike,Pike Mugs, slab built and stamped. Photo Courtesy of the Artist Maria Baleva,Candle Sticks, carved. Photo Courtesy of the Artist Lynne Hobaica,Cellar Plaid, coil built. Photo Courtesy of the Artist Leonie Allan,Planters, slab built. Photo Courtesy of the Artist Clairy Laurence,Cats Skulls 1 and 2, pinch. Photo Courtesy of the Artist Magda Gluszek,Luchabbit, pinch built. Photo Courtesy of the Artist Vipoo Srivilasa,Wellness Deity Series, pinch and coil. Photo Courtesy of the Artist Erum Aamir,Mirantibus, rolled, pinch, coil, and carved. Photo Courtesy of the Artist Didem Mert,Bling Flower Cage, slab and coil built. Photo Courtesy of the Artist colby charpentier,Cluster, assembled from coiled and pinched parts. Photo Courtesy of the Artist Adam Shiverdecker,Absurd Mug, Kanthal wire frame and clay/glaze melt. Photo Courtesy of the ArtistGALLERY