Clay is made in nature through the physical and chemical weathering of rock. The theoretical formula of clay is Al2O3 2SiO22 H2O, meaning it is made up of alumina, silica, and water. During Earth’s molten stage, heavy materials sank and minerals rose. Over time, wind and water broke down igneous rock and clay was formed. This means clay can be found naturally. In certain areas, you can dig your own clay—though typically it needs to be processed before use. These days, most potters prefer to purchase already mixed clay through a clay distributer rather than mixing it themselves. When you shop, you will find there are different types of clay bodies for different types of uses, but they all start with the three basic ingredients: clay, filler, and flux. When deciding which clay to use, it is important to consider your options and the qualities each clay possesses. Earthenware is a low-fire clay. It is generally the least durable of the clays because it typically is not fired to a vitrificated state. Think flowerpot. The firing range is 1828 to 2124°F (cone 08 to 4). While it can be white or buff, red earthenware is the most common. Red earthenware contains a high iron content, causing the clay to fire to a rusty color. Earthenware is good for beginners as it is not likely to warp, accepts attachments well, and holds form when working with slabs. It has an absorption rate of 5 to 10 percent. Stoneware clay is a midrange to high-fire clay. It is more durable because it is fired at higher temperatures, causing the clay to vitrify, hence the word “stone.” The firing range is 2167 to 2383°F (cone 5 to 12). Most stoneware clays are incredibly workable, making them appropriate for beginners. Choosing the right stoneware clay depends on your specific needs. It has an absorption rate of 1 to 5 percent. Porcelain is a high-fire clay. It is the purest of the clays with a fine texture and is glassy and vitreous. Some but not all porcelains are translucent when the walls are thin enough. The firing range is 2232 to 2383°F (cone 6 to 12). Porcelain is the most fickle of the clays. It lends itself beautifully for throwing and trimming but has a fierce memory and a high shrinkage rate, which can cause warping and cracking. It is not recommended for beginners. It has an absorption rate of 0 to 2 percent.CLAY

Types of Clay
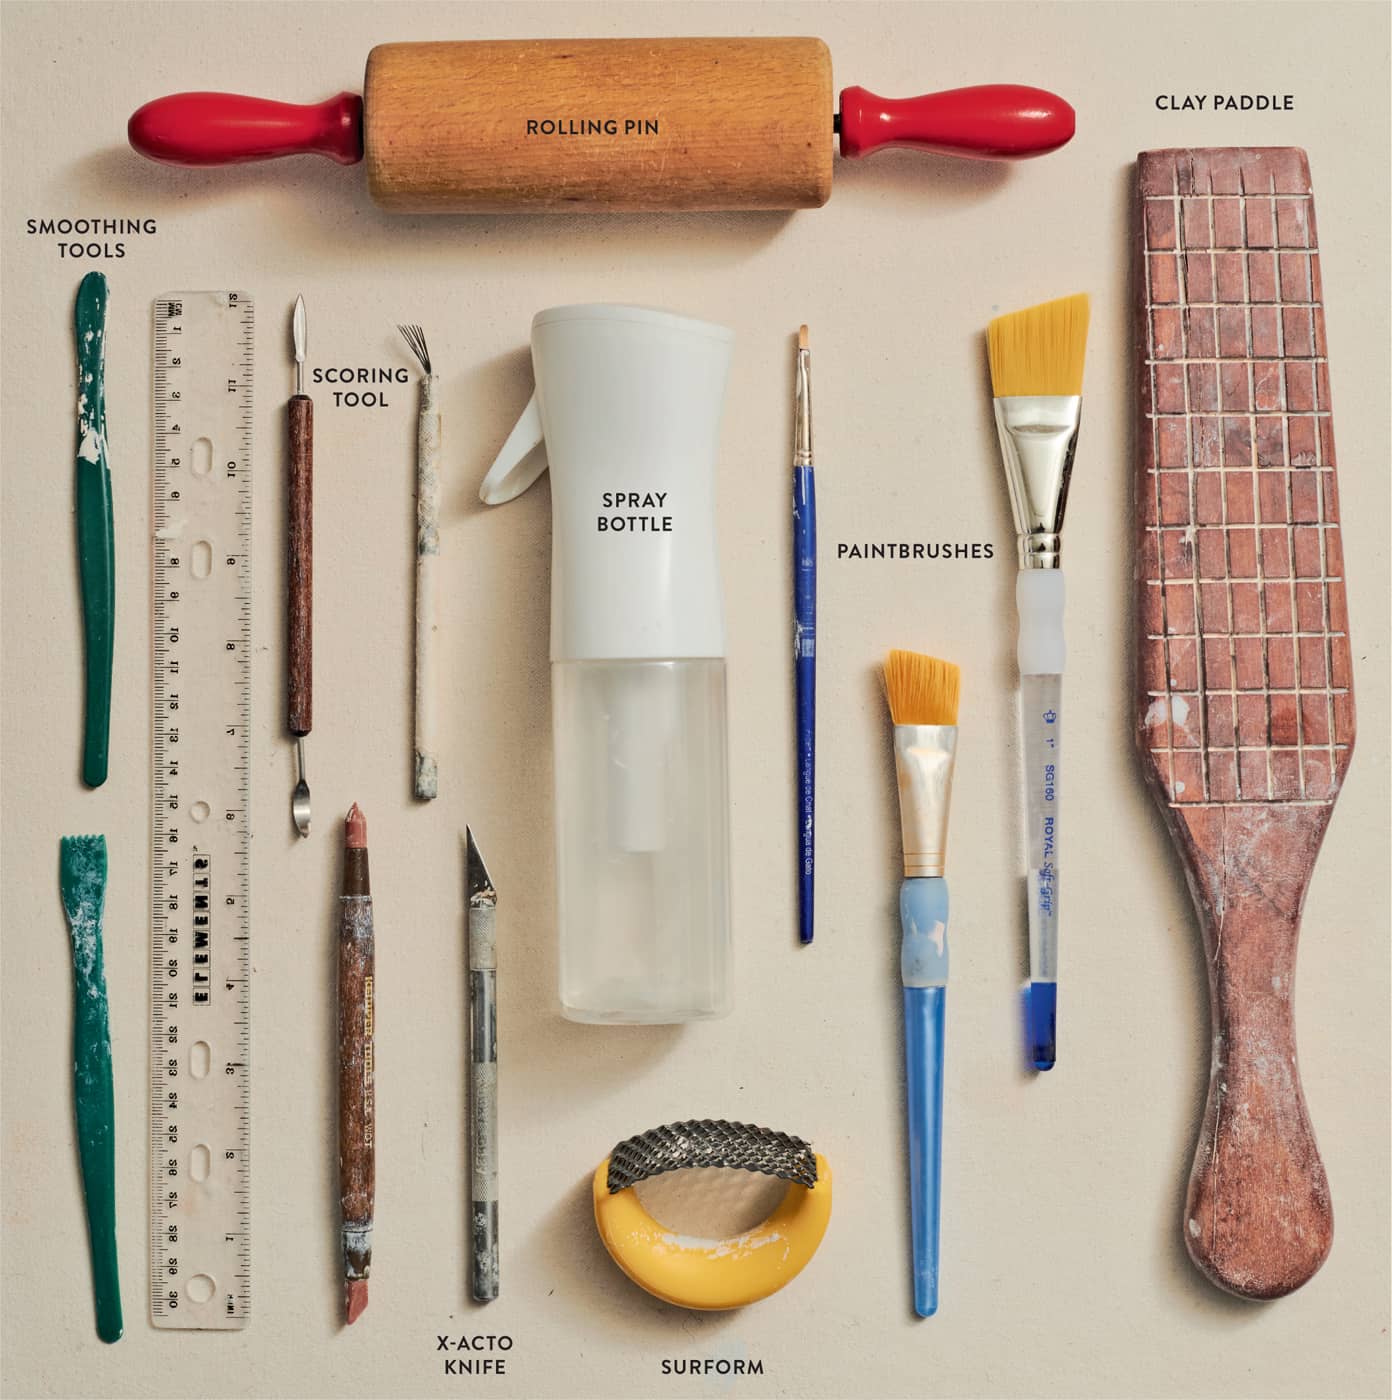
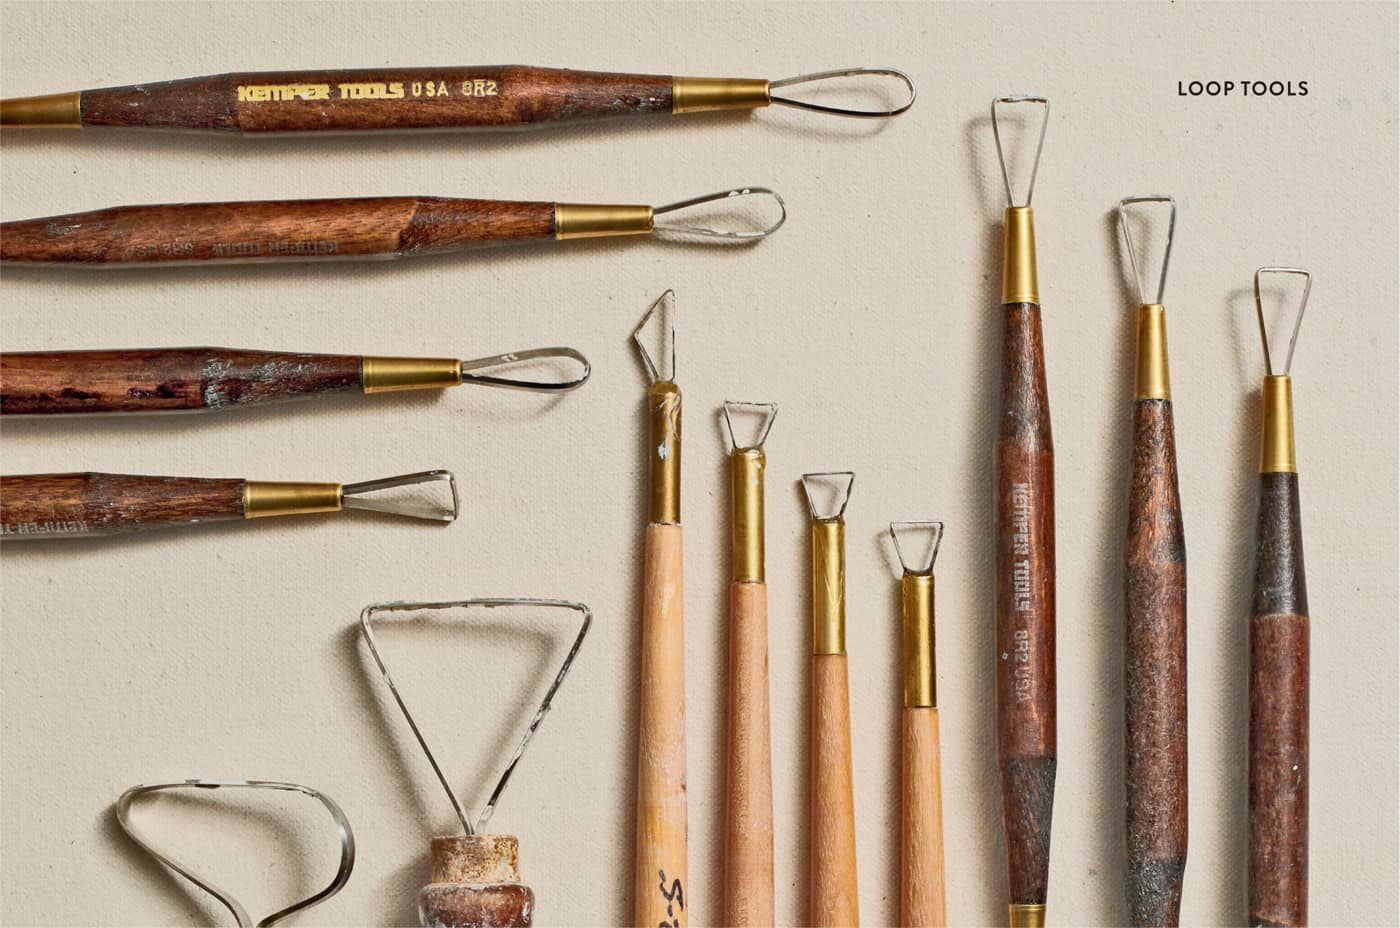
When it comes to working with clay, there’s no denying your best tool is your hands. Nevertheless, there are so many cool clay tool options out there, all made specifically to help you have a higher success rate in making pottery! Let’s go over the tools you are most likely to encounter in the studio. When it comes to choosing a wheel, every potter has their own preference. To discover which wheel is best for you, I recommend taking a community clay class. Chances are the studio will have a few different brands/models, allowing you to peruse and see what you find most comfortable. Here are some tips to consider when looking for the perfect wheel for you. SPONGE – A sponge is typically used to moisten clay during the throwing process and is also useful for cleanup. I use a sponge as a buffer between my fingers during wheel throwing. I love my sponge! WIRE CUTTER – The needle tool is used to remove your finished pot from the wheel and to slice clay before wedging. WOOD KNIFE – This knife is used to remove excess clay at the foot of your pot at the end of the throwing process. NEEDLE TOOL – The needle tool is used for many tasks but especially for slicing the rim of a pot on the wheel to make it even. RIBS – There are several different kinds of ribs, including wooden, metal, and plastic. They are typically used in the throwing process to smooth clay and to refine the shape, but they can also be used during the decorating and finishing process. CALIPERS – Calipers measure diameter when throwing forms such as jars and lids. Lidded forms are beyond the scope of this book, but you might also use calipers to measure pots when making a matching set. SCALE – When weighing clay, a scale is essential for mixing slip or glaze. BUCKET – I use a bucket to hold water while throwing, but buckets have a million other uses around the studio. BATS – Bats are flat disks or square attachments that are secured to the wheel. They are used so pots can be easily removed from the wheel without having to directly touch them. They make life easier when throwing flat or large objects on the wheel. BAT PINS – Bat pins secure the bats on the wheel. POT LIFTERS – These help you lift your pot off the wheel with ease. WARE BOARDS – Ware boards are used for carrying multiple pots much like a waitress carries a serving tray. Potters typically use wood or other materials, but I prefer drywall because it absorbs some of the moisture of the pot without sticking. Just be sure to duct tape the edges of drywall boards so they don’t crumble or deteriorate. LOOP TOOLS – Coming in all shapes and sizes, these tools are used to trim excess clay off pots. Different shapes make different impressions. TURN TOOLS – This style of trim tool uses an elongated L-shaped edge to trim a larger surface area. Turn tools are also used to create a textured chattering effect. SPRAY BOTTLE – A great tool for keeping pots moist. RESPIRATOR – Respirators protect your lungs from clay dust and toxic materials. These are not just for mixing glazes; you should wear a respirator when cleaning any ceramic studio or wherever dust is present, such as when using sandpaper or similar tools on greenware. X-ACTO KNIFE – I love my X-ACTO knife for a number of reasons. It is perfect for cutting handles, cutting slabs of clay, darting, and decorating. SURFORM – Similar to a cheese grater, this tool is preferred for removing excess clay by hand. SMOOTHING TOOLS – To get into all the nooks and crannies, smoothing tools are your friend when attaching pieces such as handles. SCORING TOOL – Slip and score, scratch and attach. This tool is all you need (besides water) to merge together two pieces of clay. PAINTBRUSHES – Having good brushes is key. Slip and underglaze will go on more smoothly during the decorating process with the help of a good soft brush. ROLLING PIN – Extremely useful for flattening clay evenly and many other tasks. The more handbuilding or slab work you do, the more you will use a rolling pin. BANDING WHEEL – A banding wheel is basically a turntable that allows you to spin the pot without picking it up. It is incredibly useful for decorating, sculpting, carving, and adding attachments. DECORATING DISKS – These are used to map out equal parts of a pot and are great aids in executing calculated decoration (and altering) of pots. SCISSORS – For cutting out transfers and designs; see chapter 5. TRANSPARENCY PAPER – For mapping out decal designs; see chapter 5. MICRON PENS – For designing decals; see chapter 5. PENCIL AND PAPER – The classics, good for so many aspects of pottery planning.TOOLS AND MATERIALS
The Wheel
Basic Wheel Tools
Trimming Tools
Finishing Tools
Decorating and Design Tools

Whether or not you plan to make clay your career, it is best to practice studio safety from the beginning so you do not fall into any bad habits. If you have long hair, tie it back and secure it. (I have sliced the top of a beautifully tall vase with a single strand of my hair, and even worse got my braid sucked into a standing glaze mixer—yikes!) I recommend wearing comfortable clothing. Sleeves that can be rolled up easily and pants with some stretch or space will allow you to focus on what’s happening on the wheel. You should also remove large rings, anything around your wrist, and dangling necklaces that could get damaged by clay or get in your way. Do your best to avoid wiping wet clay hands on your clothes. The clay will dry and flake dust into the air. This is a habit I have worked so hard to break. Avoiding this is as simple as rinsing your hands in a water bucket or wiping them on an apron before wiping them on clothing. Clay in its wet form is safe in that it does not release dust into the air. Once it dries, you run the risk of inhaling silica dust. This poses a health risk for career potters and ceramic artists because inhalation of silica dust over time can cause silicosis. Often referred to as “white lung,” this condition causes emphysema-like symptoms. I share this not to scare you but to inspire you to develop good cleaning habits from the start. Never sweep dried clay or glaze. Doing so releases silica dust and particles into the air, where it then settles on objects. Instead, use wet cleaning methods, such as a wet sponge or a wet mop. Better yet, get in the habit of disposing clay scraps before they dry. Also, every time you think you will have potential exposure to silica dust (whether it is cleaning dried clay, sanding greenware, mixing glazes, etc.), wear a safety mask or respirator. While silica is the most common danger in the studio for potters, there are other materials to look out for. Always read labels before handling clay or dry materials. When you are mixing glazes with toxic materials such as chrome, manganese, copper, and vanadium, always handle and store these safely, use gloves, and wear a respirator. If you are unsure what is in the glaze you are using, treat it as if it contains ingredients like these. No matter what studio you work in, don’t eat, drink with an open container, or store food in a place where there could be any cross-contamination. Always wash your hands after working in the studio and before eating.STUDIO SAFETY
Cleaning
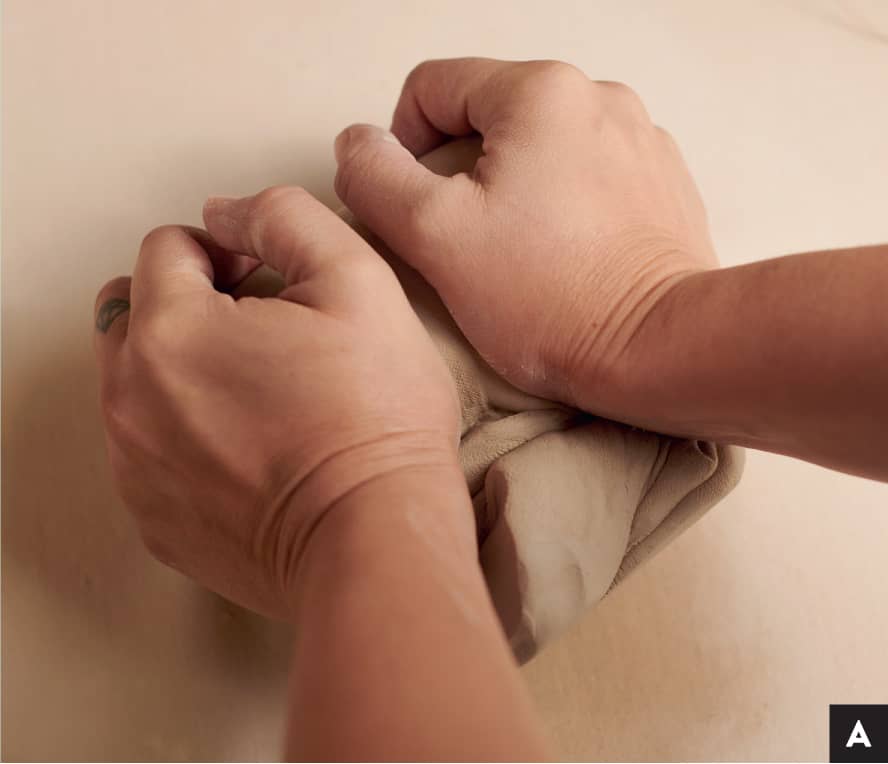
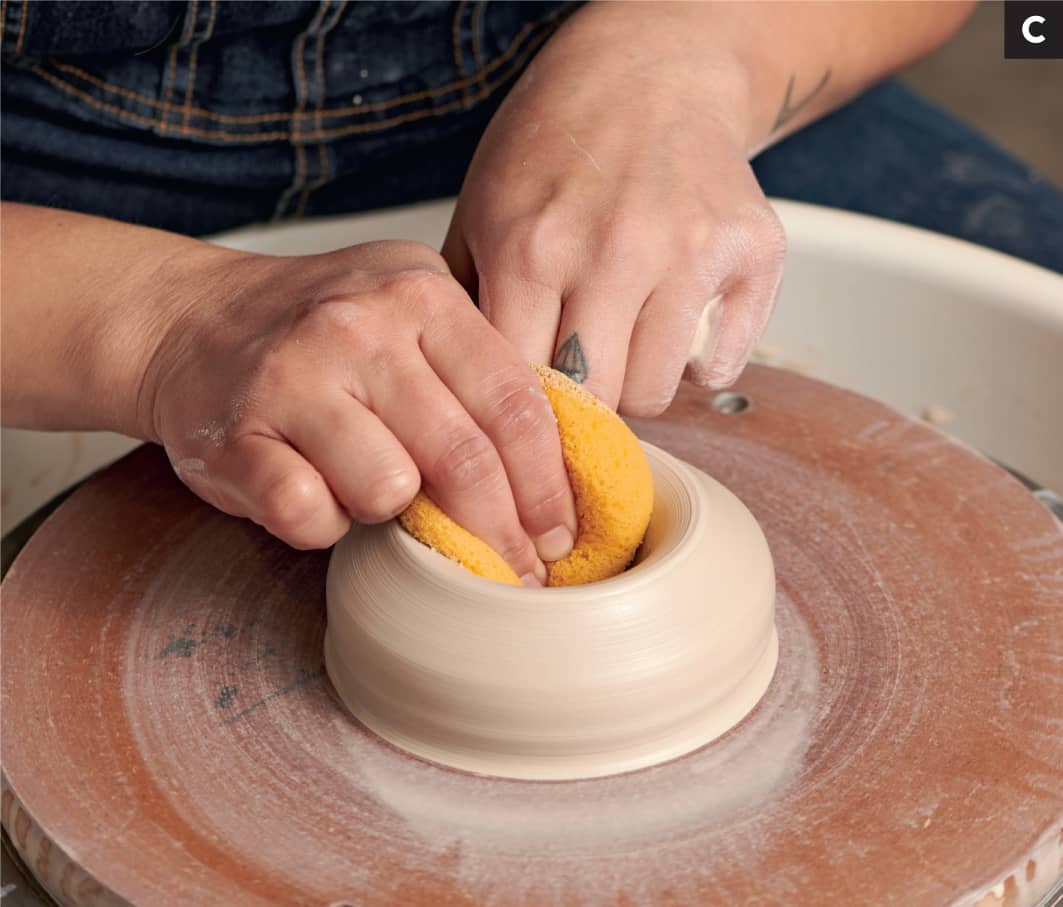
NOTEUsing a wire tool, slice out the amount of clay necessary to throw a form. To get started, I recommend using 1.5 to 2 pounds (680 to 907 g) of clay. This will be enough to make a large cup or a medium-size bowl. I will dive deeper into specific clay weight for different forms in chapter 2. STEP 1 To make it easier on yourself, pound your clay into a loose ball. Next, drive the clay downward into the wedging surface at a 45-degree angle using the palm of your hands and holding onto the clay with your fingertips. [A] STEP 2 Swoop your hands upward, still holding onto the clay at your fingertips, and repeat that driving motion. [B] Be careful not to make such drastic movements that you are flattening and folding the clay. This will add air to it rather than remove it. STEP 3 To keep the clay from elongating continuously, pat the sides between each couple of rolls. At any time, you can lift up the clay and move it back to the center of the wedging surface to prevent it from traveling. [C] TIP As a beginner, you might find it difficult to tell whether you are wedging correctly or have wedged the clay enough. A quick way to find out is by slicing your clay in half with a wire cutter. If you spot any air bubbles, you should continue wedging, making sure you are following the above instructions by de-airing the clay. Either way, slap your two pieces back together and repeat the movements in steps 1 to 3. [D]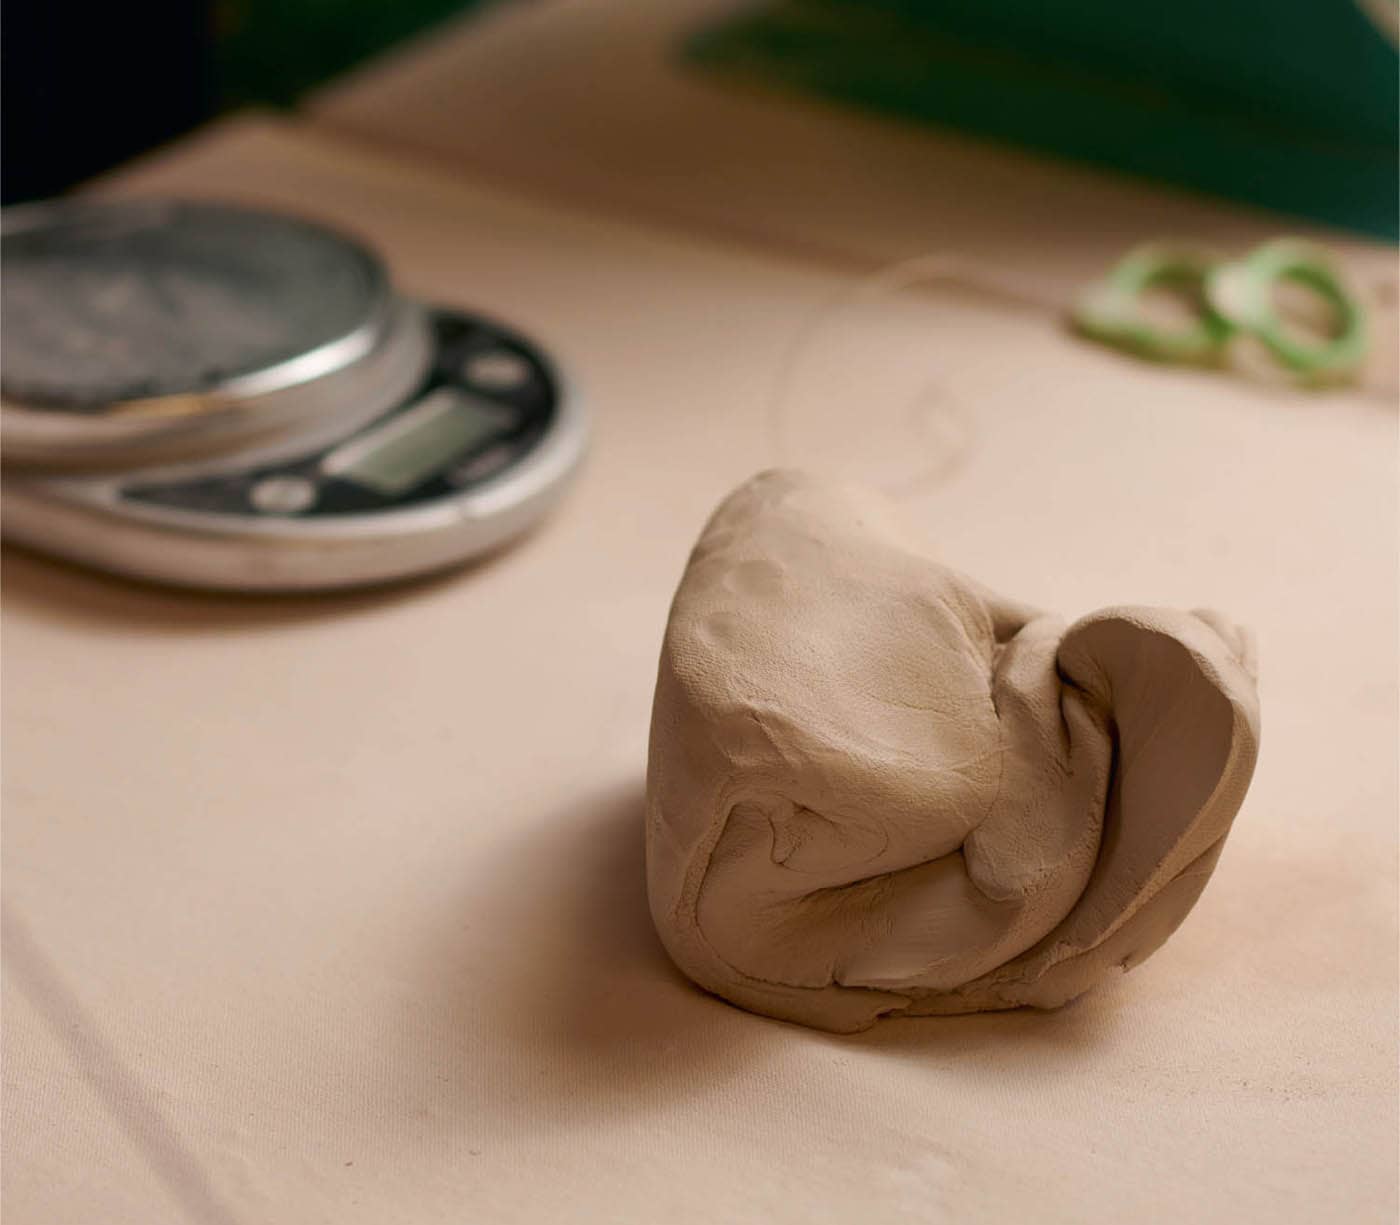
Basic Wedging


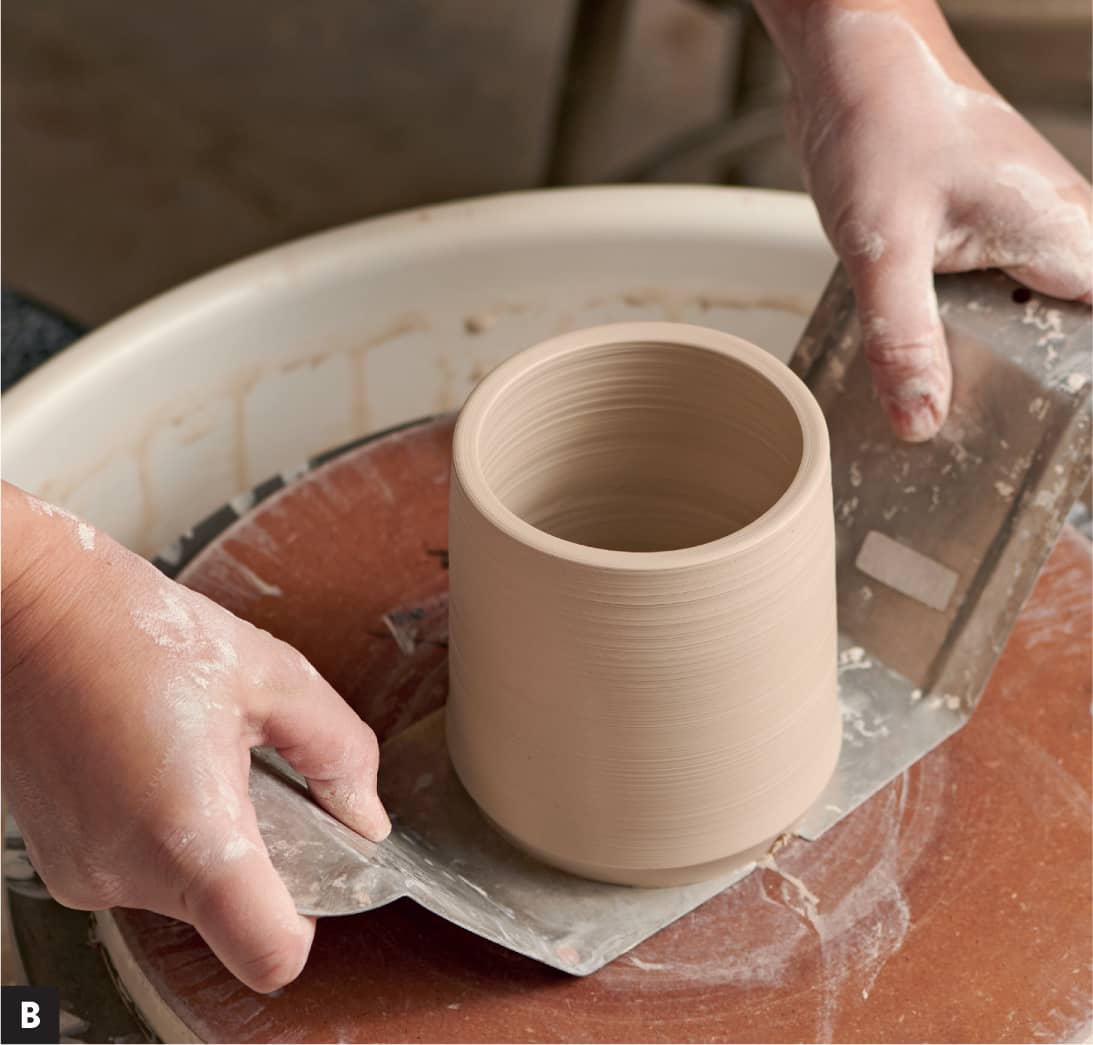
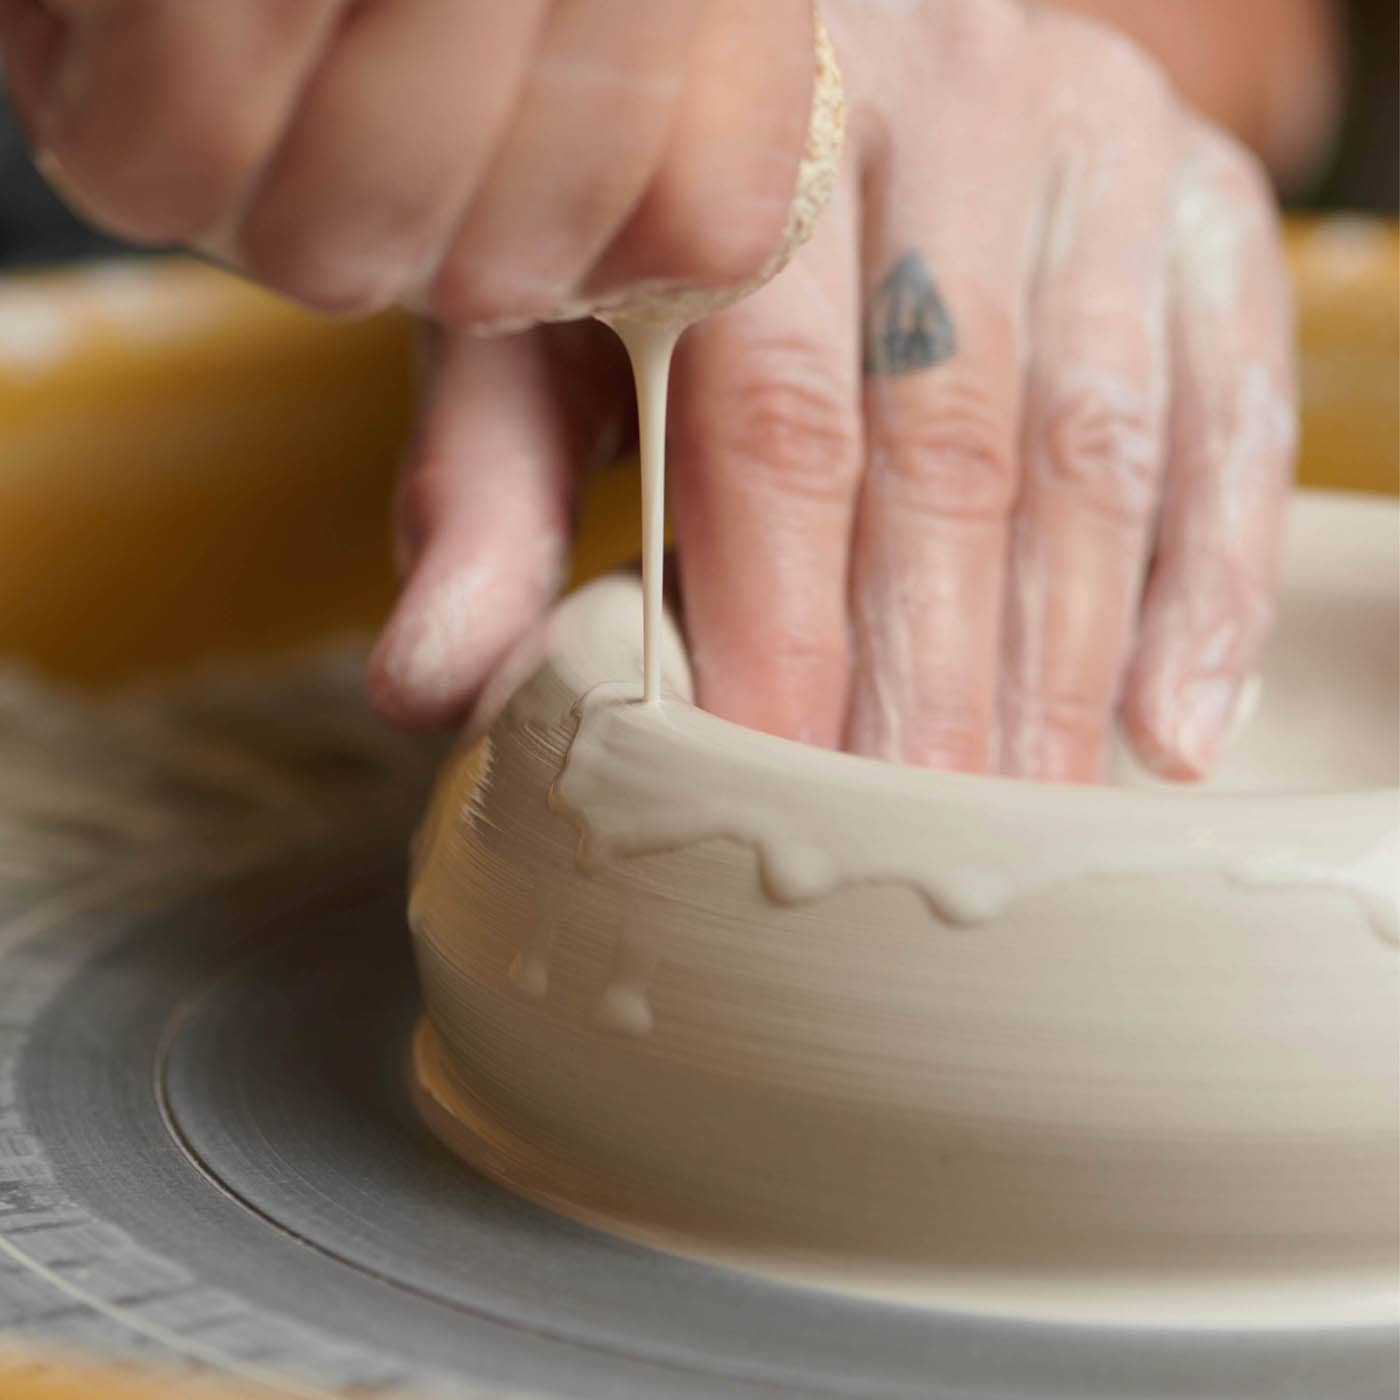
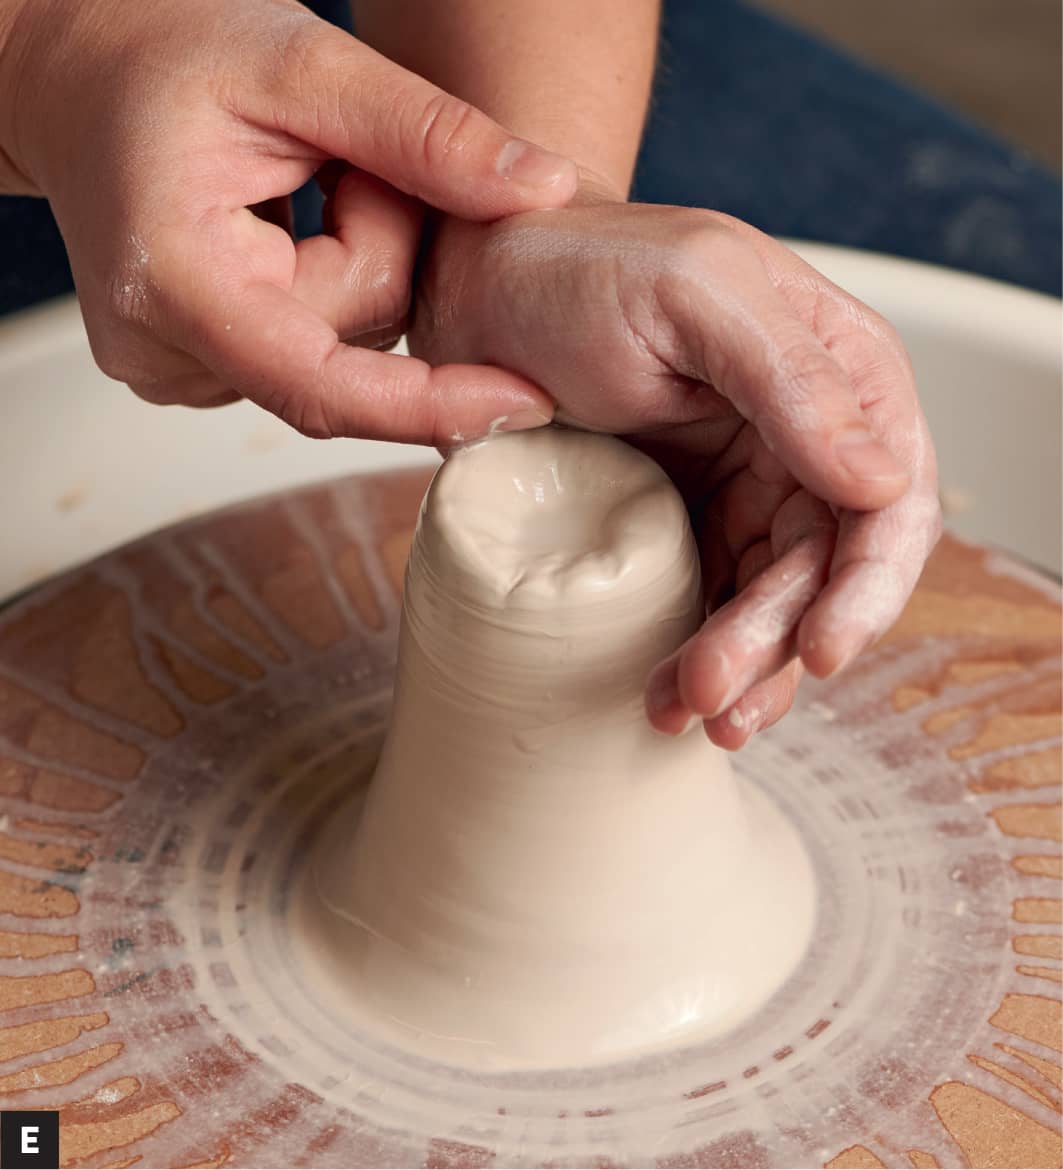
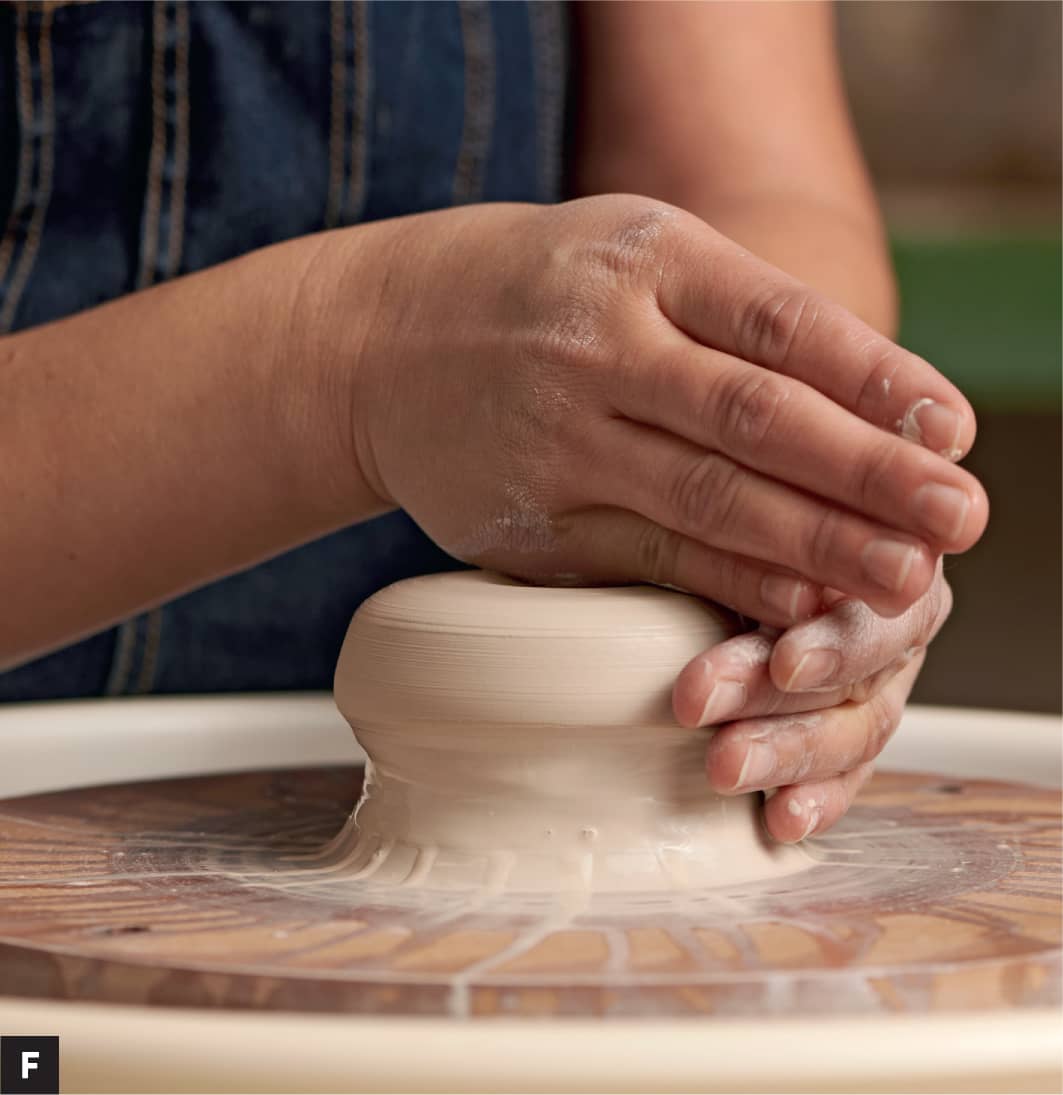
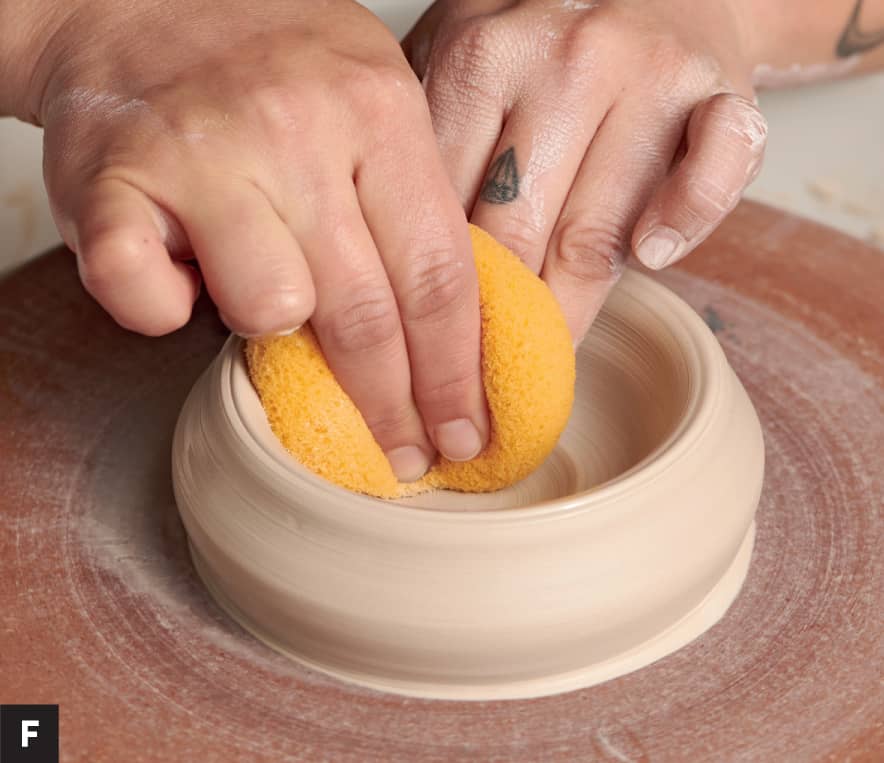
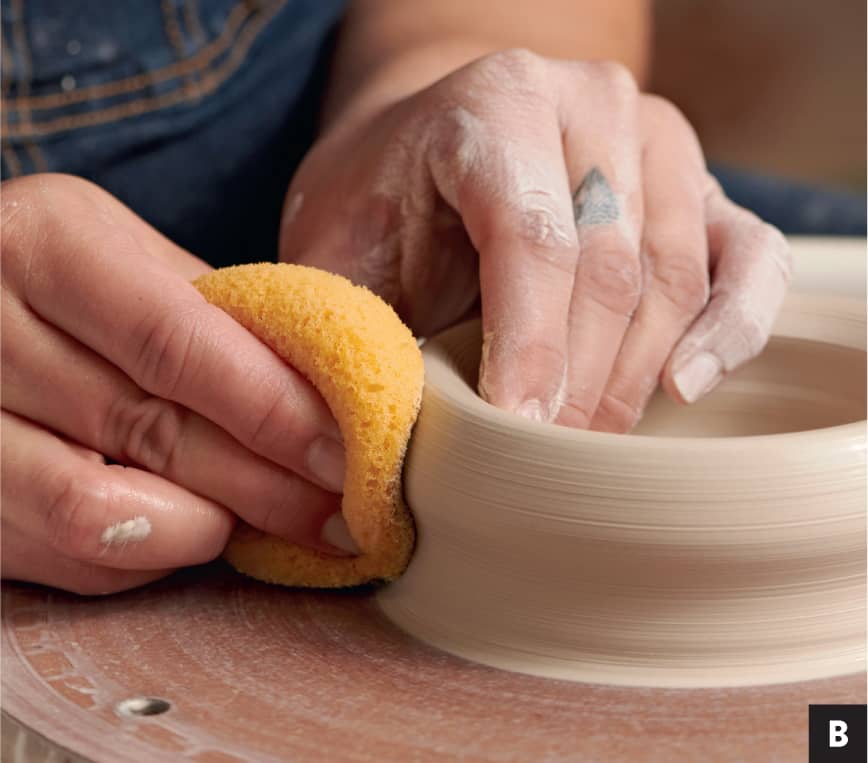
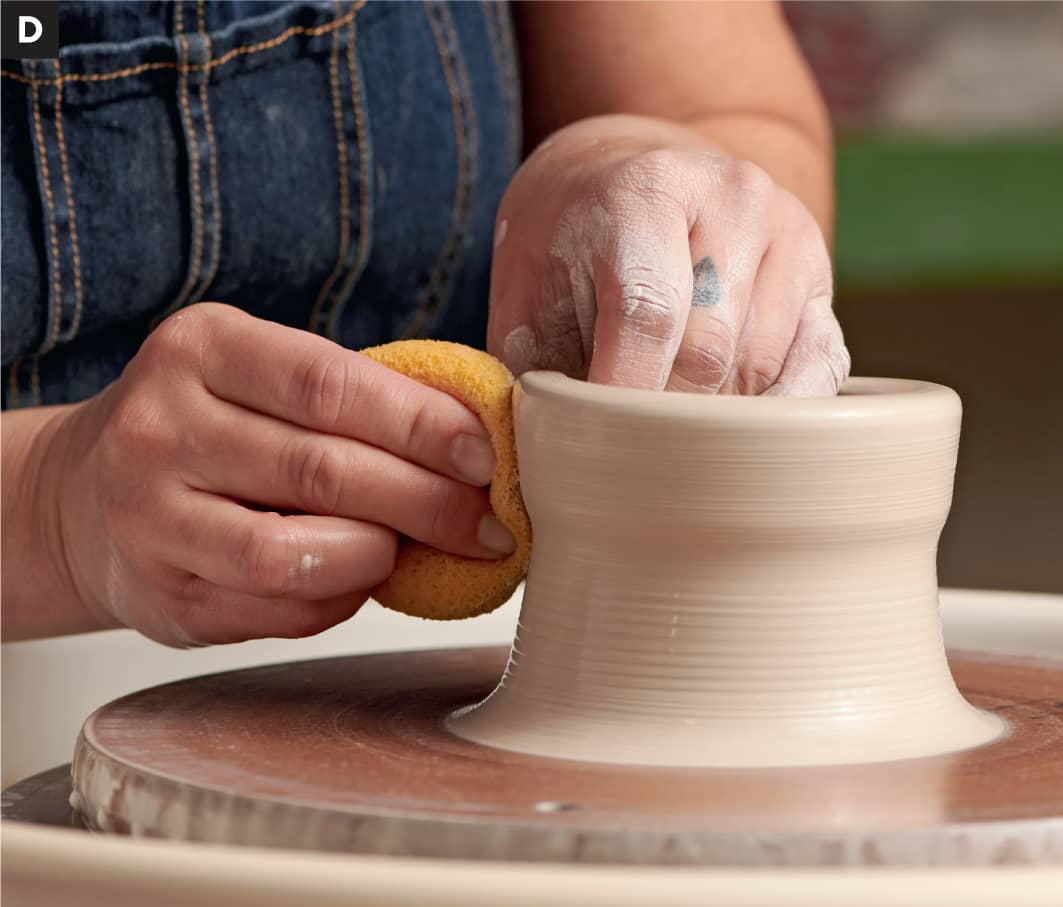
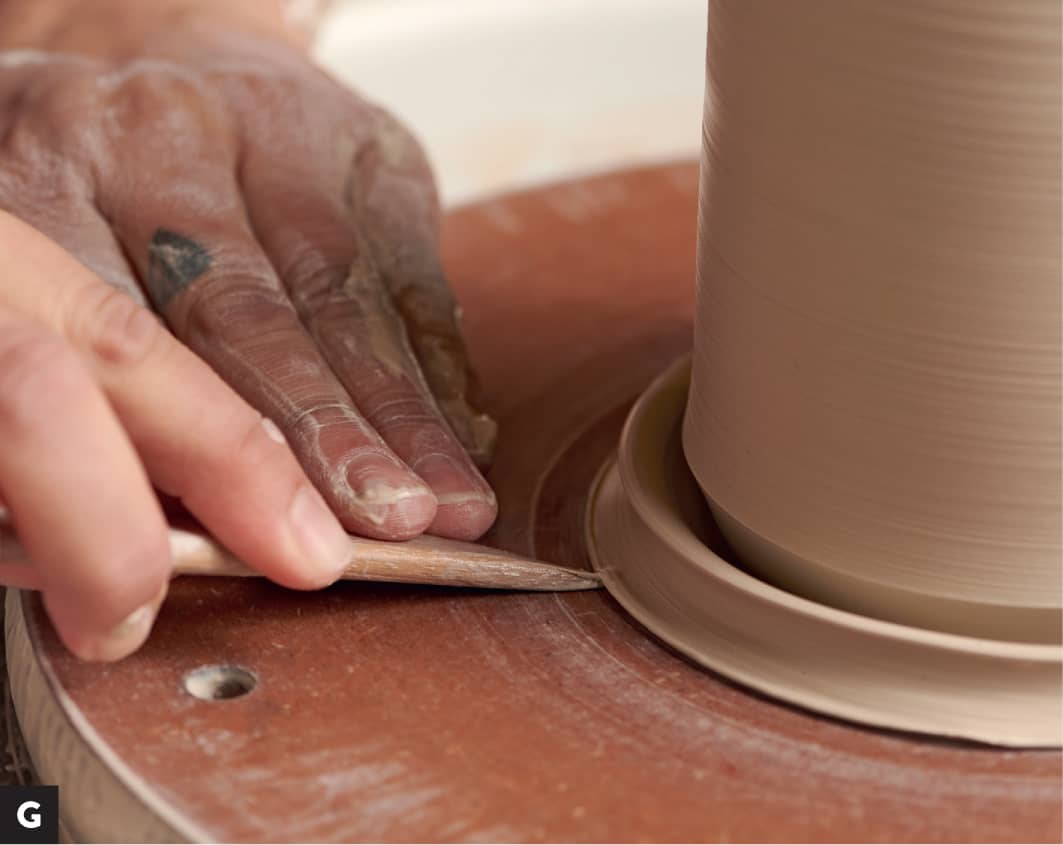
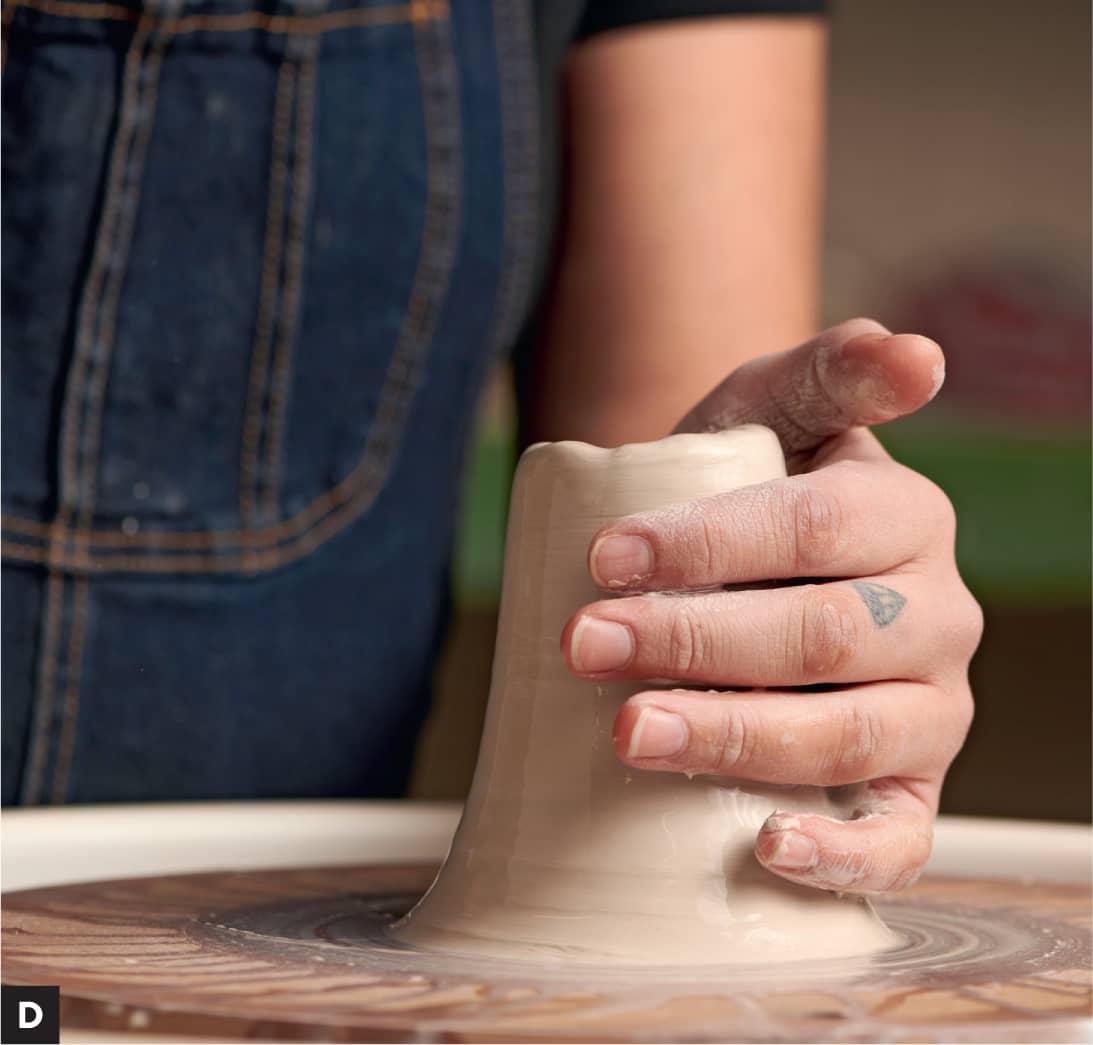
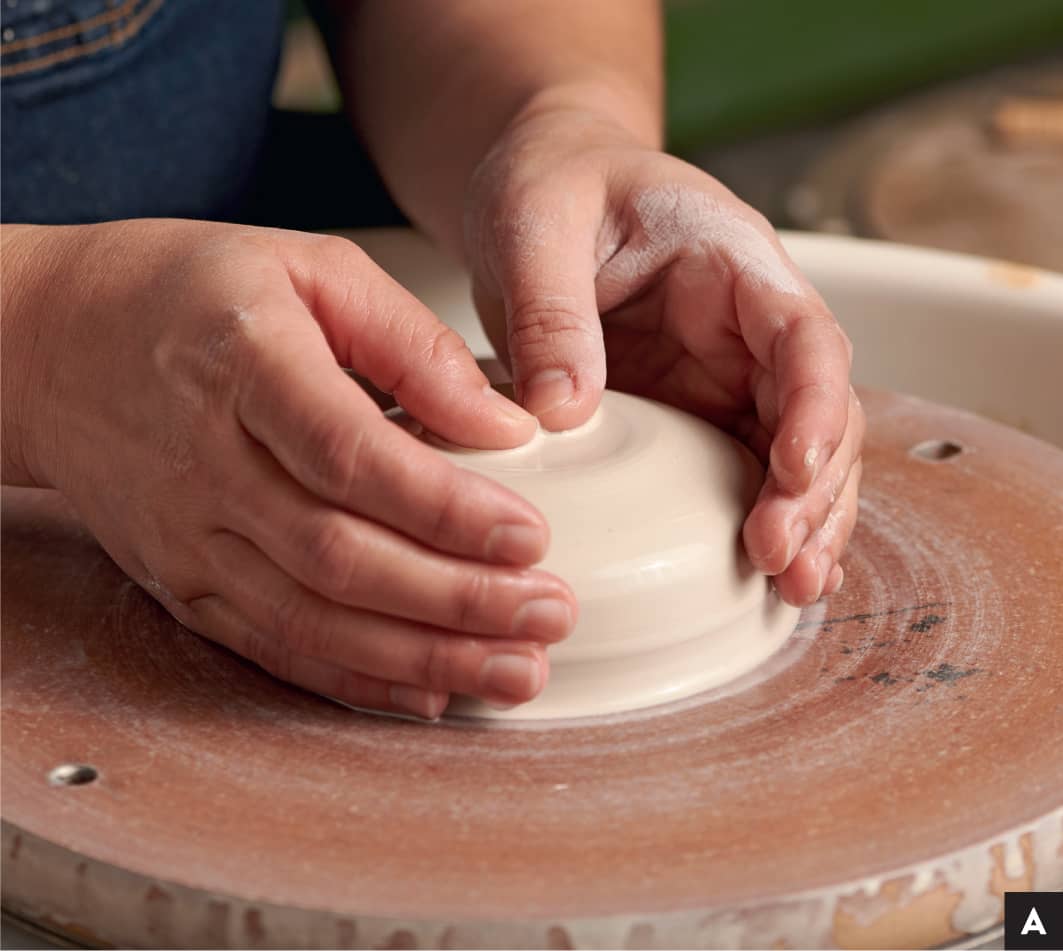
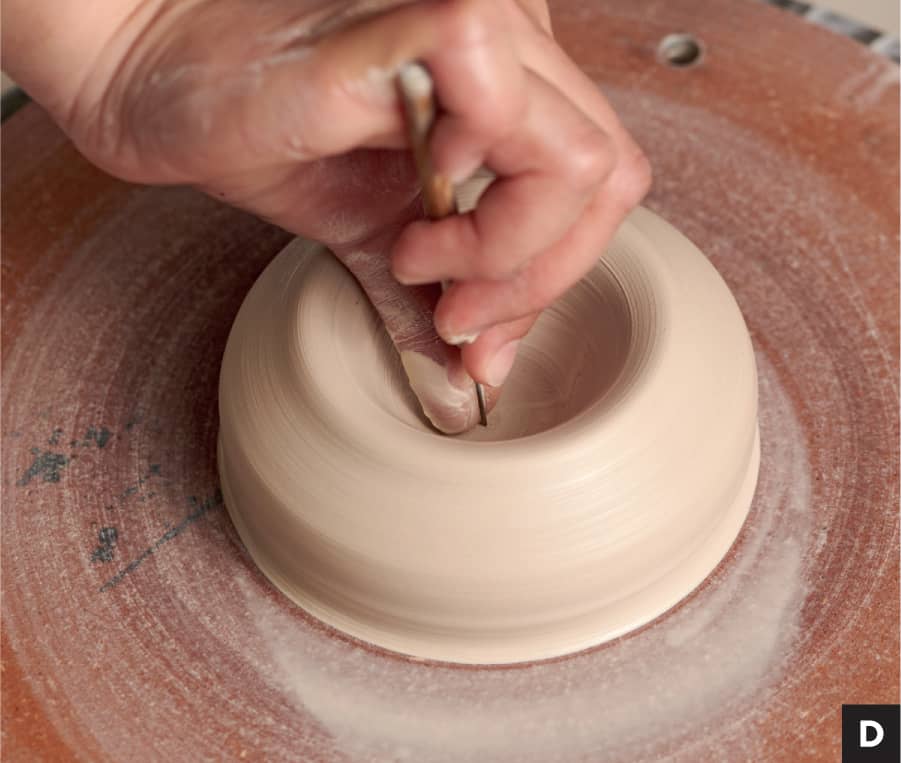
Before throwing the clay on the wheel, I recommended giving the wheel a test-drive. Turn the wheel on and put the pedal to the metal! Now slow it all the way down by easing up on the pedal. Getting comfortable controlling the wheel speed and transitioning speeds gracefully will make all the difference as you get going. STEP 1 Throw your ball of clay as close to the center of the wheel as possible. If it’s slightly off, there’s no shame in pushing the clay closer to center. [A] STEP 2 With your wheel spinning as slowly as possible, slap or pat the clay evenly with both hands, using your palms in a downward, inward motion. [B] If you forget this step, your clay may fly off the wheel mid-centering. STEP 3 Coning up: Using your sponge, add water to the clay and begin spinning the wheel at a medium speed. Come in with both hands, one on each side of the clay, and let your palms connect to the clay. Place your left palm at 9 o’clock and your right palm at 3 o’clock. As the wheel is spinning and as if your hands were magnets reaching for each other, push inward while raising your hands up. What you are looking for is a nice, gradual cone shape. [C] TIP Use the right amount of force and aim to apply equal force with both hands. If one hand is working harder than the other, you will end up with a spiralized shape rather than a cone. If you push too hard with even pressure, you might chop the clay in half. If you don’t push hard enough, nothing will happen. The key to mastering “coning up” (and really all wheel throwing techniques) is practice. Understanding when wheel speed is in harmony with movement speed takes time. STEP 4 Coning down: Keep spinning the wheel at medium speed and bring your hands up to the top of the cone. Position your left hand as if you were shaking the clay’s hand, with your palm between 8 o’clock and 9 o’clock. Your right hand goes on top of the clay using the thicker part of your palm toward the pinky. [D] Push down with your right hand and push toward the center with your left hand. [E] TIP My aha moment in mastering centering came from this tip: If you’re right-handed, focus on keeping your left hand steady. You can center almost entirely with one hand if you put your mind to it. Don’t let the clay boss you around. Also helpful: Keep your elbows close to your waist. This will help you create a full body movement and prevent strain on your arms. STEP 5 Repeat steps 3 and 4 until you end up with a centered mound of clay. It is centered when the clay flows evenly and smoothly through your hands. If you were to cut the mound in half, both sides should be perfectly equal. [F] Now that you have a centered mound of clay, it is time to form the inside of your future pot. The movement of these next steps often depends on the form you are making. For instance, when throwing a bowl, you will most likely want a rounded inside. I will expand more on this later in chapter 2. For the sake of mastering the basics, a cylinder is a great starting point and the fastest gateway to throwing a mug. STEP 1 While the wheel is spinning, cup both hands evenly around the clay. Make sure the centered mound of clay is moist so that your hands are smoothly gliding and not sticking at all. Bring both thumbs together so they are parallel. When teaching kids, I refer to this as the butterfly method, although it works perfectly as a visual for adults as well. [A] Find the center with your thumbs and start pressing down with even pressure. As soon as you feel your clay getting dry or at any sign of resistance, lift your hands gently off the clay and add more water. STEP 2, OPTION A With the wheel spinning, continue using your parallel thumbs to push down toward the center until you are about ½" (1.27 cm) away from the wheel head. [B] STEP 2, OPTION B Over the years, I have found that I have the most luck when positioning my hands a little differently from most potters. So, if the parallel thumb method doesn’t seem to work for you, try this: using both hands as one, start this step with your right hand overtop your left hand, holding the sponge in between with your right hand thumb and pointer/middle fingers. With the wheel spinning, begin pushing your fingers down with even pressure toward the center. Stop when you have about ½" (1.27 cm) of clay between your fingers and the wheel. [C] TIP Sometimes visualizing depth can be difficult. To see how much space you have left, I recommend using your needle tool as a guide. With the wheel at a standstill, sink your needle tool into the center of the clay and slide your thumb to touch the clay. [D] Gently pull the needle tool out, keeping your thumb on the tool. If the depth looks good, use light pressure with the wheel spinning to smooth over the needle tool mark. If you need to go down further by repeating step 2, the needle tool mark will disappear automatically. [E] STEP 3 Once you are happy with the depth you have achieved, you are ready to open the walls. For this next step, I use a moistened sponge rather than drenching the clay. With the wheel spinning, come back to the center of the base with your left hand overtop your right hand and your sponge between your right hand and the clay. Using light pressure on the base of the clay, start pulling your hands toward the right side of your body. [F] TIP Make sure your clay stays moist and that your hands are not moving faster than the wheel is spinning. It is common to get excited and move your hands very fast, but this could result in pushing your pot off center! STEP 4 With the wheel spinning and sponge moistened, compress the walls of your clay with your sponge. For this step, I pinch the walls of the clay with my left hand like a lobster claw while my right hand is compressing. [G] The movement of this step is to ensure that your pot stays centered and that you are not stressing the rim of your clay. Now it is time for the very exciting make or break moment. Don’t be nervous; when you get this part right, it is very enjoyable. I will teach you how to successfully raise the walls of your cylinder. STEP 1 Moisten your clay so it is slick but not soaking wet. I prefer to do this while the wheel is spinning so that the moisture will be even. Working on the right side of the pot, place your left hand on the inside and your right hand on the outside. With the wheel spinning at medium speed, gently push your fingers toward each other as if they were magnets, then start pulling upward using even pressure. [A] [B] TIP This is truly about even pressure, just like coning up. If you press too hard, like the strongest magnet connection, you might slice a donut of clay right off your pot. If you do not press hard enough, you might have a pot that keeps looking the same no matter how much you work on it. STEP 2 Once you reach the top of the pot and with the wheel spinning gently, compress the rim. Do this step after every pull, as it helps keep your pot centered and the rim a consistent thickness. You need to be gentle with your compression though. If you press too hard, you might erase the progress you made. STEP 3 Repeat the pulling movement in step 1, only this time focus on the movement of your hands gliding straight upward. This might feel as if you are pulling up toward the center of the wheel. [C] The centrifugal force of the wheel spinning will make it feel natural for your hands to move outward when pulling the walls up. This is why many people teach starting with a bowl, but it’s why I like starting with a cylinder. Being mindful of movement from the beginning gives you a pathway to success. [D] STEP 4 This is the time to check in: Are your walls even? Are they still pretty thick? Are they just right? This takes time and experience to understand. A good tip to go by is if your walls are about ¼" (0.635 cm) thick, that is a good time to stop. If they are still too thick, continue the pulling motion one or two more times until you reach your desired thickness. [E] STEP 5 You might have noticed excess clay at the base of your pot. This is very common. To remove excess clay, use a wooden knife tool. While the wheel is spinning, hold the tool like a pencil and gradually slice through the clay at an angle until you reach the wheel head. [F] Next, hold the knife tool flush against the wheel, and while it is spinning, come underneath the clay until you reach your first mark. [G] Then remove the ring of clay. [H] This step takes practice, so if you don’t get it on your first attempt, keep trying.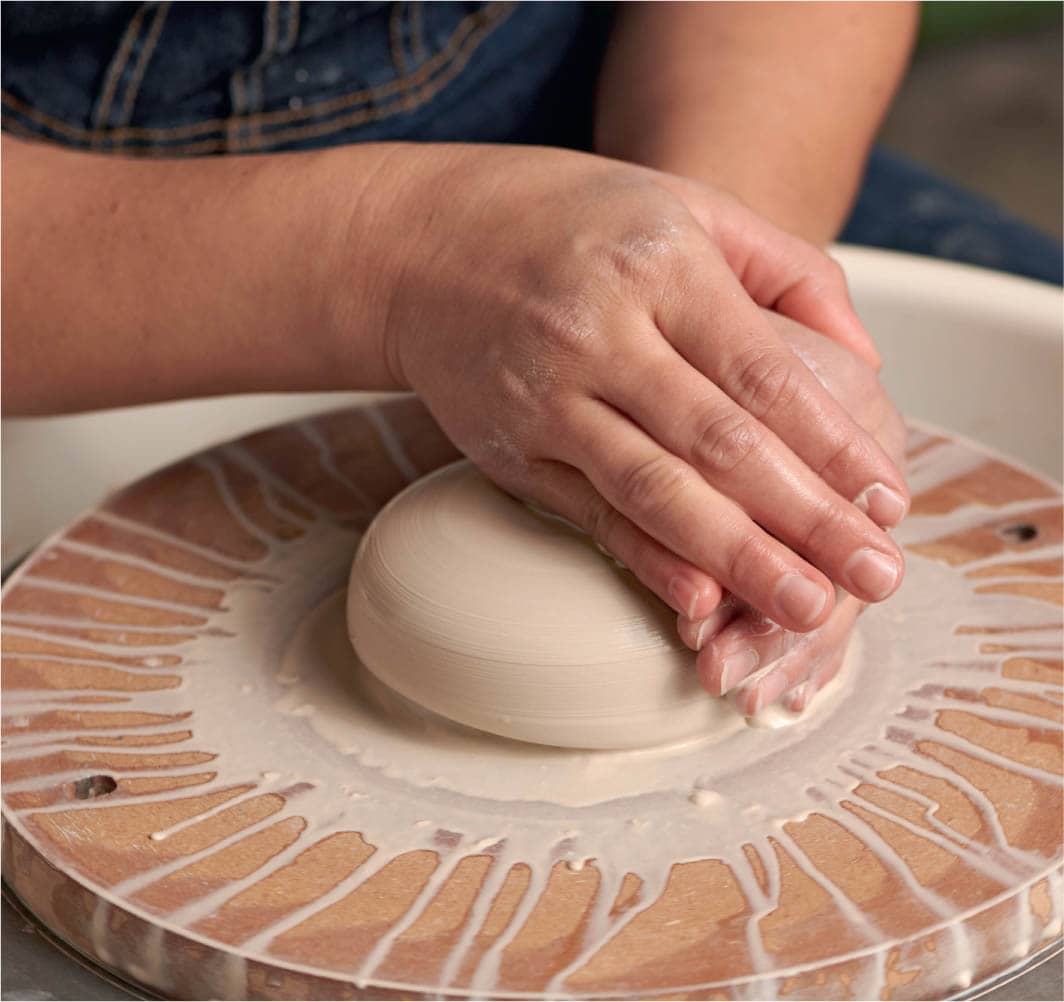
Centering


Opening the Clay


Raising the Walls


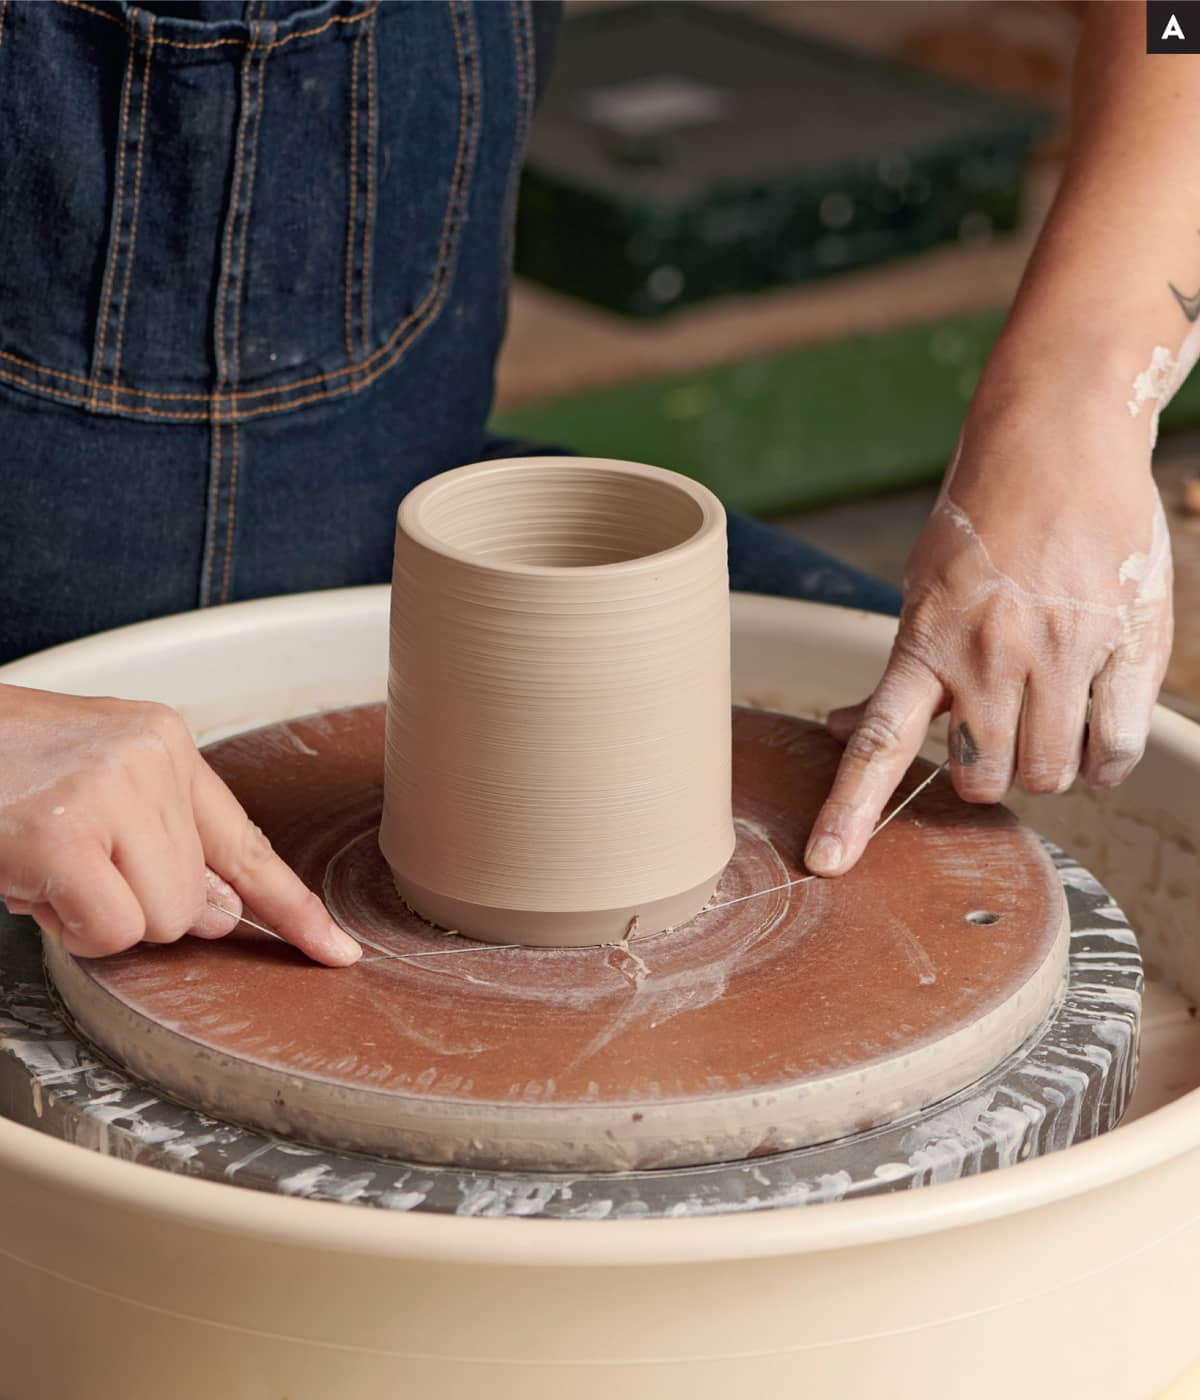
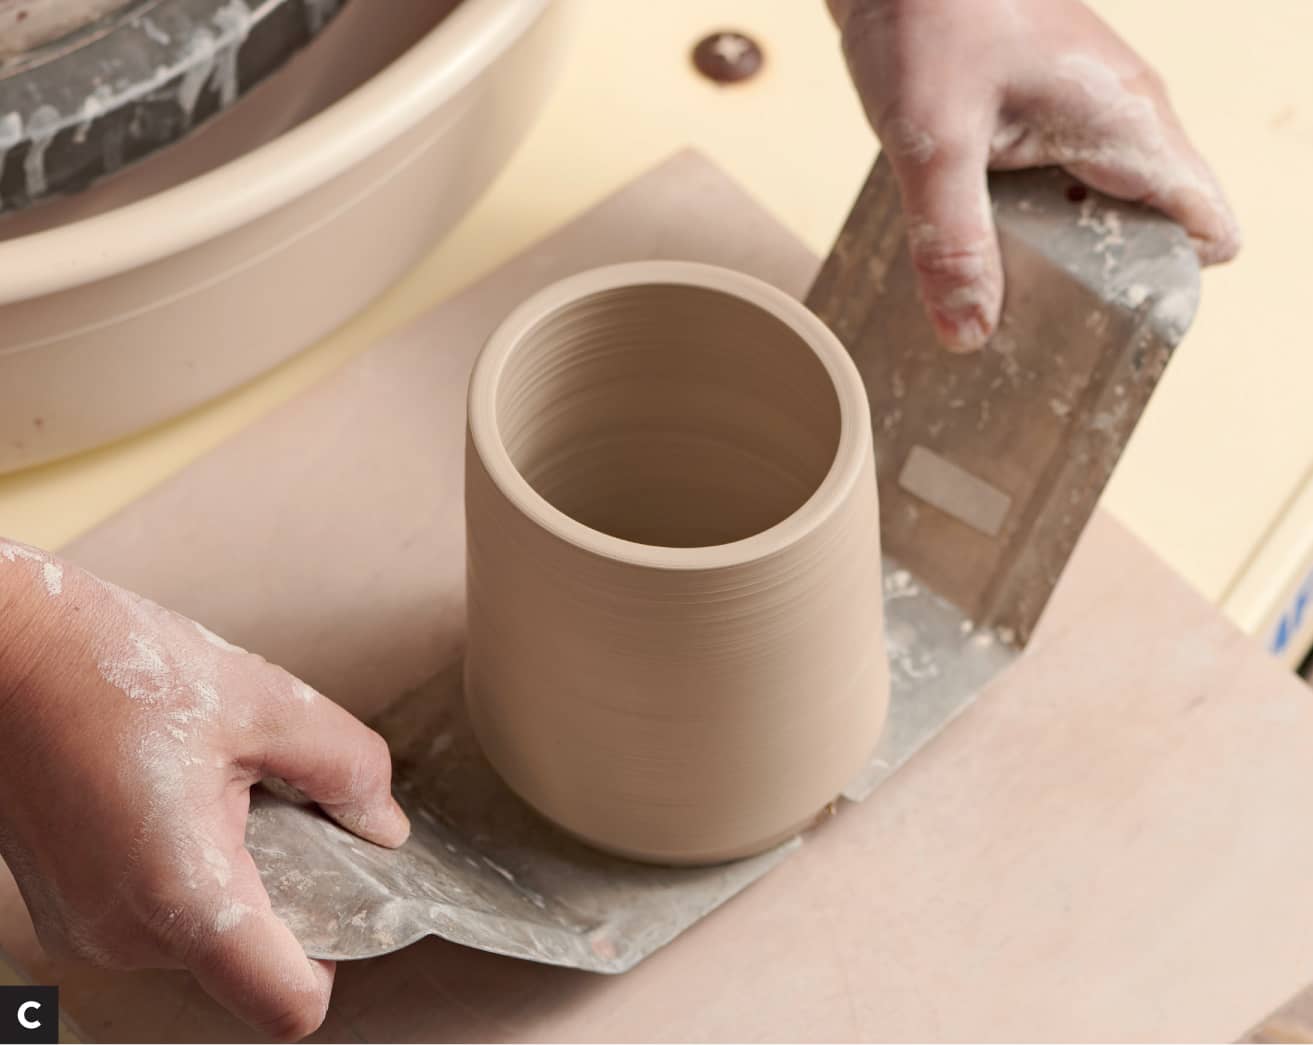
STEP 1 Grab your wire tool and carefully place it behind your pot using your thumbs to hold each side down. [A] STEP 2 Slide your wire tool completely under your pot until you reach the other side, the front. Be careful not to lift your hands up until you have cleared the bottom of the pot. TIP If this is a practice pot and you want to see how even your walls are, stop halfway and pull the wire tool up through the middle of your pot. STEP3 Add water behind the pot on the wheel head. Then slide your wire tool underneath again. Be mindful not to lift up too soon; those thumbs really help! The added moisture and second swipe will make it easier to take your pot off the wheel. STEP 4 Grab your pot lifters, one in each hand, and like a spatula, scoop them underneath your pot. [B] With both hands, use even force and lift your pot off the wheel. Don’t be afraid of this movement. If you gently rock the pot lifters back and forth, you should feel the pot wiggle a little before you lift up. Remember, this is about gently removing the pot off the wheel. Too much force could cause the pot to go flying across the room. [C] TIP Have your ware board or other surface ready and in an easy to access location before you lift your pot off the wheel. In almost every class, there will be a student taking a pot off the wheel with their pot lifters yelling “Help!” because they forgot they have to put that pot somewhere! It’s funny, but it can definitely lead to disappointment if you drop your pot. STEP 5 Place your pot and pot lifters on your ware board. Gently press down and outward with your pot lifters and voilà. Your pot is ready for the drying process. For tips on successfully drying pots, skip ahead to here.
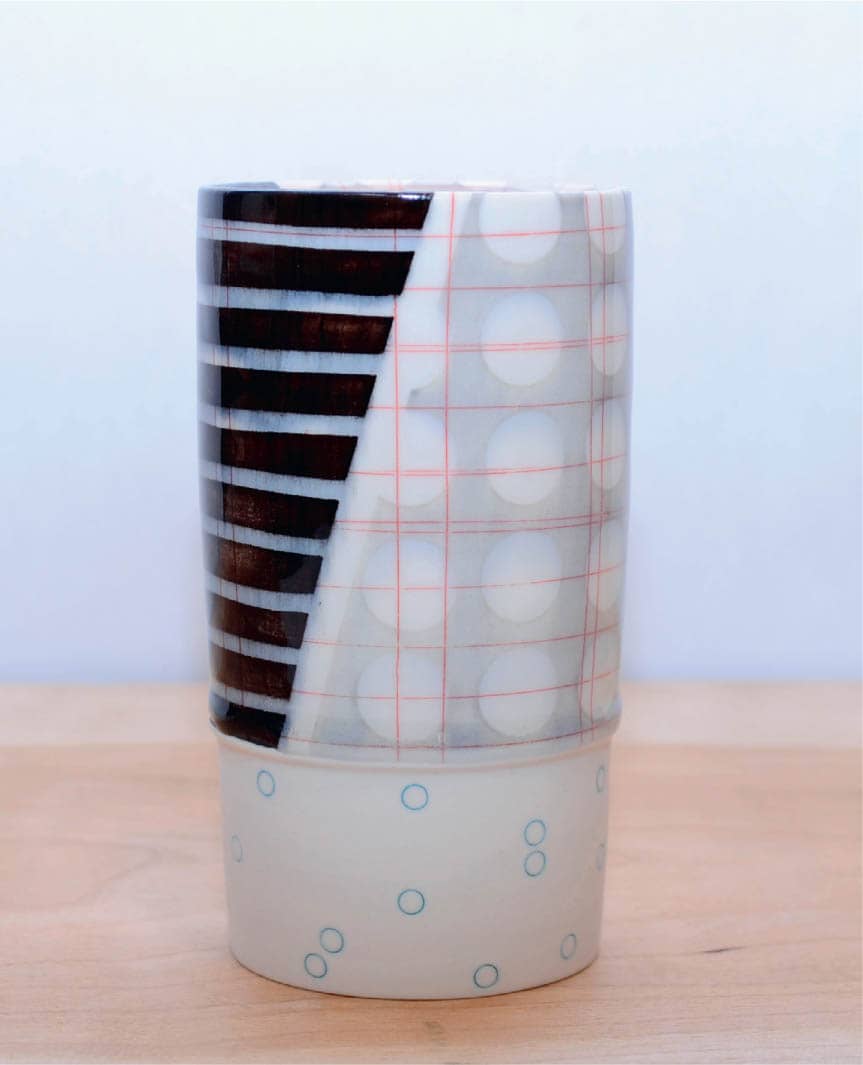
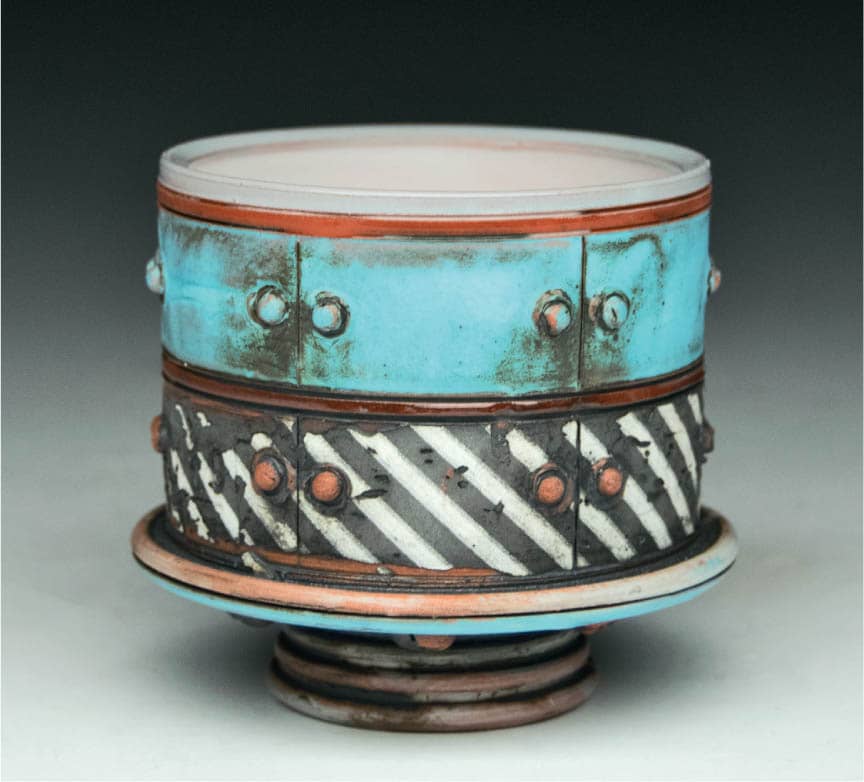
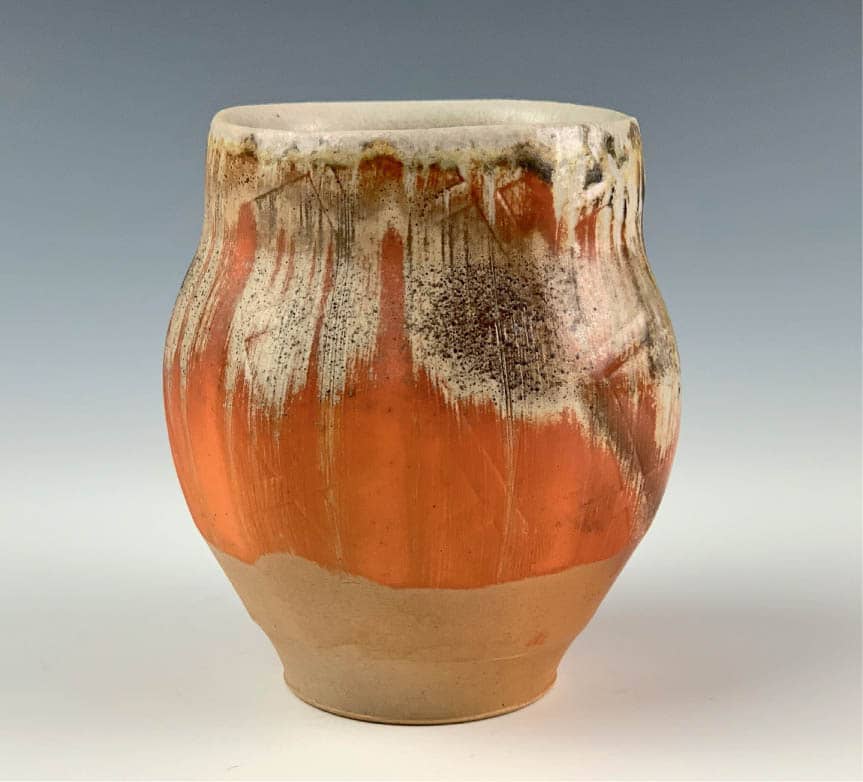
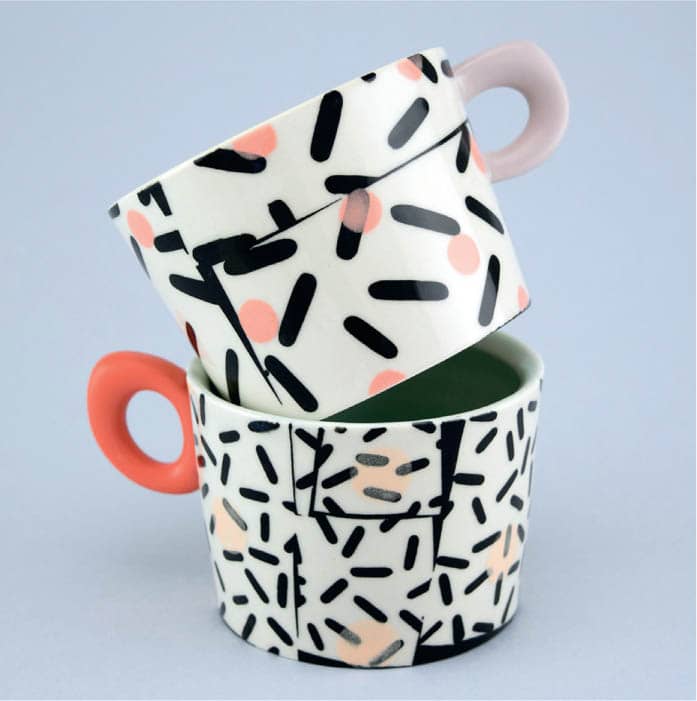
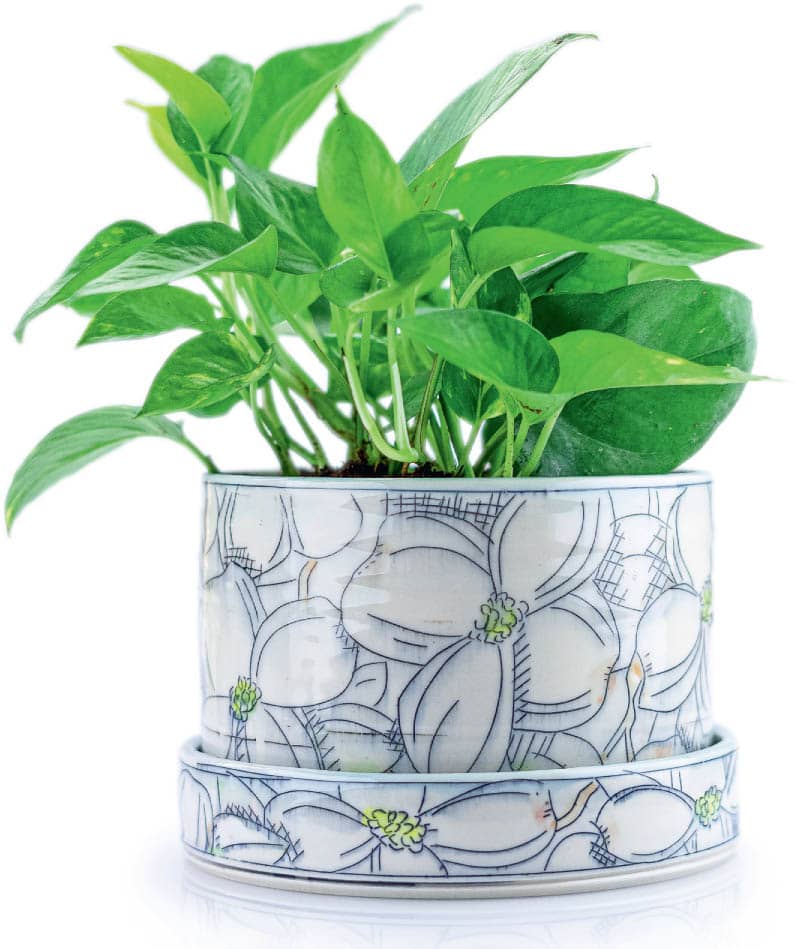
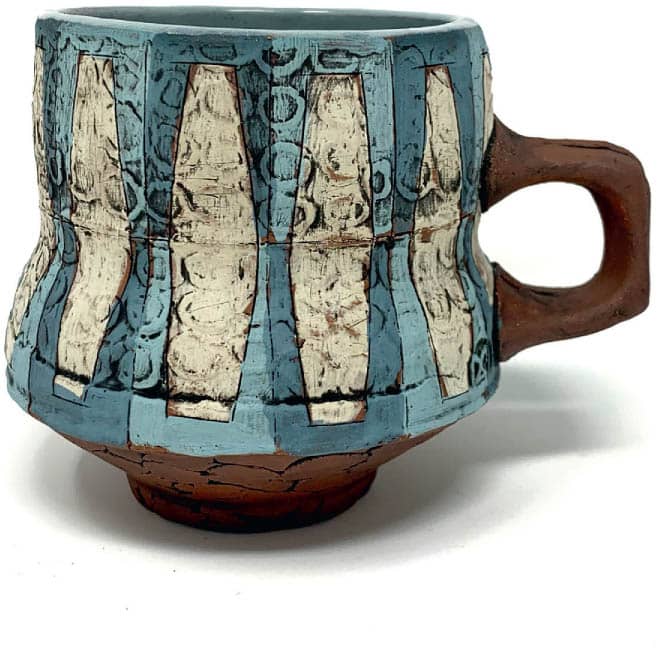
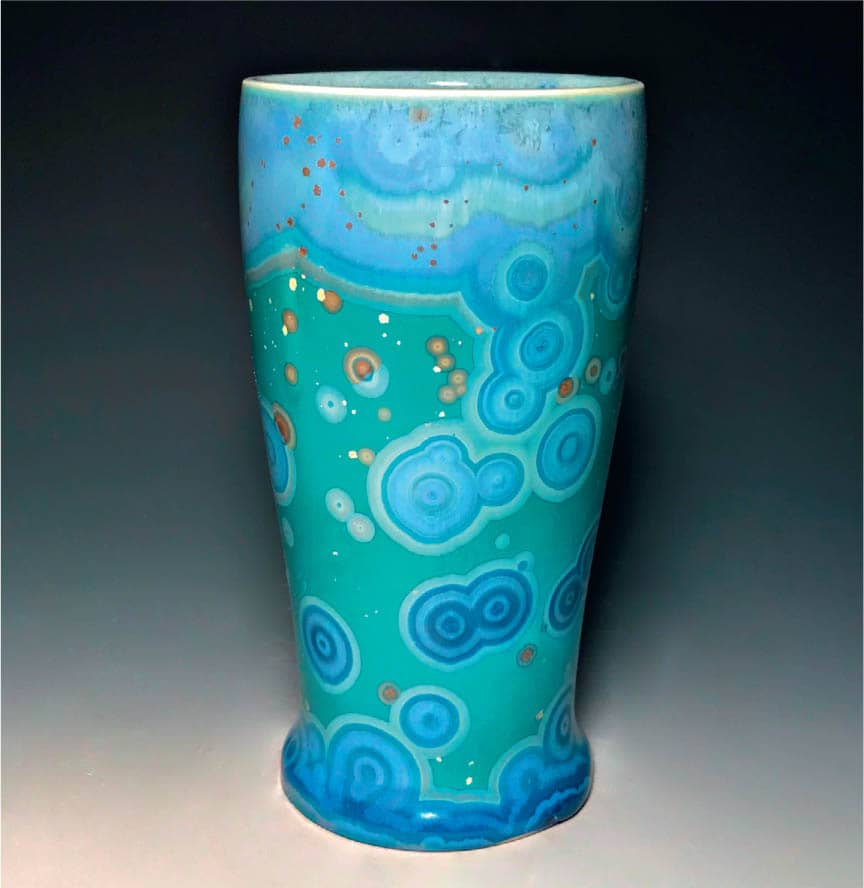
Heather Spontak, Tumbler SetWheel-thrown black clay with colored terra sigillata, slip, sgraffito, cone 4 oxidation Heather Spontak, Oval VasesWheel-thrown and altered red clay with colored terra sigillata, slip, stencils, sgraffito, cone 4 oxidation Gillan Doty, Cup, Wood-Fired Sara Ballek, Bubbly CupWheel-thrown and pinched earthen red clay, white slip, Amaco Velvet underglaze, sgraffito, cone 4 Ben Carter, Garden VaseThrown and decorated with slip, underglaze, sgraffito, and glaze before being fired to cone 4 in an electric kiln Rachel Donner, Tumbler Mike Cinelli, Cup Simon Levin, Yunomi Wood-fired Adrienne Eliades, MugsPorcelain, wheel-thrown with pigmented slip-cast handles, underglaze and glaze decoration fired to cone 7 oxidation Laurie Caffery, Dogwood Planter Porcelain, underglaze and mishima, cone 6 oxidation Jen Allen, dishes in sinkPorcelain, wheel-thrown Throwing on the wheel may be harder than it looks, but, with a little perseverance, you too can fill up a sink with your own dishes! Mark Arnold, MugRed clay, colored terra sigillata, underglaze and glaze, press-molded and wheel-thrown Eric Herspink, Stein Liana Agnew, Pitcher Luke Doyle, BottleSoda-fired in a wood kiln to cone 12Instructions
GALLERY