
As you have no doubt figured out, clay will eventually dry. How fast or how slow depends on how you manage it after you make your pot. Knowing what to do and when can be tricky at first. In fact, the most common question I receive as a teacher aside from “Is this centered?” is “Are my pots ready to be trimmed?” The good news is that the tools you need to ensure even drying are accessible and inexpensive. Dry-cleaning bags and trash bags can be used to cover your works in progress. Your studio may also have wet boxes or dry boxes for communal use, though these are more of a perk than a necessity. DRY: This refers to the powder stage of clay before water is added. You may never see your clay in this form unless you plan to mix your own clay body. SLIP: This refers to liquid clay, which can be used for slip trailing decoration and also for slip painting. It can be used like glue for attaching two pieces of clay or in the process of mold making called slip casting. PLASTIC OR WET: Clay you can easily mold. This includes clay straight from the bag and freshly thrown pots. Clay is most workable for hand building and throwing at this stage. SOFT: In between plastic and leather. This clay is slightly harder than clay straight from the bag and is no longer wet or easily malleable. However, it is soft enough to smudge. It is perfect for slicing and dicing, alterations, adding handles, and darting. LEATHER HARD: This clay is stiff, no longer tacky to the touch, and unable to change shape. It is the consistency you want for trimming, carving, attaching handles, and decorating with slip or underglaze. BONE DRY OR GREENWARE: This refers to clay that is completely dry. All the water has evaporated from the pot. If the pot is cool to the touch, that would indicate there is still moisture inside and it is not yet bone dry. BISQUE: Clay that has been fired once is considered bisque or bisqueware. There is no chemical water left in the clay at this point, making it porous and better able to accept glaze. GLAZE WARE: Finished pottery. This refers to clay that has been glaze fired and vitrified to maturing temperature. Generally, only glaze ware is watertight.THE STAGES OF CLAY
The Key Stages of Clay
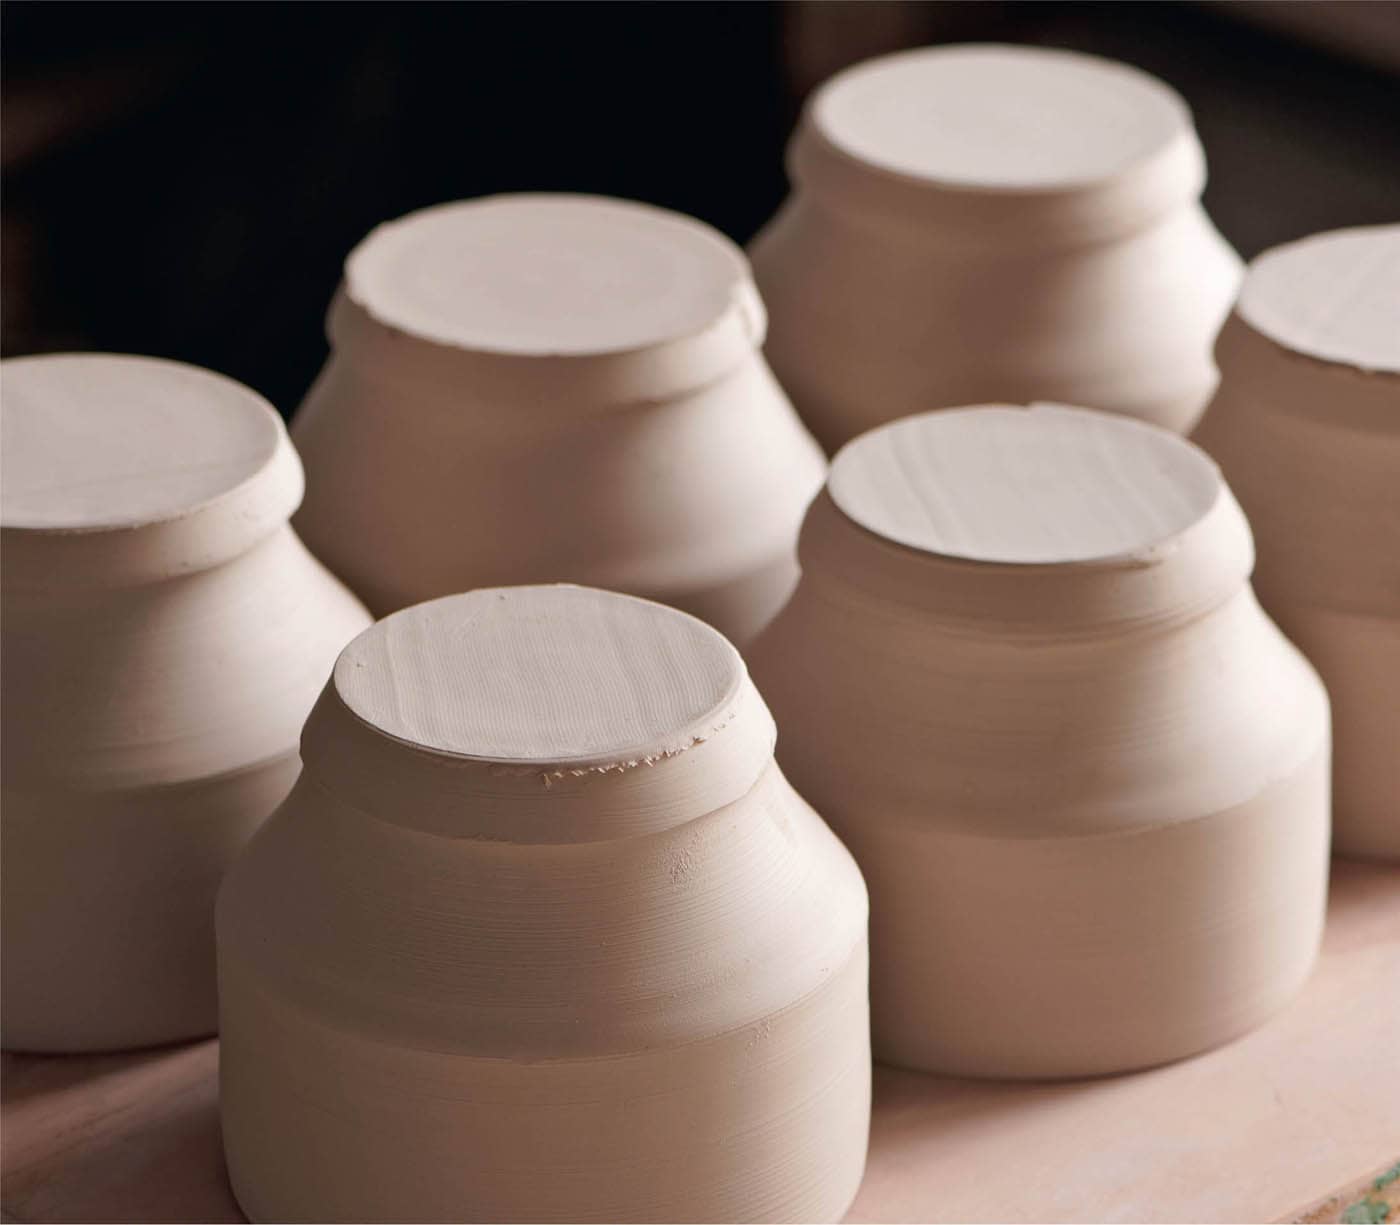
Drying your pottery properly is crucial for success in trimming. After throwing, it is best to leave your pots uncovered until the tops begin to stiffen up a bit. This means they should not be tacky to the touch. At this stage, cover your pots loosely with plastic, allowing the bottoms to catch up. If you cover your pots immediately after throwing, the plastic may stick to the wet clay and deform the shape. If you absolutely need to cover your pots immediately, be creative. Place taller found objects in between your pots so the plastic rests on them and not your fresh rims. When the bottom of your pot is soft and the rim is stiff enough to maintain its shape, carefully flip your pot upside down. This will allow the bottom to catch up to the rim for an even, leather-hard pot. It may take a few days of uncovering and re-covering depending on the conditions specific to your studio. Humid climates and dry climates can affect the drying differently. Once your pot is leather hard, you are ready for trimming. This stage may be difficult to detect, so I suggest testing the bottom of your pot by sinking your nail in it. If you can see your fingerprint clearly, along with your nail indentation, the pot might need to dry a little more. While most potters I know trim at this stage, it is a personal preference. Some people prefer to work a tad wetter, and that is okay too.DRYING POTS

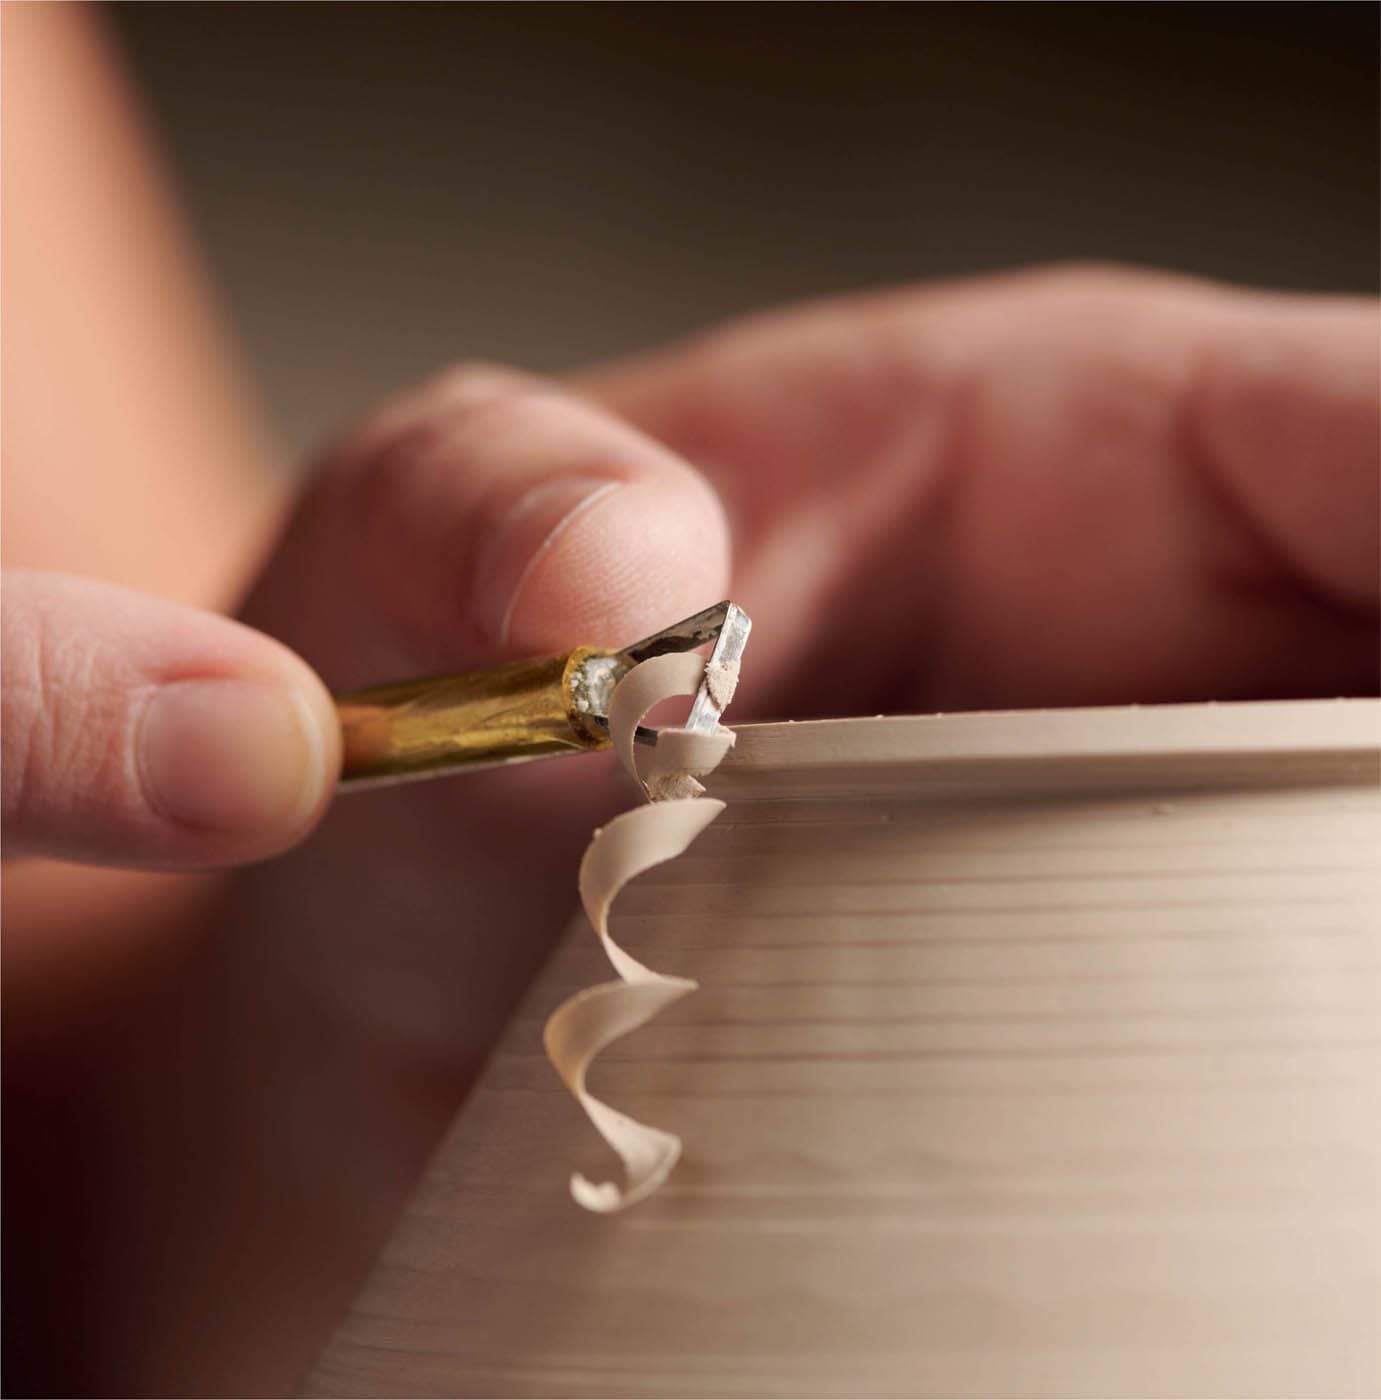
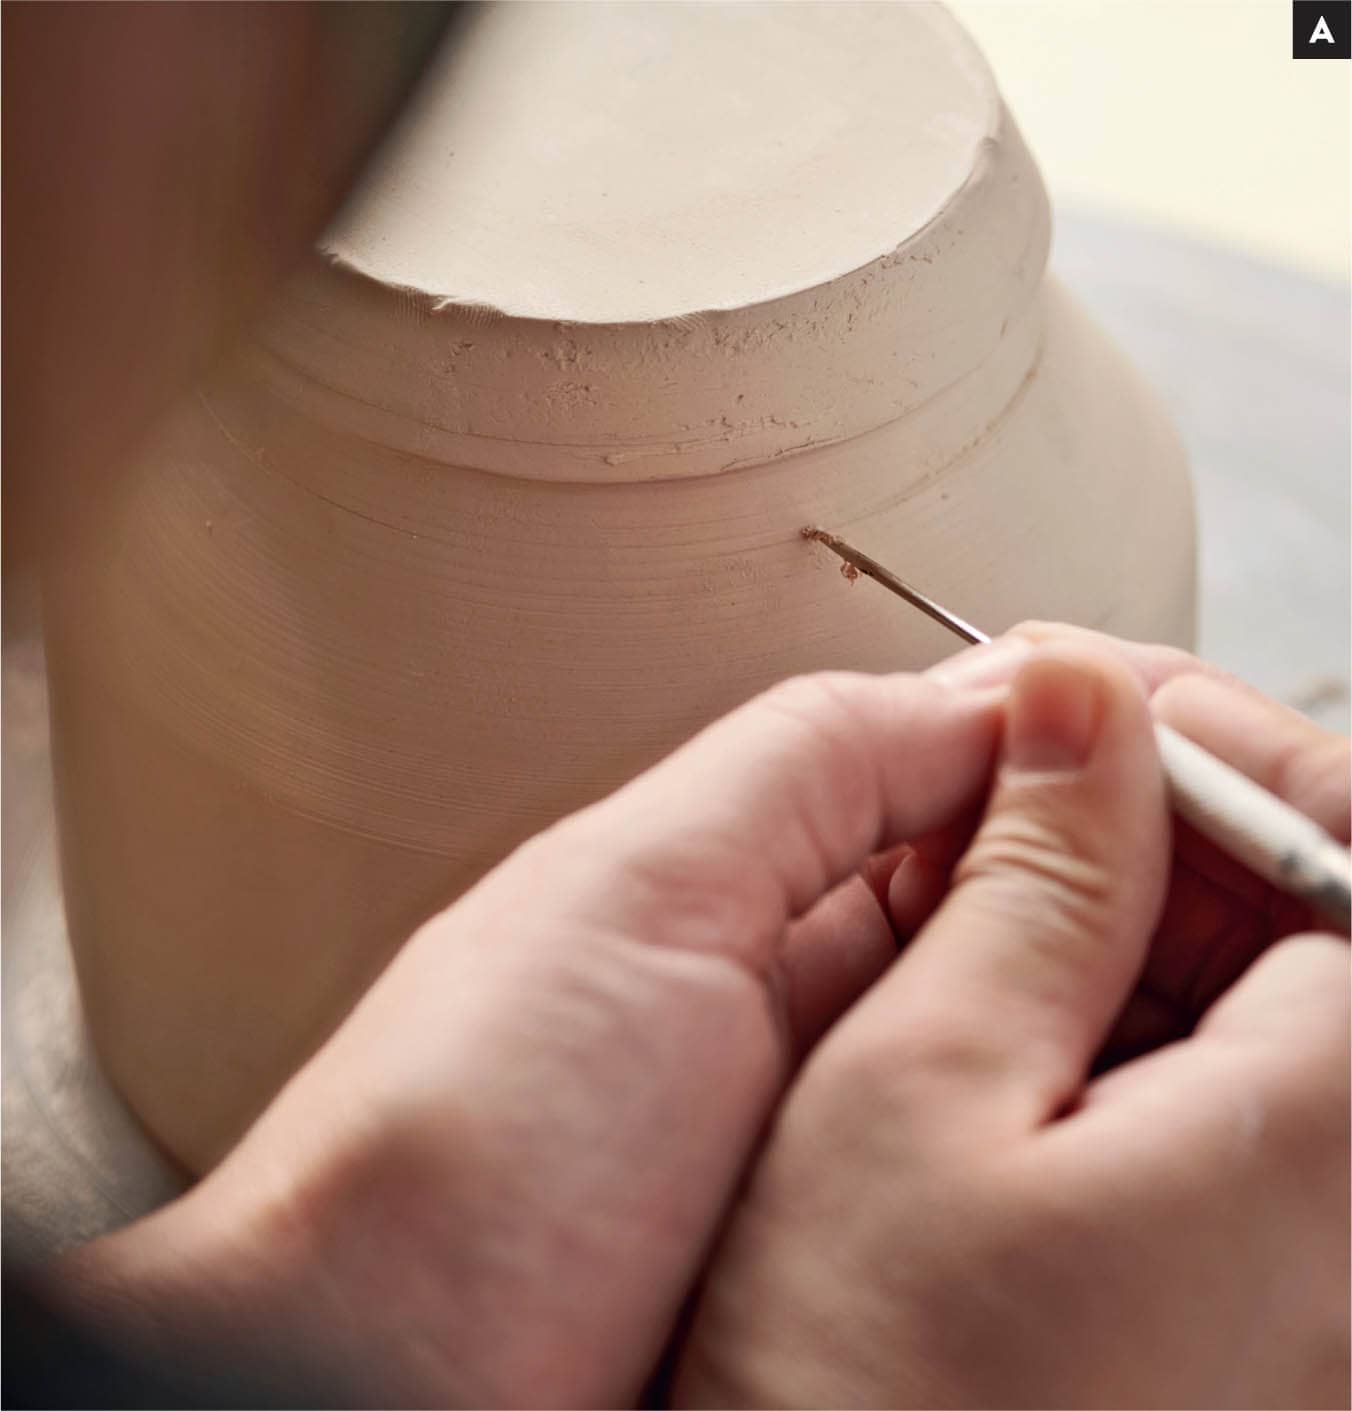
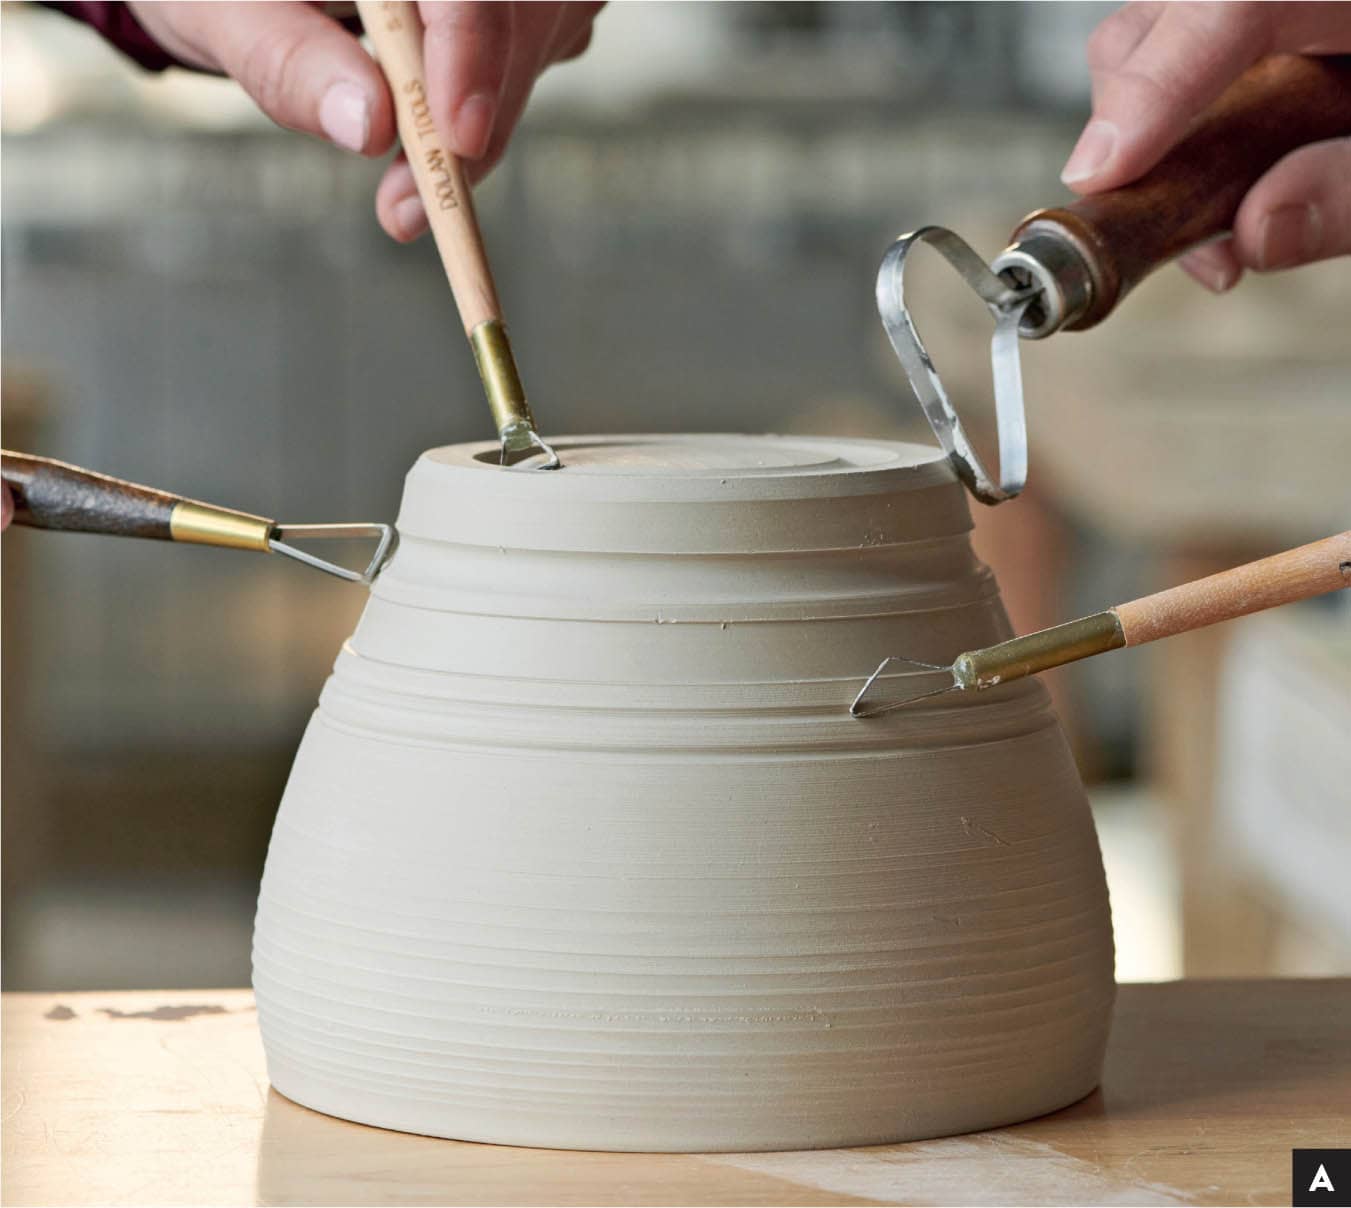
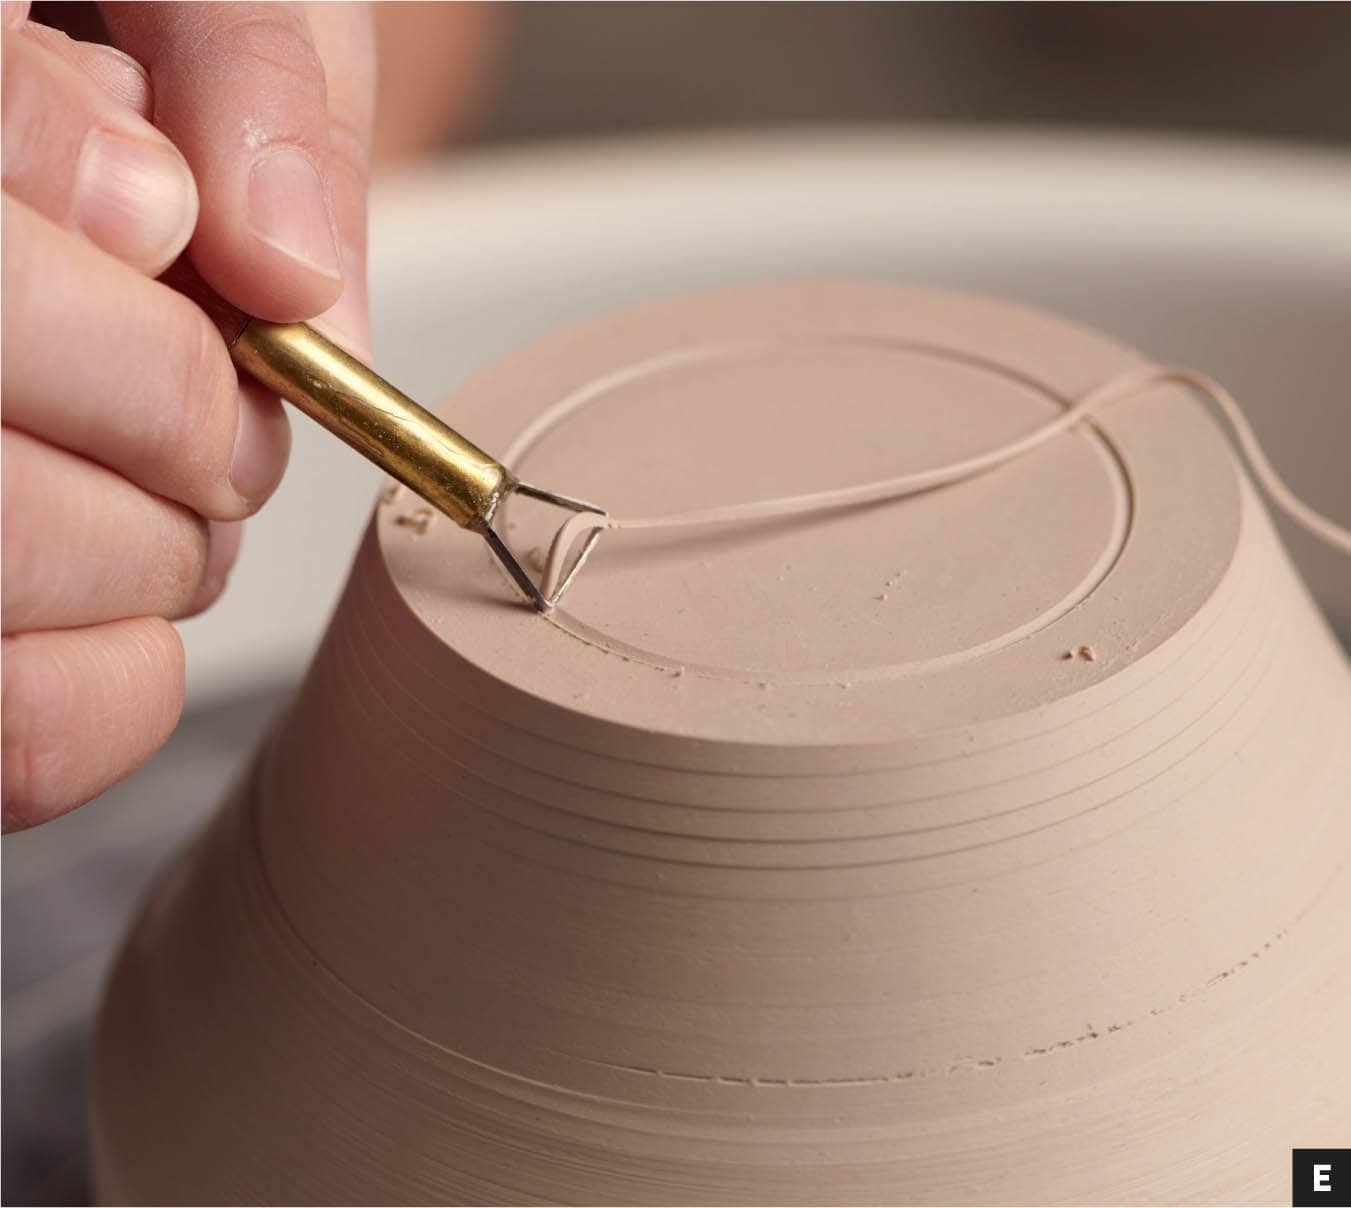
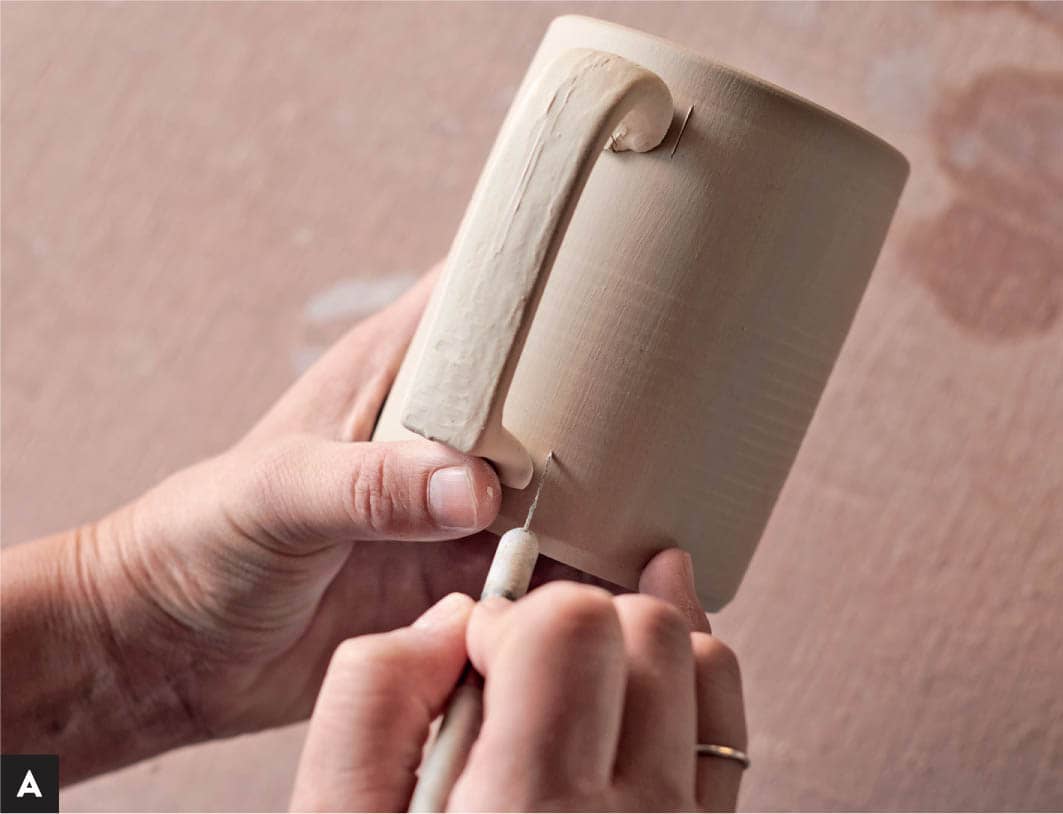
STEP 1 Flip your pot upside down and use the lines on the wheel to position your pot in the center. Lightly press your foot on the pedal. While the wheel is spinning slowly, carefully move inward with your needle tool in hand. Slowly move your needle tool toward the foot of the pot. As your tool starts to make an impression, keep your hand steady and stationary. If your pot is off center, the tool will make a line on only one side of the pot. [A] TIP What you want to avoid is letting your needle tool move the pot. This will give you inaccurate centering results. STEP 2 Stop your wheel and find the middle of that line and gently push the pot toward the center of the wheel. Small movements are best. Repeat this step until the needle tool makes a complete line around the pot. Now it is centered. [B] STEP 3 To secure the pot to the wheel, grab fresh clay from the bag and roll it into three balls, also called lugs. Use four lugs for large or wide pots. Place one hand on top of the pot and, using your other hand, press the lug at the rim of the pot where it meets the wheel. If you forget to place your hand on top of the pot while securing the pot to the wheel, you might accidentally move it off center. If this happens, go back to step 1. No big deal. [C] STEP 4 Repeat evenly for the other lugs. Finding the right amount of pressure is crucial. If you press too hard, you risk altering the rim or moving the pot out of center. Once your lugs are in place, give your pot a little wiggle to secure it. If you forget this step, your pot might fly off the wheel. TIP The Giffin Grip is one of my absolute favorite tools. It centers and holds your pot in place to allow for easy trimming and less waste by omitting lugs. The only tricky part is, it works best on centered, symmetrical pots. It generally cannot work magic on wonky pots but is an amazing tool once you are able to throw a centered pot. [D] With your pot attached to the wheel, start trimming. There are various shapes and sizes of trimming tools, and each one makes a different impression. Before you grab one out of your toolbox, take a moment to see which one speaks to you. [A] STEP 1 Start spinning your wheel at medium speed and move toward the side of your pot with the larger of the trim tools. In this step, you are removing excess clay, bumps, and crumbs. Don’t hesitate with your movement. Hold onto your trim tool tightly and only stop the wheel once you have moved your hand away from the pot. [B] Do the same with the bottom of your pot. TIP Just with throwing pots, you want to start with the wheel spinning and stop spinning the wheel once you have lifted your trim tool off the clay. STEP 2 Now that you have a smooth, workable bottom, it is time to decide where you want your foot to be. Mark this with your nail, needle tool, or trim tool. For the purpose of this demonstration, I will use a bowl, which is the most common of the beginner shapes. STEP 3 Start spinning the wheel at medium speed and begin trimming the outside of the foot until you reach the desired width. Once you have your desired depth and width, use the flat edge of your trim tool to round or angle the top edge of the foot. [C] TIP I like to undercut my feet. It provides a nice landing spot for glaze and is also aesthetically pleasing. If you are interested in trying this, use the flat edge of your triangle tool to cut under the clay. [D] STEP 4 Using the same trim tool and the same wheel speed, begin carving the inside of the foot. I find it is easier to decide first how wide you want the foot to be and make that indentation with the edge of your triangle tool before you start carving out the middle. [E] STEP 5 With the wheel at medium speed, begin trimming the inside of the foot. Start to the right of the center mark and work your way toward the inside edge line. If you are too hasty in your movements, you could trim the foot right off, so be aware of where you are spatially. Continue trimming until you are happy with your results. [F] STEP 6 Optional: Once you have a nicely trimmed foot, some potters come in with a damp sponge to smooth their foot. I typically skip this step and opt to wipe my pots once they are bone dry. I do this because there is still a chance, at the leather-hard stage, that my pot will endure bumps and scrapes from movement on ware boards.Securing a Pot to the Wheel


Let’s Trim


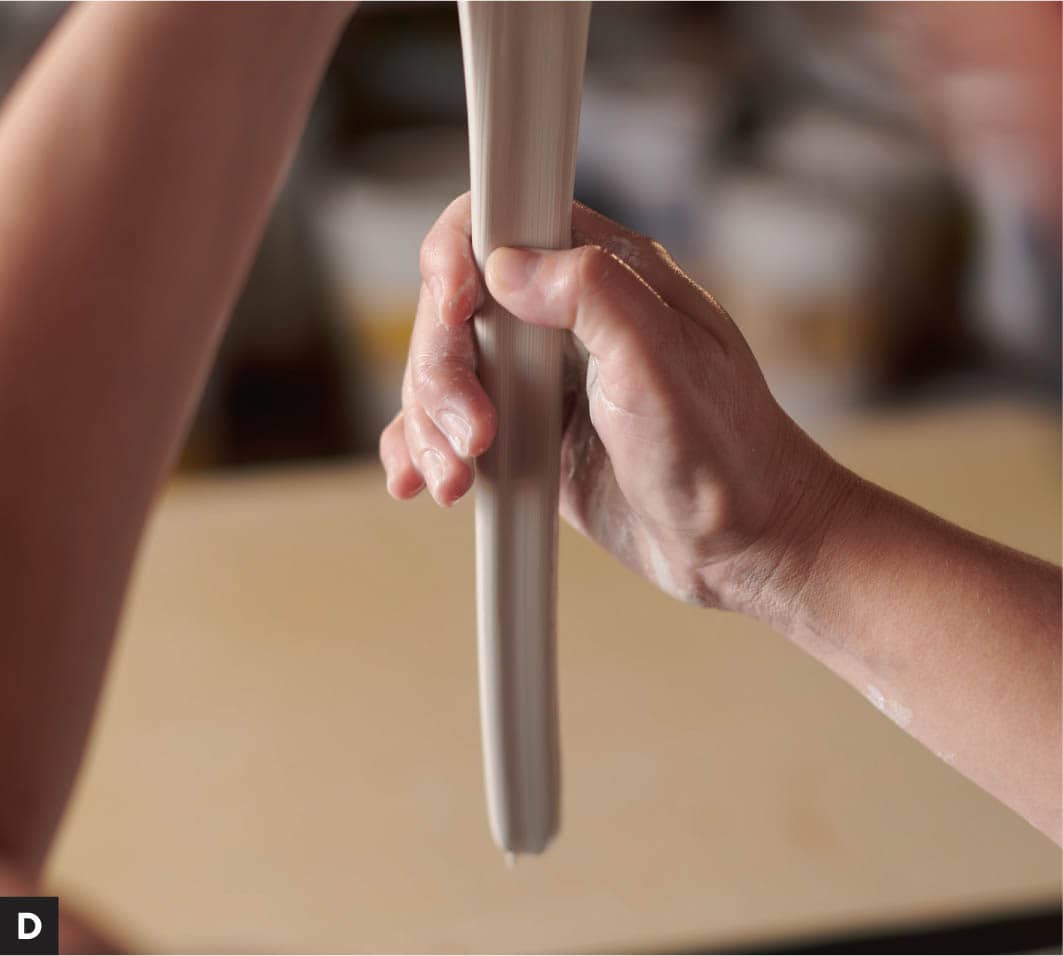
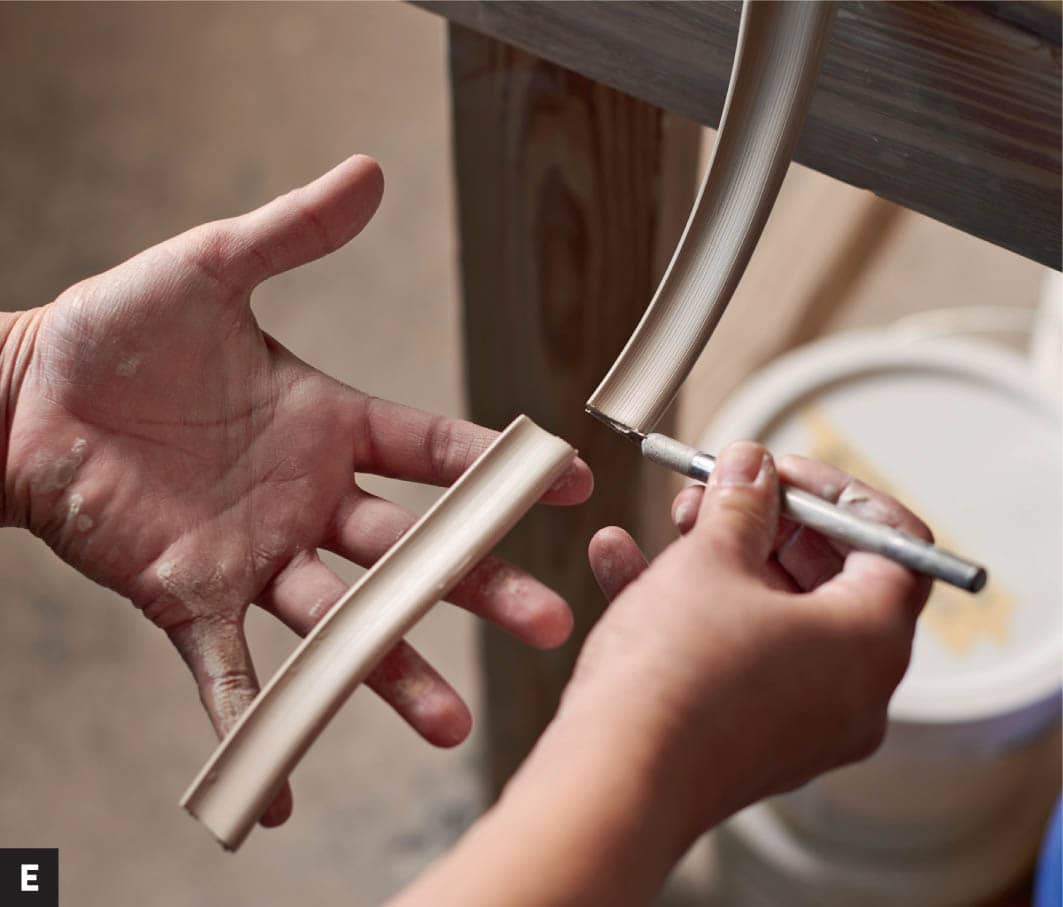
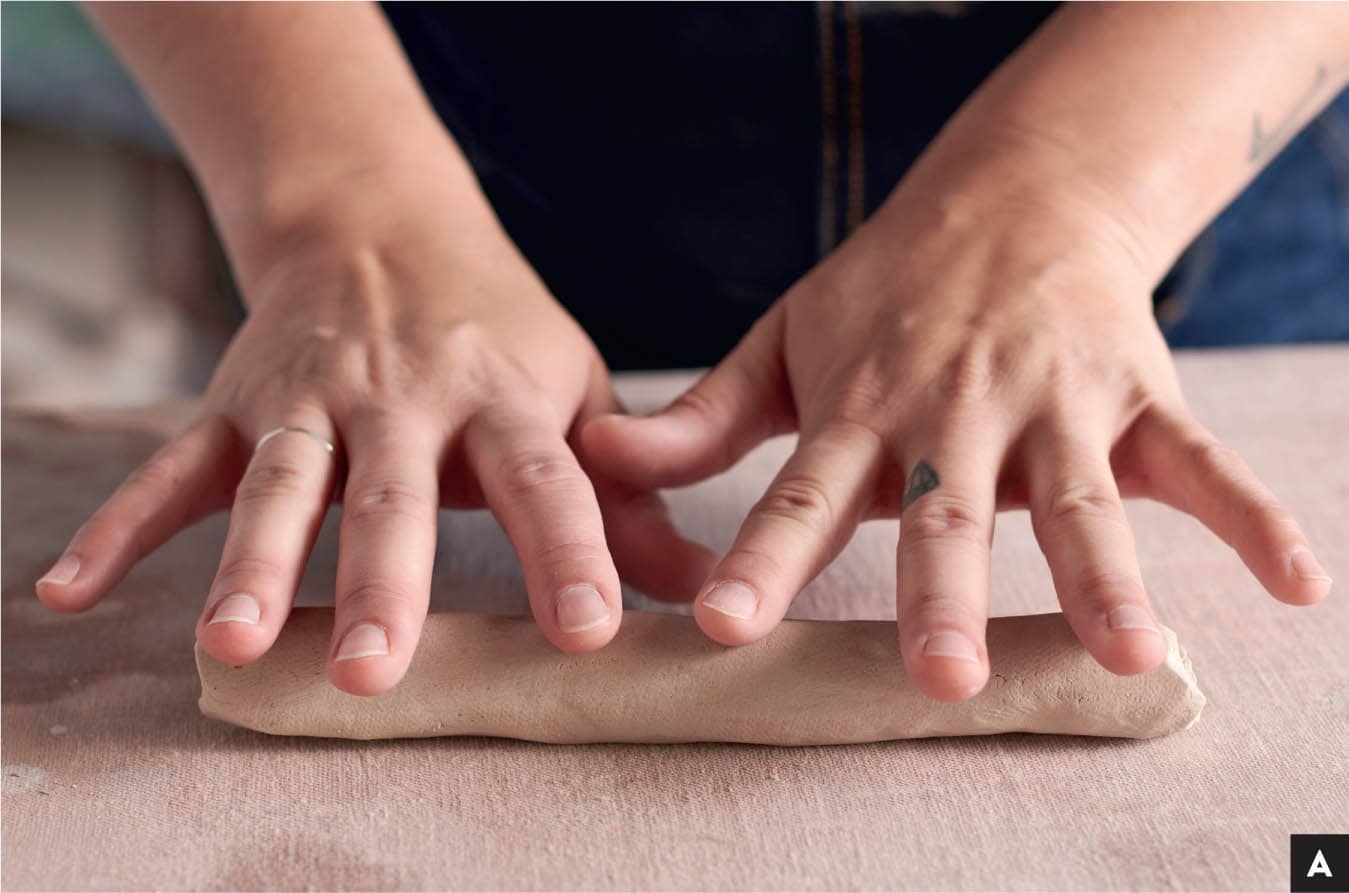
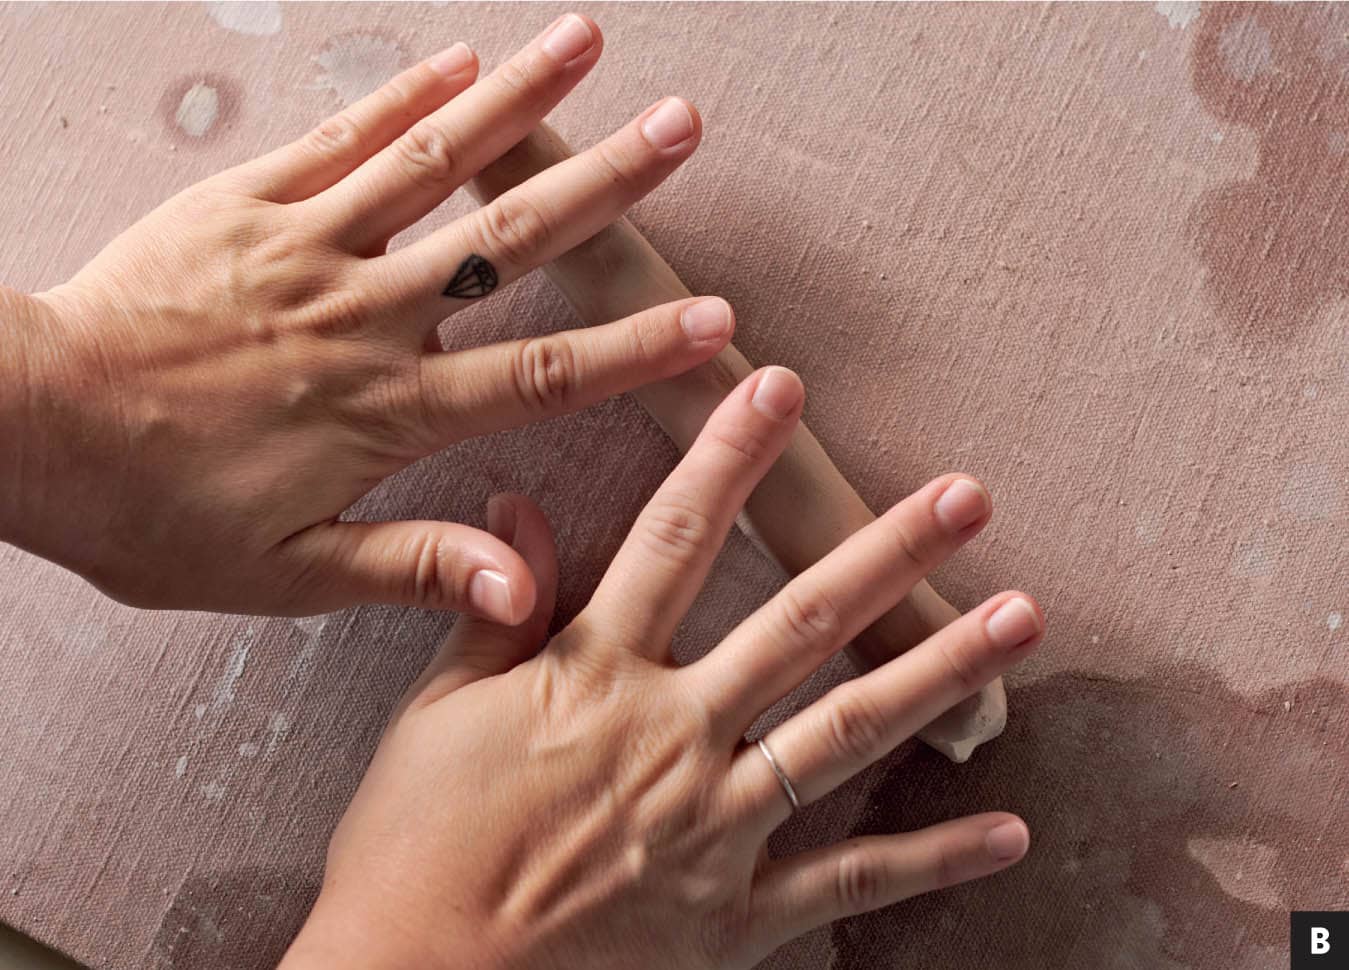
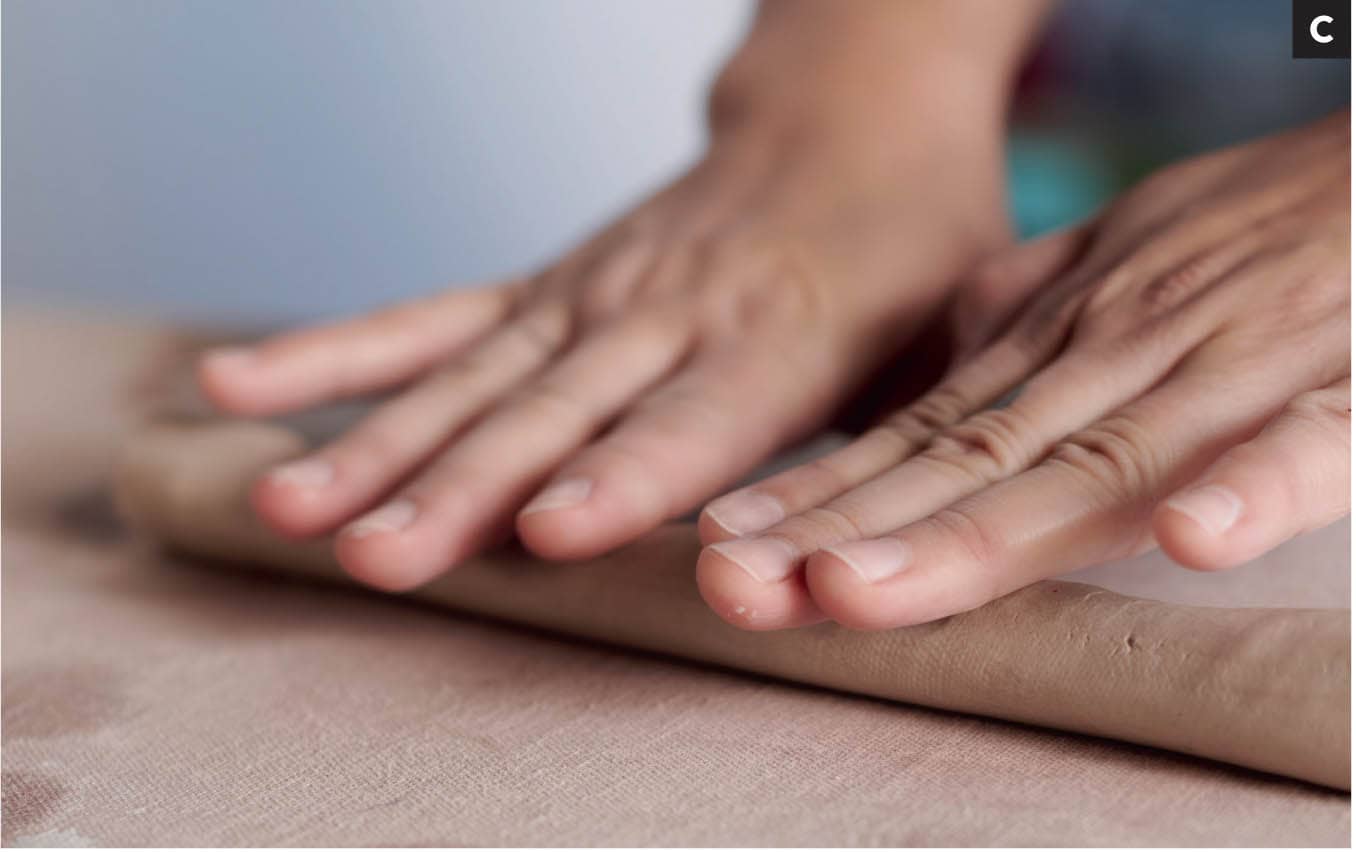
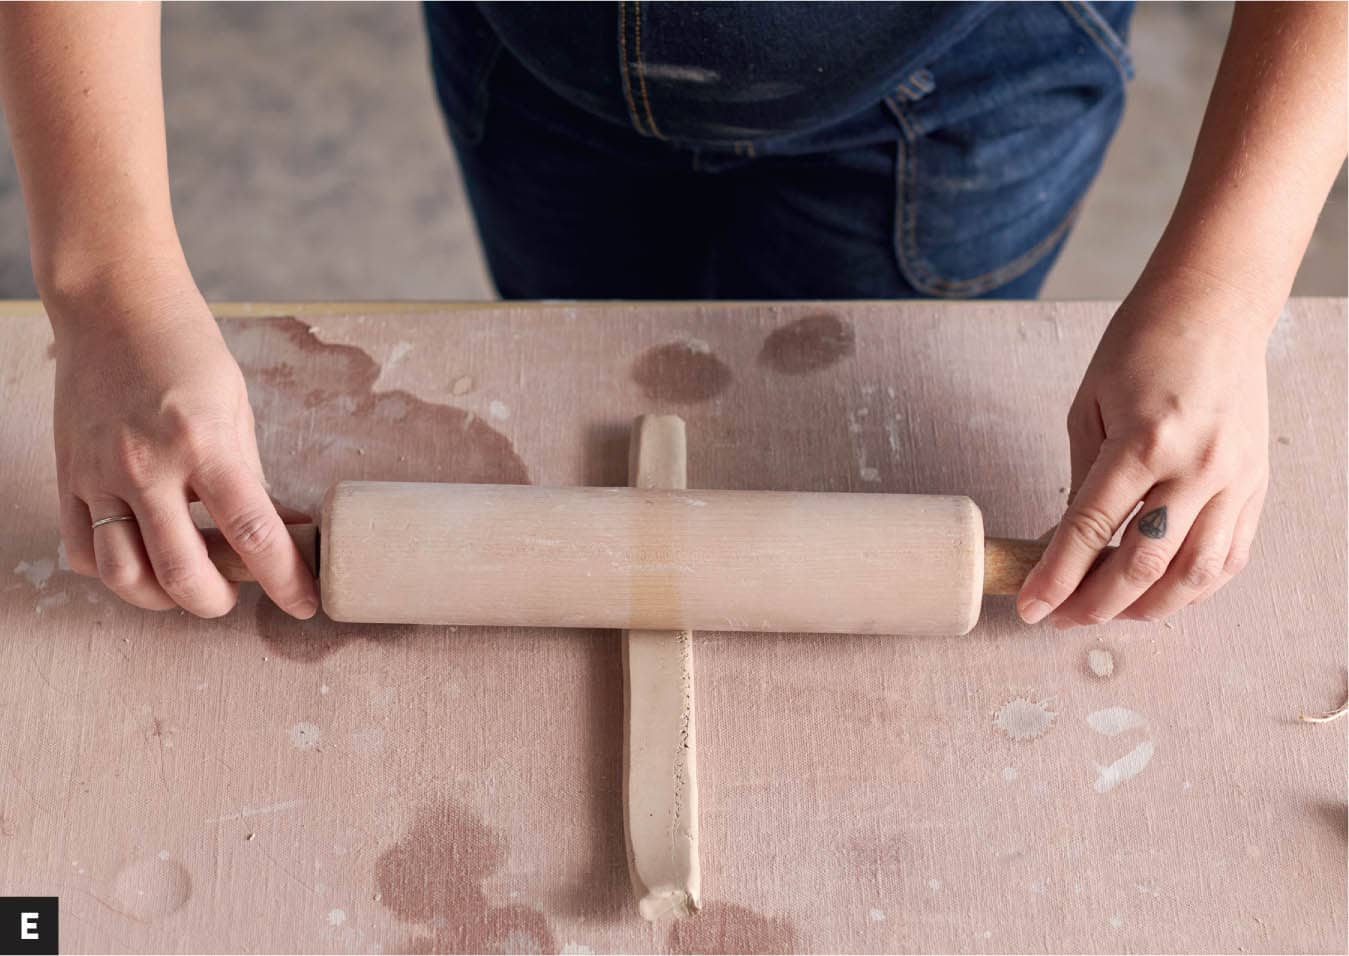
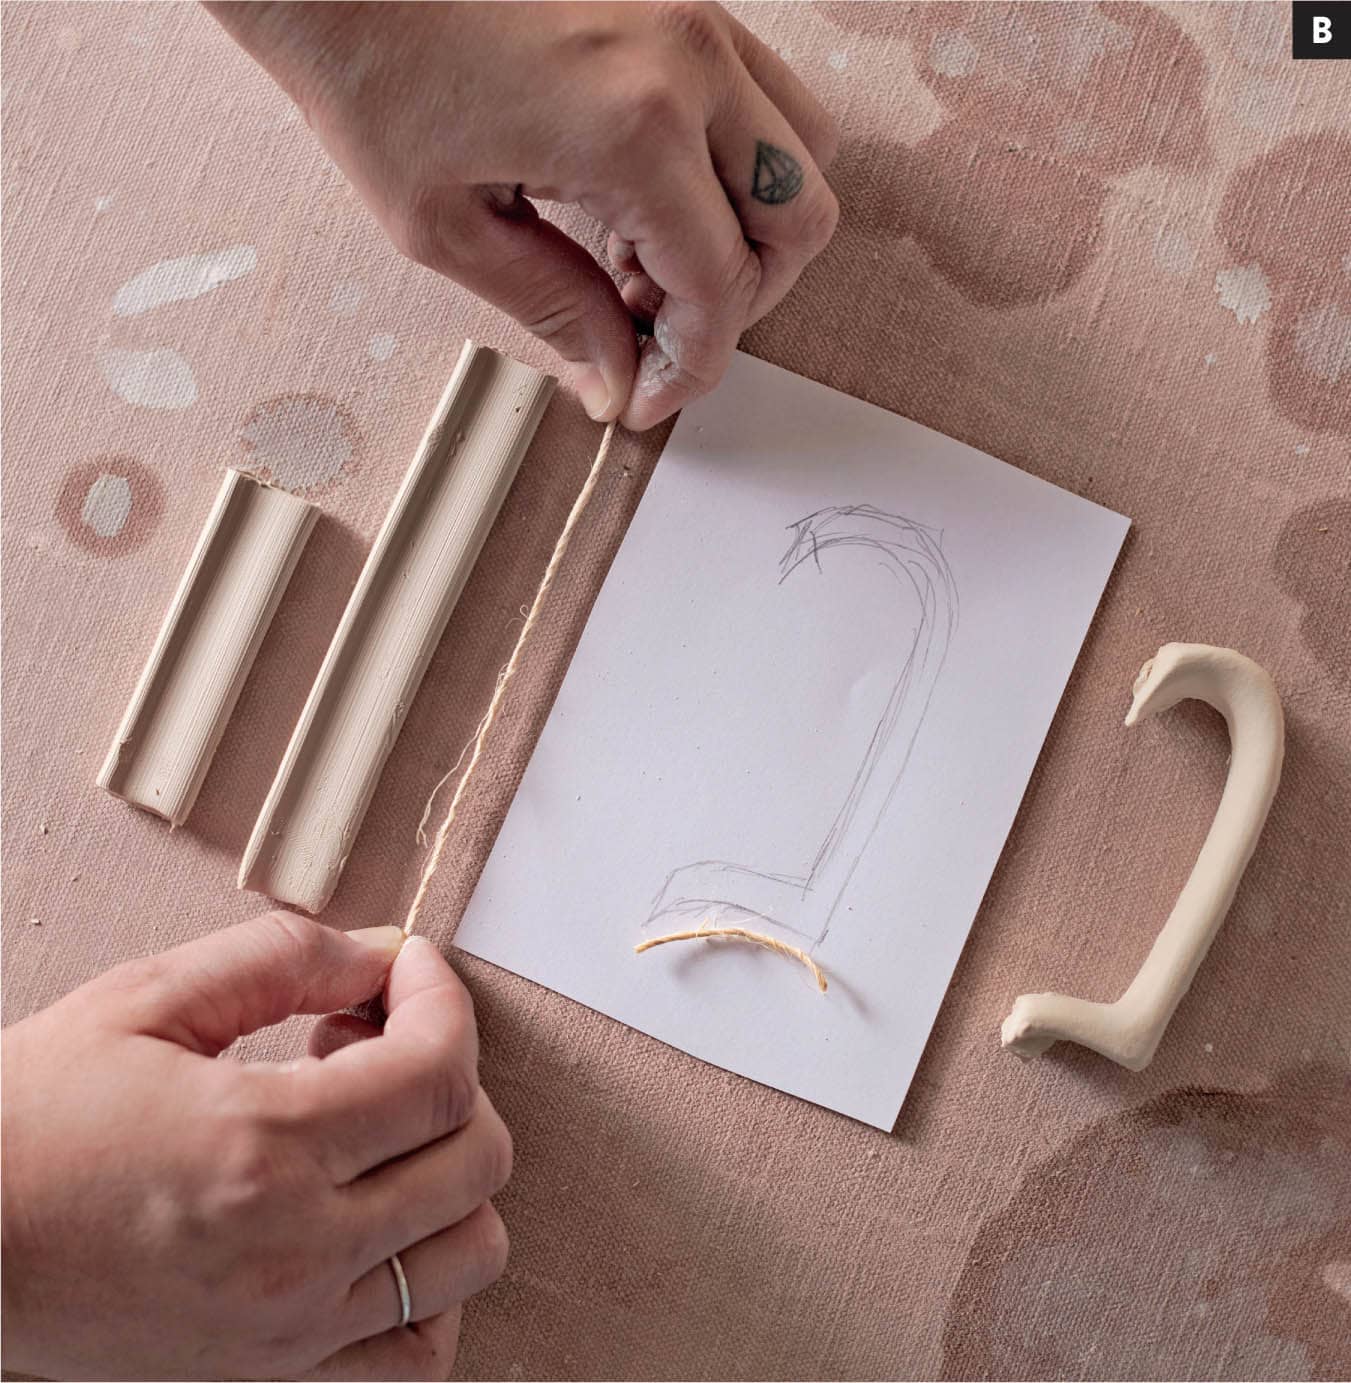
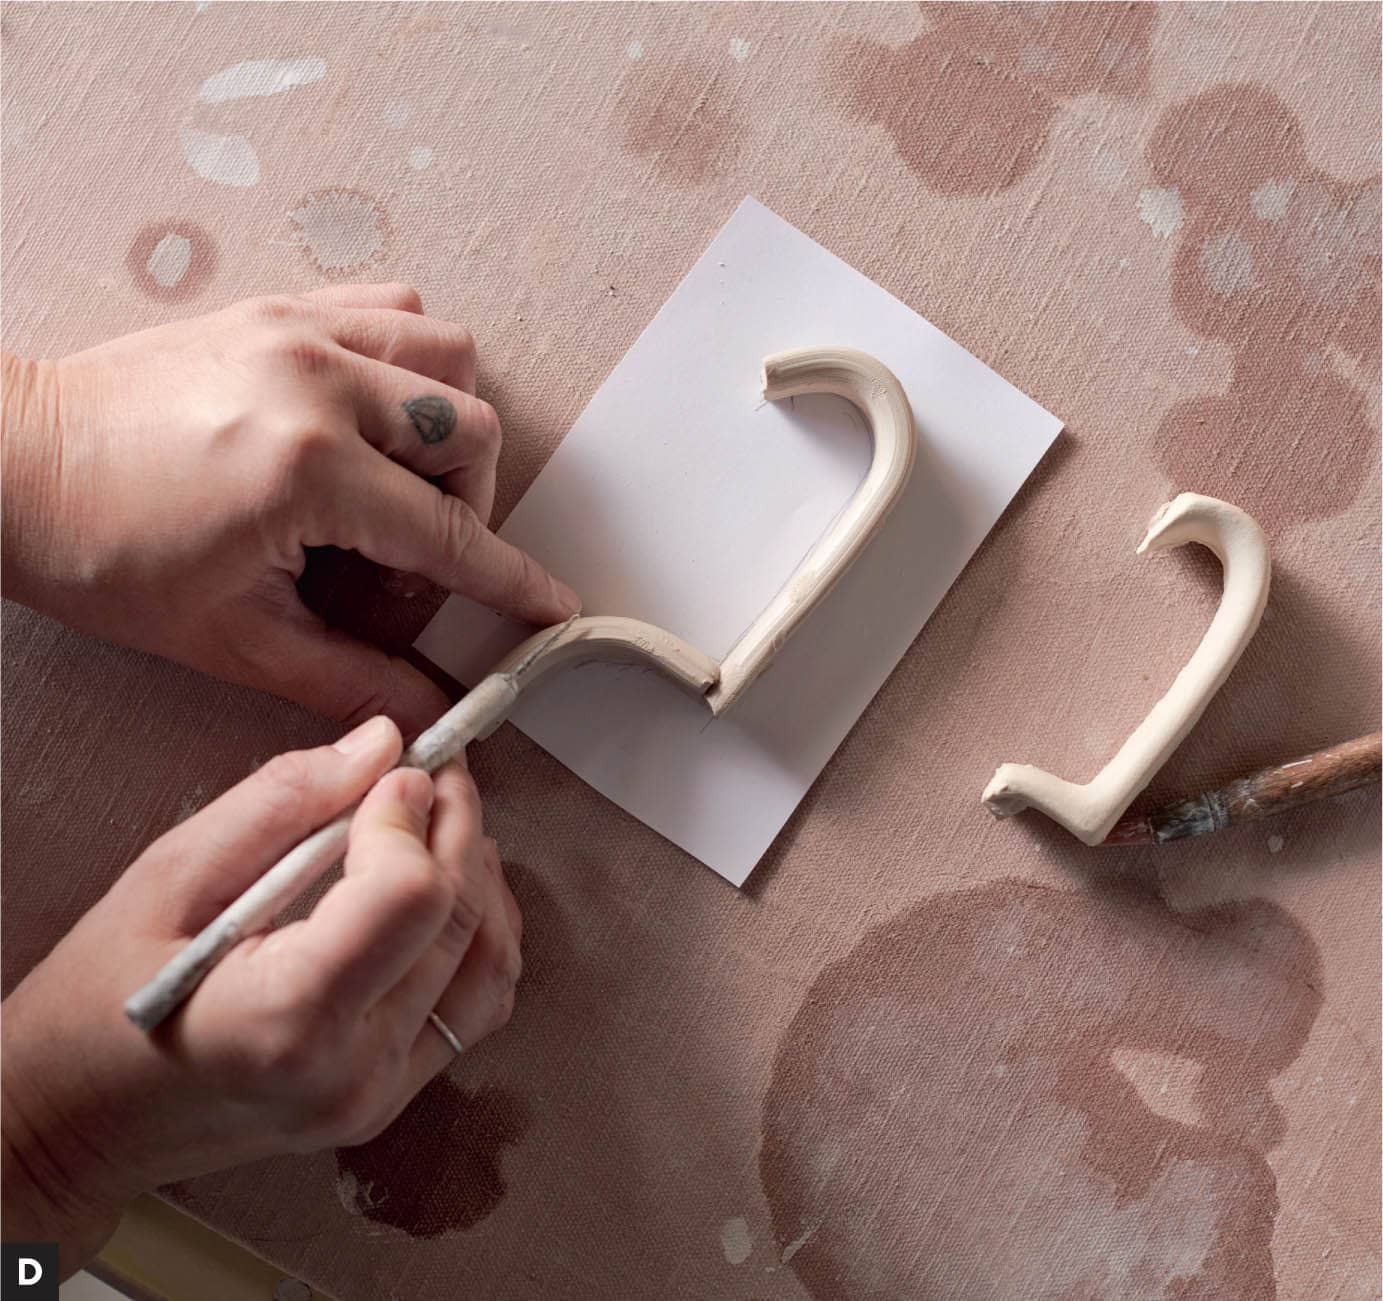
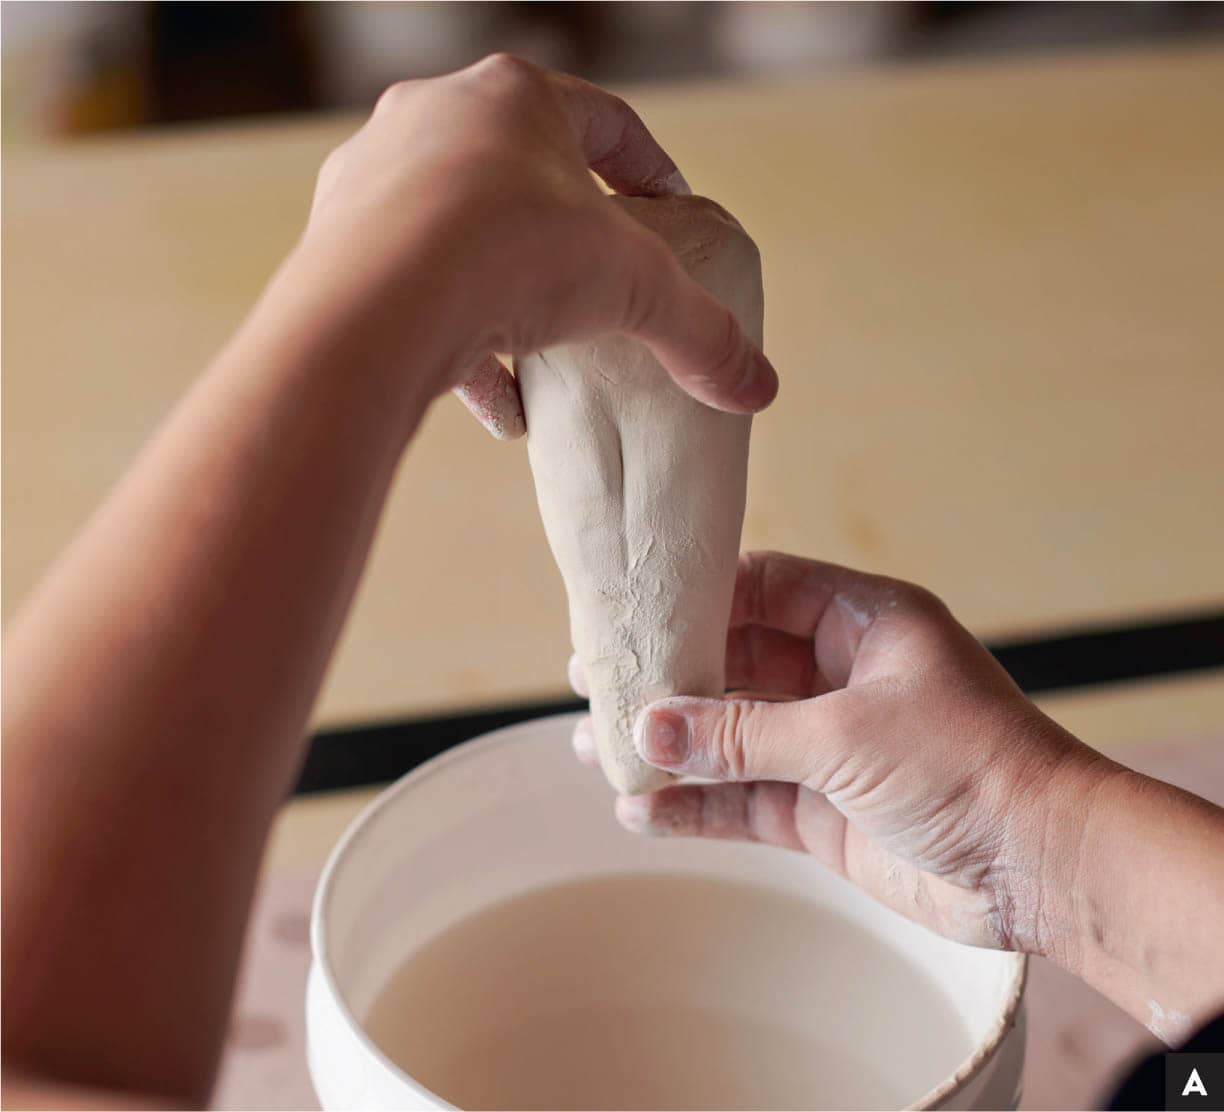
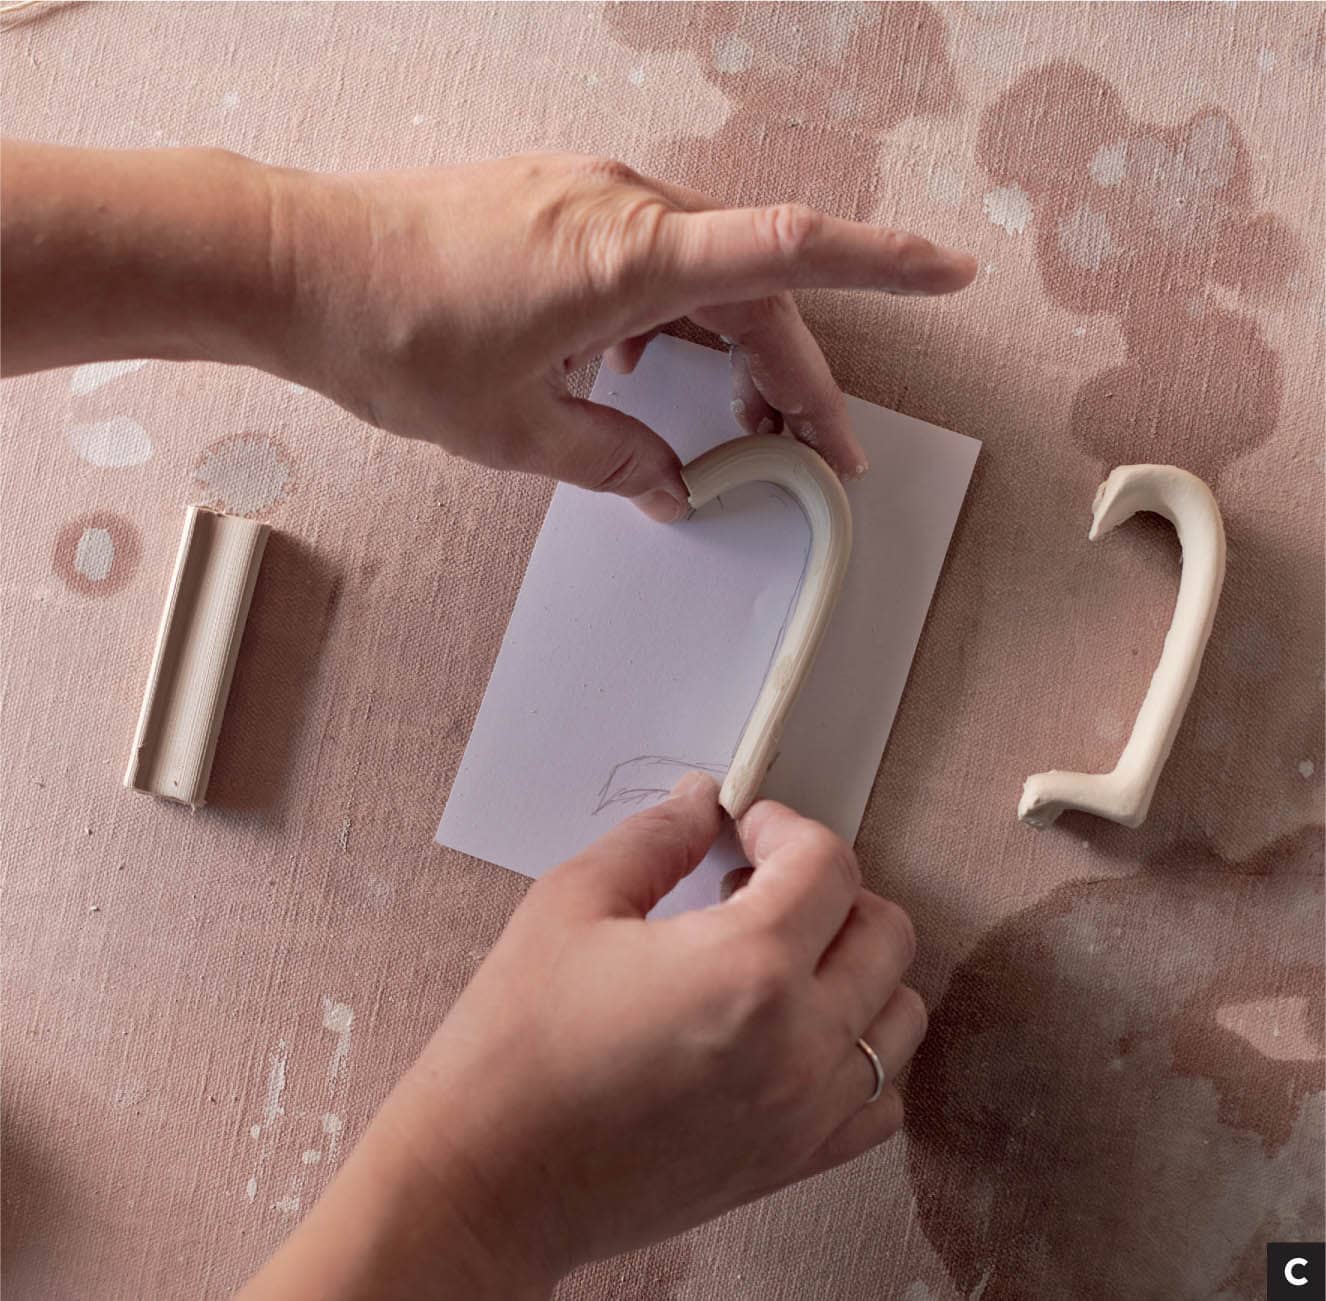
When making handles, first ask yourself what kind of handle you prefer. Let this grid be your inspirational guide. Some things to consider include how many fingers you want to fit and whether you want to have a thumb or pinky rest. Another thing to consider is balance. Where you place the handle will determine the overall ease in drinking from your vessel. This all depends on your mug shape and where the weight is being distributed. It’s also a good idea to leave enough space so your fingers don’t touch the wall of the mug (which could potentially be hot). Renee LoPresti Mike Cinelli Mark Arnold Matthew Schiemann Deb Schwartzkopf Gillan Doty Adrienne Eliades Rachel Donner Mark Arnold Pulling handles is the most traditional way to make handles in clay. It uses the unique imprint of your hand and fingers to produce a handle. This process may seem tricky at first, but if you persist you will find a sweet rhythm. As my professor once said, “After you have pulled a hundred handles, you just might get it.” I don’t think it takes quite that long to “get it,” but maybe to “master it.” STEP 1 Start with 1 to 2 pounds (453 to 907 g) of freshly wedged clay. Pat the clay into a cone shape with your hands. [A] STEP 2 Hold the top of the coned clay with your left hand over a bucket of water and, using your right hand, begin moistening the clay. You can even dunk the whole cone up to your left hand in the water bucket. [B] STEP 3 Wet your right hand and start pulling the clay downward. I have been told this is similar to milking a cow (something I have never done, so I can’t relate). What I can tell you is the process becomes easier if you make a crab claw with your right hand during the pulling movement. [C] If you want, use your thumb to make an indentation in the clay. [D] TIP I switch back and forth when using my thumb so as to not create a deep ridge in my handle. However, if this is the effect you want, continue using your thumb more often throughout the movements. For example, thumb, thumb, thumb, crab claw, and repeat. STEP 4 With your long pulled piece of clay, cut your handle to size. Rest the end of your cone on the edge of your table and use your X-ACTO knife to cut away the size handle you need. [E] STEP 5 Roll your handle into your desired shape and rest it on a ware board so that it can stiffen up to leather hard. [F] I often draw my desired handle shape on a piece of paper and lay my handle directly on it so I can match the shape perfectly. TIP Just as with throwing on the wheel, pulling handles is all about even pressure. If you squeeze too hard, the clay will become thin and weak and might break in half mid-pulling. If you don’t squeeze hard enough, your handle will grow at a turtle’s pace. As with everything in pottery, practice, practice, practice. If you are having trouble finding your groove pulling handles and are looking for some instant success, I highly recommend trying this next technique. Rolling handles is the perfect “fake it until you make it” method. Some students never go back to the pulling method, but both techniques have their time and place. STEP 1 Grab a ¼ pound (113 g) chunk of fresh clay and pound it into a hot-dog shape using the palms of your hands. Create a thick coil and start rolling. [A] STEP 2 Place your coil hot dog on a nonstick surface such as a canvas-covered table or a ware board. Start rolling your hands over the clay from front to back in a forward to backward motion. [B] TIP To roll a perfect coil, open and close your fingers during the movements, and move from the center outward and back to center. Avoid keeping your hands stationary for too long or else your coil will look lumpier than it does smooth. STEP 3 Continue rolling until your coil is about as wide as a penny or a nickel. The width will depend largely on how big your mug form is. If you have a large-size mug, use a thick handle, or a thin handle for a small mug shape. [C] STEP 4 Starting on one end of the clay, press the coil into a flattened oval shape with your thumb. [D] This method can cause a few lumps, so if you are a perfectionist, grab your rolling pin and in one gentle sweep, flatten the coil. [E] STEP 5 The last step in this process is shaping the clay to your handle form. Using the same method as pulled handles, cut your desired handle size and roll into the perfect shape. Let it rest on a ware board to dry and catch up to your leather-hard pot. [F] TIP If you want this to look like a pulled handle, follow this method before shaping the clay: Grab your flattened coil and hold it just like you were pulling a handle over a bucket of water. Moisten your hands and “pull” the handle a few times to give it a slick shape. This pulling motion is more cosmetic than it is actually pulling the clay. Cut to shape and you’re done. As your skills enhance, you might notice the plethora of more complex handles on hand-crafted mugs. There are more than a couple of ways to make a handle, such as pinching, slab building, slip casting, and hand building. The slice and dice method will open you up to a whole new world of creative opportunity with mugs, making your handles more comfortable, more aesthetically pleasing, and more dynamic. In this demonstration, I will show you step by step the development of my signature “ear” handle on my Blue Ridge Mountain mug. This handle design started as an idea while I was on a mission to create the most comfortable handle. Once I settled on the mug shape and size, I sketched out my handle design to scale. Using the slice and dice method, this is how I made this handle. STEP 1 Using the pulled or rolled method, cut one long piece of clay and one short piece of clay. [A] TIP To determine the size of each piece of clay, I took string, placed it over my drawing, and cut the two sizes I would need. [B] Give yourself a little extra slack in case you have to cut away more than you think. STEP 2 Bend the long piece of clay into shape one and the short piece into shape two. [C] STEP 3 If your clay is ultra moist, let the two pieces stiffen up to just before leather hard. To attach the two pieces, dip your scratchy tool in water and scratch the surface of both connection points. What you are looking for here is a nice slurry of clay to act as the glue that binds the two pieces together. STEP 4 Attach the two pieces of clay together. Once this step is complete, I typically let my handle sit out for a little bit. This gives the two pieces of clay enough time to bond together and stiffen up just enough to smooth the attachment points. [D] STEP 5 Clean up the handle with refining tools or a paintbrush. As long as your handle is close to leather hard, it is ready to be attached to your pot.


Pulled Handles


Rolled Handles


Sliced and Diced Handle


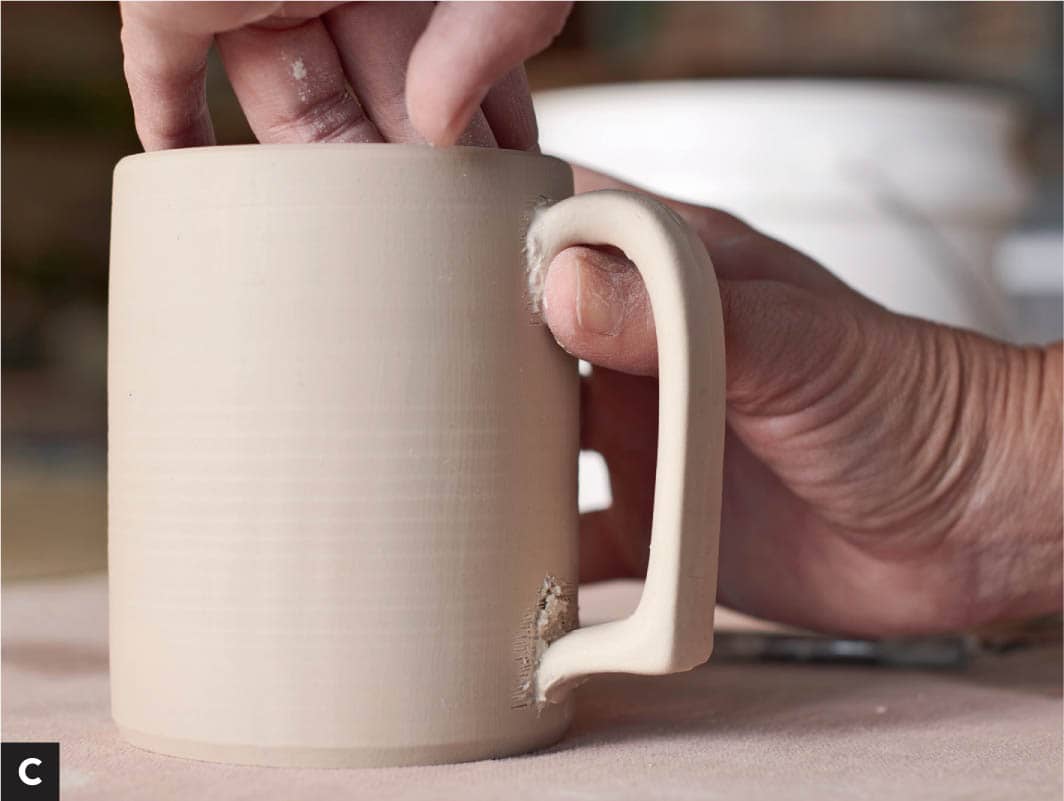
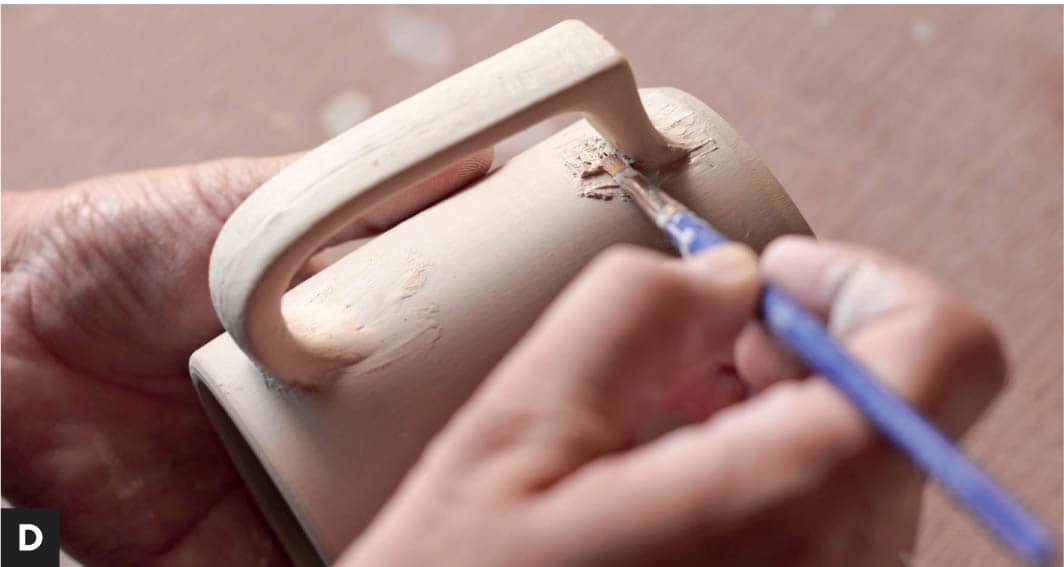
STEP 1 Decide on the placement of your handle by holding it up to your mug. Use your needle tool to mark the connection points on your mug. [A] If the connection points of your handle do not perfectly match up to your mug, use an X-ACTO knife or a surform tool to gently round the connection points. STEP 2 Dip your scratchy tool in water and scratch the surface of the marked areas on your mug. Do the same with the attachment points on your handle. Just as with the slice and dice method of scratching, you want to create a slurry of clay at your attachment points to serve as a glue. [B] STEP 3 Attach the handle. This is truly the best part of the mug making process when your vision comes to fruition. Hold your handle with your left hand and gently press it into the connection points. Use your right hand on the inside of your mug so that you are pushing the mug into the handle and the handle into your mug. This will help you avoid misshaping your mug. Check the handle from all angles before you get comfortable merging the two completely. I often put my handles on crooked, so it’s good to check this before you get carried away. [C] STEP 4 Once your handle is attached to your mug, begin the last step of smoothing. There are several tools to aid you in this venture. I use a combination of smoothing tools and paintbrushes to achieve this last bit of perfection. [D] Congratulations, you just made your first mug!
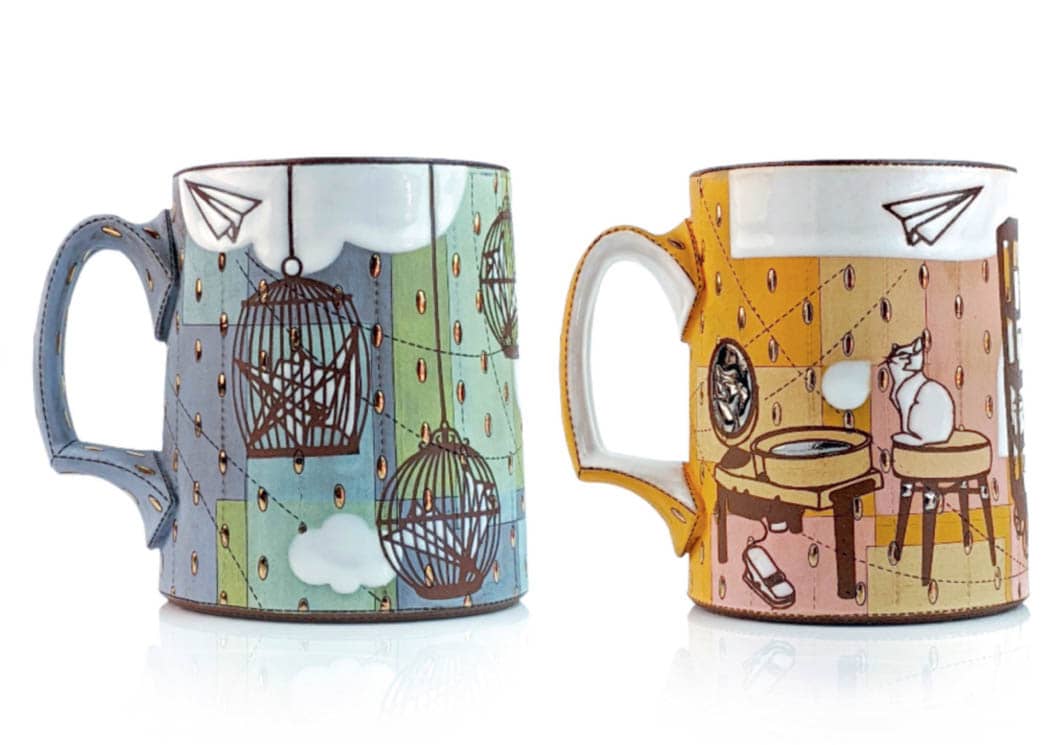
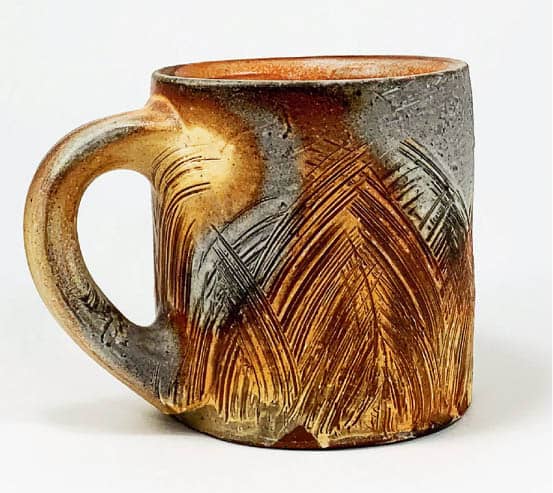
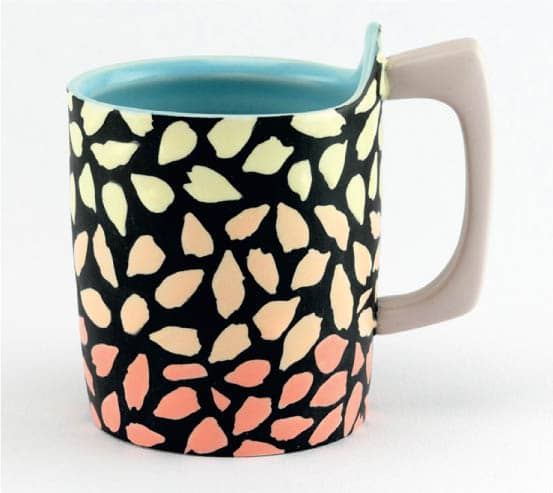
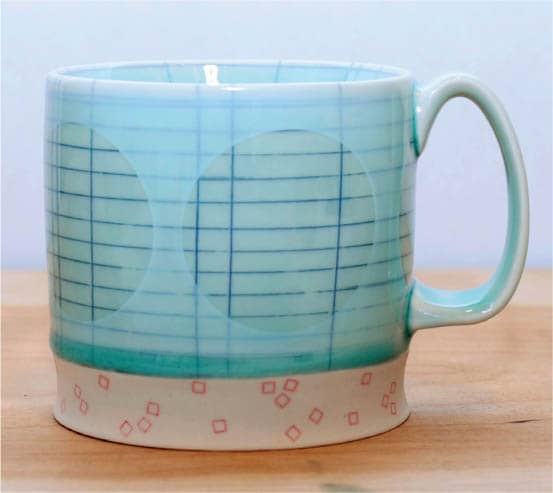
Anja Bartels, Golden Sailing Ship MugsWheel-thrown porcelain, fired to cone 7 electric, sgraffito decor, gold decals Heather Spontak, Teacups and SaucersWheel-thrown black clay with colored terra sigillata, slip, sgraffito, cone 5 oxidation Sara Ballek, Bubbly Cup Bottom Bottoms up! This cup has been trimmed with purpose so the artist has room to sign the foot without compromising the contact it will make with any surface. Ben Carter, Three Blue Mugs Jen Allen, Two MugsWheel-thrown porcelain Deb Schwartzkopf, CupWheel-thrown and hand-built porcelain, cone 6 electric with underglaze dots Austin Riddle, PitcherSoda-fired porcelain, cone 11 Renee LoPresti, MugWheel-thrown 2020 stoneware underglazes, glazes, and luster, fired to cone 5 and 019 electric oxidation Sara Ballek, Mug Sara uses a variety of techniques from chapter 4. Two layers of white slip cover the earthen red clay, and patterns are created using the sgraffito technique. Color has been meticulously painted with underglaze. Luke Doyle, Mug Soda-fired in a wood kiln to cone 12 Meredith Host, Dot Dot Rounded Square Mug Mike Cinelli, Mug Laurie Caffery, Cabin MugPorcelain, underglaze and mishima, cone 6 oxidation Shannon Tovey, Handle Model (middle) Mold (bottom) for Laurie Caffery Mug Teamwork makes the dream work. Shannon made this mold by casting the “master” handle created by Laurie.Instructions

GALLERY
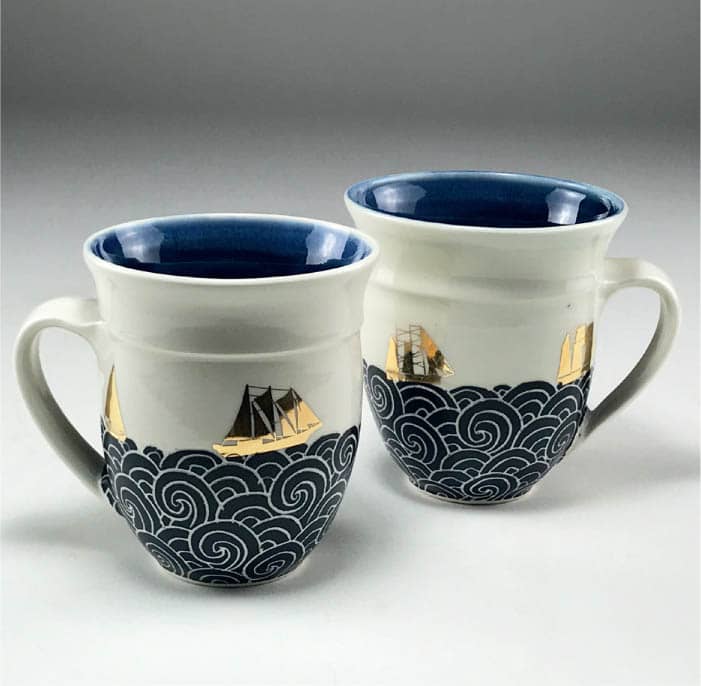
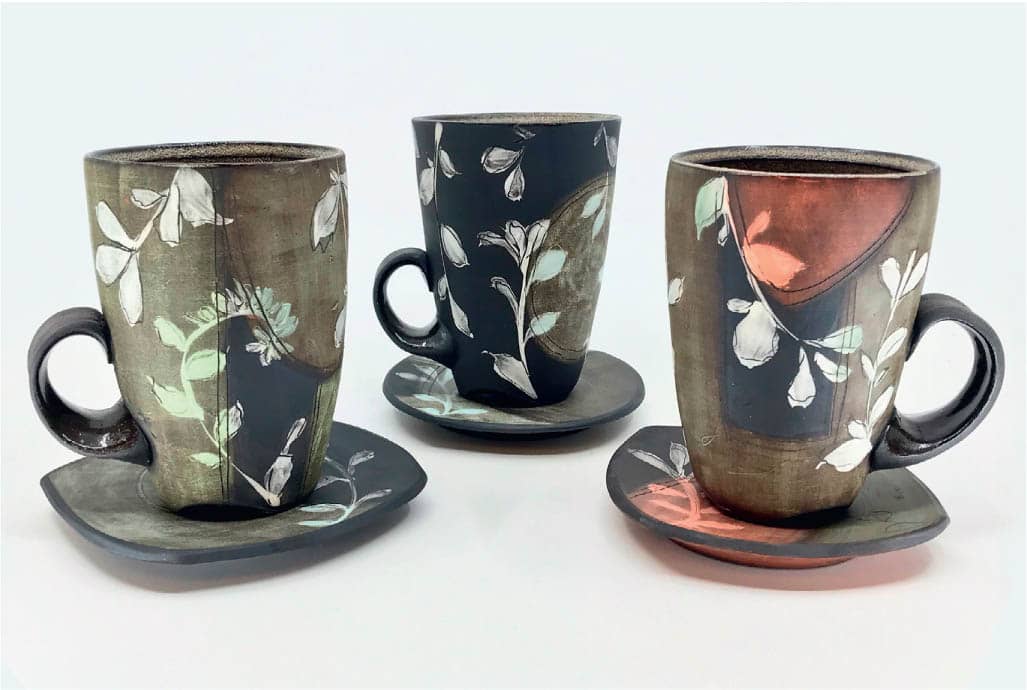

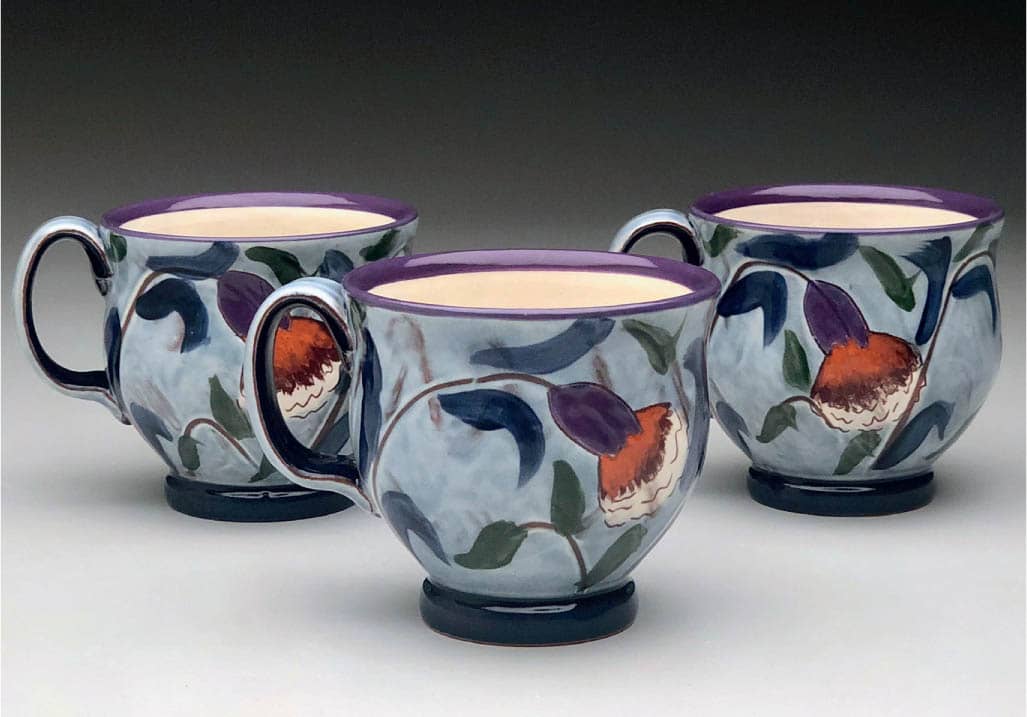


Photo courtesy of Robert Batey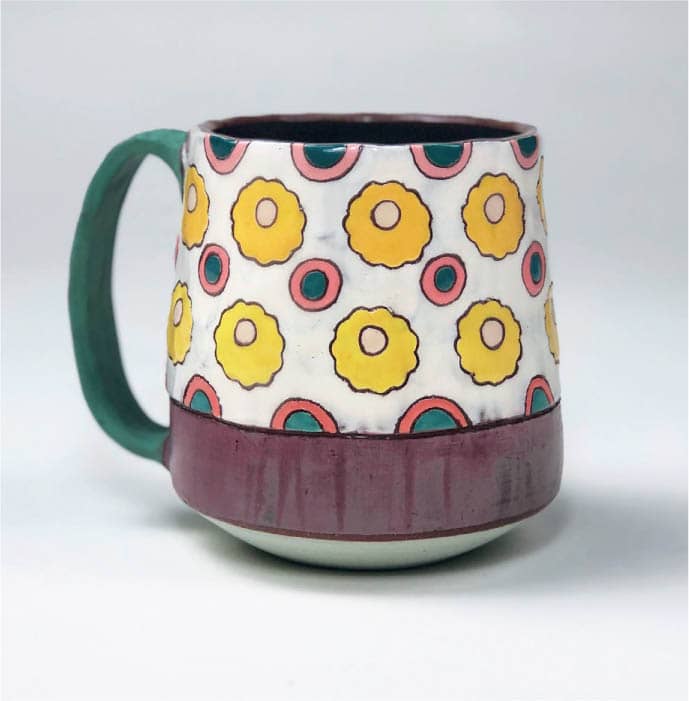

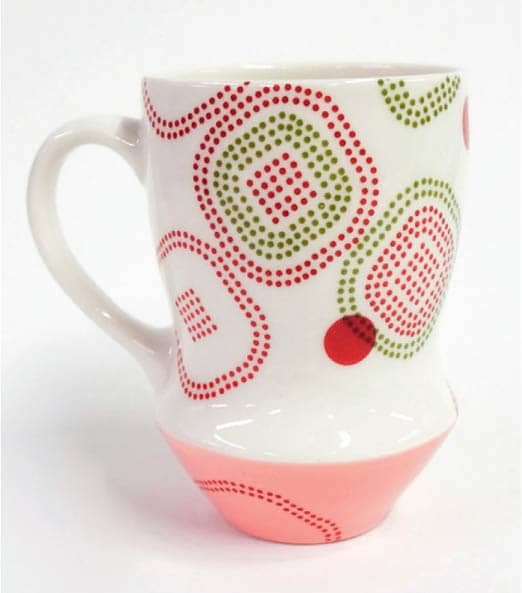
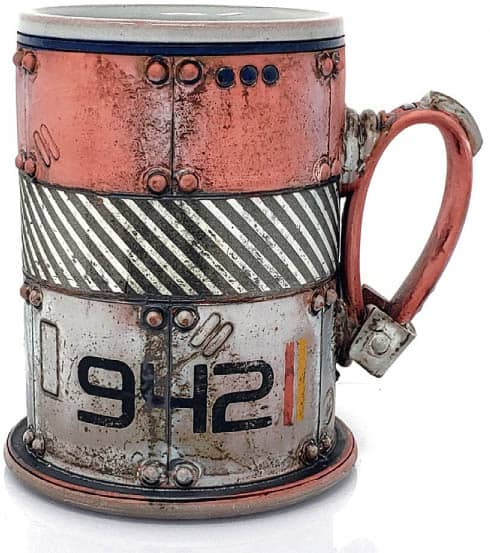
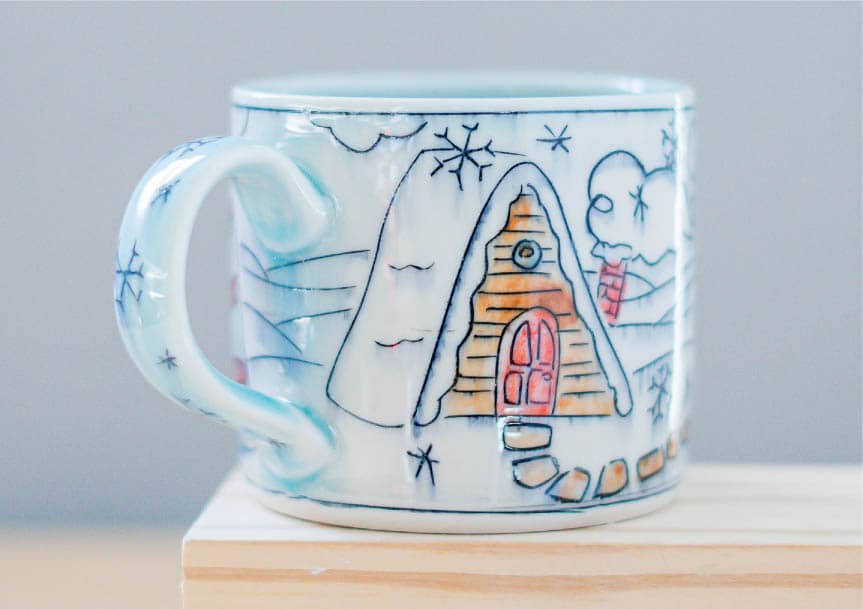
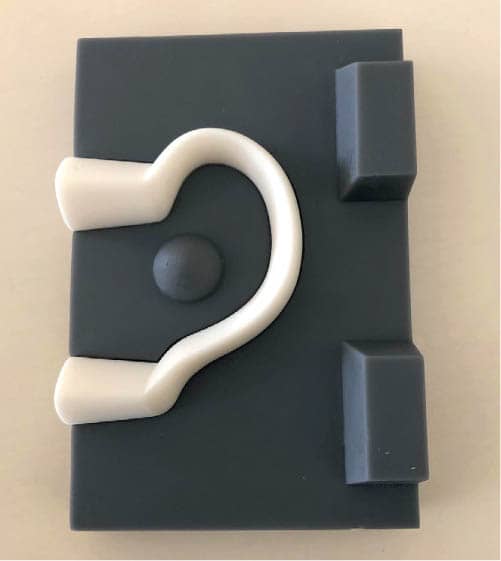
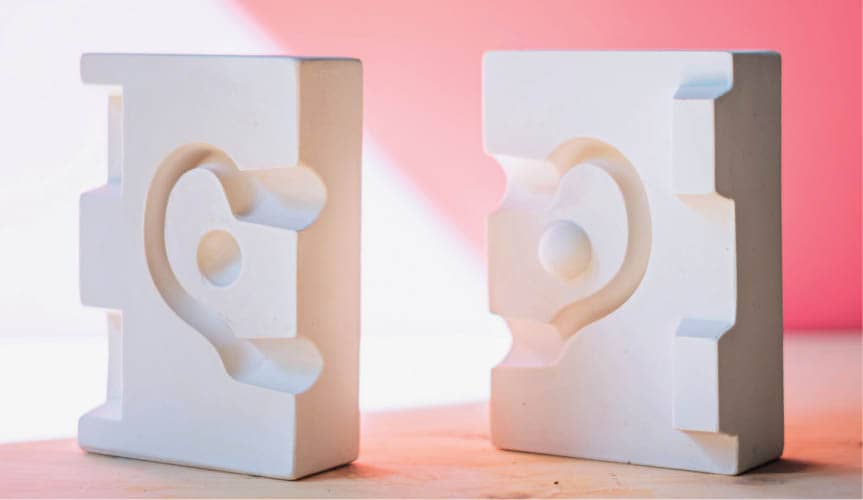
Photo courtesy of Laurie Caffery