Overview
There are many types of applications in use nowadays and web apps top the list of the most used ones. In this chapter, you will be introduced to ASP.NET, a web framework built with C# and the .NET runtime, made to create web apps with ease. You will also learn the anatomy of a basic ASP.NET application, web application development approaches such as server-side rendering and single-page applications, and how C# helps implement these approaches to build safe, performant, and scalable applications.
Introduction
In Chapter 1, Hello C#, you learned that .NET is what brings C# to life, as it contains both a Software Development Kit (SDK) used to build your code and a runtime that executes the code. In this chapter, you will learn about ASP.NET, which is an open-source and cross-platform framework embedded within the .NET runtime. It is used for building applications for both frontend and backend applications for web, mobile, and IoT devices.
It is a complete toolbox for these kinds of development, as it provides several built-in features, such as lightweight and customizable HTTP pipelines, dependency injection, and support for modern hosting technologies, such as containers, web UI pages, routing, and APIs. A well-known example is Stack Overflow; its architecture is built entirely on top of ASP.NET.
The focus of this chapter is to acquaint you with the fundamentals of ASP.NET and to give you both an introduction and an end-to-end overview of web application development with Razor Pages, a built-in toolbox included in ASP.NET to build web apps.
Anatomy of an ASP.NET Web App
You'll begin this chapter by creating a new Razor Pages application with ASP.NET. It is just one of the various types of apps that can be created with ASP.NET but will be an effective starting point as it shares and showcases a lot of commonalities with other web application types that can be built with the framework.
- To create a new Razor Pages app, enter the following commands in the CLI:
dotnet new razor -n ToDoListApp dotnet new sln -n ToDoList dotnet sln add ./ToDoListApp
Here you are creating a to-do list application with Razor Pages. Once the preceding command is executed, you will see a folder with the following structure:
/ToDoListApp |-- /bin |-- /obj |-- /Pages
|-- /Properties |-- /wwwroot |-- appsettings.json |-- appsettings.Development.json |-- Program.cs
|-- ToDoListApp.csproj
|ToDoList.sln
- Open the root folder in Visual Studio Code.
There are some files inside these folders that will be covered in the upcoming sections. For now, consider this structure:
- bin is the folder where the final binaries go after the application is built.
- obj is the folder where the compiler places intermediate outputs during the build process.
- Pages is the folder where the application Razor Pages will be placed.
- Properties is a folder containing the launchSettings.json file, a file where the run configurations are placed. In this file, you can define some configuration for local run i.e., environment variables and application ports.
- wwwroot is the folder where all the static files of the application go.
- appsettings.json is a configuration file.
- appsettings.Development.json is a configuration file for the Development environment.
- Program.cs is the program class that you have seen since Chapter 1, Hello C#. It is the entry point of an application.
Now that you know that in .NET 6.0, it is the Program.cs file, created at the root of the folder, that brings a WebApplication to life, you can begin to explore Program.cs in greater depth in the next section.
Program.cs and the WebApplication
As mentioned earlier, Program.cs is the entry point of any C# application. In this section, you will see how a typical Program class is structured for an ASP.NET app. Consider the following example of Program.cs, which describes a very simple ASP.NET application:
Program.cs
var builder = WebApplication.CreateBuilder(args);
// Add services to the container.
builder.Services.AddRazorPages();
var app = builder.Build();
// Configure the HTTP request pipeline.
if (!app.Environment.IsDevelopment())
{
app.UseExceptionHandler("/Error");
// The default HSTS value is 30 days. You may want to change this for production scenarios, see https://aka.ms/aspnetcore-hsts.
The complete code can be found here: https://packt.link/tX9iK.
The first thing done here is the creation of a WebApplicationBuilder object. This object contains everything that's needed to bootstrap a basic Web Application in ASP.NET—Configuration, Logging, DI, and Service Registration, Middlewares, and other Host configurations. This Host is the one responsible for the lifetime management of a web application; they set up a web server and a basic HTTP pipeline to process HTTP requests.
As you can see, it is quite impressive how, in a few lines of code, so many things can be done that enable you to run a well-structured web application. ASP.NET does all of that so that you can focus on providing value through the functionalities you will build.
Note
Bootstrap is a CSS library for the beautification of web content. You can know more about it at the official website.
Middlewares
Think of middleware as small pieces of applications that connect to each other to form a pipeline for handling HTTP requests and responses. Each piece is a component that can do some work either before or after another component is executed on the pipeline. They are also linked to each other through a next() call, as shown in Figure 7.1:

Figure 7.1: The Middleware for an HTTP pipeline
Middleware is a whole universe unto itself. The following list defines the salient features for building a web application:
- The order in which the middleware is placed matters. As they are chained one after another, the placement of each component impacts the way the pipeline is processed.
- The before logic, as shown in Figure 7.1, is executed until the endpoint is finally reached. Once the endpoint is reached, the pipeline continues to process the response using the after logic.
- next() is a method call that will execute the next middleware in the pipeline, before executing the after logic of the current middleware.
In ASP.NET applications, middleware can be defined in the Program.cs file after the WebApplicationBuilder calls the Build method with a WebApplication? object as a result of this operation.
The application you created in the Program.cs and the WebApplication section, already contains a set of middlewares placed for new boilerplate Razor Pages applications that will be called sequentially when an HTTP request arrives.
This is easily configurable because the WebApplication object contains a generic UseMiddleware<T> method. This method allows you to create middleware to embed into the HTTP pipeline for requests and responses. When used within the Configure method, each time the application receives an incoming request, this request will go through all the middleware in the order the requests are placed within the Configure method. By default, ASP.NET provides basic error handling, autoredirection to HTTPS, and serves static files, along with some basic routing and authorization.
However, you might notice in your Program.cs file, of the Program.cs and the WebApplication section, there are no UseMiddleware<> calls. That's because you can write extension methods to give a more concise name and readability to the code, and the ASP.NET framework already does it by default for some built-in middlewares. For instance, consider the following example:
using Microsoft.AspNetCore.HttpsPolicy;
public static class HttpsPolicyBuilderExtensions
{
public static IApplicationBuilder UseHttpsRedirection(this WebApplication app)
{
app.UseMiddleware<HttpsRedirectionMiddleware>();
return app;
}
}
Here, a sample of the built-in UseHttpsRedirection extension method is used for enabling a redirect middleware.
Logging
Logging might be understood as the simple process of writing everything that is done by an application to an output. This output might be the console application, a file, or even a third-party logging monitor application, such as the ELK Stack or Grafana. Logging has an important place in assimilating the behavior of an application, especially with regard to error tracing. This makes it an important concept to learn.
One thing that enables ASP.NET to be an effective platform for enterprise applications is its modularity. Since it is built on top of abstractions, any new implementation can be easily done without loading too much into the framework. The logging abstractions are some of these.
By default, the WebApplication object created in Program.cs adds some logging providers on top of these logging abstractions, which are Console, Debug, EventSource, and EventLog. The latter—EventLog—is an advanced feature specific to the Windows OS only. The focus here will be the Console logging provider. As the name suggests, this provider will output all the logged information to your application console. You'll learn more about it later in this section.
As logs basically write everything your application does, you might wonder whether these logs will end up being huge, especially for large-scale apps. They might be, but an important thing while writing application logs is to grasp the severity of the log. There might be some information that is crucial to log, such as an unexpected exception. There might also be information that you would only like to log to a development environment, to know some behaviors better. That said, a log in .NET has seven possible log levels, which are:
- Trace = 0
- Debug = 1
- Information = 2
- Warning = 3
- Error = 4
- Critical = 5
- None = 6
Which level is output to the provider is defined via variables set either as environment variables or via the appSettings.json file in the Logging:LogLevel section, as in the following example:
{
"Logging": {
"LogLevel": {
"Default": "Information",
"ToDoListApp": "Warning",
"ToDoListApp.Pages": "Information"
}
}
}
In this file, there are log categories, which are either the Default category or part of the namespace of the type that wants to set the log. That is exactly why these namespaces exist. For instance, you could set two different levels of logging for files inside the namespace.
In the preceding example configuration, the entire ToDoListApp is a set namespace to write logs only with LogLevel equal to or higher than Warning. You are also specifying that, for the ToDoListApp.Pages category/ namespace, the application will write all logs with a level equal to or higher than Information. This means that the changes on a more specific namespace override the settings that were set at a higher level.
This section showed you how to configure log levels for an application. With this knowledge, you can now grasp the concept of DI, as discussed in the following section.
Dependency Injection
Dependency Injection (DI) is a technique supported natively by the ASP.NET framework. It is a form of achieving a famous concept in object-oriented programming called Inversion of Control (IoC).
Any component that an object requires to function can be termed a dependency. In the case of a class, this might refer to parameters that need to be constructed. In the case of a method, it might be the method that parameters need for the execution. Using IoC with dependencies means delegating the responsibility of creating a class to the framework, instead of doing everything manually.
In Chapter 2, Building Quality Object-Oriented Code, you learned about interfaces. Interfaces are basically a common form of establishing a contract. They allow you to focus on what the outcome is of a call, rather than how it is executed. When you use IoC, your dependencies can now be interfaces instead of concrete classes. This allows your classes or methods to focus on the contracts established by these interfaces, instead of implementation details. This brings the following advantages:
- You can easily replace implementations without affecting any class that depends on the contracts.
- It decouples the application boundaries and modules, as the contracts usually do not need any hardened dependencies.
- It makes testing easier, allowing you to create these explicit dependencies as mocks, or fakes, and focus on behavior instead of real implementation details.
Imagine now that to create the middleware of your application, you need to construct each of their dependencies, and you have a lot of middleware chained to each other on the constructor. Clearly, this would be a cumbersome process. Also, testing any of this middleware would be a tedious process, as you would need to rely on every single concrete implementation to create an object.
By injecting dependencies, you tell the compiler how to construct a class that has its dependencies declared on the constructor. The DI mechanism does this at runtime. This is equivalent to telling the compiler that whenever it finds a dependency of a certain type, it should resolve it using the appropriate class instance.
ASP.NET provides a native DI container, which stores the information pertaining to how a type should be resolved. You'll next learn how to store this information in the container.
In the Program.cs file, you'll see the call builder.Services.AddRazorPages(). The Services property is of type IServiceCollection and it holds the entire set of dependencies—also known as services—that is injected into the container. A lot of the required dependencies for an ASP.NET application to run are already injected in the WebApplication.CreateBuilder(args) method called at the top of the Program.cs file. This is true, for instance, for some native logging dependencies as you will see in the next exercise.
Exercise 7.01: Creating Custom Logging Middleware
In this exercise, you will create custom logging middleware that will output the details and the duration of an HTTP request to the console. After creating it, you will place it in the HTTP pipeline so that it is called by every request your application receives. The purpose is to give you a first practical introduction to the concepts of middleware, logging, and DI.
The following steps will help you complete this exercise:
- Create a new folder called Middlewares.
- Inside this folder, create a new class named RequestLoggingMiddleware.
- Create a new private readonly field named RequestDelegate and initialize this field inside the constructor:
private readonly RequestDelegate _next;
public RequestLoggingMiddleware(RequestDelegate next)
{
_next = next;
}
This is the reference that ASP.NET gathers as the next middleware to be executed on the HTTP pipeline. By initializing this field, you can call the next registered middleware.
- Add a using statement to the System.Diagnostics namespace so that a special class named Stopwatch can be added It will be used to measure the request time length:
using System.Diagnostics;
- Create a private readonly ILogger field. The ILogger interface is the default interface provided by .NET to manually log information.
- After that, place a second parameter inside the constructor for the ILoggerFactory type. This interface is another one provided by .NET that allows you to create ILogger objects.
- Use the CreateLogger<T> method from this factory to create a logger object:
private readonly ILogger _logger;
private readonly RequestDelegate _next;
public RequestLoggingMiddleware(RequestDelegate next, ILoggerFactory loggerFactory)
{
_next = next;
_logger = loggerFactory.CreateLogger<RequestLoggingMiddleware>();
}
Here, T is a generic parameter that refers to a type, which is the log category, as seen in the Logging section. In this case, the category will be the type of the class where the logging will be done that is, the RequestLoggingMiddleware class.
- Once the fields have been initialized, create a new method with the following signature:
public async Task InvokeAsync(HttpContext context) { }
- Inside this method, declare a variable called Stopwatch and assign the Stopwatch.StartNew() value to it:
var stopwatch = Stopwatch.StartNew();
The Stopwatch class is a helper that measures the execution time from the moment the .StartNew() method is called.
- After this variable, write a try-catch block with code to call the next request as well as a call to the .Stop() method from the stopwatch to measure the elapsed time that the _next() call took:
using System.Diagnostics;
namespace ToDoListApp.Middlewares;
public class RequestLoggingMiddleware
{
private readonly ILogger _logger;
private readonly RequestDelegate _next;
public RequestLoggingMiddleware(RequestDelegate next, ILoggerFactory loggerFactory)
{
_next = next;
_logger = loggerFactory.CreateLogger<RequestLoggingMiddleware>();
}
You can also deal with a possible exception here. So, it is better to wrap these two calls inside a try-catch method.
- In the Program.cs file, call the custom middleware by placing the declaration as follows:
var app = builder.Build();
// Configure the HTTP request pipeline.app.UseMiddleware<RequestLoggingMiddleware>();
Write it in the line right below where the app variable is assigned.
- Finally, in the Program.cs file, place a using statement to ToDoListApp.Middlewares:
Program.cs
using ToDoListApp.Middlewares;
var builder = WebApplication.CreateBuilder(args);
// Add services to the container.
builder.Services.AddRazorPages();
var app = builder.Build();
// Configure the HTTP request pipeline.
app.UseMiddleware<RequestLoggingMiddleware>();
if (!app.Environment.IsDevelopment())
{
app.UseExceptionHandler("/Error");
The complete code can be found here: https://packt.link/tX9iK.
- To see the application running on your web browser and its output in the Visual Studio Code, type the following command at the address bar:
localhost:####
Here #### represents the port number. This would be different for different systems.
- After pressing enter, the following screen gets displayed:
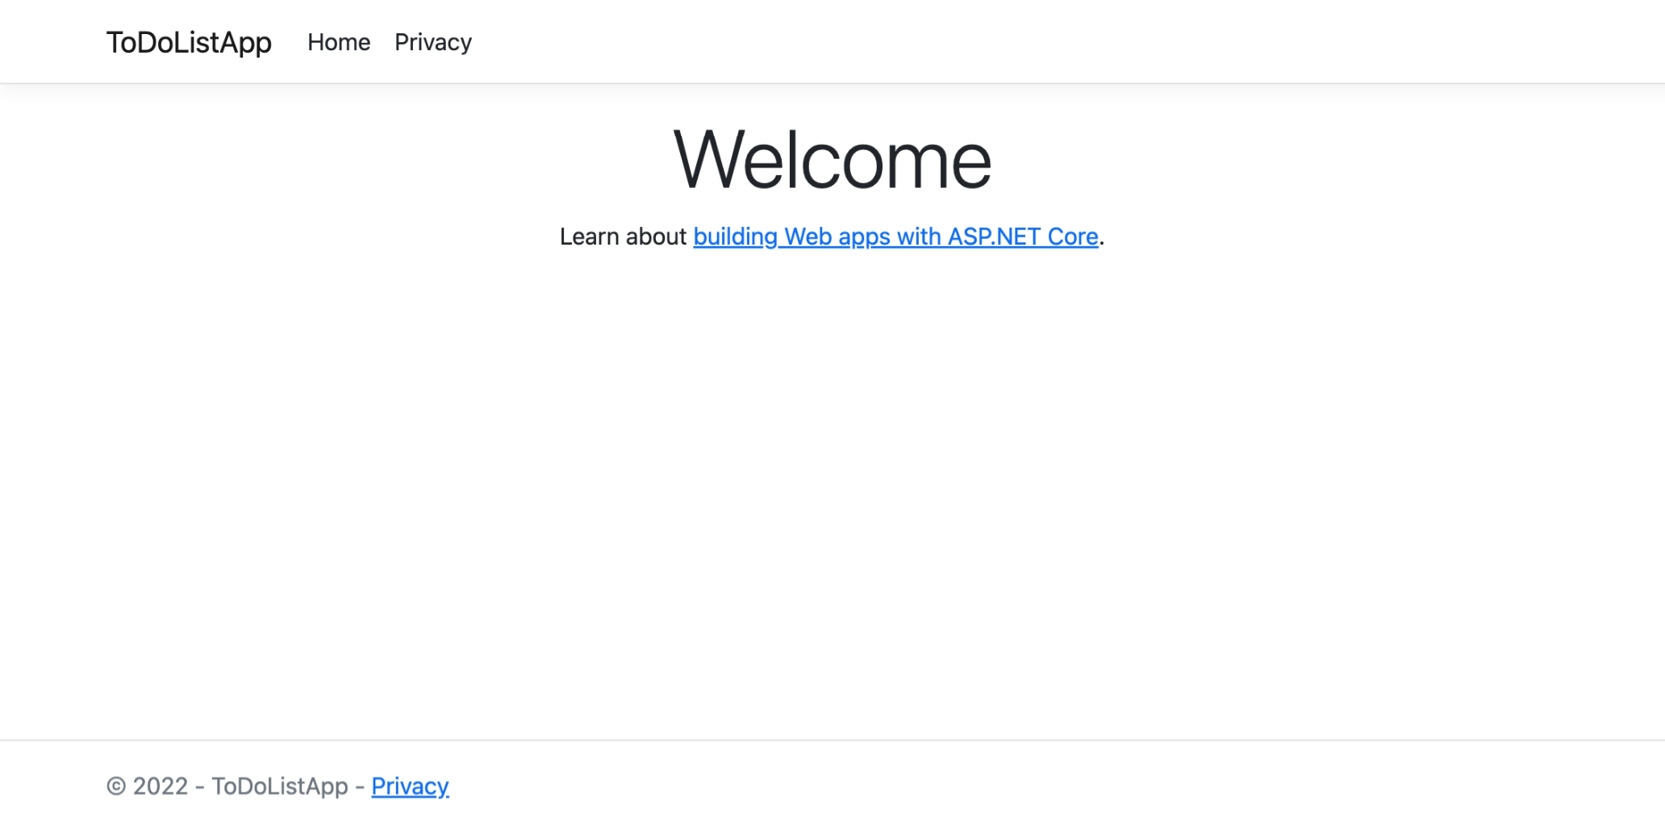
Figure 7.2: Application running on the browser
- Perform Step 13 each time after executing the exercise/ activity in VS Code.
- Press Control+C inside the VS code terminal to break the task before executing another exercise/ activity.
- After executing the application in your browser, you'll see a similar output in the Visual Studio Code terminal:
info: ToDoListApp.Middlewares.RequestLoggingMiddleware[0]
HTTP GET request for path / with status 200 executed in 301 ms
info: ToDoListApp.Middlewares.RequestLoggingMiddleware[0]
HTTP GET request for path /lib/bootstrap/dist/css/bootstrap.min.css with status 200 executed in 18 ms
info: ToDoListApp.Middlewares.RequestLoggingMiddleware[0]
HTTP GET request for path /css/site.css with status 200 executed in 1 ms
info: ToDoListApp.Middlewares.RequestLoggingMiddleware[0]
HTTP GET request for path /favicon.ico with status 200 executed in 1 ms
You will observe that the output on the console logs messages with an elapsed time of HTTP requests coming in the middleware pipelines. Since you've declared it with your methods, it should take the execution time considering all the pipeline chains.
In this exercise, you created your first middleware—the RequestLoggingMiddleware. This middleware measures the execution time of an HTTP request, in your HTTP pipeline. By placing it right before all other middlewares, you will be able to measure the entire execution time of a request that goes through the entire middleware pipeline.
Note
You can find the code used for this exercise at https://packt.link/i04Iq.
Now imagine you have 10 to 20 middleware for the HTTP pipeline, each has its own dependencies, and you must manually instantiate each middleware. IoC comes in handy in such cases by delegating to ASP.NET the instantiation of these classes, as well as injecting their dependencies. You have already seen how to create custom middleware that uses the native ASP.NET logging mechanism with DI.
In ASP.NET, logging and DI are powerful mechanisms that allow you to create very detailed logs for an application. This is possible, as you've seen, through logger injection via constructors. For these loggers, you can create an object of a log category in two ways:
- As shown in the exercise, one way is the injection of ILoggerFactory. You could call the CreateLogger(categoryName) method, which receives a string as an argument. You could also call the CreateLogger<CategoryType>() method, which receives a generic type. This approach is preferable as it sets the category for the logger as the full name of the type (including the namespace).
- Another way would be through the injection of ILogger<CategoryType>. In this case, the category type is usually the type of the class where you are injecting the logger, as seen in the previous exercise. In the previous exercise, you could replace the injection of ILoggerFactory with ILogger<RequestLoggingMiddleware> and assign this new injected dependency directly to the ILogger private field as follows:
private readonly ILogger _logger;
private readonly RequestDelegate _next;
public RequestLoggingMiddleware(RequestDelegate next, ILogger< RequestLoggingMiddleware> logger)
{
_next = next;
_logger = logger;
}
You now know that logging and DI are powerful mechanisms that allow you to create very detailed logs for an application. Before moving to Razor pages, it is important to learn about the life cycle of an object within an application. This is called the dependency lifetimes.
Dependency Lifetimes
Before moving on to the next and main topic of this chapter, it is important to talk about dependency lifetimes. All the dependencies used in the previous exercise were injected via the constructor. But the resolution of these dependencies was only possible because ASP.NET registers these dependencies beforehand, as mentioned in the Program.cs section. In the following code, you can see an example of code built into ASP.NET that deals with the logging dependency registration, by adding the ILoggerFactory dependency to the services container:
LoggingServiceCollectionExtensions.cs
public static IServiceCollection AddLogging(this IServiceCollection services, Action<ILoggingBuilder> configure)
{T
if (services == null)
{
throw new ArgumentNullException(nameof(services));
}
services.AddOptions();
services.TryAdd(ServiceDescriptor.Singleton<ILoggerFactory, LoggerFactory>());
services.TryAdd(ServiceDescriptor.Singleton(typeof(ILogger<>), typeof(Logger<>)));
services.TryAddEnumerable(ServiceDescriptor.Singleton<IConfigureOptions<LoggerFilterOptions>>(new DefaultLoggerLevelConfigureOptions(LogLevel.Information)));
configure(new LoggingBuilder(services));
return services;
}
The complete code can be found here: https://packt.link/g4JPp.
Note
The preceding code is an example from a standard library and built into ASP.NET that deals with the logging dependency registration.
A lot is going on here, but the two important things to consider are as follows:
- The method here is TryAdd, which registers a dependency on the DI container.
- The ServiceDescriptor.Singleton method is what defines a dependency lifetime. This is the final important concept of the Dependency Injection section of this chapter.
A dependency lifetime describes the life cycle of an object within an application. ASP.NET has three default lifetimes that can be used to register a dependency:
- Transient: Objects with this lifetime are created every time they are requested and disposed of after use. This is effective for stateless dependencies, which are dependencies that do not need to keep the state when they are called. For instance, if you need to connect to an HTTP API to request some information, you can register a dependency with this lifetime, since HTTP requests are stateless.
- Scoped: Objects with a scoped lifetime are created once for each client connection. For instance, in an HTTP request, a scoped dependency will have the same instance for the entire request, no matter how many times it is called. This dependency carries some state around for a certain amount of time. At the end of the connection, the dependency is disposed of.
- Singleton: Objects with a singleton lifetime are created once for an entire application's lifetime. Once they are requested, their instance will be carried on while the application is running. This kind of lifetime should be considered carefully as it might consume a lot of memory.
As mentioned before, the manual registration of these dependencies can be done in the ConfigureServices method located in the Startup class. Every new dependency that is not provided and automatically registered by ASP.NET should be manually registered there and knowing about these lifetimes is important as they allow the application to manage the dependencies in different ways.
You have learned that the resolution of these dependencies was only possible because ASP.NET registers three default lifetimes that can be used to register a dependency. You will now move on to Razor pages that enable the construction of page-based applications with all the capabilities provided and powered by ASP.NET.
Razor Pages
Now that you have covered the main aspects pertaining to an ASP.NET application, you'll continue to build the application that you started at the beginning of the chapter. The goal here is to build a to-do list application, where you can easily create and manage a list of tasks on a Kanban-style board.
Earlier sections have referenced Razor Pages, but what exactly is it? Razor Pages is a framework that enables the construction of page-based applications with all the capabilities provided and powered by ASP.NET. It was created to enable the building of dynamic data-driven applications with a clear separation of concerns that is, having each method and class with separate but complementary responsibilities.
Basic Razor Syntax
Razor Pages uses Razor syntax, a syntax powered by Microsoft that enables a page to have static HTML/ CSS/ JS, C# code, and custom tag helpers, which are reusable components that enable the rendering of HTML pieces in pages.
If you look at the .cshtml files generated by the dotnet new command that you ran in the first exercise, you will notice a lot of HTML code and, inside this code, some methods, and variables with a @ prefix. In Razor, as soon as you write this symbol, the compiler detects that some C# code will be written. You're already aware that HTML is a markup language used to build web pages. Razor uses it along with C# to create powerful markup combined with server-rendered code.
If you want to place a block of code, it can be done within brackets like:
@{ … }
Inside this block, you are allowed to do basically everything you can do with C# syntax, from local variable declarations to loops and more. If you want to put a static @, you have to escape it by placing two @ symbols for it to be rendered in HTML. That happens, for instance, in email IDs, such as james@@bond.com.
File Structure
Razor Pages end with the .cshtml extension and might have another file, popularly called the code-behind file, which has the same name but with the .cshtml.cs extension. If you go to the root folder of your application and navigate to the Pages folder, you will see the following structure generated upon the creation of a page:
|-- /Pages
|---- /Shared |------ _Layout.cshtml |------ _ValidationScriptsPartial.cshtml |---- _ViewImports.cshtml
|---- _ViewStart.cshtml
|---- Error.cshtml
|---- Error.cshtml.cs
|---- Index.cshtml
|---- Index.cshtml.cs
|---- Privacy.cshtml
|---- Privacy.cshtml.cs
The Index, Privacy, and Error pages are automatically generated after project creation. Briefly look at the other files here.
The /Shared folder contains a shared Layout page that is used by default in the application. This page contains some shared sections, such as navbars, headers, footers, and metadata, that repeat in almost every application page:
_Layout.cshtml
<!DOCTYPE html>
<html lang="en">
<head>
<meta charset="utf-8" />
<meta name="viewport" content="width=device-width, initial-scale=1.0" />
<title>@ViewData["Title"] - ToDoListApp</title> <link rel="stylesheet" href="~/lib/bootstrap/dist/css/bootstrap.min.css" />
<link rel="stylesheet" href="~/css/site.css" asp-append-version="true" />
<link rel="stylesheet" href="~/ToDoListApp.styles.css" asp-append-version="true" />
</head>
<body>
<header>
<nav class="navbar navbar-expand-sm navbar-toggleable-sm navbar-light bg-white border-bottom box-shadow mb-3">
<div class="container">
<a class="navbar-brand" asp-area="" asp-page="/Index">ToDoListApp</a>
The complete code can be found here: https://packt.link/2Hb8r.
Keeping these shared sections in a single file makes reusability and maintainability easier. If you look at this Layout page generated in your boilerplate, there are some things worth highlighting:
- By default, a Razor Pages app is generated using Twitter Bootstrap for design—a library used for writing beautiful, simple, and responsive websites—and jQuery for basic scripting. This can be customized for each application, as those are just static files.
- There is a special RenderBody() method that indicates where the generated HTML for the application pages will be placed.
- Another method, named RenderSection(), is useful for rendering predefined sections per page. It is useful, for instance, when some static file, such as an image, script, or stylesheet, is needed only for some pages. In this way, you can place these files inside specific sections only in the pages where they are needed and call the RenderSection method at the level of the HTML you want them to be rendered. This is done on the _Layout.cshtml page.
The _ViewImports.cshtml file is another important file; it enables the application pages to share common directives and reduces effort by placing these directives on every page. It is where all the global using namespaces, tag helpers, and global Pages namespaces are defined. Some of the directives this file supports are as follows:
- @namespace: Used to set the base namespace for Pages.
- @inject: Used to place DI within the page.
- @model: Includes PageModel, a class that will determine what information the page will handle.
- @using: Similar to the .cs files, this directive allows you to fully qualify namespaces at the top level of a Razor page to avoid repeating these namespaces throughout the code.
The _ViewStart.cshtml file is used to place code that will be executed at the start of each page call. On this page, you define the Layout property while setting the Layout page.
Now that you are familiar with the basics of Razor Pages, it is time to start working on your application and dive into some more interesting topics. You will start by creating the basic structure of the to-do list application.
Exercise 7.02: Creating a Kanban Board with Razor
The goal of this exercise will be to start the to-do application creation with its first component—a Kanban board. This board is used for controlling workflows, where people can divide their work into cards and move these cards between different statuses, such as To Do, Doing, and Done. A popular application that uses this is Trello. The same ToDoListApp project created in the Exercise 7.01 will be used throughout this chapter to learn new concepts and incrementally evolve the application, including in this exercise. Perform the following steps:
- Navigate to the root folder of your application and create a folder named Models.
- Inside the Models folder, create a new enum called ETaskStatus with the ToDo, Doing, and Done options:
public enum ETaskStatus {
ToDo,
Doing,
Done
}
- Again, in the Models folder, create a new class called ToDoTask that will be used to create a new task for your to-do list with the following properties:
namespace ToDoListApp.Models;
public class ToDoTask
{
public Guid Id { get; set; }
public DateTime CreatedAt { get; set; }
public DateTime? DueTo { get; set; }
public string Title { get; set; }
public string? Description { get; set; }
public ETaskStatus Status { get; set; }
}
- Create two constructors as shown here for the ToDoTask class:
ToDoTask.cs
namespace ToDoListApp.Models;
public class ToDoTask
{
public ToDoTask()
{
CreatedAt = DateTime.UtcNow;
Id = Guid.NewGuid();
}
public ToDoTask(string title, ETaskStatus status) : this()
{
Title = title;
Status = status;
}
The complete code can be found here: https://packt.link/nFk00.
Create one with no parameters to set the default values for the Id and CreatedAt properties, and the other with lowercase-named parameters for the preceding class to initialize the Title and Status properties.
The Pages/ Index.cshtml is automatically generated in your application boilerplate. It is this page that will be the entry point of your application.
- Now, customize it by editing the file Pages/ Index.cshtml.cs and replacing the boilerplate code with the code shown as follows:
Index.cshtml.cs
using System.Collections.Generic;
using Microsoft.AspNetCore.Mvc.RazorPages;
using ToDoListApp.Models;
namespace ToDoListApp.Pages;
public class IndexModel : PageModel
{
public IList<ToDoTask> Tasks { get; set; } = new List<ToDoTask>();
public IndexModel()
{
}
The complete code can be found here: https://packt.link/h8mni.
Basically, this code fills your model. Here, the OnGet method of PageModel is used to tell the application that when the page is loaded, it should fill the model with the properties assigned to Task
- Replace the code within Pages/ Index.cshtml with the code shown as follows in order to create your Kanban board with the task cards:
Index.cshtml
@page
@using ToDoListApp.Models
@model IndexModel
@{
ViewData["Title"] = "My To Do List";
}
<div class="text-center">
<h1 class="display-4">@ViewData["Title"]</h1>
<div class="row">
<div class="col-4">
<div class="card bg-light">
<div class="card-body">
<h6 class="card-title text-uppercase text-truncate py-2">To Do</h6>
<div class="border border-light">
The complete code can be found here: https://packt.link/IhELU.
This page is your view. It shares the properties from the Pages/ Index.cshtml.cs class (also called the code-behind class). When you assign a value to the Tasks property in the code-behind class, it becomes visible to the view. With this property, you can populate the HTML from the page.
- Now, run your application with the dotnet run command. You will see the following on the Index page when the application is loaded on the browser:
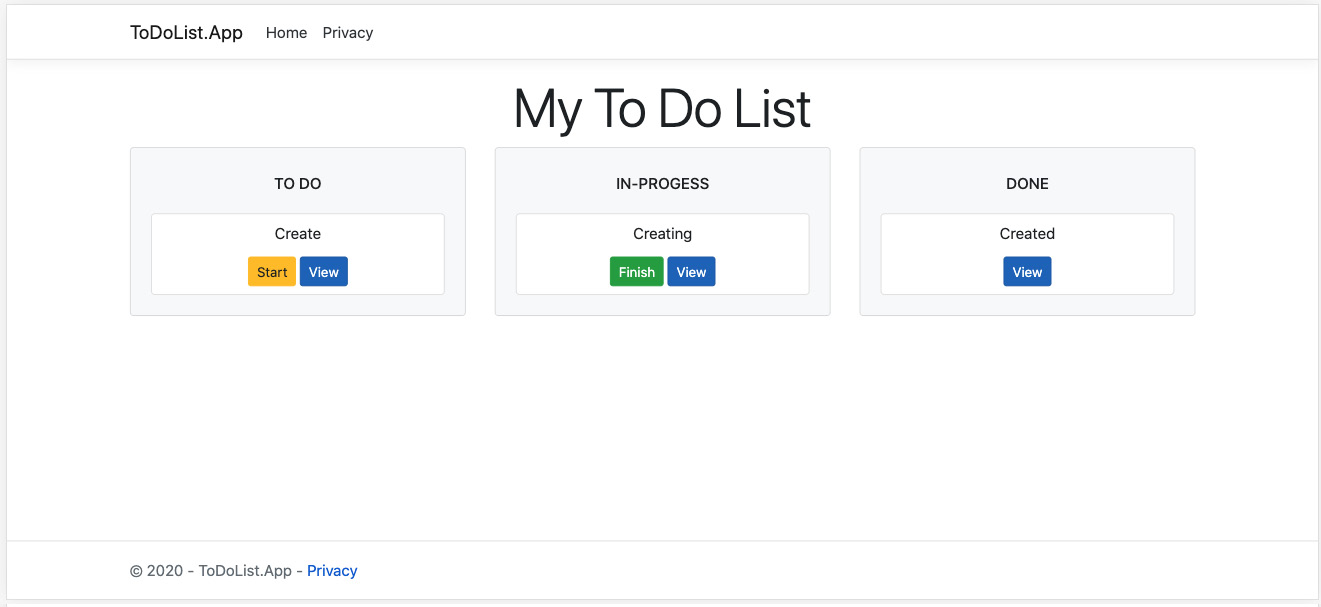
Figure 7.3: Displaying your first application, the Kanban board
Notice that, for now, the application does not contain any logic. What you built here is simply a UI powered by the PageModel data.
Note
You can find the code used for this exercise at https://packt.link/1PRdq.
As you saw in Exercise 7.02, for every page created there are two main types of files which are a .cshtml and a .cshtml.cs file. These files form the foundations of each Razor page. The next section will detail about this difference in the filename suffix and how these two files complement each other.
PageModel
In the Index.cshtml.cs file that you created in Exercise 7.02, you might have noticed that the class inside it inherits from the PageModel class. Having this code-behind class provides some advantages—such as a clear separation of concerns between the client and the server—and this makes maintenance and development easier. It also enables you to create both unit and integration tests for the logic placed on the server. You will learn more about testing in Chapter 10, Automated Testing.
A PageModel may contain some properties that are bound to the view. In Exercise 7.02, the IndexModel page has a property that is a List<ToDoTask>. This property is then populated when the page loads on the OnGet() method. So how does populating happen? The next section will discuss the life cycle of populating properties and using them within PageModel.
The Life Cycle with Page Handlers
Handler methods are a core feature of Razor Pages. These methods are automatically executed when the server receives a request from the page. In Exercise 7.02, for instance, the OnGet method will be executed each time the page receives a GET request.
By convention, the handler methods will answer according to the HTTP verb of the request. So, for instance, if you wanted something to be executed after a POST request, you should have an OnPost method. Also, after a PUT request, you should have an OnPut method. Each of these methods has an asynchronous equivalent, which changes the method's signature; an Async suffix is added to the method name, and it returns a Task property instead of void. This also makes the await functionality available for the method.
There is, however, one tricky scenario in which you may want a form to perform multiple actions with the same HTTP verb. In that case, you could perform some confusing logic on the backend to handle different inputs. Razor Pages, however, provides you with a functionality right out of the box called tag helpers, which allows you to create and render HTML elements on the server before placing them on the client. The anchor tag helper has an attribute called asp-page-handler that allows you to specify the name of the handler being called on the server. Tag helpers will be discussed in the next section, but for now, consider the following code as an example. The code contains an HTML form containing two submit buttons, to perform two different actions—one for creating an order, and the other for canceling an order:
<form method="post">
<button asp-page-handler="PlaceOrder">Place Order</button>
<button asp-page-handler="CancelOrder">Cancel Order</button>
</form>
On the server side, you only need to have two handlers, one for each action, as shown in the following code:
public async Task<IActionResult> OnPostPlaceOrderAsync()
{
// …
}
public async Task<IActionResult> OnPostCancelOrderAsync()
{
// …
}
Here, the code behind the page matches the value of the form method and the asp-page-handler tag on the .cshtml file to the method name on the code-behind file. That way, you can have multiple actions for the same HTTP verb in the same form.
A final note on this subject is that in this case, the method name on the server should be written as:
On + {VERB} + {HANDLER}
This is written with or without the Async suffix. In the previous example, the OnPostPlaceOrderAsync method is the PlaceOrder handler for the PlaceOrder button, and OnPostCancelOrderAsync is the handler for the CancelOrder button.
Rendering Reusable Static Code with Tag Helpers
One thing you might have noticed is that the HTML written previously is lengthy. You created Kanban cards, lists, and a board to wrap it all. If you take a closer look at the code, it has the same pattern repeated all the way through. That raises one major problem, maintenance. It is hard to imagine having to handle, maintain, and evolve all this plain text.
Fortunately, tag helpers can be immensely useful in this regard. They are basically components that render static HTML code. ASP.NET has a set of built-in tag helpers with custom server-side attributes, such as anchors, forms, and images. Tag helpers are a core feature that helps make advanced concepts easy to handle, such as model binding, which will be discussed a little further ahead.
Besides the fact that they add rendering capabilities to built-in HTML tags, they are also an impressive way to achieve reusability on static and repetitive code. In the next exercise, you will learn how to create a customized tag helper.
Exercise 7.03: Creating Reusable Components with Tag Helpers
In this exercise, you are going to improve upon your work in the previous one. The improvement here will be to simplify the HTML code by moving part of this code that could be reused to custom tag helpers.
To do so, perform the following steps:
- Open the _ViewImports.cshtml file, which was created with your application.
- Add the following lines to the end with the content to define custom tag helpers @addTagHelper directive:
@addTagHelper *, Microsoft.AspNetCore.Mvc.TagHelpers
@addTagHelper *, ToDoListApp
In the preceding code, you added all the custom tag helpers that exist within this namespace using the asterisk (*).
- Now, create a new folder under the project's root (ToDoApp) called TagHelpers.
- Create a new class inside this folder called KanbanListTagHelper.cs.
- Make this class inherit from the TagHelper class:
namespace ToDoListApp.TagHelpers;
- This inheritance is what allows ASP.NET to identify both built-in and custom tag helpers.
- Now place a using statement for the Microsoft.AspNetCore.Razor.TagHelpers namespace:
using Microsoft.AspNetCore.Razor.TagHelpers;
namespace ToDoListApp.TagHelpers;
public class KanbanListTagHelper : TagHelper
{
}
- For the KanbanListTagHelper class, create two string properties, called Name and Size, with getters and setters:
using Microsoft.AspNetCore.Razor.TagHelpers;
namespace ToDoListApp.TagHelpers;
public class KanbanListTagHelper : TagHelper
{
public string? Name { get; set; }
public string? Size { get; set; }
}
- Override the base asynchronous ProcessAsync (TagHelperContext context, TagHelperOutput) output method with the following code:
KanbanListTagHelper.cs
public override async Task ProcessAsync(TagHelperContext context, TagHelperOutput output)
{
output.TagName = "div";
output.Attributes.SetAttribute("class", $"col-{Size}");
output.PreContent.SetHtmlContent(
$"<div class="card bg-light">"
+ "<div class="card-body">"
+ $"<h6 class="card-title text-uppercase text-truncate py- 2">{Name}</h6>"
+ "<div class "border border-light">");
var childContent = await output.GetChildContentAsync();
output.Content.SetHtmlContent(childContent.GetContent());
The complete code can be found here: https://packt.link/bjFIk.
Every tag helper has a standard HTML tag as an output. That is why, at the beginning of your methods, the TagName property was called from the TagHelperOutput object to specify the HTML tag that will be used as output. Additionally, you can set the attributes for this HTML tag by calling the Attributes property and its SetAttribute method from the TagHelperOutput object. That is what you did right after specifying the HTML output tag.
- Now, create another class named KanbanCardTagHelper.cs with the same inheritance and namespace using a statement such as the previous one:
namespace ToDoListApp.TagHelpers;
using Microsoft.AspNetCore.Razor.TagHelpers;
public class KanbanCardTagHelper: TagHelper
{
public string? Task { get; set; }
}
For this class, create a string property with public getters and setters named Task.
- In this new class, override the base synchronous Process(TagHelperContext context, TagHelperOutput output) method. Within this method, write the following code:
public override void Process(TagHelperContext context, TagHelperOutput output)
{
output.TagName = "div";
output.Attributes.SetAttribute("class", "card");
output.PreContent.SetHtmlContent(
"<div class="card-body p-2">"
+ "<div class="card-title">");
output.Content.SetContent(Task);
output.PostContent.SetHtmlContent(
"</div>"
+ "<button class="btn btn-primary btn-sm">View</button>"
+ "</div>");
output.TagMode = TagMode.StartTagAndEndTag;
}
An important concept to know about is how the HTML content is placed within the tag helper. As you can see, the code uses three different properties from the TagHelperOutput object to place the content:
- PreContent
- Content
- PostContent
The pre-and post-properties are useful to set the content right before and after that you want to generate. A use case for them is when you want to set up fixed content as div containers, headers, and footers.
Another thing you did here was set how the tag helper will be rendered through the Mode property. You used TagMode.StartTagAndEndTag as a value because you used a div container as a tag output for the tag helper, and div elements have both start and end tags in HTML. If the output tag were some other HTML element, such as email, which is self-closing, you would use TagMode.SelfClosing instead.
- Finally, go to the Index.cshtml file under the Pages folder and replace the HTML created in Exercise 7.02 with the tag helpers to make your code concise:
Index.cshtml
@page
@using ToDoListApp.Models
@model IndexModel
@{
ViewData["Title"] = "My To Do List";
}
<div class="text-center">
<h1 class="display-4">@ViewData["Title"]</h1>
<div class="row">
<kanban-list name="To Do" size="4">
@foreach (var task in Model.Tasks.Where(t => t.Status == ETaskStatus.ToDo))
{
<kanban-card task="@task.Description">
</kanban-card>
The complete code can be found here: https://packt.link/YIgdp.
- Now run the application with the following command:
dotnet run
- In your browser, navigate to the localhost:#### address provided by the Visual Studio console output just like you did in the last exercise:

Figure 7.4: The frontend displayed in the browser
You will see the same result at the frontend that you had before, as shown in Figure 7.3. The improvement is in the fact that even though the output is the same, you have now a much more modular and concise code to maintain and evolve.
Note
You can find the code used for this exercise at https://packt.link/YEdiU.
In this exercise, you used tag helpers to create reusable components that generate static HTML code. You can see now that the HTML code is much cleaner and more concise. The next section will detail about creating interactive pages by linking what's on the Code Behind with your HTML view using the concept of model binding.
Model Binding
So far, you have covered concepts that helped create a foundation for the to-do app. As a quick recap, the main points are as follows:
- PageModel is used to add data to a page.
- Tag helpers add custom static rendering to the HTML generated by the server.
- Handler methods define the way a page interacts with an HTTP request.
One final overarching concept that is central to building Razor Pages applications is model binding. The data used as arguments in handler methods and passed through the page model is rendered through this mechanism. It consists of extracting data in key/ value pairs from HTTP requests and placing them in either the client-side HTML or the server-side code, depending on the direction of the binding that is, whether the data is moving from client to server or from server to client.
This data might be placed in routes, forms, or query strings and is binding to .NET types, either primitive or complex. Exercise 7.04 will help clarify how the model binding works when coming from the client to the server.
Exercise 7.04: Creating a New Page to Submit Tasks
The goal of this exercise is to create a new page. It will be used to create new tasks that will be displayed on the Kanban board. Perform the following steps to complete this exercise:
- Inside the project root folder, run the following commands:
dotnet add package Microsoft.EntityFrameworkCore
dotnet add package Microsoft.EntityFrameworkCore.Sqlite
dotnet add package Microsoft.EntityFrameworkCore.Design
- At the root of the project, create a new folder named Data with a ToDoDbContext class inside it. This class will inherit from Entity Framework's DbContext and will be used to access the database.
- Now add the following code in it:
using Microsoft.EntityFrameworkCore;
using ToDoListApp.Models;
namespace ToDoListApp.Data;
public class ToDoDbContext : DbContext
{
public ToDoDbContext(DbContextOptions<ToDoDbContext> options) : base(options)
{
}
public DbSet<ToDoTask> Tasks { get; set; }
}
- Update your Program.cs file to match the following:
Program.cs
using Microsoft.EntityFrameworkCore;
using ToDoListApp.Data;
using ToDoListApp.Middlewares;
var builder = WebApplication.CreateBuilder(args);
// Add services to the container.builder.Services.AddRazorPages();
builder.Services.AddDbContext<ToDoDbContext>(opt => opt.UseSqlite("Data Source=Data/ToDoList.db"));
var app = builder.Build();
// Configure the HTTP request pipeline.app.UseMiddleware<RequestLoggingMiddleware>();
The complete code can be found here: https://packt.link/D4M8o.
This change will register the DbContext dependencies within the DI container, as well as sets up the database access.
- Run the following commands on the terminal to install the dotnet ef tool. This is a CLI tool that will help you to iterate with database helpers, such as schema creation and update:
dotnet tool install --global dotnet-ef
- Now, build the application and run the following commands on the terminal:
dotnet ef migrations add 'FirstMigration'
dotnet ef database update
These commands will create a new migration that will create the schema from your database and apply this migration to your database.
- After the migration has run and the database is updated, create a new folder called Tasks inside the Pages folder.
- Move the Index page files—index.cshtml and index.cshtml.cs—to the Tasks folder.
- Next, replace the AddRazorPages call in the Program.cs with the following call:
builder.Services.AddRazorPages(opt =>{ opt.Conventions.AddPageRoute("/Tasks/Index", ""); });
This will add a convention for the page routes to be called.
- Replace the header tag inside the _Layout.cshtml file (under Pages/Shared/) to create a shared navbar for the application:
<header>
<nav class="navbar navbar-expand-sm navbar-toggleable-sm navbar-light bg-white border-bottom box-shadow mb-3">
<div class="container">
<a class="navbar-brand" asp-area="" asp-page="/Index">MyToDos</a>
<button class="navbar-toggler" type="button" data-toggle="collapse" data-target=".navbar-collapse" aria-controls="navbarSupportedContent"
aria-expanded="false" aria-label="Toggle navigation">
<span class="navbar-toggler-icon"></span>
</button>
<div class="navbar-collapse collapse d-sm-inline-flex flex-sm-row-reverse">
<ul class="navbar-nav flex-grow-1">
<li class="nav-item">
<a class="nav-link text-dark" asp-area="" asp-page="/tasks/create">Create Task</a>
</li>
</ul>
</div>
</div>
</nav>
</header>
This navbar will allow you to access the newly created page.
- Create the Create.cshtml page (under Pages/Tasks/) and add the following code:
Create.cshtml
@page "/tasks/create"
@model CreateModel
@{
ViewData["Title"] = "Task";
}
<h2>Create</h2>
<div>
<h4>@ViewData["Title"]</h4>
<hr />
<dl class="row">
<form method="post" class="col-6">
<div class="form-group">
<label asp-for="Task.Title"></label>
<input asp-for="Task.Title" class="form-control" />
The complete code can be found here: https://packt.link/2NjdN.
This should contain a form that will use a PageModel class to create the new tasks. For each form input field, an asp-for attribute is used inside the input tag helper. This attribute is responsible for filling the HTML input with a proper value in the name attribute.
Since you are binding to a complex property inside the page model named Task, the name value is generated with the following syntax:
{PREFIX}_{PROPERTYNAME} pattern
Here PREFIX is the complex object name on the PageModel. So, for an ID of a task, an input with name="Task_Id" is generated on the client-side and the input is populated with the value attribute having the Task.Id property value that comes from the server. In the case of the page, as you are creating a new task, the field does not come previously populated. That is because with the OnGet method you assigned a new object to the Task property of the PageModel class.
- Now, create the code-behind page, named CreateModel.cshtml.cs (placed in Pages/Tasks/):
Create.cshtml.cs
using Microsoft.AspNetCore.Mvc;
using Microsoft.AspNetCore.Mvc.RazorPages;
using ToDoListApp.Data;
using ToDoListApp.Models;
namespace ToDoListApp.Pages.Tasks;
public class CreateModel : PageModel {
private readonly ToDoDbContext _context;
public CreateModel(ToDoDbContext context)
{
_context = context;
}
The complete code can be found here: https://packt.link/06ciR.
When posting a form, all the values inside the form are placed in the incoming HttpRequest. The call to TryUpdateModelAsync tries to populate an object with these values that the request brought from the client-side. Since the form is created with the name attribute in the input element with the format that has been explained previously, this method knows how to extract these values and bind them to the object. Put simply, that is the magic behind model binding.
- Now, replace the code of Index.cshtml (under Pages/Tasks/) with the following:
Index.cshtml
@page
@using ToDoListApp.Models
@model IndexModel
@{
ViewData["Title"] = "My To Do List";
}
<div class="text-center">
@if (TempData["SuccessMessage"] != null)
{
<div class="alert alert-success" role="alert">
@TempData["SuccessMessage"]
</div>
}
<h1 class="display-4">@ViewData["Title"]</h1>
The complete code can be found here: https://packt.link/hNOTx.
This code adds a section that introduces an alert to be displayed if there is an entry with the SuccessMessage key in the TempData dictionary.
- Finally, add some display and validation rules via data annotations to the Models/ToDoTask.cs class properties:
ToDoTask.cs
using System.ComponentModel;
using System.ComponentModel.DataAnnotations;
namespace ToDoListApp.Models;
public class ToDoTask
{
public ToDoTask()
{
CreatedAt = DateTime.UtcNow;
Id = Guid.NewGuid();
}
public ToDoTask(string title, ETaskStatus status) : this()
{
The complete code can be found here: https://packt.link/yau4p.
Here the Required data annotation over the property is to ensure that this property is set with a valid value. In this exercise, you added persistence with Entity Framework Core and SQLite and created a new page that creates a task for the to-do application, finally saving it into the database.
- Now run the code in VS Code.
- To see the output on your web browser, type the following command on the address bar:
Localhost:####
Here #### represents the port number. This would be different for different systems.
After pressing enter, the following screen is displayed:
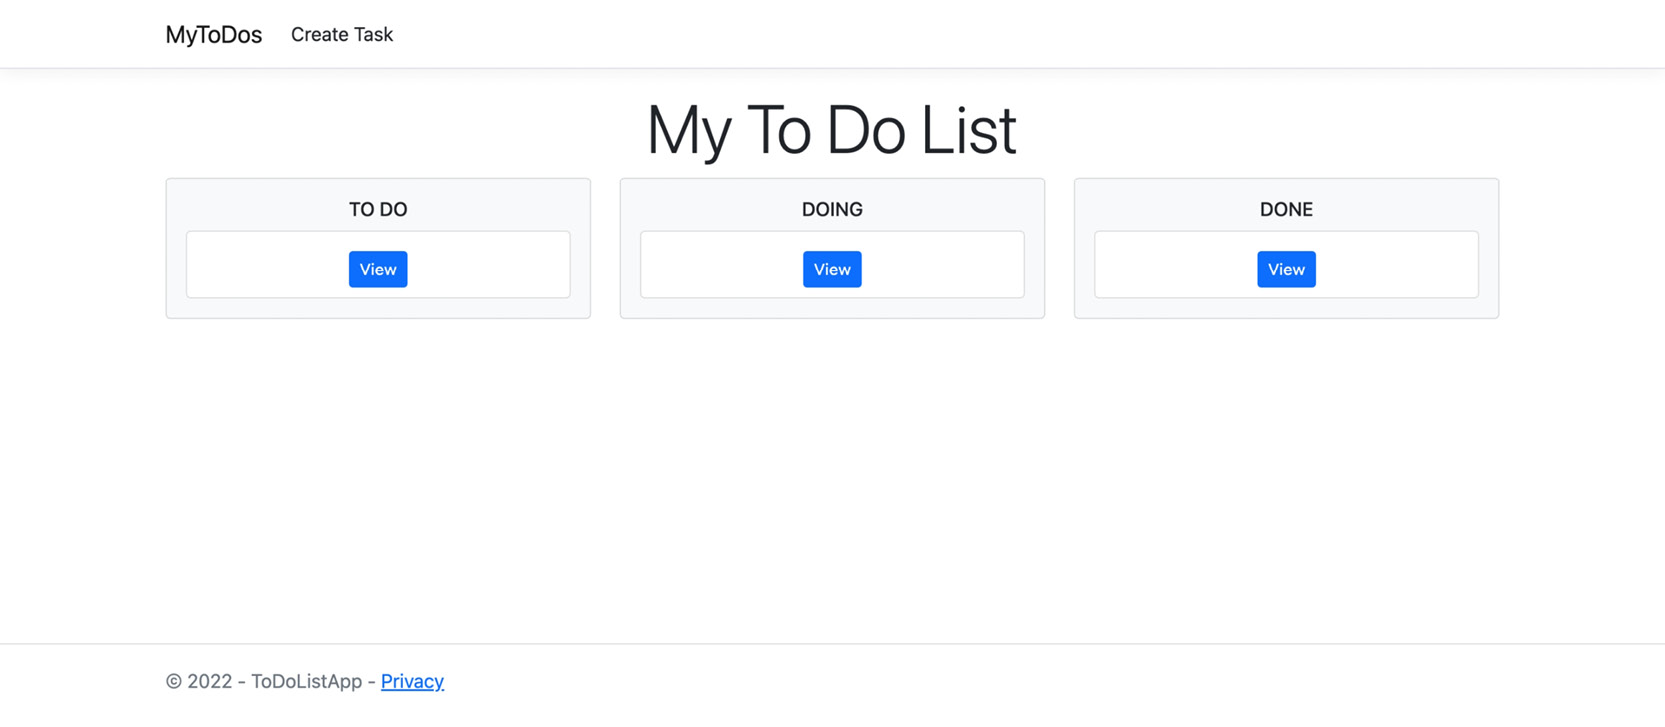
Figure 7.5: Home page with Create Task button in the navigation bar
- Click on the Create Task button, and you'll see the page you just created to insert new cards into your Kanban Board:
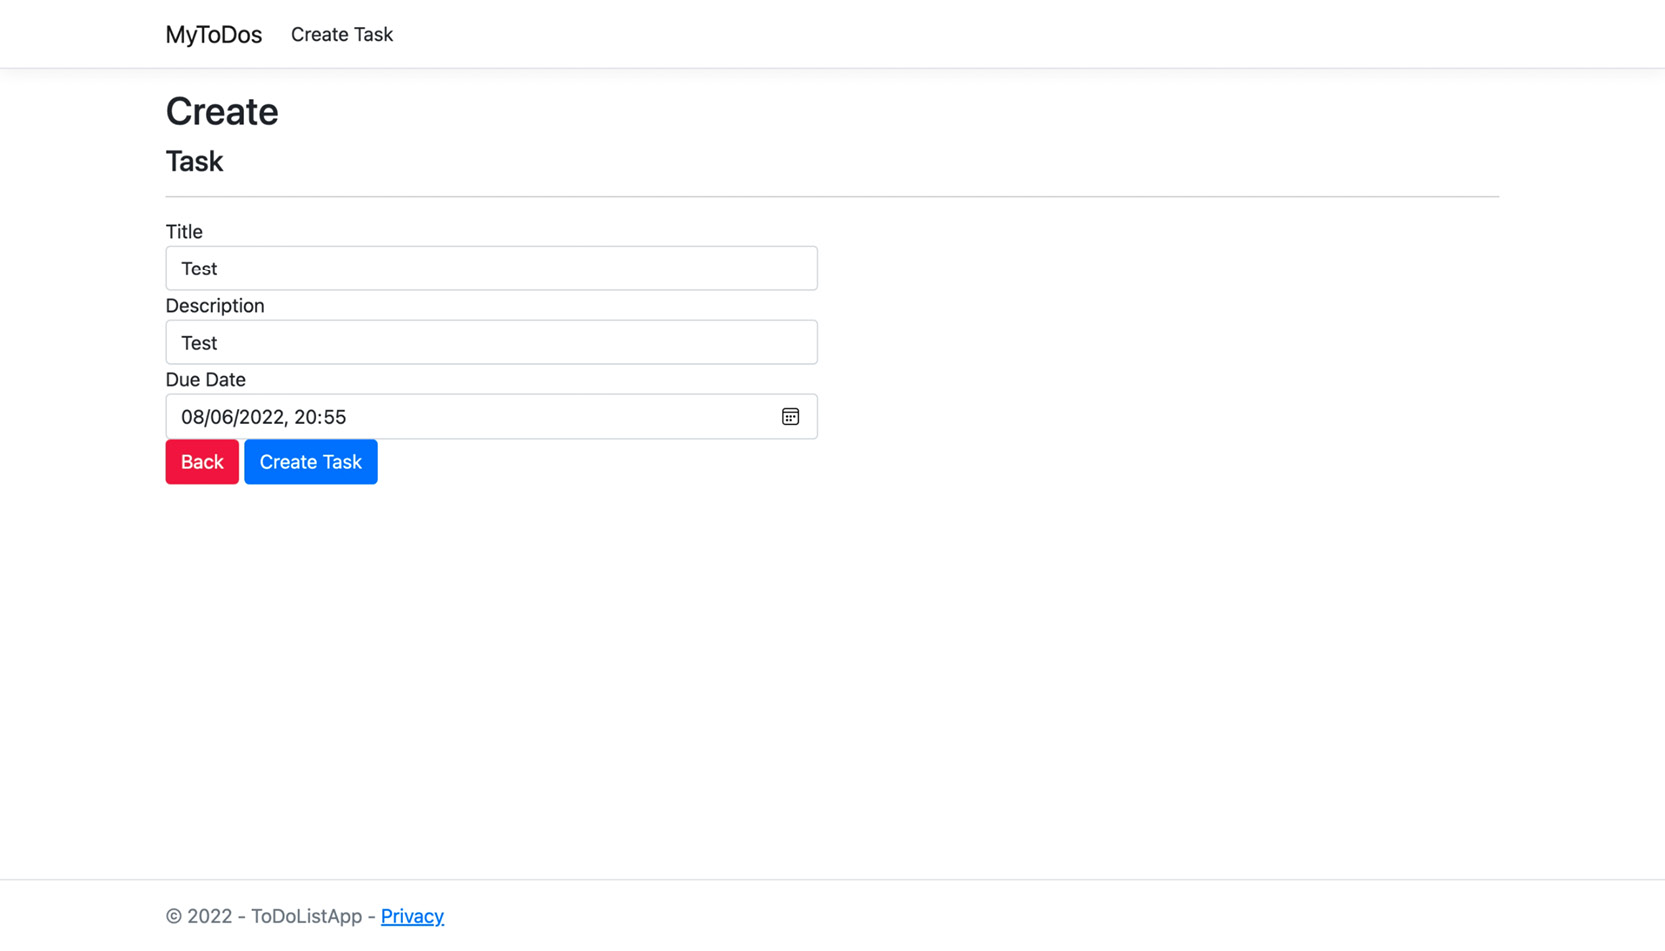
Figure 7.6: The Create Task page
Note
You can find the code used for this exercise at https://packt.link/3FPaG.
Now, you'll take a deep dive into how model binding brings it all together, enabling you to transport data back and forth between the client and the server. You will also know more about validations in the next section.
Validation
Validating data is something you will often need to do while developing an application. Validating a field may either mean that it is a required field or that it should follow a specific format. An important thing you may have noticed in the final part of the previous exercise is that you placed some [Required] attributes on top of some model properties in the final step of the last exercise. Those attributes are called data annotations and are used to create server-side validations. Moreover, you can add some client-side validation combined with this technique.
Note that in Step 10 of Exercise 7.04, the frontend has some span tag helpers with an asp-validation-for attribute pointing to the model properties. There is one thing that binds this all together—the inclusion of the _ValidationScriptsPartial.cshtml partial page. Partial pages are a subject discussed in the next section, but for now, it is enough to know that they are pages that can be reused inside other ones. The one just mentioned includes default validation for the pages.
With those three placed together (that is, the required annotation, the asp-validation-for tag helper, and the ValidationScriptsPartial page), validation logic is created on the client-side that prevents the form from being submitted with invalid values. If you want to perform the validation on the server, you could use the built-in TryValidateModel method, passing the model to be validated.
Dynamic Behavior with Partial Pages
So far, you have built a board to display tasks and a way to create and edit them. Still, there is one major feature for a to-do application that needs adding—a way to move tasks across the board. You can start as simple as moving one way only—from to-do to doing, and from doing to done.
Until now, your task cards were built using tag helpers. However, tag helpers are rendered as static components and do not allow any dynamic behavior to be added during rendering. You could add tag helpers directly to your page, but you would have to repeat it for every board list. That is exactly where a major Razor Pages feature comes into play and that is Partial Pages. They allow you to create reusable page code snippets in smaller pieces. That way, you can share the base page dynamic utilities and still avoid duplicate code in your application.
This concludes the theoretical portion of this section. In the following section, you will put this into practice with an exercise.
Exercise 7.05: Refactoring a Tag Helper to a Partial Page with Custom Logic
In this exercise, you will create a partial page to replace KanbanCardTagHelper and add some dynamic behavior to your task's cards, such as changing content based on custom logic. You will see how partial pages help in reducing duplicate code and make it more easily reusable. Perform the following steps to complete this exercise:
- Inside the Pages/Tasks folder, create a new file called _TaskItem.cshtml with the following content:
_TaskItem.cshtml
@model ToDoListApp.Models.ToDoTask
<form method="post">
<div class="card">
<div class="card-body p-2">
<div class="card-title">
@Model.Title
</div>
<a class="btn btn-primary btn-sm" href="/tasks/@Model.Id">View</a>
@if (Model.Status == Models.ETaskStatus.ToDo)
{
<button type="submit" class="btn btn-warning btn-sm" href="@Model.Id" asp-page-handler="StartTask" asp-route-id="@Model.Id">
Start
</button>
The complete code can be found here: https://packt.link/aUOcj.
The _TaskItem.cshtml is basically a partial page that contains the .cshtml code of a card from the Kanban board.
- Now, replace the code within the Index.cshtml.cs file with the following code that can read the saved tasks from the database and place the actions you created on the partial page:
Index.cshtml.cs
using System;
using System.Collections.Generic;
using System.Linq;
using Microsoft.AspNetCore.Mvc;
using Microsoft.AspNetCore.Mvc.RazorPages;
using ToDoListApp.Data;
using ToDoListApp.Models;
namespace ToDoListApp.Pages
{
public class IndexModel : PageModel
{
private readonly ToDoDbContext _context;
public IndexModel(ToDoDbContext context)
The complete code can be found here: https://packt.link/Tqgup.
This code creates handler methods for the three HTTP requests—a GET request and two POST requests. It also places the logic to be executed on these handlers. You will read values from the database with GET and save them back with POST.
- Finally, update the Index.cshtml page with the following code to replace the use of tag helpers by the partial Razor page with your Kanban cards:
Index.cshtml
@page
@using ToDoListApp.Models
@model IndexModel
@{
ViewData["Title"] = "MyToDos";
}
<div class="text-center">
@if(TempData["SuccessMessage"] != null)
{
<div class="alert alert-success" role="alert">
@TempData["SuccessMessage"]
</div>
The complete code can be found here: https://packt.link/9SRsY.
Doing so, you'll notice how much duplicate code gets eliminated.
- Now run the application with the following command:
dotnet run
- Next click at the Create Task button and fill the form. After a Task is created, you'll see a confirmation message, as shown in Figure 7.7.

Figure 7.7: The Home screen after a Task creation
Note
If you have created some tasks in the previous screen, the screen display might be different on your system.
In this exercise, you created an almost fully functional to-do application in which you can create tasks and save them to the database, and even log your requests to see how long they take.
Note
You can find the code used for this exercise at https://packt.link/VVT4M.
Now, it is time to work on an enhanced feature through an activity.
Activity 7.01: Creating a Page to Edit an Existing Task
Now it's time to enhance the previous exercise with a new and fundamental feature that is, to move tasks across the Kanban board. You must build this application using the concepts covered in this chapter such as model binding, tag helpers, partial pages, and DI.
To complete this activity, you need to add a page to edit the tasks. The following steps will help you complete this activity:
- Create a new file called Edit.cshtml with the same form as Create.cshtml.
- Change the route at the page directive to receive "/tasks/{id}".
- Create the code-behind file that loads a task by the OnGet ID from the DbContext schema. If the ID does not return a task, redirect it to the Create page.
- On the Post form, recover the task from the database, update its values, send a success message, and redirect to the Index view afterward.
The output of a page is displayed as follows:

Figure 7.8: The Edit Task Page as output to the activity
Note
The solution to this activity can be found at https://packt.link/qclbF.
With the examples and activity so far, you now know how to develop pages with Razor. In the next section, you will learn how to work with a tool that has an even smaller scope of isolated and reusable logic called view components.
View Components
So far, you have seen two ways of creating reusable components to provide better maintenance and reduce the amount of code and that is tag helpers and partial pages. While a tag helper produces mainly static HTML code (as it translates a custom tag into an existing HTML tag with some content inside it), a partial page is a small Razor page inside another Razor page that shares the page data-binding mechanism and can perform some actions such as form submission. The only downside to partial pages is that the dynamic behavior relies on the page that contains it.
This section is about another tool that allows you to create reusable components that is, view components. View components are somewhat similar to partial pages, as they also allow you to provide dynamic functionality and have logic on the backend. However, they are even more powerful as they are self-contained. This self-containment allows them to be developed independently of the page and be fully testable on their own.
There are several requirements for creating view components, as follows:
- The custom component class must inherit from Microsoft.AspNetCore.Mvc.ViewComponent.
- It must either have the ViewComponent suffix in the class name or be decorated with the [ViewComponent] attribute.
- This class must implement either a IViewComponentResult Invoke() synchronous method or a Task<IViewComponentResult> InvokeAsync() asynchronous method (when you need to call async methods from within).
- The result of both previous methods is typically the View(model) method with the view component model as an argument. On the frontend, the default view filename should, by convention, be called Default.cshtml.
- For the view to be rendered, it must be located in either Pages/Components/{MY_COMPONENT_NAME}/Default.cshtml or /Views/Shared/Components/{MY_COMPONENT_NAME}/Default.cshtml.
- If not located in any of the preceding paths, the location of the view must be explicitly passed as an argument on the View method returned in the Invoke or InvokeAsync methods.
This concludes the theoretical portion of this section. In the following section, you will put this into practice with an exercise.
Exercise 7.06: Creating a View Component to Display Task Statistics
In this exercise, you will create a view component that allows you to display some statistics regarding delayed tasks on the navbar of the application. Working through this exercise, you will learn the basic syntax of view components and how to place them in Razor Pages. Perform the following steps to do so:
- Under the root of the ToDoListApp project, create a new folder called ViewComponents.
- Inside this folder, create a new class called StatsViewComponent:
namespace ToDoListApp.ViewComponents;
public class StatsViewComponent
{
}
- Again, inside the ViewComponents folder, create a new class named StatsViewModel with two public int properties, named Delayed and DueToday:
namespace ToDoListApp.ViewComponents;
public class StatsViewModel
{
public int Delayed { get; set; }
public int DueToday { get; set; }
}
- Edit the StatsViewComponent class to inherit from the ViewComponent class that is contained in the Microsoft.AspNetCore.Mvc namespace:
using Microsoft.AspNetCore.Mvc;
public class StatsViewComponent : ViewComponent
{
}
- Inject ToDoDbContext via a constructor initializing a private readonly field:
public class StatsViewComponent : ViewComponent
{
private readonly ToDoDbContext _context;
public StatsViewComponent(ToDoDbContext context) => _context = context;
}
Place the proper using namespaces.
- Create a method named InvokeAsync with the following signature and content:
StatsViewComponent.cs
using ToDoListApp.Data;
using Microsoft.AspNetCore.Mvc;
using Microsoft.EntityFrameworkCore;
using System.Linq;
namespace ToDoListApp.ViewComponents;
public class StatsViewComponent : ViewComponent
{
private readonly ToDoDbContext _context;
public StatsViewComponent(ToDoDbContext context) => _context = context;
public async Task<IViewComponentResult> InvokeAsync()
{
var delayedTasks = await _context.Tasks.Where(t =>
The complete code can be found here: https://packt.link/jl2Ue.
This method will use ToDoDbContext to query the database and retrieve the delayed tasks, as well as the ones that are due on the current day.
- Now under the Pages folder, create a new folder called Components.
- Under it make another folder called Stats.
- Then, inside the Stats folder, create a new file called default.cshtml with the following content:
@model ToDoListApp.ViewComponents.StatsViewModel
<form class="form-inline my-2 my-lg-0">
@{
var delayedEmoji = Model.Delayed > 0 ? "
 " : "
" : " ";
";var delayedClass = Model.Delayed > 0 ? "btn-warning" : "btn-success";
var dueClass = Model.DueToday > 0 ? "btn-warning" : "btn-success";
}
<button type="button" class="btn @delayedClass my-2 my-sm-0">
<span class="badge badge-light">@Model.Delayed</span> Delayed Tasks @delayedEmoji
</button>
<button type="button" class="btn @dueClass my-2 my-sm-0">
<span class="badge badge-light">@Model.DueToday</span> Tasks Due Today

</button>
</form>
The default.cshtml will contain the view part of the view component class. Here, you are basically creating a .cshtml file based on a model specified.
- Finally, in _Layout.cshtml (under Pages/Shared/), add a call to the ViewComponent by adding the <vc:stats></vc:stats> tag inside your navbar. Replace the page code with the following:
_Layout.cshtml
<!DOCTYPE html>
<html lang="en">
<head>
<meta charset="utf-8" />
<meta name="viewport" content="width=device-width, initial-scale=1.0" />
<title>@ViewData["Title"] - ToDoListApp</title>
<link rel="stylesheet" href="~/lib/bootstrap/dist/css/bootstrap.min.css" />
<link rel="stylesheet" href="~/css/site.css" asp-append-version="true" />
<link rel="stylesheet" href="~/ToDoListApp.styles.css" asp-append-version="true" />
</head>
<body>
<header>
<nav class="navbar navbar-expand-sm navbar-toggleable-sm navbar-light bg-white border-bottom box-shadow mb-3">
The complete code can be found here: https://packt.link/DNUBC.
- Run the application to see your navbar as shown in Figure 7.8:
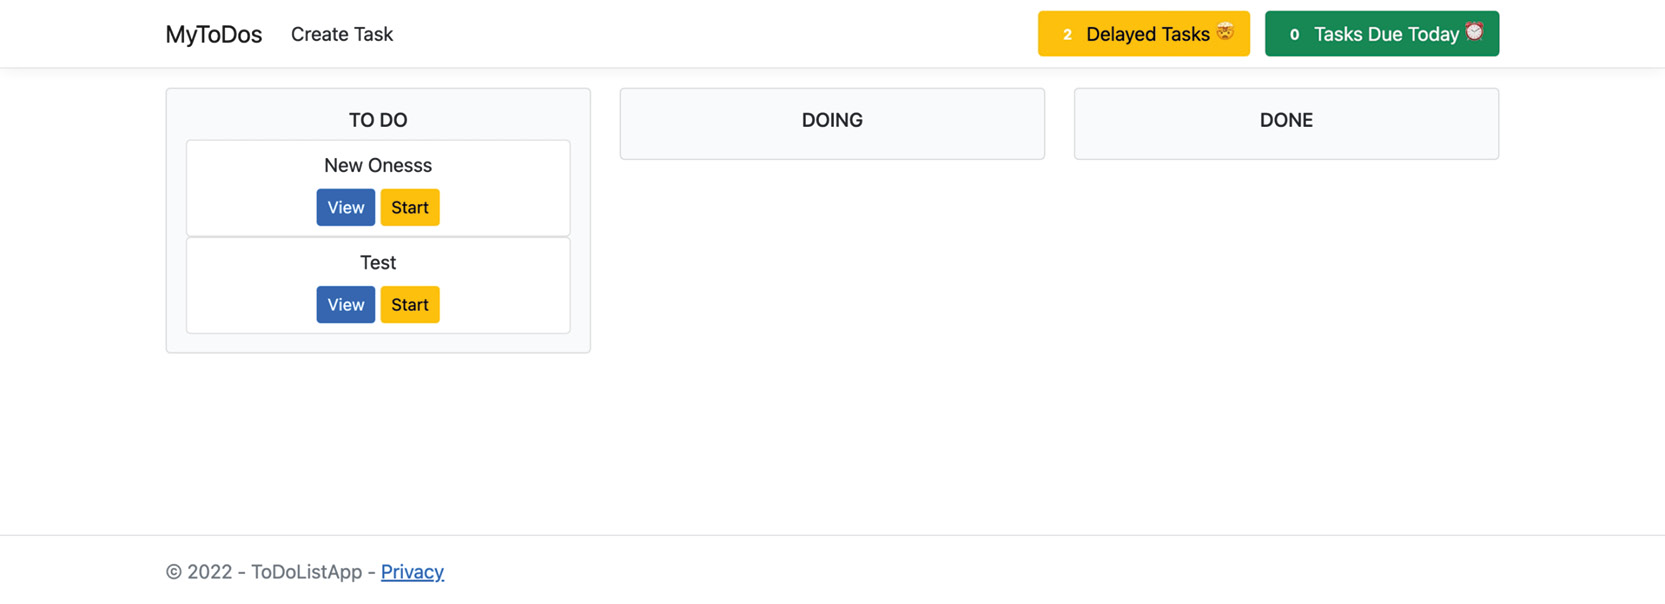
Figure 7.9: The Task stats view component
In this exercise, you created your first view component which is a task stat displayed right on your navbar. As you may have noticed, one efficient thing about view components that distinguishes them from partial pages is that they are independent of the page they are displayed on. You build both your frontend and backend all self-contained inside the component, with no external dependencies on the page.
Note
You can find the code used for this exercise at https://packt.link/j9eLW.
This exercise covered view components, which allow you to display some statistics regarding delayed tasks on the navbar of the application. With this knowledge, you will now complete an activity wherein you will work in a view component to show a log history.
Activity 7.02: Writing a View Component to Display Task Log
As the final step of this chapter, this activity will be based on a common task in real-world applications—to have a log of user activities. In this case, you will write every change the user does to a field to the database and display it in a view. To do so, you would need to use a view component.
The following steps will help you complete this activity:
- Create a new class under the Models folder named ActivityLog. This class should have the following properties: Guid Id, String EntityId, DateTime Timestamp, String Property, String OldValue, and String NewValue.
- Create a new DbSet<ActivityLog> property for this model under ToDoDbContext.
- Under your DbContext, create a method to generate activity logs for the modified properties of Entries under the Entity Framework's ChangeTracker with EntityState.Modified.
- Override SaveChangesAsync() in DbContext, by adding the generated logs to DbSet right before calling the base method.
- Create a new Entity Framework Core migration and update the database to support this migration.
- Create the ViewComponent class, which should load all logs for a given taskId passed on the invocation and return them to the ViewComponent.
- Create the ViewComponent view, which should take a collection of ActivityLog as a model and display them in a Bootstrap table, if any exists. If no logs are recorded, show an alert saying that no logs are available.
- Add the view component to the Edit page, passing the taskId property.
- Run the application and check the final output by opening a task's details. You will see a box on the right with your activity logs or a message with no logs, if there are no activity logs recorded, for that task yet.

Figure 7.10: The Activity log being displayed with no logs
In this activity, you were able to create an isolated view component with completely new functionality that's decoupled from a page, allowing it to work on a single feature at a time.
Note
The solution to this activity can be found at https://packt.link/qclbF.
Summary
In this chapter, you learned the foundations of building a modern web application with C# and Razor Pages. You focused on important concepts at the beginning of the chapter, such as middleware, logging, DI, and configuration. Next, you used Razor Pages to create CRUD models along with Entity Framework and used some more advanced features, such as custom tag helpers, partial pages, and view components, which enable you to create more easily maintainable application features.
Finally, you saw how ASP.NET model binding works so that there can be a two-way data binding between the client and the server. By now, you should have an effective foundation for building modern web applications with ASP.NET and Razor Pages on your own.
Over the next two chapters, you will learn about building and communicating with APIs.