
Chapter Three. Shooting Portraits Like a Pro
More Tips to Make People Look Their Very Best
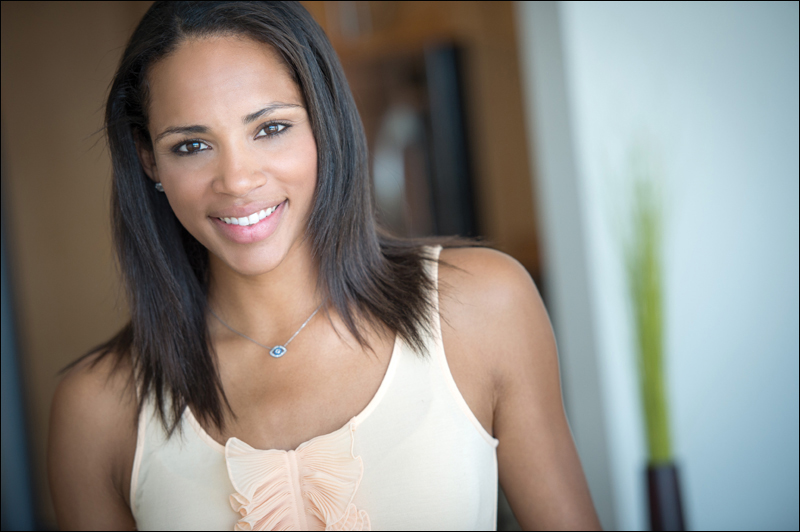
SHUTTER SPEED: 1/800 SEC F-STOP: F/2.8 ISO:100 FOCAL LENGTH: 150MM PHOTOGRAPHER: SCOTT KELBY
 Getting professional-looking shots of people is harder than you might think, for one simple reason: the pros hire really good-looking models, and as you know, models are models for one simple reason—they forget to eat. I’m joking, of course. They’re models because they photograph really, really well. So, what makes our job so hard is that we’re not surrounded by fabulous-looking models who just happen to be standing around not eating. Nope, we usually wind up shooting portraits of our friends, many of whom (on a looks scale) fall somewhere between Mr. Bean and Jabba the Hut. This is why our job, as portrait photographers, is actually substantially more challenging than that of a seasoned professional—we’ve got to make magic from some seriously un-model-like people. This is precisely why we’re often so disappointed with our portraits (when it’s really not our fault). So, in this chapter, we’ll look at two proven strategies to get better, more professional-looking portraits every time, including: (1) how to make friends with better-looking people (it helps if you’re rich), and (2) learning to control your light and pose your subjects so that no one gets a really good look at them. The key to this is to use dramatic light, and by “dramatic light” I mean—virtually none at all. The less you light these “un-model-like” subjects, the better your final images will be. In fact, think silhouette or long distance night photography, where your subjects are 100 to 200 yards away—anybody looks good from that distance (that’s why long distance relationships work so well). Anyway, what this chapter will give you is a strategy for photographing people, and a list of places where good-looking people hang out and wear jeans that cost more than the gross national product of Luxembourg.
Don’t Leave Too Much Headroom
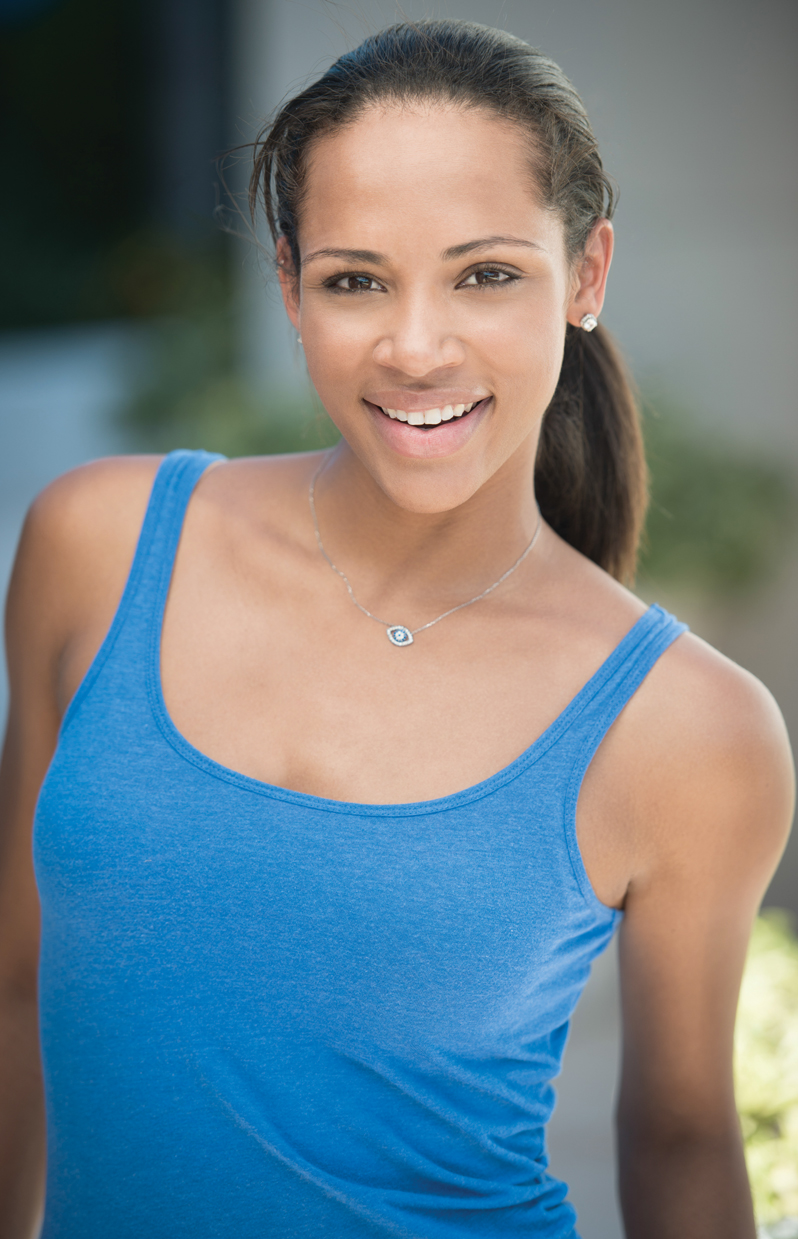
When your average person takes a snapshot of someone, they almost always leave way too much space above their subject’s head (as you see on the left here) because they almost always put their subject’s eyes in the center of the frame. It’s a classic mistake most amateurs make, but luckily it’s one that’s really easy to fix. Just don’t do that—don’t leave too much space. If you remember my portrait composition tip from part 1 of this book (position your subject’s eyes at the top one-third of the frame), then you’ll usually avoid this “too much headroom” problem altogether.
Great f-Stop for On-Location Portraits
In a photo studio, our goal is usually to make everything in focus, so we use high-numbered f-stops like f/11. However, if you’re shooting on location or outdoors, now we have a new goal: make the background soft and out of focus, so our subject stands out from the background, creating some separation (this makes for a much more professional look on location). There are just two things you need to do to make this happen: (1) Shoot wide open (meaning, use the lowest number f-stop your lens will allow, so if your lowest number is f/4, use that. If it’s f/2.8, even better—the lower the number, the more out of focus your background will be). And, (2) zoom in on your subject. Just changing the f-stop to a low number won’t be enough by itself, the zooming-in part is really important (so you might have to stand back quite a ways from your subject). Try this and you’ll see what I mean. Go ahead and set your f-stop to its lowest number (say, on your lens, it’s f/3.5), then shoot a portrait without zooming in—shoot it with a wide angle, like a 24mm. Now, take a look at the photo. Everything’s in focus, right? Even though the f-stop is low, a wide-angle shot will make everything sharp. That’s why the “zooming-in” part of this two-step technique is so important. Do both and you’ll have a wonderfully soft, out-of-focus background.
Shoot in Portrait Orientation
Most photos are taken in horizontal (landscape) orientation, and that makes perfect sense, since cameras are designed that way—to be held horizontally—and that’s why the shutter button is on the top right, right where your finger would naturally be. However, professional portraits are generally taken using a vertical orientation (that’s why it’s referred to as “portrait orientation,” but that term is most often seen when you go to print something on your computer—you’ll see a button for Landscape [wide] or Portrait [tall]). So, if you want more professional-looking portraits, turn your camera vertically and shoot in portrait orientation (of course, like any rule, there are exceptions, some of which you’ll learn later in this chapter).
Shooting Portraits? Get a Battery Grip!
If you shoot a lot of portraits, you’re going to be spending a lot of time with your camera flipped vertically, and before long you’ll get tired of reaching over the top of your camera to press the shutter button. When that happens, you’ll want to get a vertical battery grip. Besides enabling you to use two batteries, so you can shoot longer without recharging your batteries, there’s another huge advantage to battery grips, and that is that most include a vertical orientation shutter button and dials for setting your aperture and shutter speed, so you’re as comfortable shooting vertically as when you’re shooting horizontally. Besides those advantages, most of the photographers I know swear that it makes the whole camera feel better and more substantial in their hands, even when shooting horizontally (and how a camera feels in your hands is very important). The best news is these battery grips are available for most DSLRs, and for all the advantages they offer, they cost less than you’d think (starting at around $50). Just one thing to look for when ordering yours: not all battery grips have the vertical shutter button, so check to make sure the one you order does.
Most High-End Cameras Already Come with a Vertical Shutter Button
If you’ve got a high-end digital camera, like a Canon 1Dx or a Nikon D3s or D4, they already come with a vertical shutter button built right in. Hey, ya pay that type of money, they oughta come with one, right?
The “Sun Over Your Shoulder” Rule Is Bogus
You may have heard of the “Sun Over Your Shoulder” rule, which basically states that when you’re shooting people outdoors, you put the sun behind you (over your shoulder), so your subjects’ faces are lit. This is a perfectly fine rule for people taking snapshots, but it is the worst thing you can do for your group portrait (besides the “tall people in the back” thing). If you want more professional-looking shots of people outdoors, the last thing you want is the bright sun blasting them straight in their faces (although that’s exactly what your average person does), so everyone is squinting, trying to shield their eyes, and turning away from the camera. Worse, it puts harsh, direct, unflattering light on them. Instead, position your subjects with the sun behind them (not behind you), so it puts a nice rim light effect around them (outlining their hair), and then use just a tiny bit of flash (keep the brightness of your flash low) to put just enough light into their faces to make them blend in with the natural light that surrounds them.
Shoot Wide and Push in Tight
This is a concept—shooting on-location portraits with a wide-angle lens—that I hadn’t considered for many years because of the time-honored rule that states: “Don’t shoot people with a wide-angle lens because they look all distorted and weird.” But it was one of the world’s top shooters, the brilliant Joe McNally, who totally busted that myth and totally changed the way I shoot environmental portraits by turning me on to “shoot wide and push in tight.” When you’re shooting wide-angle and you get really close to your subjects (you’re pushing in tight), they don’t look distorted—only the stuff at the very edges of the frame looks a little “wide,” but it’s that stuff at the edge of the frame that shows the environment where the shot is taken. I was skeptical until Joe challenged me to pick up a People magazine and look at what most of the shots are—taken in tight with a wide-angle lens. I was shocked, but it’s not just People, it’s just about everywhere—from magazines to billboards to prints ads to the web. The pros are shooting wide and pushing in tight. You can, too!
Name-Dropping Disclaimer
Throughout this book, I wind up mentioning names of some famous photographers. The reason I do this isn’t to drop names; instead, it’s to give credit where credit is due. If I learned a tip or technique and I can remember who taught it to me, I think it’s only right to give them the proper credit.
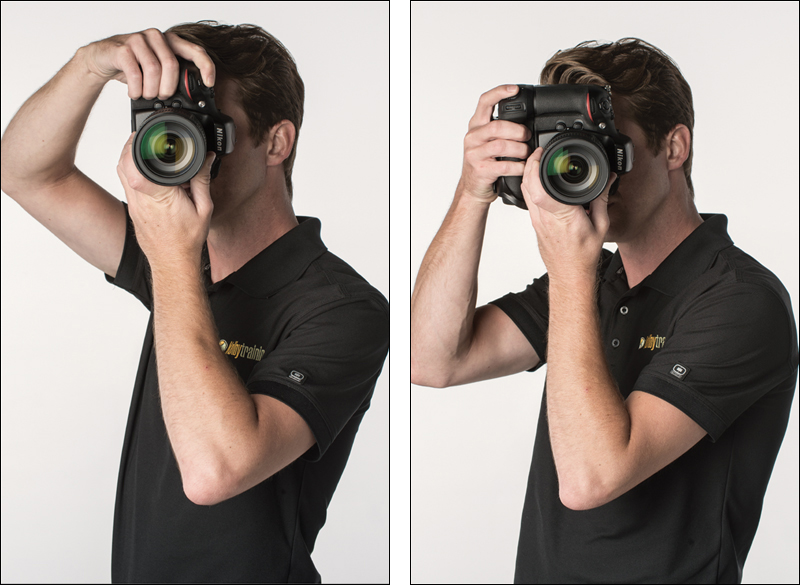
Shoot Profile Shots in Horizontal
So, now that we’ve learned the Shoot Portraits Vertically rule, let’s break it! (That’s the great thing about the photographic rules—once you learn ‘em, you can break ‘em, then it’s cool. It’s only uncool when you break the rules by accident because you didn’t know any better.) Anyway, one place where we intentionally break this rule is when we’re shooting a profile view of our subject. The reason is this: because your subject is facing the edge of the frame, if you shoot your subject vertically, they look boxed-in, and that’s uncomfortable for your viewer. So, by breaking the vertical rule and shooting profiles horizontally, it gives your subject some visual breathing room and makes your subject look more comfortable within the frame.
Shoot Long for More Flattering Portraits
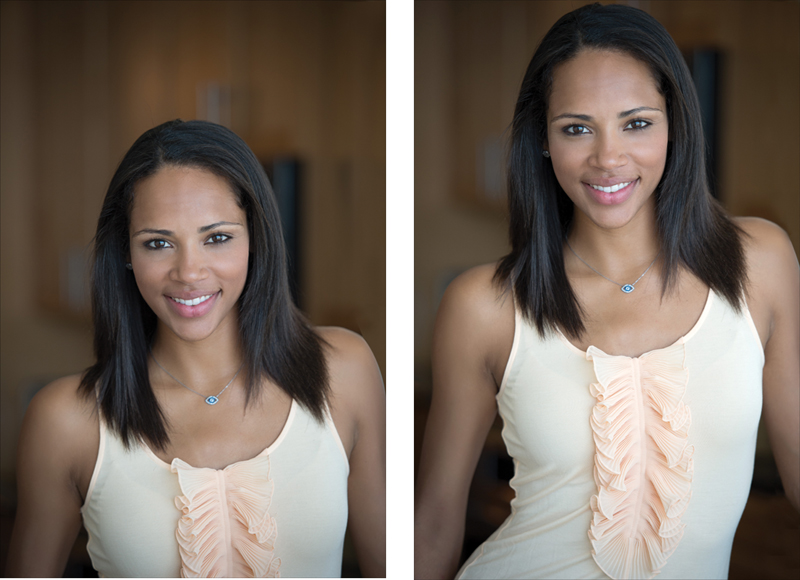
Have you ever seen a high-end photo shoot on TV (maybe a fashion or celebrity shoot), and have you noticed how far back the photographer is from their subject? That’s because they’re taking advantage of “lens compression” offered by a longer zoom lens (which is very flattering to portraits). The shots above really tell the story—the one on the left was shot with a 50mm lens, and the one on the right with a 70–200mm lens zoomed out to 190mm. Even though all the camera settings and lighting are identical (they were taken just seconds apart), her features in the shot on the right look much more pleasing. That’s why you’ll see many pro photographers shooting portraits at the far range of their zoom. By that I mean they shoot with the lens extended out as far as it can go. So, if they’re shooting a 28–135mm lens, they’re shooting out in the 100mm to 135mm range to get the best, most flattering look for portraits.
 The phrase we use for shooting all the way out at the longest end of a telephoto lens (for example, shooting at 200mm on a 70–200mm lens) is “racked out.” So, you might hear a photographer say, “I shot racked out to 200,” which means he shot with his lens extended out as far as it can go—to the far end of its range (in this case, 200mm).
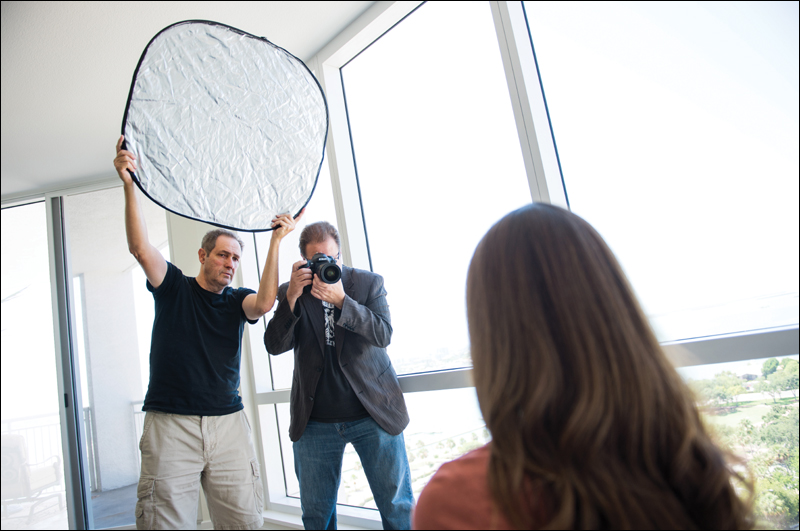
Why Diffusers Rock for Outdoor Portraits
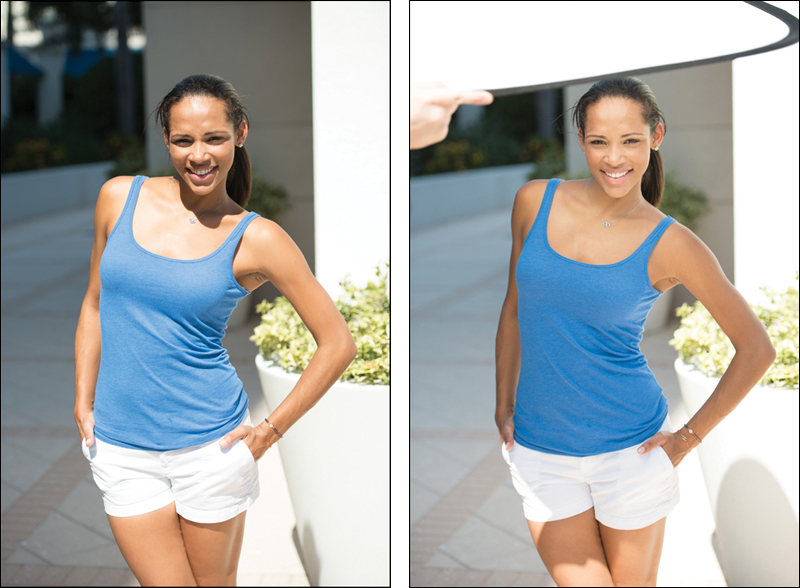
When it comes to really harsh, unflattering light for portraits, it’s a toss-up between which is worse: your camera’s built-in pop-up flash or direct sunlight. Luckily, as you learned in part 1 of this book, if you’re shooting portraits outdoors and there’s an area with some shade nearby, you can shoot there. But what if you’re out at the beach, or in the desert, or one of a thousand other places that doesn’t have a shady tree nearby? Then you’ll want to own one of these—a 30″ Lastolite TriGrip 1 Stop Diffuser (the same one I mentioned in the flash chapter for diffusing harsh light from an off-camera flash—so it does double-duty here). Just have a friend hold this diffuser between the sun and your subject (as shown above on the right), and instantly you have soft, beautiful, natural light on location. It sells for around $70 at B&H Photo, and you’ll want this lightweight lifesaver with you every time you leave the studio.
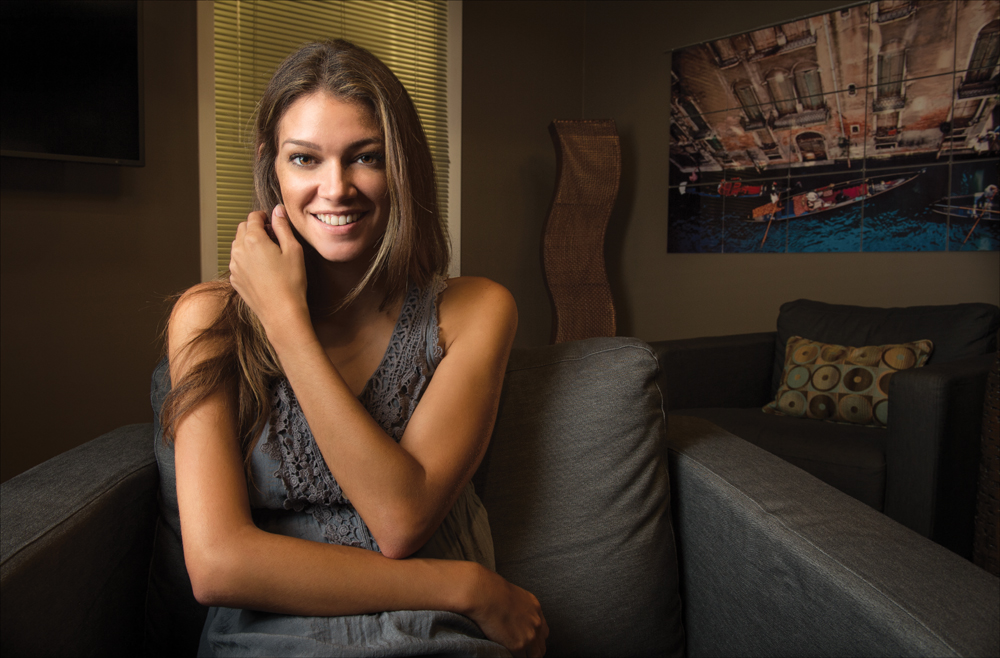
Making a Better Background for Portraits
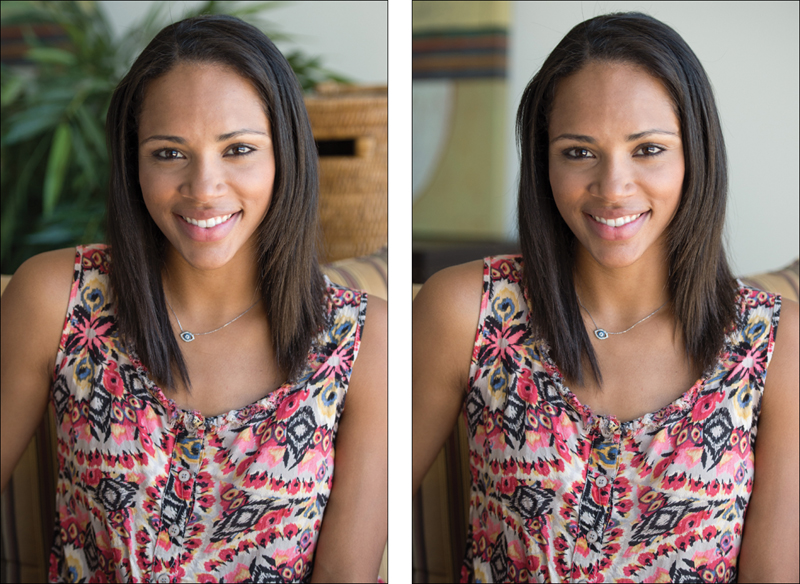
The key to great backgrounds for portraits is “less is more.” If you’re shooting an environmental portrait (a photo taken on location in someone’s home, office, etc.), to get that pro look, it’s not what you do to the background, it’s what you take away from the background that makes it work. You want to have as few distracting elements in the background as you can, so either position your subject on a very simple, uncluttered background to begin with, or if that’s not possible, remove as many distracting elements (or knicknacks) as your subject will let you get away with, as I did in the image on the right here. Don’t take this lightly—to create a really great environmental portrait, it can’t just be the foreground that works. The whole photo has to work together, and by choosing (or creating) a sparse, uncluttered background, your chances of having a winner go way up.
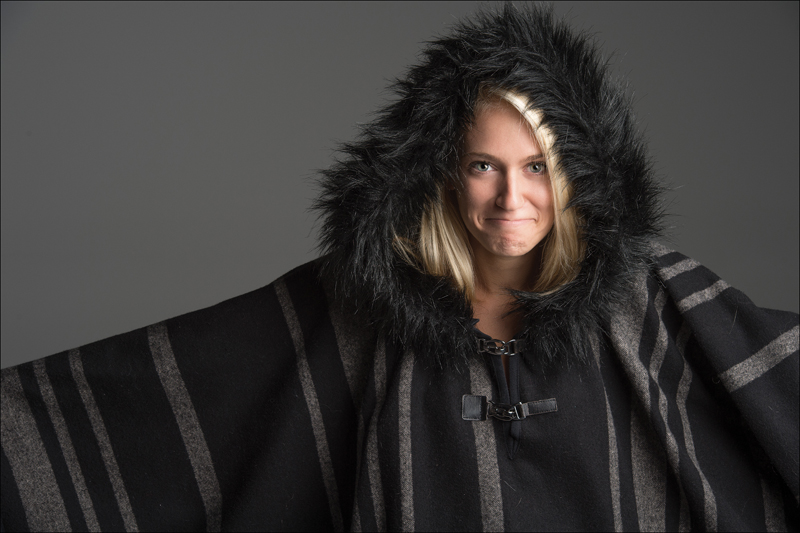
Cropping Off the Top of Their Head
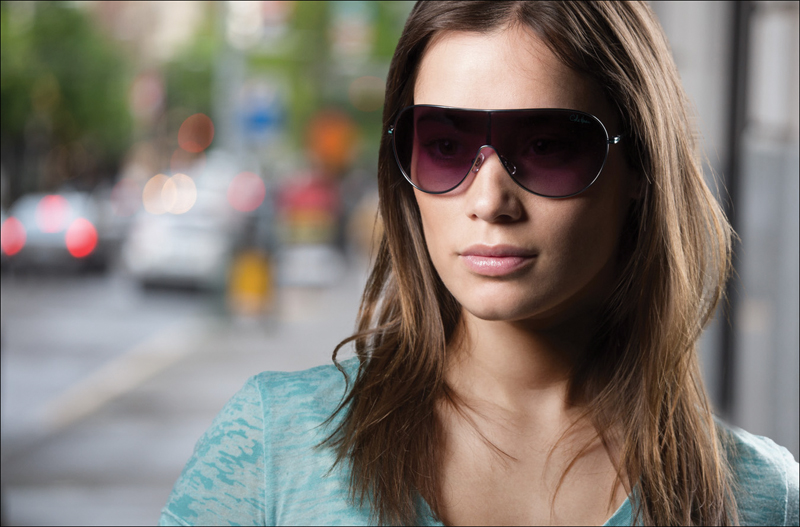
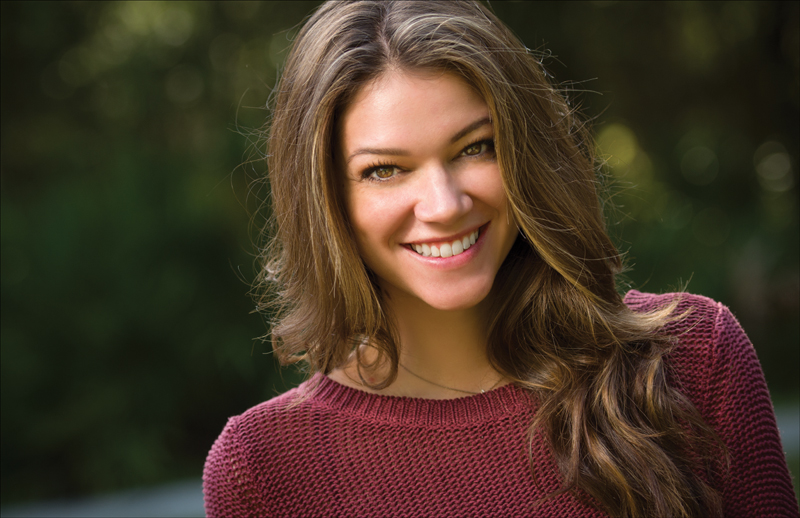
This is the next step past “Don’t leave too much room above your subject’s head” in portraits. In this composition technique, you actually cut off the top of your subject’s head, and while that probably sounds weird reading it here, it’s a very popular pro technique that fills your frame with your subject’s head. Getting in tight like this makes for a very compelling look, as you see above, and now that it has been brought to your attention, you’ll see this composition technique is everywhere and has become the mainstay of many top fashion, beauty, and portrait shooters. (Note: Although it’s perfectly fine to cut off the top of their head, or side of their arms, shoulders, hair, etc., you shouldn’t cut off their chin. People are actually very used to seeing the top cut off and it looks natural, but seeing a shot where the chin is cropped off makes for a very uncomfortable composition.)
Trendy Composition Tip
Since most photos you see are either horizontal or vertical, doing something different looks...well...different! And right now, a very popular technique for portrait photography is to turn the camera at an angle, which puts your subject kind of up in the corner. The technique couldn’t be simpler—just rotate your camera to the left or right a little bit and then take the shot. It may take you a couple of tries to get your subject positioned right where you want them in the frame, but this look (which has been around for years) is getting very popular once again.
Group Photos Are Easier Outdoors
Lighting a group shot, and getting a consistent amount of light on each person, can be pretty challenging, which is why, when it comes to group shots, you’ll usually get better results by moving the group outside. It’s easier to light the group using available outdoor light, especially if you can get them in the shade (not deep in the shade, just on the edge of the shade, but without letting any dapples of light appear on them through tree branches or gaps between windows or buildings). If you’re lucky enough to wind up shooting a group portrait on an overcast day, then your job will be pretty easy—just get them outside and the overcast sky will take care of your lighting woes, so you can focus on getting them posed. (By the way, professional-looking group shots never start with the photographer saying, “Okay, all the tall people in the back row.”)
Tip for Posing Group Portraits
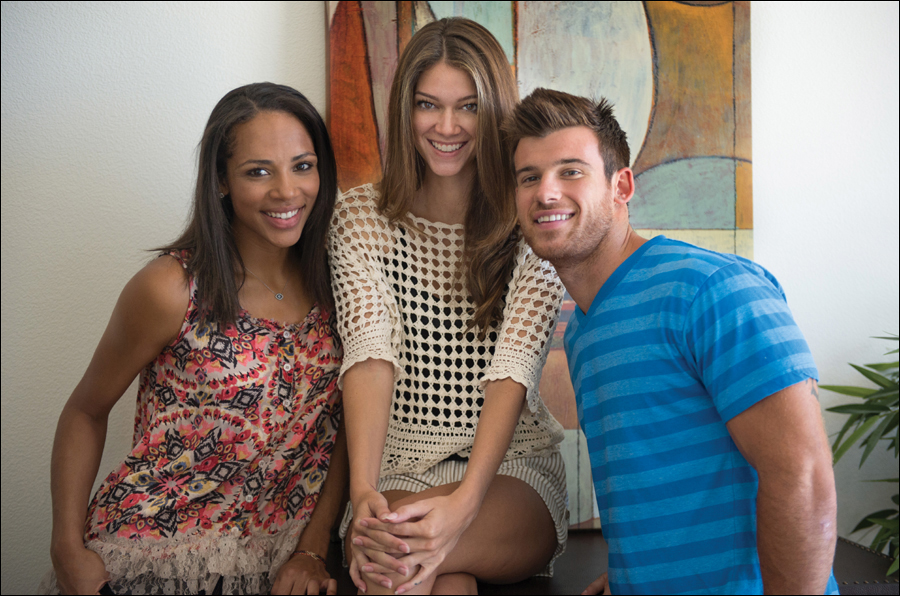
The next time you’re shooting a group portrait, rather than lining everybody up in rows (which you already know doesn’t look good), instead try to get them to rally around something—some object—and they’ll arrange themselves naturally around it. For example, try posing people in and around a couch, a column, a chair, a car, a desk, or any object that can pull them together into a group that isn’t just a bunch of people standing in straight lines.
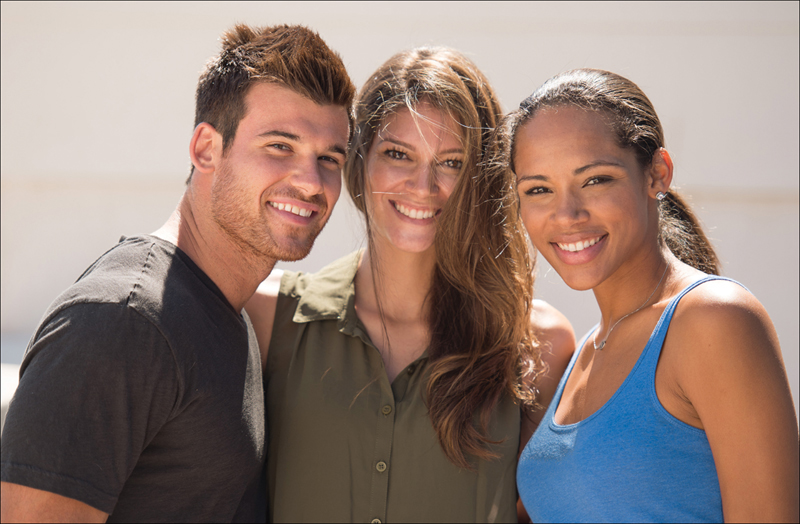
Great Tip for Casual Group Shots

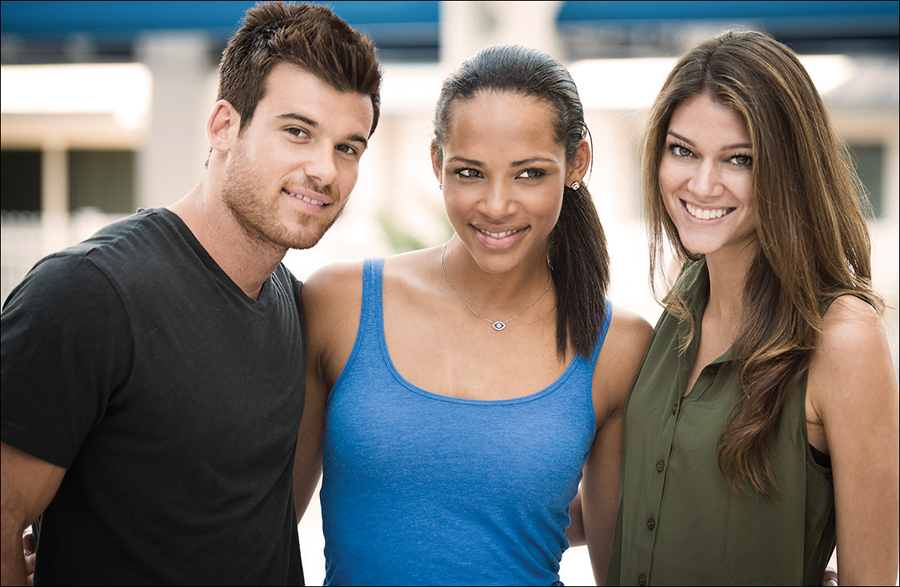
Want to make a more compelling look for a casual group shot? Put your subjects in a very tight pyramid shape (a triangle), but by tight I mean so tight that they’re all touching—arms around one another, their heads very close together, with one person at the top of your frame, and one on either side of the bottom of the pyramid shape (as shown above), with the others all scrunched in the middle. Also, you’ll notice their bodies are not in a straight line—they’re kind of staggered, but they’re all leaning into the shot, which gives the shot more energy and a sense of fun. I wouldn’t try this for an executive group portrait, but if you’ve got a fun-loving casual group, this is a great way to visually say that about them.
Don’t Use Rows—Use Clusters
If you’re shooting a large group, instead of posing everyone in those tired rows, group people together in small clusters—like mini-triangles within the group, with three or four people in each triangle. These little mini-clusters add closeness and energy, and then when you’ve got two or three groups put together, slide them all a little closer together to visually make one big group. (These mini-clusters don’t have to touch each other—small gaps between them are okay.)
Get Couples Really, Really Close
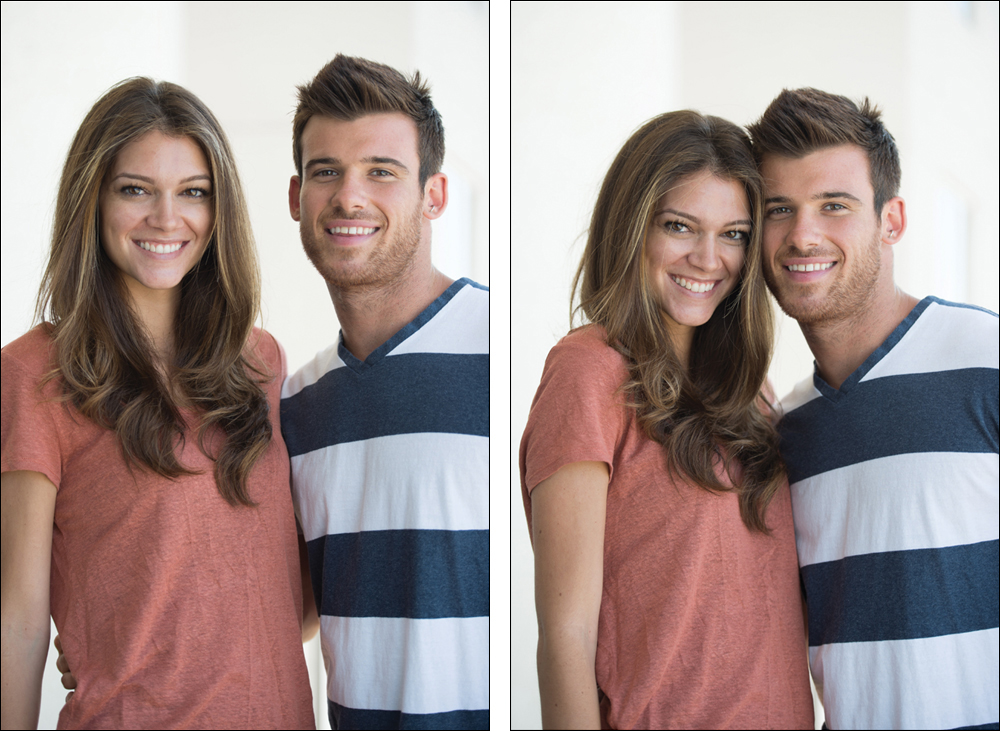
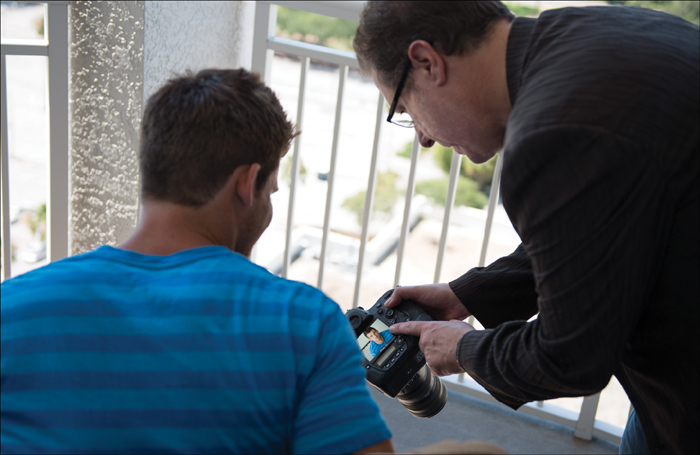
When you pose a couple and tell them to get in nice and close to each other (which you definitely should), they never get nearly close enough to look “close” in a photo. When you put your eye up to the viewfinder, you’ll see the gap I’m talking about, so you tell them to “get even closer” and they move in all of about 2 inches, but I’ve got a trick that fixes this every time. Go ahead and take a quick shot—with the gap between them—then take it right over and show them the gap on your LCD monitor. Once they see it (and how big the gap that they thought wasn’t there actually looks), they’ll really get in close, and it literally makes the shot. I’ve done this again and again, and it always works like a charm.
Want Better Portraits? Don’t Count Down!
If you want that really posed look, then count 1-2-3 right before you press the shutter button. It’s almost a guarantee that you won’t have any natural expressions in your portraits. It’s your job as photographer to find that moment when your subject looks natural, and capture that moment in time. Anyone can stand there and say “1-2-3” and push the shutter button at “4,” and if you do that, you’ll wind up with images that anyone can take. If you want something special, something more natural—a genuine smile or expression—then ditch the 1-2-3 cliché and instead just talk to your subject. Engage them, get them talking, laughing, smiling naturally in the course of a conversation, or even goofing around, and then when the moment is right—capture that moment. Then you’ll be giving them more than a well-lit, totally posed photo. You’ll give them something special.
Shoot Before & Between Shoots for More Natural-Looking Portraits
A number of pros swear by this technique for getting more natural shots: they tell the subject not to pose yet, because they’re just taking “test shots” to check the lighting. Since you’re not really shooting, they’re not really posing, and you’re just talking to them, firing away the whole time. Once you tell the subject, “Okay, here we go,” they change their demeanor, and begin “posing,” so make sure you get lots of these candid, non-posed shots before the official shoot and between shoots, because they will probably be the most natural, un-posed shots of the day.
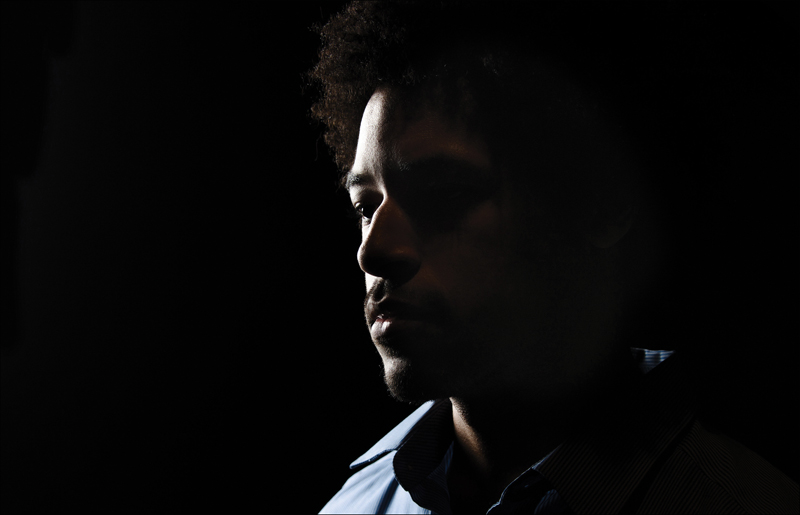
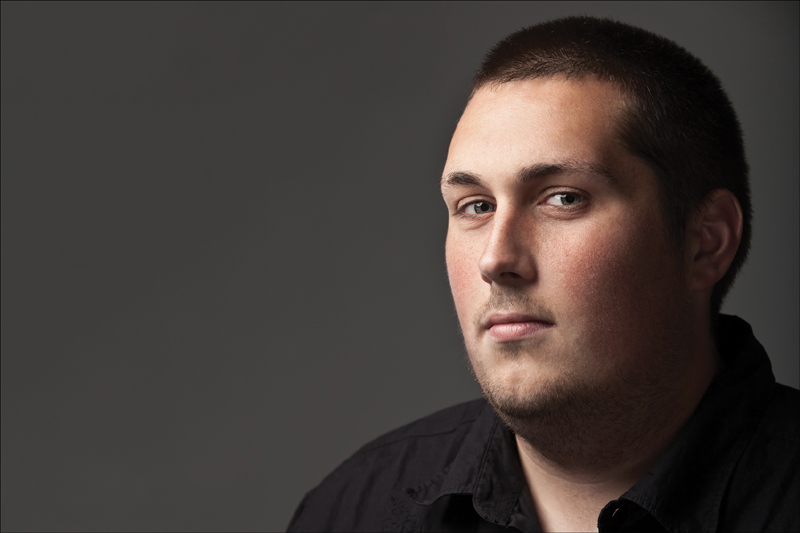
Don’t Light Your Entire Subject Evenly
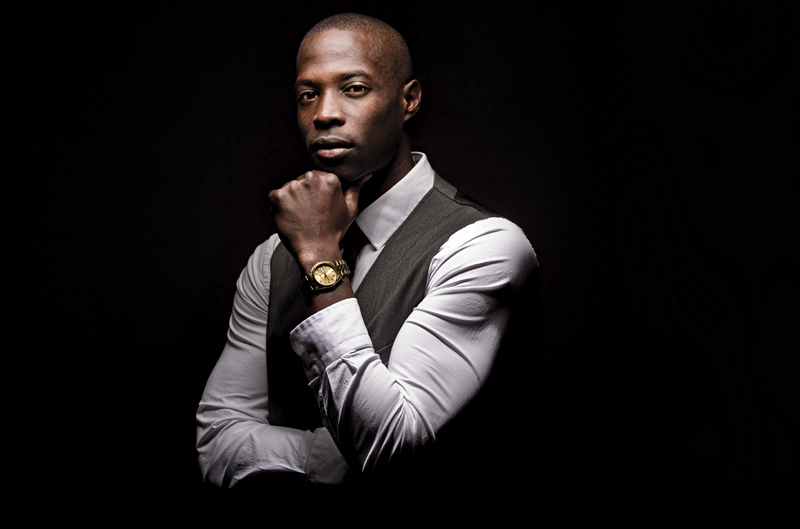
When people look at a photo, their eye is first drawn to the brightest thing in the photo, so you only want the brightest light falling where you want them to look, right? Right. So, if you’re shooting a portrait, do you want the person viewing the portrait to look at your subject’s face or their folded arms? Right. But most people light the entire portrait with the same exact light throughout, where the subject’s hands at their sides have the same approximate light as the subject’s face. If you want to create portraits that really lead the viewer to where you want them to focus, light your subject so the light is brightest on their face, and it gradually falls off the lower down their body it goes. This adds interest, drama, and a visual focus that you’ll find so often in high-end portraits. By the way, this is another case for feathering your light (see page 61), so that the edges of the light are what light your subject’s face, and below that the light falls off pretty rapidly (but don’t let it get too dark—it should still have light, and detail, just not as much as their face).
Don’t Let Too Much Light Fall on Their Ears
If there’s a part of your subject that doesn’t need to be well-lit, it’s their ears. Ears are often distracting because they’re poking out of what is usually a darker area (a person’s hair), so they catch enough light to draw your attention. Since a person’s ears are rarely their best feature, you don’t want your viewer’s eyes stopping on them first, so just be careful to not have some really bright ears in your portraits.
Window Light: Where to Position the Subject
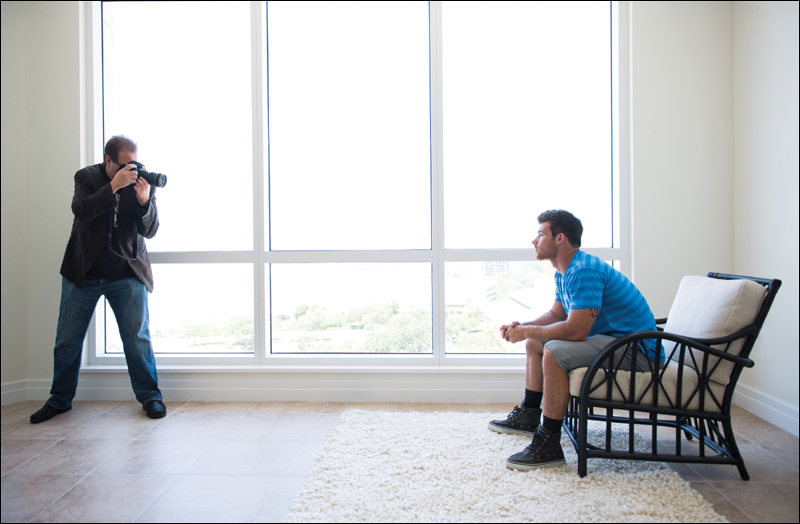
Window light, especially light from a north-facing window, is among the most beautiful light for portraits anywhere (in fact, some pros insist on only using natural window light for all their portraits—period!). The window diffuses the light streaming in, and the larger the window, the more soft and diffuse the light. So, if you’ve got some nice window light, where do you position your subject to make the most of this beautiful light? You want to position your subject with their shoulder facing the window (so the light comes across your subject, creating soft shadows on the far side of their face). Then, place them about 6 feet from the window, so the light is very soft and wraps around your subject (if you get them any closer, that soft light could turn very contrasty fast). Also, position your subject a little bit back behind the window, so they catch the edge of the window light and not the direct sunlight. This edge light is very soft and gives you that wonderful, almost magical light that so many pros swear by.
Window Light: Where You Should Shoot From
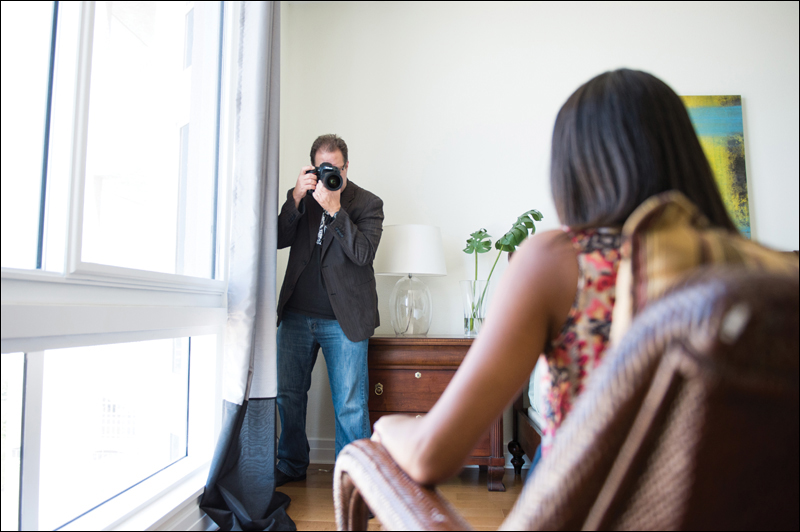
When shooting a window-light portrait, you want to set up your camera right near the window, with your shoulder facing the window. Then, you’ll aim back a little toward your subject, who should be positioned just past the window, about 6 feet from it (so basically, you’re up against the window, shooting at a slight angle back toward your subject).
Window Light: Where to Position the Reflector
Since we generally use a reflector to bounce light into the shadow side of our subject’s face, you might think that with window light you’d put the reflector on the shadow side of your subject’s face. It makes sense, right? Right. And you can do that, but with window-light portraits, try this technique I learned from legendary portrait and wedding photographer Monte Zucker: bounce the light from the camera position (near the window) above your head, bouncing the window light down onto the dark side of your subject’s face to open up those shadow areas.
You can hide or greatly reduce many typical facial problems (like a big nose, round face, wrinkles, big ears, etc.) by how you pose and light your subject. Here are six quick posing tips to help you make your subjects look their very best: (1) If your subject is balding, shoot from a lower angle, and don’t use any hair light whatsoever. (2) If your subject has lots of wrinkles, try lighting them straight on, because side lighting tends to accentuate the shadows and make the wrinkles more prominent. (3) If your subject has large ears, pose them so they’re only showing one ear, then light them so that ear appears on the shadow side of their face (so basically, only one ear is showing, and that one is kind of hidden in the shadow). (4) If they have a big honkin’ nose (that’s a technical term, by the way), then have them turn their head straight toward the camera, have them raise their chin a bit, and shoot from a little lower angle, which will take much of the emphasis off their schnozz. (5) If your subject has a double chin, have them look straight at the camera, and extend their head forward toward the camera a bit. This stretches and tightens the skin under their chin. Also, if you light them straight on (with the light positioned directly above where you’re shooting from), this puts a shadow under their chin and helps to hide the double chin. (6) If your subject has a round or fat face, make fun of them, and tell them to lose a few pounds. Then, when they burst into tears, you’ll have some of the most natural-looking expressions of the day. Or, you can have them turn their face to the left or right, giving a 3/4-view of their face, which will make their face look less round, but really—it’s your call.
Don’t Shoot with Their Shoulders Straight On
Everybody—women, men, kids—generally looks better when posed with their shoulders angled toward the camera. If their shoulders are straight toward the camera, it makes your subjects look very wide and flat, and even somewhat confrontational. But by simply having them turn one shoulder away from the camera, it makes them look thinner and generally gives them a more pleasing look by lessening the width of their shoulders and focusing more attention on their head. Remember: Their head can still face the camera—you’re just turning their shoulders. Two exceptions: (1) If you want somebody to look very wide and flat (like a football player), then the straight-on look can look fantastic. And, (2) if you work with professional models, they are usually experts at posing, so they can get away with posing shoulders straight toward the camera, and it still looks great. But, for the rest of us, we generally look better with our shoulders angled.
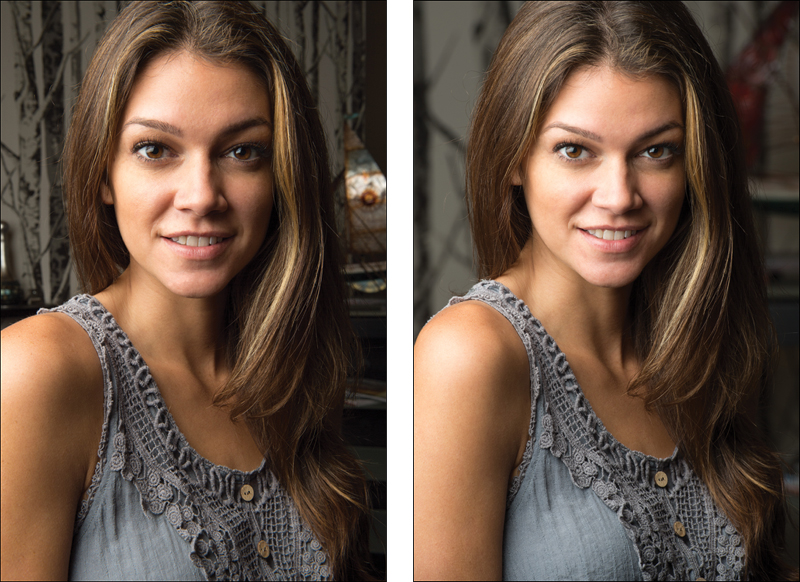
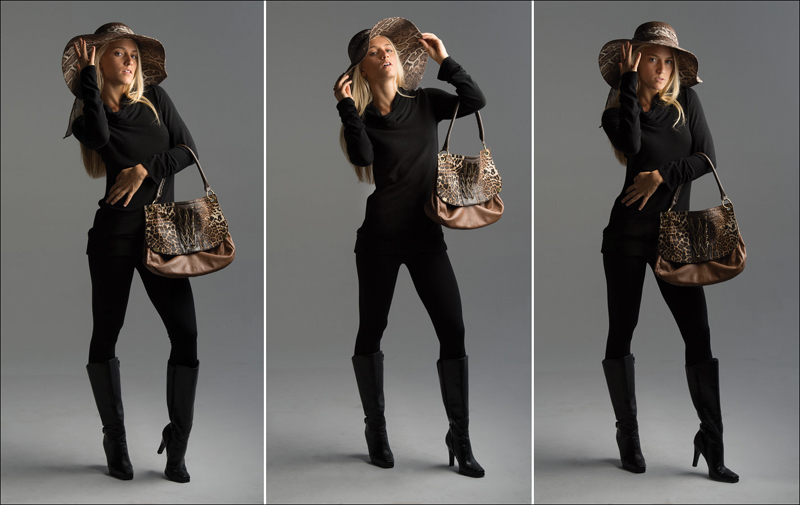
Making Your Subject Look Slimmer
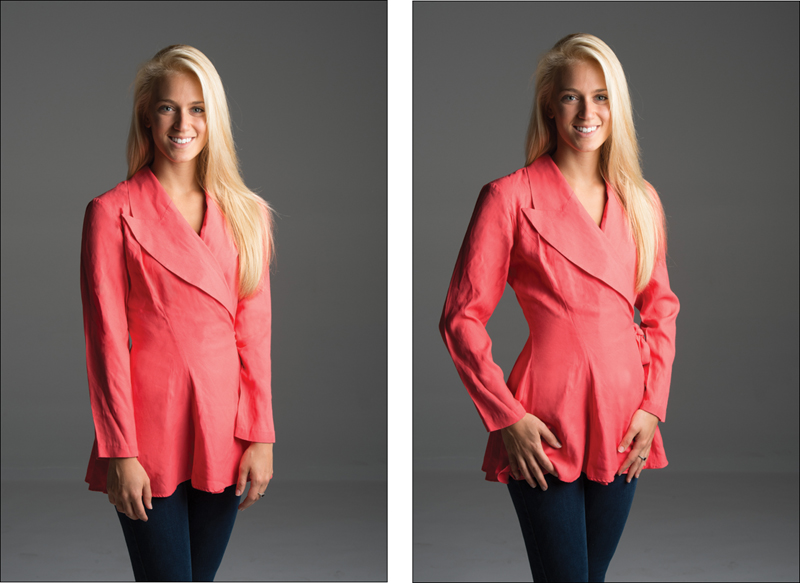
If you want to make someone’s body look slimmer, keep their arms from touching their body—leave a little gap between their arms and their body, so their arms don’t add to their body mass and make their whole figure look larger. You’ll see this trick used often in celebrity and fashion shots, and you’ll be surprised what a difference this little gap between the arms and waist can make (as seen in the before/after above). Another trick is to have your subject face their body away from the camera at an angle, and then just twist the upper half of their body toward the camera (leaving their lower half still facing away). Again, this is one of those little tricks that makes a big difference.
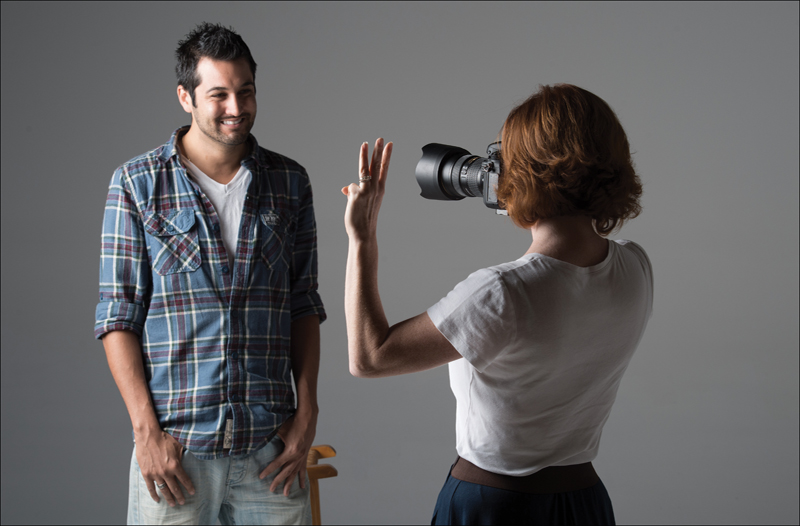
Using a Posing Chair
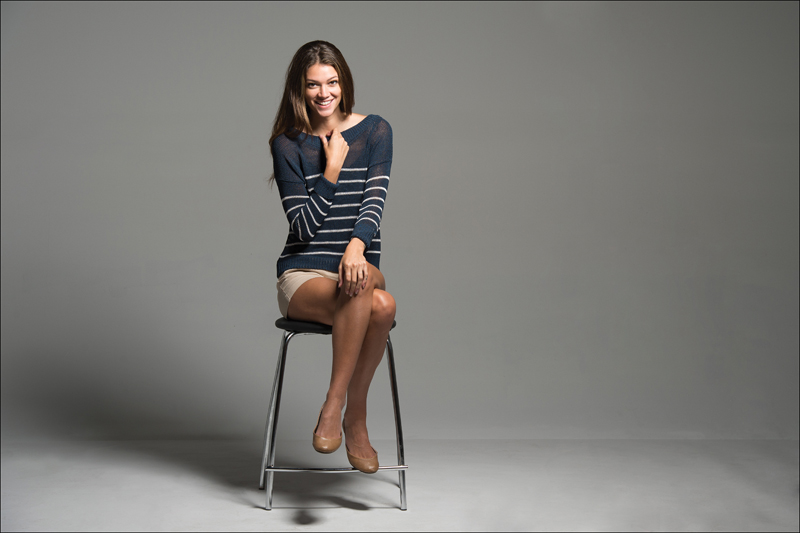
One of the best reasons to pose your subject in a chair is that people often feel more comfortable in a chair, and if they’re comfortable, your chances of getting a relaxed, natural portrait go way up. If you have your subject standing alone in the middle of a studio, with all sorts of lights aimed at them, you’re giving your subject every opportunity to be uncomfortable, and that usually translates to less-than-natural, uncomfortable-looking portraits. By the way, if you do shoot your subject seated, here’s a tip to help get better-looking poses: have them sit near the end of the chair (being that far from the back of the chair almost ensures that they won’t slouch or lean back), and it helps the overall look to have them lean a little forward, into the camera. So, the next time your subject looks really uncomfortable, offer them a seat, and watch them instantly become more comfortable, which usually results in better, more natural-looking portraits.
Keeping Your Subject “In the Zone”
When you’re shooting a person’s portrait, it’s a very vulnerable, and often uncomfortable, position to be in, and in most cases the person you’re shooting wants you, the photographer, to be happy with what you see and what’s going on with the shoot. If they feel things aren’t going well, they start to think it’s their fault. You want them feeling great—you want them confident and happy, enjoying their time in front of the lens as much as possible, because that translates into better portraits. One way to keep them “in the zone” and engaged is to keep talking to them. All the time. The entire time. Talk about what you’re doing, why you’re doing it, talk about the weather—anything to keep them engaged. Anytime there’s a period of silence, they start to get worried something’s wrong, and that it may be their fault. They have no idea what you’re seeing through the viewfinder, and if things get quiet, they start to get concerned and they start to get edgy, and within a minute or two they’re totally out of the zone. When I’m shooting a portrait, I’m talking to them the whole time. If I stop to move a light, I tell them why (I know they don’t care, but I’m keeping them engaged in the shoot). I keep giving them constant verbal encouragement (“That looks great. Fantastic! Right on the money! What a great smile,” etc.) the whole time, and it makes them more comfortable and confident.
Avoid Dappled Light
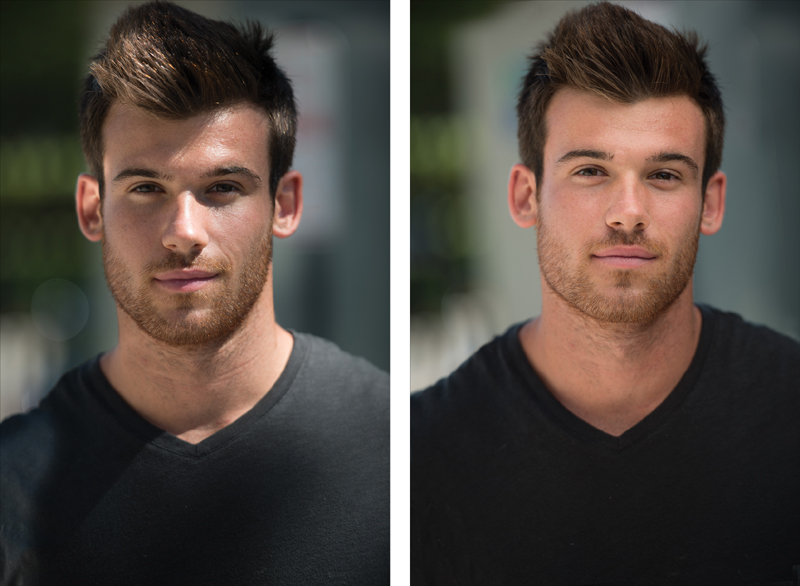
If you read part 1 of this book, then you already know about putting your subjects in the shade to get better portraits outdoors (ideally, out near the edge of the shady area for the best light), but when you do this, there’s something to watch out for—the dreaded “dappled light.” That’s those small areas of bright sunlight that break through the trees, causing uneven hot spots of light on your subject, which pretty much ruin the portrait (even if the dapples don’t fall directly on their face). Luckily, the fix is amazingly easy—just reposition your subject in an area of the shade that doesn’t have any of this distracting dappled light shining through. You can see how much better this looks in the image on the right here. Now, there are certain instances where dappled light works when you’re shooting landscape photography, but when it comes to shooting people, dapples pretty much ruin any hope of a professional look, so be on the lookout for them anytime you’re shooting under trees, or in a barn (where sunbeams can come through the cracks in the wood), or anyplace where small beams of sunlight can fall directly on your subject.
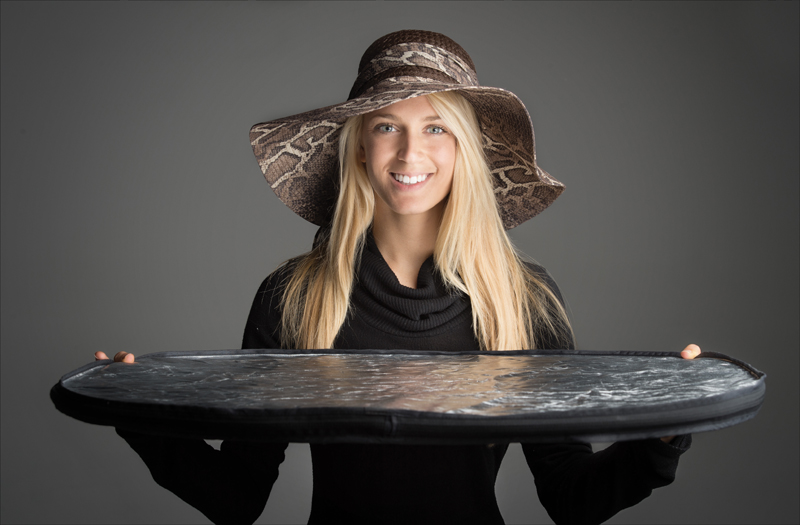
Gold Reflectors Are for Outdoors
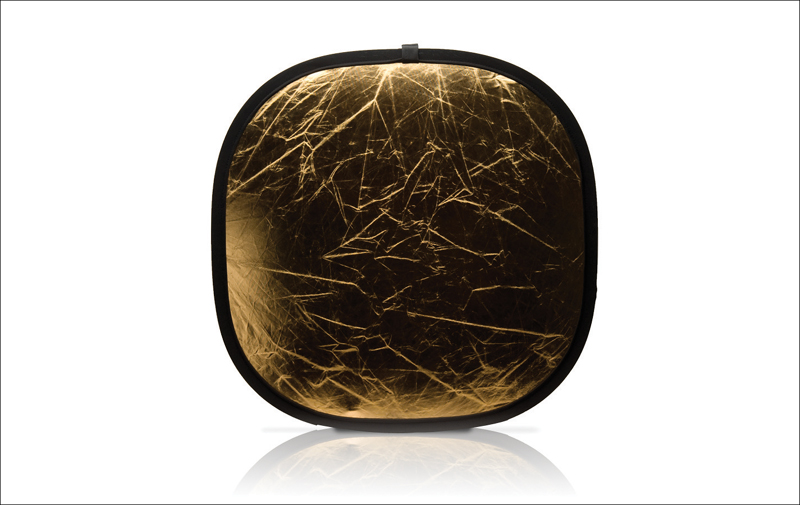
One of the most popular color combinations for reflectors is silver on one side and gold on the other. The silver side is usually used when shooting indoors or inside a studio. The gold side is usually used outdoors, and since it’s gold (and light picks up the color of whatever it hits), the light it throws will be very warm—like sunlight. So why wouldn’t you use this warm reflected light in the studio? Because the light in your studio is usually very white balanced, probably from a flash, and you don’t generally want to have white-balanced light from a flash on one side of their face and warm, golden light on the other side.
Minimizing Shadows Under the Eyes
If your subject starts to get shadows under their eyes (from overhead lighting indoors or outdoors), one way to reduce those is to put a silver or white reflector directly in front of them at their chest (or as high up as right under their chin), aiming up at them and reflecting some of the light back up into their eyes.