
Chapter Six. Shooting Travel Like a Pro
How to Bring Back Photos That Really Make Them Wish They Were There
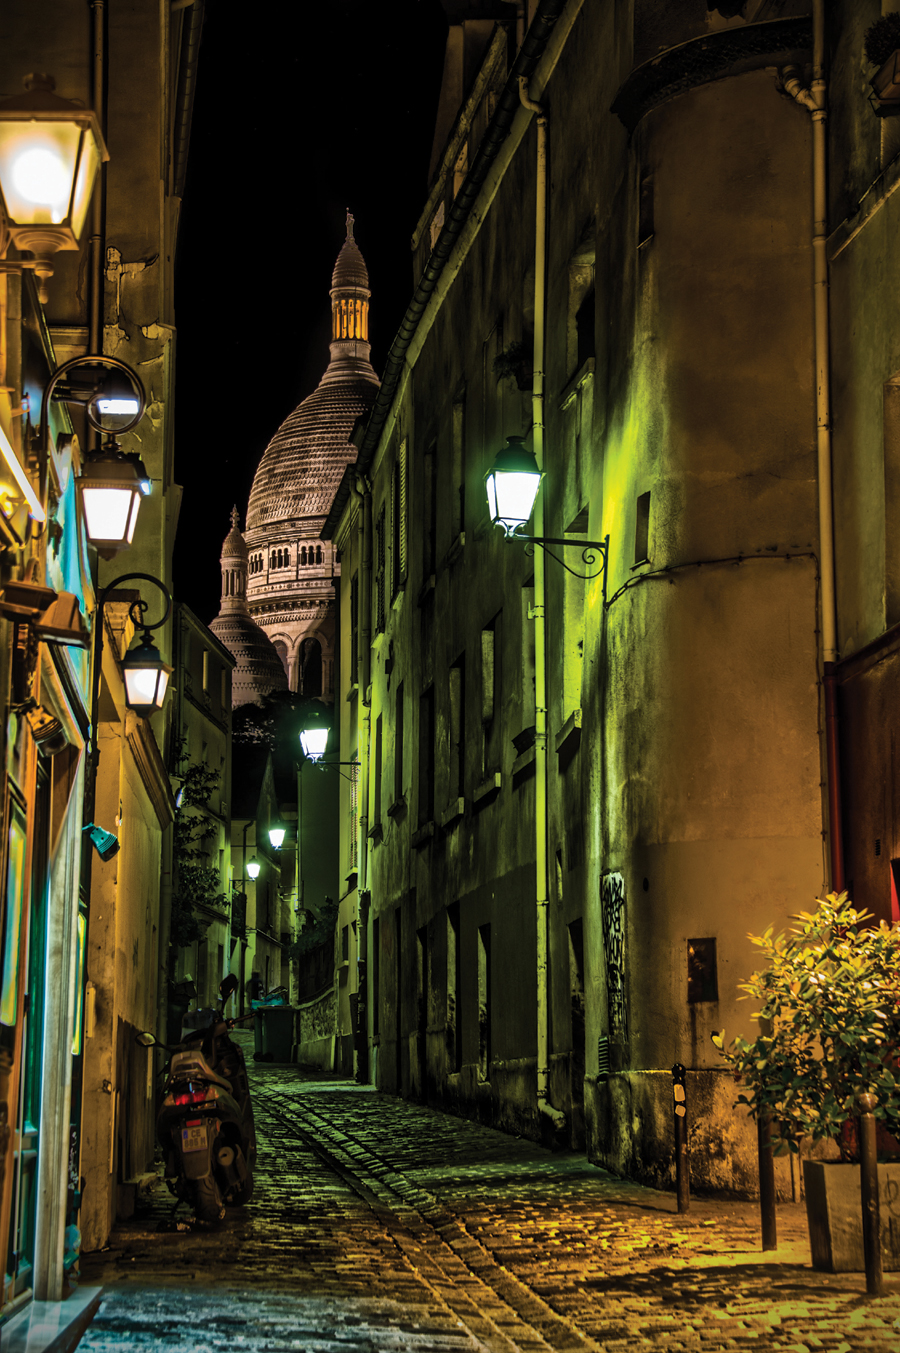
SHUTTER SPEED: 5 SEC F-STOP: F/4.8 ISO: 200 FOCAL LENGTH: 68MM PHOTOGRAPHER: SCOTT KELBY
 When you come home from a really amazing trip, it’s not enough to chronicle your trip through photos and show factual images that detail where you were. You want to move people. You want to create images that are so powerful that they make the person viewing them want to go there so badly that they’re willing to risk a series of white collar crimes (mostly embezzling) to pay for their trip to that very same place. Now, if you took good enough shots, it won’t be long before your friends are overcome with emotion (jealousy) and will have to go to the exact same location to experience that same amazing feeling once again. Now, if either of your two friends have DSLR cameras, it’s helpful to understand right up front that they’re not going to that spot because they trust your judgment on travel. They’re going there because they think they can get better photos from that spot than you did. Then, once they come back and show off their images, all your mutual friends will say something like, “Did you see Rick’s photos from Machu Picchu? Wow, his were much better than Sandy’s” and at that moment—you’ve been blinged. Actually, this is what is known as an IB, or an “Intentional Bling,” and it gives you some insight into just how shallow your friends really are. But as shallow as they are, you can drain a little more water out of the pond by pulling this quick and easy stunt: when they see a really cool travel shot of yours, and they ask you where you took it (which means they don’t already recognize the landmark)—lie. They’ll never know. For example, if you shot the Portland Head lighthouse in Cape Elizabeth, Maine, tell ‘em it’s the Nauset lighthouse in North Eastham, Massachusetts. By the time they catch on, they’ll already be back home, and you can feign a mysterious illness.
In This Case, Less Gear Is More
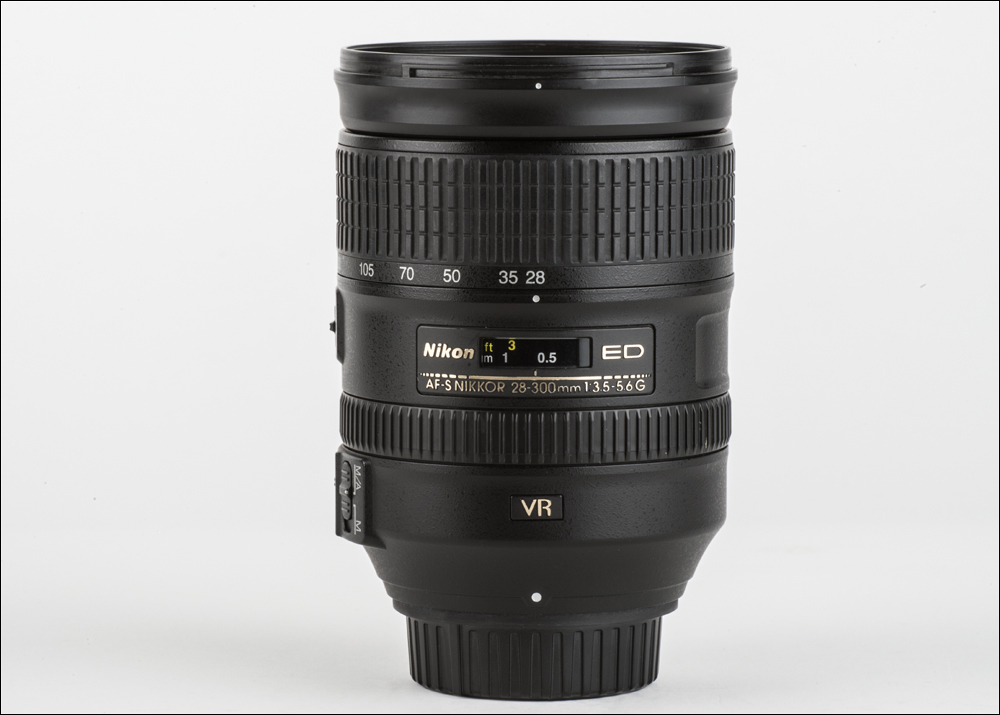
I’m a total gear freak, but the one time I definitely don’t want to lug around a lot of gear is when I’m doing travel photography. You’re going to be lugging your gear all day long, hopping on and off of all sorts of transportation, and as the day goes on, your gear seems to get heavier and bulkier, and by the end of the day, you’ve all but stopped digging around in your camera bag. To get around that, take as little with you as possible—one or two lenses, tops. For example, for crop sensor cameras, Nikon and Canon make reasonably priced 18–200mm lenses, and Sony makes an 18–250mm lens, that let you leave your camera bag back in the hotel because you’ve got everything covered from wide angle to long telephoto in just one lens. For full-frame cameras, if you want the same type of range, Nikon, Canon, and Tamron make 28–300mm lenses that don’t go quite as wide as the 18–200mm, but are amazingly small and lightweight. Also, there are some incredibly lightweight travel tripods available today, ranging from the Slik Sprint Pro II for around $90, to the Oben CT-3500 for around $350, to what is probably the best travel tripod on the planet, the Gitzo GT1542T Traveler carbon-fiber tripod (for around $680). When it comes to lugging around lots of gear in an unfamiliar city, travel photography is definitely a case of “less is more.” Do yourself a favor and travel light—you’ll find yourself taking more shots, because you’re changing lenses and messing with your equipment less.
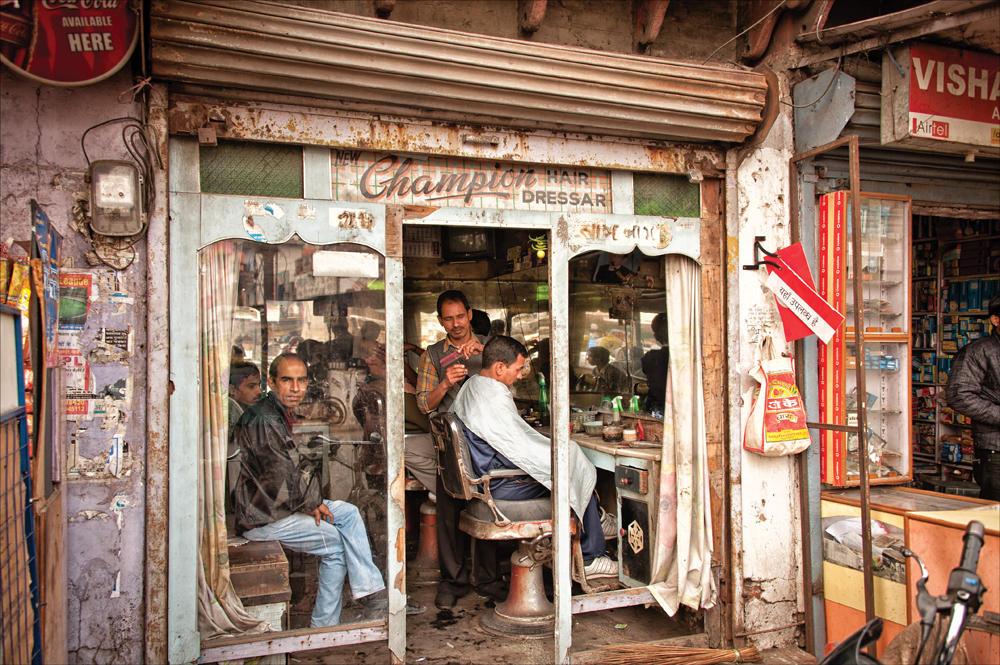
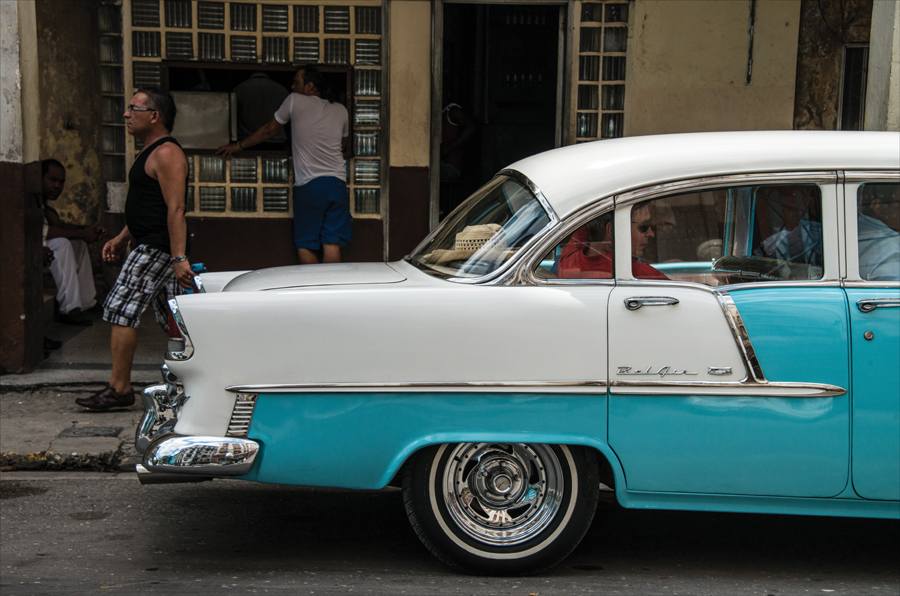
If you want to improve your travel photos, here’s a simple trick: add more people to your shots. When you really want to capture the flavor of an area, don’t just shoot buildings, cathedrals, and monuments—show the people of that area. Nothing conveys the character and soul of a city more than its people, and that’s why so many of the top travel photo pros work people into the majority of their shots. The next time you’re feeling disappointed with your travel shots, it’s probably because you’re looking at cold buildings and empty streets. Add people and everything changes (for the better).
How to Know What to Shoot
Before you travel to a new city, do some research to see what other photographers have shot there and where they shot it from. One great place to do this type of research is the websites of the big stock agencies (like Corbis or Getty Images), where you can do a search for the country or city you’re going to. You’ll see some amazing images, and you’ll get lots of ideas for how the pros cover that area.
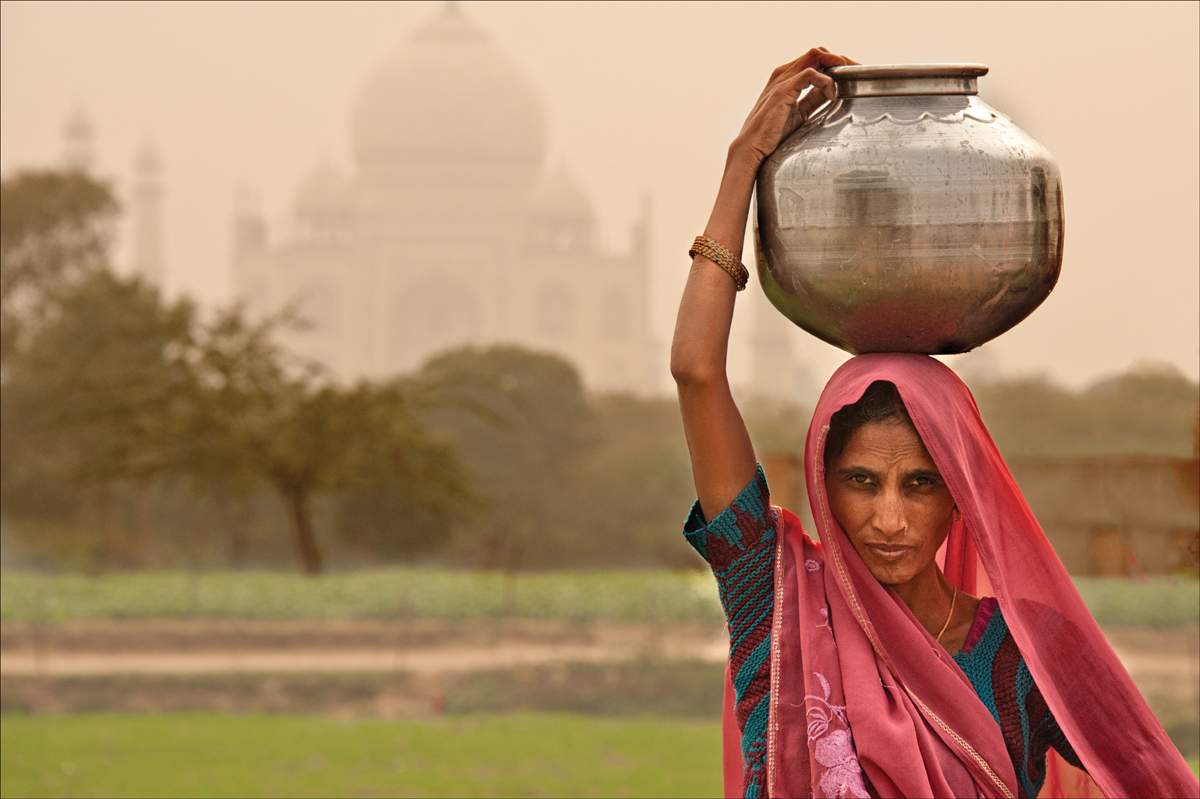
Candid shots of some of the locals make a nice addition to your travel shots, but if you have too many of them, they start to look less like travel photos and more like surveillance photos. To get those close-up, fascinating personal shots, you’ll need to get some of the locals to pose for you. One of the best tricks for getting people to stop what they’re doing and pose for you is to get them to let you take the first shot. When they see that I have a camera, I smile at them, hold up the camera with my finger on the shutter, and nod my head as if to say, “Is it okay if I take your picture?” Most of the time, they smile and nod back, and pause just long enough to let me snap one photo. Then I immediately turn the camera around and show them the photo on the camera’s LCD monitor. Once they see that photo on your LCD, it kind of breaks down a barrier, because everybody loves a photo (especially if they’re the subject), and they’re usually more than happy to pose for a few more.
A Surefire Way to Get Them to Pose (Buy Stuff)
If you’re uncomfortable with the “lift-and-nod” technique I outlined above, here’s one that can’t miss—find somebody selling something and buy one. If you’re in a market, and you buy something from a vendor, you can bet that they’ll pose for a quick picture or two, because now you’re not just some tourist with a camera, you’re one of their customers. This one works like a charm.
When the weather gets cloudy and overcast, don’t pack up your gear—this is the time to shoot people on the street, open-air markets, stained glass windows (which look great under cloudy skies), and close-ups of architecture (as long as you do your best to avoid including any of that gray, cloudy sky). Cobblestone streets are great to shoot right after it has rained, and flowers photograph great under the shade that comes from a cloudy sky. Plus, if the sky gets really nasty, it may be a great time to shoot the sky itself. If it’s just a flat gray, it’s boring. But if a storm is on the way, the dark clouds can make an interesting subject, or add to a boring subject just with the shadows and mystery they bring.
What to Do if Your Room Doesn’t Have a View
If you can’t get a room with a view (see next page), try these: (1) See if there’s a restaurant or lounge at the top of the hotel—you can bet it has plenty of great views, and they may let you shoot there at dusk, before they start serving dinner. (2) See if you can take a few shots from the rooftop. Strike up a rapport with the concierge (give him a big tip) and you’ll be amazed at the doors that will open.
Shooting from Your Hotel Room
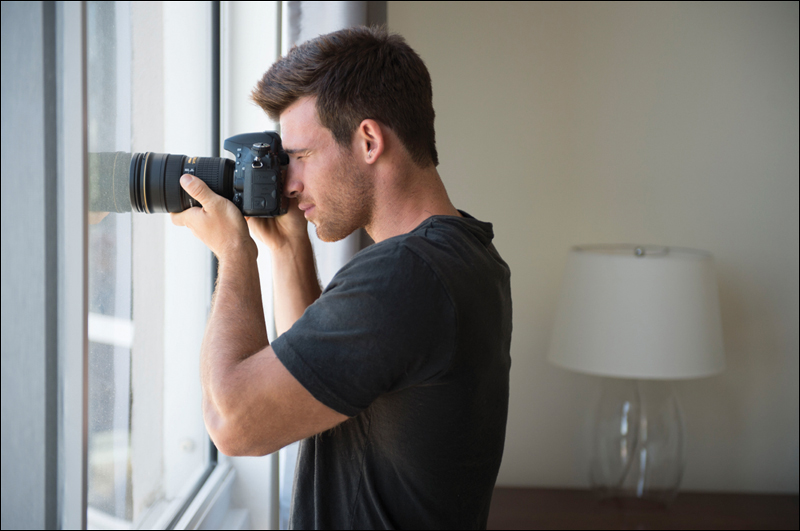
Everybody wants to have a “room with a view,” and now you have even more motivation to ask for just that, because your hotel room can be a wonderful platform to shoot the city from. When you check in, ask for a room on the highest available floor and be prepared for some amazing opportunities to unfold right outside your window. If you don’t have a balcony, or a window you can open, you can shoot right through the window if you follow these three rules: (1) Turn off any lights in your hotel room—they’ll cause reflections in the glass that can show up in your photos—and (2) put your lens as close to the glass as possible (I keep a lens hood on my lenses, so I put the lens hood right on the glass itself. If you think you’ll be doing this a lot, you can buy a rubber lens hood, which runs from around $5 on up). And, (3) you can often use a polarizing filter to cut the reflections in the glass, but since you lose some light, you might need to shoot on a tripod, which makes getting right against the glass that much trickier. (I’m not even going to count this last one as a rule, because I hope it goes without saying, but...don’t use your flash.)
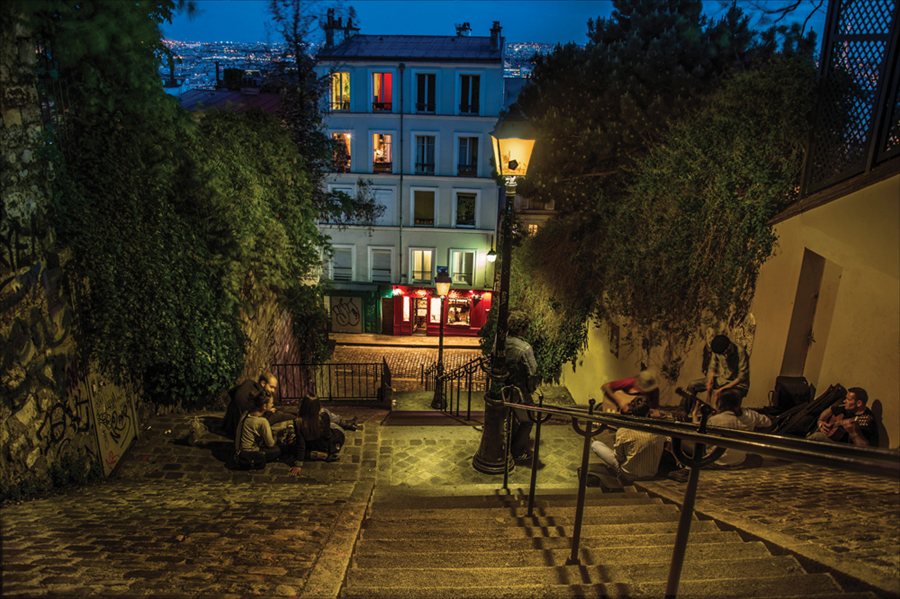
Great shots of cityscapes don’t happen at 2:00 in the afternoon. If you want that killer shot of the city skyline, wait until about 30 minutes after sunset and shoot at twilight. The sky will usually be a rich, dark blue and the lights of the city will all be on, creating that magical photographic combination that creates the type of cityscapes you’ve always dreamed of taking. Now that you know what time to shoot, there’s one more key to making this type of shot work, and that is you absolutely, positively must take this type of low-light shot with a tripod. Your shutter is going to have to stay open for a full second or more, and if you’re not on a tripod, you’re going to wind up with a blurry mess.
Taking the Cityscape Lights Shot Up a Notch
If the city you’re shooting is near water, try to position yourself so that water comes between you and the city (for example, try shooting from a bridge). That way, you see reflections of the city lights in the water, which can add a tremendous amount of visual interest. This is another one of those “can’t miss” travel shots, and what an impact it makes when friends, family, and even other photographers see your city-at-twilight-reflected-in-the-water shot.
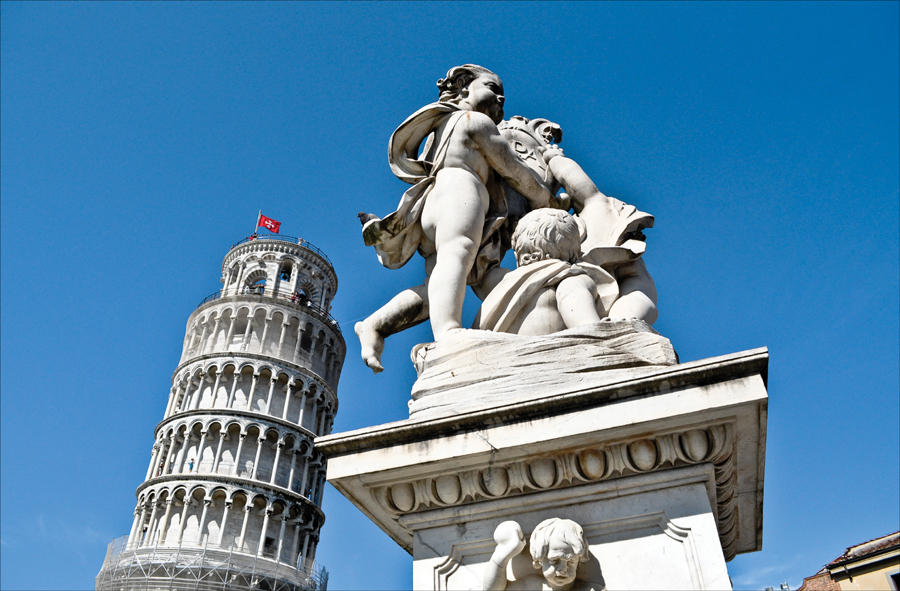
If you travel to a famous city, your friends and family back home will be expecting shots of that city’s most famous landmarks. For example, if you go to Italy, you’d better come back with a photo of the Leaning Tower of Pisa or the Colosseum in Rome. If you go to Paris, you’d better come back with some Eiffel Tower shots (cliché as they may seem), because people expect it. If you don’t come back with some Colosseum or Eiffel Tower shots, they’ll be so distracted by what you didn’t shoot that they won’t pay attention to what you did shoot. So, get those out of the way first—shoot those for the folks back home now and get them “in the bag.” That way, you can spend the rest of your time showing the city your way—shooting the people, the local flavor, the customs, and taking shots that speak to the photographer in you. One more thing: When you get back home, and friends and relatives tell you some of your shots look like postcards (and they will), just smile and thank them. Although photographers sometimes tend to look down on travel postcards, your average person doesn’t, so if they tell you your shots “look like postcards,” they’re actually paying you a huge compliment.
One Landscape Rule Kinda Applies to Travel
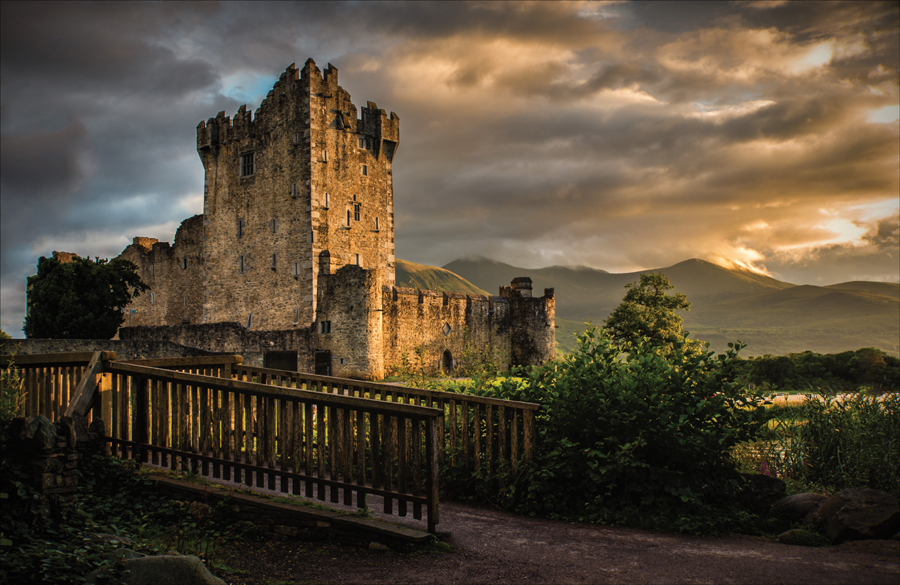
LOCATION: ROSS CASTLE, KILLARNEY NATIONAL PARK, COUNTY KERRY, IRELAND
In Chapter 4 (the landscapes chapter), I talked about how important it is that you only shoot landscape photos twice a day—around dawn and around dusk—but landscape photos are all about having great light. Luckily for travel photography, we can pretty much shoot all day and night (look for tips about what to shoot during different times of the day here in this chapter). However, if we apply part of that landscapes rule to our travel photography, we’ll have the opportunity to make travel photos that are truly spectacular, because just like landscapes look best in soft, beautiful dawn or dusk light, so do famous landscapes, monuments, cityscapes, castles, and charming old buildings. That doesn’t mean we can only shoot travel at dawn or dusk (far from it), but if you really want to create some magical images, get up way before the tour bus arrives at your hotel and get some shots of the city in beautiful first-morning light. Or, plan your day so you’ll have time after the bus tour to get in position in front of a beautiful landscape, or church, or monument (etc.), so you’re in place at sunset to capture a shot that will make your photography friends back home totally jealous when they see it. Remember, beautiful light pretty much makes everything beautiful, so if you thought that fountain or majestic tower looked fascinating in the dry, harsh light of midday, imagine it wrapped in beautiful morning or evening light. Try it once—it’ll make a believer out of you.
Air Travel with Camera Gear
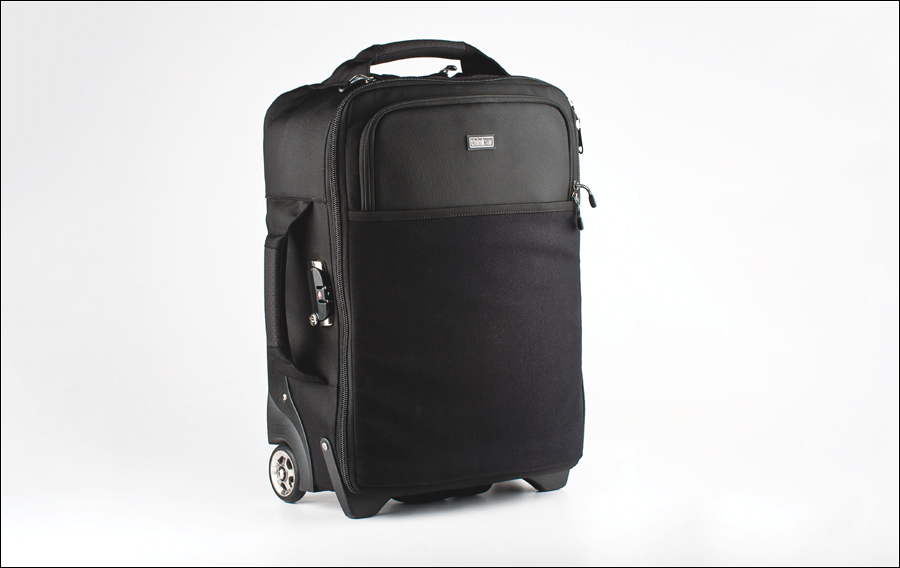
Earlier, I mentioned that you want to travel with as little gear as possible, and here’s another reason—you absolutely, positively want to bring your gear on the plane as a carry-on. If your camera bag is too big and bulky, there’s a good chance it won’t fit in the overhead bin, especially if at some point in your trip you wind up in a smaller regional jet or turboprop with little, if any, overhead space. If you’re thinking of buying a hard case and checking your gear, I’d reconsider. A photographer I know once got all his checked gear stolen—lenses, camera bodies, flashes, the works! When he arrived at his destination and opened his case, it was completely empty. Keep your gear down to a minimum, take a small camera bag, and take it with you on the plane as a carry-on, and you’ll avoid a lot of stress and complications, and possibly having to replace all of your gear. The camera bag shown above is the Airport International from Think Tank Photo. It’s the best camera bag I’ve ever used.
Bring Extra Batteries
When you’re in an unfamiliar city, the last thing you want to waste your time doing is searching for batteries (believe me, I learned this one the hard way), so make sure one thing you do bring with you is plenty of extra batteries for your flash unit and your camera (at the very least, recharge your camera battery every single night, because if your battery runs out, that’s the end of the shoot).
Shoot the Food
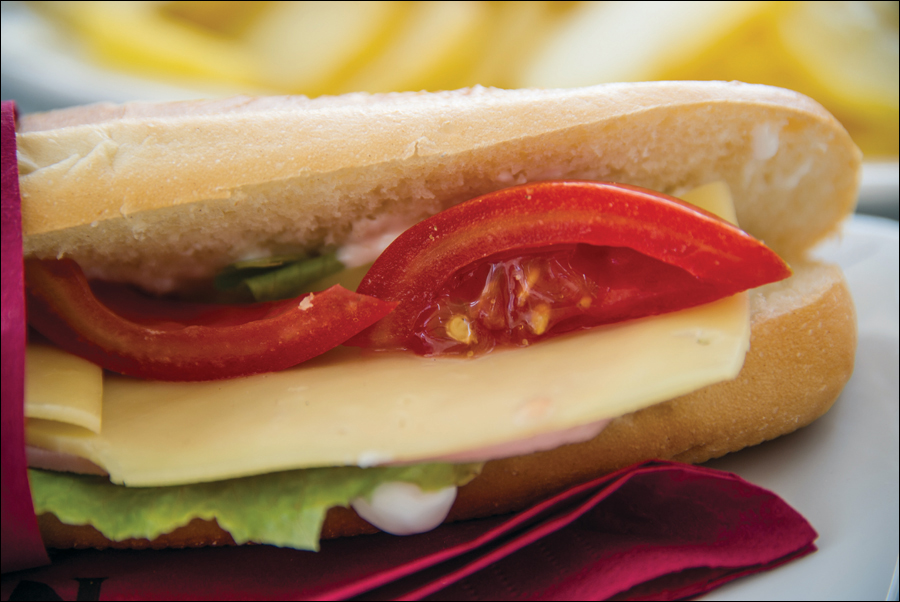
Take a look at any great travel magazine and in every feature about a charming city, you’ll always find a photo of its food. Trying new dishes is one of the most fun things about traveling to a new destination, so why wouldn’t you include it in your photographs? Watch the expressions of people who look at your album when they come across a photo of a great-looking dish—do that once, and you’ll always “shoot the food.” Your best opportunities will be during the day, especially if you ask to sit near a window (to catch some of that gorgeous natural window light) or outside (preferably under an umbrella or awning, so you can shoot in shade). If you’ve got a white tablecloth (which is likely), you’ve got a great background to shoot on—just remove distracting items from around the dish as much as possible. Also, the classic food shots you see in these magazines generally have two things in common: (1) They generally use a very shallow depth of field (where the front of the plate is in focus and the back is somewhat out of focus). To get this effect, use the lowest f-stop possible (f/4, f/2.8, or even lower if you can). And, (2) shoot plates that have great presentation (in other words, shoot food that’s beautifully arranged on the plate, which usually comes from higher-end restaurants). Desserts often are presented nicely, as are appetizers and sushi, and keep an eye out for anything served in a unique-looking dish.
Get a GPS for Your Digital Camera
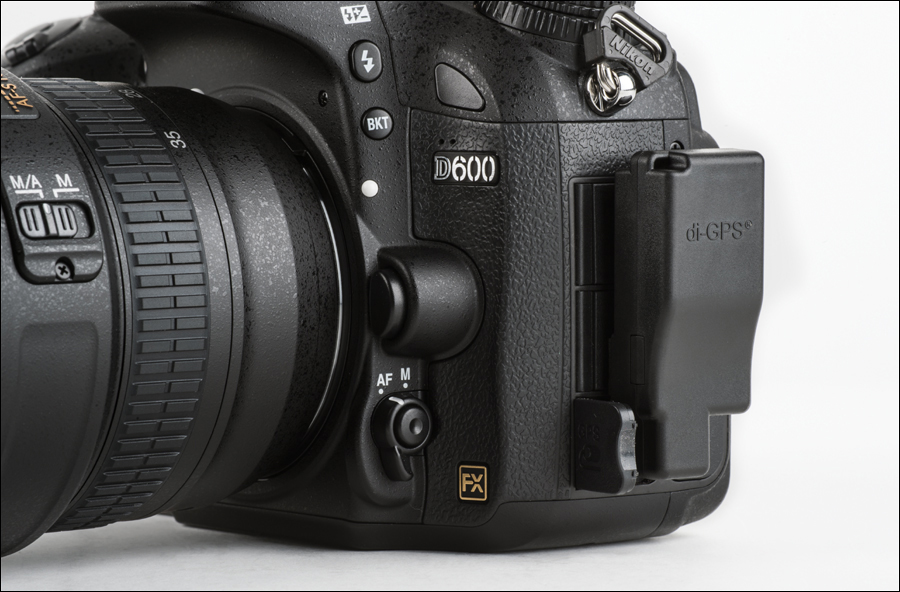
Today, you can buy small, incredibly lightweight GPS units that sit in your camera’s hot shoe or attach directly to your camera’s 10-pin terminal, and each time you take a photo, they embed the exact location (longitude and latitude) of where the shot was taken directly into the digital photo itself. Then, applications like Lightroom can display that information (it appears in Lightroom’s Metadata panel), and you’re then one click away from seeing that location plotted on a Google map, and better yet, you can even see a satellite photo of that exact location while you’re there. I use Dawn Technology’s tiny GPS unit called the di-GPS that works with most digital cameras. They start around $150.
Have Someone Else Shoot You
If you’re the one behind the camera, nobody’s getting any shots of you in these fascinating, exotic, wonderful places. That’s why you need to make it a point to get a friend or acquaintance you meet in your travels (even if it winds up being the waiter who serves you at a restaurant) to get at least a few shots of you. Although it might not mean much to you that you’re not in any of your photos, it does mean something to your family and friends that you are in the shots.
Shooting Where They Don’t Allow Flash
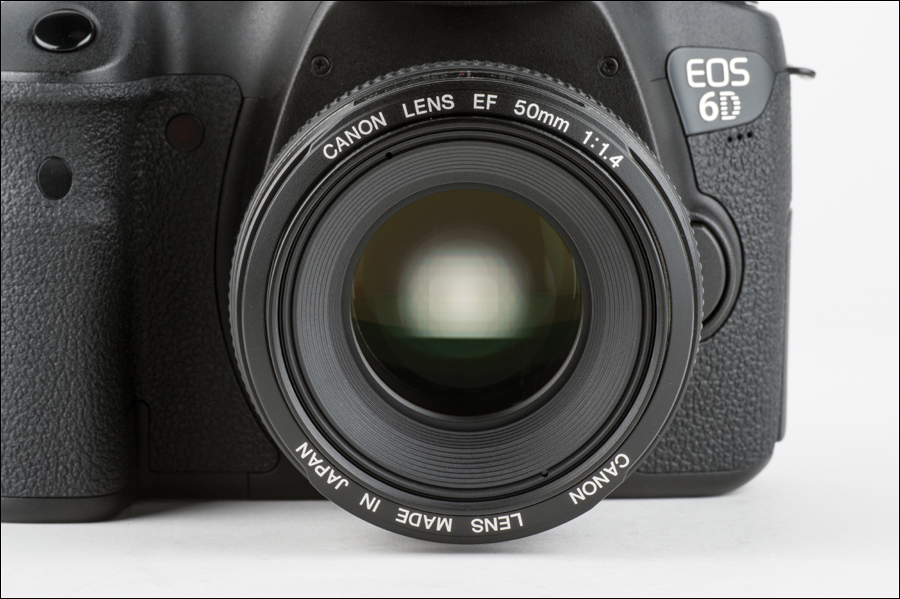
If you plan on shooting in museums, cathedrals, and other places that generally don’t allow you to set up a tripod or use your flash, then I recommend buying an inexpensive 50mm f/1.8 lens. This is an old trick pro wedding photographers use (see the wedding photography chapter), and these super-fast lenses let in so much light that you can handhold shots where others dare not tread. Both the Nikon and Canon 50mm f/1.8 lenses sell for around $110–125 each, they take up little room in your camera bag, and they add very little weight to your bag, as well. If you can spring for an even faster lens (like an f/1.4, shown above, or an f/1.2), they let in an amazing amount of light, so you can fire away in incredibly low light (like candlelight situations) without having to raise your camera’s ISO to 800 or more (which can greatly increase the amount of noise in your images).
When They Won’t let you Set up Your Tripod
If you’re in a place where they just won’t let you set up your tripod, but the light is so low that your camera is going to leave the shutter open for a few seconds, try using your camera bag as a tripod. Turn your camera bag on its side, position it on a ledge, a counter, or any tall surface, then rest your camera on top. Put some spare batteries under the lens to support it and use the self-timer to take the shot.
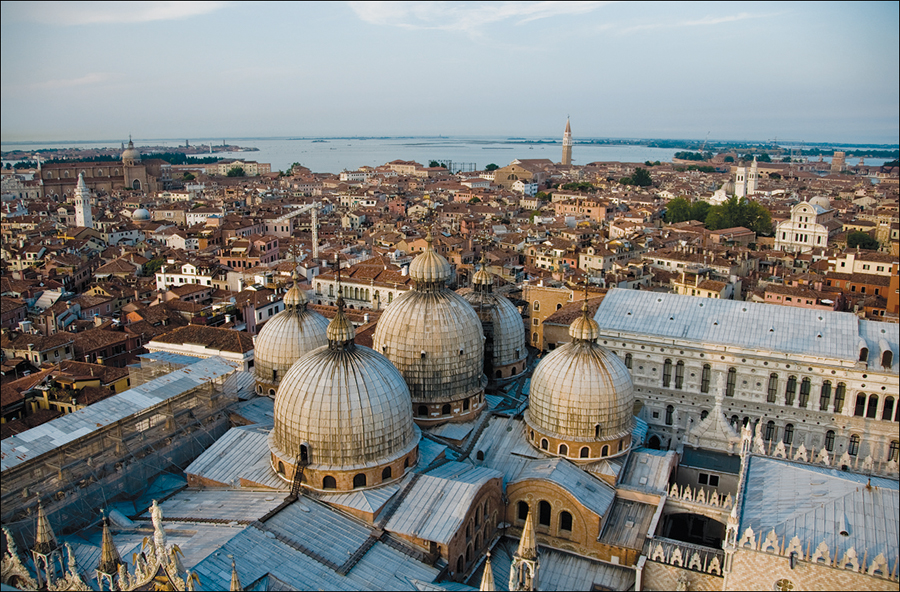
Your average person’s view of a city is going to be from the city streets (or from a tour bus on those streets), so if you want a more compelling place to shoot from, look for a different vantage point—one above the city. Look for towers, observation decks, tall hotels, church towers, cable cars, a bridge, an office building, or mountains overlooking the city, where you can show the city from a completely different view that your average photographer wouldn’t get. It’s just another thing that keeps your travel photos from looking average.
The Perfect Background Music for Travel Slide Shows
Want to find the perfect background music to put behind slides from your trip? Try this: buy the movie soundtrack from a movie that was filmed where you took your shots. For example, if your shots are from your trip to Italy, you can be sure you’ll find instrumental background music that sounds very Italian in the movie Under the Tuscan Sun. If you shot in Paris, try the soundtrack from Disney’s Ratatouille. If you shot in Russia, you can get some very dramatic Russian-sounding background music from the movie The Sum of All Fears. These all work so well because most movie scores are instrumental, which is ideal for your travel slide shows.
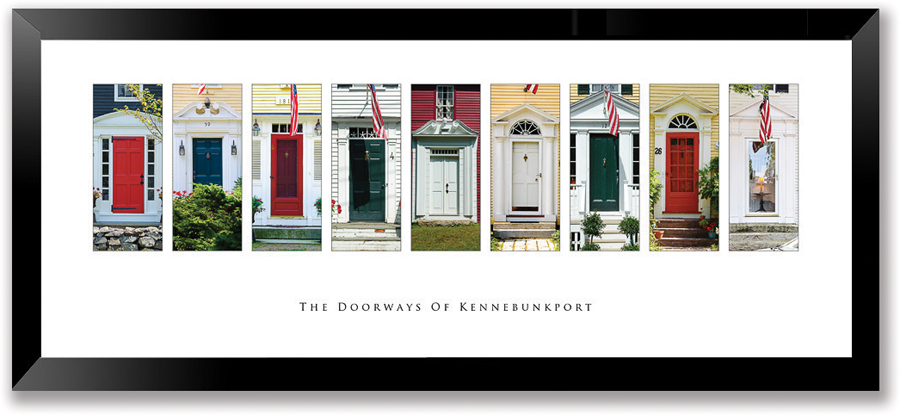
Give Yourself a Theme
Once you’ve shot the classic local landmark photos, here is a great way to spark your creativity and show the city in a different light for a day: give yourself a mini-assignment. Pick a topic, spend part of the day focusing on that subject, and you’ll be amazed at what you can come up with. For example, some of the mini–travel assignments I have given myself are: (1) shoot charming street numbers on the outsides of buildings, homes, and apartments; (2) shoot interesting doors and/or doorways; (3) shoot just things that are one vivid color; (4) shoot weather vanes; (5) shoot nothing but flowers; (6) shoot charming local barns; and (7) shoot close-ups of local architecture. Other ideas might be: shooting coffee cups; shooting those little food signs in local markets; shooting interesting columns, traffic signs or street signs, mailboxes, or things that are a particular shape (like only things that are round), or things of a particular color (only things that are red). You don’t have to make one of these the only thing you do all day, just keep an eye out for it during your travels, and each time you see one of your assignment objects, make sure you get it. Then, you can present these all together in one print (an example is shown above).