
4. THE LIGHT METER AND METERING MODES
![]()
ALL MODERN CAMERAS have a light meter—a device that measures the amount of light that will strike the sensor. The light meter takes that information and then makes a recommendation to the photographer as to how much light should be allowed in. The camera delivers this information to you via the exposure indicator (sometimes referred to as the light meter): generally a linear scale ranging from -3 to +3. This scale may be horizontal or vertical; it may only range from -2 to +2; or, it may only show you a numeric value, like -1 or +2. Look in the viewfinder to locate the indicator. You may also see one on the top or back LCD, as well.
Put your camera in the Manual exposure mode (M on the mode dial) and adjust the shutter speed and aperture until you see the exposure indicators changing. You may need to adjust your ISO to something other than AUTO for this to work.
The concept is pretty easy. The meter will read a setting of 0 (zero) when you have achieved the recommended setting for the exposure. In the automatic exposure modes, the photos you take will likely look like just about right: not too bright, not too dark. This if fine for most situations, but there can be complications depending on your subject.
18% Gray
The camera gauges 0 (zero) on the exposure indicator as the best exposure for a scene based on the assumption that the average brightness of your scene, and all scenes, is equal to 18% gray, which is a middle gray between black and white. This may or may not be true, but it’s how the camera makes its recommendations.
Bright Scenes
You’ll need to second-guess your exposure meter with scenes that are predominantly bright or dark. Imagine a snow-covered mountain in bright sun—your camera doesn’t know that the subject is mostly white; it just thinks the subject is super bright. The meter believes that all subjects are gray, so the camera will recommend an exposure that results in the mountain looking like it’s covered in dirty, gray snow.
To resolve this issue, you need to let the camera know that your subject is much brighter than 18% gray. Instead of setting your exposure to 0 (zero), set the exposure indicator to somewhere in the +1 or +2 range by adjusting the shutter speed or aperture. For brighter scenes, set the meter to the + (positive/overexposure) side of the scale, because the scene you are capturing is brighter than an average scene.
Dark Scenes
With dark environments, we’ll use the opposite technique. Imagine a forest with a thick canopy above and dark trees, foliage, and dirt on the ground. If you shoot an exposure with the indicator at the 0 (zero) mark, the scene will be much brighter in the photo than in real life. It might look pretty good on the back of the camera, but it doesn’t represent the true brightness of the scene. To correct for this, you’ll need to set the exposure indicator somewhere in the -1 or -2 range.
4.1 Light-colored subjects, which reflect more light than average, can fool your camera’s light meter. You’ll need to overexpose these types of shot to compensate for the amount of light in the scene.
1/320 sec.; f/8; ISO 100; Canon 5D Mark III; EF70-200mm f/4L IS USM @ 135mm
4.2 Shots of very dark environments can fool your camera’s light meter. You’ll need to underexpose these types of shots to compensate for the amount of light in the scene.
1/8 sec; f/5.6; ISO 800; Canon 5D Mark III; EF16-35mm f/4L IS USM @ 16mm
Wiggle Room
Modern digital cameras and their advanced sensors have a bit of leeway in the exposure, meaning it doesn’t have to be perfect in camera. If the exposure is a little too bright or too dark, we can always fix it in postproduction with adjustments in your photo editing software. Most images can withstand a “push” or “pull” of a couple of stops. Some cameras can handle adjustments as much as 5 stops. Despite this flexibility, the standard recommendation is to try and get it right in the camera if possible.
The Metering Mode
The cameras exposure recommendation is for middle gray (18%), but from where in the frame is this reading being taken? Cameras have several ways of reading the amount of light entering the lens. These are called the metering modes.
Old cameras used a metering mode called center-weighted metering. In this system, the camera measured everything inside and outside of a big circle in the middle of the frame, and weighted the result with a 60% emphasis on the inside of the circle. For subjects that mostly filled the frame and were of an average brightness, this system worked perfectly well.
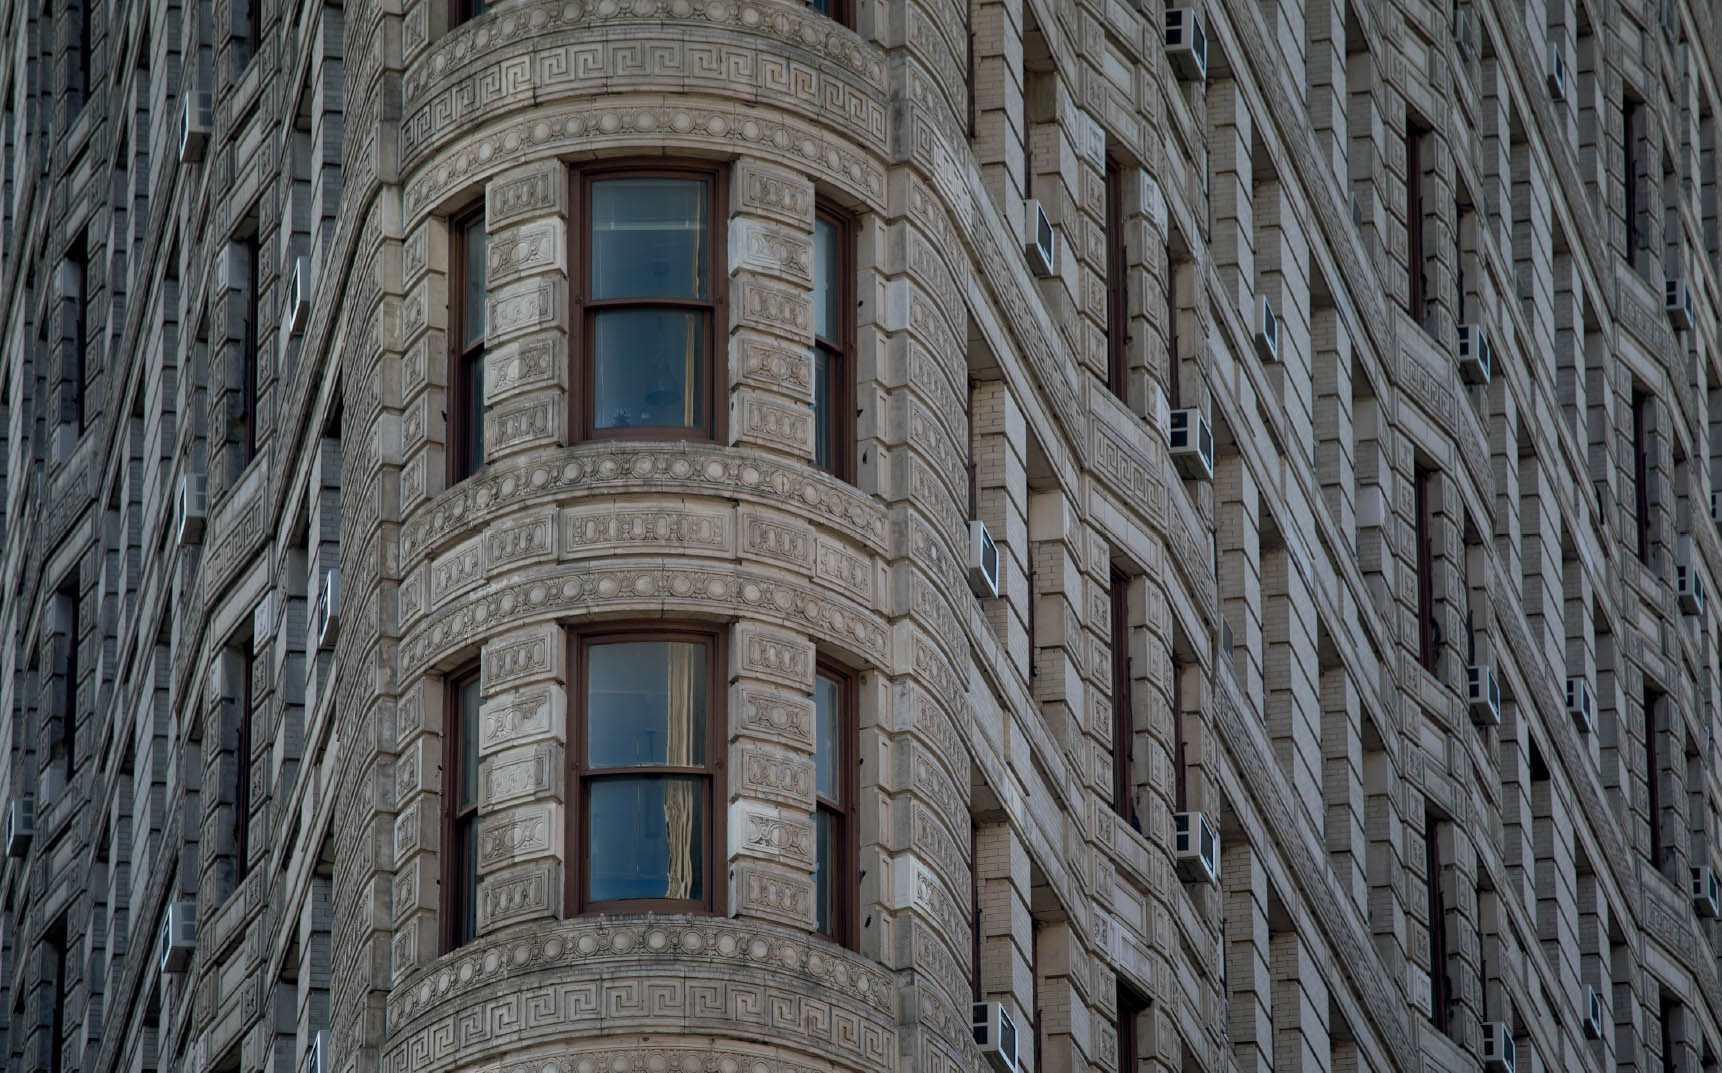
4.3 The Flat Iron building in New York City is of average brightness. Metering the light reflected off this building will give a correct reading because the building is near the 18% gray that all cameras read.
1/250 sec.; f/4; ISO 100; Canon 5D Mark IV; EF70-200mm f/4L IS USM @ 200mm
The Spot Meter
The next evolution in metering, used to obtain a more precise reading—perhaps the measure of light on a person’s cheek or a bird perched on distant tree—was the spot meter. Spot metering measures the light inside a very small circle within the viewfinder’s frame. This circle, often just around the focusing area in the middle of the frame, comprised only 1-5% of the total area in the frame.
This metering system proved accurate when only a small portion of the total scene was middle gray (18%). The problem with this system is that it is a very precise tool; pointing it at the wrong subject (anything not 18% gray) yields images that are under- or overexposed. Be forewarned: don’t absentmindedly leave your camera in spot metering!
The Multi-Segment Meter
The next step in the evolution of the meter was a system that used multiple points to read the light. The information was then run through an algorithm to achieve an optimal exposure recommendation. At first, these systems were using 5 points of data; then 9; then 15; and beyond. Today, some cameras have over 100,000 detection points.
The number of points don’t matter as much as how that data is crunched. These multisegment metering systems don’t just average all the data, they work hard to try and figure out what the scene is. Modern systems can detect a human in the frame, or “see” a bright yellow object in the upper portion of the frame and assume a landscape scene.
These systems are generally very good at figuring out the best exposure. They are what I recommend to all photographers for most situations. The name for this metering system varies by manufacturer: Matrix, Evaluative, and Multi-Segment are among the more popular names.

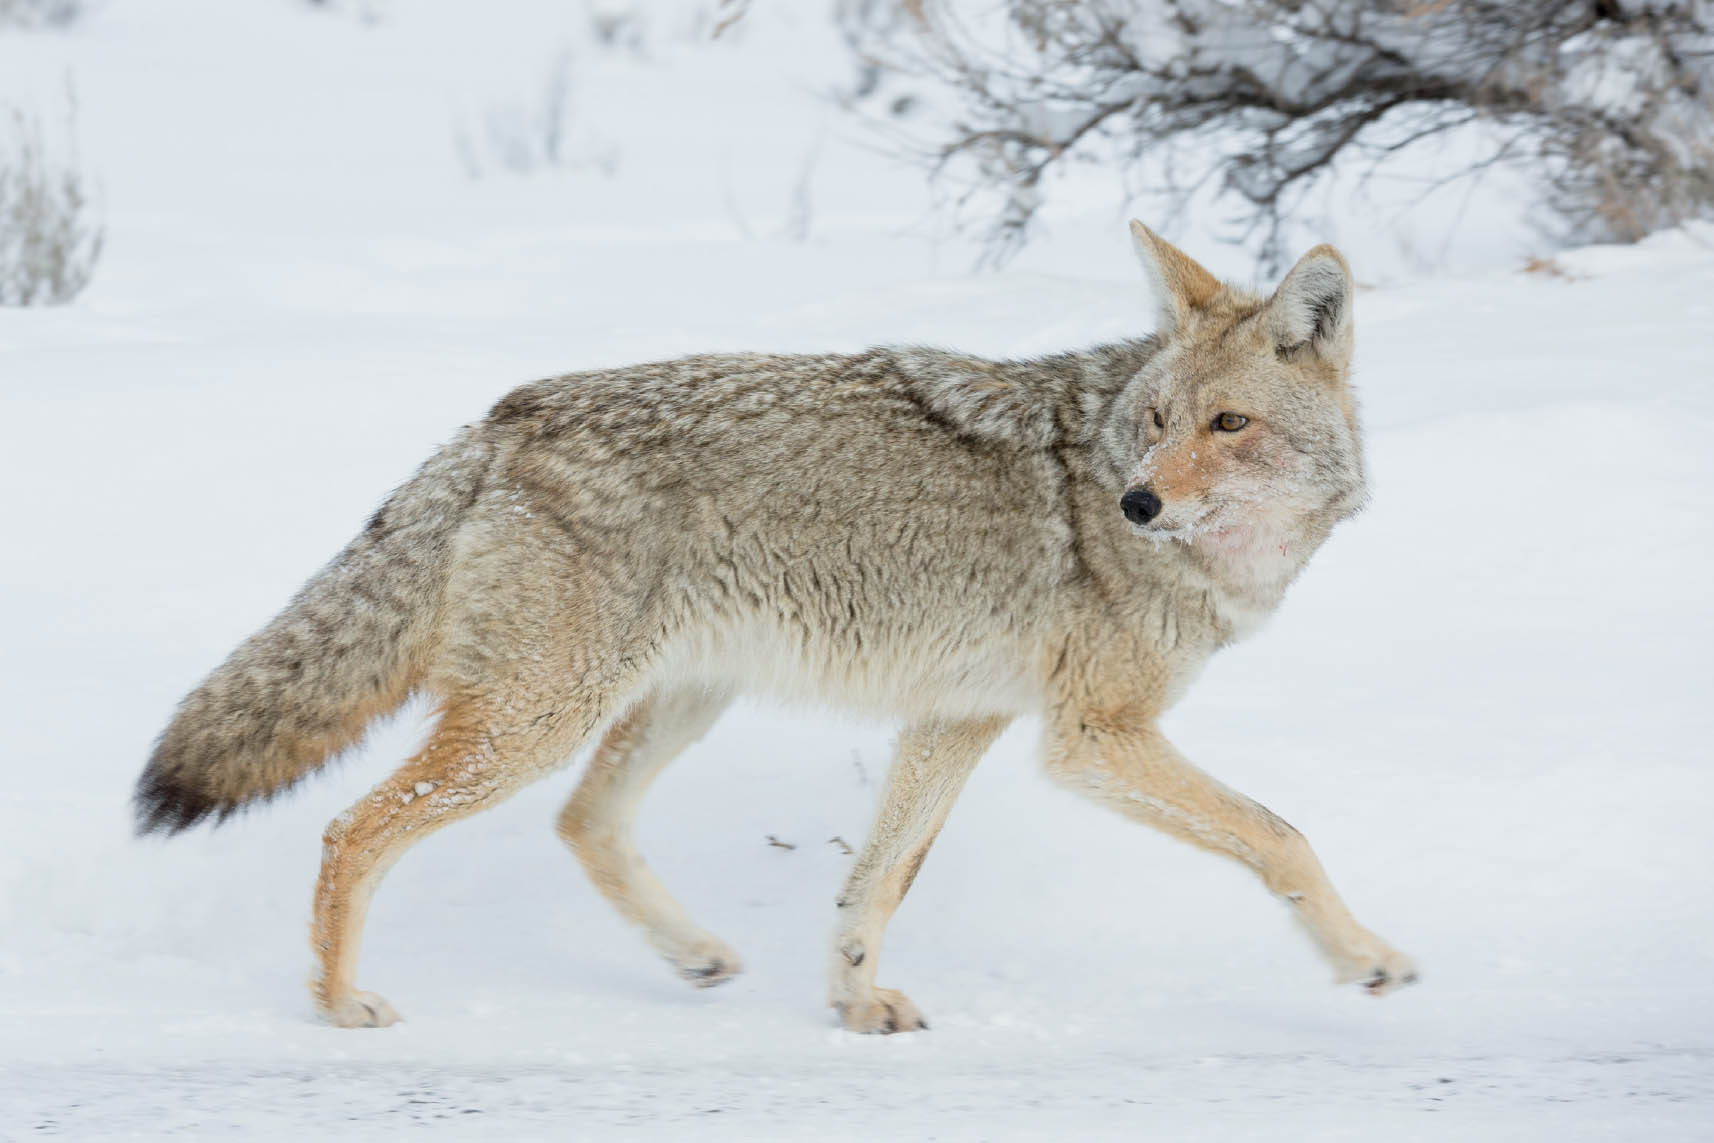
4.4 Subjects with bright (or dark) surroundings can be properly metered using a spot meter.
1/2500 sec.; f/4.5; ISO 400; Canon 40D; EF70-200mm f/4L IS USM @ 135mm
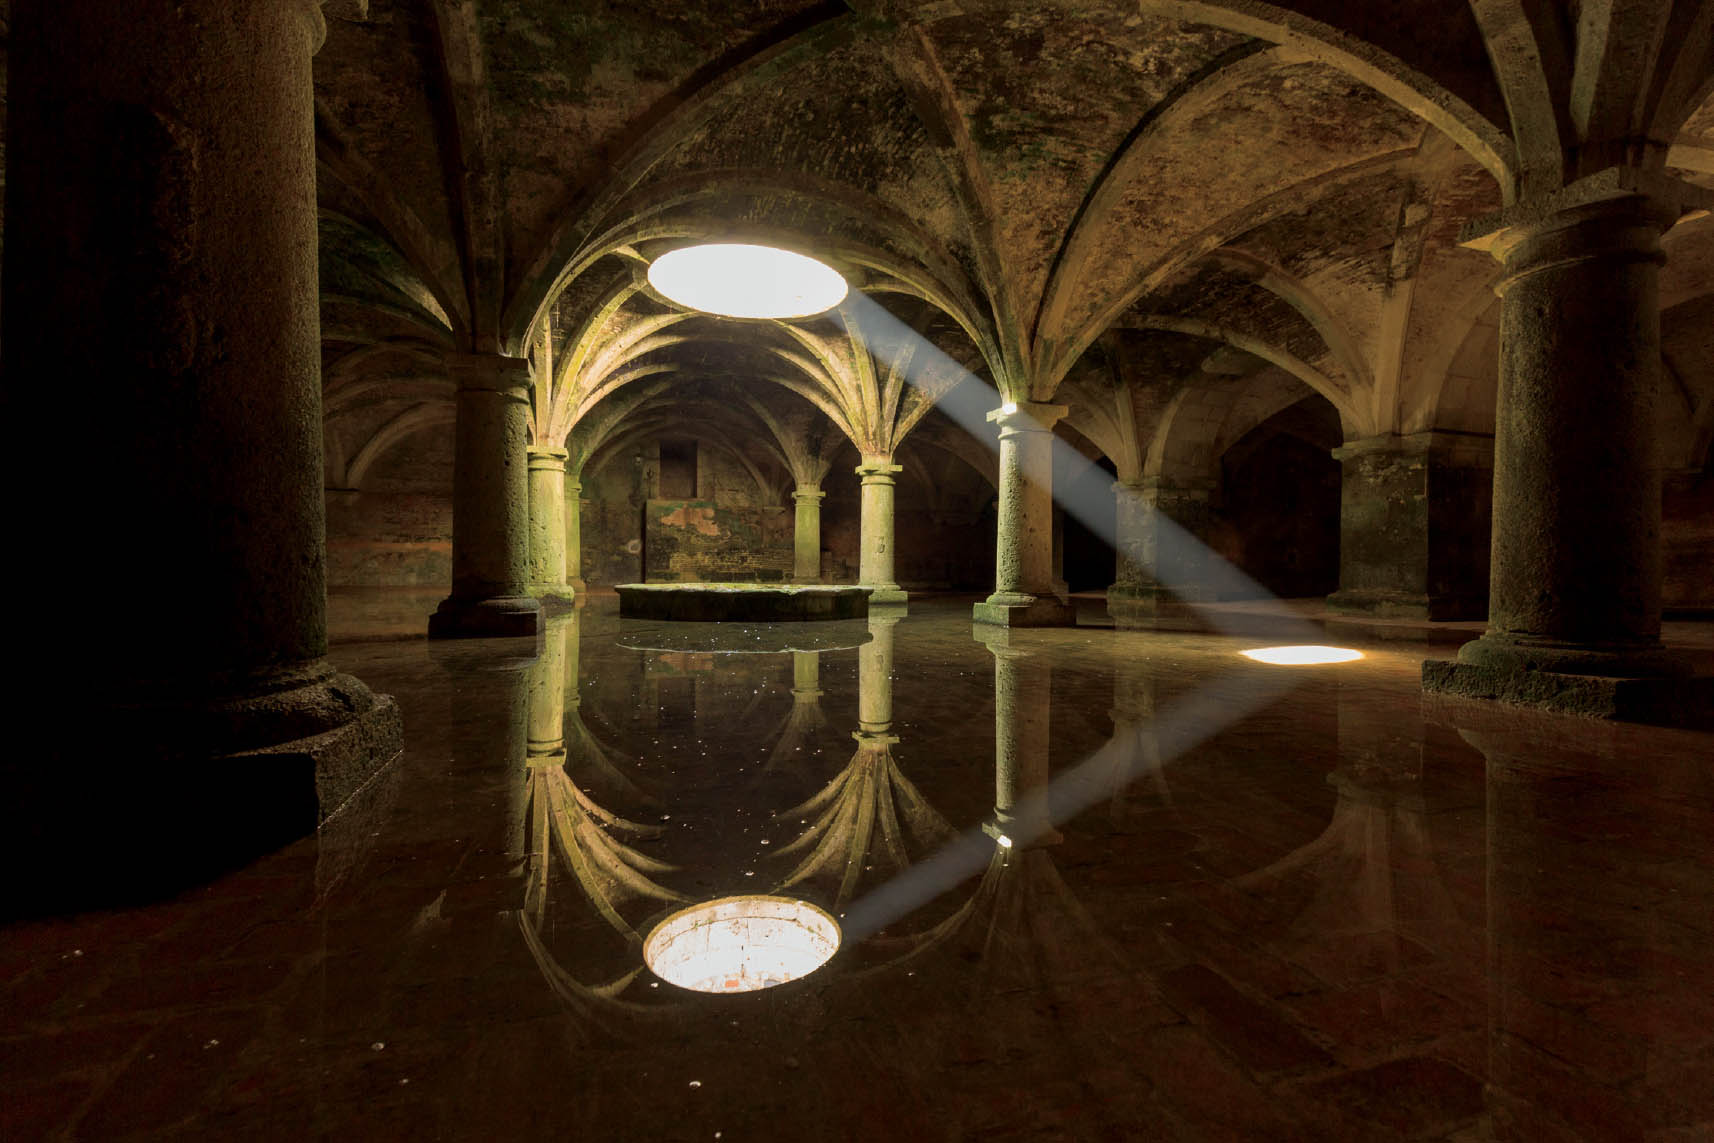
4.5 The multi-segment meter can analyze an entire scene and produce a reasonable average of the light and dark regions in the shot to maintain as much exposure information as possible.
1/100 sec.; f/11; ISO 100; Canon 5D Mark III; EF11-24mm f/4L USM @ 11mm