Grace Hopper
December 9, 1906 – January 1, 1992
EARLY YEARS
When she was seven years old, Grace Hopper took apart seven alarm clocks to figure out how they worked. She attended Vassar College, graduating with honors in math and physics. Impressively, on top of being a full-time math professor at Vassar, Hopper found the time to earn a PhD, in math from Yale University.
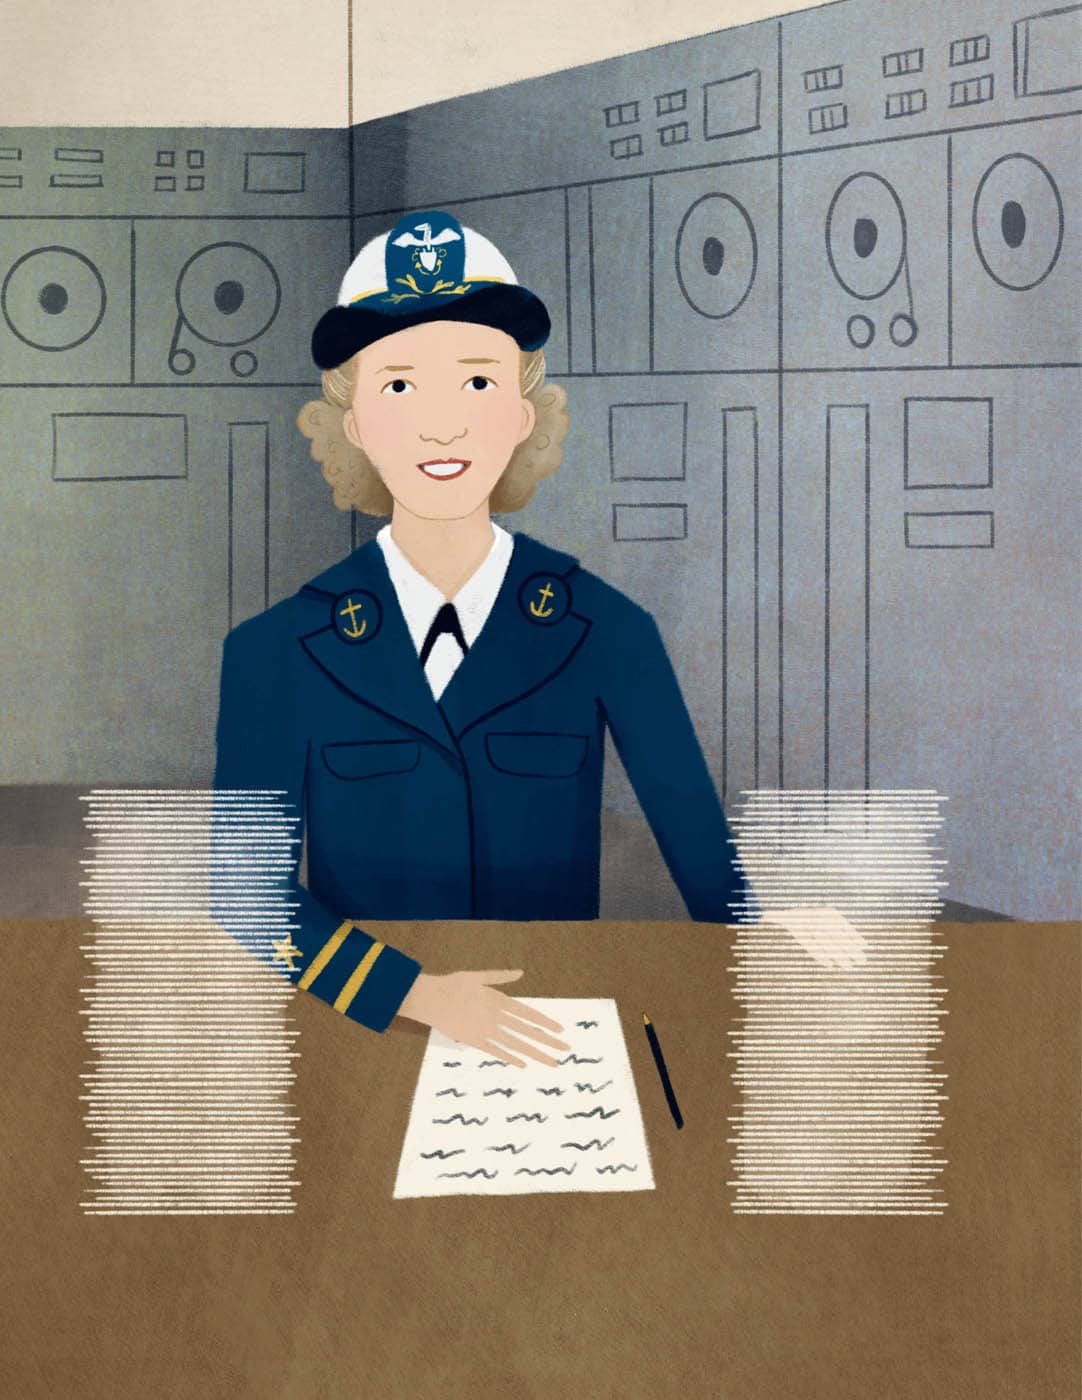
JOINING THE NAVY
Grace was a math professor at Vassar for over a decade. When World War II broke out, she tried to enlist in the Navy but was rejected because, at age thirty-four, she was considered too old; her weight was fifteen pounds below the Navy’s minimum; and most importantly, her job as a mathematician and math professor was considered too important to the war effort. Grace refused to give up and joined the U.S. Navy Reserves instead, although she had to get an exemption because of her weight. She was assigned to a very early computer project at Harvard University. Their computer, the Mark I, was 51 feet (15.5 m) long, 8 feet (2.4 m) high, 8 feet (2.4 m) wide, and could only do three additions per second.
FIRST COMPUTER BUG
Grace continued to work on the Harvard computing project even after World War II ended. One night, a computer malfunctioned. Eventually, someone figured out there was a moth inside the computer! Grace later explained, “From then on, when anything went wrong with a computer, we said it had bugs in it.” She taped the moth to a logbook where you can still see it at the Smithsonian Museum. To this day, finding errors in a computer program is called “debugging.”
ENGLISH-BASED PROGRAMMING LANGUAGE
Grace understood long before most people just how useful computers could be in the business world. Early programming required significant math and computer knowledge. She developed a programming language that looked closer to English to make programming easier and allow more people to work with computers. This was successful, but there was soon a problem because every type of computer had its own language. So then, Grace helped lead a group that standardized computer language for business. The result was Common Business Oriented Language (COBOL). Next, she worked on convincing the Navy to adopt COBOL.
COMPUTER AMBASSADOR
Dr. Grace Hopper was a great speaker and teacher. She was a tireless advocate for the simplification, standardization, and wider adoption of computers. She retired from the Navy twice, only to be recalled to active service each time as they needed her to lead important projects, such as standardizing the Navy’s computer use. Grace was seventy-nine when she retired from the Navy for the third and final time.
AWARDS AND HONORS
Grace retired from the Navy with the high rank of rear admiral. She received almost fifty honorary university degrees, the Presidential Medal of Freedom, and many military medals, including the Legion of Merit, and she was buried with full honors in Arlington National Cemetery. She was the first woman to be the sole winner of the National Medal of Technology, the United States’ highest technology award. Yale University even renamed one of its colleges after her. She was elected to the American Academy of Arts and Sciences, had multiple scholarships and awards established in her name, and inspired a yearly conference for women in computing. Grace also had a U.S. Navy boat and a planet named after her!
BINARY BRACELET
ASCII, which is short for American Standard Code for Information Interchange, is used to encode the letters of the alphabet into computer language, like Grace Hopper did. We’re going to use ASCII to make a bracelet that contains a secret code!
MATERIALS
- Beads in three different colors
- Pencil or pen
- Paper
- Ruler
- Scissors
- Yarn, string, wire, or a pipe cleaner
Binary codes use only 0s and 1s, which are called bits. When coding for computers, we often want some way to indicate that a letter, word, or something else has ended and we’re about to start a new one. We call the indicator a delimiter.
DIRECTIONS
PREPARE YOUR CODE
1 Choose one color bead to use for 1s, a second color to use for 0s, and a third color to use for delimiters. In our example, we chose black for 1s, white for 0s, and red for delimiters.
2 Decide what you want to encode in your bracelet. It could be your initials, your name, or another short word. Or if you want to encode something longer, you can make a binary necklace instead of a bracelet. In our example, we will encode the name “Zack.”
NOTE: Beads that are 8mm in diameter are large enough that you will only have room for your initials if you are making a bracelet. You can encode a longer message in a necklace or if you use smaller beads.
3 Look up each letter in the “ASCII to Text Conversion Table” and write it down on your paper. We’re encoding “Zack,” so we write down: Z: 1 0 1 1 0 1 0 , a: 1100001, c: 1100011, k: 1101011.
ASCII to Text Conversion Table | |||
ASCII | LETTER | ASCII | LETTER |
1 0 0 0 0 0 1 | A | 1 1 0 0 0 0 1 | a |
1 0 0 0 0 1 0 | B | 1 1 0 0 0 1 0 | b |
1 0 0 0 0 1 1 | C | 1 1 0 0 0 1 1 | c |
1 0 0 0 1 0 0 | D | 1 1 0 0 1 0 0 | d |
1 0 0 0 1 0 1 | E | 1 1 0 0 1 0 1 | e |
1 0 0 0 1 1 0 | F | 1 1 0 0 1 1 0 | f |
1 0 0 0 1 1 1 | G | 1 1 0 0 1 1 1 | g |
1 0 0 1 0 0 0 | H | 1 1 0 1 0 0 0 | h |
1 0 0 1 0 0 1 | I | 1 1 0 1 0 0 1 | i |
1 0 0 1 0 1 0 | J | 1 1 0 1 0 1 0 | j |
1 0 0 1 0 1 1 | K | 1 1 0 1 0 1 1 | k |
1 0 0 1 1 0 0 | L | 1 1 0 1 1 0 0 | l |
1 0 0 1 1 0 1 | M | 1 1 0 1 1 0 1 | m |
1 0 0 1 1 1 0 | N | 1 1 0 1 1 1 0 | n |
1 0 0 1 1 1 1 | O | 1 1 0 1 1 1 1 | o |
1 0 1 0 0 0 0 | P | 1 1 1 0 0 0 0 | p |
1 0 1 0 0 0 1 | Q | 1 1 1 0 0 0 1 | q |
1 0 1 0 0 1 0 | R | 1 1 1 0 0 1 0 | r |
1 0 1 0 0 1 1 | S | 1 1 1 0 0 1 1 | s |
1 0 1 0 1 0 0 | T | 1 1 1 0 1 0 0 | t |
1 0 1 0 1 0 1 | U | 1 1 1 0 1 0 1 | u |
1 0 1 0 1 1 0 | V | 1 1 1 0 1 1 0 | v |
1 0 1 0 1 1 1 | W | 1 1 1 0 1 1 1 | w |
1 0 1 1 0 0 0 | X | 1 1 1 1 0 0 0 | x |
1 0 1 1 0 0 1 | Y | 1 1 1 1 0 0 1 | y |
1 0 1 1 0 1 0 | Z | 1 1 1 1 0 1 0 | z |
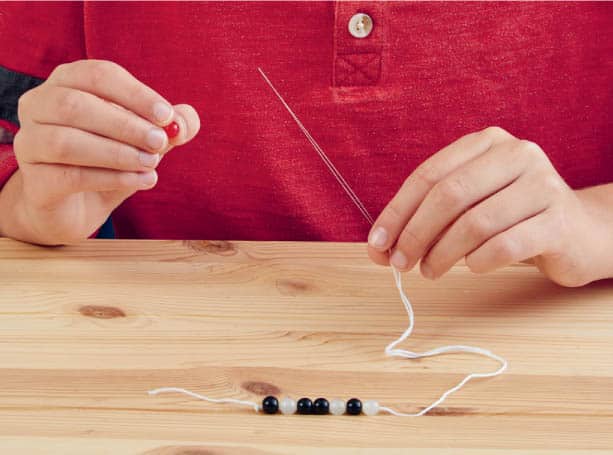
MAKE YOUR BRACELET
1 With a ruler and scissors, measure and cut a piece of string 3 inches (7.6 cm) longer than you want the final bracelet or necklace to be.
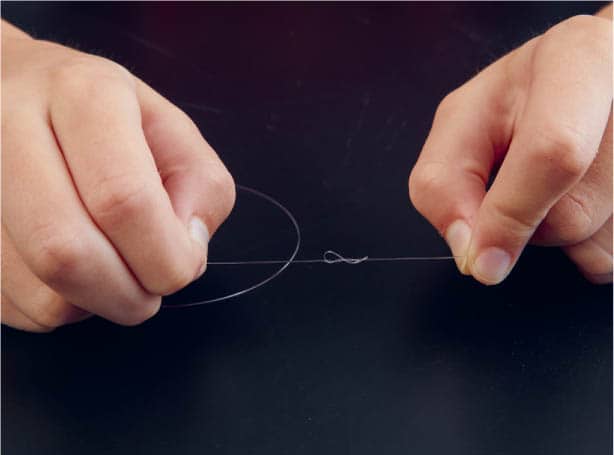
2 Tie a big knot at one end of your string. Make sure the knot is big enough that the beads won’t slip off. You will probably want to tie a double or triple knot. Fig. 1.
3 Using the colors you chose for 1s and 0s, string them in order for your first letter. Our example shows “Z.” Fig. 2.
4 Add a delimiter bead at the end of your first letter. Fig. 3.
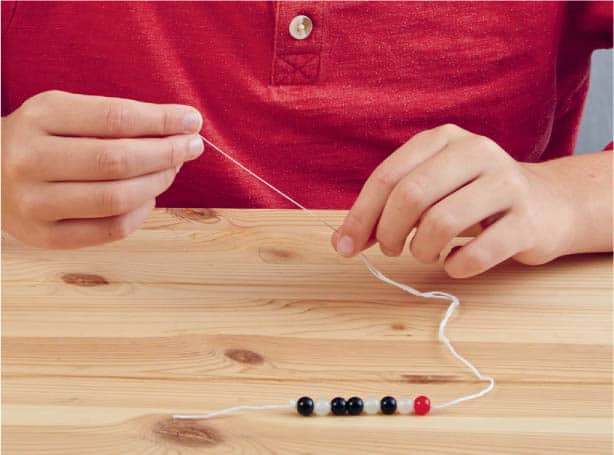
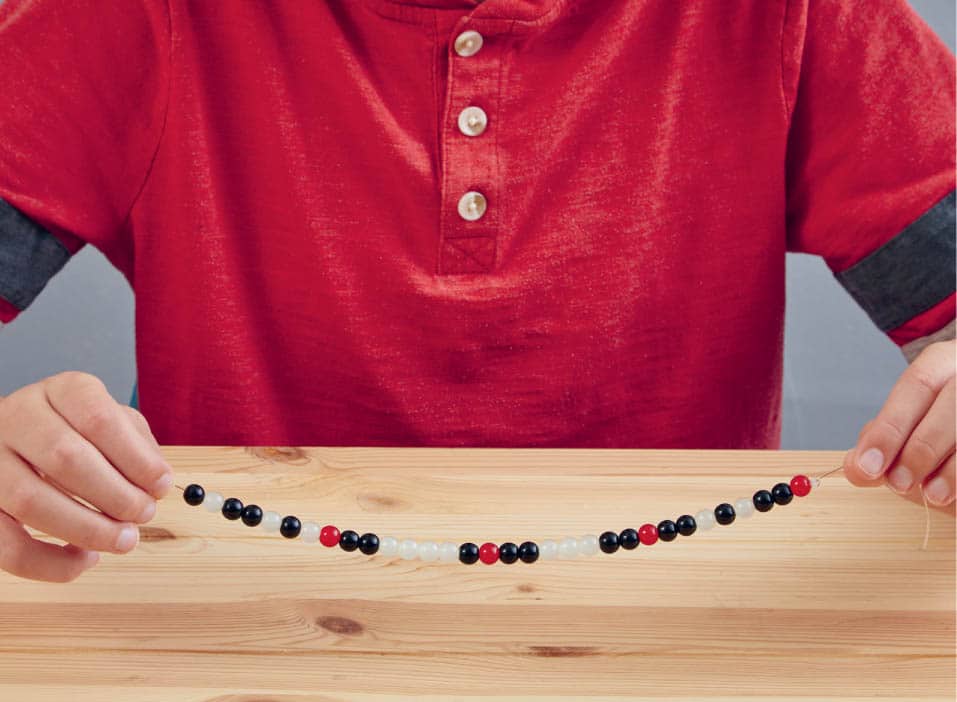
5 Repeat steps 3 and 4 until you have spelled your entire coded message. Our example shows “Zack.” Fig. 4.
6 Cut the string so it is a few inches longer than what is needed to fit around your wrist. If you’re making a necklace, cut the string a few inches longer than you want the necklace to be.
7 Tie the bracelet closed but leave a little extra space so you can slip it on and off.
8 Cut off the extra string but not too close to the end so the knots don’t come undone.
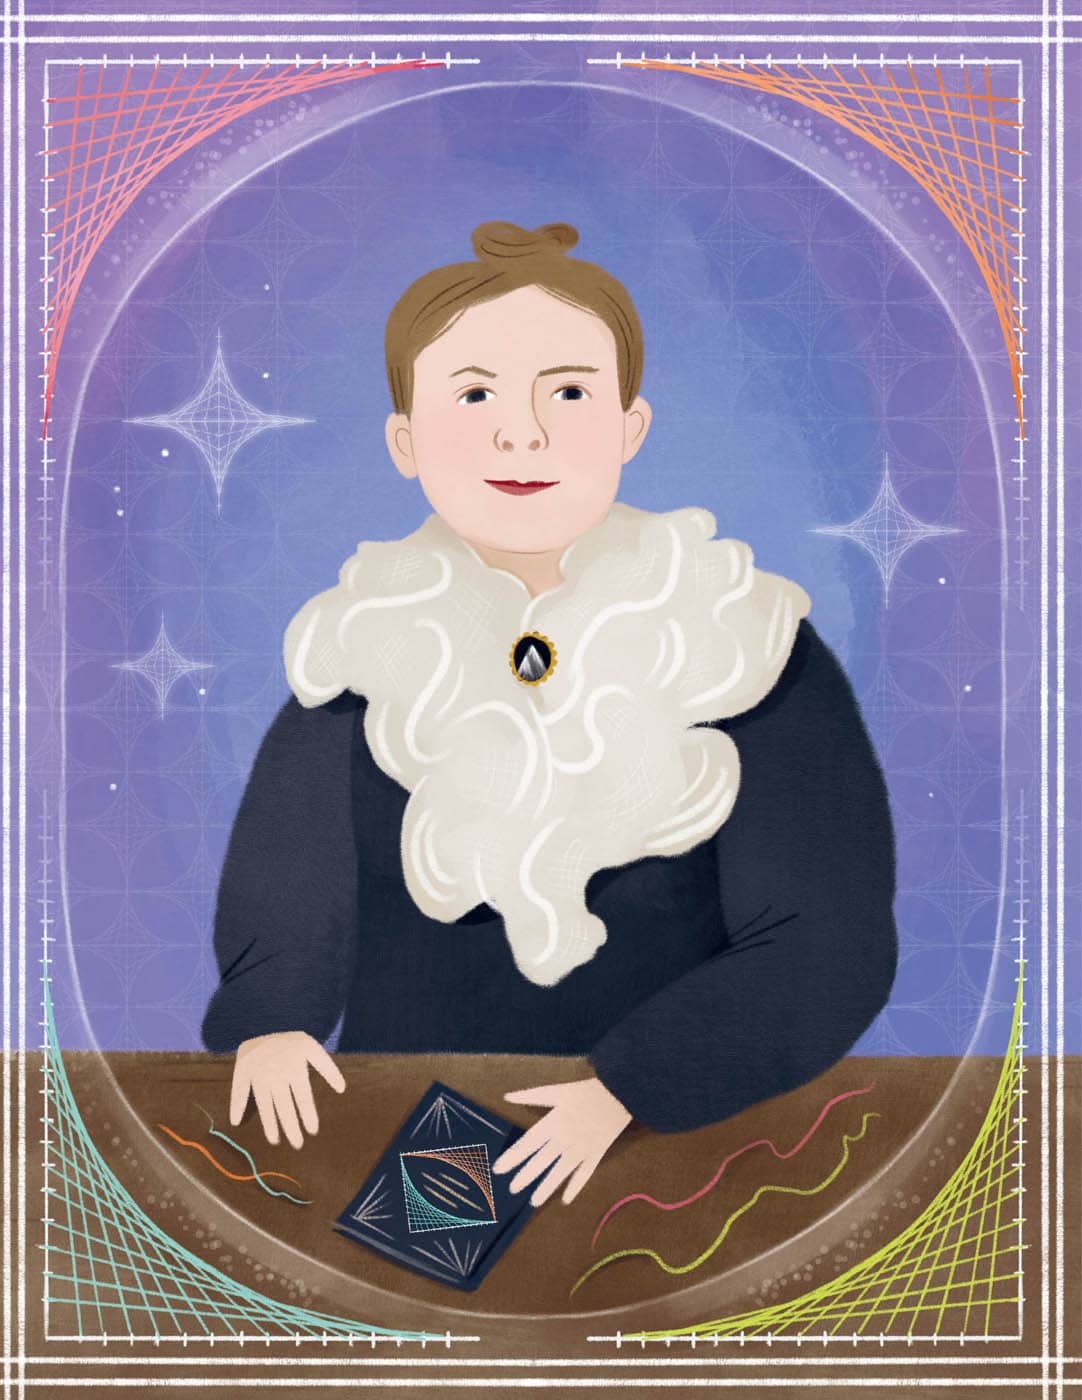
March 11, 1832 – May 17, 1916 When Mary Everest was very young, her family moved from England to France, where her math tutor, Monsieur Deplace, inspired her fascination with math. He was such a great teacher that Mary was devastated when she had to move back to England. Back home, Mary was disappointed to learn that because she was a woman, she was unable to attend university to continue studying math. She resolved to teach herself, learning calculus from her father’s books and talking to many of her father’s mathematician friends. Her uncle, George Everest, also encouraged Mary by introducing her to mathematician George Boole when she was eighteen. Mary and George developed a strong friendship over their shared love of math and wrote each other letters for several years. When Mary was twenty-three, she married George Boole. She attended his lectures and helped him with his work. Sadly, he died nine years later when their youngest child was only six months old, leaving Mary to raise five daughters on her own. Mary’s eldest daughter, Alicia Boole Stott, followed in her parents’ footsteps and became a respected mathematician. Lucy Everest Boole, Mary’s second child, became a chemist and broke through many barriers for women, including becoming the first female professor at the London School of Medicine and the first female fellow of the Royal Institute of Chemistry. Mary’s youngest daughter, Ethel, made a name for herself as a novelist. Mary’s uncle, George Everest, used math to figure out the height of the mountain that is now named after him. Shortly after her husband’s death, Mary got a job as a librarian at Queens College, London, the first women’s college in England. Mary wanted to teach math and science, but at the time, women were not allowed to teach or even earn degrees. As a librarian, however, she was able to tutor students who came to the library. Not only did she love teaching, but she was also good at it. Mary channeled her love of teaching into writing books, including the controversial The Message of Psychic Science for Mothers and Nurses. Her belief in the influence of the supernatural eventually caused her to lose her librarian job. After that, she took a job as a secretary for her father’s friend, James Hinton. While working for James, Mary became interested in evolution and corresponded with Charles Darwin. Mary went on to write other books that were extremely well received. Mary Everest Boole is best known for her innovative methods of teaching math and science to children. Her books The Preparation of the Child for Science and Philosophy and Fun of Algebra discussed how children learn. She advocated for hands-on teaching methods that allowed children to explore math through playful activities. Mary also encouraged critical thinking and urged careful use of repetition. These books were highly respected and influenced the development of many schools in England and the United States. Many of Mary’s methods are still used in Montessori and other schools today.
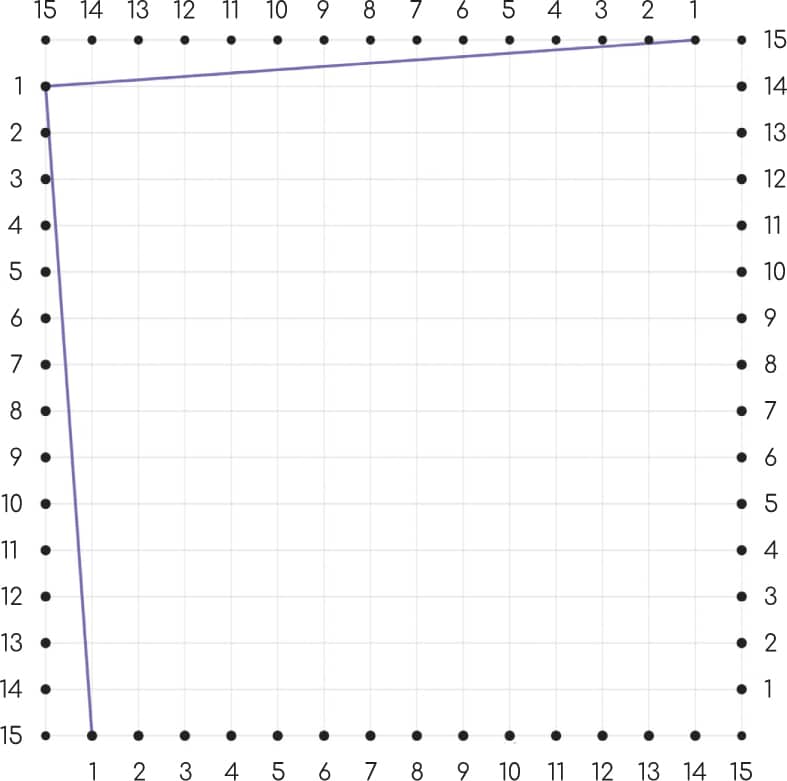
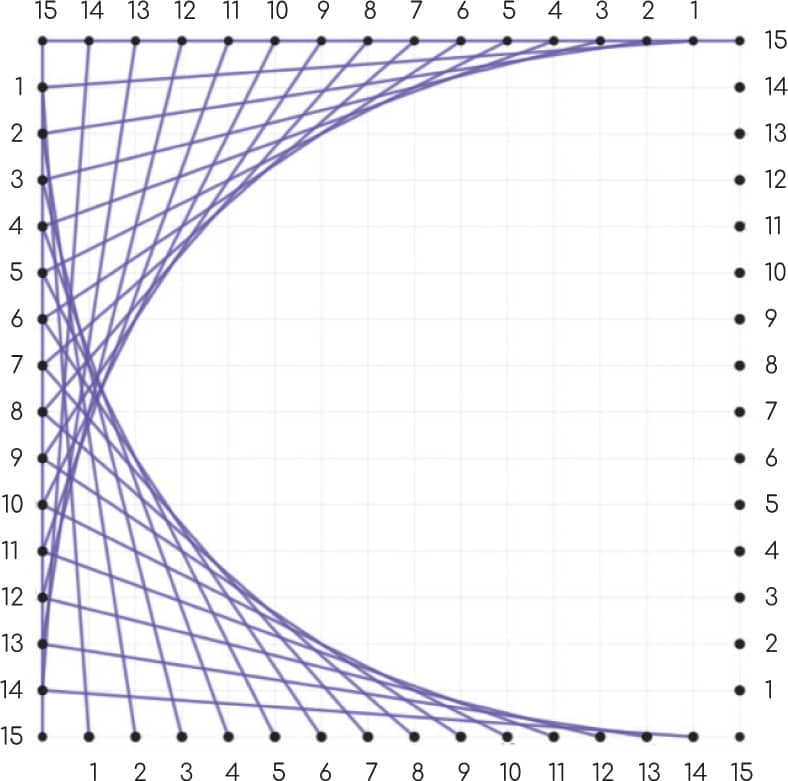
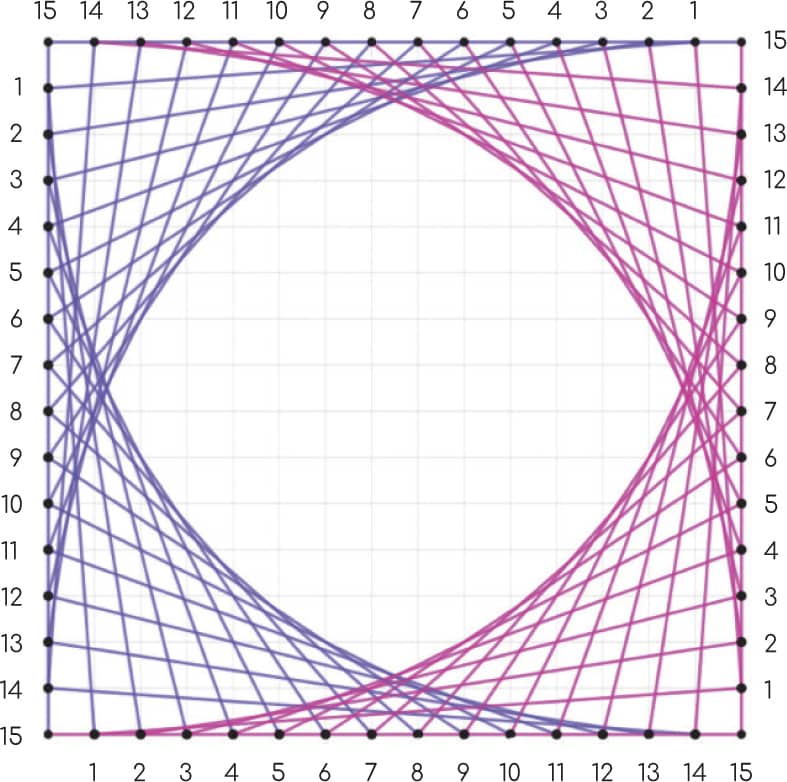
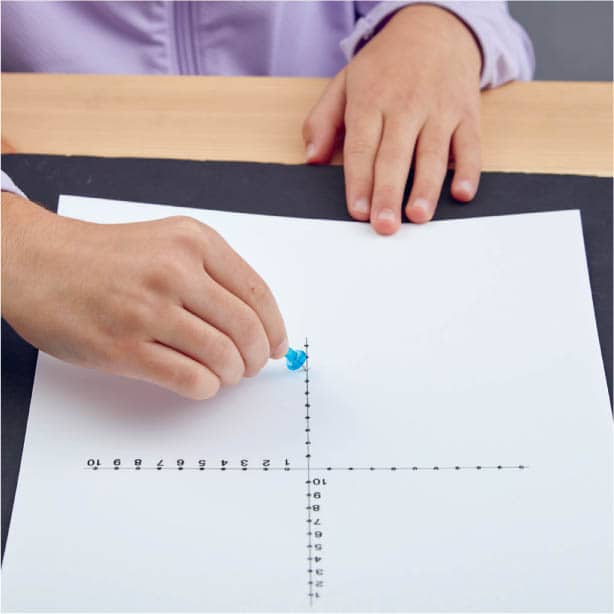
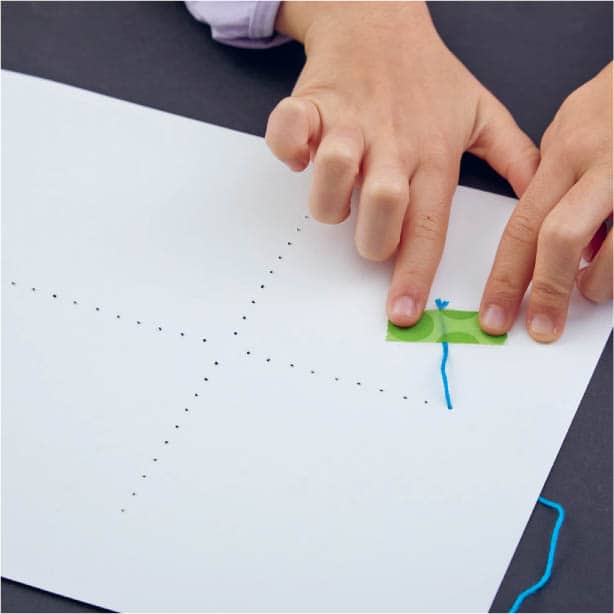
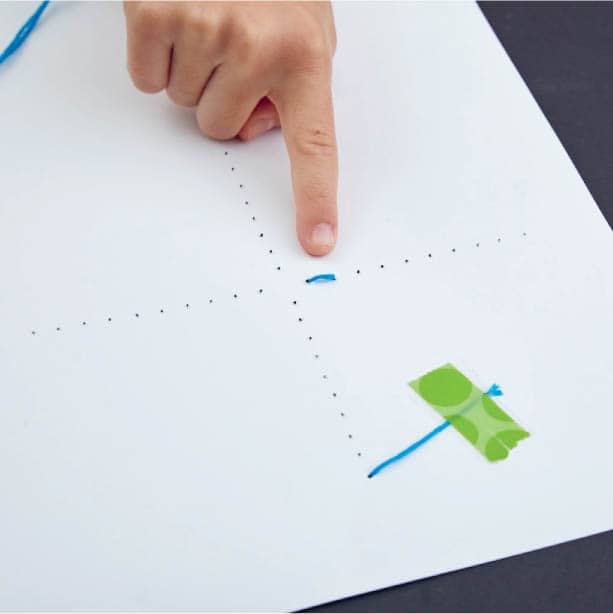
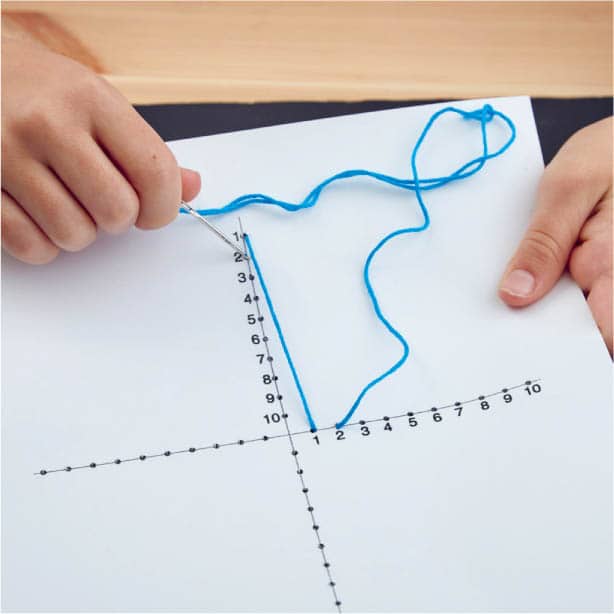
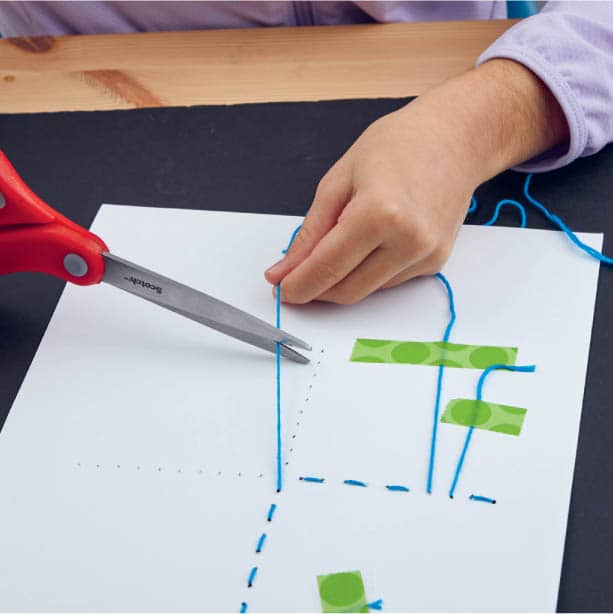
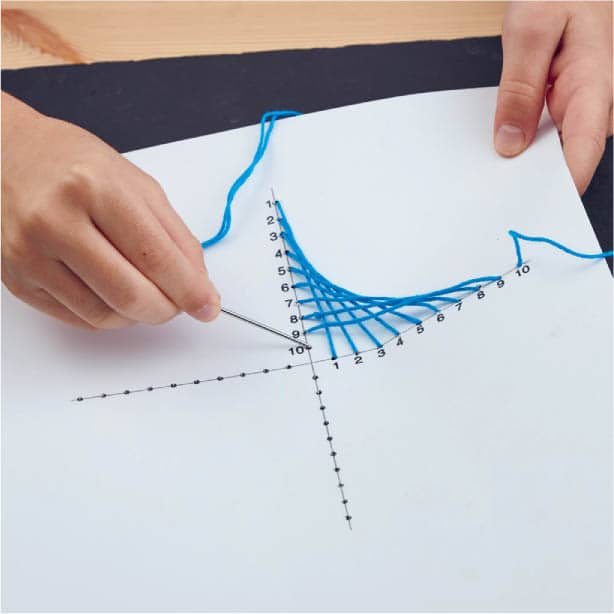
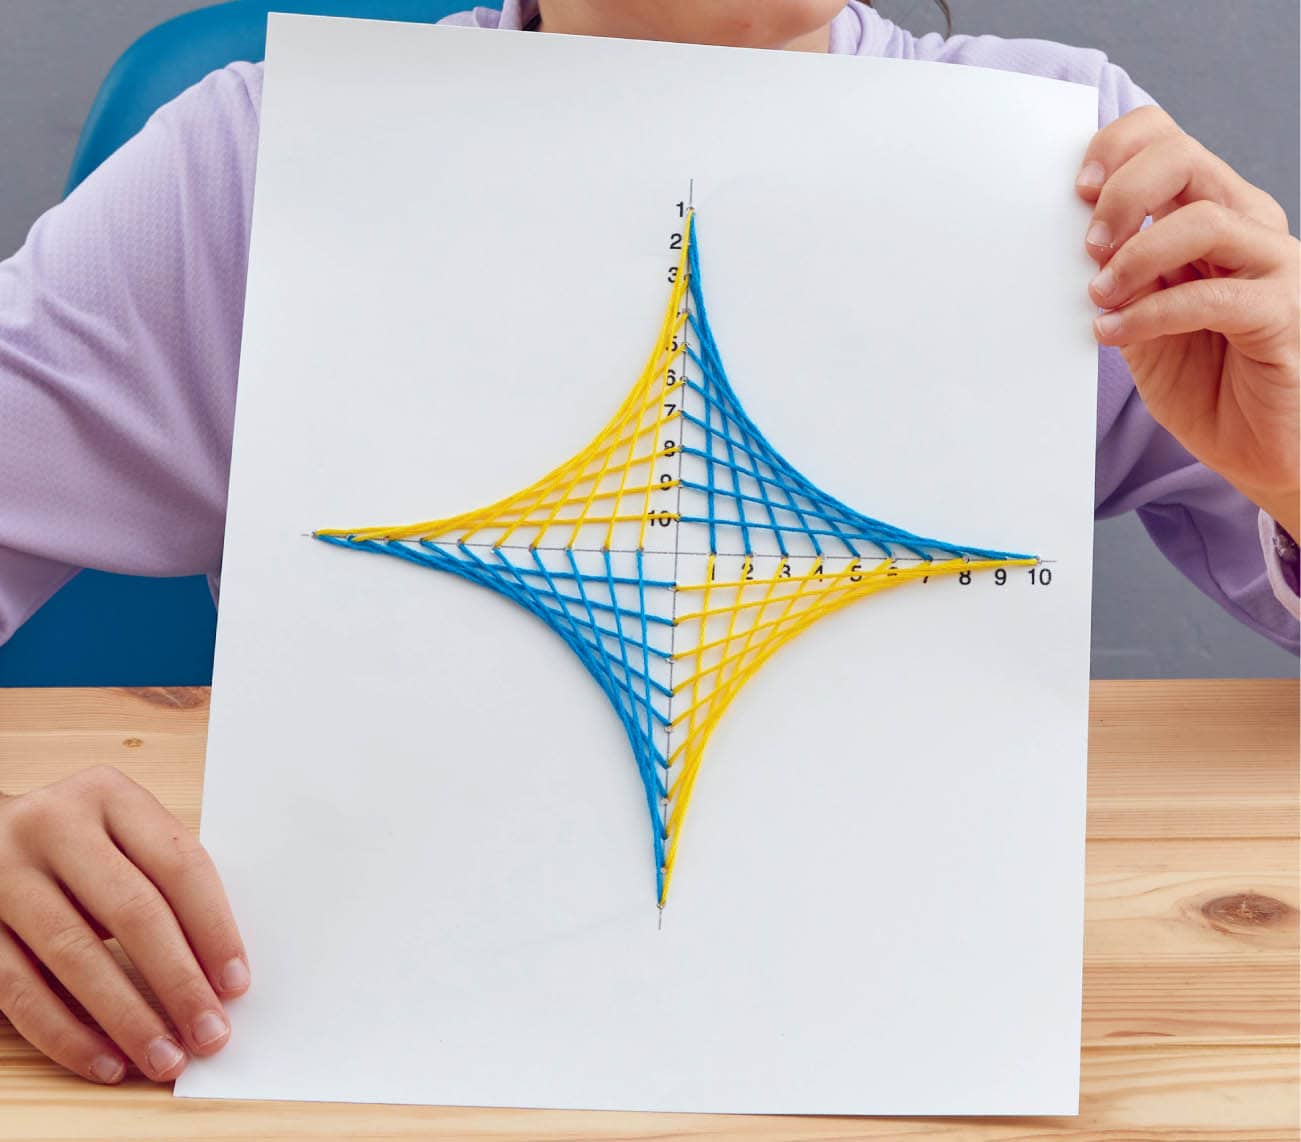
Mary Everest Boole invented curve stitching as a hands-on way for kids to learn math concepts. In this project, you’ll learn to draw curves using straight lines and also how to stitch beautiful mathematical art, just like Mary Everest Boole! 1 Download and print out a copy of the Stitching Everest template from www.mathlabforkids.com or make a copy of the Stitching Everest template. Fig. 1. 2 Using a ruler and a pencil, draw a straight line from the point labeled 1 in the upper left corner to the points labeled 1 on the top and bottom of the square. Fig. 2. 3 Repeat step 2 for points labeled 2 through 15. Fig. 3. 4 Repeat steps 2 and 3 starting with the point labeled 1 in the lower right corner of the square. (Use a different color if you like.) Fig. 4. When Mary Everest Boole devised this activity, called “curve stitching,” she intended for kids to poke holes in something and pull string through the holes. Let’s try it! 1 Use a ruler and pencil to draw and label the plus sign image shown in the “Bonus Level” box on this page onto a piece of cardstock. You could use graph paper to make the plus sign, then tape it to the cardstock if you prefer. Alternatively, print a downloadable version of the image from www.mathlabforkids.com directly onto the cardstock. 2 Use a pushpin to carefully poke a hole at each mark on your cardstock. This is easier to do if you put your cardstock over something you can push pins into safely, like a piece of corrugated cardboard. Fig. 5. 3 Cut a piece of embroidery floss or yarn about the length of your arm and thread it onto your needle. 4 Starting from the back of your cardstock, push the needle through the hole you labeled number 1 at the top. As you pull the embroidery floss through the hole, stop when there are a couple of inches still sticking through and tape the end of the floss down on the BACK of the cardstock very securely. Tug on the floss a little to make sure it won’t slip through. Fig. 6. 5 Your needle should be on the front side of your cardstock now. Push the needle through the other hole marked number 1 to make a long stitch. The yarn should connect the two dots, just like we did when drawing curves above. Fig. 7. 6 Starting on the back of your cardstock again, push the needle through the hole right next to it, which should be hole number 2, making a short stitch. Then, from the front side, you can make another long stitch to connect the two number 2 holes. Fig. 8 and Fig. 9. 7 Continue like this for the rest of the holes. You should have long stitches on the front side of your cardstock and short stitches on the back. If you run out of yarn before you’re done, tape the end down on the back of your cardstock, cut another piece of floss, thread your needle, and keep going. When you’ve finished the curve, tape the end of the floss on the back of the cardstock and trim any long ends. Fig. 10 and Fig. 11. 8 Stitch the other three curves in the same way to make a four-pointed star! You can number the other holes if that makes it easier for you to visualize what to connect. Experiment with different colors of embroidery floss. Fig. 12 (here).Mary Everest Boole
FALLING IN LOVE WITH MATH
A MATHEMATICAL FAMILY
CAREER
MARY’S INFLUENCE ON TEACHING PERSISTS TODAY
STITCHING EVEREST
DRAWING CURVES USING STRAIGHT LINES
MATERIALS
DIRECTIONS
CURVE STITCHING
MATERIALS
DIRECTIONS


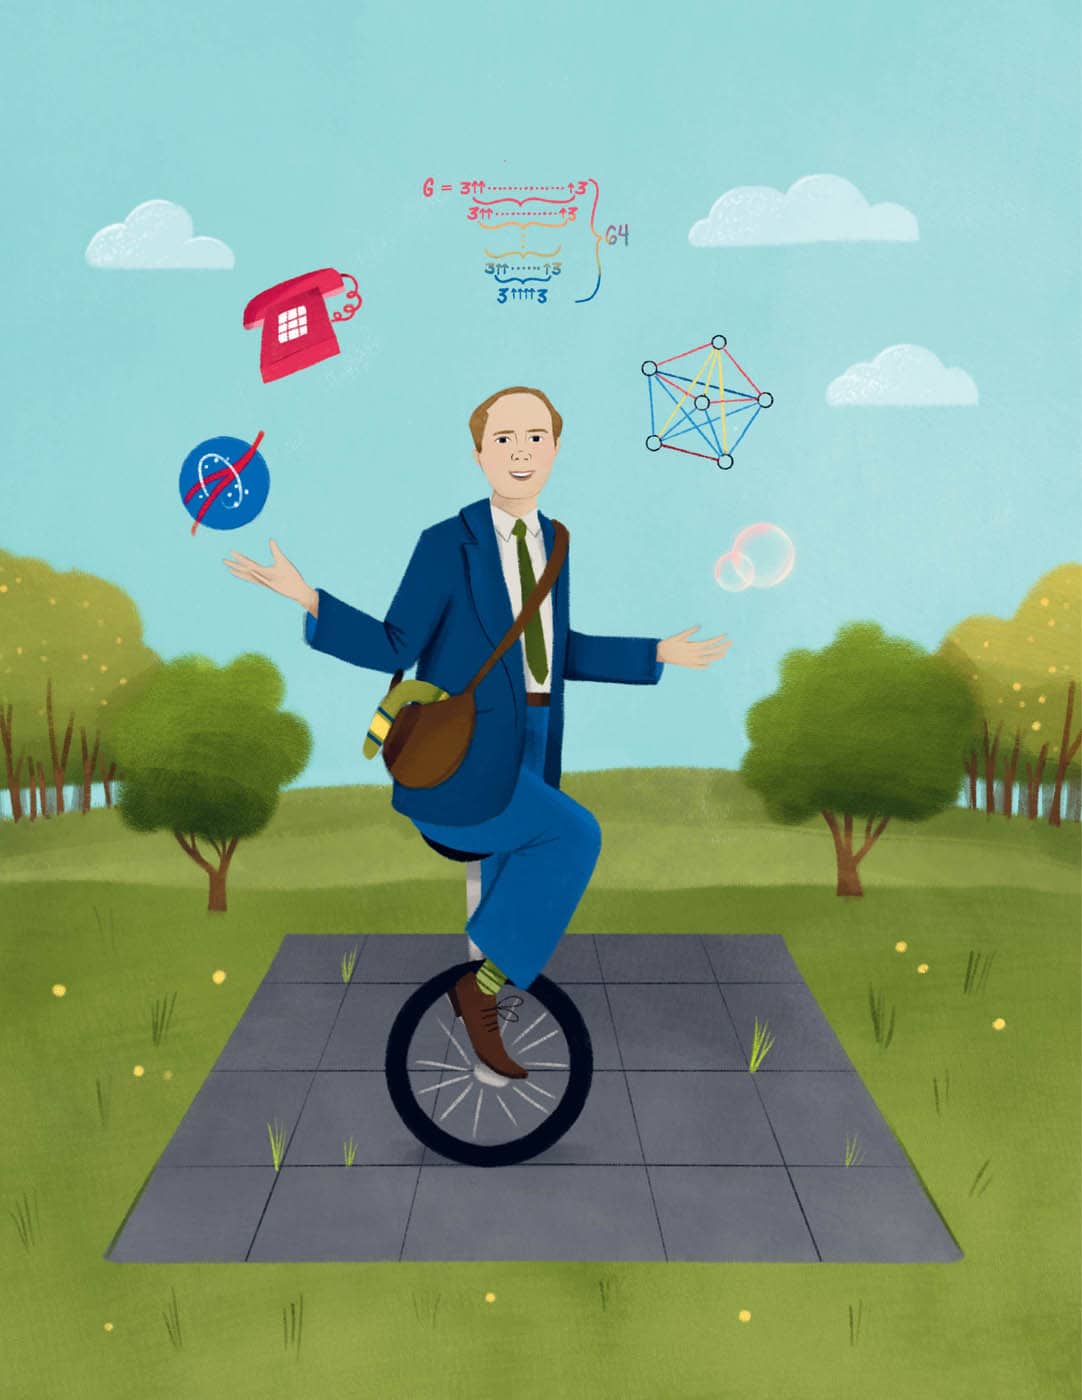
October 31, 1935 – July 6, 2020 Ron Graham was a giant among mathematicians, both because he had a huge influence on many areas of modern math and because he was over 6 feet (1.8 m) tall. Ron started at the University of Chicago when he was fifteen. He did so well in the math portion of his scholarship qualifying exams that he didn’t take any math classes while he was there. However, he did learn how to juggle and participated in many gymnastics contests, especially on the trampoline. He was the California state trampoline champion and supported himself through graduate school at the University of California, Berkeley by founding a professional trampoline troupe called the Bouncing Baers. Ron was great at showing nonmathematicians how interesting and useful math can be. He is in the Guinness Book of World Records for Graham’s number, the largest number ever used in a mathematical proof. Graham’s number is so big that there is not enough space in the known universe to write it down! Ron was featured in Ripley’s Believe It or Not! He also consulted and juggled on stage with Cirque du Soleil. Ron was quite interested in the mathematics of magic. He and Persi Diaconis (whom you can also read about in this book) wrote a book called Magical Mathematics: The Mathematical Ideas That Animate Great Magic Tricks. The book won the Euler Book Prize for “an outstanding book in mathematics that is likely to improve the public view of the field.” Ron worked on scheduling problems and pioneered the area of worst-case analysis, a method for finding the worst possible outcome of a situation. NASA even sought his expertise on the Apollo moon mission. NASA was worried that the astronauts’ schedules were flawed. Ron was able to reassure them that the schedules were within a few percentage points of the best possible outcome and certainly good enough. In addition to the math mentioned earlier, Ron developed much of the math of juggling. He also studied the math of telephones and the Internet. He researched Ramsey theory, soap bubbles, Fibonacci numbers, and much more. Ron loved numbers so much that his license plate was “NUMBER.” He wrote more than four hundred papers, including more than a hundred with his wife, fellow mathematician Fan Chung (profiled earlier in this book). Their mathematical and life partnership was admired and envied by many. Ron sometimes showed up to give talks with a mysterious satchel. After his talk, he would encourage people to meet him at a nearby field. He would open the mysterious satchel to reveal many boomerangs and then proceed to teach everyone present how to throw a boomerang. A charismatic leader, Dr. Ron Graham worked at Bell Labs, which was considered the most prominent research lab outside a university, for thirty-seven years, rising to the level of chief scientist. He was the first person to be president of both the American Mathematical Society and the Mathematical Association of America. He was also the president of the International Jugglers’ Association. Ron was elected to the National Academy of Sciences and won the American Mathematical Society’s Steele Prize for Lifetime Achievement.
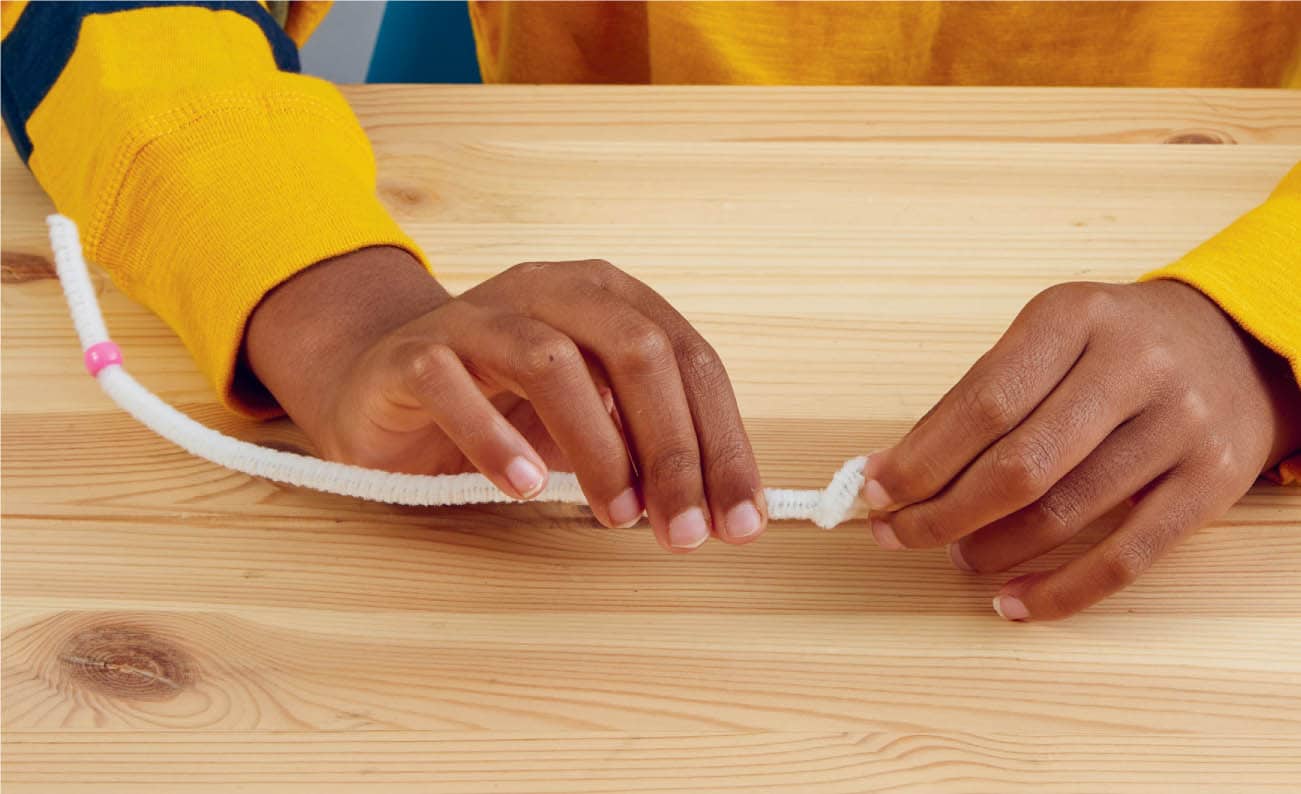
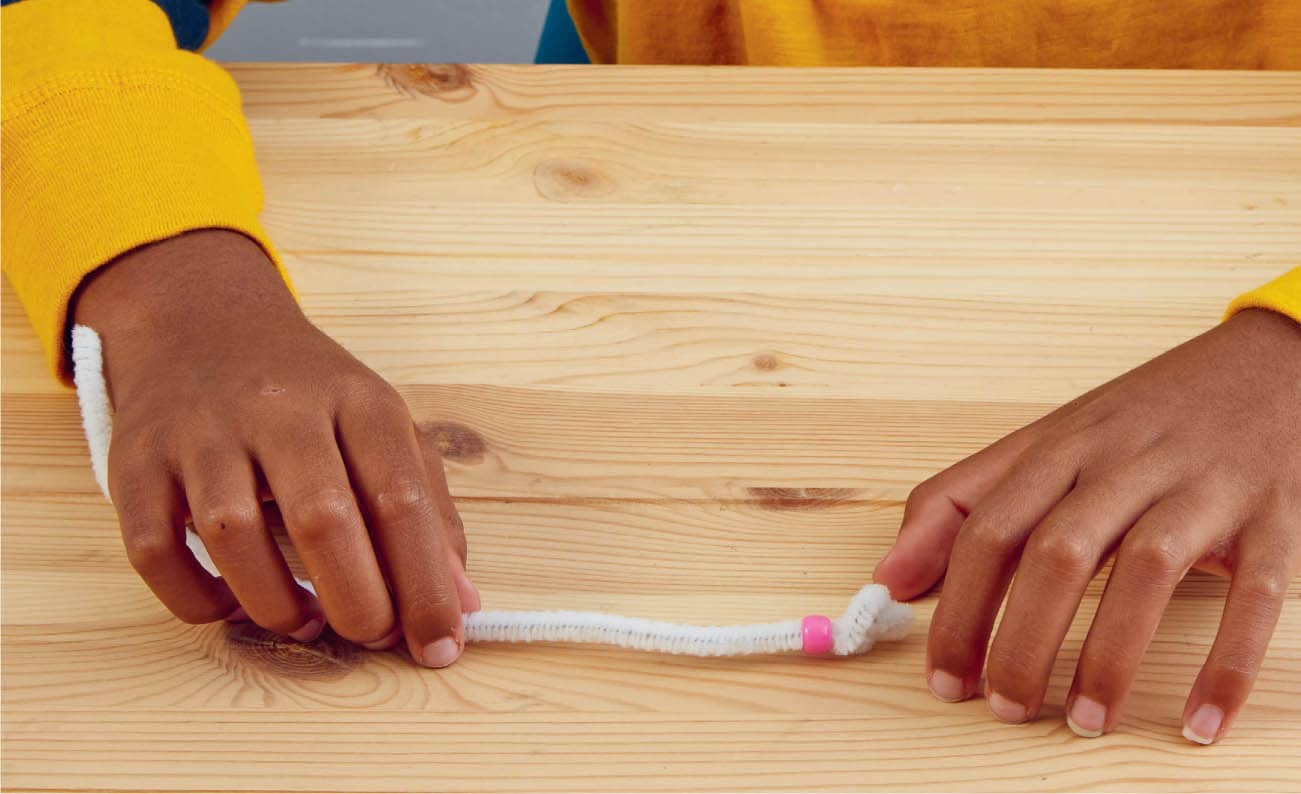
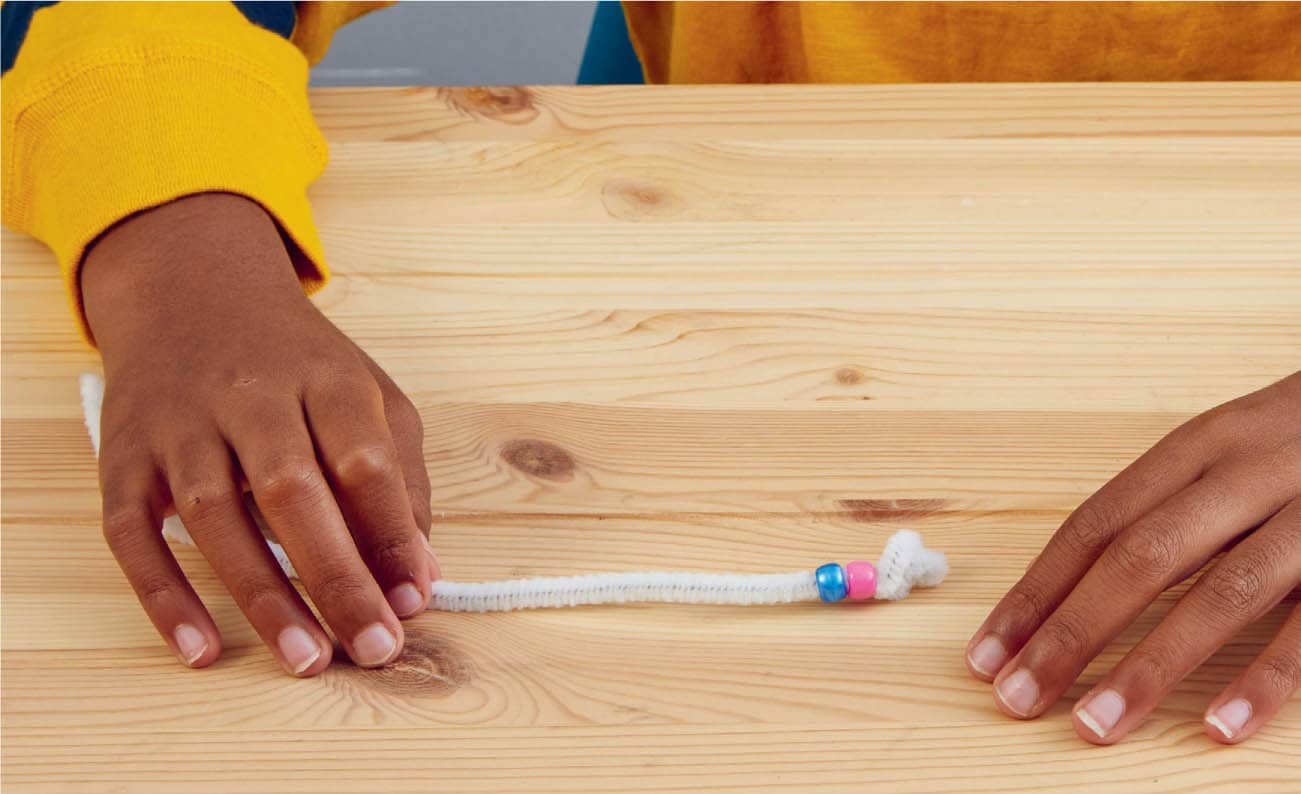
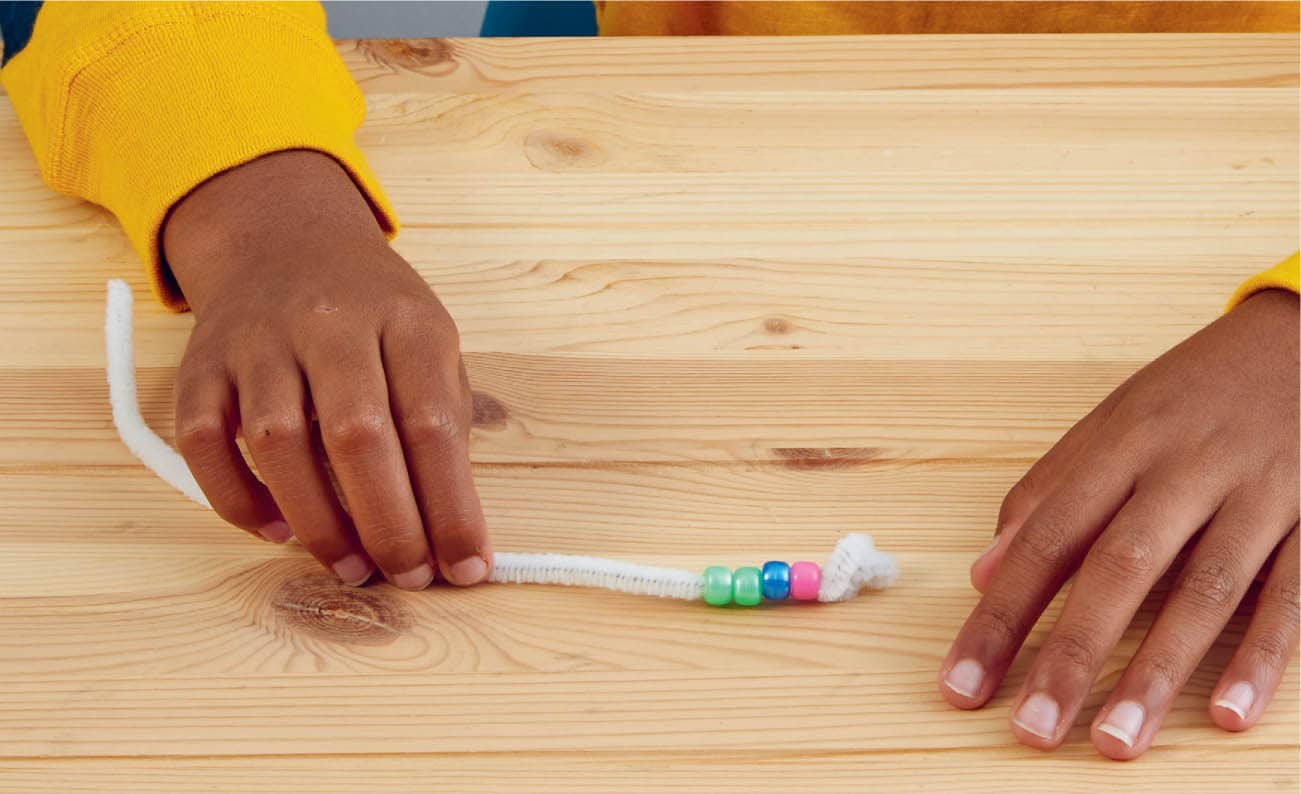
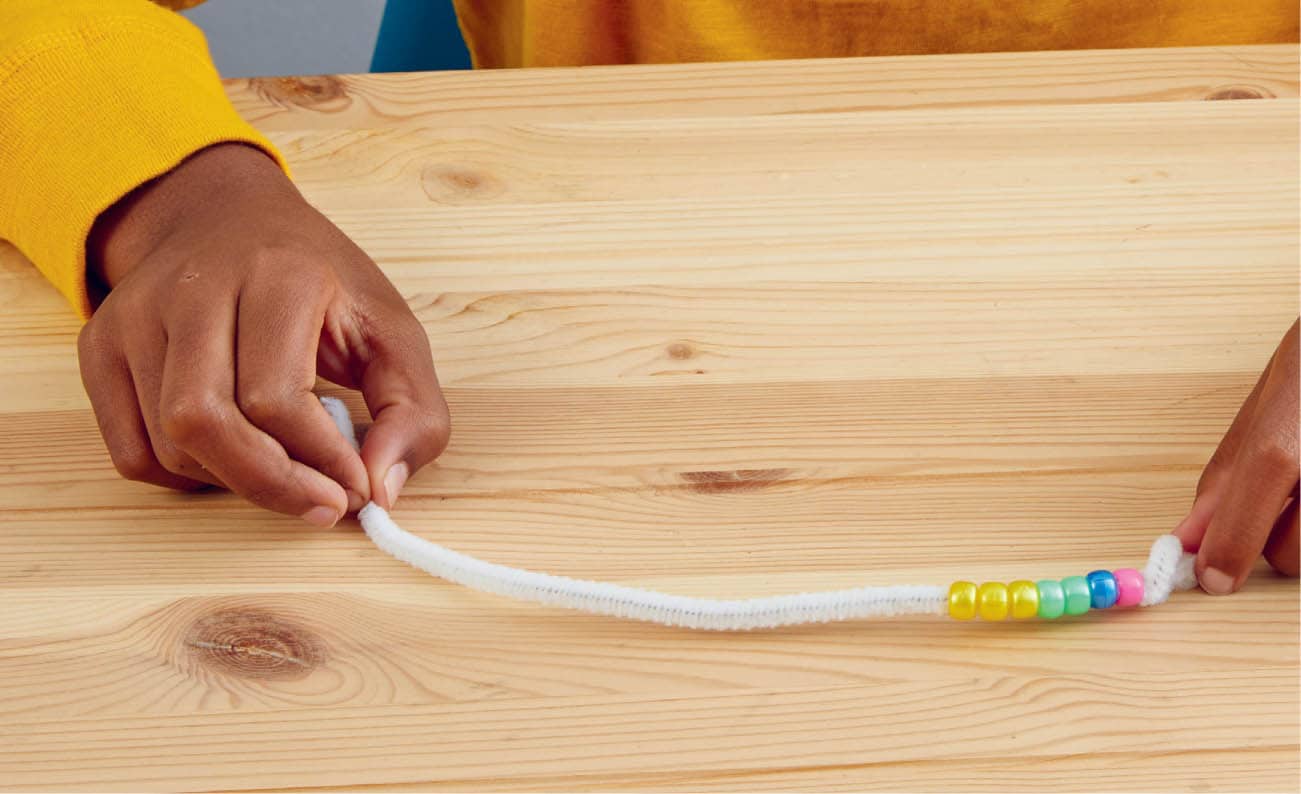
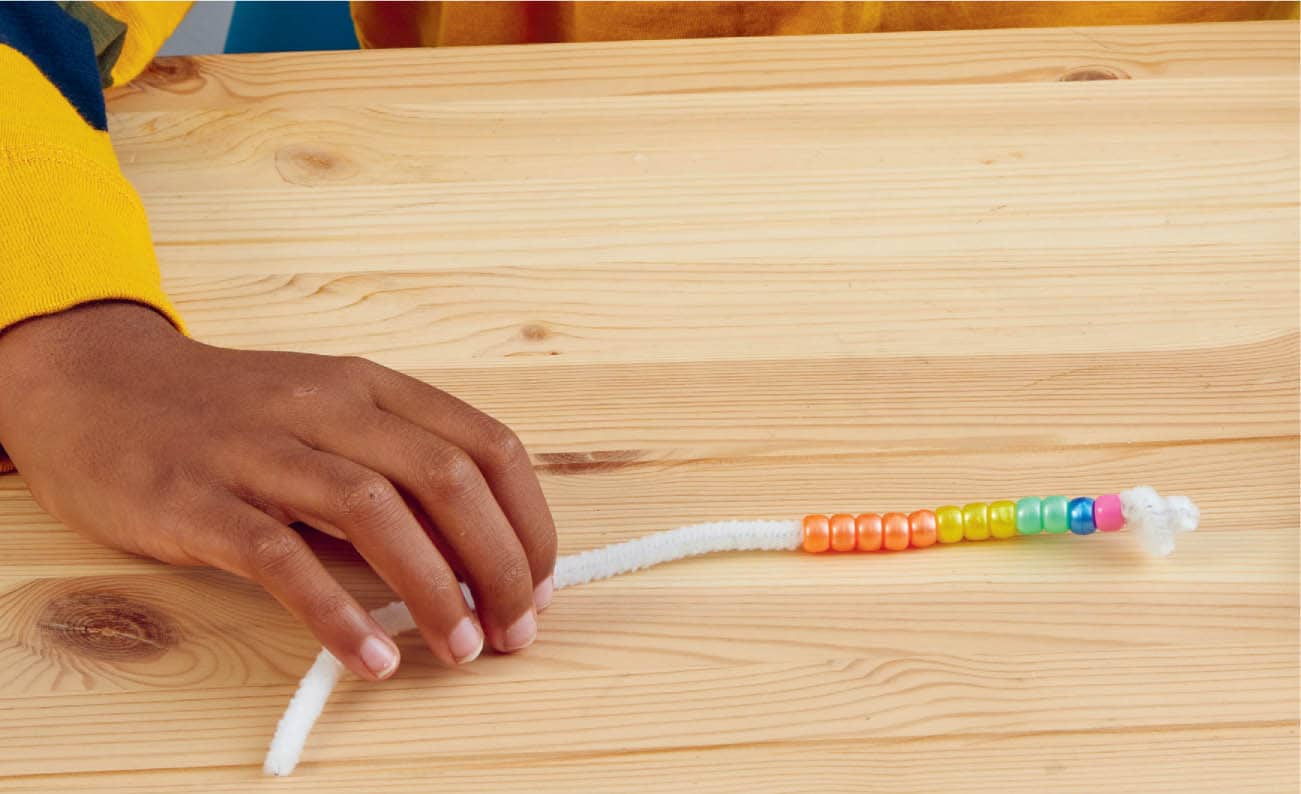
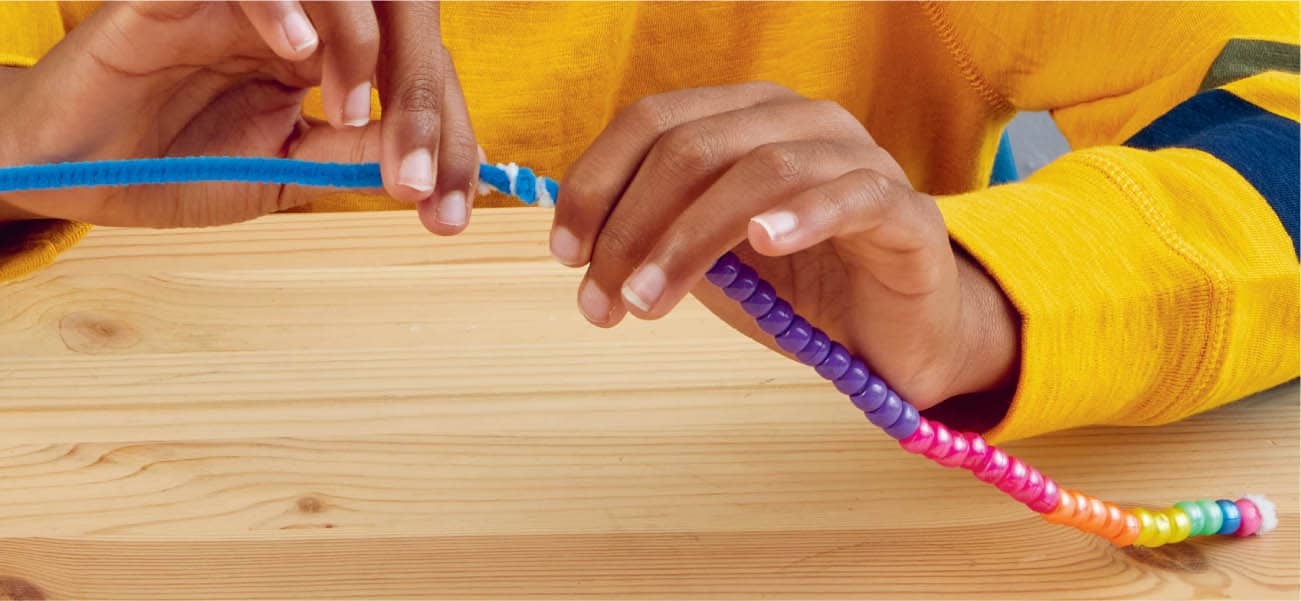
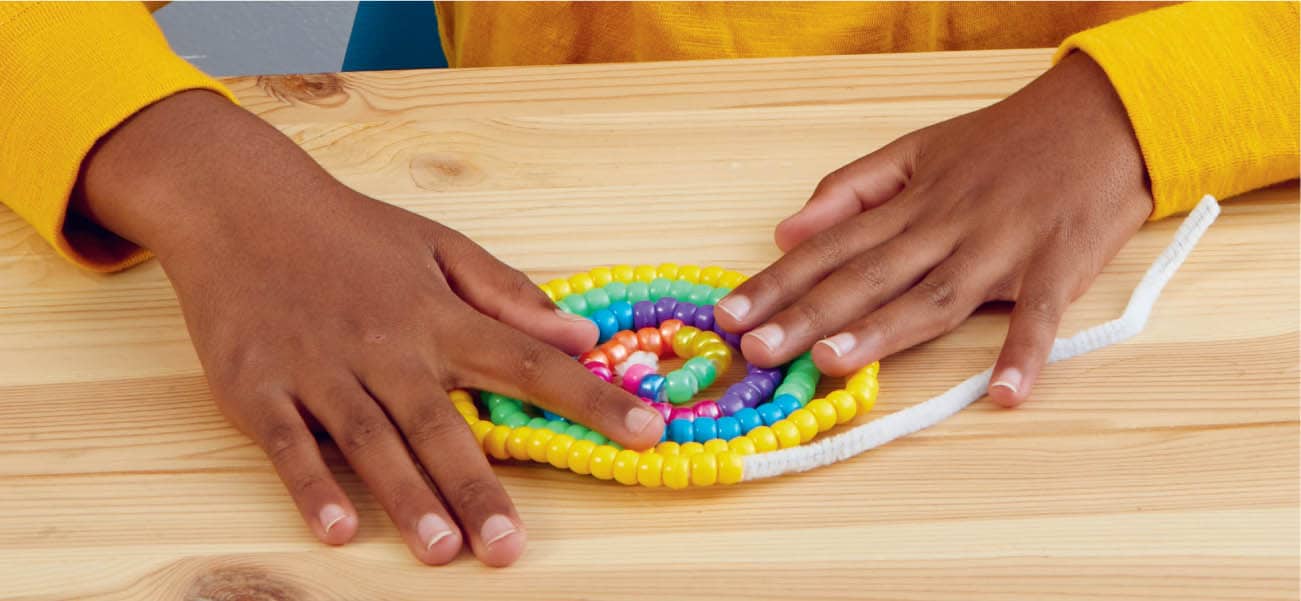
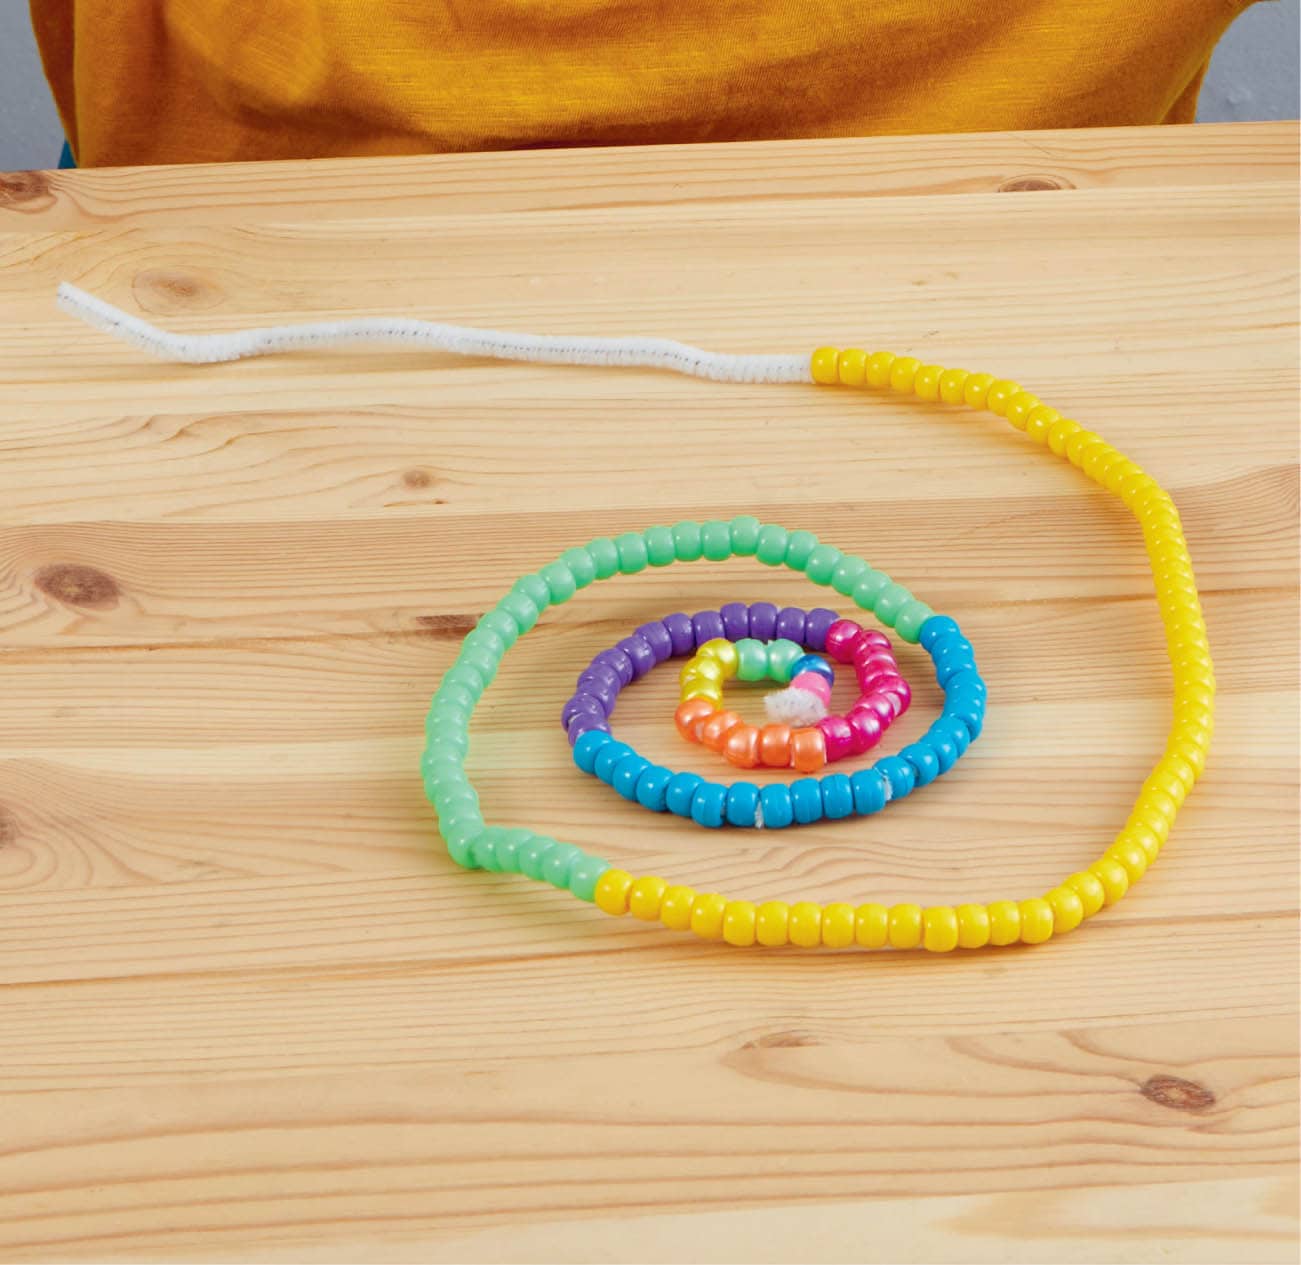
Ron Graham loved playing with the famous Fibonacci sequence. In this activity, we’ll make an artistic representation of the Fibonacci sequence. NOTE: Save the finished spiral for the Alien City activity (on this page). 1 Make a knot at one end of a chenille stem so your beads won’t fall off. You can fold one end if you prefer, just make sure the beads won’t come off. Fig. 1. 2 String one bead onto the chenille stem and push it all the way to the end until the knot prevents it from going further. Really test your knot to make sure the bead can’t slip off. Fig. 2. 3 String a second bead in a different color from the first bead and push it all the way to the end so it’s snug against the first bead. Fig. 3. 4 From now on, we’ll be increasing the number of beads we string each time to follow the Fibonacci sequence. String two beads of a new color. Fig. 4. 5 String three beads of a new color. Fig. 5. 6 String five beads of a new color. Fig. 6. 7 At this point, you have used five different colors. If you have more colors, keep going with new colors as long as you can. At some point, you will have to start reusing colors. The most important thing is to not use the same color for two numbers in a row. We think it’s prettiest if you use the same order for your colors, but feel free to be creative as long as you don’t reuse the same color for two Fibonacci numbers in a row. String eight beads. 8 String thirteen beads. 9 At this point, you probably don’t have much room left on your chenille stem. Take a new chenille stem and twist it together with the one that contains your beads. Make sure the stems are twisted together really well. When you string the next set of beads, have them cover where the stems are twisted together. Fig. 7. 10 Keep stringing ever increasing Fibonacci numbers until you get bored, adding more stems as in step 9 if needed. We ended up using three chenille stems and stopped after adding fifty-five beads of the same color. 11 Now we’re going to turn our creation into a spiral. Lay your handiwork on a flat surface. Starting at the knotted end, slowly curl the whole object around itself, keeping it as flat and tightly wound as possible. Fig. 8. 12 Now let go. The spiral will “open up” beautifully. Fig. 9.Ron Graham
JUGGLING AND TRAMPOLINE
MATH OUTREACH
MATH AND MAGIC
APOLLO MOON MISSION
PROLIFIC MATHEMATICIAN
ALWAYS THE ENTERTAINER
CHARISMATIC LEADER
FIBONACCI SPIRAL
MATERIALS
DIRECTIONS
Born: June 21, 1975 In 2015, Jennifer McLoud-Mann and her husband, mathematician Casey Mann, with the help of University of Washington Bothell student, David Von Derau, wrote a computer program that found the fifteenth type of pentagon that can “tile the plane.” A shape can tile the plane if you can use many copies of it to cover a flat surface without gaps or overlaps. Many bathroom floors (without the grout) provide a good example of mathematical tiling. All three-and four-sided shapes can tile the plane. Mathematicians had previously classified all six-sided convex shapes that could tile the plane. But the question of convex pentagons (five-sided shapes) was still open. Jennifer was interested in this question because “the cool thing in mathematics is that sometimes you have a simply stated problem that doesn’t have a simple solution.” The fifteenth pentagon was the first new pentagon discovered to tile the plane in thirty years! Jennifer had begun to wonder whether they would ever succeed because it took them two years to find it. After hearing about the discovery, French mathematician Michael Rao created a computer-assisted proof that there can only be fifteen. So it turns out that Jennifer and her team found the last possible pentagon to tile the plane! Jennifer was the first college graduate in her family and received a PhD from the University of Arkansas, Fayetteville. She is currently a professor and the associate dean for the School of STEM at the University of Washington (UW) Bothell. Her main research areas are knot theory, combinatorics, tiling theory, and commutative algebra. She enjoys collaborating with other mathematicians and undergraduates. She is also interested in shaping how college students are taught mathematics. Jennifer loves to teach mathematics courses where curious students learn how to show why math works! Dr. Jennifer McLoud-Mann is committed to encouraging students from underrepresented groups to pursue careers in mathematics because of her experiences as a first-generation Native American woman of the Cherokee Nation. For example, she organized Sonya Kovalevsky Day festivals several years in a row. During these festivals, high school women were invited to the University of Texas (UT) at Tyler for a day of mathematical activities and encouraged to pursue math-related careers. She has led Research Experience for Undergraduates (REU) sites at two universities to give students a taste of math research. The REUs have specifically selected minority, women, and first-generation college students to encourage them to go to math graduate school. Jennifer has also served as an adviser to the UT Tyler and UW Bothell Mathematics Societies, where she helps college students see what it’s like to be a professional mathematician. Jennifer’s emphasis on good teaching has been recognized by her peers. She won the Mathematical Association of America’s Henry L. Alder Award for Distinguished Teaching by a Beginning College or University Mathematics Faculty Member and the White Fellowship for Teaching at UT Tyler. She also received UW Bothell’s Distinguished Research, Scholarship, and Create Activity Award.
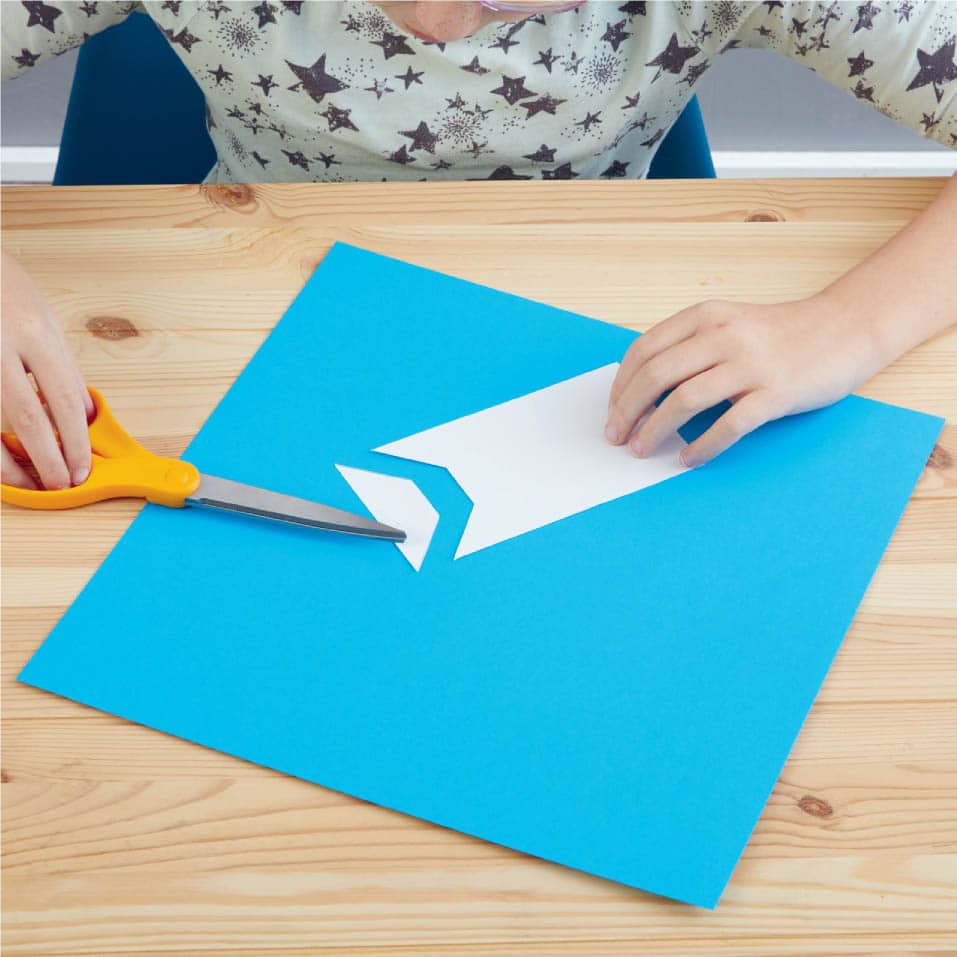
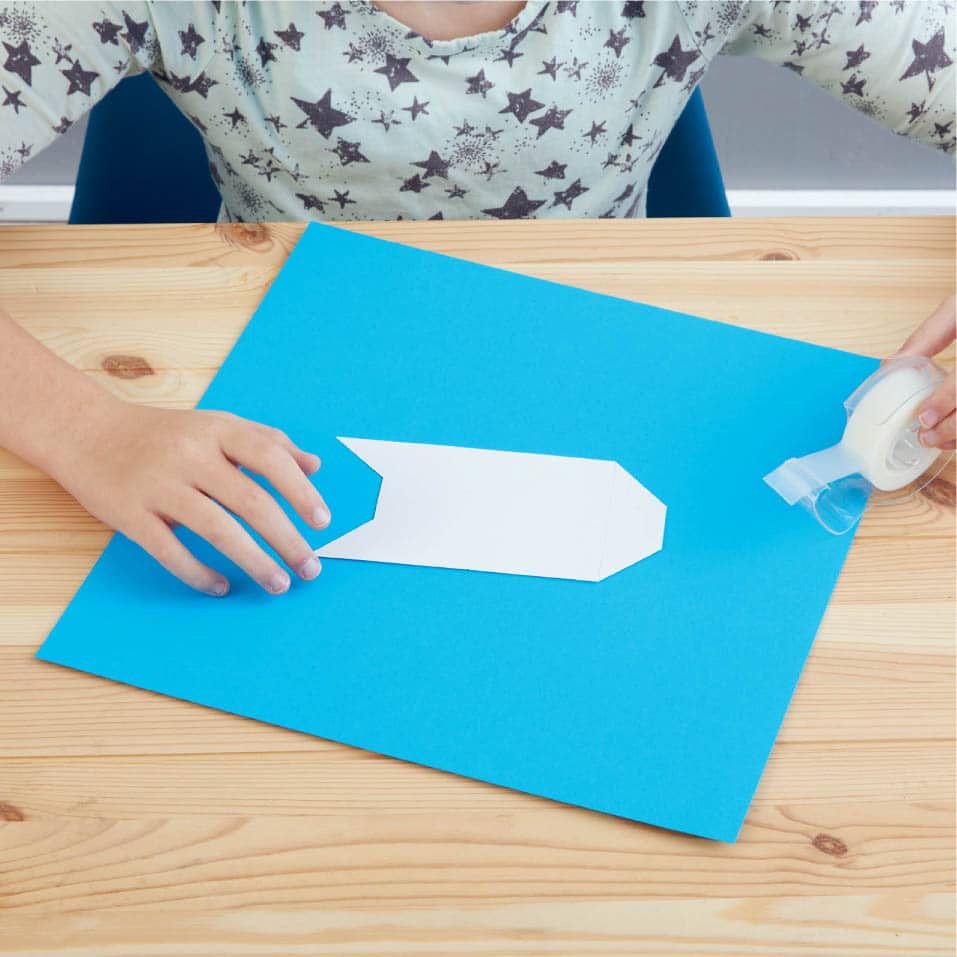
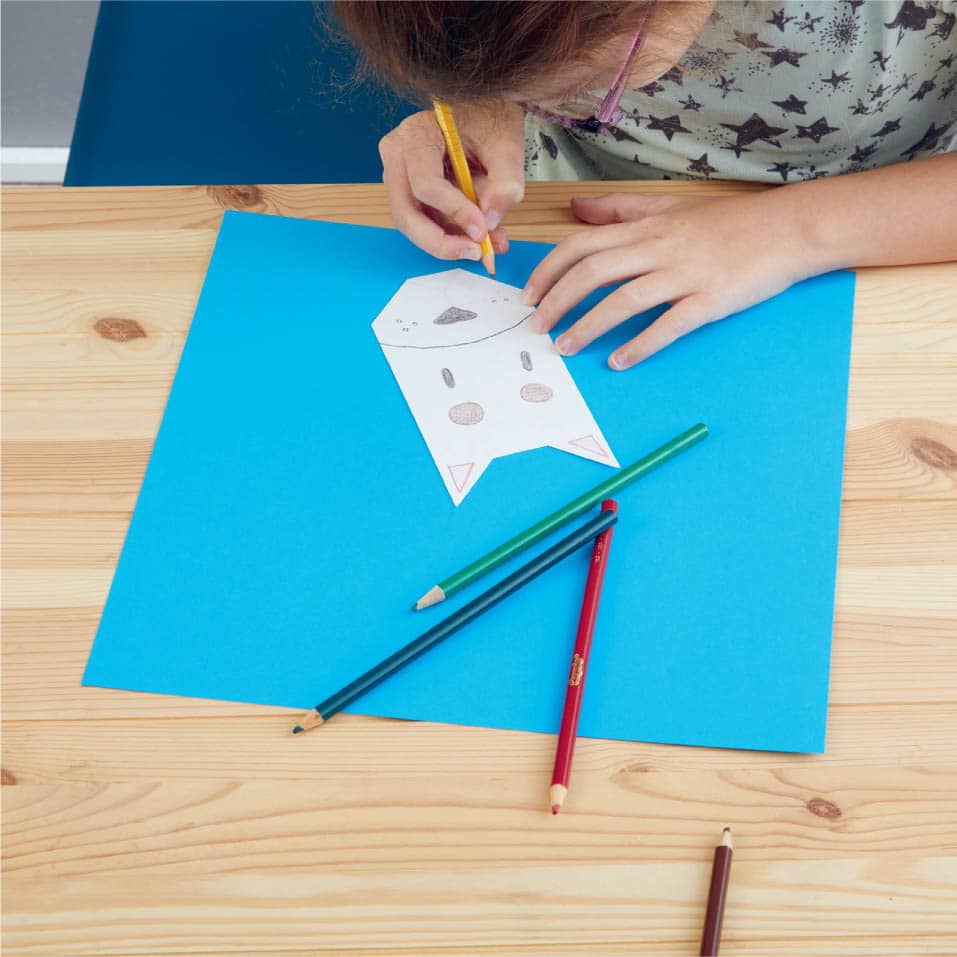
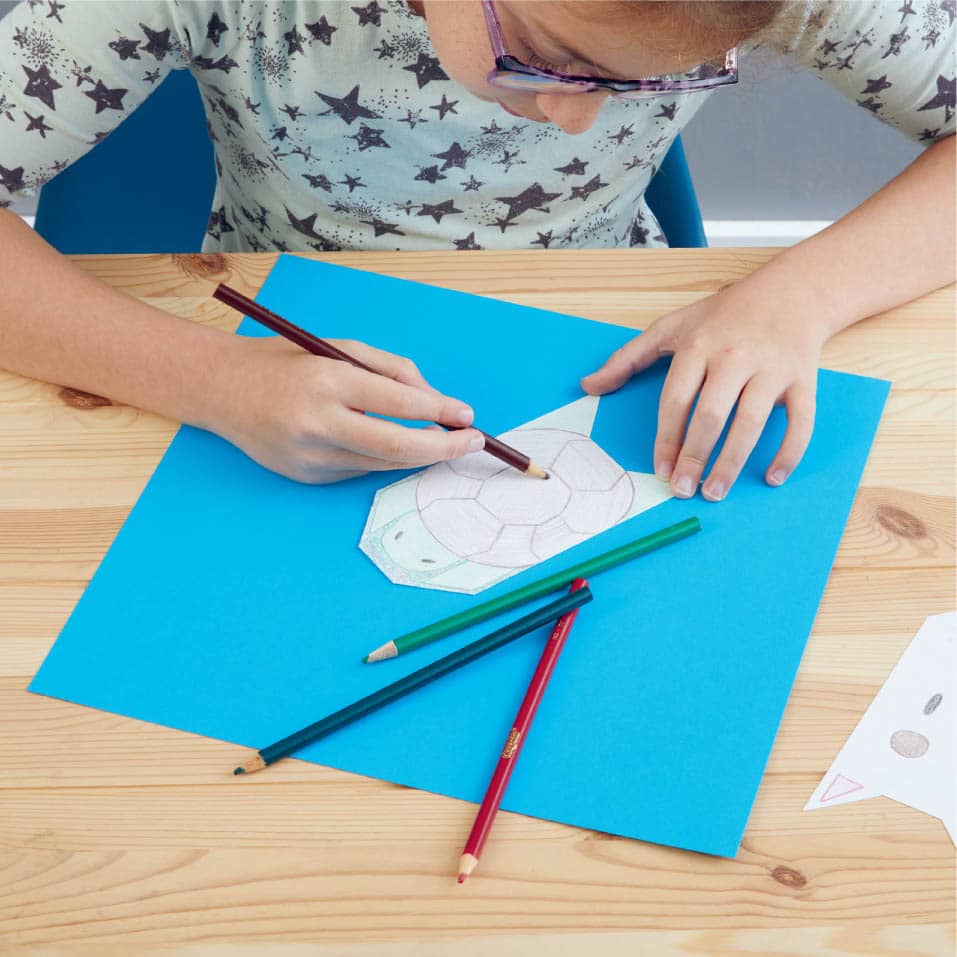
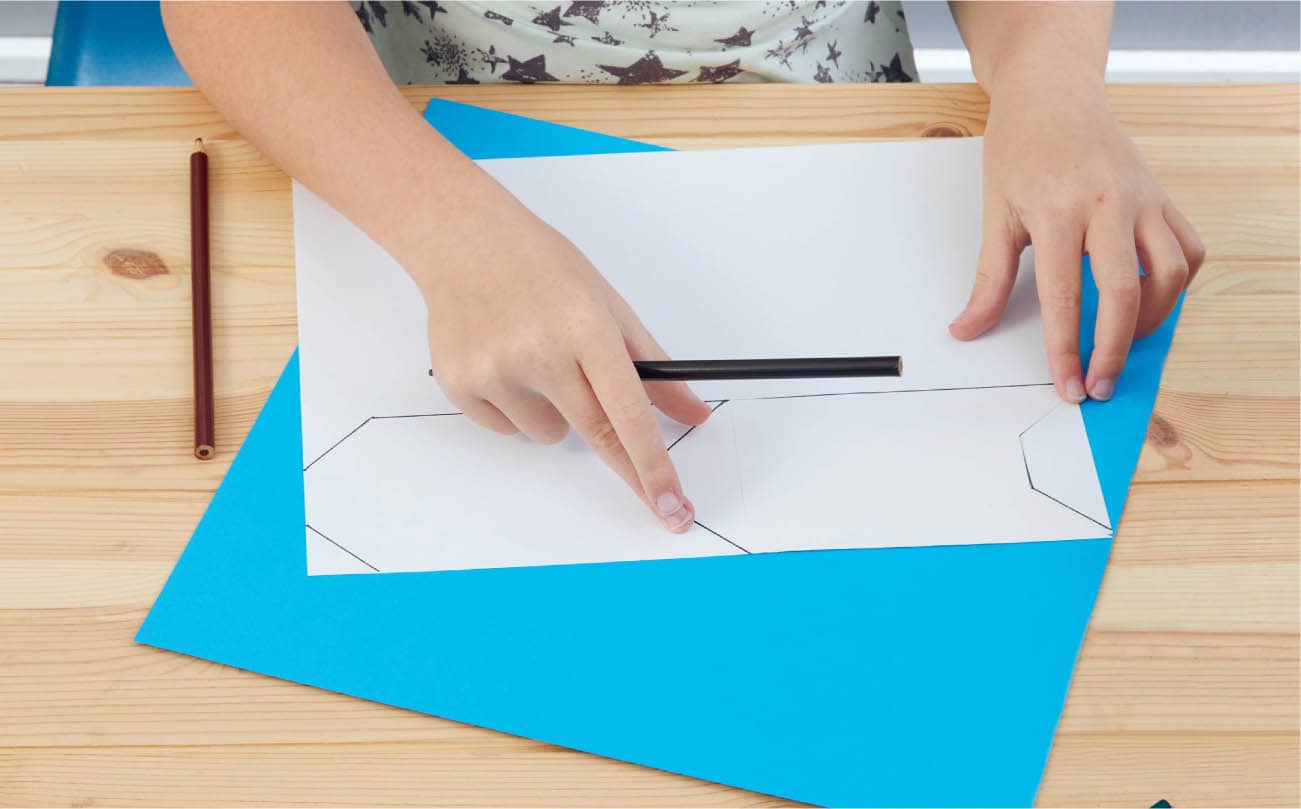
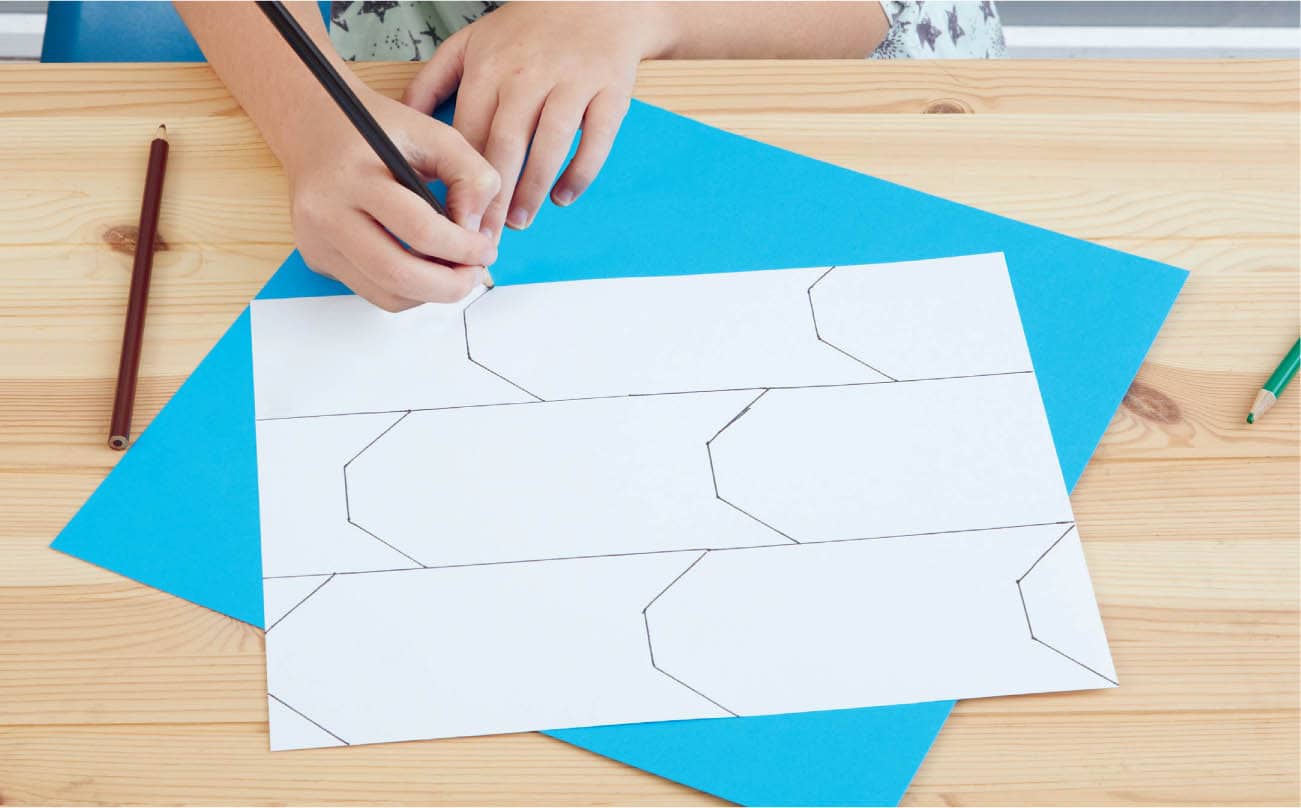
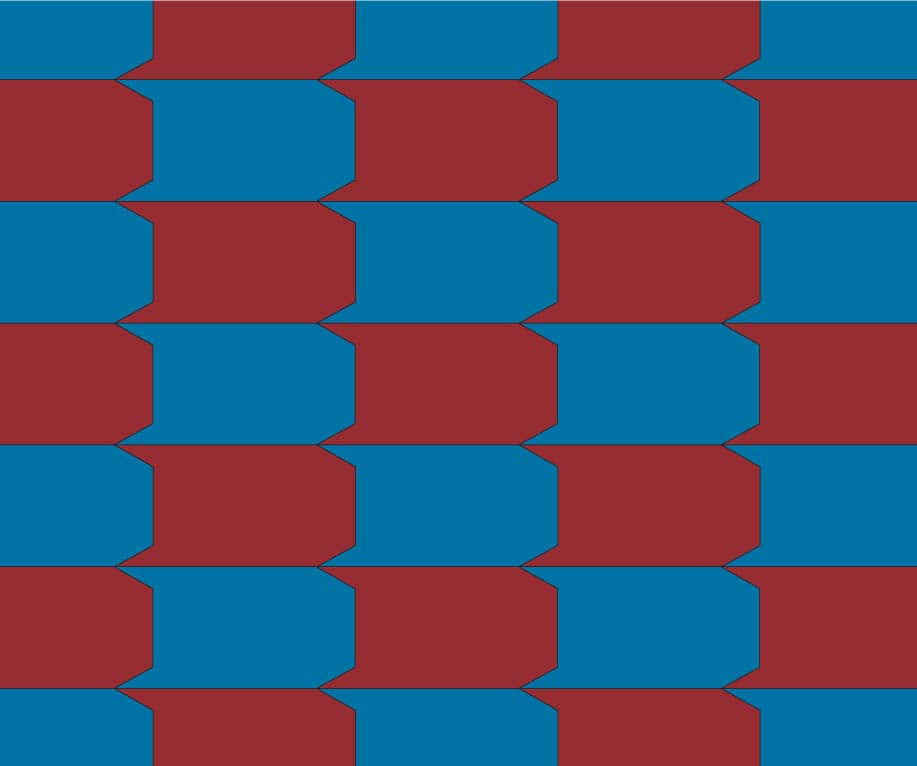
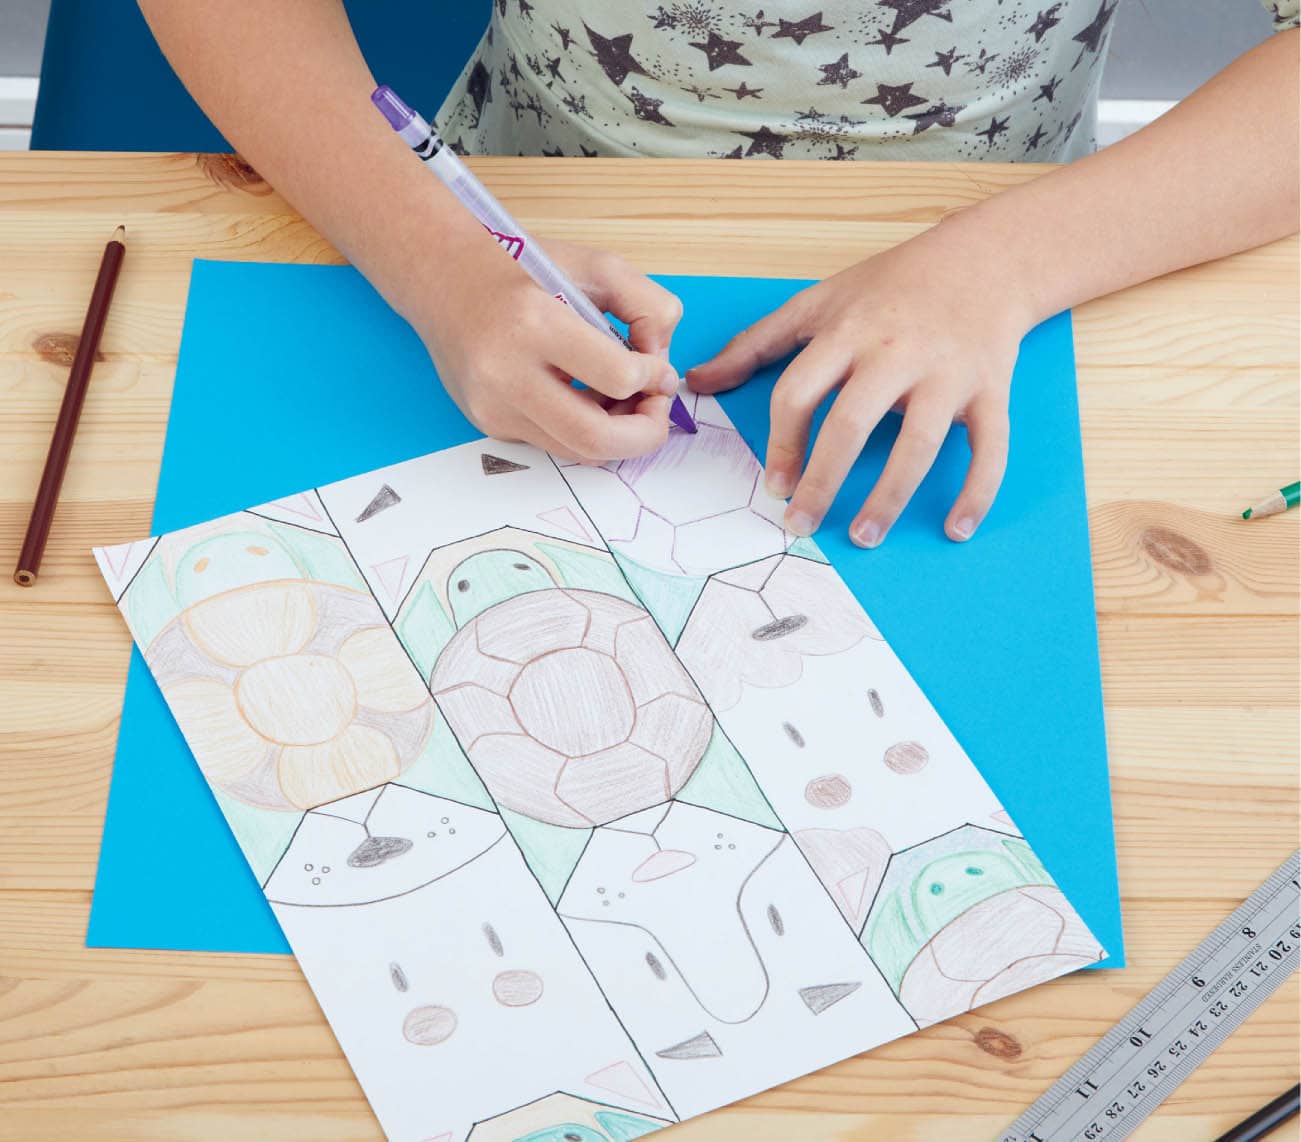
Jennifer McLoud-Mann works with tiling, and you can too! A shape can “tile the plane” if you can use many copies of it to cover a flat surface with no gaps and no overlaps. In this activity, you’ll create a fun shape to tile a piece of paper! 1 We start with a rectangle. You can carefully measure one, or just use an index card for your rectangle. 2 With a pencil, make a design on one edge. It can be as complicated as you want but make sure it goes all the way from the top to the bottom. Cut it out with scissors. Fig. 1. 3 Tape the cut piece to the opposite side. Fig. 2. 4 Decide what your design looks like. In our example, it could be a dog or a turtle. With different decorations, the same shape can look quite different! Decorate your design. Fig. 3 and Fig. 4. 5 Carefully trace your shape on a piece of paper starting in the bottom left or right corner. Then slide the shape to the left or right so the cut edges line up and trace the shape again. This is called translating the shape. Keep going until you fill up the row. Fig. 5. 6 When you get to the second row, you can shift your shape over a little. Or you can start it all the way to the side like you did with the first row. 7 Keep going until you fill up the paper with copies of your shape. It’s okay, and expected, that you’ll have some partial pieces of your shape. Fig. 6. 8 Now decorate! You can decorate all the shapes the same way, decorate them all differently, or alternate decorations. In one of our examples, we switched between turtles and dogs, and decorated them all a little differently. In another example, we decorated using solid colors. Fig. 7 and Fig. 8.Jennifer McLoud-Mann
PENTAGONAL TILING DISCOVERY
CAREER
ENCOURAGING FUTURE MATHEMATICIANS
AWARDS
SHAPE-SHIFTING
MATERIALS
DIRECTIONS