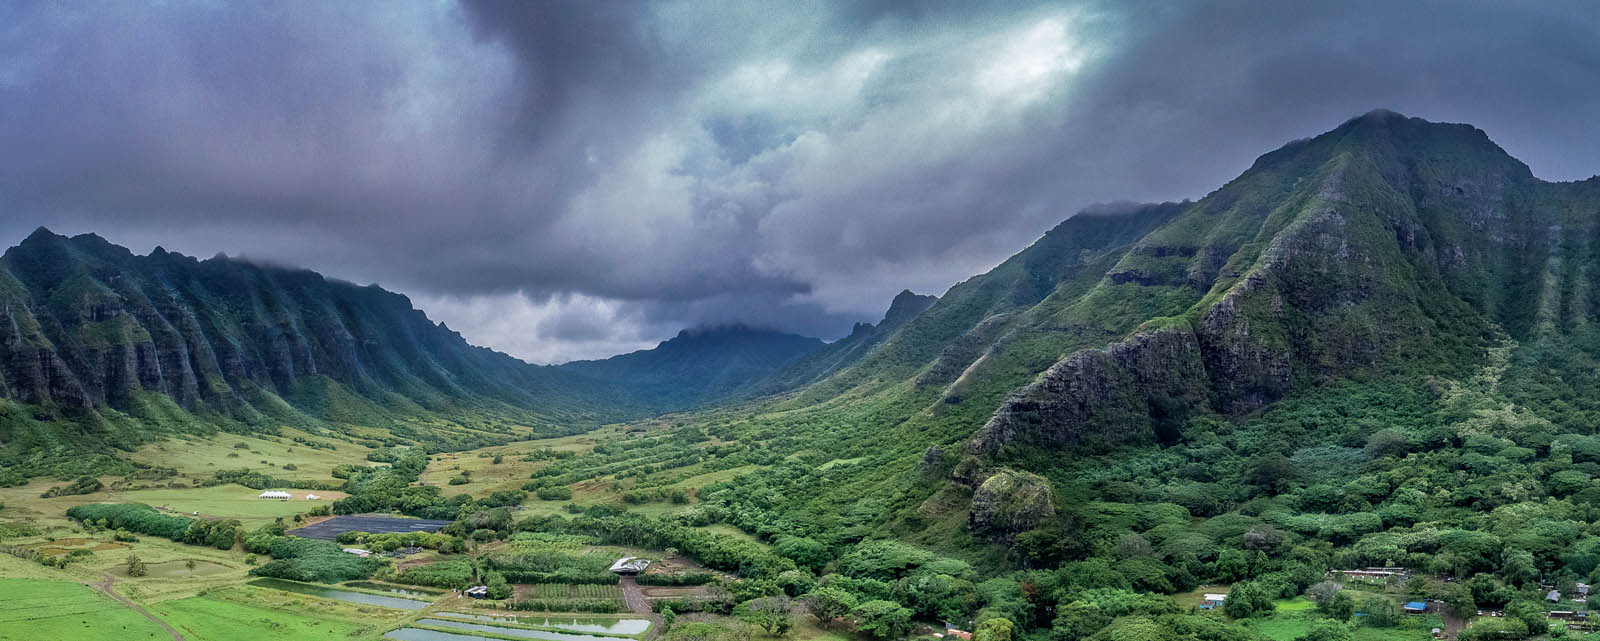
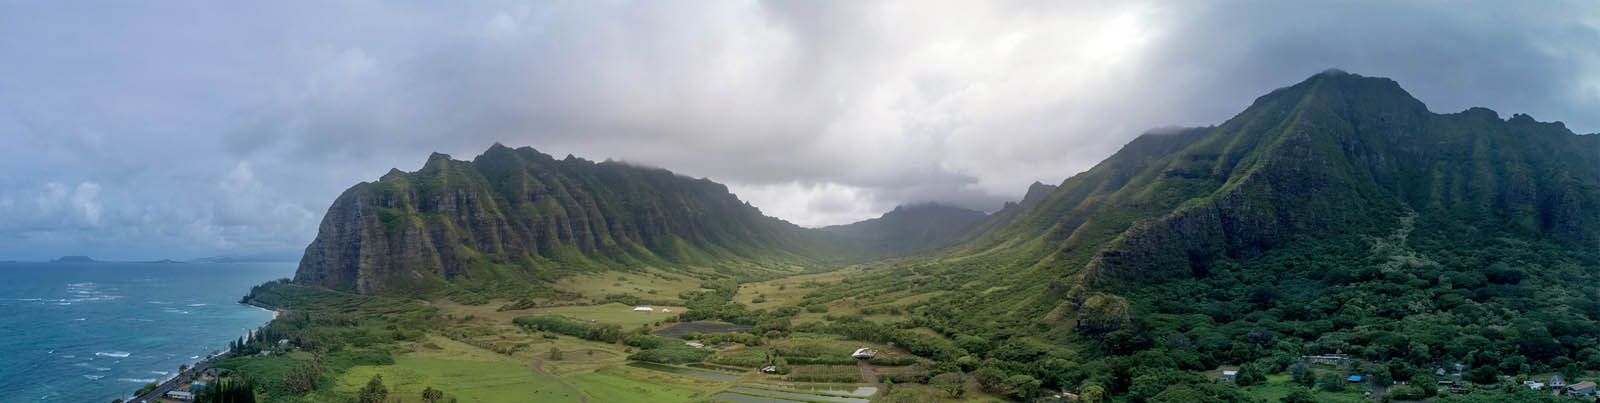
OAHU, HAWAII MAVIC PRO
These impressive rock structures are often featured in movies, such as Jurassic Park and King Kong.
CHAPTER 4SHOOTING PHOTOGRAPHS WITH A DRONE
DRONES HAVE BEEN CALLED FLYING TRIPODS and tripods in the sky. Essentially, you have a flying camera that’s capable of hovering in place. With today’s drone technology, this can be a very stable shooting platform. One of the things I have noticed about aerial drone photography is that people initially fly as high as they legally can to take a photo. There is nothing wrong with that, and it’s really thrilling the first few times you do it. When you look through your FPV and see your copter take off for the first time, it’s an incredible feeling. You are vicariously soaring the skies through your flying machine!
Let me tell you a story about my aerial composition style. One of the things that I noticed fairly early on is that shooting at 400 feet all the time is akin to over-processed HDR. It’s exciting the first few times, but once the novelty has worn off you start to realize just how bad some of the photos really are. I soon had an epiphany: The rules that apply to regular photography also apply to aerial photography. I wouldn’t shoot with my “terrestrial” camera (Mirrorless/DSLR) in bad light, so why am I shooting with my drone in bad light?
Some of the rules that apply to photography have existed for many years, while others are more recent due to changing technologies. When you are flying your drone, you are really just positioning your camera. Instead of the two dimensions that you are used to, forward and backward, you now have a third dimension available: up. You may have learned that standing on a ladder or lying down will change your perspective and add interest to your photo. Imagine what you can do at 100 or 400 feet. Using altitude isn’t the only advantage of drone photography. To me, the biggest advantage is being able to position your camera almost anywhere, such as over treacherous rocks, just over a cliff or other places that would traditionally be inaccessible. Although this chapter is focused on photography (pun not intended), the composition rules, for a large part, also apply to framing your videos shots.
You will find that many of the rules of photography, when applied, will make your aerial images look a lot better. Some of these rules need to be modified, and others broken. In some rare cases, the rules haven’t been written yet. This is our opportunity to define this new frontier. In the following pages I am going to take the liberty of coining a few phrases. This is a way to label some of these newer things and help us all understand and grow together.
FOUNDATIONAL RULES OF PHOTOGRAPHY
I KNOW THAT MANY PEOPLE WHO FLY DRONES don’t have a photographic background. I’m going to mention a few of the traditional rules of photography and then discuss how they can be applied to aerial photography.
Rule of Thirds for Composition
When you place the subject in the center of a frame, there is no tension or implied movement and it tends to be a very boring, static image. The exception is when you are purposely shooting for symmetry, as in Figure 4.1.
You can add a lot to a photo by using the rule of thirds. Take the image and divide it up into nine squares by using a grid that divides the image into thirds both horizontally and vertically. This method has been around since before photography and is used by painters on canvas. Place the object of interest on one of the overlapping thirds of your image and it looks more pleasing. This is especially strong with your subject pointing toward the center of the photo, as it leads the viewer’s eye into the photo and causes them to be interested in the image for a longer period of time.

4.1
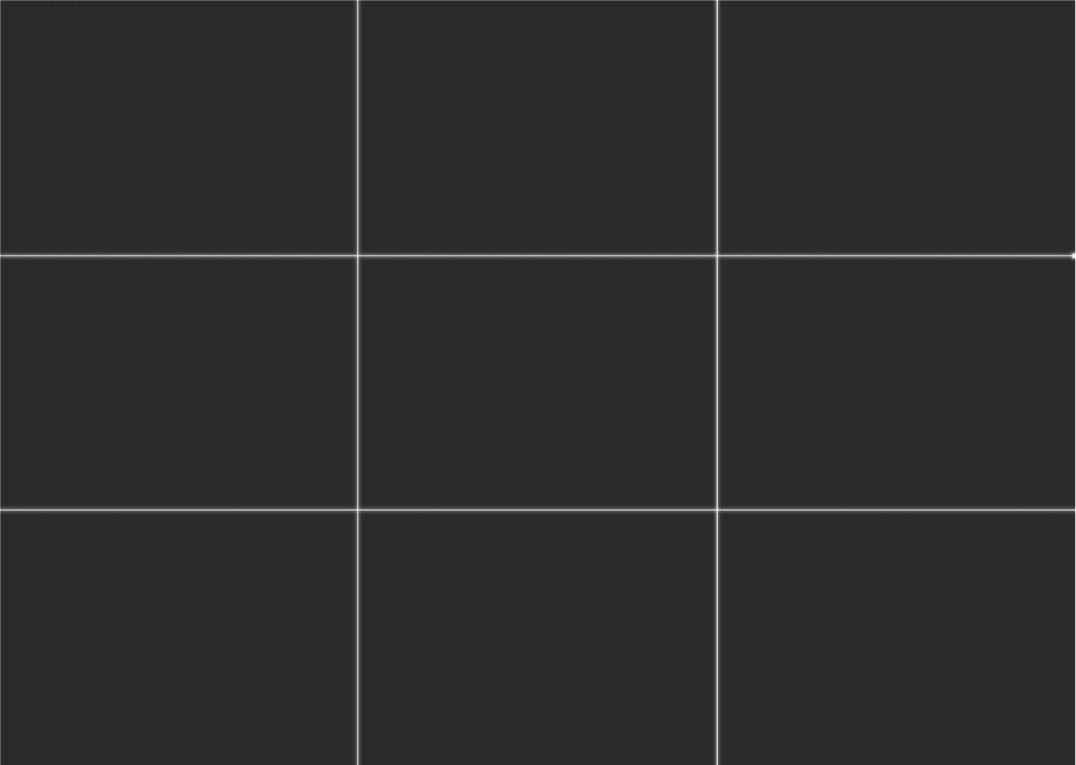
4.2 The rule of thirds grid
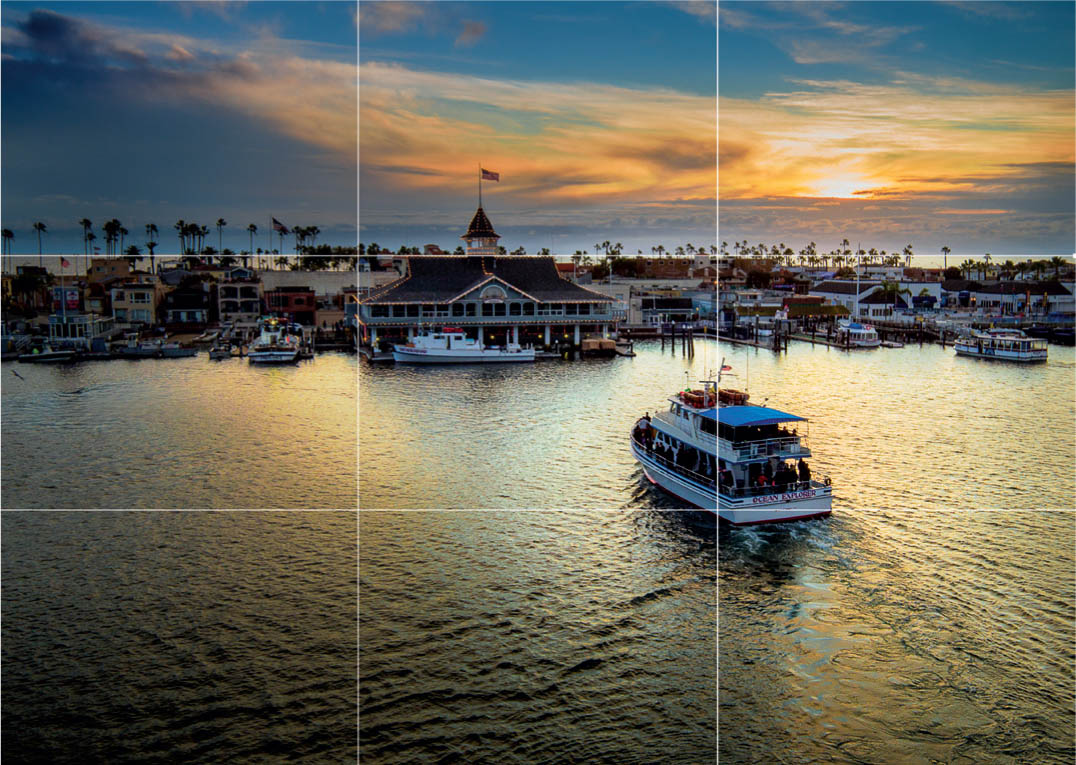
4.3 A photo divided into thirds
HOW IT APPLIES TO AERIAL IMAGING
You will notice that many of the aerial apps will allow you to display a rule of thirds grid to assist in composition. I find the grid lines useful for many things, such as making sure horizons are level. Use the rule of thirds to frame the sky, the ocean, or other elements into thirds. Try to avoid horizons in the center of the image; try to place them in the top third. If the sky is the interesting part of the image, then place the sky in the top two-thirds of the image.
Most current aerial cameras are only capable of shooting horizontally, although some, such as the original Mavic Pro have the ability to rotate the sensor into a portrait orientation. I suspect with all the vertical video and photos on social media, we will see more of this ability in upcoming cameras. If you desire a portrait orientation, and you don’t have a camera capable of shooting vertical, there are only two ways to create it. The first is cropping the photo in post-processing software.
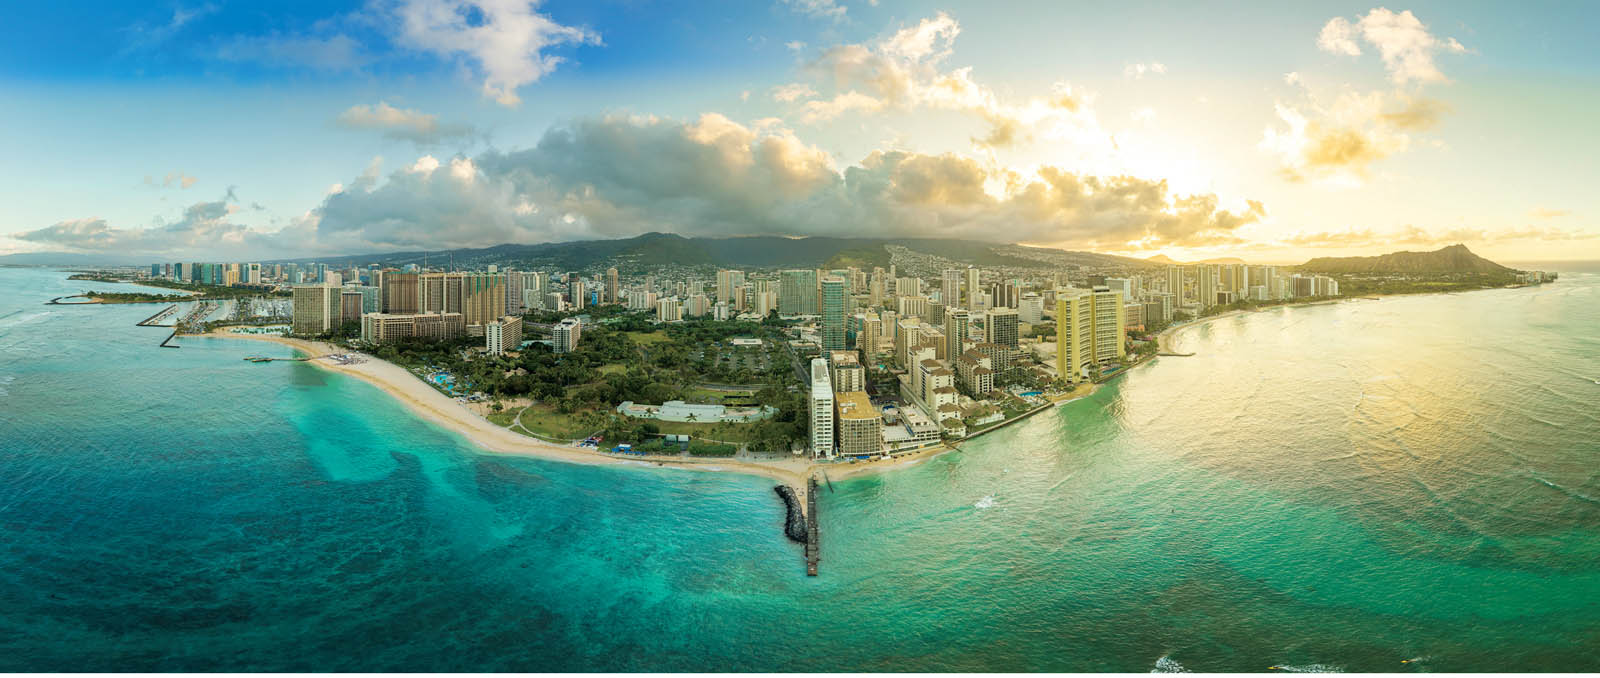
The other method is to create a panorama by stitching multiple images together to produce a different orientation.
4.4 The sky is framed in the top two thirds of the image
4.5 A vertically cropped photo

4.6 Vertical panorama
Change Your Viewpoint, Change the Photo
A lot of people notice something interesting and stop to shoot it. They stay in the place they originally see it and get a good photo. To get a great photo, explore different angles. Move around the subject and explore its many different facets. Notice that its relationship to the background changes as you move around. Notice its angle changes, as does the lighting and the contrast. Don’t be lazy; put in the extra effort and you will get a much better composition. Sometimes the original angle is perfect, but more often than not, you can discover a better shooting position.
HOW IT APPLIES TO AERIAL IMAGING
This rule applies more to aerial imaging than anything. You have the ability to explore most subjects from 360 degrees horizontally and 180 degrees vertically. When shooting an aerial photo, look first for the most interesting angle and best lighting by flying around the subject. Then choose the best altitude. For example, when shooting a nice sunset, you can choose the altitude that best shows off the silhouettes. You can add contrast by paying attention to the background—change its relationship with the subject by flying higher, lower, or closer.

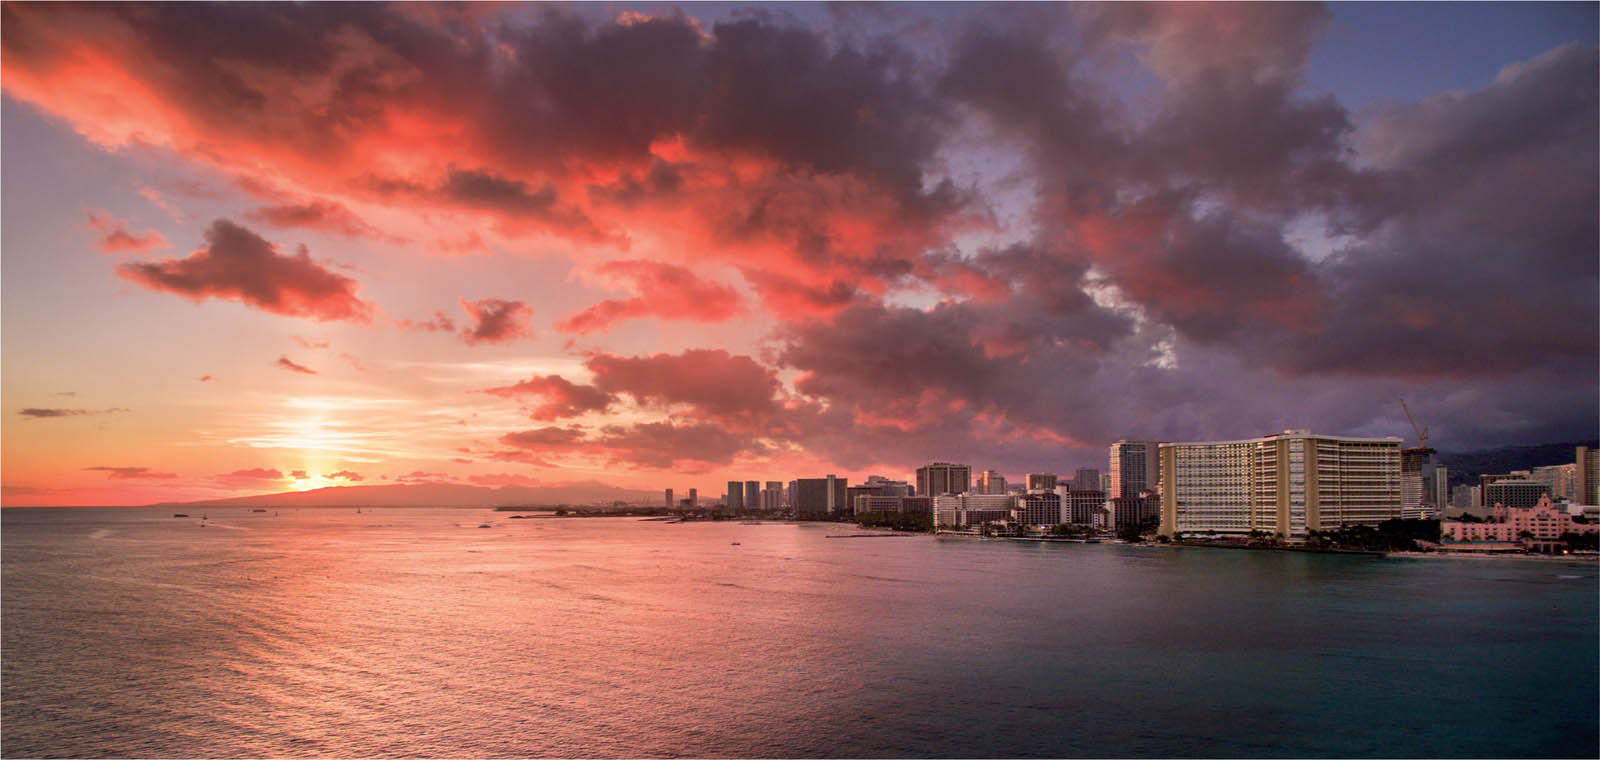
4.7 See how the buildings interact with the mountain and the sky at different altitudes
Reflections on water or glass can be planned by flying at the perfect location. Reflections bounce off water and glass at the opposite angle from where they strike the reflective surface. This is the law of reflection (Figure 4.8). The incident ray (I) of light strikes a reflective surface and a reflection occurs. Imagine a perpendicular line from the surface. This is the normal (N) angle of the reflection (R), and it will match the angle of the incident (I) ray. Just like shooting billiards and bouncing a ball off the cushion. This is the perfect position to catch (or avoid) a reflection.

4.8 The law of reflection
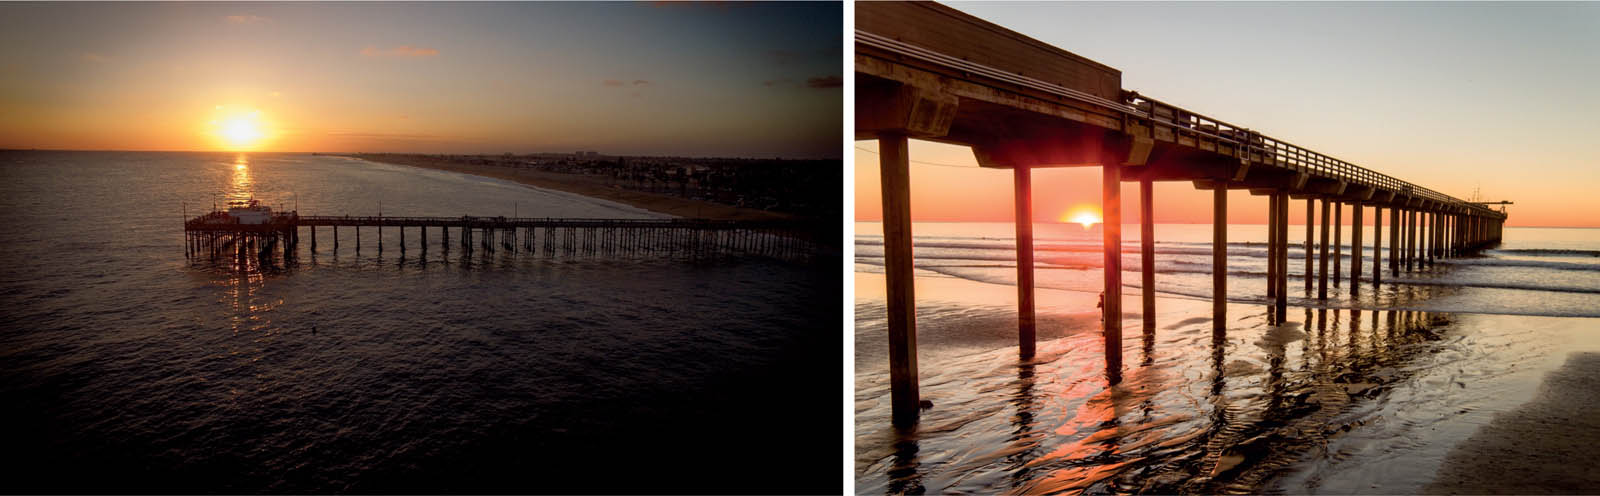
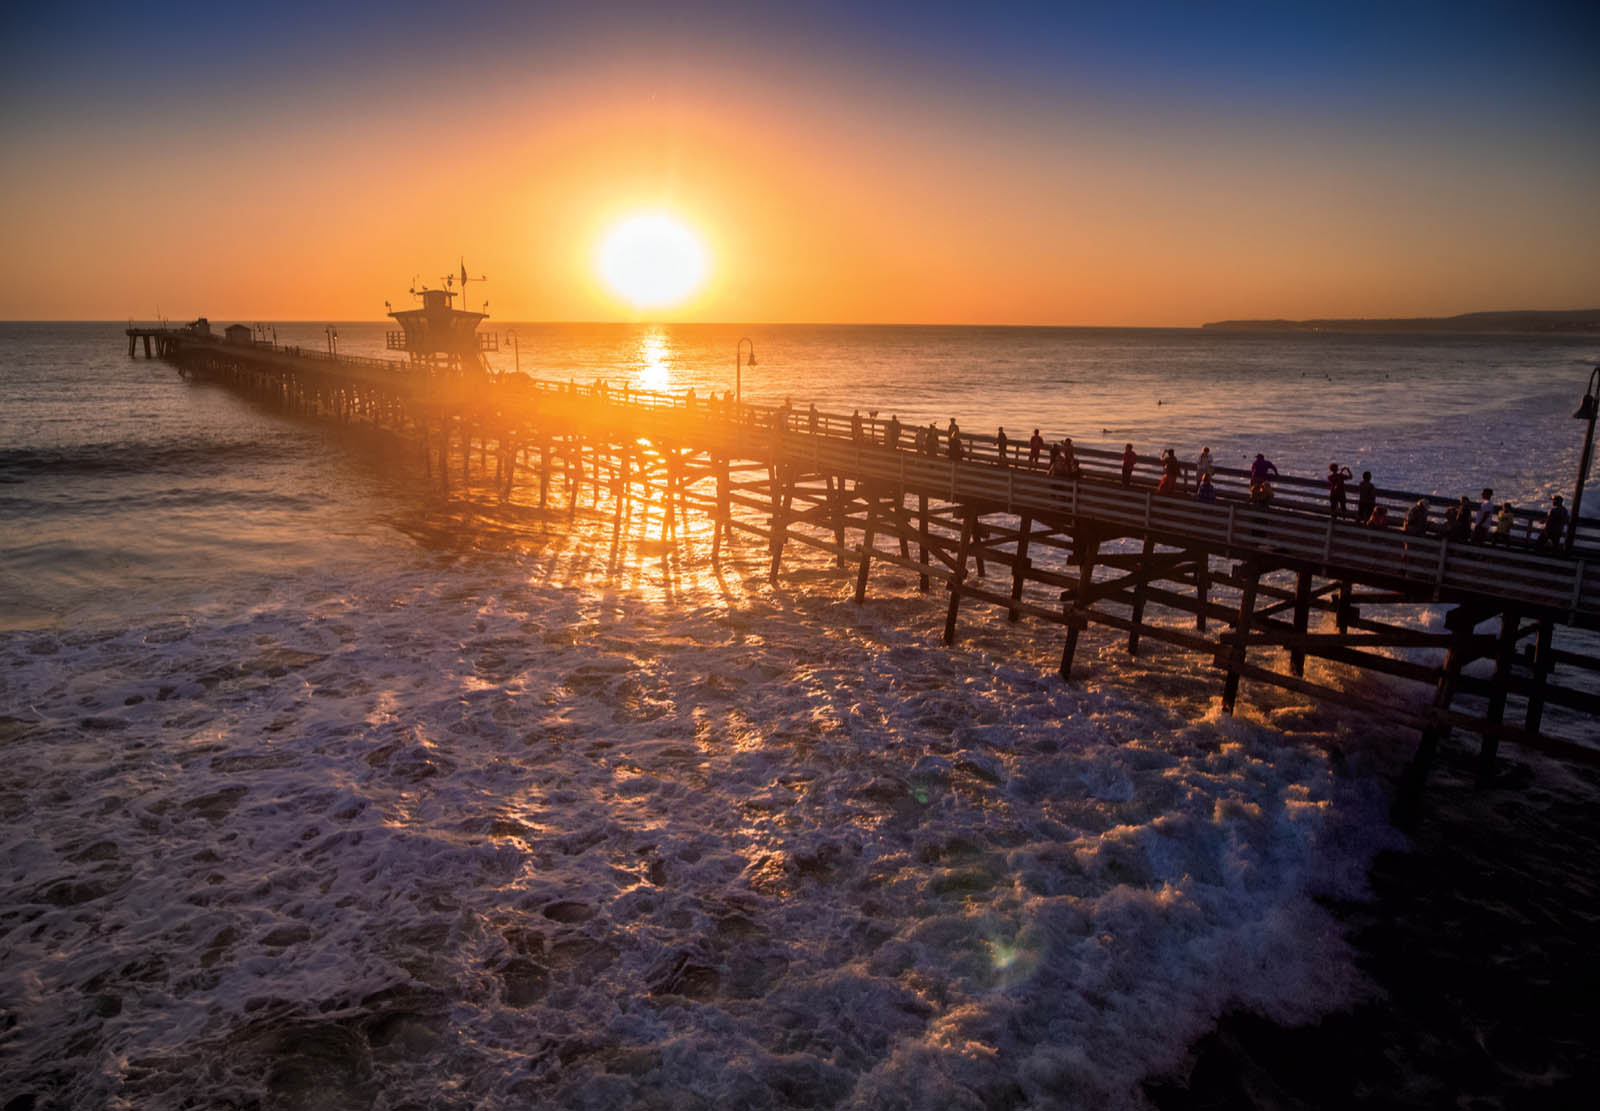
4.9 You will notice that I fly low for most of my sunsets. This enables me to get the maximum reflected light from the sun.
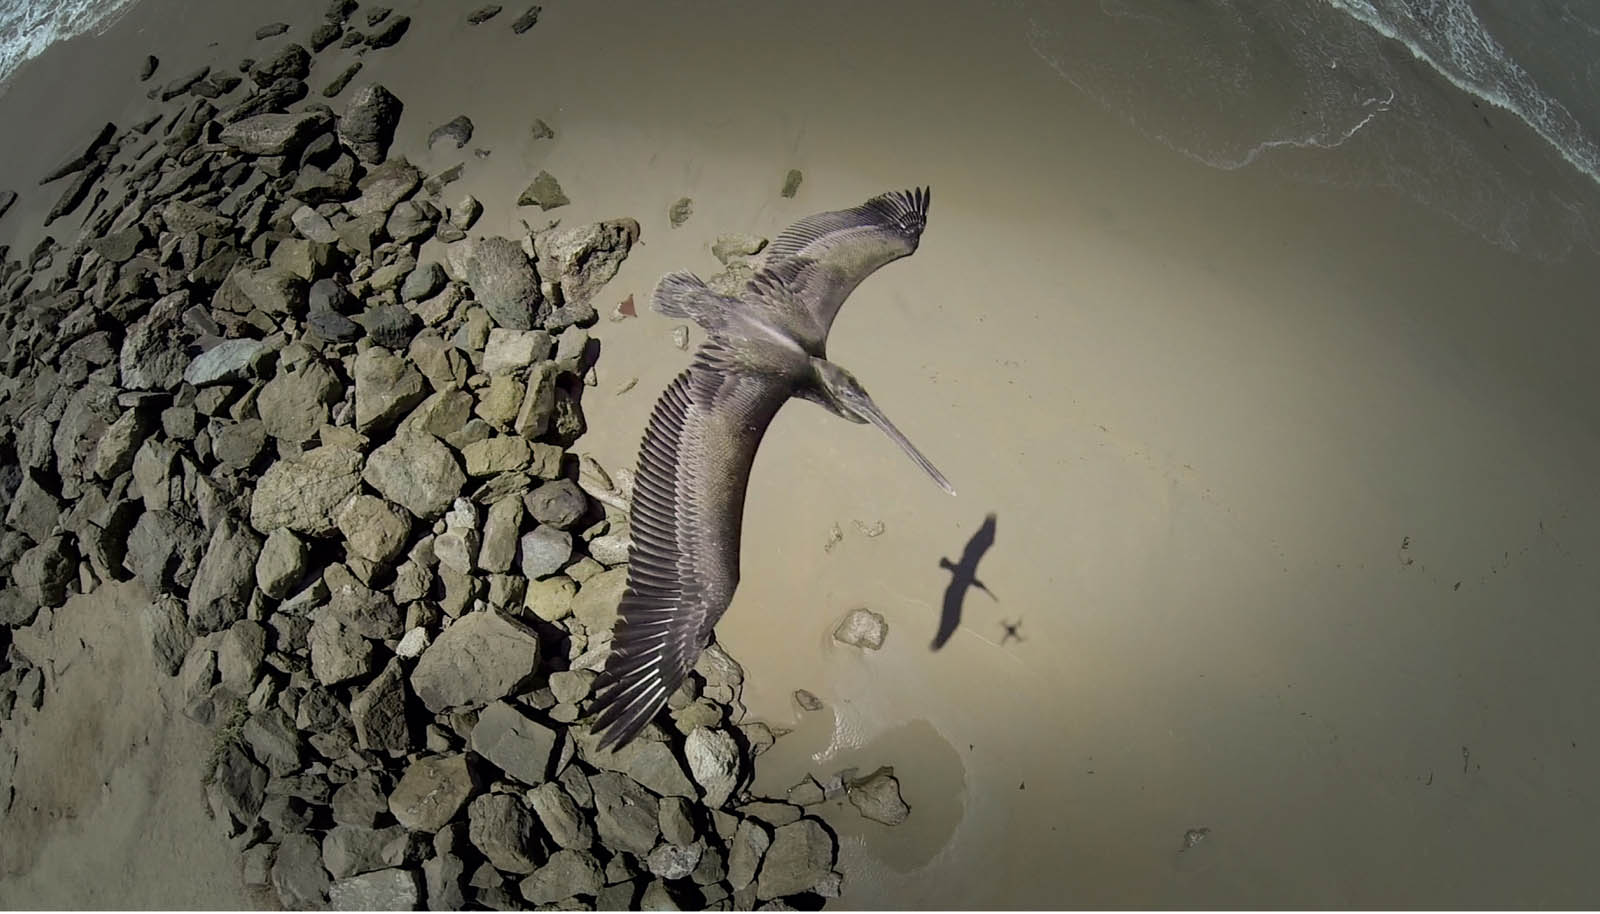
Try Flying Lower
Put a person on a drone and they will fly as high as they can; put that same person in a helicopter and they will fly as low as they can.
It’s tempting to fly right up to the 400-foot ceiling and photograph from there. There are times when this is the best option. However, when looking at my flight logs, I spend the majority of my time flying below 100 feet, and I rarely go above 150 feet. A lot of the good stuff is down low. There are times when I fly over the water, just a few feet off the surface, and get some fantastic angles. I certainly don’t recommend that for an inexperienced pilot, though, since water and drones don’t mix.

4.10 Low shot

4.11 Low shot
Fill the Frame with the Subject
Filling the frame with the subject reduces visual clutter and makes it very clear what the subject of the photograph is. Typically, photographers choose a longer lens, zoom in, or move closer to the subject. Cropping is also an option. When you’re using prime lenses (fixed focal length; that is, no zoom), the old adage goes “You zoom with your feet.”
By coming in close to your subject, it changes the mood. Rather than observing from a distance, the viewer becomes involved with the subject. It’s much more intimate and evokes more emotion. Now, remember that this is for a particular type of shot; a sweeping panorama has a different intent, and that is to awe you with expanse. If a panorama is a shout through a megaphone, a closeup is a whisper.
HOW IT APPLIES TO AERIAL IMAGING
Most consumer drones have a wide fixed lens and zooming or using a longer lens often isn’t an option. In this case, try flying lower and closer to the subject. If at all possible, stand as close to the subject as you can while flying. The reason for this is that your depth and distance perception (binocular vision) is better when you are up close (you pretty much have no 3D depth perception after about 30 feet). It’s OK to use FPV to frame your shot, but if you are getting close to a subject, also have a spotter. A spotter is a person who keeps their eyes fixed on your drone at all times. Remember to be safe and careful when flying close to people. Don’t fly too close; no shot is worth injuring someone.
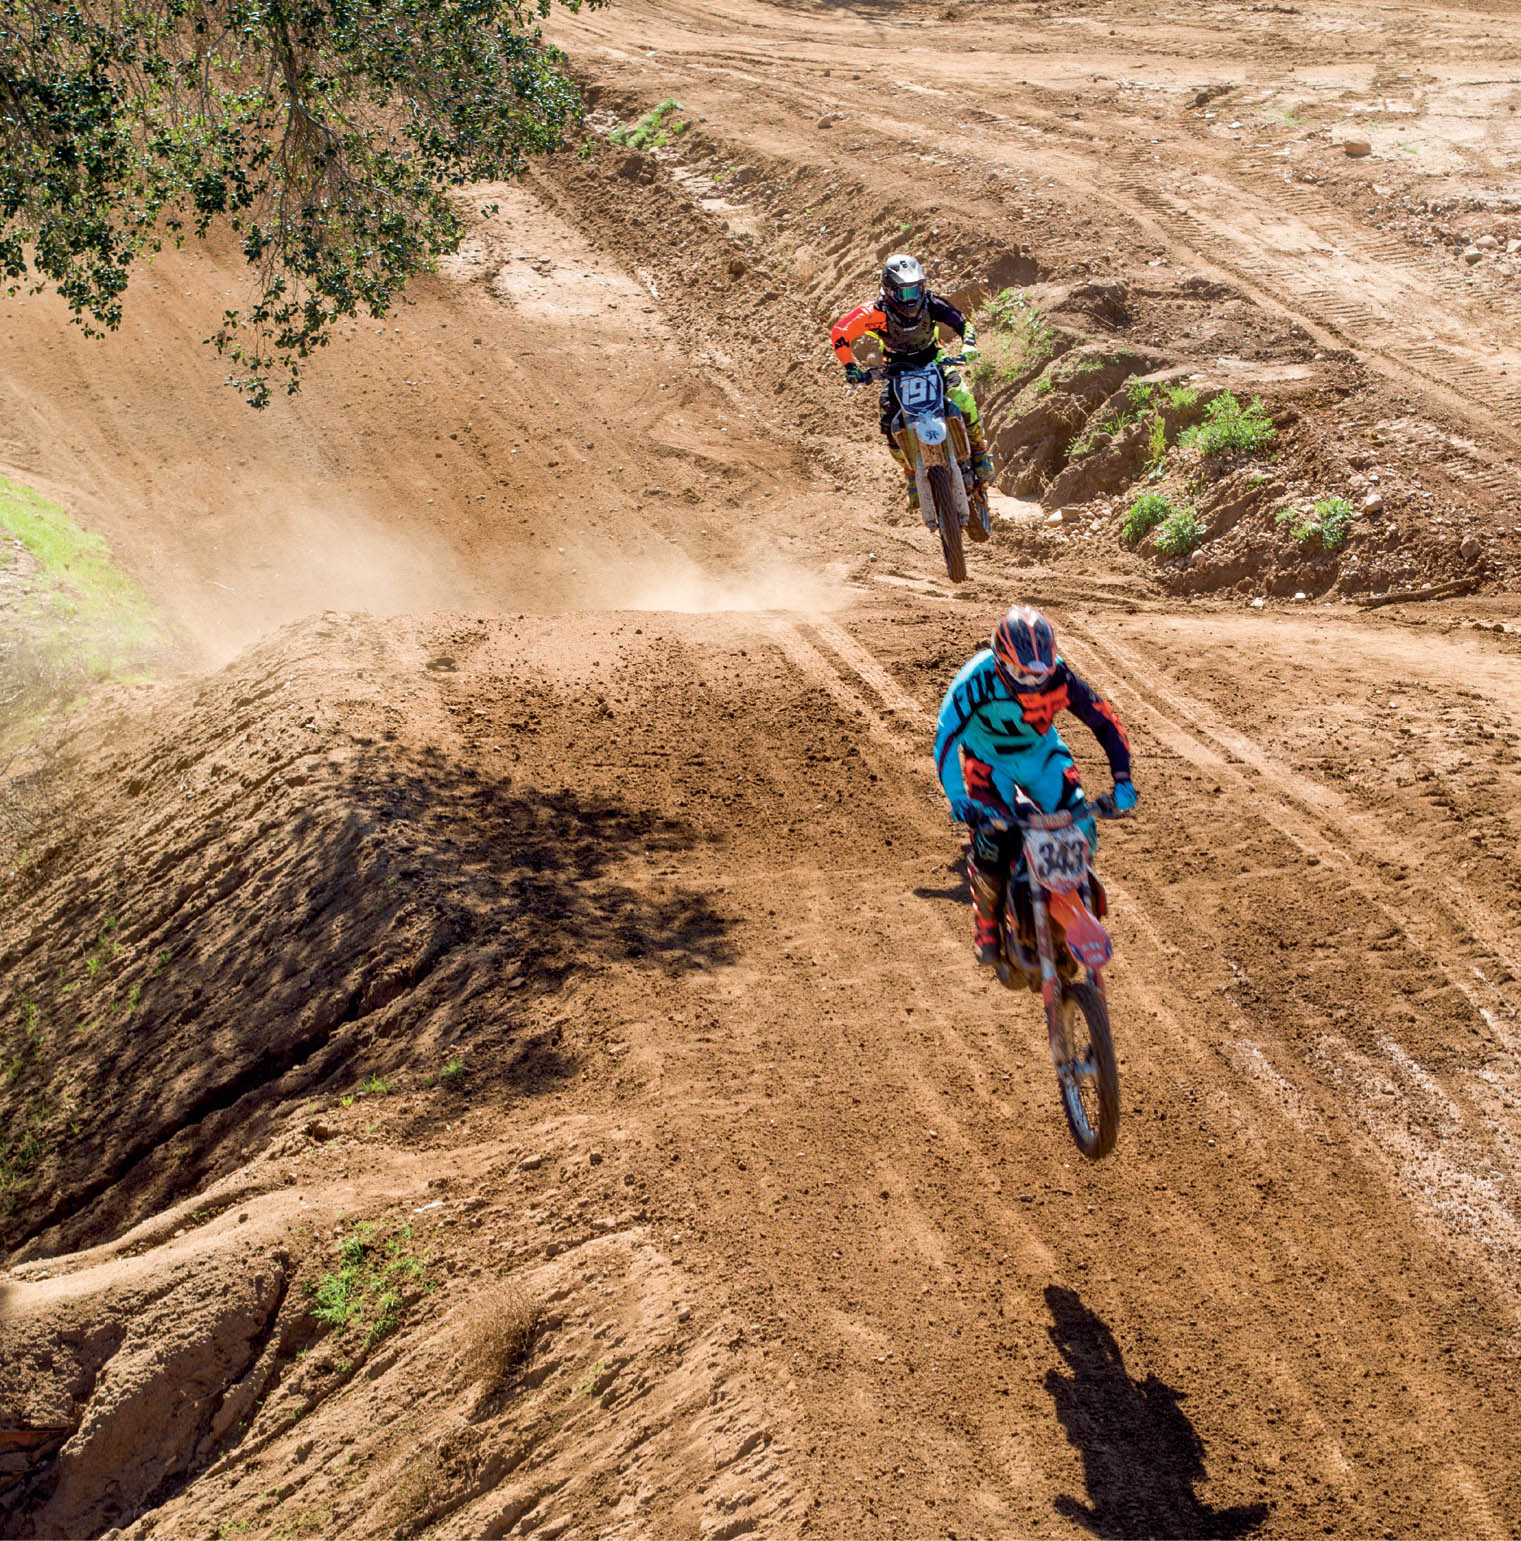
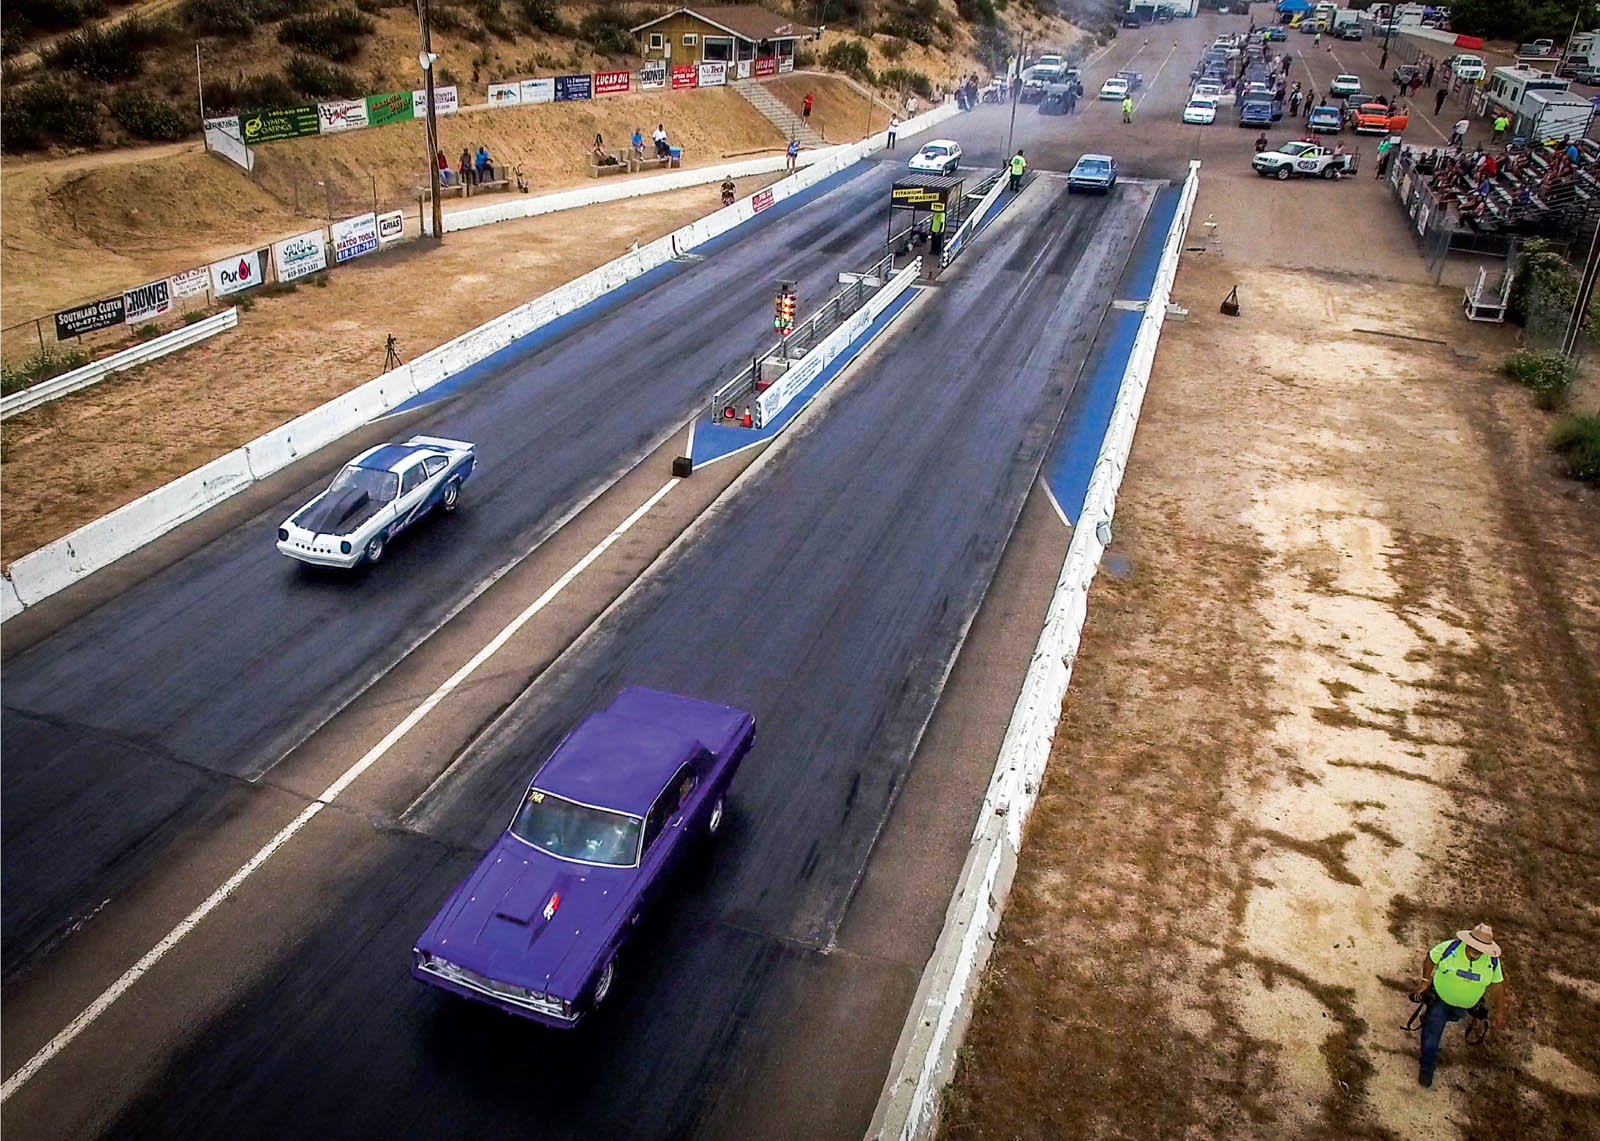
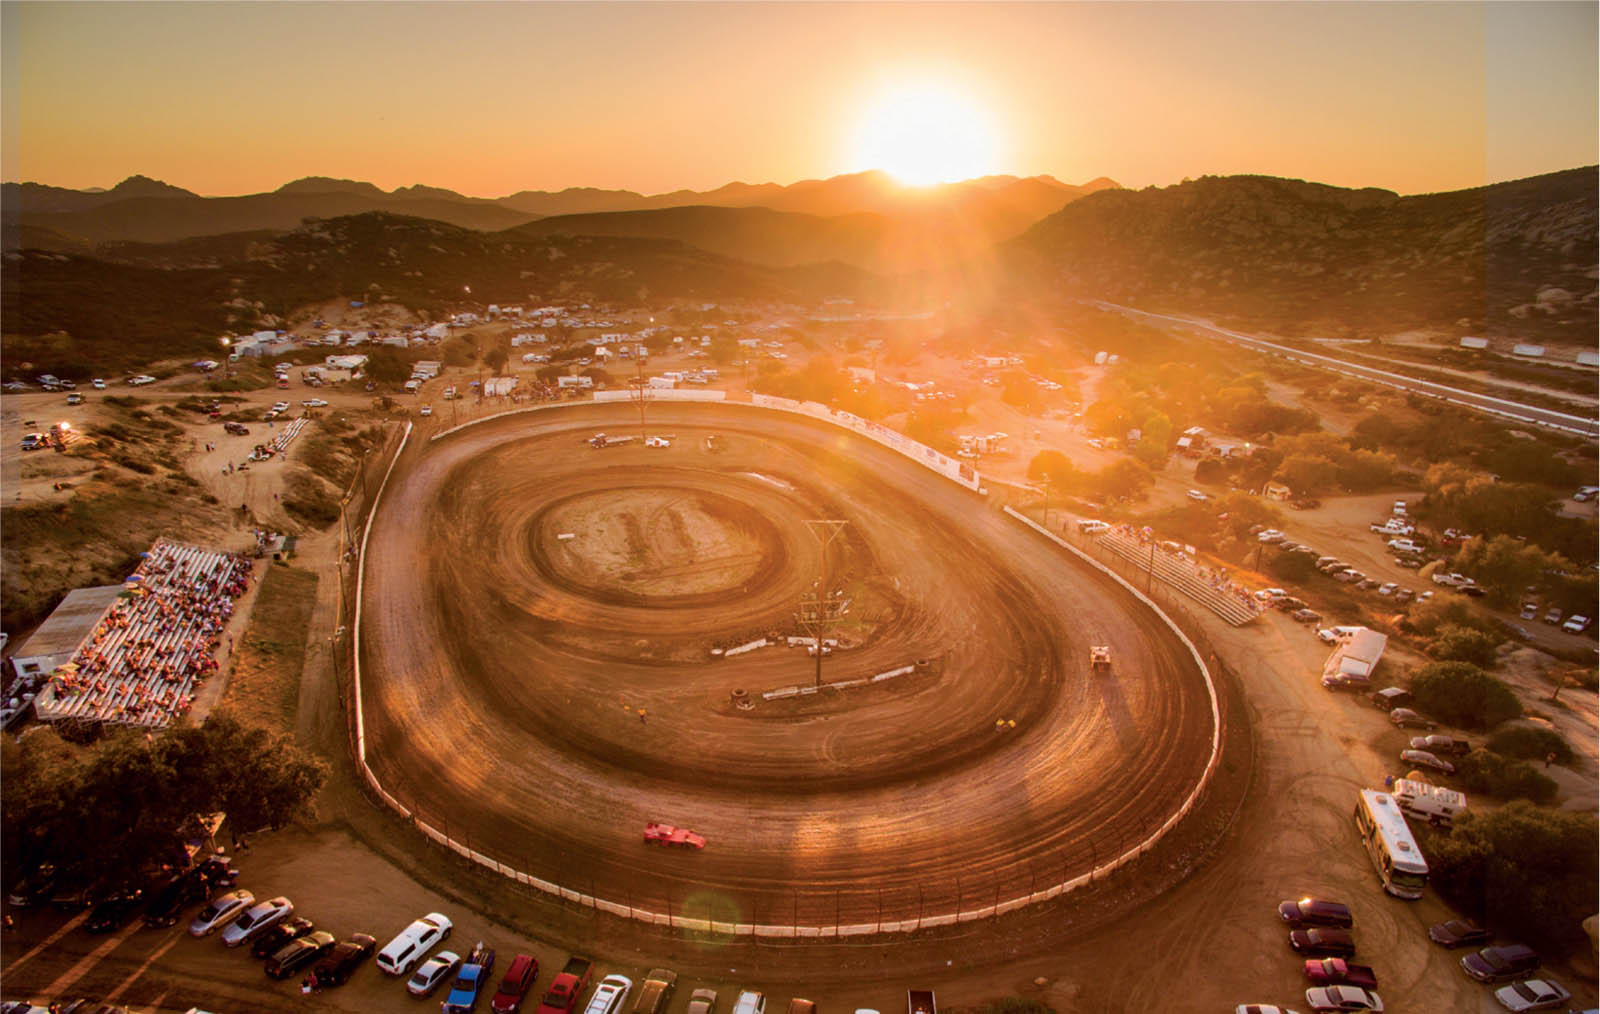
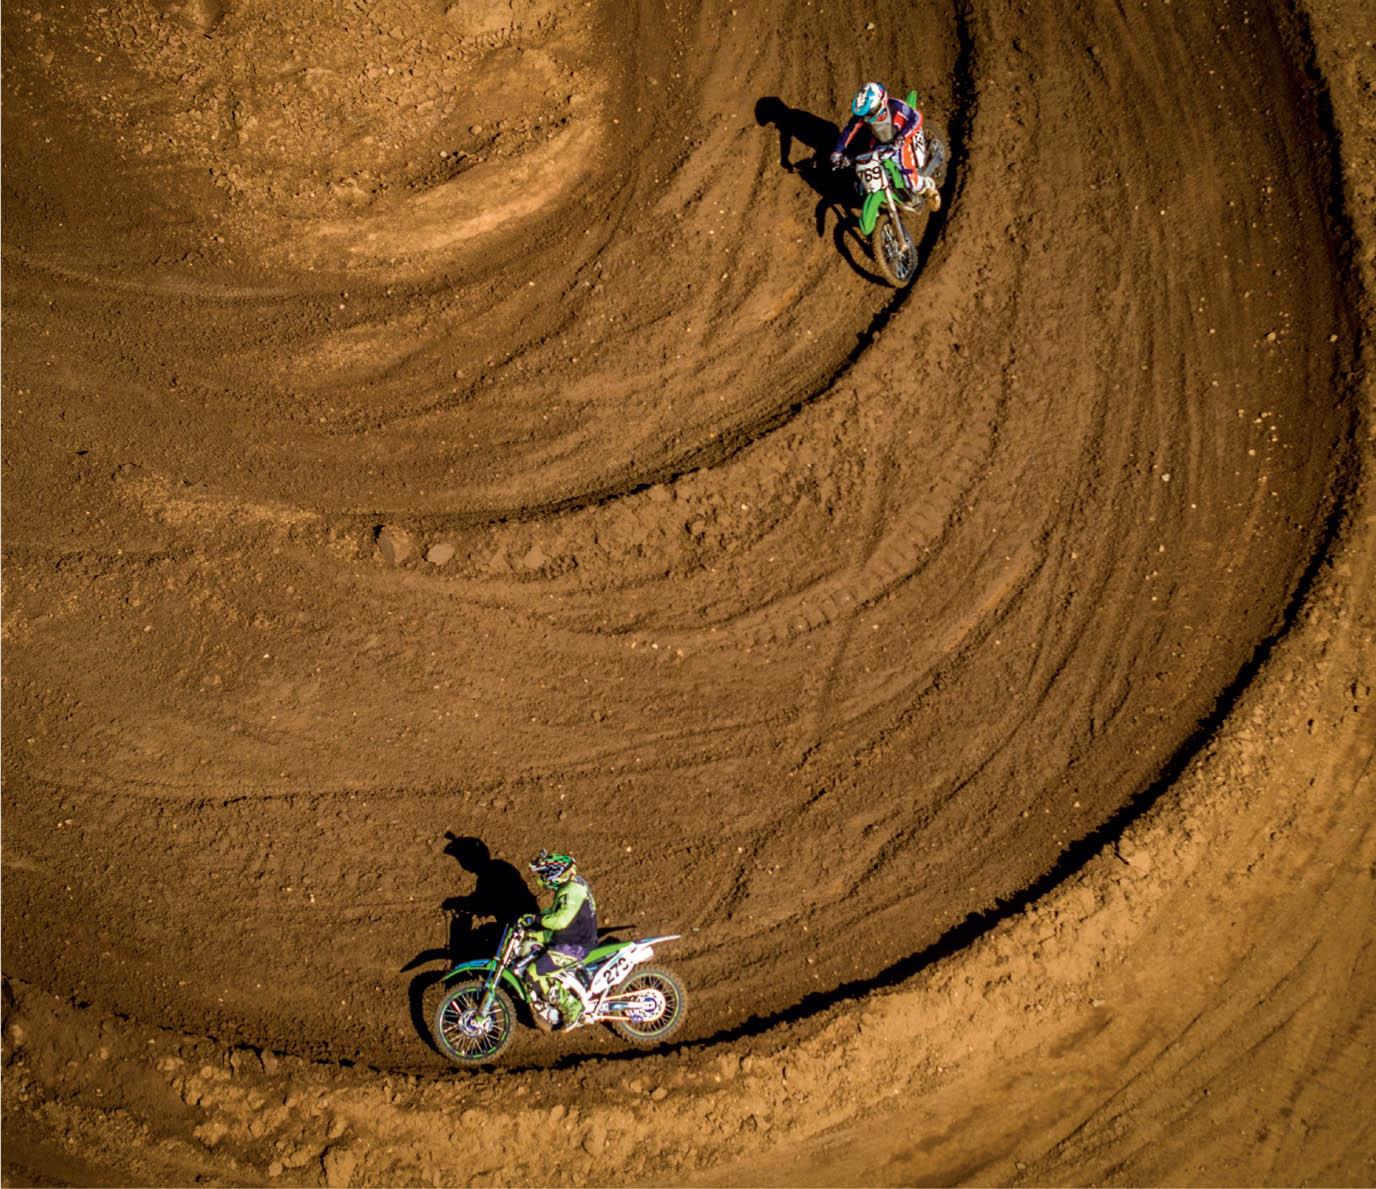
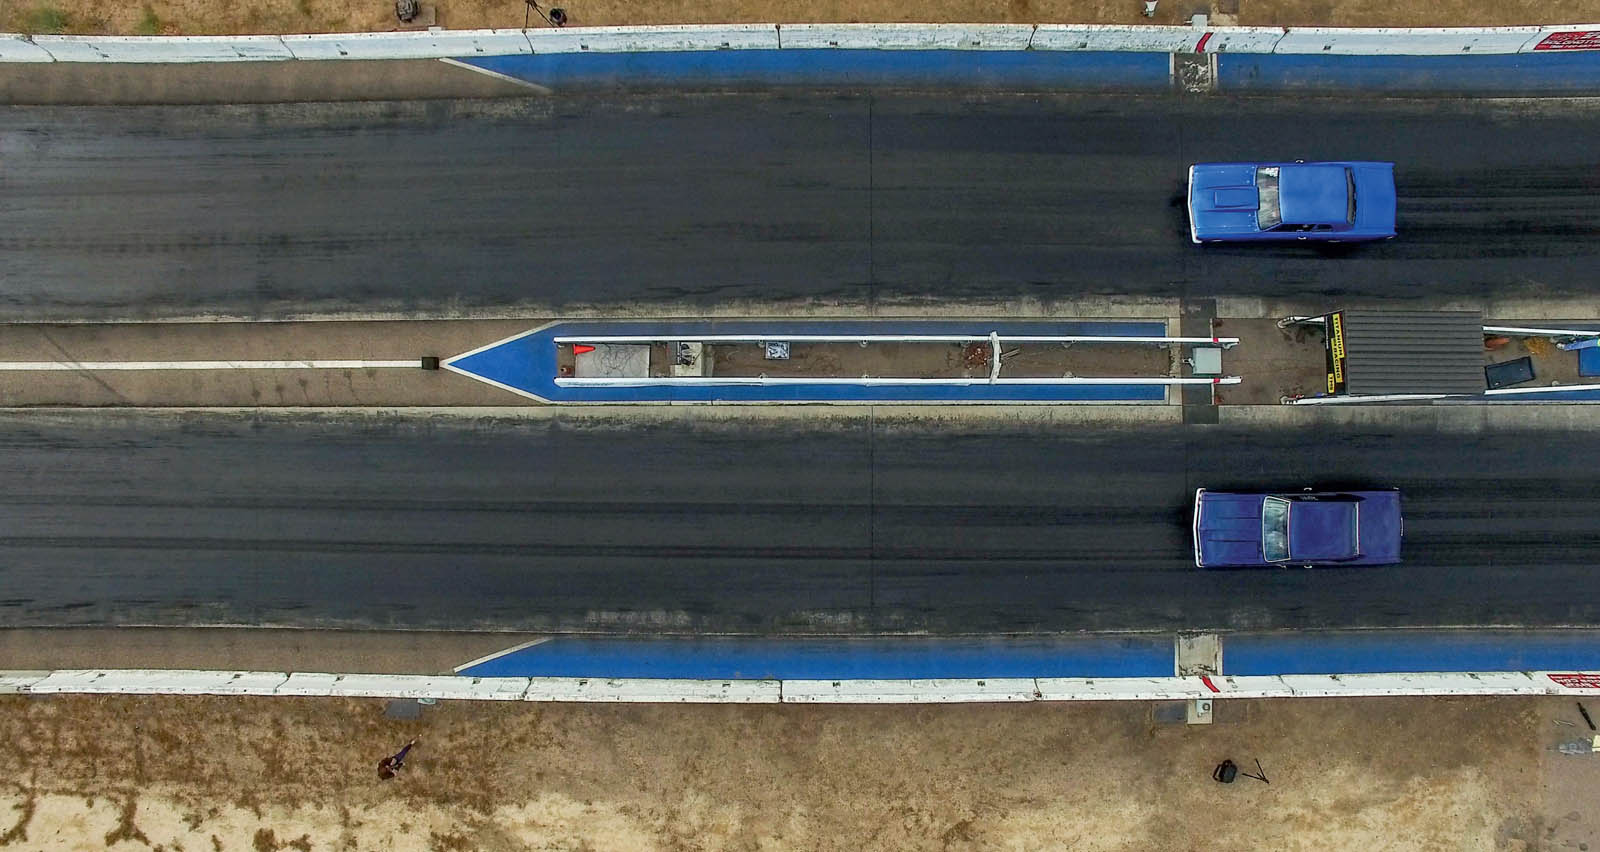
If you are flying a drone that allows you to change lenses, try a longer lens. I have the Zenmuse X5 camera on the Inspire 1 and I use it for shooting things like motor sports. Adding a 45mm lens with a crop sensor is the equivalent of a 90mm lens, and you can get right into the action while staying at a safe distance.
A big challenge of shooting with a longer lens is locating your subject on your FPV. Have you ever used a telescope or binoculars? You see something in the sky and then try to locate it through a magnifying lens—not that easy. I usually fly a little higher or farther away and locate the subject. Then I keep it centered in my screen as I fly into the shooting position. I also recalibrate the gimbal whenever I change lenses. This helps keep things balanced and allows for more stable shooting of photographs and video.
Some drones, such as the Mavic 2 zoom or Mavic 3 allow you to zoom in. In this case, use the optical zoom. Try to avoid using digital zoom because of image quality degradation. Digital Zoom is basically just enlarging digitally and cropping in the sensor, versus optical zoom, which is using the physical lens to zoom. There will come a day when this rule is obsolete because AI powered computational photography is getting better and better.
Another thing to bear in mind is background compression because of your distance to the subject. With a long lens, the background appears more compressed, shows more of the background in the frame, and it looks closer to the subject because you are farther away than if using a wide lens. Use this to your advantage.

4.12 Close shot
4.13 45mm
Foreground Elements and Interest
When shooting a photograph, you can add a lot of interest and really make it dynamic by including an interesting foreground element. It’s a good idea to walk around and find something to place in the foreground to add interest to the photo. This also adds a sense of depth and dimension to the image. Without this foreground element, a distant photo really lacks a point of focus and can appear flat. Usually a viewer will be drawn in by the foreground object and then notice the features in the distance.
Make sure that the foreground element adds interest to the photo rather than clutter. Look for something that adds context or even contrast to the image. A foreground element can give a sense of location or bring in a bit more of the story.
HOW IT APPLIES TO AERIAL IMAGING
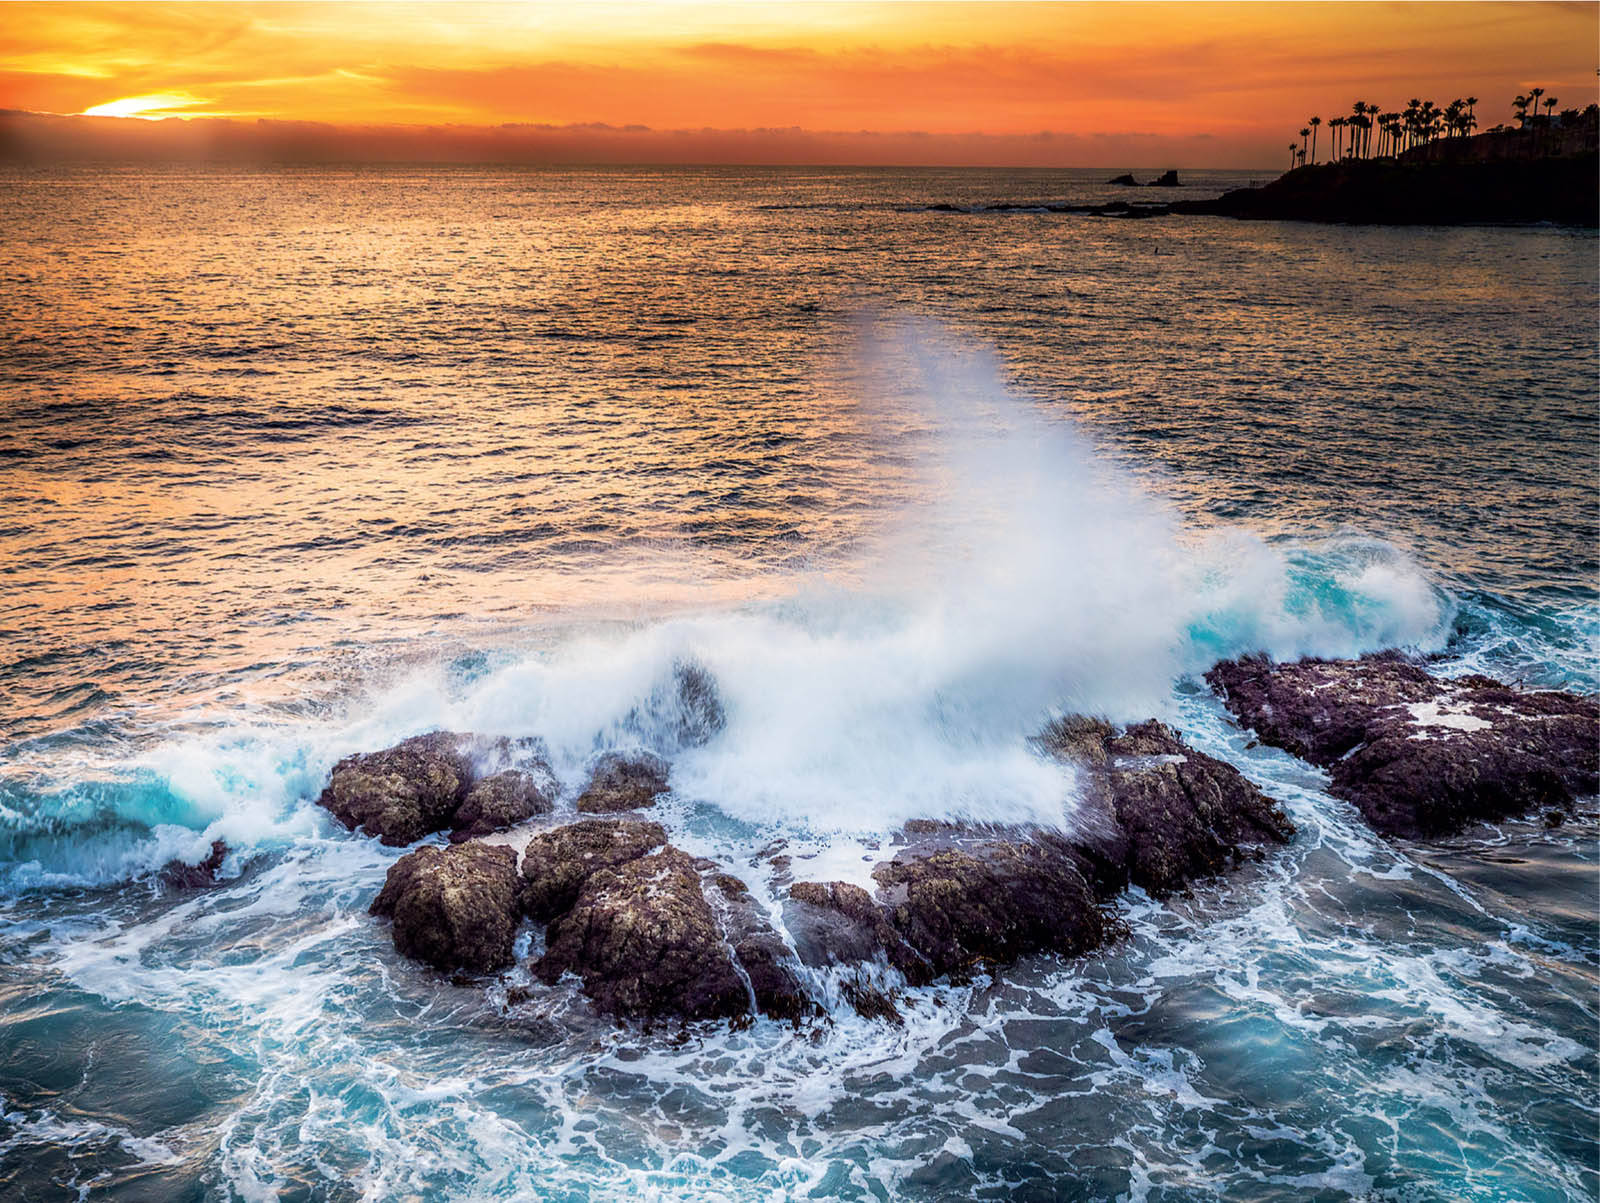
When you are flying, most of what you shoot is going to be in the distance due to the nature of small cameras with wide-angle lenses. Because you have the ability to move around almost anywhere you like, it’s pretty easy to reposition a shot and capture some interesting foreground elements. When I’m shooting a sunset over the ocean, I’m always looking for water breaking over a rock or something that will place a feature in the lower part of the photograph.
After shooting thousands of these images, I have realized that the ones with a foreground element have much stronger compositions. If you can’t find any features in front of you, try flying back a bit and include a tree or the shore. There is always something for you to include if you look around. Also consider flying lower if you are having trouble with this.

4.14 Example of a photo with foreground
It’s easy to see what you are going to shoot in the distance—a mountain, a sunset, the ocean, etc. Try concentrating on how you are going to relate it to the foreground. In aerial imaging, we have a huge advantage over “terrestrial photographers.” For example, in regular photography, with careful planning or with luck you can have the sun at the right time of day in a particular location. In aerial photography, you can manipulate this by changing altitude and position. With aerial images, you can have the sun bursting through any object you like.

4.15 The sun running across tiny islands
Leading Lines
Leading lines are objects that naturally draw the viewer’s eye into a photograph. They can occur in nature, or they can be manmade. These leading lines are powerful, and they attract the eye and draw it toward the main subject of the photo. Examples are roads, railway lines, rivers, power lines, paths, cracks in rocks, ploughed fields, coastlines, buildings, and trees.
Look for leading lines when making your composition and your photograph will become much more dynamic. Straight leading lines are powerful and fast. Curved leading lines softly lead the eye in a more relaxed and rhythmic pace.
HOW THEY APPLY TO AERIAL IMAGING
In aerial photography, you have the opportunity to see leading lines that aren’t visible from the ground. Once you find them, you can move freely and use these lines to your advantage. You also have the opportunity to use leading lines to look down trees, masts, chimneys, and other shapes that are impossible to use from the ground.
4.16 Example of leading lines
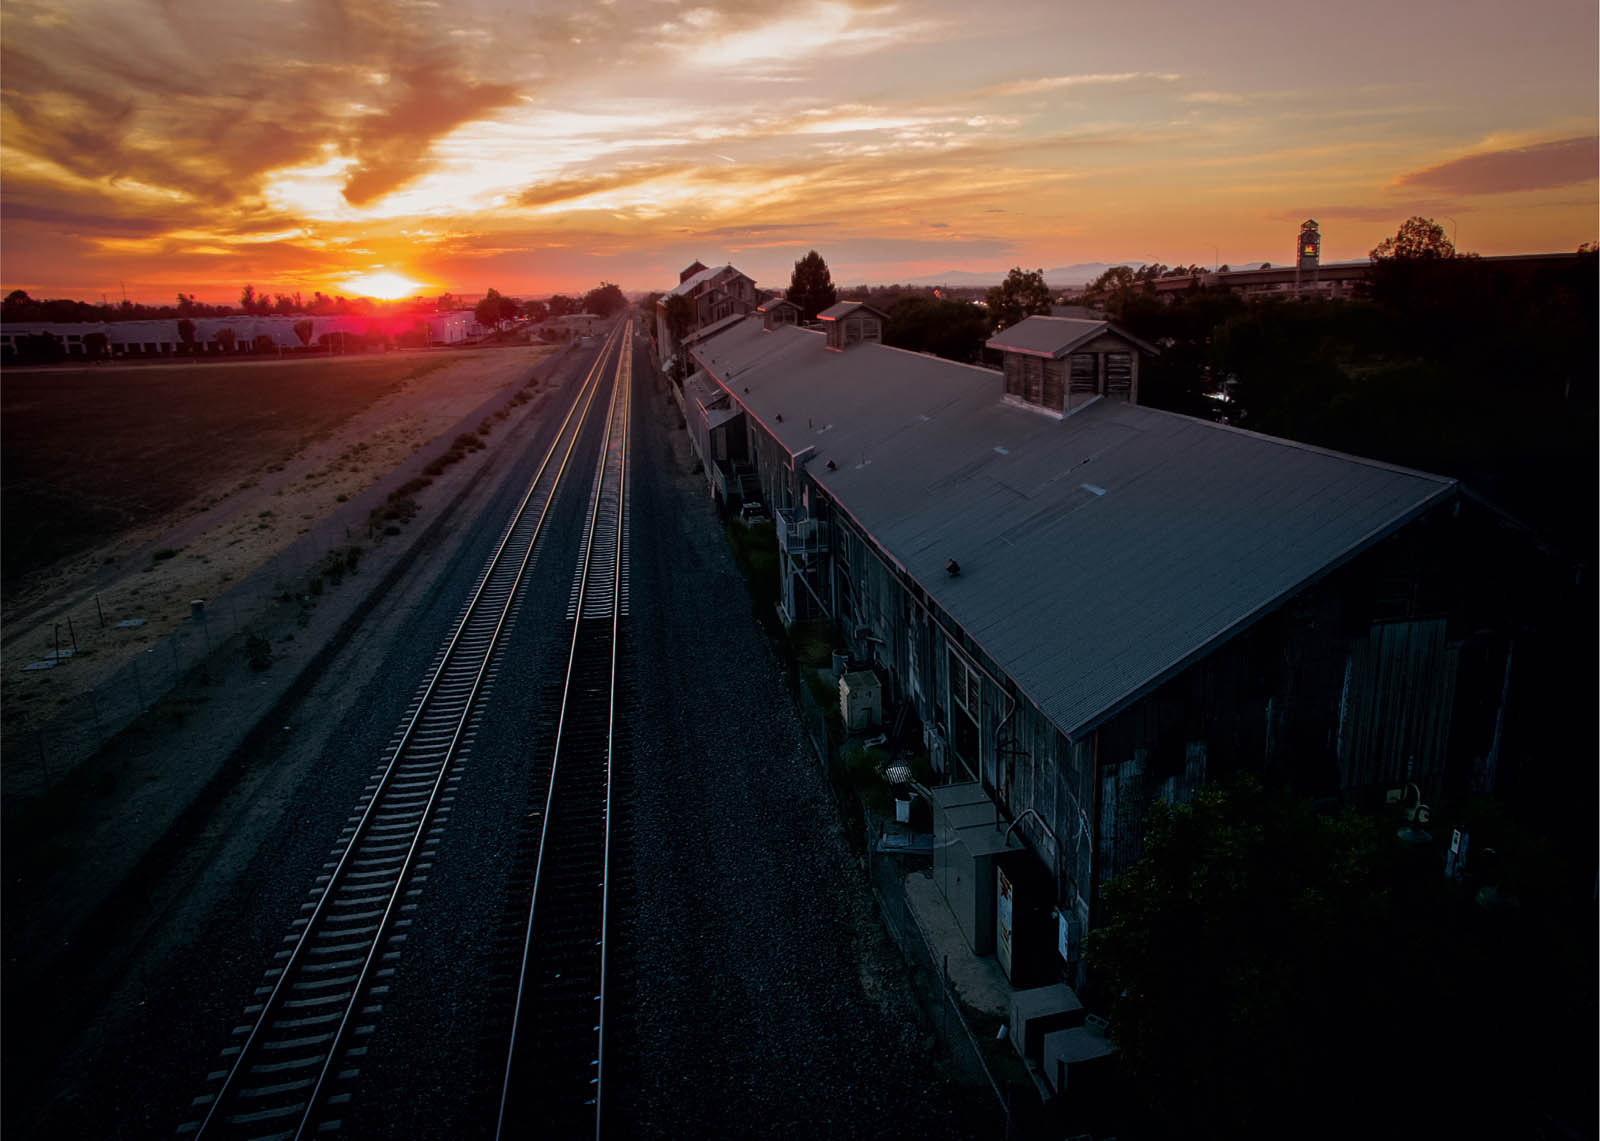
4.17 Example of leading lines
4.18 Example of leading lines
Control the Background
When shooting, pay special attention to the background. Eliminate distractions, such as trees that appear to grow out of people’s heads. More importantly, look for a non-distracting background that isn’t too busy. Change angles so that lines don’t intersect and so there is good contrast. If your foreground is a lighter color, look for a darker background to create contrast and make your subject pop. Traditional photography uses depth of field to further separate a subject from a background; shoot with a shallow depth of field to blur the background.
HOW IT APPLIES TO AERIAL IMAGING
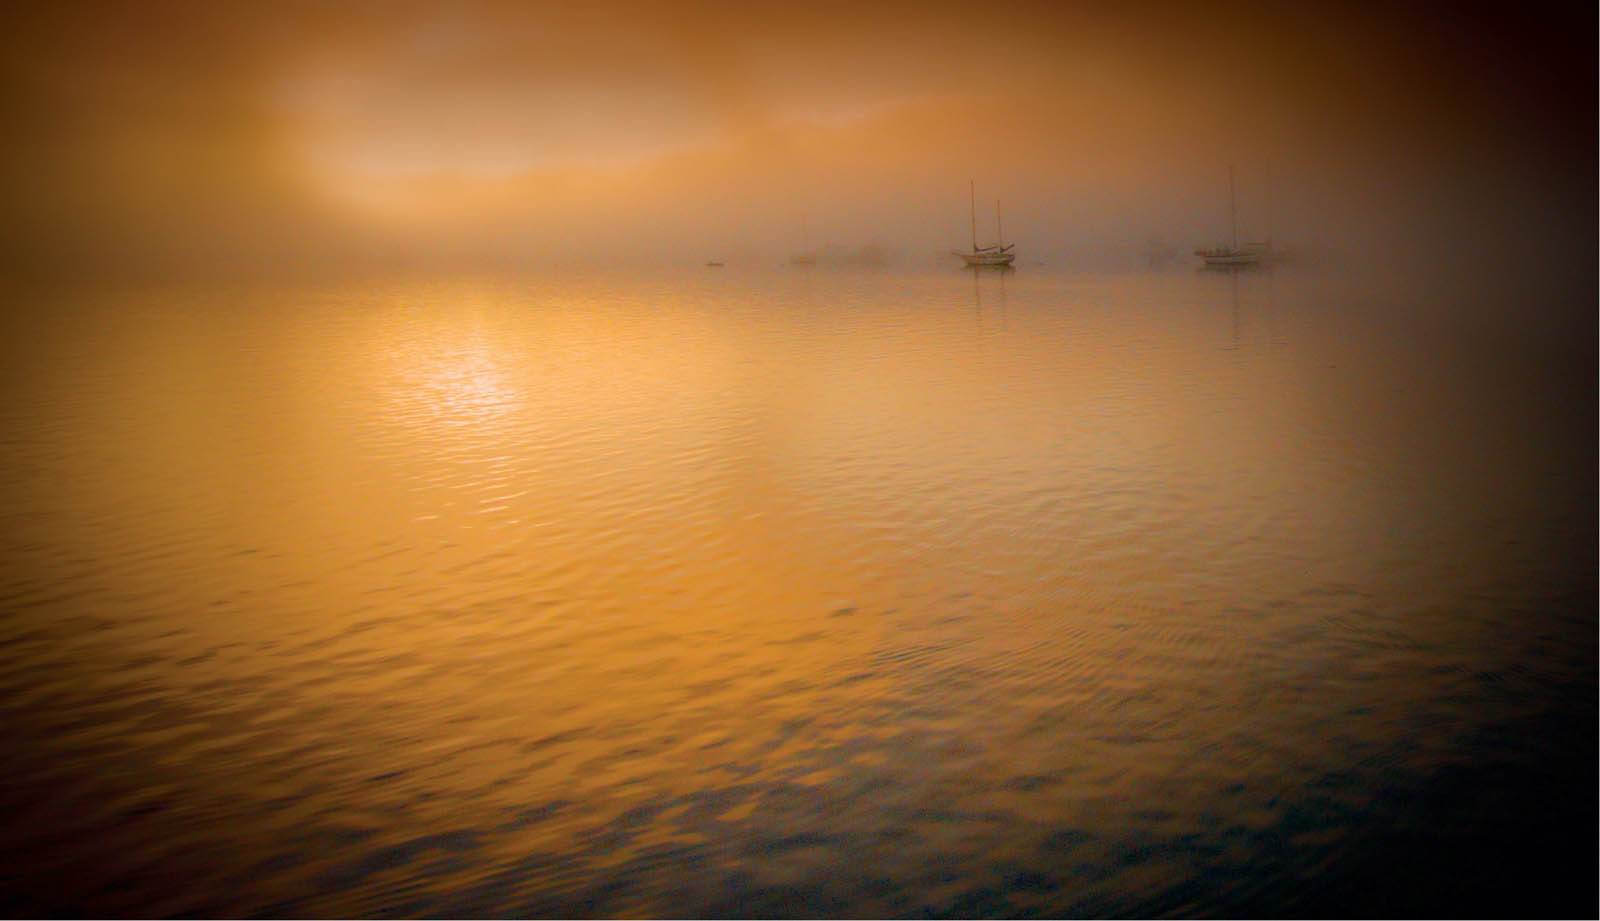
In drone photography, using depth of field to blur a background isn’t usually an option. You can get a little bit of background blur with some systems. However, in most cases this is minimal because you have to be really close to a subject, or use a powerful zoom to pull this off. Look for alternatives to create background separation. Use fog, mist, and even backlighting to create some separation and depth in a photograph.
So background separation seems to be a bit of a weakness for drones? I would say no. We have an advantage over regular cameras; it just requires a different way of thinking. “Terrestrial photographers” (a phrase I coined to describe ground-based photographers; makes sense, right?) can change positions to create the right balance of foreground to background. They may even be able to change the midground into background by moving. However, they really can’t manipulate altitude as a composition tool. Sure, they can climb a tree, mountain, or rooftop, if there is one available. Maybe they can shoot out the window of a hotel. Think about this: You have the ability to get the viewpoint out of every single window in this hotel, and when you run out of hotel, no problem—just keep flying!
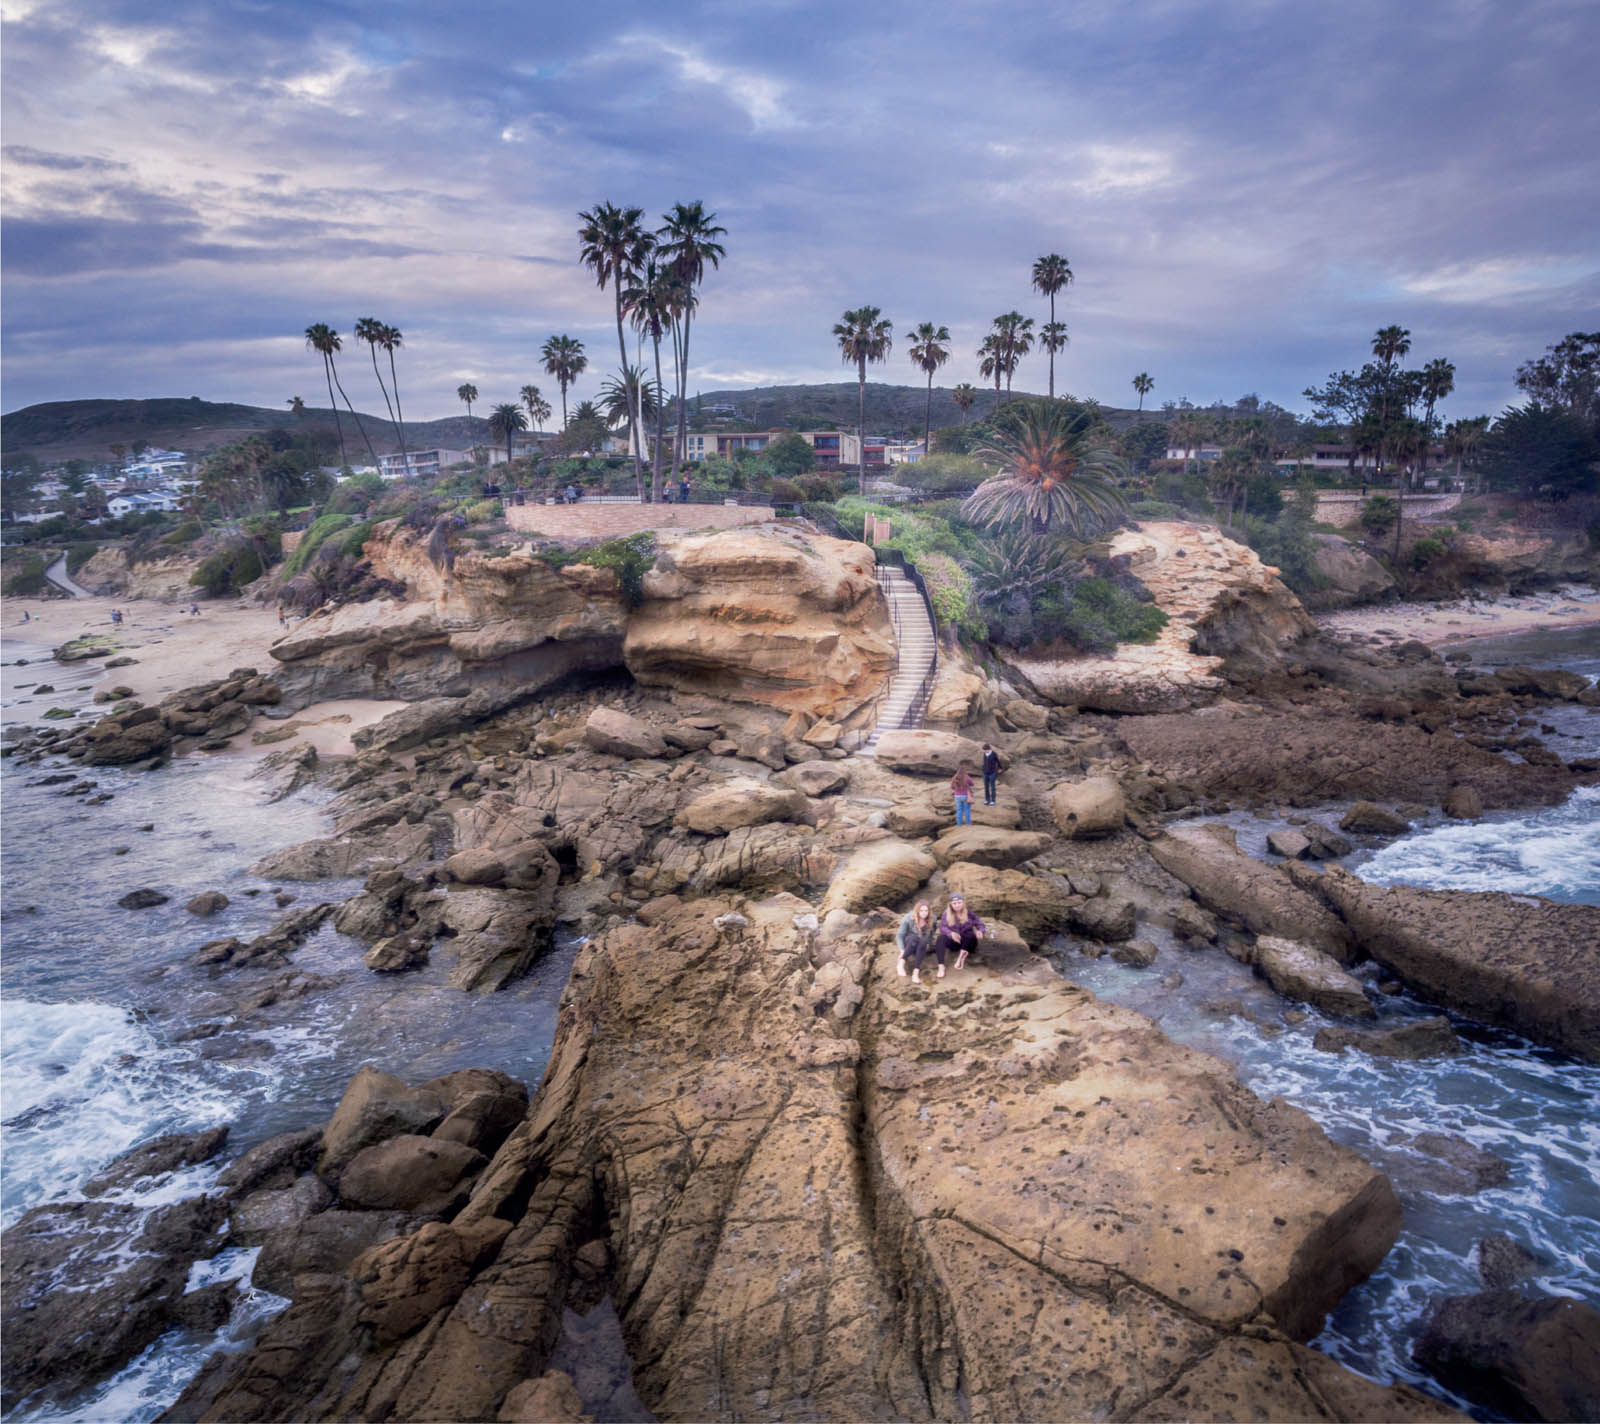
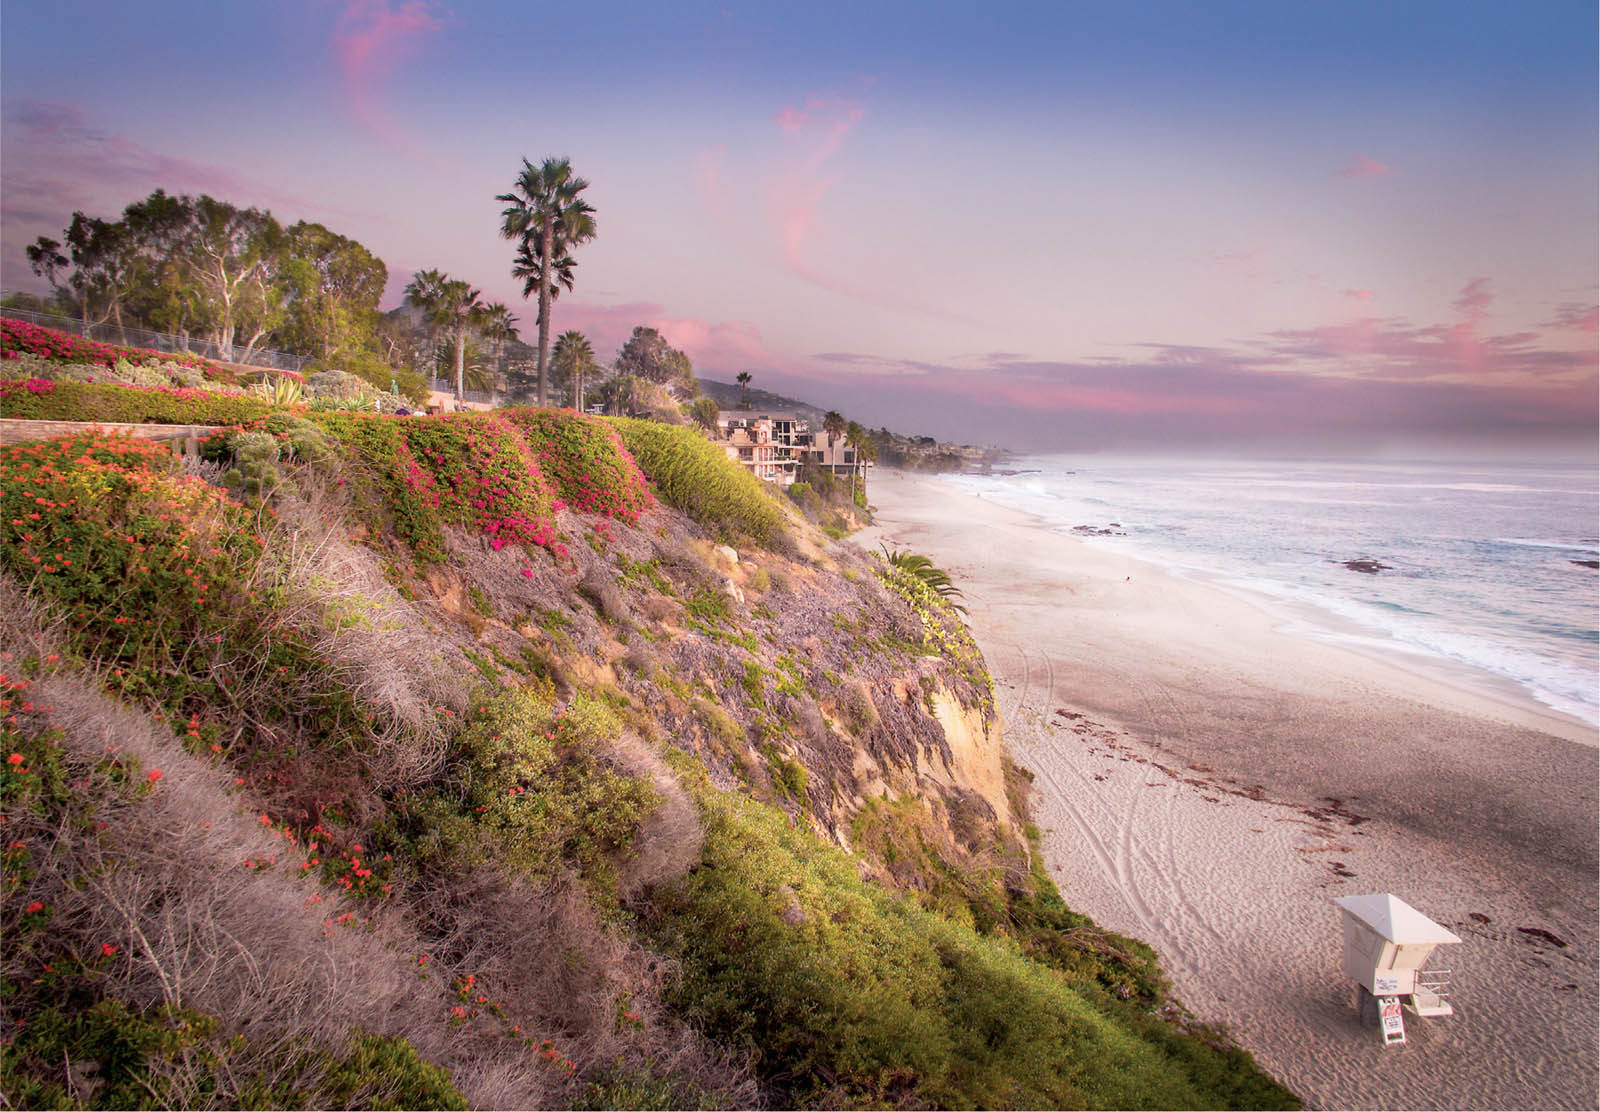
One of the greatest strengths of using an aerial shooting platform is altitude. Use it; don’t let it go to waste. For example, when shooting a cove, move to the height that best shows the curvature of the cove. Let hills intersect distant hills to create contrast and drama. If you see a tree line, let the trees rise above the hills or set them against a distant area of contrasting tone.
One of the key things I do is purposely find the best altitude. It’s no accident when a row of palm trees appears just above or below a horizon. Always think about that when you compose a photo. Think about how foreground and midground elements interact with the background. If it’s not clean, don’t settle for the shot. Try a different height or a different angle. It’s so easy to move your drone around that there really is no excuse for weak composition.
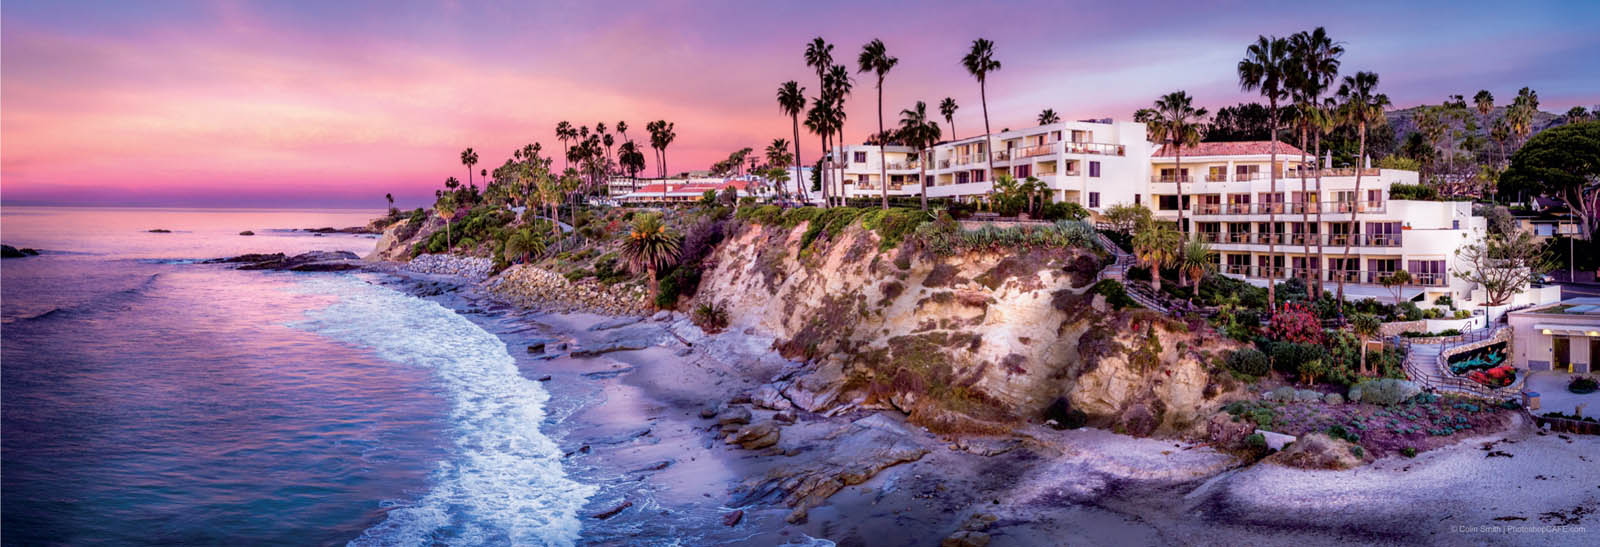
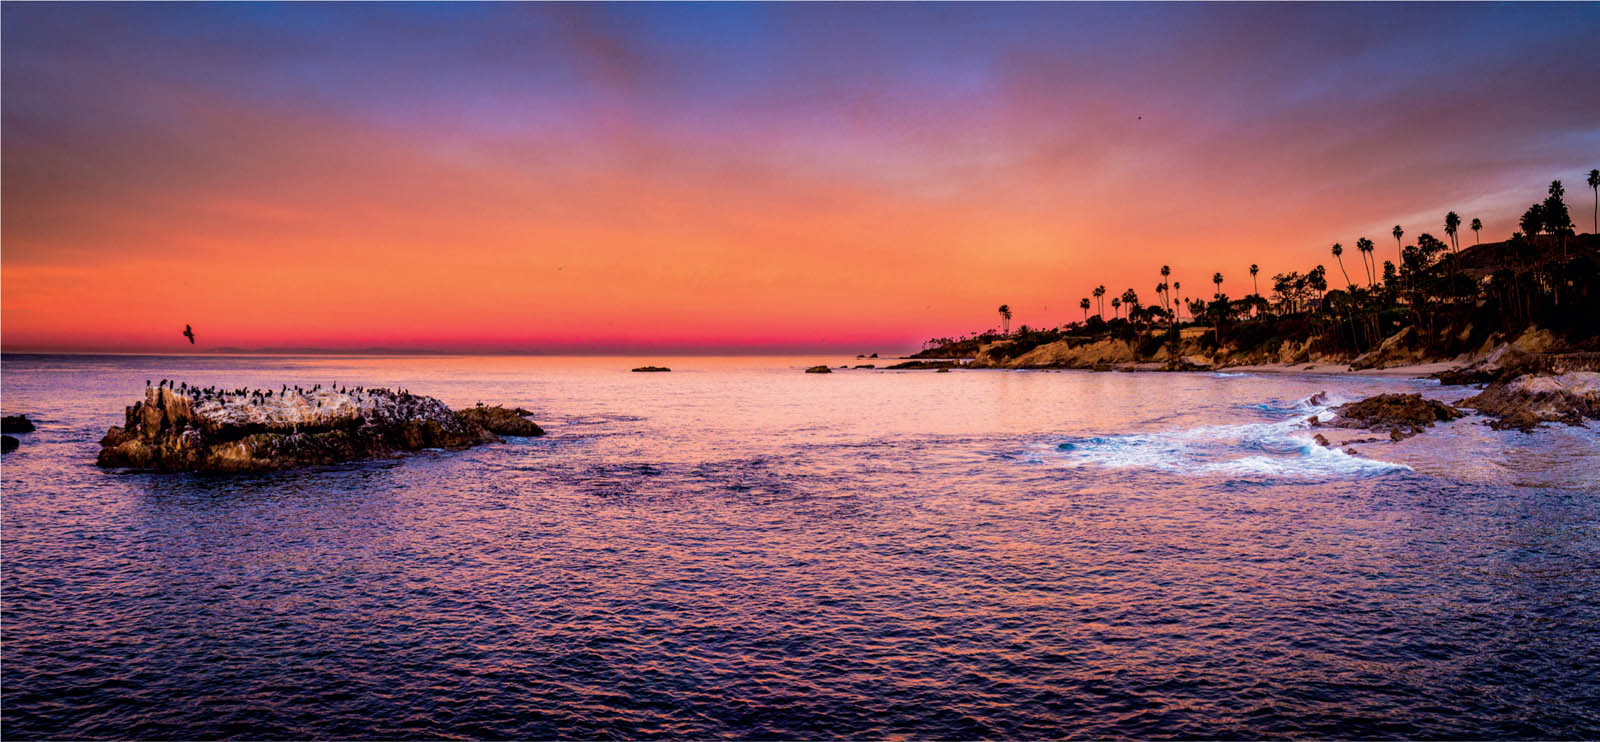
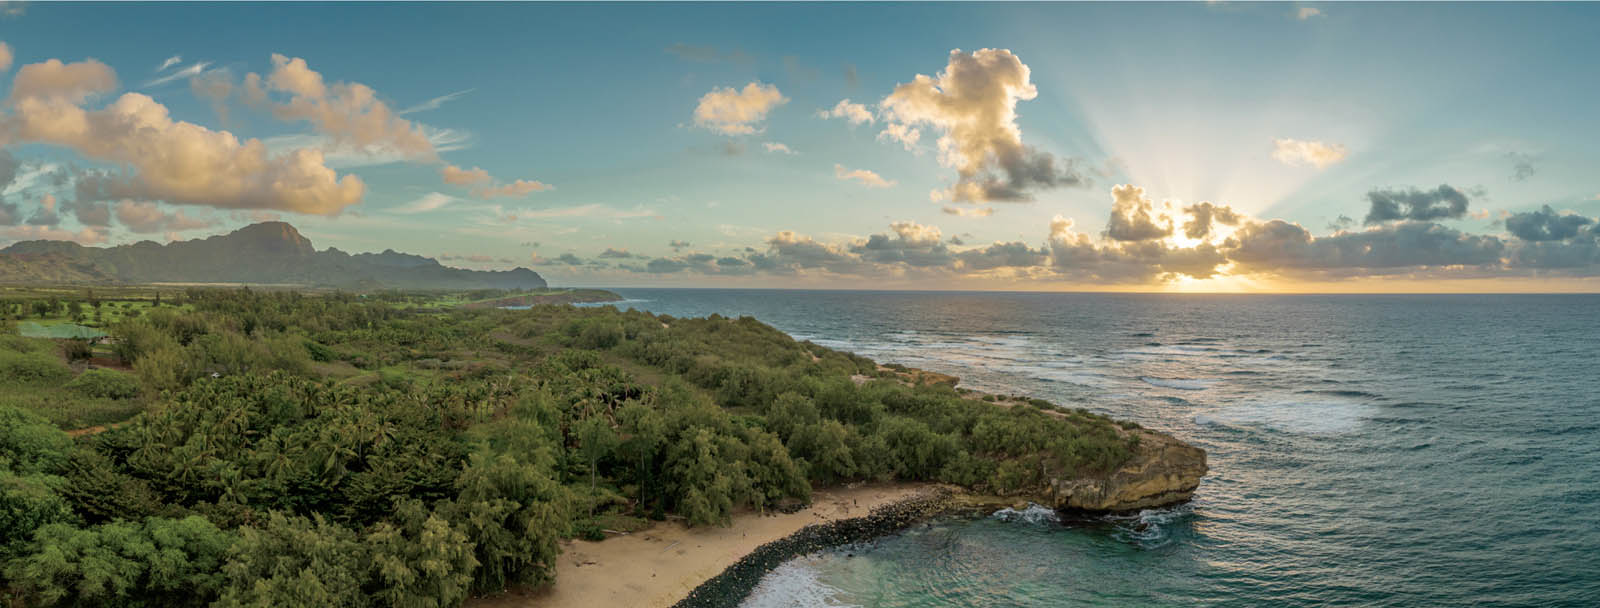
4.19 Laguna Crescent Beach
4.20 Example of palm trees appearing just above the horizon
Take this example of the birds on a rock. The first shot has a decent angle and catches the light nicely, but the silhouette of the birds doesn’t really pop. Try flying a little bit lower. Now you can see the edge of the rock and the birds against the sun. Also notice at this lower height we don’t see so much of the empty ocean behind the rocks leading to the sunset. Instead, we see more of the foreground water, leading us into the rocks. Often, people fly too high and miss the best composition.
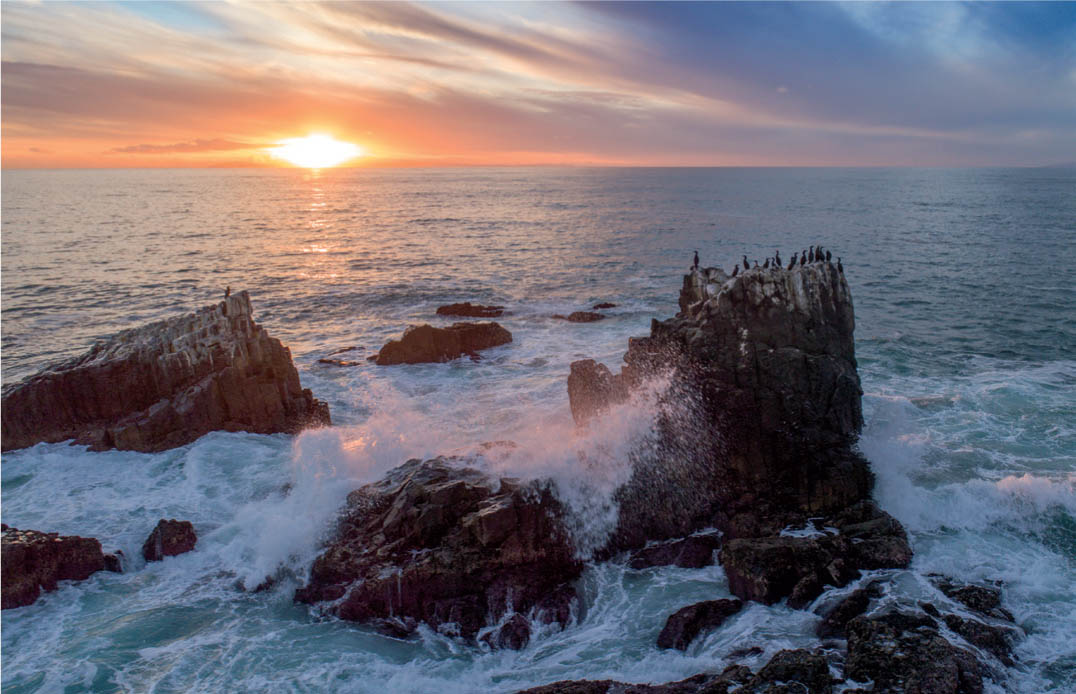
4.21 Making a weak composition …
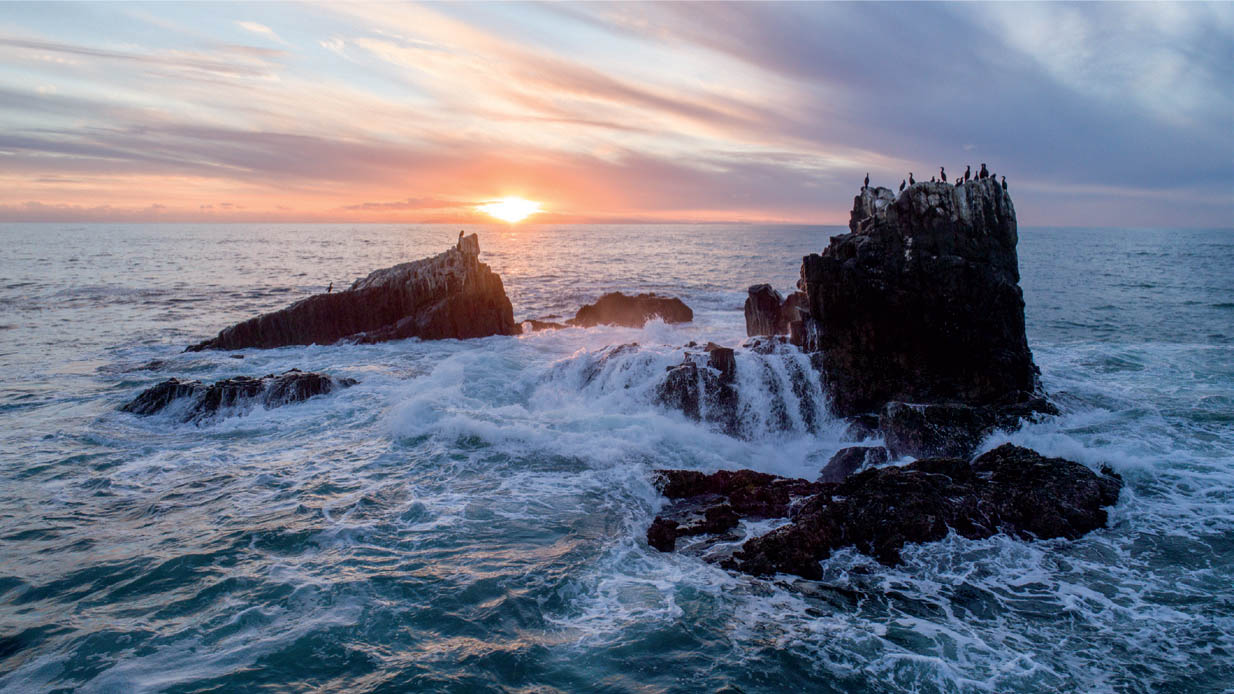
4.22 … stronger by changing height
Shoot During Good Light
Choosing the correct time of the day for shooting is vital. All photography is about the art of capturing light. When we are shooting outdoors, the sun is our light source. On a clear day in the middle of the afternoon, the light is very harsh and the shadows are direct. This causes shapes to lose their definition because there is a lack of angled shadows to give them shape. There is also a lot of glare at this time of day. Many outdoor photographers avoid this kind of light because it’s not flattering. On the other hand, if there is cloud cover, the clouds diffuse the light by scattering the light rays in all directions. This is nature’s soft box. It makes a very soft light and almost eliminates shadows. When it comes to capturing details and natural color, a diffused, overcast day can provide good light for shooting.
HOW IT APPLIES TO AERIAL IMAGING
This is a great time of day for aerial mapping and shooting straight down to capture clear shots that show the detail of a landmark.
Golden Hour
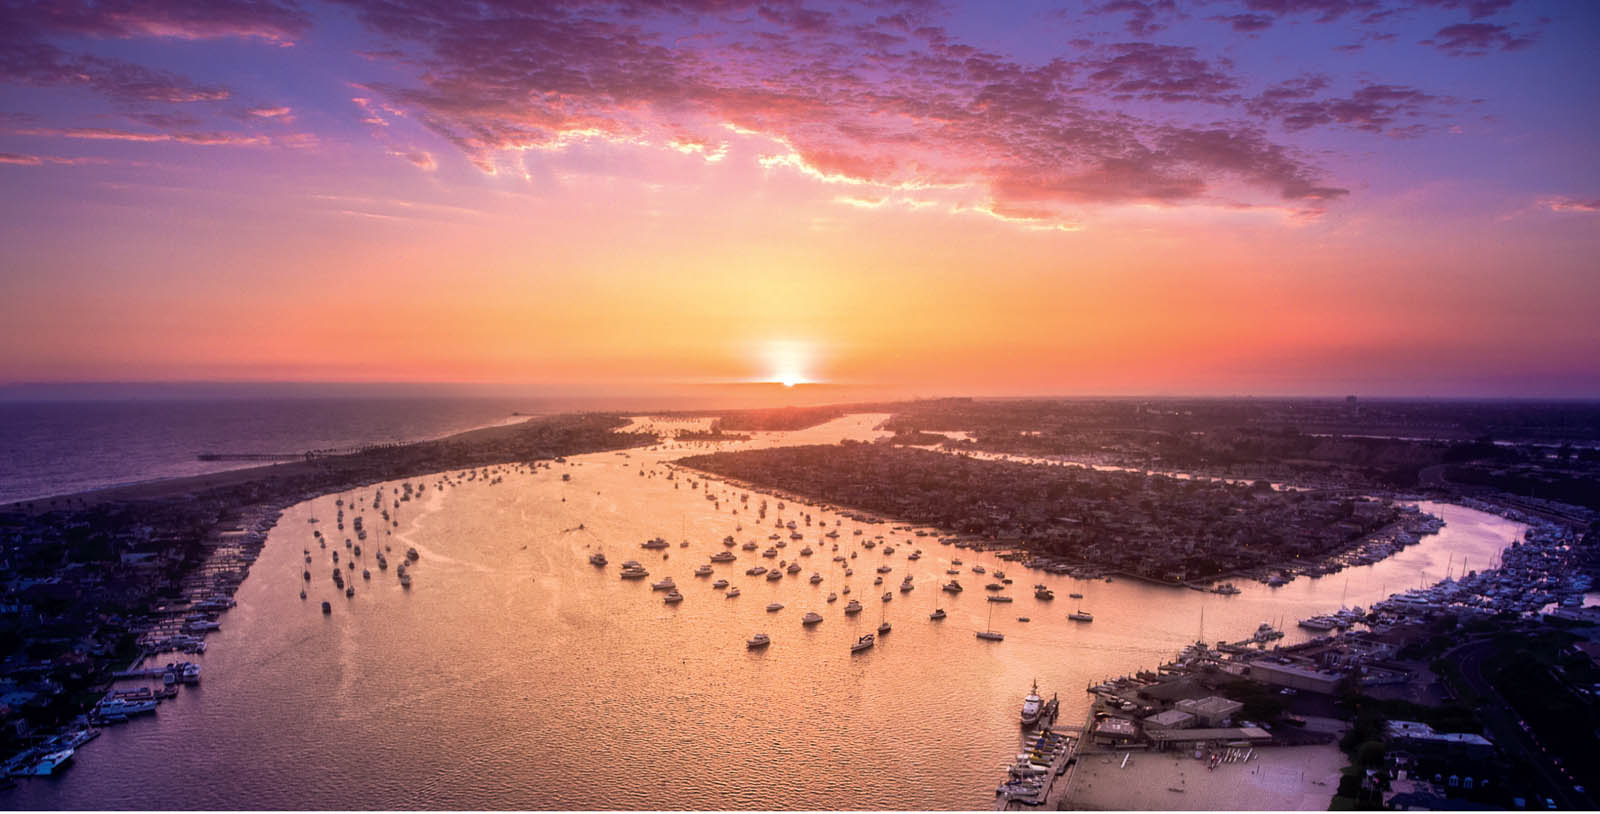
Another type of light, and my favorite for shooting aerial photography, is at sunrise and sunset. These times are called the magic hour or the golden hour. The sun is low in the sky and the light is traveling though particulates or pollution. This causes the golden color that we associate with these times of day. The shadows are also longer, which can be very interesting, especially when shooting from above. The golden hour lasts for about an hour before sundown and an hour after sunrise.
HOW IT APPLIES TO AERIAL IMAGING
I shoot sunsets almost every day. I live quite close to the Southern California coast, so I look out the window a couple of hours before sunset. If I see the right kind of sky—not too clear but not too cloudy, and no wind—I usually grab my gear and head to the coast. If it’s too cloudy, such as a solid sheet of gray, then the sun won’t break through. On the other hand, if there are no clouds, the sky can be a bit boring. However, there can sometimes be a good marine layer over the ocean, which makes for a great sunset photo. Without clouds, you won’t get that amazing afterglow that lights up the sky in an amazing way after the sun dips below the horizon. I’m amazed at the number of photographers that pack up and leave as soon as the sun dips, missing that incredible twilight afterglow.
4.23 The sun setting over Catalina Island in the distance
The big challenge in shooting a sunset is the amount of contrast in the scene. The dynamic range is getting better on most drones, but still not enough to capture the sun in the sky without blowing it out, and not enough to capture enough detail to illuminate the foreground. This is why I often shoot HDR in these situations (check out the section on HDR later in this chapter).
We have just discussed some of the compositional rules of photography and how they apply to aerial photography with drones. If you apply these rules, you will find a marked improvement in your aerial images. Once you know these rules, they can and should be broken. Don’t always break them, and don’t break them just for the sake of it. You will naturally find opportunities to do something you normally wouldn’t. For example, I have been taught to shoot away from the light, with it behind me, so that it illuminates the subject. I break this often because I want to include the sun in my sunsets. If the sun isn’t setting, I almost never shoot into the light. So I use sunsets as my exception to the rule. Learn the rules first. Only break the rules when you have a valid reason. Don’t be mechanical; stretch the rules often. But learn them first and break them boldly; otherwise, your image will look like a mistake.

4.24 Example of sunset
4.25 Example of sunset
4.26 Example of sunset
4.27 Example of sunrise
4.28 Example of sunrise
4.29 Example of sunrise
SPECIAL TYPES OF PHOTOGRAPHY
NOW THAT YOU KNOW HOW TO SHOOT A PHOTOGRAPH, let’s look at how to create an image that comprises more than one image. We are still creating a single image, but we might need to shoot multiple frames that we will use to build this image. It’s more work, but with practice the results can be stunning and worth the effort.
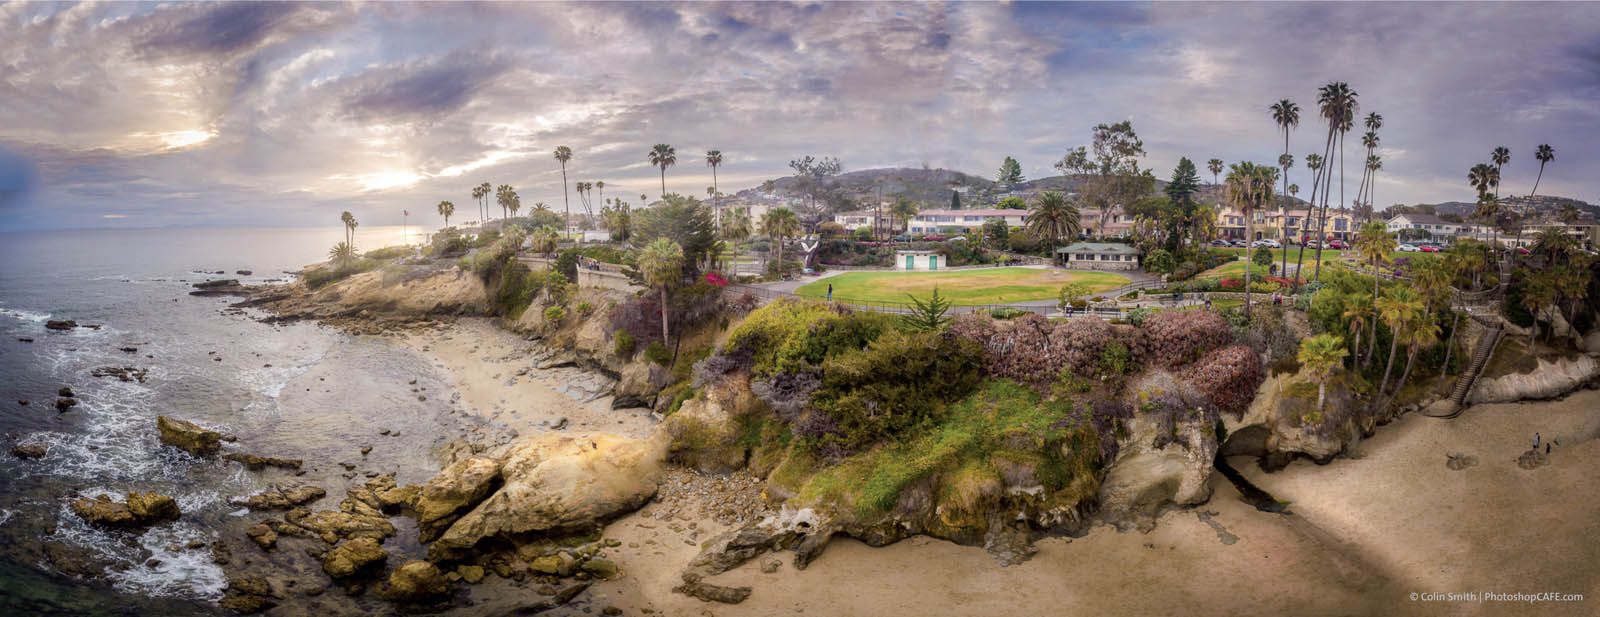
Panoramas
One of the most stunning landscape shots you can get from a drone is a panorama. A panorama is a series of photographs that are assembled, or “stitched” together, to create a larger photo. The main reason most people shoot panoramas is to capture an entire vista that won’t fit in the lens in a single shot. An additional benefit to panoramas is a larger image with more details, which can be printed at large sizes. Some drones have the ability to shoot panoramas automatically and quite often that works just fine. At other times you may want more control over the composition of your panorama, or you wish to shoot bracketed panoramas, which isn’t a common option currently for an automatic shot.
4.30 Panorama

4.31 Panorama

4.32 Panorama

4.33 Panorama
Traditionally, the rule for shooting panoramas is to rotate the camera on the point of no parallax, which is called the nodal point. Try holding an object or your finger close to your face and close one eye. Now switch eyes and see how far the background moves in comparison to the object. This is known as parallax and is a key element in our depth perception. Now try holding the object farther away from your face and repeat the eye exercise. Notice that the shift is less marked. Parallax is reduced with distance and almost disappears at about 30 feet. Because you are generally shooting panoramas from a greater distance than a traditional tripod on the ground, parallax is no longer the main issue.
Another traditional rule of panoramas is a 30 percent overlap. For several reasons—wider lenses, more of a fisheye effect on some lenses, drifting position while rotating the drone, and so on—I shoot for more of an overlap. I personally shoot a 50 percent overlap with smaller cameras such as the Phantoms. Overkill? Maybe, but at least I have options, and I find I get a lot less doubling and weird stitches with this method. I also have less stretching of objects in the image. The Phantom 4 has a 94-degree field of view (84 on the Mavic 3), which changes the angle of view between images very quickly while rotating.
When shooting with a longer lens, such as the Zenmuse X5 on the Inspire 1 Pro or the Mavic zoom, the excessive overlap isn’t needed.
To capture this kind of shot, I figure out what I call my “shooting rectangle.” Corner to corner, how wide an area do I want to capture and how tall? A key part is the distance I choose to shoot from. At 2,000 feet from my subject, I might get the shot in three images; at a lesser distance, it might take six shots to achieve the same width. These images are not the same. The closer shot will have more distortion and bending, whereas the shot from farther away will appear more natural, but with less detail. This is something you will learn with practice.
It’s very important when shooting a panorama to make sure that your camera is level with the horizon. If the camera is tilted, you can get a wavy horizon or weird stair-stepping in the panoramic merge, or it could fail altogether. If you are having issues with leveling the camera, try putting your drone on a perfectly level surface that’s free from magnetic interference, and run a gimbal calibration. You can also offset the camera tilt in the DJI Fly app or whatever software you are using. If the tilting is caused by a camera balance issue, taping a coin to one side of the camera is a hack that can work.
4.34 Overlay diagram
Bracketing: HDR, Capturing the Full Range
How often have you looked at a beautiful scene and photographed it, but then been disappointed later when you saw the photograph? Instead of the beautiful sunset, there is a solid white blob, and the light dancing off the sand is just a dark expanse. This is because of a limitation called dynamic range. The human eye can see a wide dynamic range and is able to adjust very quickly. This is why we see an astonishing amount of detail even in very bright light while also seeing a lot of detail in the shadows.
The sensor on a camera isn’t capable of capturing the same amount of information. In a high-contrast situation, such as sunset or nighttime, when you expose for the highlights all the darker areas turn solid black. If you expose for those shadows, all the highlights turn pure white with no detail. This situation shows the limits of the dynamic range of the camera. Because it’s so early in aerial camera development, many cameras have less dynamic range than their larger siblings, but it’s getting better very quickly. Camera quality has increased substantially in the time since the first edition of this book was written. Shooting in RAW definitely helps capture more dynamic range—certainly enough for an overcast day. However, when it comes to capturing a bright sky and dark ground, even the most sophisticated cameras struggle to have enough dynamic range.
The solution is HDR, or high dynamic range. This is accomplished by shooting multiple photographs at different exposures to capture the entire visible spectrum of light. These photos are then combined into an HDR image that contains all the details in both shadow and highlight. Some cameras do auto HDR, but I avoid these because I prefer to have more control. This doesn’t mean you can’t use these modes, and I’m sure they will improve after the time of this writing; I may use them myself in the future.
My preferred method is to shoot multiple photos at different exposures and then use Lightroom or Photoshop to make the HDR images later, in post. The steps for merging them are included in chapter 7. For now, I’m going to tell you how to shoot these images.
In a perfect world, I would shoot from three to five images that are +/- 2 stops apart (Figure 4.35). Let me explain. In photographic terms, an f-stop is how we measure exposure, or more correctly EV (exposure value). Say you shoot an image and want to overexpose it by one stop, or one EV. This means that you double the amount of light that hits the sensor. If you want to underexpose by one stop, or one EV, you halve the amount of light that hits the sensor. You can control how much light hits the sensor in four ways:
- Change the ISO. This is the sensor sensitivity.
- Change the shutter speed. This is how long the light strikes the sensor to make an image.
- Change the aperture. This is how much light can enter the camera at once (the size of the opening of the lens). Many aerial cameras don’t have an adjustable aperture.
- Add an ND (neutral density) filter, which uses tinted glass to reduce the amount of light that comes into the lens.
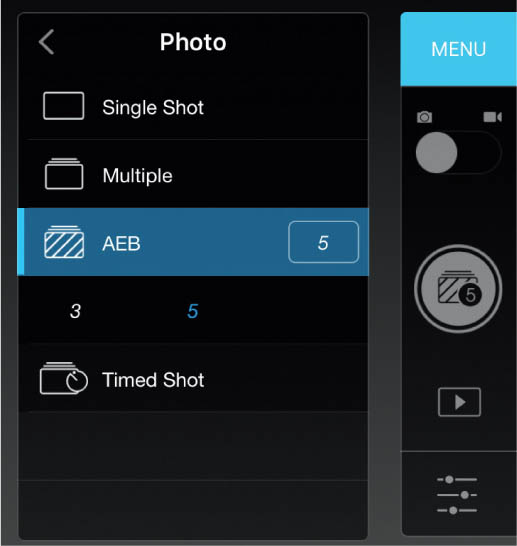
Generally speaking, for HDR the best way to vary exposure is by changing the shutter speed. Most cameras have AEB (auto exposure bracketing) so that you don’t have to physically change the shutter speed between photographs. At the time of this writing, all the DJI cameras, through the DJI Go app, are capable of shooting AEB. It’s under the camera settings (Figure 4.36).
The DJI Go app doesn’t allow you to change the amount of the bracket; it’s set to approximately .7 stops (I have seen it vary from .66 to .7). Because of the small amount of variance, it’s best to shoot five images. This will capture a wider dynamic range. In the future, if they allow you to change the bracket amount, set it to two stops +/- and just shoot three exposures.
When AEB is selected, shoot your images like you normally would. You’ll hear the camera shoot multiple images. You don’t need to do this for all photos, just when there is a lot of contrast, such as a bright sky against a shaded landscape.

4.35 Bracketed exposures
4.36

4.37A Example of an HDR image
4.37B Example of an HDR image
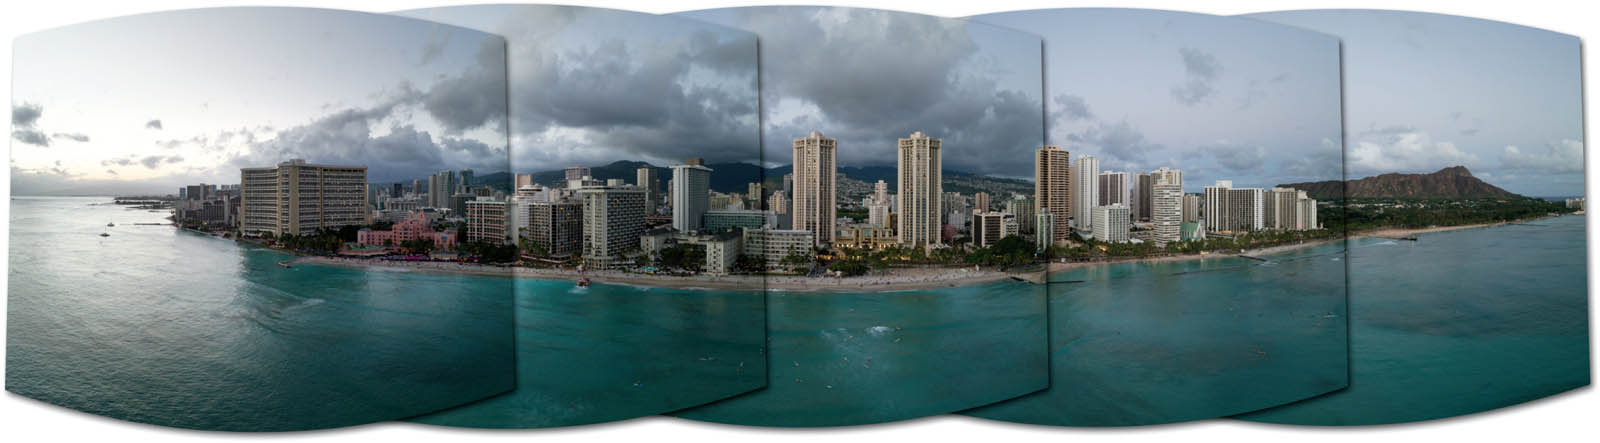
Panoramic HDR
One of the things I’m asked about daily on social media is how I make my HDR panoramas. One image I posted recently was comprised of 115 images. Why 115 images? And how do I shoot that? Because of my background in visual effects, HDR panoramas aren’t new to me. I was shooting these kinds of images years ago on a panoramic head with my DSLR and building 360-degree HDR spherical environments that could be mapped to the inside of spheres in Maya. The technical side is much easier with drones, but the execution is more difficult because the precision isn’t the same—it’s the difference between a nodal-calibrated tripod on the ground with rotation clicks and a satellite-stabilized drone in the sky.
As I have already described, I shoot bracketed photographs so that I can capture more detail simultaneously in the highlights and shadows. This is particularly true with sunsets and sunrises, as visual contrast is much higher at these times. Because of the current limitation on the DJI bracketing options, I often shoot five images for each frame to capture more detail in the sky and ground. If we divide 115 by 5, it comes to 23 frames to make the panorama. I actually attempted to do three levels of eight photographs in this case, but one of them didn’t come out right. In many cases it doesn’t matter if one or two don’t work if you have enough overlap. The goal is to completely cover the area that you want to capture. This really isn’t new. When Photoshop came out with auto align, we used to “spray” photos and stitch them together to see what would happen. The truth is that you don’t have to have an even number of photos in each stack in order for Photoshop to stitch them together. An even number will get you a better crop though, without losing so much of the image.
TO CAPTURE THIS KIND OF SHOT
- Set your camera to AEB (five exposures on the current DJI Fly app).
- Determine your shooting rectangle, corner to corner.
- Rotate your copter to determine your shooting radius.
- Tilt the camera to an upward position and rotate to make sure everything is in frame.
- Tilt the camera to the lowest point and rotate to make sure everything is in frame.
- Starting with the top row, shoot your brackets right to left (for sunsets on the West Coast; for sunrises, I go the opposite way). I shoot this way because the sun is much brighter and throws off the exposure settings. So I shoot the sun as the last image and sometimes use Exposure Lock for this frame (not always; only if it’s radically different than the rest of the shots).
- Tilt the camera down and shoot the middle row.
- Tilt the camera down and shoot the bottom row.
TIPS
- Wait a few seconds for the drone to stabilize between shots, or you could get blurring due to motion caused by rotating the aircraft.
- Shoot in an S-shaped pattern, like mowing the lawn.
- Use the grid overlay on the app to align the shots and plan your camera tilts.
- Use the fastest SD card you can get to minimize waiting time between shots.

4.38 Grid overlay
Don’t be disappointed if your first few attempts don’t work. It takes a lot of practice to nail these HDR panoramas, and you will get better over time. I also like to use Lightroom to at least visualize the shots. Lightroom can quickly assemble a preview so that you can tell if the image is going to work or not. Most of the time, I use Lightroom to assemble my HDR panoramas, because it’s quick. Camera Raw in Photoshop works the exact same way. You can also do this in Photoshop or a dedicated program such as PT GUI for more control.
4.39 Final HDR panorama
4.40 Final HDR panorama

4.41 Final HDR panorama

4.42 Final HDR panorama

4.43 Final HDR panorama
Burst of Shots to Get the Action
Another type of shot is the burst. This enables you to shoot multiple photographs in a very short succession. On the DJI Fly app, you are able to shoot three, five, or seven images in a burst. The camera fires the photos as quickly as it can and loads them up into a buffer. Then it processes the buffer before you can shoot again. The advantage of this is that it captures the precise moment of the action. If you are shooting an action scene, such as sports or something happening in nature, it can be very difficult to capture the exact moment something happens. If you use burst mode, you are bracketing time and you can choose the best photograph out of the group. It’s also common to create a montage of the action over time; this is very common with skateboarders, and it won’t take much hunting to find out how to do this online.
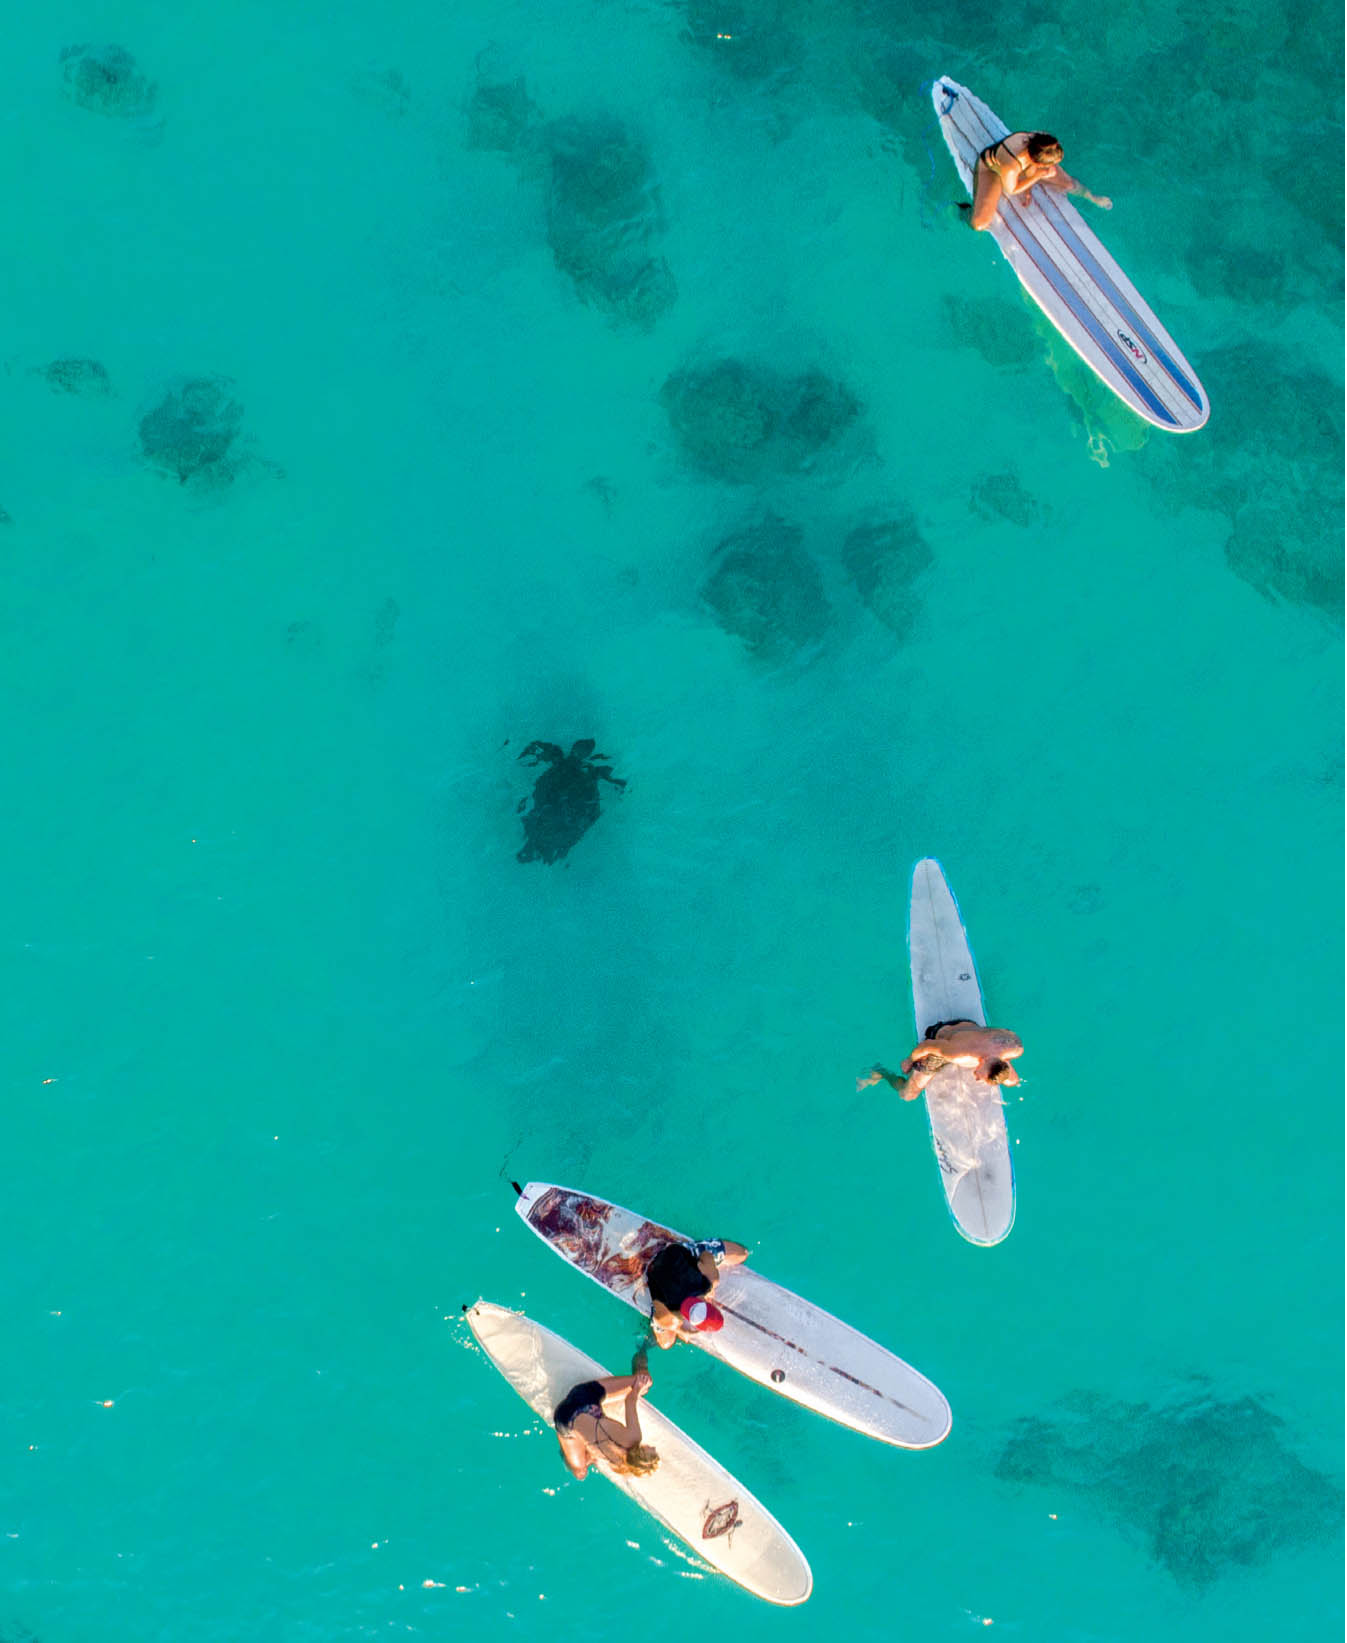
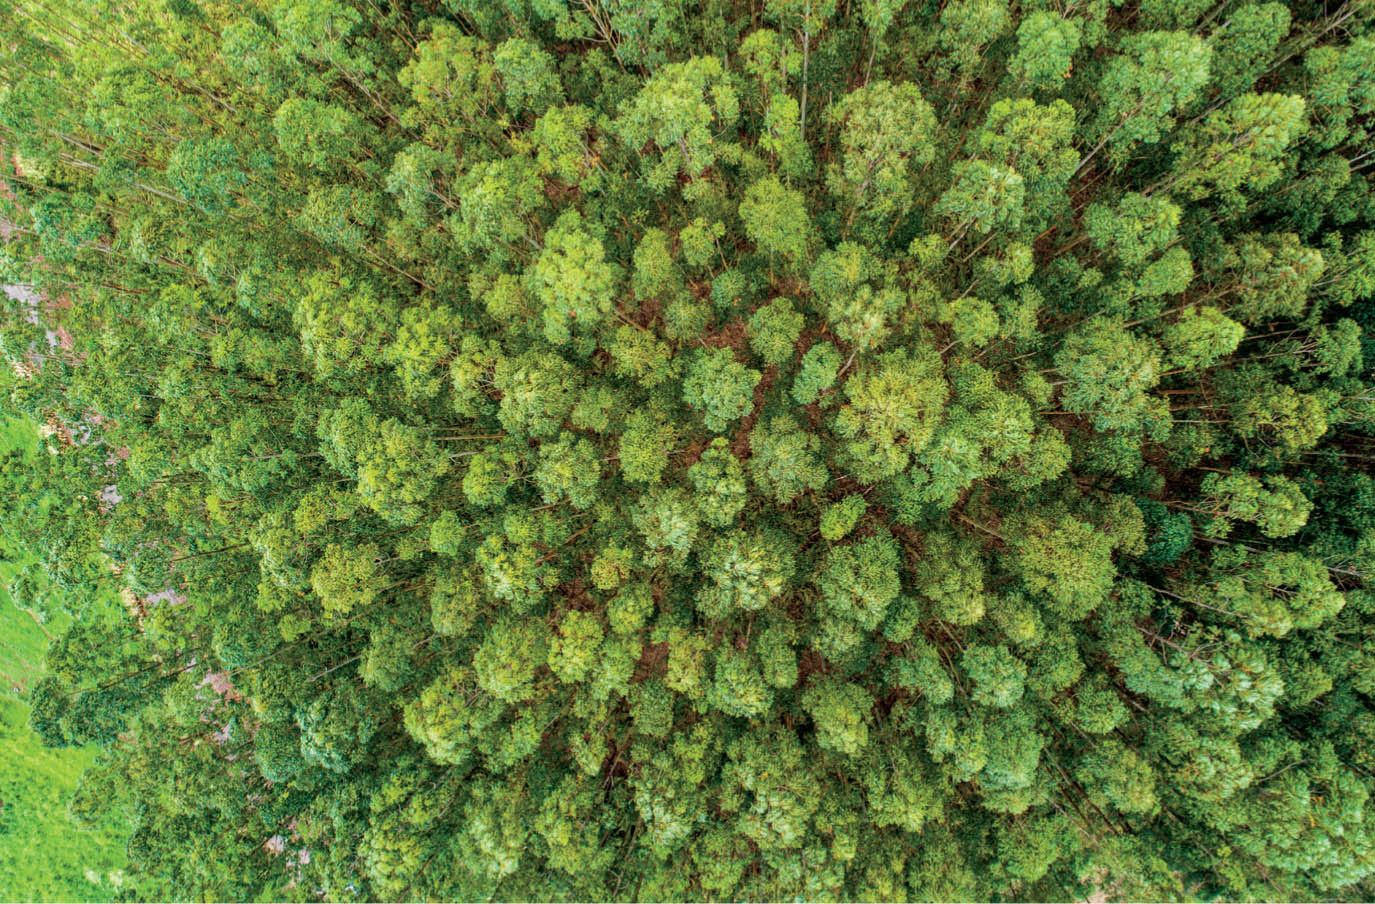
Bird’s-Eye View
Of course there is always the bird’s-eye view, also called the topdown view. This shot is distinctively aerial. It’s looking straight down on a subject from above. There is no mistaking this classic, top-down photo. People are looking at things from a view that they’ve never seen before. This has become the classic drone shot. There really isn’t a lot to be said about this shot except that you should look for unique views of shots that people have seen before. This will get their attention and stop them in their tracks. Also bear in mind, scouting a shot from the ground can be deceiving. Because something is interesting from the ground doesn’t make it interesting from the air, and vice versa. Over time, you will start to develop a sense of what might look interesting from the air.
4.44 Example of a bird’s-eye view shot
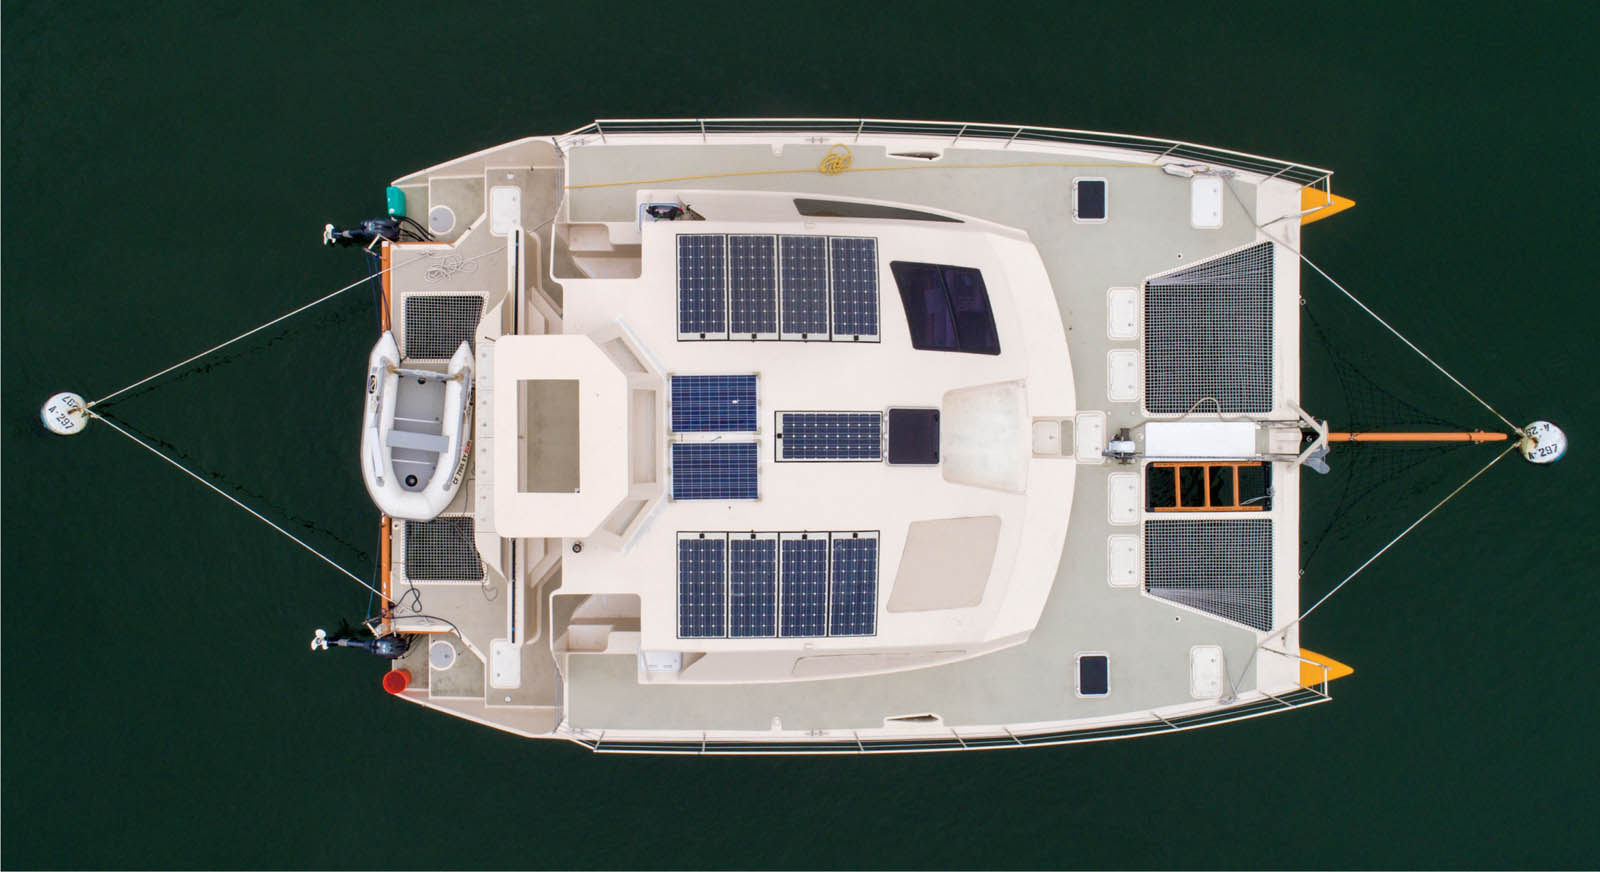
4.45 Example of a bird’s-eye view shot
4.46 Example of a bird’s-eye view shot
4.47 Example of a bird’s-eye view shot

4.48 Example of a bird’s-eye view shot
4.49 Example of a bird’s-eye view shot
4.50 Example of a bird’s-eye view shot