Head Games:
Retouching Portraits
Photographer: Scott Kelby
Exposure: 1/8
Focal Length: 75mm
Aperture Value: ƒ/5.0
This should be called "The Kevin Ames Chapter." Actually, it really should be called the "I Hate Kevin Ames Chapter" because I already had this entire chapter written, until I stopped by Kevin's studio in Atlanta one night to show him the rough draft of the book. What should have been a 15-minute visit went on until after midnight with him showing me some amazing portrait retouching tricks. So I had to go back home and basically rewrite, update, and tweak the entire chapter. Which, I can tell you, is no fun once you think a chapter is done and you're about a week from deadline. But the stuff he showed me was so cool, I literally couldn't sleep that night because I knew his techniques would take this chapter to the next level. And even though Kevin was incredibly gracious to let me share his techniques with my readers (that's the kind of guy Kevin is), there was no real way I was going to name this chapter "The Kevin Ames Chapter." That's when it became clear to me—I would have to kill him. But then I remembered Kevin had mentioned that Jim DiVitale had developed some of the techniques that he had showed me, so now it was going to be a double murder. I thought, "Hey, they both live in Atlanta, how hard could this be?" but the more I thought about it, what with having to fly back up there and having to fly on Delta (stuffed in like human cattle), I figured I'd just give them the credit they deserve and go on with my life. Thus far, it's worked out okay.
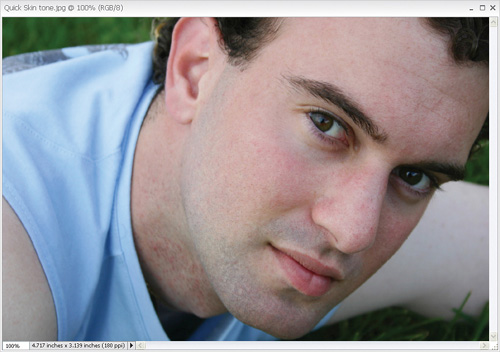
Quick Skin Tone Fix
In photos of people, the most important thing is that the skin tone looks good. That's because it's really hard for someone looking at your photo to determine if the grass is exactly the right shade of green or if the sky is the right shade of blue; but if the skin tone is off, it sticks out like a sore thumb (which would be red if it were really sore). Here's a quick fix to get your skin tones patched up in a hurry:
Step One
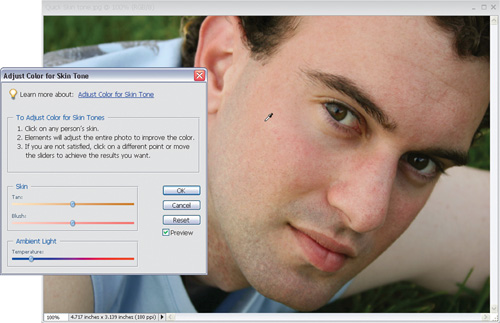
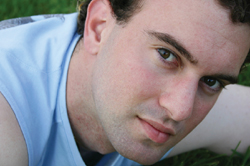
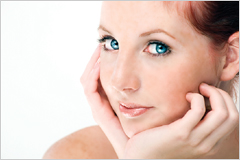
Open an image in which the flesh tone looks like it needs adjusting. In the example shown here, the skin tone looks bluish and a little bit pale, so it definitely needs a fix to look right.
©ISTOCKPHOTO/PETER CHEN
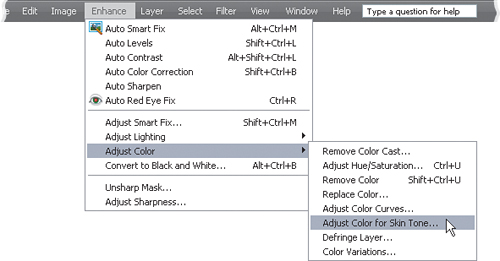
Step Two
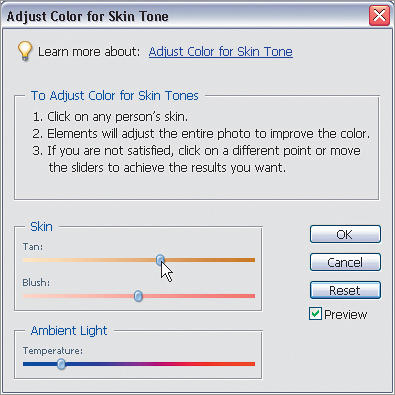
Go under the Enhance menu, under Adjust Color, and choose Adjust Color for Skin Tone.
Step Three
When the Adjust Color for Skin Tone dialog appears, move your cursor over an area of skin tone and click once to set the skin tone for the image. If you don't like your first results, click in a different area of skin tone until you find a skin-tone adjustment you're happy with.
Step Four
You can also manually tweak the skin tone by using the Tan and Blush sliders, and you can control the overall tint of the light by dragging the Temperature slider to the left to make the skin tones cooler or to the right to make them warmer. Note: This skin-tone adjustment affects more than just skin—it usually warms the entire photo. If that creates a problem, use one of the selection tools (even the Lasso tool) to put a selection around the skin-tone areas first, add a 2-pixel Feather (under the Select menu), and then use the Adjust Color for Skin Tone command.
Before
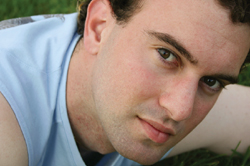
After
Removing Blemishes
When it comes to removing blemishes, acne, or any other imperfections on the skin, our goal is to maintain as much of the original skin texture as possible. That way, our retouch doesn't look pasty and obvious. Here are three techniques I use that work nicely.
Technique #1
Step One
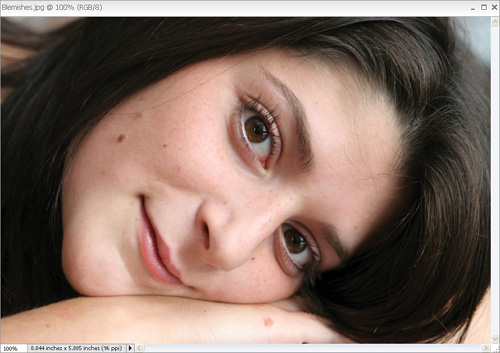
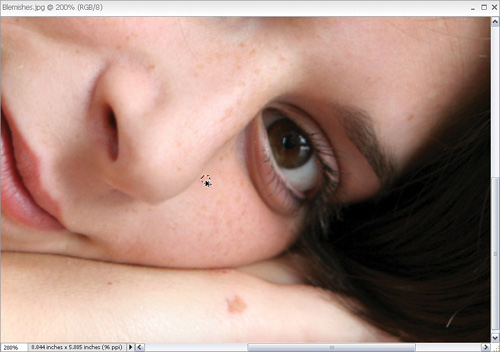
Open a photo containing some skin imperfections you want to remove.
©ISTOCKPHOTO/MATTHEW GOUGH
Step Two
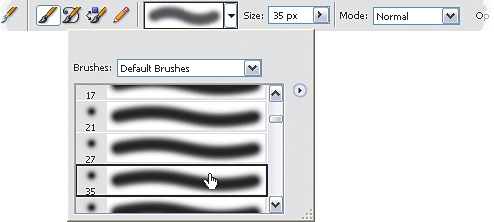
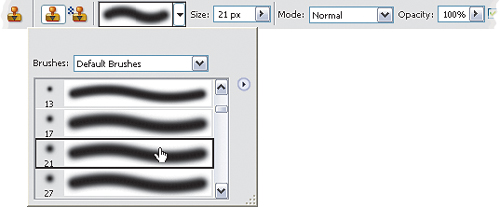
Choose the Clone Stamp tool from the Toolbox (or press the S key). From the Brush Picker (which you access by clicking on the Brush thumbnail in the Options Bar), choose a soft-edged brush that's slightly larger than the blemish you want to remove.

Tip
Once you're working, if you need to quickly adjust the brush size, use the Bracket keys on your keyboard: the Left Bracket key ([) makes your brush smaller; the Right (]) larger.
Step Three
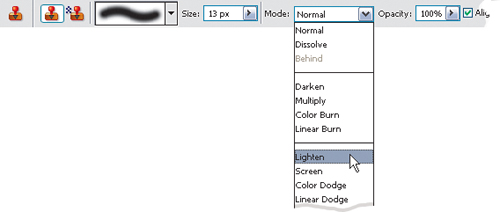
In the Options Bar, change the Mode pop-up menu of the Clone Stamp tool to Lighten. With its Mode set to Lighten, the Clone Stamp will affect only pixels that are darker than the area you're going to sample. The lighter pixels (the regular flesh tone) will pretty much stay intact, and only the darker pixels (the blemish) will be affected.
Step Four
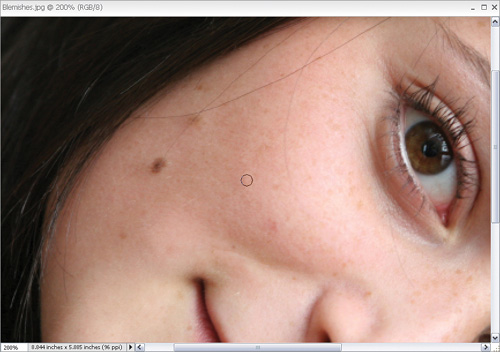
Press the letter Z to access the Zoom tool and zoom in if needed, and then switch back to the Clone Stamp tool. Find an area right near the blemish that's pretty clean (no visible spots, blemishes, etc.), hold the Alt key, and click once. The Clone Stamp will now sample the skin from that area. Try to make sure this sample area is very near the blemish so the skin tones will match. If you move too far away, you risk having your repair appear in a slightly different color, which is a dead giveaway of a repair.

Step Five
Now, move your cursor directly over the blemish and click just once. Don't paint! Just click. The click will do it—it will remove the blemish instantly, while leaving the skin texture intact. But what if the blemish is lighter than the skin, rather than darker? Simply go to the Options Bar and change the Mode of the Clone Stamp tool to Darken instead of Lighten—it's that easy. On to Technique #2.
Technique #2
Step One
Press L to switch to the Lasso tool. Find a clean area (no blemishes, spots, etc.) near the blemish that you want to remove. In this clean area, use the Lasso tool to make a selection that is slightly larger than the blemish. (Note: If you make a mistake and need to add to your selection, press-and-hold the Shift key while selecting with the Lasso tool; if you need to remove parts of your selection, press-and-hold the Alt key.)

Step Two
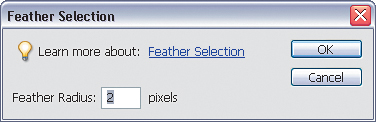
Once your selection is in place, go under the Select menu and choose Feather. When the Feather Selection dialog appears, enter 2 pixels as your Feather Radius and click OK. Feathering blurs the edges of our selected area, which will help hide the traces of our retouch. Feathering (softening) the edges of a selection is a very important part of facial retouching, and you'll do this quite a bit to "hide your tracks," so to speak.
Step Three
Now that you've softened the edges of the selection, hold Control-Alt, and you'll see your cursor change into two arrowheads—a white one with a black one overlapping it. This is telling you that you're about to copy the selected area. Click within your selection and drag this clean skin area right over the blemish to completely cover it. When the clean area covers the blemish, release the keys (and the mouse button, of course) to drop this selected area down onto your photo. Now, press Control-D to deselect. The blemish is gone. Best of all, because you dragged skin over from a nearby area, the full skin texture is perfectly intact, making your repair nearly impossible to detect.
Technique #3
Step One
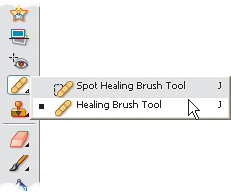
Get the Spot Healing Brush tool from the Toolbox (or just press the J key). We'll use it on the blemishes—and you'll see it works brilliantly.
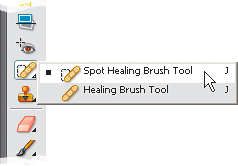
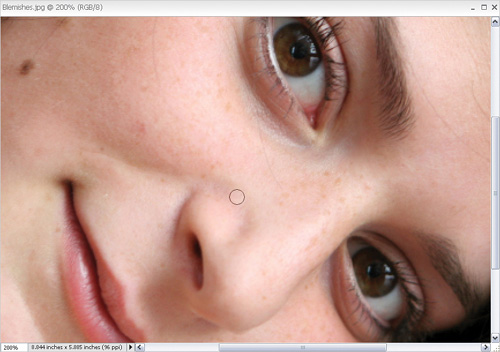
Step Two
Just move over the blemish, and click the tool once. That's it. You've got to love a technique that only has two steps.
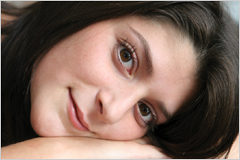
Before

After, using all three techniques
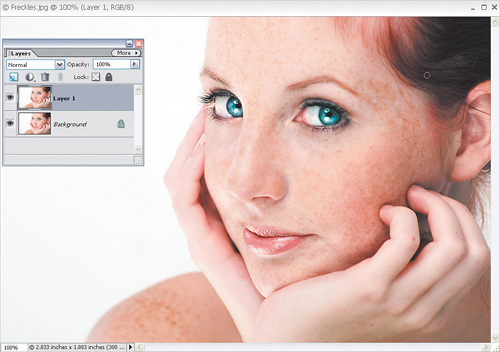
Lessening Freckles or Facial Acne
This technique is popular with senior class portrait photographers who need to lessen or remove large areas of acne, pockmarks, or freckles from their subjects. This is especially useful when you have a lot of photos to retouch and don't have the time to use the methods shown previously, where you deal with each blemish individually.
Step One
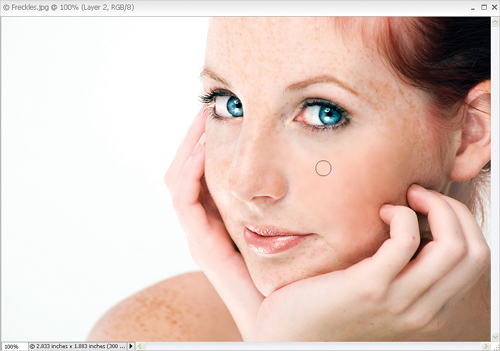
Open the photo that you need to retouch. Make a duplicate of the Background layer by going to the Layer menu, under New, and choosing Layer via Copy (or just pressing Control-J). We'll perform our retouch on this duplicate of the Background layer, named "Layer 1."
©ISTOCKPHOTO/KATERYNA GOVORUSHCHENKO
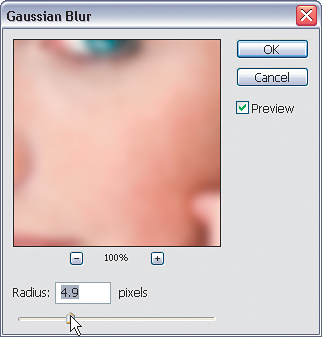
Step Two
Go under the Filter menu, under Blur, and choose Gaussian Blur. When the Gaussian Blur dialog appears, drag the slider all the way to the left, then drag it slowly to the right until you see the freckles blurred away. The photo should look very blurry, but we'll fix that in just a minute, so don't let that throw you off—make sure it's blurry enough that the freckles are no longer visible. Click OK.
Step Three
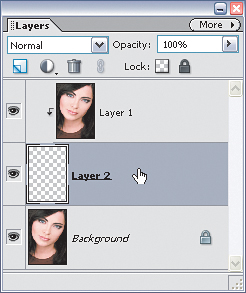
Press-and-hold the Control key and click once on the Create a New Layer icon at the top of the Layers palette. This creates a new blank layer (Layer 2) directly beneath your current layer (the blurry Layer 1).
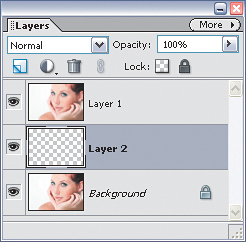
Step Four
Now, in the Layers palette, click back on the top layer (the blurry Layer 1), then press Control-G to group the blurry layer with the blank layer beneath it (Layer 2). Doing this removes all the blurriness from view (and that's exactly what we want to do at this point).
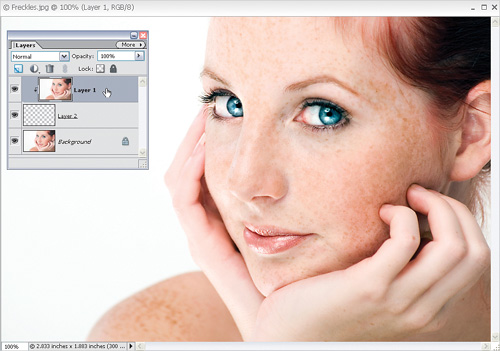
Step Five
In the Layers palette, click on the middle layer (the blank Layer 2), as you're going to paint on this layer. Press the letter D to set your Foreground color to black. Press the letter B to switch to the Brush tool, then click on the Brush thumbnail in the Options Bar, and from the Brush Picker choose a soft-edged brush.
Step Six
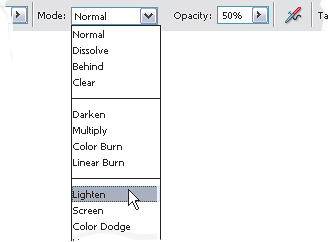
Lower the Opacity setting of your brush in the Options Bar to 50%, and change the Mode pop-up menu from Normal to Lighten. Now when you paint, it will affect only the pixels that are darker than the blurred state. Ahhh, do you see where this is going?
Step Seven
Now you can paint over the freckle areas, and as you paint you'll see them diminish quite a bit. If they diminish too much, and the person looks "too clean," undo (Control-Z), then lower the Opacity of the brush to 25% and try again.
Before
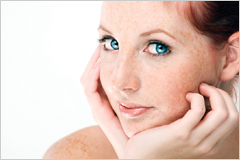
After
Removing Dark Circles under Eyes
Here's a quick technique for removing the dark circles that sometimes appear under a person's eyes—especially after a hard night of drinking. At least, that's what I've been told.
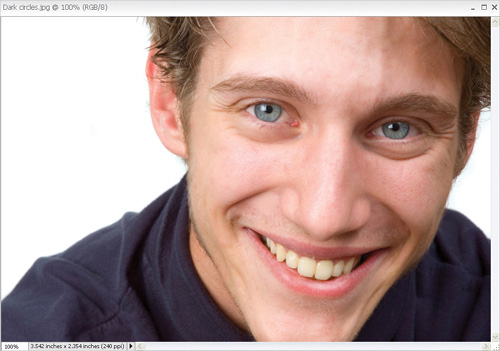
Step One
Open the photo that has the dark circles you want to lessen. Select the Clone Stamp tool in the Toolbox (or press the S key). Then, click on the Brush thumbnail in the Options Bar to open the Brush Picker and choose a soft-edged brush that's half as wide as the area you want to repair. Note: Press the letter Z to switch to the Zoom tool and zoom in if needed.
©ISTOCKPHOTO/IVAR TEUNISSEN
Step Two
Go to the Options Bar and lower the Opacity of the Clone Stamp tool to 50%. Then, change the Mode pop-up menu to Lighten (so you'll only affect areas that are darker than where you'll sample from).

Step Three
Press-and-hold the Alt key and click once in an area near the eye that isn't affected by the dark circles. If the cheeks aren't too rosy, you can click there, but more likely you'll click (sample) on an area just below the dark circles under the eyes.

Step Four
Now, take the Clone Stamp tool and paint over the dark circles to lessen or remove them. It may take two or more strokes for the dark circles to pretty much disappear, so don't be afraid to go back over the same spot if the first stroke didn't work. Note: If you want the dark circles to completely disappear, try using the Healing Brush tool (J) from the Toolbox. Simply Alt-click the Healing Brush in a light area under the dark circles, and then paint the circles away.
Before

After

Removing or Lessening Wrinkles
This is a great trick for removing wrinkles, with a little twist at the end (courtesy of my buddy Kevin Ames) that helps make the technique look more realistic. His little tweak makes a big difference because (depending on the age of the subject) removing every wrinkle would probably make the photo look obviously retouched (in other words, if you're retouching someone in their 70s and you make them look as if they're 20 years old, it's just going to look weird). Here's how to get a more realistic wrinkle removal:
Step One
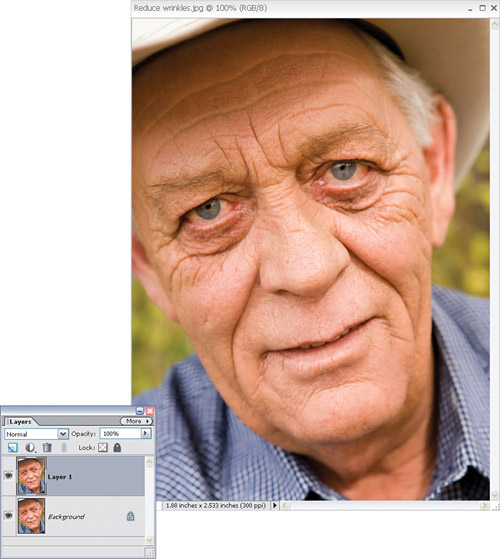
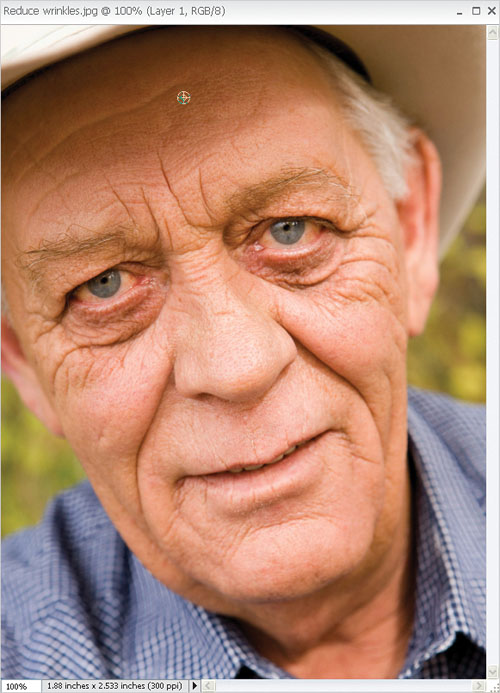
Open the photo that needs some wrinkles or crow's-feet lessened or removed.
©ISTOCKPHOTO/JOEY NELSON
Step Two
Duplicate the Background layer by going to the Layer menu, under New, and choosing Layer via Copy (or pressing Control-J). You'll perform your "wrinkle removal" on this duplicate layer, named "Layer 1" in the Layers palette.
Step Three
Get the Healing Brush tool from the Toolbox (or press the J key). Then, choose a soft-edged brush from the Brush Picker (which opens when you click the Brush thumbnail in the Options Bar). Choose a brush size that's close to the size of the wrinkles you want to remove.
Step Four
Find a clean area that's somewhere near the wrinkles (perhaps the upper cheek if you're removing crow's-feet, or if you're removing forehead wrinkles, perhaps just above or below the wrinkle). Hold the Alt key and click once to sample the skin texture from that area. Now, take the Healing Brush tool and paint over the wrinkles. As you paint, the wrinkles will disappear, yet the texture and detail of the skin remains intact, which is why this tool is so amazing.
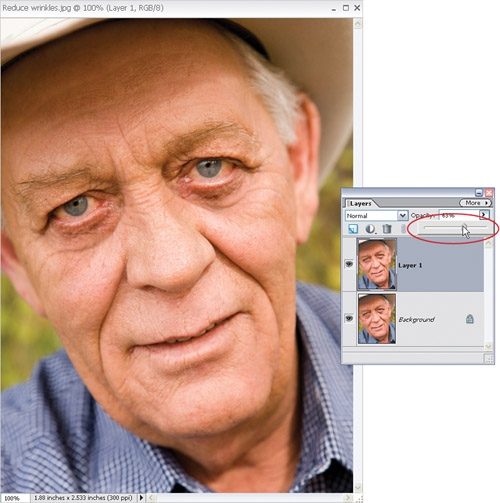
Step Five
Now that the wrinkles are gone, it's time to bring just enough of them back to make it look realistic. Simply go to the Layers palette and reduce the Opacity of this layer to bring back some of the original wrinkles. This lets a small amount of the original photo (the Background layer, with all its wrinkles still intact) show through. Keep lowering the Opacity until you see the wrinkles, but not nearly as prominent as before.
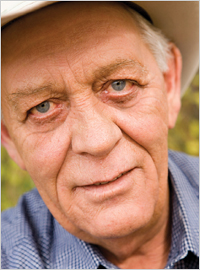
Before

After
Whitening the Eyes
This is a great little technique for quickly whitening the whites of the eyes, and it has the added benefit of removing any redness in the eye along the way. Note: By redness, I mean the "bloodshot-I-stayed-up-too-late" type of redness, not the "red-eye-from-a-flash-mounted-above-the-lens" type of redness, which is addressed in Chapter 5.
Step One
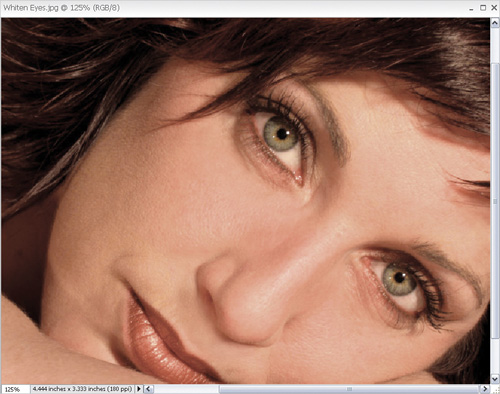
Open the photo where the subject's eyes need whitening. Press the letter Z to switch to the Zoom tool and zoom in if needed.
©ISTOCKPHOTO/STEPHANE DAOUST
Step Two
Choose the Lasso tool from the Toolbox (or press the L key) and draw a selection around one side of whites in one of the eyes. Press-and-hold the Shift key and draw selections around the other area of whites in the same eye and the whites of the other eye, until all the whites are selected in both eyes.

Step Three
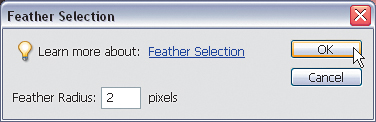
Go under the Select menu and choose Feather. You'll need to use Feather to soften the edges of your selection so your retouch isn't obvious. In the Feather Selection dialog, enter 2 pixels and click OK.
Step Four
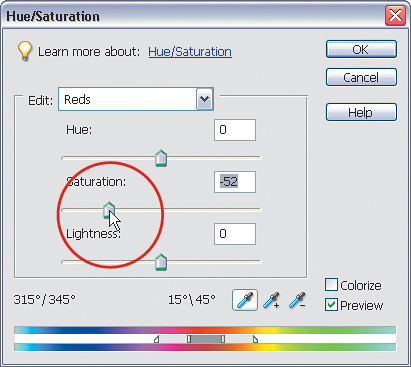
Go under the Enhance menu, under Adjust Color, and choose Adjust Hue/Saturation. When the Hue/Saturation dialog appears, choose Reds from the Edit pop-up menu at the top (to edit just the reds in the selection). Now, drag the Saturation slider to the left to lower the amount of saturation in the reds (which removes any bloodshot appearance in the whites of the eyes).
Step Five
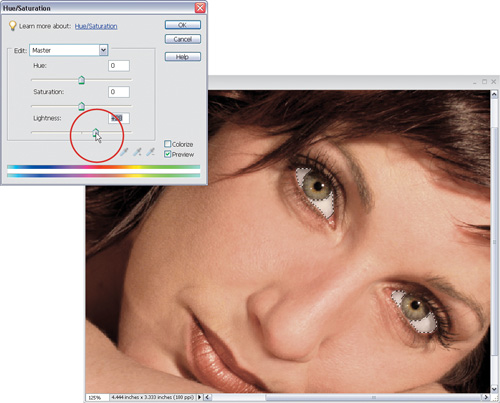
While you're still in the Hue/Saturation dialog, from the Edit menu switch back to Master. Drag the Lightness slider to the right to increase the lightness of the whites of the eyes. Click OK in the Hue/Saturation dialog to apply your adjustments, and then press Control-D to deselect and complete the enhancement.
Before

After
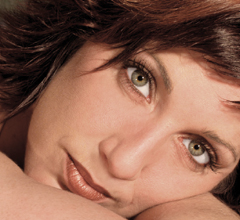
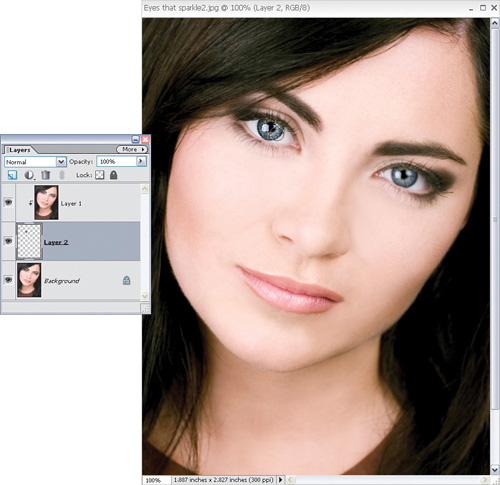
Making Eyes that Sparkle
This is another one of those 30-second miracles for enhancing the eyes. This technique makes the eyes seem to sparkle by accentuating the catch lights, and generally draws attention to the eyes by making them look sharp and crisp (crisp in the "sharp and clean" sense, not crisp in the "I-burned-my-retina-while-looking-at-the-sun" sense).
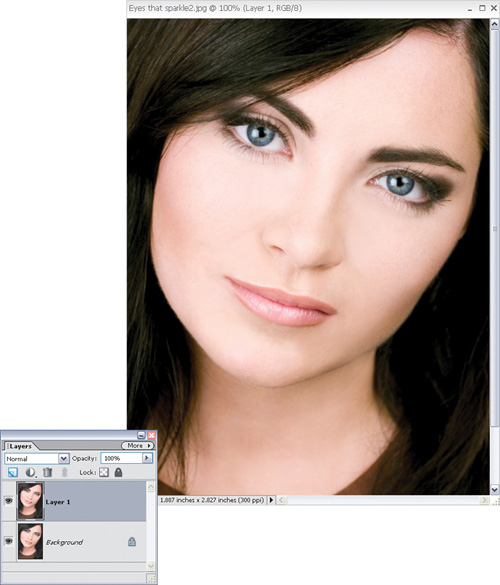
Step One
Open the photo that you want to retouch. Make a duplicate of the Background layer by going under the Layer menu, under New, and choosing Layer via Copy (or pressing Control-J), which creates a new layer named "Layer 1." Note: Press the Z key to switch to the Zoom tool and zoom in if needed.
©ISTOCKPHOTO/KARINA TISCHLINGER
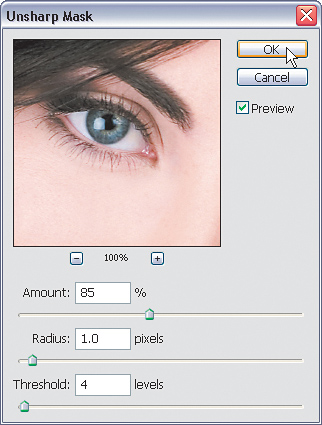
Step Two
Go under the Enhance menu and choose Unsharp Mask. (It sounds like this filter would make things blurry, but it's actually for sharpening photos.) When the Unsharp Mask dialog appears, enter your settings. (If you need some settings, go to the first technique, named "Basic Sharpening," in Chapter 11, or you can use my favorite all-around sharpening settings of Amount: 85%, Radius: 1, and Threshold: 4 for now.) Then click OK to sharpen the entire photo.
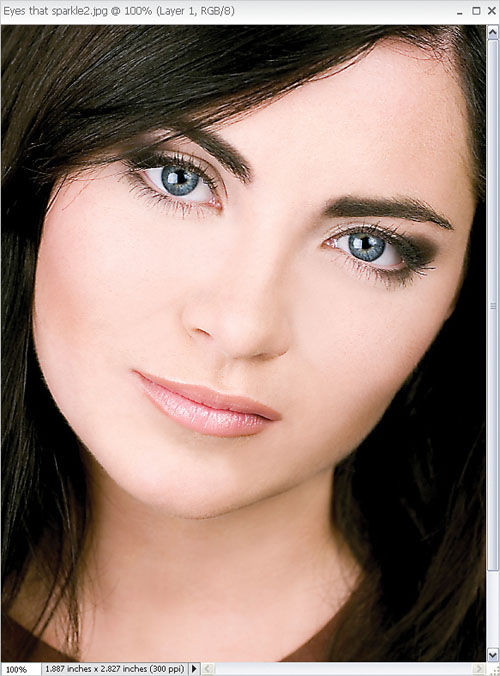
Step Three
After you've applied the Unsharp Mask filter, apply it again using the same settings by pressing Control-F, and then apply it one more time using the same keyboard shortcut (you'll apply it three times in all). The eyes will probably look nice and crisp at this point, but the rest of the person will be severely oversharpened, and you'll probably see lots of noise and other unpleasant artifacts.
Step Four
Hold the Control key and click once on the Create a New Layer icon at the top of the Layers palette. This creates a new blank layer directly beneath your sharpened layer. Now, in the Layers palette, click back on the top layer (the sharpened layer), then press Control-G to group the sharpened layer with the blank layer beneath it. This removes all the visible sharpness (at least for now). In the Layers palette, click on the middle layer (the blank layer), as you're going to paint on this layer.
Step Five
Press the letter D to set your Foreground color to black. Then, press B to switch to the Brush tool. Click on the Brush thumbnail in the Options Bar to open the Brush Picker, and choose a soft-edged brush that's a little smaller than your subject's eyes. Now paint over just the irises and pupils of the eyes to reveal the sharpening, making the eyes really sparkle and completing the effect.
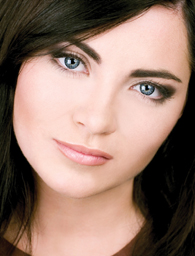
Before

After
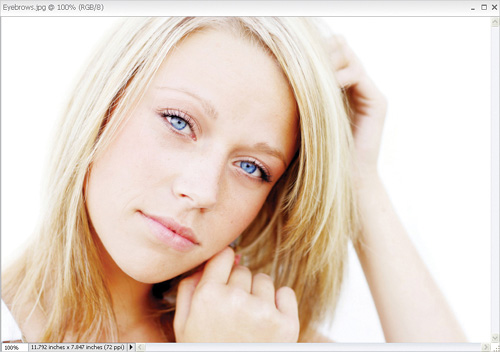
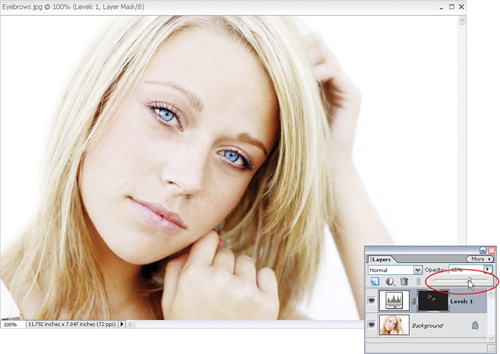
Enhancing Eyebrows and Eyelashes
Let's face it—not every face is perfect, so we sometimes resort to using makeup to enhance our facial features. So what happens when the model for your photo shoot forgets to wear mascara—or worse yet—has transparent eyebrows? Well, don't browbeat her (okay, that was lame)—just fix it in Elements.
Step One
Open the photo that you want to enhance.
©ISTOCKPHOTO/AmANDA ROHDE
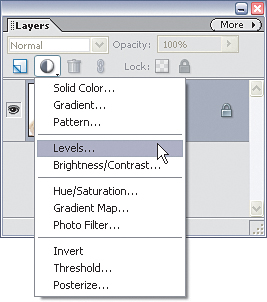
Step Two
Go to the Layers palette and choose Levels from the Create Adjustment Layer pop-up menu (it's the half-white/half-black circle icon at the top of the palette).
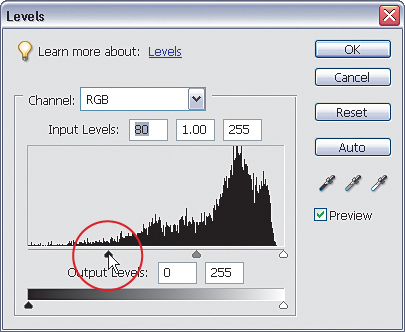
Step Three
When the Levels dialog appears, drag the shadow Input Levels slider to the right to darken the image. The entire image will darken, but don't worry, we'll fix that later—just focus on the eyebrows and eyelashes as you drag the slider. When the eyebrows and eyelashes look good to you, click OK.
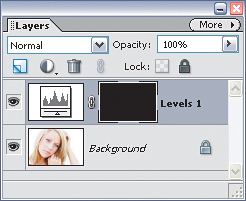
Step Four
Press the letter X until your Foreground color is black. Then, press Alt-Backspace to fill your adjustment layer mask with black. This hides the Levels adjustment you just made, revealing your original Background layer.
Step Five
Now, press the letter B to switch to the Brush tool. Click on the Brush thumbnail in the Options Bar and in the resulting Brush Picker choose a small, soft-edged brush that's the same size as the largest area of the eyebrows. Press the X key again to switch your Foreground color to white and begin painting over the eyebrows. As you get to smaller areas of the eyebrows, press the Left Bracket key ([) to decrease the size of your brush.

Step Six
If the eyebrows are too dark, don't sweat it—we'll fix that later. Now let's move on to the eyelashes, so press the Left Bracket key ([) to decrease the size of your Brush tool. (You may have to press the Bracket key several times to make the brush the size of the eyelashes.)
Step Seven
With your small Brush tool, lightly paint over the eyelashes on both eyes. Note: If needed, press the Z key to switch to the Zoom tool and zoom into the image for a better look. Then, press the B key to switch back to the Brush tool and begin painting.

Step Eight
Now the effect may be too intense, so lower the Opacity in the Layers palette to around 65% or until the effect looks natural.
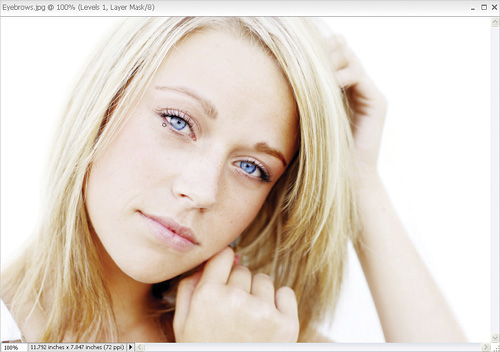
Before

After

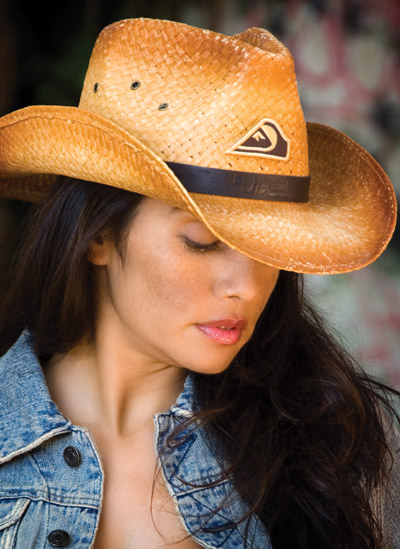
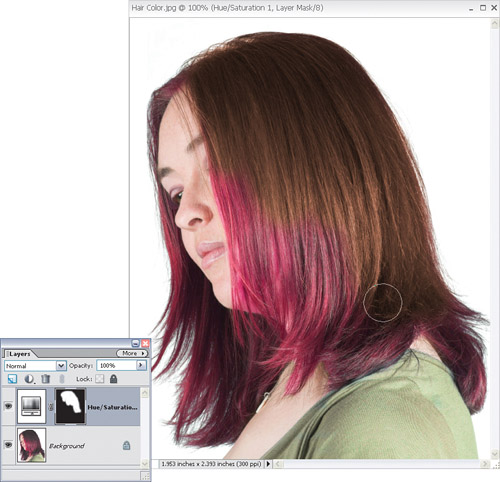
Colorizing Hair
This technique (that I learned from Kevin Ames) gives you maximum control and flexibility while changing or adjusting hair color, and because of the use of an adjustment layer, you're not "bruising the pixels." Instead, you're following the enlightened path of "non-destructive retouching."
Step One
Open the photo you want to retouch. Choose Hue/Saturation from the Create Adjustment Layer pop-up menu at the top of the Layers palette.
©ISTOCKPHOTO
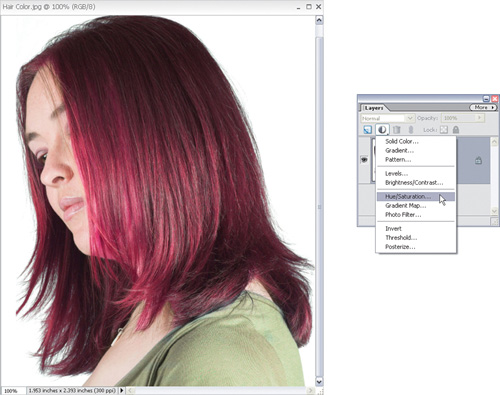
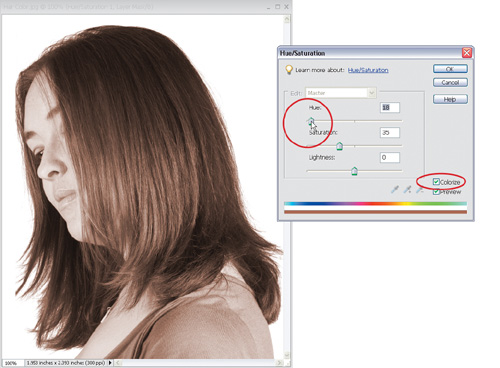
Step Two
When the dialog appears, turn on the Colorize checkbox (in the bottom right-hand corner of the dialog) and then drag the Hue slider to the approximate color you'd like for the hair. Doing this will colorize the entire image, but don't let that throw you—just focus on the hair color. You may also have to drag the Saturation slider to the right a bit to make the color more vibrant. Now, click OK and the entire photo will have a heavy color cast over it.
Step Three
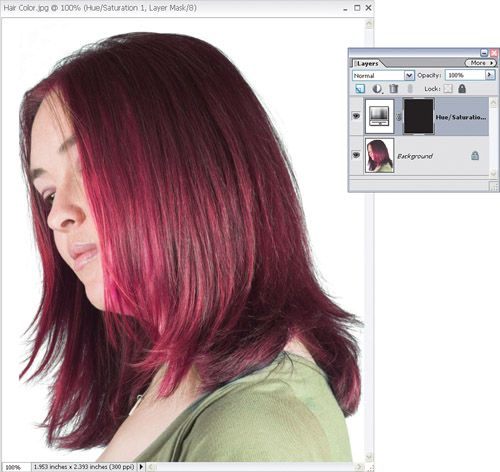
Press the letter X to change your Foreground color to black, and then press Alt-Backspace to fill the layer mask of the Hue/Saturation adjustment layer with black. Doing so removes the colorized tint from the photo.
Step Four
Press B to switch to the Brush tool. Choose a soft-edged brush from the Brush Picker (by clicking on the Brush thumbnail in the Options Bar). Press X again to set your Foreground color to white and begin painting over the hair. As you paint, the tint you added with Hue/Saturation is painted back in. Once the hair is fully painted, change the layer blend mode of your Hue/Saturation adjustment layer to Color, then lower the Opacity in the Layers palette until the hair color looks natural.
Before
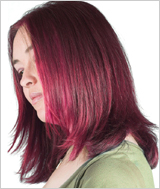
After

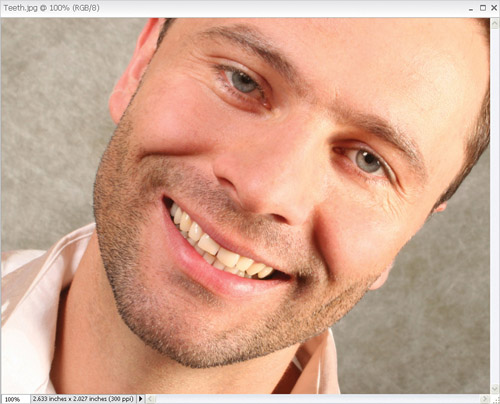
Whitening and Brightening Teeth
This really should be called "Removing Yellowing, Then Whitening Teeth" because almost everyone has some yellowing, so we remove that first before we move on to the whitening process. This is a simple technique, but the results have a big impact on the overall look of the portrait, and that's why I do this to every single portrait where the subject is smiling.
Step One
Open the photo you need to retouch. Press Z to switch to the Zoom tool and zoom in if needed.
©ISTOCKPHOTO/MARCIN BALCERZAK
Step Two
Press L to switch to the Lasso tool, and carefully draw a selection around the teeth, being careful not to select any of the gums or lips. If you've missed a spot, press-and-hold Shift while using the Lasso tool to add to your selection, or press-and-hold Alt and drag the Lasso to remove parts of the selection.
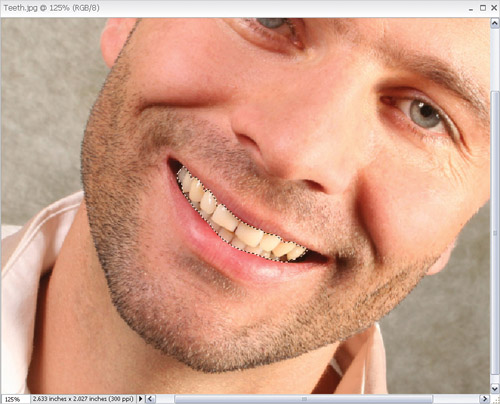
Step Three
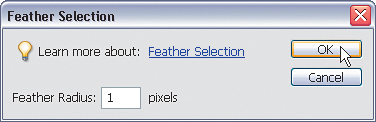
Go under the Select menu and choose Feather. When the Feather Selection dialog appears, enter 1 pixel and click OK to smooth the edges of your selection. That way, you won't see a hard edge along the area you selected once you've whitened the teeth.
Step Four
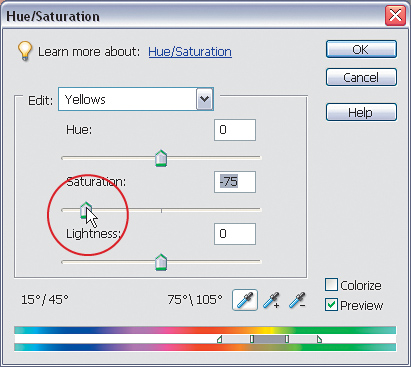
Go under the Enhance menu, under Adjust Color, and choose Adjust Hue/Saturation. When the dialog appears, choose Yellows from the Edit pop-up menu at the top. Then, drag the Saturation slider to the left to remove the yellowing from the teeth.
Step Five
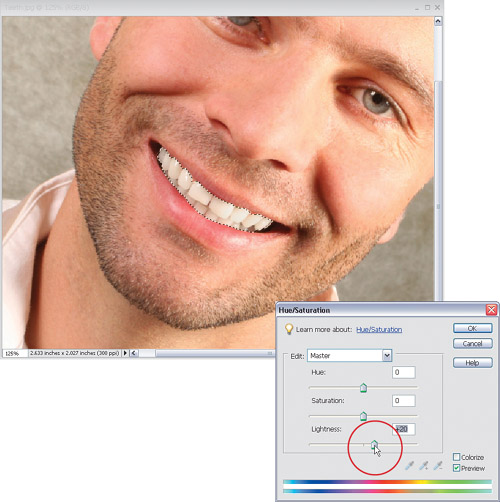
Now that the yellowing is removed, switch the Edit pop-up menu back to Master, and drag the Lightness slider to the right to whiten and brighten the teeth. Be careful not to drag it too far, or the retouch will be obvious. Click OK in the Hue/Saturation dialog and your enhancements will be applied. Press Control-D to deselect and see your finished retouch.
Before
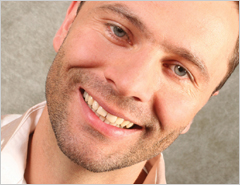
After
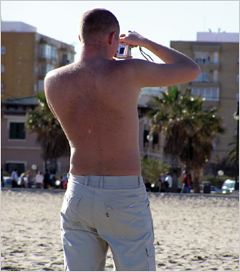
Removing Hot Spots
If you've ever had to deal with hot spots (shiny areas on your subject's face caused by uneven lighting or the flash reflecting off shiny surfaces, making your subject look as if they're sweating), you know they can be pretty tough to correct. That is, unless you know this trick.
Step One
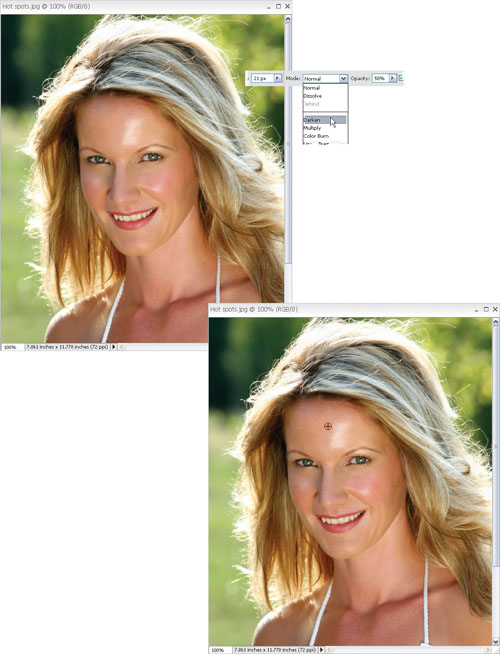
Open the photo that has hot spots that need to be toned down. Press the Z key to switch to the Zoom tool and zoom in if needed. Select the Clone Stamp tool in the Toolbox (or press the S key). Go to the Options Bar and change the Mode pop-up menu from Normal to Darken and lower the Opacity to 50%. By changing the Mode to Darken, we'll only affect pixels that are lighter than the area we're sampling, and those lighter pixels are the hot spots.
©ISTOCKPHOTO/ZDENKA MICKA
Step Two
Choose a medium, soft-edged brush from the Brush Picker (found by clicking the Brush thumbnail in the Options Bar), then hold the Alt key and click once in a clean area of skin (an area with no hot spots). This will be your sample area, or reference point, so Elements knows to affect only pixels that are lighter than this.
Step Three
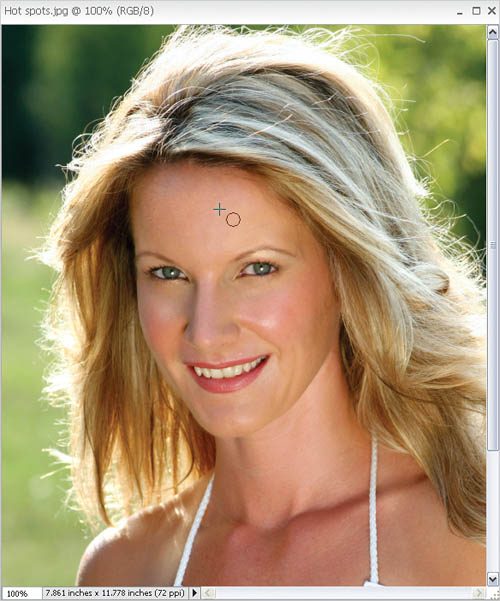
Start gently painting over the hot spot areas with the Clone Stamp tool, and as you do, the hot spots will fade away.
Step Four
As you work on different hot spots, you'll have to resample (Alt-click) on nearby areas of skin so the skin tone matches. For example, when you move on to another hot spot, sample an area of skin near the new hot spot that you'll be working on.
Step Five
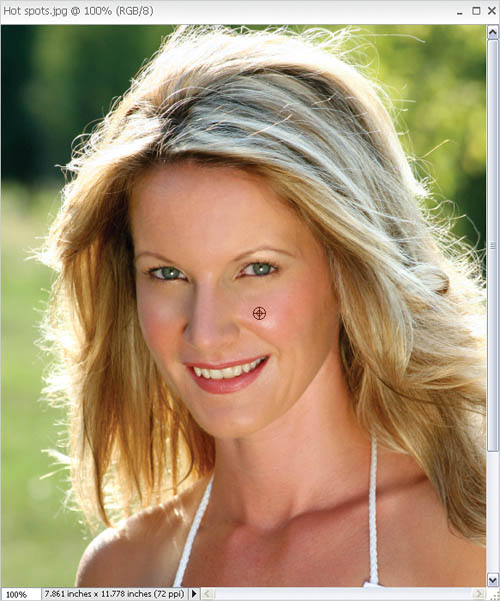
It's amazing what you can do in 60 seconds of hot-spot retouching using this technique. Notice how the hot spots are now gone as I paint them away. Much of this was done with brush strokes, but just clicking once or twice with the Clone Stamp tool (as I'm doing here) often works, too.

Before
After
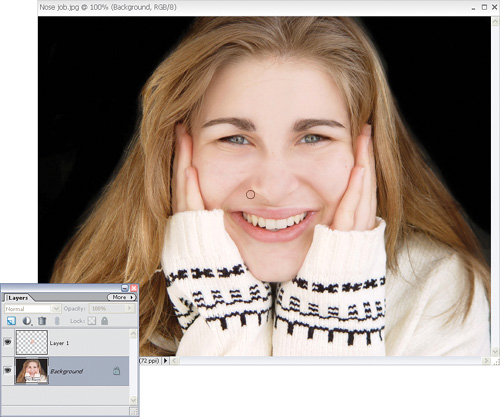
Digital Nose Job
This is a very simple technique for decreasing the size of your subject's nose by 15% to 20%. The actual shrinking of the nose is a breeze and only takes a minute or two—you may spend a little bit of time cloning away the sides of the original nose, but since the new nose winds up on its own layer, it makes this cloning a lot easier. Here's how it's done:
Step One
Open the photo that you want to retouch. Press the Z key to switch to the Zoom tool and zoom in if needed. Press L to switch to the Lasso tool, and draw a loose selection around your subject's nose. Make sure you don't make this selection too close or too precise—you need to capture some flesh-tone area around the nose as well.
©ISTOCKPHOTO/ROBERTA OSBORNE

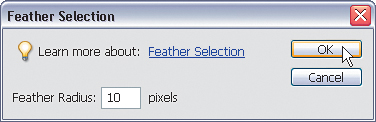
Step Two
To soften the edges of your selection, go under the Select menu and choose Feather. When the Feather Selection dialog appears, for Feather Radius enter 10 pixels (for high-res, 300-ppi images, enter 22 pixels), then click OK. Now, go under the Layer menu, under New, and choose Layer via Copy. This will copy just the selected area to a new layer (Layer 1).
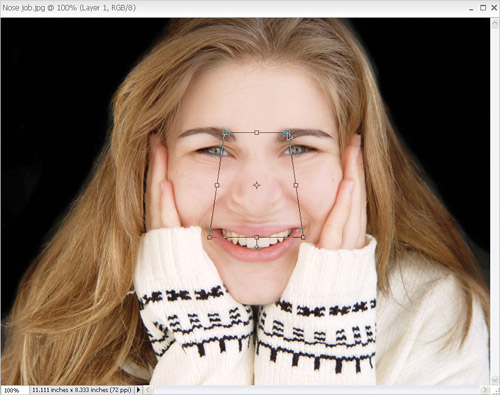
Step Three
Press Control-T to bring up the Free Transform bounding box. Hold Control-Alt-Shift, then grab the upper right-hand corner point of the bounding box and drag inward to add a perspective effect to the nose. Doing this gives the person a pug nose, so release all the keys, then grab the top-center point and drag straight downward to undo the "pug effect" and make the nose look natural again, but now it's smaller.
Step Four
When the new size looks about right, press Enter to lock in your changes. If any of the old nose peeks out from behind the new nose, go to the Layers palette, click on the Background layer, and then use the Clone Stamp tool (S) to clone away those areas: Sample an area next to the nose by Alt-clicking, and then clone right over the old nose, completing the effect.
Before
After

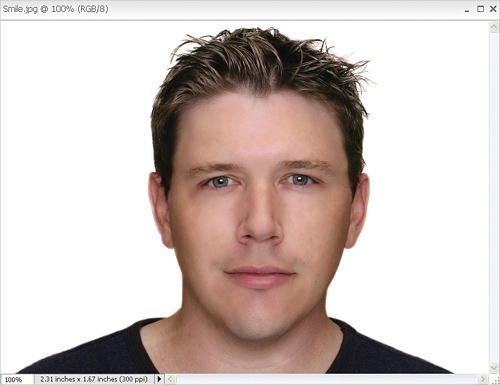
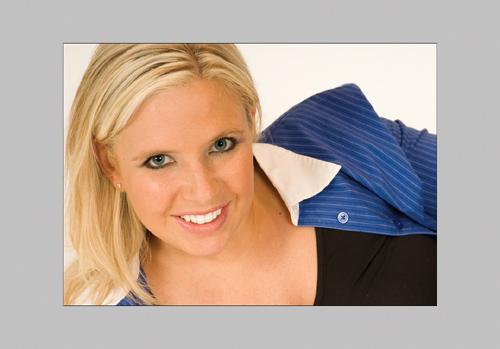
Transforming a Frown into a Smile
This is a pretty slick technique for taking a photo where the subject was frowning and tweaking it just a bit to add a pleasant smile—which can often save a photo that otherwise would've been ignored.
Step One
Open the photo that you want to retouch.
©ISTOCKPHOTO/FLOYD ANDERSON
Step Two
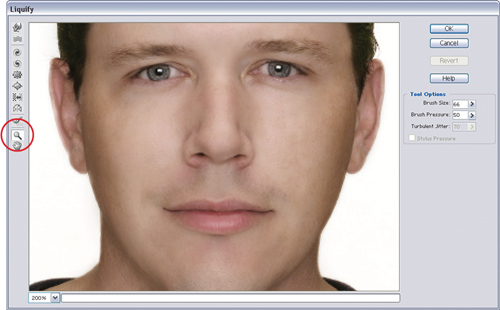
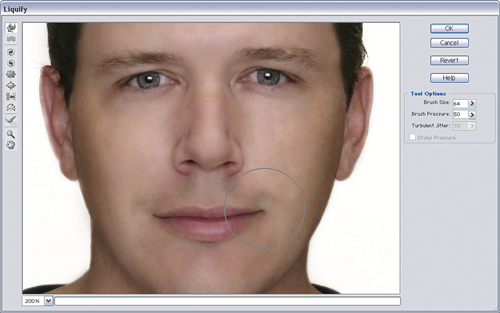
Go under the Filter menu, under Distort, and choose Liquify. When the Liquify dialog appears, choose the Zoom tool (it looks like a magnifying glass) from the Liquify Toolbox (found along the left edge of the dialog). Click it once or twice within the preview window to zoom in closer on your subject's face. Then, choose the Warp tool (it's the top tool in the Liquify Toolbox).
Step Three
In the Tool Options on the right side of the dialog, choose a brush size that's roughly the size of the person's cheek. Place the brush at the base of a cheek and click-and-"tug" slightly up. This tugging of the cheek makes the corner of the mouth turn up, creating a smile.
Step Four
Repeat the "tug" on the opposite side of the mouth, using the already tugged side as a visual guide as to how far to tug. Be careful not to tug too far, or you'll turn your subject into the Joker from Batman Returns. Click OK in Liquify to apply the change, and the retouch is applied to your photo.

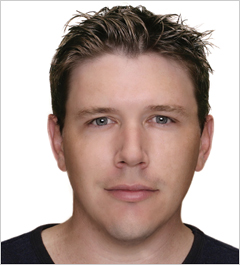
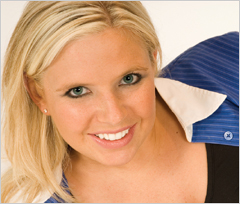
Before
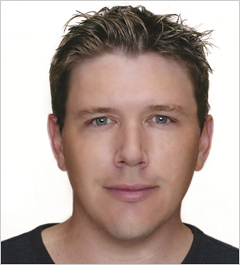
After
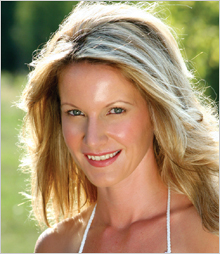
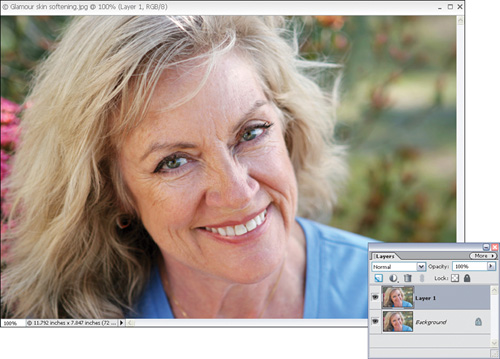
Glamour Skin Softening
This is a technique I learned from Chicago-based retoucher David Cuerdon. David uses this technique in fashion and glamour photography to give skin a smooth, silky look, and it's also popular in shots of female seniors (not high school seniors—the other seniors).
Step One
Open the photo to which you want to give the glamour skin-softening effect and duplicate the Background layer by going under the Layer menu, under New, and choosing Layer via Copy (or pressing Control-J).
©ISTOCKPHOTO/LISA F. YOUNG
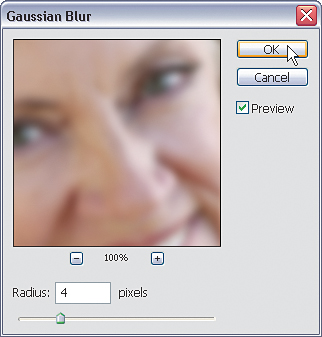
Step Two
Go under the Filter menu, under Blur, and choose Gaussian Blur. When the dialog appears, enter from 3 to 6 pixels of blur (depending on how soft you want the skin) to put a blur over the entire photo. When it looks good to you, click OK in the dialog.
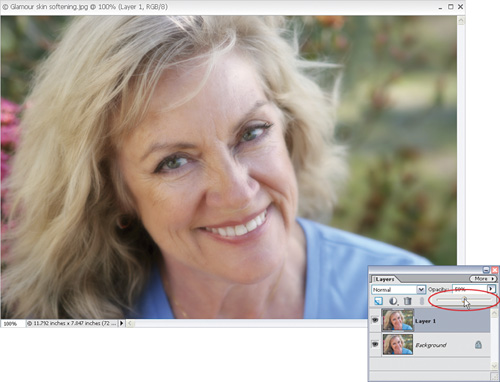
Step Three
Next, lower the Opacity of this layer by 50%. At this point, the blurring effect is reduced and now the photo has a soft glow to it. In some cases, you may want to leave it at this, with an overall soft, glamorous effect (you sometimes see portraits of people over 60 with this overall softening), so your retouch is complete. If this is too much softening for your subject, go on to the next steps.
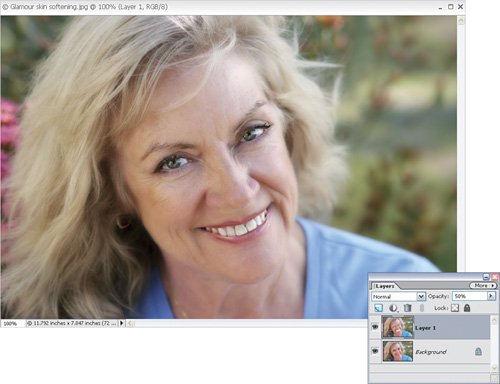
Step Four
What really pulls this technique together is selectively bringing back details in some of the facial areas. Press E to switch to the Eraser tool, choose a soft-edged brush from the Brush Picker in the Options Bar, and erase over the facial areas that are supposed to have sharp detail, such as eyebrows, lips, and teeth. What you're doing is erasing the blurriness, and thereby revealing the original features on the Background layer beneath your blurry layer.
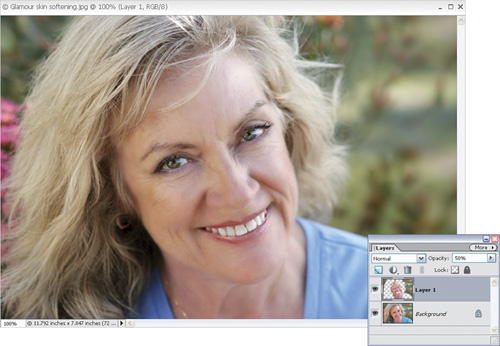
Step Five
David completes his retouch at Step Four, leaving the subject's clothes, hair, etc., with the soft glow. I prefer to switch to a larger, soft-edged Eraser tool and erase over everything else except the skin—so I erase over the hair, the clothes, etc., so everything has sharp detail except the skin. This is totally a personal preference, so I recommend trying both and seeing which fits your particular needs.
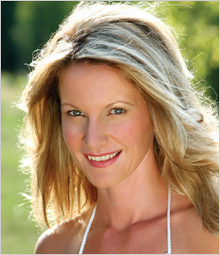
Before
After

Slimming and Trimming
This is an incredibly popular technique because it consistently works so well, and because just about everyone would like to look about 10 to 15 pounds thinner. I've never applied this technique to a photo and (a) been caught, or (b) not had clients absolutely love the way they look. The most important part of this technique may be not telling the client you used it.
Step One
Open the photo of the person that you want to put on a quick diet.
©ISTOCKPHOTO/MARK PRUITT
Step Two
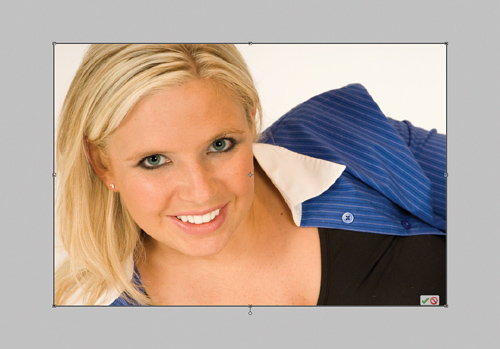
Maximize your view if needed by going under Window, under Images, and choosing Maximize Mode or click the Maximize button in the upper right-hand corner of the image window. Now, press Control-A to put a selection around the entire photo. Then, press Control-T to bring up the Free Transform command. The Free Transform handles will appear at the corners and sides of your photo.
Step Three
Grab the right-center handle and drag it horizontally toward the left to slim the subject. The farther you drag, the slimmer the subject becomes.
Step Four
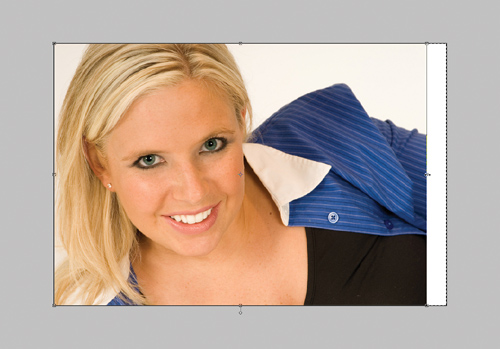
How far is too far (in other words, how far can you drag before people start looking like they've been retouched)? Use the Width field in the Options Bar as a guide. You're pretty safe to drag inward to around 95%, although I've been known to go to 94% or even 93% once in a while (it depends on the photo).
![]()
Step Five
Press Enter to lock in your transformation and press Control-D to deselect. Now that you've moved the image area over a bit, you'll have to use the Crop tool (C) to crop away the background area that is now visible on the right side of your photo. After you drag out your cropping border over your image, press the Enter key to complete your crop. You can see how effective this simple little trick is at slimming and trimming your subject. Also, notice that because we didn't drag too far, the subject still looks very natural.
Before
After

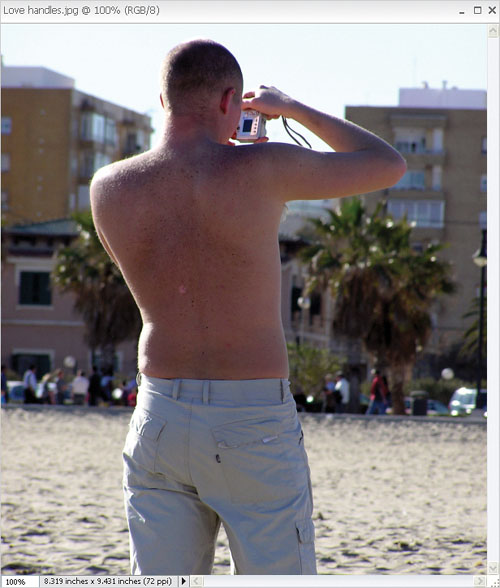
Removing Love Handles
This is a very handy body-sculpting technique, and you'll probably be surprised at how many times you'll wind up using it. It uses Liquify, which many people first dismissed as a "toy for giving people bug-eyes and huge lips," but it didn't take long for professional retouchers to see how powerful this tool could really be.
Step One
Open the photo that has a love handle repair just waiting to happen.
©ISTOCKPHOTO/LOLES BUFORN
Step Two
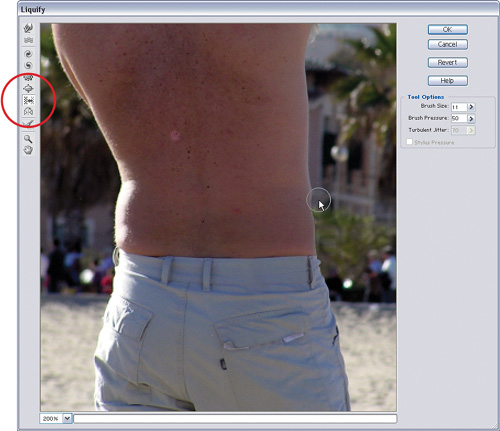
Go under the Filter menu, under Distort, and choose Liquify. When the Liquify dialog appears, click on the Zoom tool in the Toolbox on the left-hand side of the dialog, and then drag out a selection around the area you want to work on to give you a close-up view for greater accuracy.
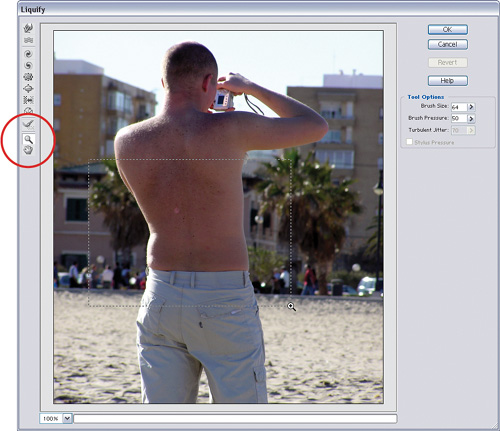
Step Three
Get the Shift Pixels tool from Liquify's Toolbox (it's the seventh tool down or just press S). Choose a relatively small brush size using the Brush Size field near the top-right of the Liquify dialog. With it, paint an upward stroke starting just below and outside of the love handle on the right and continuing upward (as shown here). The pixels will shift back in toward the body, removing the love handle as you paint. (Note: When removing the love handle on the left, paint downward rather than upward. Why? That's just the way it works.) When you click OK, the love handle repair is complete, and you'll see the difference a quick 30-second retouch can make.
Before
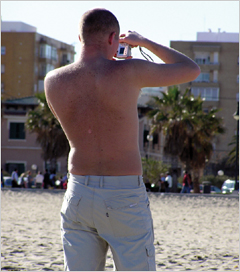
After