
Chapter 16. Action Mailer
It’s a cool way to send emails without tons of code
—Jake Scruggs
Integration with email is a crucial part of most modern web application projects. Whether it’s sign-up confirmations, password recovery, or letting users control their accounts via email, you’ll be happy to hear that Rails offers great support for both sending and receiving email, thanks to its Action Mailer framework.
In this chapter, we’ll cover what’s needed to set up your deployment to be able to send and receive mail with the Action Mailer framework and by writing mailer models, the entities in Rails that encapsulate code having to do with email handling.
16.1 Setup
By default, Rails will try to send email via SMTP (port 25) of localhost. If you are running Rails on a host that has an SMTP daemon running and it accepts SMTP email locally, you don’t have to do anything else in order to send mail. If you don’t have SMTP available on localhost, you have to decide how your system will send email.
When not using SMTP directly, the main options are to use sendmail or to give Rails information on how to connect to an external mail server. Most organizations have SMTP servers available for this type of use, although it’s worth noting that because of abuse many hosting providers have stopped offering shared SMTP service.
Most serious production deployments use third-party SMTP services that specialize in delivering automated email, avoiding user spam filters and blacklists.
16.2 Mailer Models
Assuming the mail system is configured, let’s go ahead and create a mailer model that will contain code pertaining to sending and receiving a class of email. Rails provides a generator to get us started rapidly. Our mailer will send out a notices to any user of our sample application who is late entering their time.
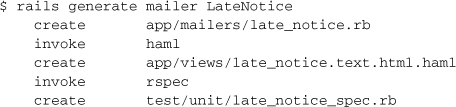
A view folder for the mailer is created at app/views/late_notice and the mailer itself is stubbed out at app/mailers/late_notice.rb:
![]()
Kind of like a default Active Record subclass, there’s not much there at the start.
16.2.1 Preparing Outbound Email Messages
You work with Action Mailer classes by defining public mailer methods that correspond to types of emails that you want to send. Inside the public method, you assign any variables that will be needed by the email message template and then call the mail method, which is conceptually similar to the render method used in controllers.
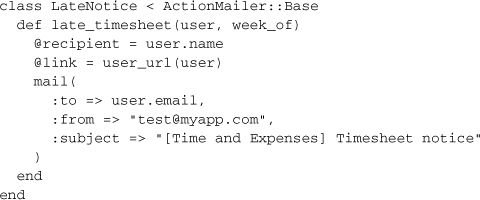
Continuing with our example, let’s write a late_timesheet mailer method that takes user and week_of parameters. Notice that it sets the basic information needed to send our notice email (see Listing 16.1).
Listing 16.1. Adding a mailer method
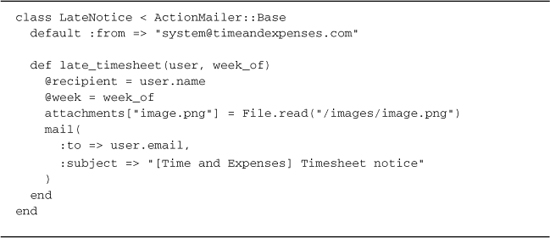
Inside the method we’ve created we have access to a few methods to set up the message for delivery, including the mail method shown above:
attachments Allows you to add normal and inline file attachments to your message
attachments["myfile.zip"] = File.read("/myfile.zip")
attachments.inline["logo.png"] = File.read("/logo.png")
headers Allows you to supply a hash of custom email headers
headers("X-Author" => "Obie Fernandez")
mail Sets up the email that will get sent. It accepts a hash of headers that a Mail::Message will accept and allows an optional block. If no block is specified, views will be used to construct the email with the same name as the method in the mailer. If a block is specified these can be customized.
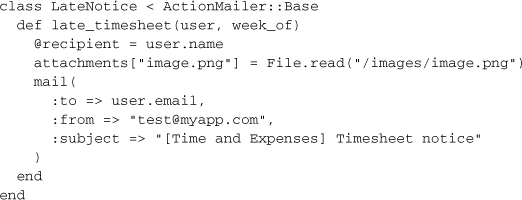
Note also the change of the default from address to one set up for our application. Here is a sample list of the headers that you can include in the hash passed to the mail method or in the default macro. In addition to these, you may pass any email header that is needed when sending, i.e., { "X-Spam" => value }.
subject The subject line for the message.
to The recipient addresses for the message, either as a string (for a single address) or an array (for multiple addresses). Remember that this method expects actual address strings not your application’s user objects.
users.map(&:email)
from Specifies the from address for the message as a string (required).
cc Specifies carbon-copy recipient (Cc:) addresses for the message, either as a string (for a single address) or an array for multiple addresses.
bcc Specifies blind recipient (Bcc:) addresses for the message, either as a string (for a single address) or an array for multiple addresses.
reply_to Sets the email for the reply-to header.
date An optional explicit sent on date for the message, usually passed Time.now. Will be automatically set by the delivery mechanism if you don’t supply a value, and cannot be set using the default macro.
The mail method can either take a block or not if you want to do custom formats similar to Rails routes.
mail(:to => "[email protected]") do |format|
format.text
format.html
end
The body of the email is created by using an Action View template (regular Haml or ERb) that has the instance variables in the mailer available as instance variables in the template. So the corresponding body template for the mailer method in Listing 16.1 could look like
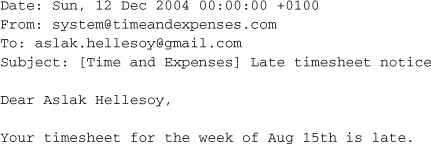
Dear #{@recipient},
Your timesheet for the week of #{@week} is late.
And if the recipient was Aslak, the email generated would look like this:
16.2.2 HTML Email Messages
To send mail as HTML, make sure your view template generates HTML and that the corresponding template name corresponds to the email method name. For our late_timesheet method this would be in app/views/late_notice/late_timesheet.text.html.haml (or .erb.) You can also override this template name in the mail block.

16.2.3 Multipart Messages
If a plain text and HTML template are present for a specific mailer action, the text template and the HTML template will both get sent by default as a multipart message. The HTML part will be flagged as alternative content for those email clients that support it.
Implicit Multipart Messages
As mentioned earlier in the chapter, multipart messages can also be used implicitly, without invoking the part method, because Action Mailer will automatically detect and use multipart templates, where each template is named after the name of the action, followed by the content type. Each such detected template will be added as separate part to the message.
For example, if the following templates existed, each would be rendered and added as a separate part to the message, with the corresponding content type. The same body hash is passed to each template.
• signup_notification.text.plain.haml
• signup_notification.text.html.haml
• signup_notification.text.xml.builder
• signup_notification.text.x-yaml.erb
16.2.4 Attachments
Including attachments in emails is relatively simple, just use the attachments method in your class.
If you wanted to attach the image inline, use attachments.inline.
attachments.inline["image.png"] = File.read("/images/image.png")
You can access this attachment in the template if need be via the, then calling url on that object for the image’s relative content id (cid:) path. image_tag helper.

16.2.5 Generating URLs
Generating application URLs is handled through named routes or using the url_for helper. Since mail does not have request context like controllers do, the host configuration option needs to be set. The best practice for this is to define them in the corresponding environment configuration although it can be defined on a per mailer basis.
# config/environments/production.rb
config.action_mailer.default_url_options = { :host => 'accounting.com' }
In your mailer you can now generate your url. It is important to note that you cannot use the _path variation for your named routes since the must be rendered as absolute URLs.
When generating URLs through url_for, the controller and action also need to be specified. If you have provided a default host then the :only_path option must be provided to tell the helper to generate an absolute path.
= url_for(:controller => "users", :action => "update",
:only_path => false)
16.2.6 Mailer Layouts
Mailer layouts behave just like controller layouts. To be automatically recognized, they need to have the same name as the mailer itself. In our previous case, layouts/late_notice.html.haml would automatically be used for our HTML emails. You can also add custom layouts if your heart desires, either at the class level or as a render option.
class LateNotice < ActionMailer::Base
layout "alternative"
def late_timesheet(user, week_of)
mail(:to => user.email) do |format|
format.html { render :layout => "another" }
end
end
end
We’ve now talked extensively about preparing email messages for sending, but what about actually sending them to the recipients?
16.2.7 Sending an Email
Sending emails only involves getting a Mail::Message object from your mailer and delivering it.
aslak = User.find_by_name "Aslak Hellesoy"
message = LateNotice.late_timesheet(aslak, 1.week.ago)
message.deliver
16.3 Receiving Emails
To receive emails, you need to write a public method named receive on one of your application’s ActionMailer::Base subclasses. It will take a Mail::Message1 object instance as its single parameter. When there is incoming email to handle, you call an instance method named receive on your Mailer class. The raw email string is converted into a Mail::Message object automatically and your receive method is invoked for further processing. You don’t have to implement the receive class method yourself, it is inherited from ActionMailer::Base.2
That’s all pretty confusing to explain, but simple in practice. Listing 16.2 shows an example.
Listing 16.2. The simple MessageArchiver mailer class with a receive method
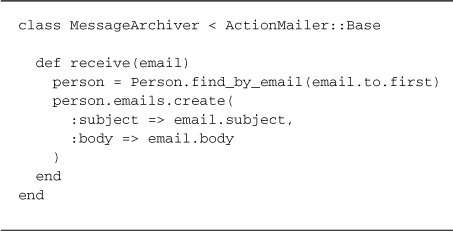
The receive class method can be the target for a Postfix recipe or any other mail-handler process that can pipe the contents of the email to another process. The rails runner command makes it easy to handle incoming mail:
rails runner 'MessageArchiver.receive(STDIN.read)'
That way, when a message is received, the receive class method would be fed the raw string content of the incoming email via STDIN.
16.3.1 Handling Incoming Attachments
Processing files attached to incoming email messages is just a matter of using the attachments attribute of Mail::Message, as in Listing 16.3. This example assumes that you have a Person class, with a has_many association to an attachment_fu object named photos.
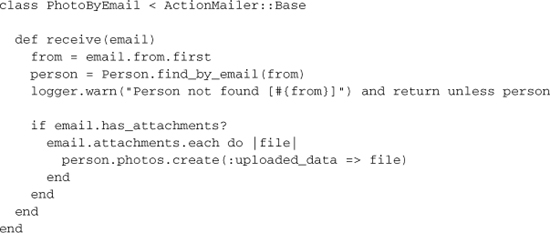
There’s not much more to it than that, except of course to wrestle with the configuration of your mail-processor (outside of Rails) since they are notoriously difficult to configure.3 After you have your mail-processor calling the rails runner command correctly, add a crontab so that incoming mail is handled about every five minutes or so, depending on the needs of your application.
16.4 Server Configuration
Most of the time, you don’t have to configure anything specifically to get mail sending to work, because your production server will have sendmail installed and Action Mailer will happily use it to send emails.
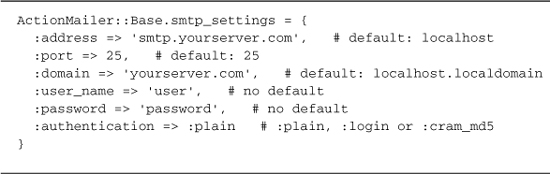
If you don’t have sendmail installed on your server, you can try setting up Rails to send email directly via SMTP. The ActionMailer::Base class has a hash named smtp_settings (server_settings prior to Rails 2.0) that holds configuration information. The settings here will vary depending on the SMTP server that you use.
The sample (as shown in Listing 16.3) demonstrates the SMTP server settings that are available (and their default values). You’ll want to add similar code to your config/environment.rb file:
Listing 16.3. SMTP settings for ActionMailer
16.5 Testing Email Content
Ben Mabey’s email_spec4 gem provides a nice way to test your mailers using RSpec. Add it to your Gemfile and first make the following additions to your spec/spec_helper.rb.
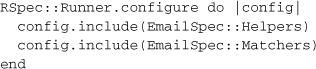
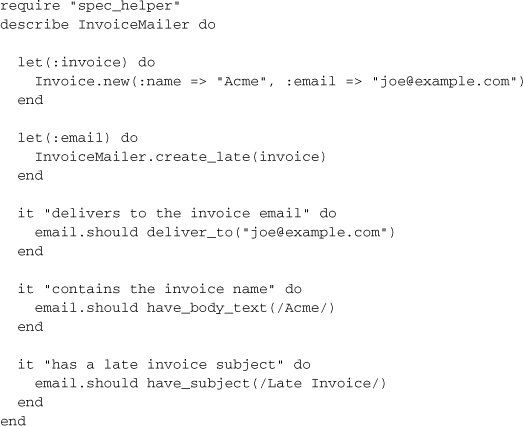
Mailer specs reside in spec/mailers, and email_spec provides convenience matchers for asserting that the mailer contains the right attributes.
• reply_to: Checks the reply-to value.
• deliver_to: Verifies the recipient.
• deliver_from: Assertion for the sender.
• bcc_to: Verifies the bcc.
• have_subject: Performs matching of the subject text.
• include_email_with_subject: Performs matching of the subject text in multiple emails.
• have_body_text: Match for text in the body.
• have_header: Check for a matching email header.
These matchers can then be used to assert that the generated email has the correct content included in it.
If you’re attempting to test whether or not the mailer gets called and sends the email, it is recommended to simply check via a mock that the deliver method got executed.
16.6 Conclusion
In this chapter, we learned how Rails makes sending and receiving email easy. With relatively little code, you can set up your application to send out email, even HTML email with inline graphics attachments. Receiving email is even easier, except perhaps for setting up mail-processing scripts and cron jobs. We also briefly covered the configuration settings that go in your application’s environment specific configuration related to mail.