
Chapter 18. RSpec
I do not think there is any thrill that can go through the human heart like that felt by the inventor as he sees some creation of the brain unfolding to success.
—Nikola Tesla
RSpec is a Ruby domain-specific language for specifying the desired behavior of Ruby code. Its strongest appeal is that RSpec scripts (or simply specs) can achieve a remarkable degree of readability, letting the authors express their intention with greater readability and fluidity than is achievable using Test::Unit’s methods and assertions.
RSpec::Rails, a drop-in replacement for the Rails testing subsystem supplies verification, mocking, and stubbing features customized for use with Rails models, controllers, and views. Since switching to RSpec I have never needed to touch Test::Unit for anything significant again. RSpec is simply that good.
18.1 Introduction
Since RSpec scripts are so readable, I can’t really think of a better way of introducing you to the framework than to dive into an actual spec. Listing 18.1 is part of a real-world RSpec script defining the behavior of a Payment in a Hashrocket client project named Workbeast.com. As you’re reading the spec, let the descriptions attached to the blocks of code come together to form sentences that describe the desired behavior.
Listing 18.1. Excerpt of Workbeast.com’s timesheet spec
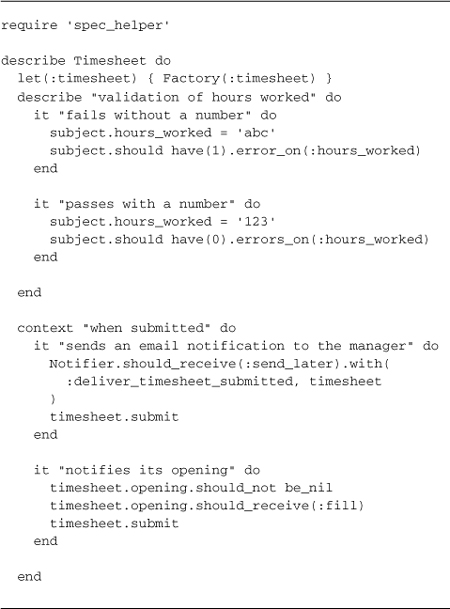
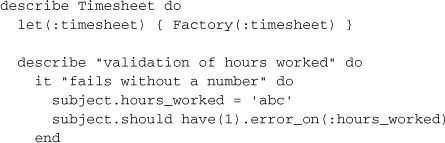
... should be understood to mean “Timesheet validation of hours worked fails without a number.”
RSpec scripts are collections of behaviors, which in turn have collections of examples. The describe method creates a Behavior object under the covers. The behavior sets the context for a set of specification examples defined with the it method, and you should pass a sentence fragment that accurately describes the context you’re about to specify.
You can use RSpec to specify and test model and controller classes, as well as view templates, as individual units in isolation, like we did in Listing 18.1. RSpec is also used to create integration tests that exercise the entire Rails stack from top to bottom.
Listing 18.2. Excerpt of Workbeast.com’s search_colleagues integration spec
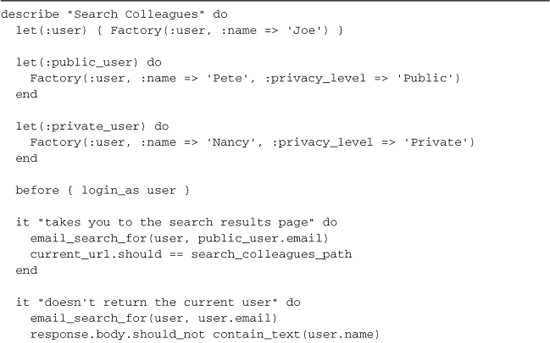
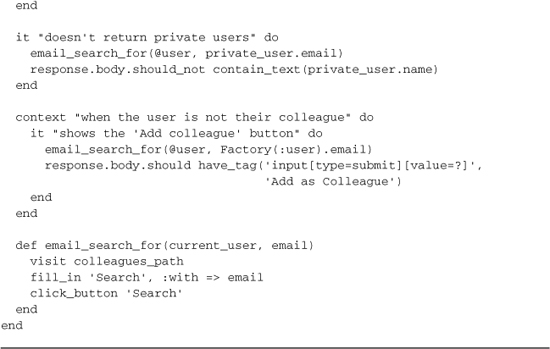
Use of methods such as visit and fill_in, as well as the checking the contents of objects such as response.body, hint at what this spec is doing: running your entire Rails application.
18.2 Basic Syntax and API
Let’s run through some of the basic syntactical features of RSpec, which we’ve just encountered in the code listings. RSpec is essentially a domain-specific language for creating specifications. The following API methods form the vocabulary of the language.
18.2.1 describe and context
The describe and context methods are used to group together related examples of behavior. They are aliases, both taking a string description as their first argument and a block to define the context of their scope.
When writing model specs or anything that smacks of a unit test, you can pass a Ruby class as the first argument to describe. Doing so also creates an implicit subject for the examples, which we’ll hold off on explaining for the moment. (If you’re impatient, you can jump ahead in this section to the subject method heading.)
describe Timesheet do
let(:timesheet) { Factory(:timesheet) }
18.2.2 let(:name) {expression}
The let method simplifies the creation of memoized attributes for use in your spec. Memoized means that the code block associated with the let is executed once and stored for future invocations, increasing performance. Use of let also allows you to lessen your dependence on instance variables, by creating a proper interface to the attributes needed in the spec.
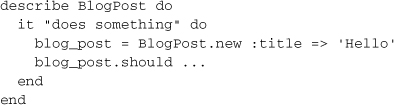
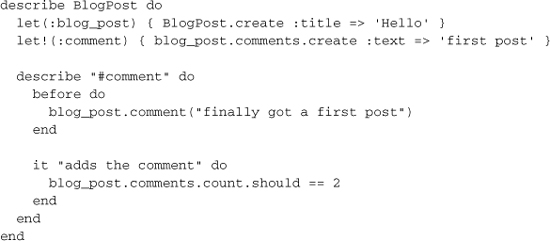
So, why use the let method? Let’s step through a typical spec coding session to understand the motivation. Imagine that you’re writing a spec, and it all starts simply enough with a local blog_post variable.
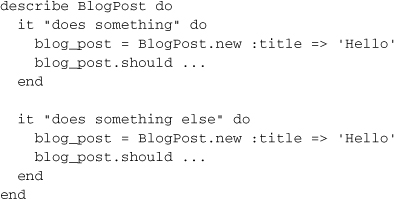
You continue on, writing another similar example, and you start to see some duplication. The blog_post creation is being done twice.
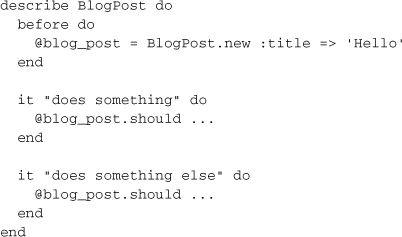
So, you refactor the instance creation into a before block, and start using an instance variable in the examples.
And here comes the punchline: you replace the instance variables with a variable described by a let expression.
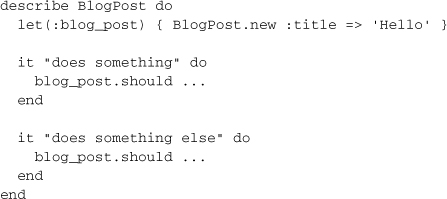
The advantages of using let are mostly in the realm of readability. One, it gets rid of all those instance variables and at-signs blotting your code. Two, gets rid of the before block, which arguably has no business setting up a bunch variables in the first place. And three, it shows you who the players are.’ A set of let blocks at the top of an example group reads like a cast of characters in a playbill. You can always refer to it when you’re deep in the code of an example.
18.2.3 let!(:name) {expression}
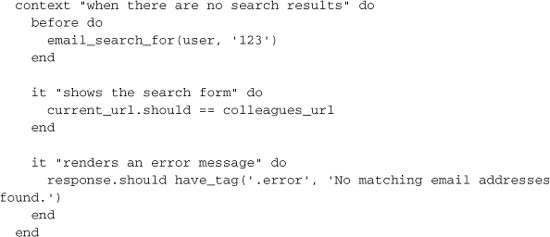
There are instances where the lazy evaluation of let will not suffice and you need the value memoized immediately. This is found often in cases of integration testing, and is where let! comes into play.
Since the comment block would never have been executed for the first assertion if you used a let definition, only one comment would have been added in this spec even though the implementation may be working. By using let! we ensure the initial comment gets created and the spec will now pass.
18.2.4 before and after
The before (and its reclusive cousin, after) methods are akin to the setup and teardown methods of xUnit frameworks like Test::Unit. They are used to set up the state as it should be prior to running an example, and if necessary, to clean up the state after the example has run. None of the example behaviors we’ve seen so far required an after block, because frankly, it’s rare to need after in Rails programming.
Before and after code can be inserted in any describe or context blocks, and by default they execute for each it block that shares their scope.
18.2.5 it
The it method also takes a description plus a block, similar to describe. As mentioned, the idea is to complete the thought that was started in the describe method, so that it forms a complete sentence. Your assertions (aka expectations) will always happen within the context of an it block, and you should try to limit yourself to one expectation per it block.
18.2.6 specify
The specify method is simply an alias of the it method. However, it’s mainly used in a different construct to improve readability. Consider the following old-school RSpec example:
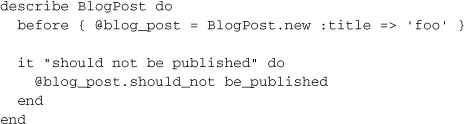
Note how the example says “should not be published” in plain English, and the Ruby code within says essentially the same thing: @blog_post.should_not be_published This is a situation where specify comes in handy. Examine a new-school example:

The English phrase has been removed, and the Ruby code has been move into a block passed to the specify method. Since the Ruby block already reads like English, there’s no need to repeat yourself. Especially since RSpec automatically (which is pretty cool) generates English output by inspection. Here’s what the specdoc output looks like:
BlogPost
- should not be published
18.2.7 expect
When you expect a method call to change a value or throw an exception, then expect is for you. Here’s an example:

This is just a more readable DSL-style version of the RSpec’s older lambda-based syntax:

Simply put, expect is an alias of the lambda keyword and the to method is an alias of the should method.
Then comes the change matcher. This is where you inspect the attribute or value that you’re interested in. In our example, we’re making sure that the record was saved to the database, thus increasing the record count by 1.
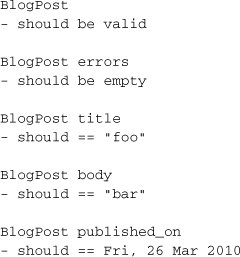
There are a few different variations on the change syntax. Here’s one more example, where we’re more explicit about before and after values by further chaining from and to methods:
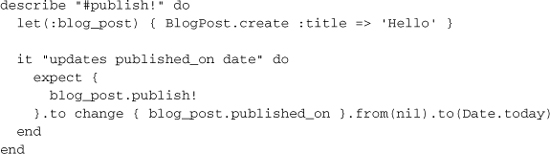
Here the published_on attribute is examined both before and after invocation of the expect block. This style of change assertion comes in handy when you want to ensure a precondition of the value. Asserting from guarantees a known starting point.
Besides expecting changes, the other common expectation has to do with code that should generate exceptions:
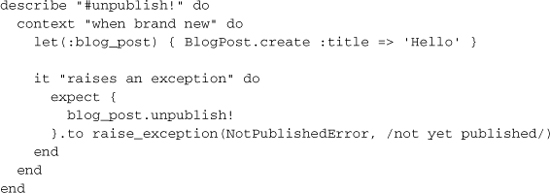
In this example, we attempt to “unpublish” a brand-new blog post that hasn’t been published yet. Therefore, we expect an exception to be raised.
18.2.8 pending
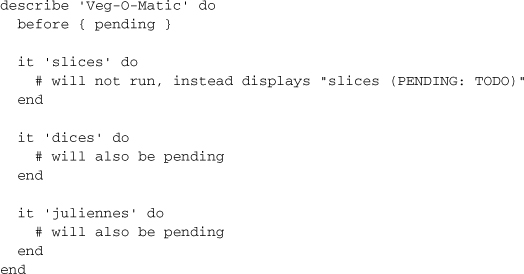
When you leave the block off of an example, RSpec treats it as pending.
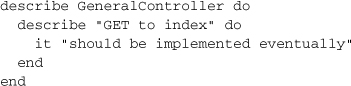
RSpec prints out pending examples at the end of its run output, which makes it potentially useful for tracking work in progress.

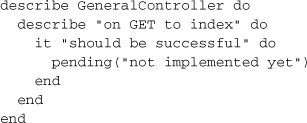
You can also explicitly create pending examples by inserting a call to the pending method anywhere inside of an example.
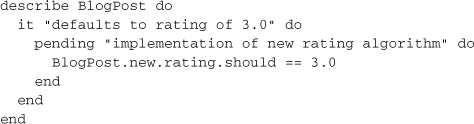
Interestingly, you can use pending with a block to keep broken code from failing your spec. However, if at some point in the future the broken code does execute without an error, the pending block will cause a failure.
Pro-tip: You can make all examples in a group pending simply by calling pending once in the group’s before block.
18.2.9 should and should_not
Rather than xUnit-style assertions, RSpec uses its own funky DSL syntax to do verification, based on a pair of methods called should and should_not. RSpec mixes them into the base Ruby Object class at runtime so that they are available on all objects. They expect to receive Matcher objects, generated using RSpec expectation syntax.
response.should have_tag('.error', 'No matching email addresses found.')
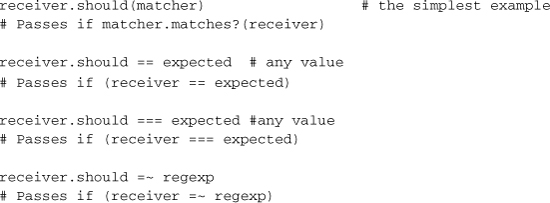
There are several ways to generate expectation matchers and pass them to should (and should_not):
Tiger says ...
This is all fairly dry and academic, but stay with us because we’ve got plenty of real-world example in the next few sessions.
The process of learning to write expectations is probably one of the meatier parts of the RSpec learning curve. One of the most common idioms is “should equal,” akin to Test::Unit’s assert_equal assertion.
18.2.10 Implicit Subject
Whether you know it or not, every RSpec example group has a subject. Think of it as the thing being described. Let’s start with an easy example:
![]()
By convention, the implicit subject here is a BlogPost.new instance. The should call may look like it is being called off of nothing. But actually the call is delegated by the example to the implicit subject. It’s just as if you’d written the expression
BlogPost.new.should be_invalid
18.2.11 Explicit Subject
If the implicit subject of the example group doesn’t quite do the job for you, you can specify a subject explicitly. For example, maybe we need to tweak a couple of the blog post’s attributes on instantiation:
describe BlogPost do
subject { BlogPost.new :title => 'foo', :body => 'bar' }
it { should be_valid }
end
Here we have the same delegation story as with implicit subject. The should be_valid call is delegated to the subject.
You can also talk to the subject directly. For example, you may need to invoke a method off the subject to change object state:
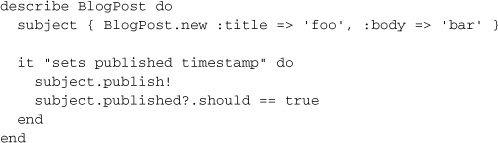
Here we call the publish! method off the subject. Mentioning subject directly is the way we get ahold of that BlogPost instance we set up. Finally, we assert that the published? boolean is true.
18.2.12 its
The its method works hand-in-hand with the fact that RSpec examples delegate to a subject. It can make your specs very compact and readable. Let’s look at a quick example:
![]()
The implicit subject here is the Array.new instance. And the length call is made on that subject. Finally, the should call is made on that result of the length call.
That example was a bit simple, here’s a meatier example that shows off what its can do:
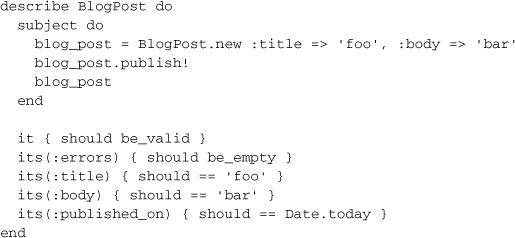
What’s awesome is you still get the English translation of the Ruby code in the specdoc output:
18.3 Predicate Matchers
Thanks to method_missing, RSpec can support arbitrary predicates, that is, it understands that if you invoke something that begins with be_, then it should use the rest of the method name as an indicator of which predicate-style method to invoke the target object. (By convention, a predicate method in Ruby ends with a ? and should return the equivalent of true or false.) The simplest hard-coded predicate-style matchers are:
target.should be
target.should be_true
target.should be_false
target.should be_nil
target.should_not be_nil
Arbitrary predicate matchers can assert against any target, and even support parameters!

As an alternative to prefixing arbitrary predicate matchers with be_, you may choose from the indefinite article versions be_a_ and be_an_, making your specs read much more naturally:
"a string".should be_an_instance_of(String)
3.should be_a_kind_of(Fixnum)
3.should be_a_kind_of(Numeric)
3.should be_an_instance_of(Fixnum)
3.should_not be_instance_of(Numeric) #fails
The cleverness (madness?) doesn’t stop there. RSpec will even understand have_ prefixes as referring to predicates like has_key?:
{:foo => "foo"}.should have_key(:foo)
{:bar => "bar"}.should_not have_key(:foo)
RSpec has a number of expectation matchers for working with classes that implement module Enumerable. You can specify whether an array should include a particular element, or if a string contains a substring. This one always weirds me out when I see it in code, because my brain wants to think that include is some sort of language keyword meant for mixing modules into classes. It’s just a method, so it can be overriden easily.
[1, 2, 3].should include(1)
[1, 2, 3].should_not include(4)
"foobar".should include("bar")
"foobar".should_not include("baz")
You get a slick bit of syntactic sugar for testing the length of collections:
[1, 2, 3].should have(3).items
What if you want to specify the length of a has_many collection? “Schedule.days.should have(3).items” is admittedly quite ugly. RSpec gives us some more sweetness here as well.
schedule.should have(3).days # passes if schedule.days.length == 3
18.4 Custom Expectation Matchers
When you find that none of the stock expectation matchers provide a natural-feeling expectation, you can very easily write your own. All you need to do is write a Ruby class that implements the following two methods:
matches?(actual)
failure_message_for_should
The following methods are optional for your custom matcher class:
does_not_match?(actual)
failure_message_for_should_not
description
The example given in the RSpec API documentation is a game in which players can be in various zones on a virtual board. To specify that a player bob should be in zone 4, you could write a spec like
bob.current_zone.should eql(Zone.new("4"))
However, it’s more expressive to say one of the following, using the custom matcher in Listing 18.3:
Listing 18.3. BeInZone custom expectation matcher class
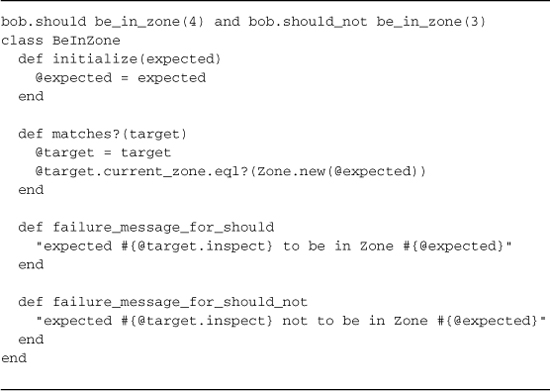
In addition to the matcher class you would need to write the following method so that it’d be in scope for your spec:
def be_in_zone(expected)
BeInZone.new(expected)
end
This is normally done by including the method and the class in a module, which is then included in your spec:
describe "Player behaviour" do
include CustomGameMatchers
...
end
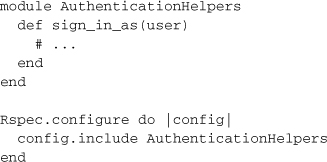
Or you can include helpers globally in a spec_helper.rb file required from your spec file(s):
RSpec::Runner.configure do |config|
config.include(CustomGameMatchers)
end
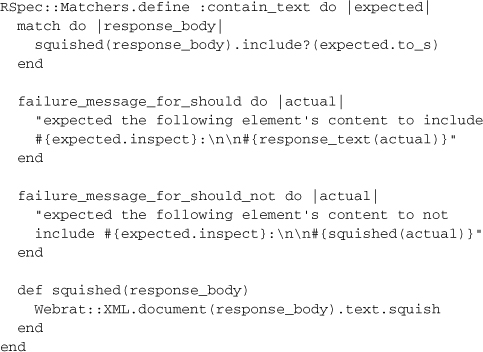
18.4.1 Custom Matcher DSL
RSpec includes a DSL for easier definition of custom matchers. The DSL’s directives match the methods you implement on custom matcher classes. Just add code similar to the following example in a file within the spec/support directory.
18.4.2 Fluent Chaining
You can create matchers that obey a fluent interface using the chain method:
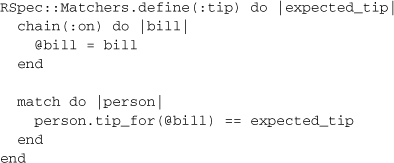
This matcher can be used as follows:
![]()
In this way, you can begin to create your own fluent domain-specific languages for testing your complex business logic in a very readable way.
18.5 Shared Behaviors
Often you’ll want to specify similar behavior in multiple specs. It would be silly to type out the same code over and over. Fortunately, RSpec has a feature named shared behaviors that aren’t run individually, but rather are included into other behaviors; they are defined using shared_examples_for.
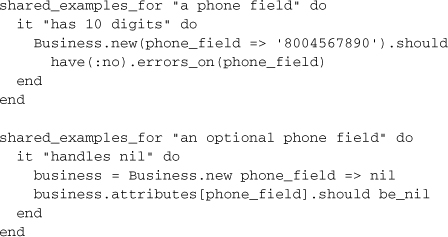
You can invoke a shared example using the it_should_behave_like method, in place of an it.
You can put the code for shared examples almost anywhere, but the default convention is to create a file named spec/support/shared_examples.rb to hold them.
18.6 RSpec’s Mocks and Stubs
It’s possible to use a number of mocking frameworks including Mocha, Flexmock, RR, and more. In our examples, however, we’ll use RSpec’s own mocking and stubbing facilities, which are almost the same and equally powerful. Mostly the method names vary.
Mock Objects
To create a mock object, you simply call the mock method anywhere in a spec, and give it a name as an optional parameter. It’s a good idea to give mock objects a name if you will be using more than one of them in your spec. If you use multiple anonymous mocks, you’ll probably have a hard time telling them apart if one fails.
echo = mock('echo')
Remember that you set expectations about what messages are sent to your mock during the course of your spec. Mocks will cause a spec to fail if their expectations are not met. To set an expectation on a mock, we invoke should_receive or should_not_receive.
echo.should_receive(:sound)
The chained method with is used to define expected parameters. If we care about the return value, we chain and_return at the end of the expectation or use a block.
echo.should_receive(:sound).with("hey").and_return("hey")
echo.should_receive(:sound).with("hey") { "hey" }
Null Objects
Occasionally you just want an object for testing purposes that accepts any message passed to it—a pattern known as null object. It’s possible to make one using the mock method and the :null_object option.
null_object = mock('null', :null_object => true)
Stub Objects
You can easily create a stub object in RSpec via the stub factory method. You pass stub a name and default attributes as a hash.
yodeler = stub('yodeler', :yodels? => true)
The underlying implementation of mocks and stubs is the same in RSpec, although the semantic difference persists since mocks and stubs are meant to be used differently.1
By the way, there’s no rule that the name parameter of a mock or stub needs to be a string. It’s pretty typical to pass mock or stub a class reference corresponding to the real type of object.
yodeler = stub(Yodeler, :yodels? => true)
Partial Mocking and Stubbing
You can use stub to install or replace methods on any object, not just mocks—a technique called partial mocking and stubbing.
Even though RSpec’s authors warn us about partial stubbing in their docs, the ability to do it is really useful in practice.
stub_chain
It’s really common to find yourself writing some gnarly code when you rely on stub to spec behavior of nested method calls.2 But, sometimes you need to stub methods down a dot chain, where one method is invoked on another method, which is itself invoked on another method, and so on. For example, you may need to stub out a set of recent, unpublished blog posts in chronological order, like BlogPost.recent.unpublished.chronological
Try to figure out what’s going on in the following example. I bet it takes you more than a few seconds!
BlogPost.stub(:recent => stub(:unpublished => stub(
:chronological => [stub, stub, stub])))
That example code can be factored to be more verbose, which makes it a little easier to understand, but is still pretty bad.
chronological = [stub, stub, stub]
unpublished = stub :chronological => chronological
recent = stub :unpublished => unpublished
BlogPost.stub :recent => recent
Luckily, Rspec gives you the stub_chain method, which understands exactly what you’re trying to do here and dramatically simplifies the code needed:
BlogPost.stub_chain(:recent, :unpublished, :chronological).
and_return([stub, stub, stub])
However, just because it’s so easy to stub the chain, doesn’t mean it’s the right thing to do. The question to ask yourself is, “Why am I testing something related to methods so deep down a chain? Could I move my tests down to that lower level?” Demeter would be proud.
18.7 Running Specs
Specs are executable documents. Each example block is executed inside its own object instance, to make sure that the integrity of each is preserved (with regard to instance variables, etc.).
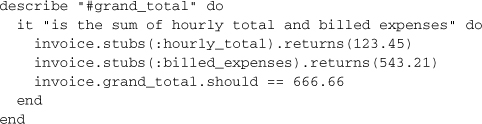
If I run one of the Workbeast specs using the rspec command that should have been installed on my system by the RSpec gem, I’ll get output similar to that of Test::Unit—familiar, comfortable, and passing. Just not too informative.
RSpec is capable of outputting results of a spec run in many formats. The traditional dots output that looks just like Test::Unit is called progress and, as we saw a moment ago, is the default. However, if we add the -fs command-line parameter to rspec, we can cause it to output the results of its run in a very different and much more interesting format, the specdoc format. It surpasses anything that Ruby’s built-in Test::Unit is capable of doing on its own “out of the box.”
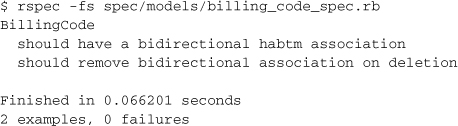
Nice, huh? If this is the first time you’re seeing this kind of output, I wouldn’t be surprised if you drifted off in speculation about whether RSpec could help you deal with sadistic PHB-imposed3 documentation requirements.
Having these sorts of self-documenting abilities is one of the biggest wins you get in choosing RSpec. It compels many people to work toward better spec coverage of their project. I also know from experience that development managers tend to really appreciate RSpec’s output, even to the extent of incorporating it into their project deliverables.
Besides the different formatting, there are all sorts of other command-line options available. Just type rspec --help to see them all.
That does it for our introduction to RSpec. Now we’ll take a look at using RSpec with Ruby on Rails.
18.8 RSpec Rails Gem
The RSpec Rails gem provides four different contexts for specs, corresponding to the four major kinds of objects you write in Rails. Along with the API support you need to write Rails specs, it also provides code generators and a bundle of Rake tasks.
18.8.1 Installation
Assuming you have the rspec-rails gem bundled already, you should run the rspec:install generator provided to set up your project for use with RSpec.
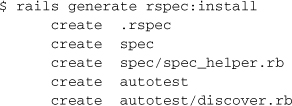
The generator will add the files and directories necessary to use RSpec with your Rails project.
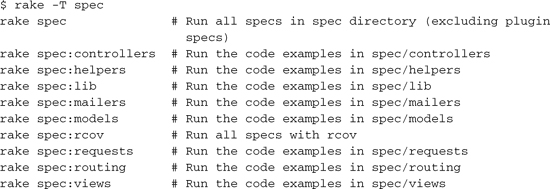
RSpec and Rake
The lib/tasks/rspec.rake script sets the default Rake task to run all specs in your /spec directory tree. It also creates specific rake spec tasks for each of the usual spec directories.
If your project has a config/database.yml then the rake spec tasks will execute rake db:test:prepare as a dependency, to make sure that the schema of your development database is kept in sync. Keep in mind that this won’t happen if you run a spec individually using the rspec command.
RSpec and Generators
RSpec ensures that other generators in your project are aware of it as your chosen test library. Subsequently it will be used for command-line generation of models, controllers, etc.

RSpec Options
The .rspec file contains a list of default command-line options. The generated file looks like
--color
--format progress
You can change it to suit your preference. I like my spec output in color, but usually prefer the more verbose output of --format specdoc.
Tim says ...
I go back and forth between preferring the dots of the progress format and the verbose output of the specdoc format. With the more verbose output and long spec suites, it’s easy to miss if something failed if you look away from your screen. Specially on terminals with short buffers.
Here are some additional options that you might want to set in your spec.opts

The RSpec Helper Script
As opposed to command-line options, major settings and configuration of your spec suite are kept in spec/spec_helper.rb, which is always required at the top of an RSpec spec.
A boilerplate copy is generated by default when you install RSpec into your project. Let’s go through it section by section and cover what it does.
First of all, we ensure that the Rails environment is set to test. Remember that RSpec replaces the standard TestUnit-based suite that is generated by default for Rails apps.
ENV["RAILS_ENV"] ||= 'test'
Next the Rails environment and RSpec Rails are loaded up.

RSpec has the notion of supporting files containing custom matchers and any other code that helps setup additional functionality for your spec suite, so it scans the spec/support directory to find those files, akin to Rails initializers.
![]()
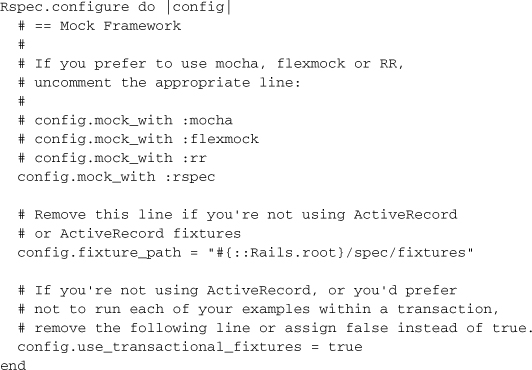
Finally, there is a block of configuration for your spec suite where you can set fixture paths, transaction options, and mocking frameworks.
Tim says ...
Traditionally a lot of extra helper methods were put into the spec_helper file, hence its name. However, nowadays it’s generally easier to organize your additions in spec/support files, for the same reasons config/initializers can be easier to manage than sticking everything in config/environment.rb.
While we’re on the subject, keep in mind that any methods defined at the top level of a support file will become global methods available from all objects, which almost certainly not what you want. Instead, create a module and mix it in, just like you’d do in any other part of your application.
18.8.2 Model Specs
Model specs help you design and verify the domain model of your Rails application, both Active Record and your own classes. RSpec Rails doesn’t provide too much special functionality for model specs, because there’s not really much needed beyond what’s provided by the base library. Let’s generate a Schedule model and examine the default spec that is created along with it.

The boilerplate spec/models/schedule_spec.rb looks like

Assume for example that our Schedule class has a collection of day objects.
![]()
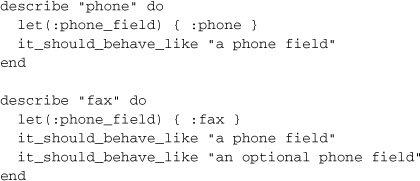
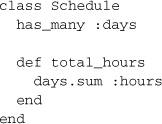
Let’s specify that we should be able to get a roll-up total of hours from schedule objects. Instead of fixtures, we’ll mock out the days dependency.
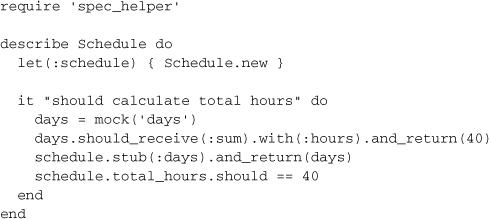
Here we’ve taken advantage of the fact that association proxies in Rails are rich objects. Active Record gives us several methods for running database aggregate functions. We set up an expectation that days should receive the sum method with one argument—:hours—and return 40. We can satisfy this specification with a very simple implementation:
A potential benefit of mocking the days proxy is that we no longer rely on the database4 in order to write our specifications and implement the total_hours method, which will make this particular spec execute lightning fast.
On the other hand, a valid criticism of this approach is that it makes our code harder to refactor. Our spec would fail if we changed the implementation of total_hours to use Enumerable#inject, even though the external behavior doesn’t change. Specifications are not only describing the visible behavior of objects, but the interactions between an object and its associated objects as well. Mocking the association proxy in this case lets us clearly specify how a Schedule should interact with its Days.
Leading mock objects advocates see mock objects as a temporary design tool. You may have noticed that we haven’t defined the Day class yet. So another benefit of using mock objects is that they allow us to specify behavior in true isolation, and during design-time. There’s no need to break our design rhythm by stopping to create the Day class and database table. This may not seem like a big deal for such a simple example, but for more involved specifications it is really helpful to just focus on the design task at hand. After the database and real object models exist, you can go back and replace the mock days with calls to the real deal. This is a subtle, yet very powerful message about mocks that is usually missed.
18.8.3 Mocked and Stubbed Models
The built-in helper method mock_model makes a mock object that pretends to be an ActiveRecord object. Its companion, stub_model makes a real model instance, but yells at you if and when you try an operation such as saving, which would connect to the database. (In other words, it’s intended use in unit-test style specs.)
Ironically, one of the benefits of stub_model is that you don’t have to be explicit about its attributes, because they are read from the database. You can get a similar effect using mock_model(Foo).as_null_object
The mock_model method creates mocks with autogenerated numeric ids and a number of certain common methods stubbed out:
id Returns an autogenerated primary key value
to_param Returns the id value as a URL-friendly string
new_record? Returns false
errors Returns an empty stub errors collection
is_a? Returns true if the parameter matches model_class
You should pass in any additional stubbed method values via the stubs hash argument or set them in a block using the yielded mock instance.
18.8.4 Controller Specs
RSpec gives you the ability to specify your controllers either in isolation from their associated views or together with them, as in regular Rails tests. According to the API docs:
Controller Specs support running specs for Controllers in two modes, which represent the tension between the more granular testing common in TDD and the more high-level testing built into Rails. BDD sits somewhere in between: we want to achieve a balance between specs that are close enough to the code to enable quick fault isolation and far enough away from the code to enable refactoring with minimal changes to the existing specs.
The controller class is passed to the describe method like
describe MessagesController do
An optional second parameter can provide additional information, or you can explicitly use the controller_name method inside a describe block to tell RSpec which controller to use.

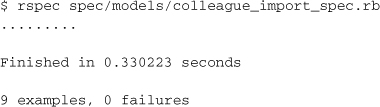
I typically group my controller examples by action and HTTP method. This example requires a logged-in user, so I stub my application controller’s current_person accessor to return a fixture.
![]()
Next, I create a mock Message object using the mock_model method. I want this mock message to be returned whenever Message.all is called during the spec.
@message = mock_model(Message)
Message.stub!(:all).and_return([@message])
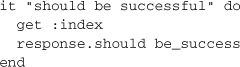
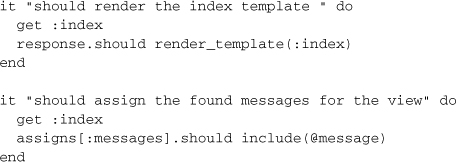
Now I can start specifying the behavior of actions (in this case, the index action). The most basic expectation is that the response should be successful, HTTP’s 200 OK response code.
Additional expectations that should be done for most controller actions include the template to be rendered and variable assignment.
Previously we saw how to stub out a model’s association proxy. Instead of stubbing the controller’s current_person method to return an actual person from the database, we can have it return a mock person.
@mock_person = mock_model(Person, :name => "Quentin")
controller.stub!(:current_person).and_return @mock_person
Isolation and Integration Modes
By default, RSpec on Rails controller specs run in isolation mode, meaning that view templates are not involved. The benefit of this mode is that you can spec the controller in complete isolation of the view, hence the name. Maybe you can sucker someone else into maintaining the view specs?
That sucker comment is of course facetious. Having separate view specs is not as difficult as it’s made out to be sometimes. It also provides much better fault isolation, which is a fancy way of saying that you’ll have an easier time figuring out what’s wrong when something fails.
If you prefer to exercise your views in conjunction with your controller logic inside the same controller specs, just as traditional Rails functional tests do, then you can tell RSpec on Rails to run in integration mode using the render_views macro. It’s not an all-or-nothing decision. You can specify modes on a per-behavior basis.
describe "Requesting /messages using GET" do
render_views
When you run integrated, the controller specs will be executed with view rendering turned on.
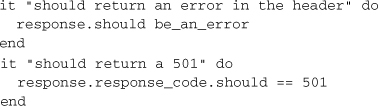
Specifying Errors
Ordinarily, Rails rescues exceptions that occur during action processing, so that it can respond with a 501 error code and give you that great error page with the stack trace and request variables, and so on. In order to directly specify that an action should raise an error, you have to override the controller’s rescue_action method, by doing something like
controller.class.send(:define_method, :rescue_action) { |e| raise e }
If you don’t mind checking that the response code was an error, you can just use the be_an_error predicate or response_code accessor of the response object:
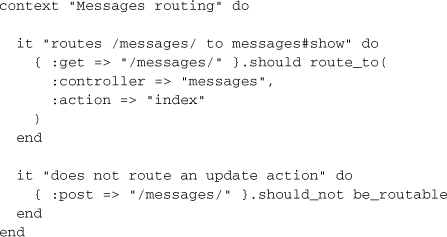
Specifying Routes
One of Rails’s central components is routing. The routing mechanism is the way Rails takes an incoming request URL and maps it to the correct controller and action. Given its importance, it is a good idea to specify the routes in your application. You can do this with by providing specs in the spec/routes directory and have two matchers to use, route_to and be_routable.
18.8.5 View Specs
Controller specs let us integrate the view to make sure there are no errors with the view, but we can do one better by specifying the views themselves. RSpec will let us write a specification for a view, completely isolated from the underlying controller. We can specify that certain tags exist and that the right data is outputted.
Let’s say we want to write a page that displays a private message sent between members of an internet forum. RSpec creates the spec/views/messages directory when we use the rspec_controller generator. The first thing we would do is create a file in that directory for the show view, naming it show.html.haml_spec.rb. Next we would set up the information to be displayed on the page.
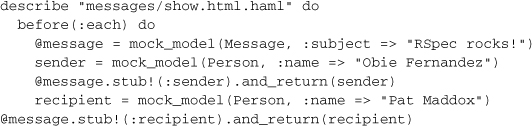
If you want to be a little more concise at the cost of one really long line of code that you’ll have to break up into multiple lines, you can create the mocks inline like:

Either way, this is standard mock usage similar to what we’ve seen before. Mocking the data used in views allows us to isolate the specification. If you’re following our advice and using Decent Exposure to make data available to your view (instead of instance variables) then skip the following section and move on to Stubbing Helper Methods.
Assigning Instance Variables
We now need to assign the message to the view. The rspec_on_rails plugin gives us a familiar-looking assigns method, which you can treat as a hash.
assigns[:message] = @message
Fantastic! Now we are ready to begin specifying the view page. We’d like to specify that the message subject is displayed, wrapped in an <h1> tag. The have_tag expectation takes two arguments—the tag selector and the content within the tag.

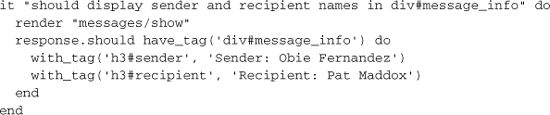
HTML tags often have an ID associated with them. We would like our page to create a <div> with the ID message_info for displaying the sender and recipient’s names. We can pass the ID to have_tag as well.

What if we want to specify that the sender and recipient’s names should appear in <h3> tags within the div?
Stubbing Helper Methods
Note that the view specs do not mix in helper methods automatically, in order to preserve isolation. If your view template code relies on helper methods, you need to mock or stub them out on the provided template object.
The decision to mock versus stub those helper methods should depend on whether they’re an active player in the behavior you want to specify, as in the following example:

If you forget to mock or stub helper method calls, your spec will fail with a NoMethodError.
18.8.6 Helper Specs
Speaking of helpers, it’s really easy to write specs for your custom helper modules. Just pass describe to your helper module and it will be mixed into a special helper object in the spec class so that its methods are available to your example code.

It’s worth noting that in contrast to view specs, all of the framework-provided ActionView::Helper modules are mixed into the helper object, so that they’re available to your helper code. All dynamically generated routes helper methods are added too.
18.9 RSpec Tools
There are several open-source projects that enhance RSpec’s functionality and your productivity or can be used in conjunction with RSpec and other testing libraries.
18.9.1 RSpactor
RSpactor5 is an automated testing framework that runs your spec suite when files are modified. It has inotify, Libnotify, and Growl support, and is about as simple to run as they come.
18.9.2 watchr
Watchr6 is a more configurable alternative to RSpactor in that it can monitor file modifications and trigger any user defined action. This is especially useful when using Cucumber in a project and you would like both your specs and features to run automatically when altered. Simply provide a Ruby script for watchr to load that defines what actions it should take on modification.
18.9.3 Spork
As your application grows, an automated test suite can start to slow down your workflow when writing specs at a frequent rate. This is due to the nature of Rails needing to load the environment for each spec run. Spork7 alleviates this by loading the Rails environment only once and having the remaining specs use the preloaded environment in the DRb server.
18.9.4 Specjour
Specjour8 is a tool aimed at lowering the run times of your entire spec suite. It distributes your specs over a LAN via Bonjour, running the specs in parallel on the number of workers it finds.
18.9.5 RCov
RCov is a code coverage tool for Ruby.9 You can run it on a spec file to see how much of your production code is covered. It provides HTML output to easily tell what code is covered by specs and what isn’t. You can RCov individually on a spec file, or the rspec_on_rails plugin provides the spec:rcov task for running all of your specs under RCov. The results are outputted into a directory named coverage and contain a set of HTML files that you can browse by opening index.html (as shown in Figure 18.2):
18.9.6 Heckle
Heckle is part of the Seattle Ruby Brigade’s awesome collection of projects,10 and is another code coverage tool. Instead of simply checking the scope of your tests, Heckle helps you measure the effectiveness of your specs. It dives into your code and scrambles things like variable values and if statements. If none of your specs break, you’re missing a spec somewhere.
The current versions of RSpec have Heckle support built-in. Just experiment with the --heckle option and see what happens.
18.10 Conclusion
You’ve gotten a taste of the different testing experience that RSpec delivers. At first it may seem like the same thing as Test::Unit with some words substituted and shifted around. One of the key points of TDD is that it’s about design rather than testing. This is a lesson that every good TDDer learns through lots of experience. RSpec uses a different vocabulary and style to emphasize that point. It comes with the lesson baked in so that you can attain the greatest benefits of TDD right away.