
Chapter 6
Implementing Learning: It’s Showtime
IN THIS CHAPTER
![]() Opening with a BANG
Opening with a BANG
![]() Creating a supportive learning environment
Creating a supportive learning environment
![]() Reaching your participants online and in person
Reaching your participants online and in person
![]() Using smooth transitions to move from one place to another
Using smooth transitions to move from one place to another
![]() Bringing closure to a training event
Bringing closure to a training event
Showtime! You’ve conducted a thorough needs assessment, written clear objectives, designed an interactive training program, and developed materials. You’re on!
This chapter’s focus is on helping you deliver training successfully. The chapter addresses opening the session with a bang and creating a supportive learning environment. I share ideas for getting to know the participants better and addressing their needs by training like a pro, using questions and answers that lead to learning, and bringing closure to the session.
The same advice applies whether you’re implementing your training online or in a classroom.
Opening Your Training Session with a BANG, Online or Off
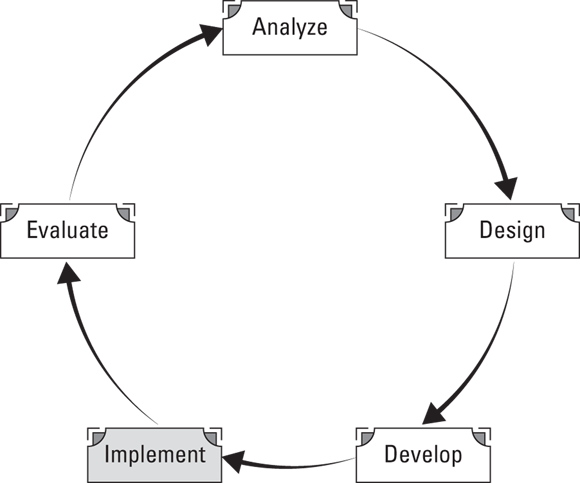
Stage Four, Implement (see Figure 6-1), is most likely the part of the Training Cycle that most people think about when they hear any terminology about training. It’s certainly the part that everyone sees, and, as previous chapters in the book reveal, it’s the culmination of a huge effort that focuses on the learner and what needs to be accomplished to ensure a successful training.
© John Wiley & Sons, Inc.
FIGURE 6-1: Stage IV of The Training Cycle: Implement.
You’ve completed all the preparation steps to ensure that the room, the equipment, and you are as ready as you’re ever going to be. You have arrived an hour early, and you have been welcoming participants as they arrive. If you’re online, you arrived early, too, and are greeting participants by asking them to respond to a warm-up question or some other detail about the content in the chat. It’s time to start the session. Many things happen when you deliver a training session, but few are as important as the opening.
Whether training occurs virtually or in person, you want your opening to be informative, yet creative. It should be practical, yet promote excitement. And it should be helpful as well as enthusiastic. Start your session with a BANG:
- Build interest in the session.
- Ask what participants know and what they want to know.
- Note the ground rules and what to expect.
- Get participants involved.
In the following sections, I examine each of these.
Build interest in the session
Start the session on time and grab participants’ attention right from the start. Be creative with your opening. You may use props, tell a story, state an unusual fact, ask a provocative question, or make a promise. Participants will want to know what’s in it for them: how what they will learn will be useful to them personally or how it will make their jobs easier.
 Telling stories is one of the most powerful means you have to influence and inspire. Stories go beyond the words used. They create mental pictures and instill emotional connections. Stories stick.
Ask what participants know and what they want to know
Understanding your participants’ needs is critical for you, so conduct a mini needs assessment by asking for a show of hands about their experience, expertise, or knowledge. Poll your participants in a virtual session. Asking questions also demonstrates that you want to know about them. In addition, ask participants about their expectations. Listen well. You may want to capture these expectations on a flip chart and then post them on a wall so that everyone can see them throughout the session.
Be honest about expectations that are unrealistic for the session or for you. For example, if one of the participants wants to learn about a topic that is too complex or lengthy or won’t fit the agenda, you can say, “We probably won’t have time to add that to the agenda, but I would be happy to chat with you offline or follow up with a reference next week.”
Note the ground rules and what to expect
Save time by stating any given ground rules up front, such as the start and end times (if they aren’t flexible.) Ask participants to add others. You may want to display the ground rules for ready reference. Some of the most common ground rules are listed here:
Ground Rules for All Classrooms |
|
Stop and start on time | Keep cellphones on silent mode |
Participate willingly | Respect others’ opinions |
Allow for interaction | There are no dumb questions |
Keep an open mind | What’s said in here stays in here |
|
|
Physical Classroom Additions |
|
No sidebars | Okay to move around as needed |
Timely breaks are scheduled | One person speaks at a time |
|
|
Virtual Classroom Additions |
|
When leaving, post “BRB” | Avoid the telephone “hold” key |
Use chat (or Q&A) to ask questions | Use mute in a noisy area |
Briefly note any administrative details and share what participants can expect beyond the ground rules. Pay particular attention to the word briefly. Don’t dwell on the mundane.
 If you must provide a telephone number, email address, or Wi-Fi password regarding an administrative detail, post it on the flip chart or in chat. If you don’t, you will repeat it a dozen times during the day.
Go over the session objectives and the agenda so that participants know what they will learn. Put participants at ease by explaining their role as learners and how you intend to conduct the session. If you facilitate a virtual classroom and you intend to call on participants by name, now is the time to tell them.
I don’t put specific times on the participants’ agenda. Participants become nervous if they see that you’re behind by 30 minutes. They don’t understand that you may be currently covering something that was planned for later or that you know that what they are addressing now is much more important than something later and that you can decrease time on another activity.
I print my personal agenda on brightly colored paper. I use bright paper so that I can see it if it gets lost under handouts. I include the timing of activities so that I stay on track. I like to allow flexibility to meet participants’ needs, but I also need to take full responsibility for achieving the learning objectives.
Get participants involved
Start with a show of hands, and then help everyone get to know each other. Participants learn as much from each other as from the program, so start quickly with introductions that are tied to an icebreaker. Knowing something about the other individuals in the session will make it easier for them to listen, contribute, and get involved.
The classic four questions answered by participants in a training session include:
- Who are you?
- Where do you work?
- What do you hope to learn?
- What’s something interesting about you?
These four questions are usually embedded in the introductions in some way. Remember that your participants will want to know the same things about you.
Always start on time. Anything else teaches participants that it’s okay to be late. You’re training them to be late. Waiting for a few stragglers punishes those who made the effort to be on time. If you anticipate legitimate tardiness (bad weather), you can always be prepared to start with something that is interesting but not critical for everyone to know.
Identify all that you want to accomplish in your opening. These goals may include
- Establishing a participative climate
- Introducing participants
- Introducing the agenda
- Clarifying the participants’ expectations
- Listing the objectives of the training
- Building interest and excitement
- Learning something about the participants
- Determining some minimum rules of engagement (ground rules)
- Establishing your credibility
Plan how you will accomplish what you need to lay the foundation for the rest of the training session. First impressions are critical. A good trainer will catch and hold participants’ attention right from the start. That’s why it’s important to start with a BANG!
Avoiding Seven Disastrous Debuts
Trainers need to be prepared with an opening — what to say and what to do. If you’re unprepared, you may find yourself saying things you didn’t mean to say, getting ahead of yourself, forgetting what you were supposed to say, and just generally confusing your audience.
Be prepared so that you don’t fall into one of these disastrous debuts:
- Asking obvious, contrived questions
- Talking too much; wandering from point to point with no direction
- Telling someone they’re wrong
- Making a participant the brunt of a joke
- Forcing your beliefs on the participants, or telling them what to do or how to think
- Apologizing for anything
- Trying to be funny
Not one of these works. Trust me. I’ve seen them all. Don’t do them.
Creating a Supportive Learning Environment
To successfully create a supportive learning environment, you need to get to know your participants, and that means remembering and using their names. It also means that you will want to let them know something about you.
Get to know your participants
If you have opened with a BANG and gained early participation, learners will expect to be involved in their learning. Don’t change the expectation now! Continue to implement activities that encourage discussion and involvement. Begin to call participants by their names immediately to create a supportive learning environment.
Online, ensure that the name participants want to be called shows up on the screen. I recently had a person who changed her name regularly. I finally asked her privately what she wanted to be called. After she told me, she stopped changing it. Perhaps she just needed some attention, someone to care.
You start to get to know your participants through introductions and by conducting a mini needs assessment during your opening. Select questions that help you better understand the group’s skill level, knowledge, experience, and expertise. In the case of a train-the-trainer session (see Chapter 5),for example, I may want to know how long participants have been trainers, whether they have ever attended a train-the-trainer session, whether they design training, and, finally, whether they thought that training was their destined profession. You may simply ask for a show of hands. If you want to add movement, you may ask participants to stand if their response is yes, or to move to a certain spot in the room based on their response. Online, be sure to take advantage of the poll feature found on most software.
Getting to know your participants early in the session is one of the best investments you can make. After you have created a learning environment in which participants feel comfortable to participate, to ask questions, and to learn, the session has the best chance of success.
What’s in a name: Five secrets to remembering names
To establish an environment that is conducive to learning, trainers need to build trust and let their participants know that they care about them. Because most people are flattered when someone takes the time to learn and use their names, this is one obvious way to build a positive environment. Oh, no! You can’t even do that at a party when you meet only one person, and now I’m suggesting that you learn 10, 20, or more participants’ names all at one time?
Obtain a copy of the roster prior to your training session. I read it over and try to get a big-picture vision of the number of people and names. I also look for names that may be difficult to pronounce so that I can take extra care to listen when they introduce themselves. In a virtual session, having the roster in front of you allows you to add notes if participants introduce themselves, or it may remind you of a comment or question they had.
The five techniques described in the following sections will help you as the facilitator to learn participants’ names in an in-person classroom.
Use name tents
Table tents are sheets of cardstock folded in half lengthwise that sit on the table like a tent (which is why they are called table tents) and may have an organization’s logos printed on them. Provide fat, dark markers so that you can read everyone’s name, even of those who sit way in the back of the room. I usually say something like “Use the marker to write your name or whatever you want to be called for the next couple of days (hours) on the name tent.” My completed table tent sits at the front of the class as a model. Sometimes my model is all participants need; they imitate it before I even say anything.
Ask them to print their names on both sides of the name tent so that everyone can see it no matter where they are in the room. This is actually as much help to you as to anyone. When you see hands go up to make a comment, a quick glance at the name tent and you can easily say, “Name, how would you answer that?”
Some organizations insist on preprinting the name tents with participants’ names. I oppose this practice for several reasons. First, a name could be misspelled, or worse yet, missed completely. Second, it adds a sense of formality that I don’t want as a part of my sessions. Third, it adds to the potential logistical nightmare. Participants need to find their name tents in a stack, or someone needs to be available to pass them out. Or worse, the name tents are placed around the tables, keeping participants from selecting where they want to sit. Fourth and worst of all, the typeface is usually too small for anyone to read throughout the length of the room, so having name tents is all for naught! The only reason you would want preprinted name tents is if you, the trainer, required assigned seating.
Work the introductions
You may think that you can relax a bit while everyone is going around and introducing themselves. Perhaps use the time to get organized for the first information sharing? Not a good idea. Remember, these first few minutes are a critical time to build rapport. As people are introducing themselves, listen to what they are saying, look at their names on their name tents, and begin to connect their names and faces. Also, use their names at least twice during the introductions. You can say, “Welcome, Name,” or “Name, thank you for telling us… .” Start planting those names in your brain.
Use small-group time
I may request that participants remain in their seats for the first small-group activity. They may either turn to the person next to them or form a group of three or four sitting next to each other. My rationale is that while they are completing the task in the small group, I spend a portion of the time matching faces and names again. If I forget anyone’s name, the name tent is nearby and provides the cue for me. I set a goal to know everyone’s names by the first break. Set a goal for yourself.
Play a game
Several name games work well. If you have time for an icebreaker that focuses on people learning each other’s names, you may try these. They’re fun, and they teach everyone, not just the trainer, the names of the participants. These are worth the time investment for a multiple-day class:
- How Many Can You Name? If your icebreaker includes individuals meeting as many other people as possible, you can let them know that you will “quiz” them on how many people they actually “meet,” meaning that they remember their names. Before you debrief the icebreaker, ask how many names each participant remembers.
- Chain Name: In this warm-up, as you go around the room with introductions, participants reiterate all the people before them. For example, person number one says “Hi, I’m Name,” and then person number two says “Hi, I’m Name and this is name of person number one.” The game becomes more and more difficult with each added person, but the rest of the participants begin to help those at the end. The activity establishes a good environment, and everyone learns some names.
- Doodles: Have participants add a doodle to their name tents. The doodle must start with the same letter as their first names. For example, Opal may add oatmeal and Dominick may add a dog. The alliteration will help you and the other participants remember names.
- Name It: When participants introduce themselves, ask them to add something about their names: the history or meaning of their names; who they were named after; what they like (or dislike) about their names; or any other unique fact about their names. The added discussion about the name itself helps everyone to remember more names.
Cheat
Finally, when all else fails, do what I do — cheat. Before the session starts, I draw a sketch of the room and the table arrangement. As participants introduce themselves, I jot the person’s name at the corresponding place in the sketch. I can use that sketch later as I practice everyone’s name.
Participants feel good when you use their names. Work at remembering them.
Let them know about you
Let participants in on who you are to create a supportive learning environment, both professionally and personally. I tend to be low-key about my expertise and experience. I may drop subtle hints related to the discussion or the content about who I am. For example, I would not say, “I have published over 80 books.” But I would say, “In my last book, I interviewed 45 training managers who said… .” You don’t need to be subtle at all. You do want to establish credibility with the participants.
How much you let people know who you are personally is entirely up to you. I like to get to know participants, so I spend breaks with them as much as possible. I discover some commonalities and then use that information to continue our discussion. Sometimes as an energizer, I ask participants what they want to know about each other. I get into the fray and let them ask questions of me as well.
You want to build professional credibility with your participants but let them know you as a human being as well. Don’t keep yourself on a pedestal that prevents you from building rapport with your participants.
Training Like a Pro
Trainers have two key skill sets that they master when conducting training, and both are requirements for the job. First, they facilitate small-group activities, large-group discussions, and learning in general. Second, they present new information, data, and knowledge. I examine the facilitator role in Chapter 10. Here, I examine how trainers can be effective presenters.
Presentation skills
Trainers need to present information. It would be nice to never have to deliver content, but that just isn’t going to happen. When you present, whether as a lecturette, by simply describing a concept during a discussion, or just by responding to a question, the participants not only hear your content, they also “hear” and “see” your presentation style.
People learn more easily when your presentation is interesting and, even better, exciting. This is true whether you’re online or in person. Consider how interesting, competent, and exciting you sound, and what participants infer about you based on your presentation techniques and style as you read the next sections.
What people hear: The Six Ps
Vocal expression adds vitality and energy to your ideas. Several characteristics make up the audio part of your presentation. They are important whether you present in a classroom or online. Think of these as the six Ps of your presentation: projection, pitch, pace, pauses, pronunciation, and “phillers” (fillers). What people hear is especially important online. Research shows that people can hear your mood from your voice. So check your mood and try to boost it before you “go live.”
- Projection refers to how loud the message is heard. Do you project enough volume? Loudness results when air is expelled from the lungs with maximum force and intensity. The appropriateness of a loud or soft voice depends on the room size or Internet connection and the need for vocal variety. You can use variations in volume to indicate urgency, exasperation, and importance.
- Pitch in a conversation flows up and down the scale naturally. But when some trainers stand in front of a group, their voices become dull and flat. Picture pitch by thinking of the states of Kansas and Colorado. Kansas is flat; even when you say the state’s name, it comes out quite flat. Now picture Colorado with its rolling hills, mountains, valleys, streams — lots of variety. Even when you say “Colorado,” your voice can’t help but roll up and down the scale. Pitch variety adds interest to your voice, but it also helps you to emphasize important ideas or signal transitions. Both are important to keep your learner tuned in to what you’re saying.
Pace is the rate of delivery; it’s determined by the duration of sound and the number of pauses between sounds. Words can be spoken fast or drawn out. Like projection and pitch, the pace can also signal importance. Try saying “$50,000” quickly, as if it’s just a small amount of money. Now, say it again, this time slowing your pace and adding emphasis on every other syllable. It can really make a difference.
Select a pace that is comfortable for you. Don’t try to speed up or slow down. Your brain is accustomed to working with your mouth in a certain cadence. However, if you’re told that you speak too rapidly, try punctuating your presentation with more pauses. Right. Just snap your jaw closed. If, on the other hand, you’re told you speak too slowly, check on a couple of things. First, make sure you’re using no fillers. Second, be certain that you’re not repeating the same information. And third, know your material cold. Practice your content aloud a couple of extra times.
- Pauses can actually add more emphasis than anything mentioned so far. A judiciously placed pause before or after an idea (or both) can focus attention right where you want it. Pauses allow you time to think and observe the participants for feedback. Pauses are the sign of a seasoned presenter, because most inexperienced presenters are uncomfortable with silence. Practice your pauses.
- Pronunciation is critical to making it easy for your participants to understand and learn easily. Speaking articulately, clearly, and distinctly is a sign of a pro. Learn to enunciate clearly. Take care that you don’t run words together or let the ends of your sentences trail off so that your learners have difficulty hearing.
Phillers (fillers) are those nasty little nonsounds that sneak in when you aren’t listening to yourself: um, ah, er, okay, ya know, like. Fillers can hypnotize your participants into a trance or grate on their innermost nerves. No matter which occurs, you can be sure that they won’t hear your content but may instead be counting fillers. Sadly, most people don’t hear their own fillers.
The only way I know to eliminate fillers is to hire yourself an Um Counter, someone who will listen to your presentation and provide you with feedback about how many and which fillers you use per minute. The shock of this information seems to awaken something that finally allows you to hear yourself.
What people see
The other half of your presentation is what your learners see. What they see should convey the same interesting, competent, and exciting message.
Body stance is one of the first aspects participants notice about you. Good posture and poise convey confidence in your message and make your participants want to know the content. When standing in front of the room, plant your feet and avoid shifting your weight. Moving around and among the participants is good; it uses up some of your nervous energy and helps to create a natural and comfortable environment. However, repetitive moves, such as pacing back and forth in the same spot, are distracting.
Try to never have your back to the group. Learn to talk and walk backwards! How about sitting? Sitting certainly changes the tone. Occasionally (rarely), you may sit or even lean against a table. Your stance then says “informal,” indicating a change in the tenor of the presentation. I have purposefully pulled a chair in the middle of the room and, while sitting, had a heart-to-heart discussion with a group that was disagreeable. So consider what your purpose is for sitting — what atmosphere you want to convey.
Gestures help to convey enthusiasm and assist your participants in following your presentation, such as indicating first, second, and so forth. Keep gestures natural. If you start with your hands at your sides, they will come up naturally. Think about speaking and gesturing to those seated farthest from you. Doing so enhances your gestures as well as your projection. Avoid crossing your arms, playing with your marker, or touching your head.
You can put your hands in your pockets when you’re relaxed and want to send a message of relaxation to your audience, but don’t do it if you’re nervous; your hands will just get into trouble jangling change.
Facial expression should be congruent with your words. In fact, your face can express more than your words! Facial mobility is an indication of a relaxed speaker. Use it to add emphasis to your message and to display energy. Be aware of your expressions and what they may convey.
Early in my career, I was surprised when a participant said to me, “You don’t want us to ask questions.” This was, of course, exactly the opposite of what I wanted: for them to ask all the questions necessary to understand the skills they were learning. When I asked why she made the statement, she said, “Whenever we ask questions, you frown.” Wow! When I concentrate, my face appears to be frowning. It was a great lesson for me. Think about what your facial expressions are saying about you.
Hang a mirror above your computer screen for the times you conduct virtual training. It will remind you to smile. People can hear a smile in your voice.Eye contact is important in all conversations. In the United States, eye contact represents caring, understanding, and trust. Good eye contact builds rapport with your participants. Avoid looking at the ceiling. Don’t just sweep the participants with your eyes or try to get by with looking at the tops of their heads. People know whether you’re making eye contact. Good eye contact means that you see their facial expressions and can tell whether they are following or agreeing with you.
Be sure to look at all your participants. I find that most trainers ignore the 25 percent of the people closest to the front on their dominant side. Be aware of where you’re looking. I’ve also noticed that good eye contact decreases the number of fillers in your speech. Somehow, it’s tougher to look someone in the eye and say “um”!
Online, looking at all your participants is just a bit easier, because when you look into the camera, you’re making eye contact with everyone. Raise your laptop so that your cameral is at eye level. You can do this quickly by placing a stack of books under your laptop. Practice speaking to the camera, not the screen.
I remind myself to look at the camera by posting a brightly colored sticky note behind the camera with “LOOK” on it.Eye contact is a cultural preference that’s not viewed the same way in all cultures. If you’re training in another country or training other cultures in the United States, you should, of course, respect other values. Some cultures consider eye contact rude or aggressive. Be familiar with the culture of your participants.
- Nervousness is displayed in numerous ways: pacing or swaying; fidgeting with a pen; jingling change in your pocket; perspiring; shaking; clearing your throat; grimacing; tenseness; and dozens of other ways. However, if you have interesting content, your participants won’t even notice. The number one rule regarding nervousness is “Do not say that you’re nervous.” I cover nervousness in greater depth in Chapter 12.
- For online viewing, participants can’t see you fully in a physical sense, but they can “see” a lack of caring if your voice isn’t engaging, or they see disorganization if you’re multitasking ineffectively, or hesitation and nervousness if you haven’t mastered your content yet. Except in an emergency, your camera should be on all the time to model for everyone else — even when you have a slide showing.
- Stand if you can, and try to utilize a standing desk for online presentations. Some recommend that you back away from your webcam so that participants can see your gestures. A recent study showed that participants didn’t even need to hear a presenter talking; all they needed to build rapport was to see the presenter’s body language.
Eliminate distractions by silencing your phone and getting rid of loud fan noises, for example. Life has changed since the pandemic, and people are more tolerant of a cat jumping up next to the computer. Still, as their leader and facilitator, you should attempt to show respect for your participants.
To eliminate background noise, try Krisp, a free software that blocks background noises so that only your voice can be heard.- Improve your online presentation by recording yourself and then considering your body language, sound, gestures, and anything else you think you want to improve. You have the ability to observe and make immediate improvements. Take advantage of this gift.
Treat feedback as a gift
Feedback is good for learning new skills and improving performance. Giving feedback to yourself is nearly impossible. I recommend that you give a copy of the form in Table 6-1 to a colleague or two. Tell them to complete the form candidly during your session about what they heard and saw. Following the training, when they share their observations with you, be quiet and listen. After you have the observations, you can get started on any performance improvements necessary.
TABLE 6-1 Training Feedback
I am interested in improving my skills as a trainer. Thank you for agreeing to observe my training session. Please provide feedback to me in the following areas. Thank you for your time. |
What do you hear (the six Ps)? |
Projection: |
Pitch: |
Pace: |
Pauses: |
Pronunciation: |
Phillers: |
What do you see? |
Body stance: |
Gestures: |
Facial expression: |
Eye contact: |
Nervousness: |
What suggestions do you have for improvements I can make? |
The participants’ materials
Encourage the participants to use the materials provided. First, using the materials will help them to understand the content better. Second, they will more easily find any information they need after the training session. Here are more tips about using materials:
- Always refer to every page, even if you won’t use it. Tell the participants why it’s there, for example: “The resource page contains information you may refer to after you return to the workplace.”
- Decide whether you will have the handouts available as participants arrive, after the session starts, or at the end of the session. Each approach has advantages and disadvantages. In a virtual setting, you have several choices prior to the session. You can email them or, if you have some unique items such as laminated job aids, you can mail them. If the content is large, you may have the participants download them from a file storage site such as Dropbox or Google Drive.
- Remind your participants what page they should be on as you move through the content. This reminder is especially important in a virtual classroom.
- During presentations or activities, tell participants whether the information is in their manuals or handouts so that they can choose whether to take notes.
Notes: To be or note to be
Whenever I conduct a train-the-trainer session, I’m asked about notes. People ask: “Should I use them? Or should I memorize everything? Should I hold them? Should I keep them in the trainer’s manual? Should I use an outline? Should I speak from key words? Should I use paper? Should I use note cards? Should I write them in my own words?”
My answer is “Yes.”
There is no secret about using notes as a trainer. Do what works best for you. My best advice is “Yes, use notes.” Your participants are there to see you succeed. They want you to stay on track. They want you to remember everything you’re supposed to tell them. They don’t want you to memorize a “speech.” They want you to converse with them. They want you to be comfortable with the content so that you can interact with them and address their unique needs — even if it isn’t on the agenda.
On the other hand, participants do not want you to read your notes. This is especially true with a virtual classroom where the participants may not see you all the time. They can “hear” you reading, though.
I can’t advise you as to the one way that works best. I can, however, offer a few techniques and ideas from experience. I hope you’ll try a couple of these ideas and find what works best for you:
- Use the trainers’ manual as your guide. If a trainers’ manual has been developed, it’s probably filled with almost everything you will need to conduct the training session. You may want to go through it, crossing off parts you won’t be using, or even removing pages you won’t need. If it’s an off-the-shelf training program, you may want to customize it for your organization, adding your own examples, questions, and stories.
- Use the participants’ manual or materials as your guide. This is my preferred method. I start with a participants’ manual. If it’s bound and printed on both sides, I copy it on one side only. I use the information from the trainers’ manual (if there is one) and add pertinent notes. I write the time at the top of the page (the time that it should be when you reach that particular page.) I underline key ideas, add notes about media, props, or handouts, and include special information about putting the participants into small groups.
Develop your own notes. Some trainers create their own notes. Doing so gives you the maximum amount of creative license to develop your notes so that they work best in your format. Some trainers use an outline, some use key words, and some develop an entire manuscript. I caution you about developing a manuscript; it’s a great deal of work. Also, trainers who tend to do this are usually good writers, and after they have written their “good stuff,” they want to read it as it is. Be careful. Your learners don’t want you to read to them.
Another method is used by trainers who rely on their visuals and media to guide them through the session. They may print the slides four to a page and add their notes, or add reminders in the margins of their flip charts. Some develop their notes using the note feature of the PowerPoint slide presentation and then use the printed pages to guide them.
Experiment a bit until you find the technique that works best for you.
Whether in a classroom or online, notes will keep you on track with regard to both time and topic. They are your support system, so use a format that works best for you. Here are a few more tips about working with notes:
- Become intimate with your notes. Practice with them and become familiar with what’s on each page and where. You should be able to trust that anything you may need will be found in your notes. Therefore, don’t write new notes just before your training session. Yes, you practiced with your notes. They are a little bent and crinkly. You folded them when you didn’t mean to. You even spilled a little latte on module three. But don’t redo them now. Better that they are well worn and familiar to you than pretty and not familiar at all. If you practiced with them, you know where to find the list of five ways to recognize a good leader.
- Number your pages. Whether you use your own pages or cards or modify the trainers’ guide, number them. If you use the trainers’ guide as a starting point, you may add pages that are more pertinent or delete pages that won’t be a part of the training session. Renumber the pages. If you drop them, you will be able to put them in order again. I once sat in the audience and watched a man shuffle his note cards as he delivered his opening lines. The audience did not hear a word he said. We were all aghast at what he was doing. He realized it and recovered by putting us into buzz groups. Fortunately, he had numbered his note cards.
Cue yourself. Whatever technique you use, develop a plan to cue yourself about where to find information. Use highlight markers, underlining, boxes, clouds, arrows, or different colors. You may, for example, underline all the places where you need to use a type of media, and put stars in front of the questions you need to ask. You may draw a miniscreen as a cue to use PowerPoint, and put red boxes around the times of the session.
If you use the trainers’ guide as your notes, it will give the times in some formula that denotes how far into the training you are. For example, 0315 means that three hours and fifteen minutes have passed since you started training. If you actually started at 8:00 o’clock and you’ve built an additional 15-minute break into the session, you would replace 0315 with 11:30 a.m.- Don’t fold or staple your notes. Folding them makes them weak, and stapling prevents you from being flexible with them. I usually keep my notes in a three-ring binder and remove only the page or pages I intend to use during a specific amount of time. When I’m finished, I return the pages and pick up the next one or two. I keep the binder at the upper-left-hand corner of the table. I always know where my notes are.
- Use good paper. If you create your own note pages, use a heavier stock of paper. It will hold up better. If your hand tends to shake, heavier paper won’t rattle, either! If you use note cards, use larger cards than the 3-x-5 cards. The larger cards provide you with much more flexibility — and room.
One final note on notes: Make them work for you; don’t be controlled by them.
Asking and Answering Questions
The art of asking and answering questions and encouraging participants to ask questions is a valued skill of trainers. Don’t take it lightly. Beyond simply eliciting answers or facts, questions can stimulate interaction and discussion. Questions enable you to assess what your participants know and what they still need to learn. You can use questions to emphasize and reinforce significant points, to encourage participants to evaluate their own knowledge gaps, and to think about how to address those gaps. Questions encourage thinking.
Encouraging participants to ask questions ensures understanding, enhances interest, increases learning, and prompts interaction.
Encouraging participants to ask questions
Participants may ask questions for different reasons. They may be positive reasons, such as to acquire information. On the other hand, they may ask questions to irritate the trainer or to impress other participants. Fortunately, participants most often ask questions for positive reasons. Here are some ways to encourage more questions:
- At the beginning of the session, encourage participants to ask questions at any time. If you’re facilitating a virtual session, encourage participants to use chat liberally.
- Online, establish guidelines for asking or responding to questions. With a small group, you may want participants to simply raise a (physical) hand. On the other hand, if your group goes beyond one screen, you could ask them to use the raised-hand feature or add it to the questions or chat. For groups of fewer than 20, Kristin Arnold, trainer, consultant, and panel expert, asks participants to simply “lean in,” and she watches for it.
- Kim Seeger, master trainer, likes to ask for a specific number of questions to get things started, as in, “What might be the three most frequently asked questions about our topic?”
- Go through your training program. Try to anticipate questions that may come up. During your presentation, pose these questions to the participants if they don’t pose them to you.
Stop at natural points in the training and ask for questions.
Have participants work in trios to create a question about the information that you’re presenting. Have them write the question on an index card. Collect the questions and redistribute them so that each trio has a different question to answer.- If a participant looks puzzled, stop and ask whether there is a question.
- If two or more participants are talking among themselves, ask them whether they would like something clarified.
- Allow time for participants to ask their questions privately. They may be too shy to ask in front of the entire group.
Make it okay to ask questions. Assume that there will be questions. At the same time, convey a message to your participants that you expect questions. You can convey this message by how you ask for questions. Instead of saying “Are there any questions?” say “What questions do you have?” It may be subtle, but it works.
Answering questions: Some guidelines
These guidelines provide suggestions as you master the art of asking questions:
- Anticipate your participants’ questions. Being prepared is always good. If you get the same questions often, you may want to add the content to the training. Practice answers out loud.
- Inform participants of your expectations for asking questions early in the session.
- Listen carefully to each question for both content (what is asked) and intent (what is meant). Listen for the emotion that may not match the words of the question. If the individual’s intent doesn’t seem to match the content, you may be heading for a let’s-see-whether-we-can-irritate-the-trainer situation. If you do receive a hostile question, avoid showing your feelings. Remember, the group is usually on your side.
- Treat a “why” question like a “how” question. “Why” questions may put you on the defensive because it seems as if you must justify your rationale. However, if you think about it from a “how” perspective, you will respond from a fact basis rather than an opinion basis. For example, if someone asks you “Why do you think your process is better?” respond by stating how your process is better. Do you see the small nuance that will help you maintain your composure?
Paraphrase the question to ensure that everyone heard and that you understood the question. Paraphrasing prevents you from answering the wrong question. You may also choose to paraphrase all lengthy questions to ensure clarity.
Another reason to paraphrase a question is that it gives you time to organize your response before plunging in with an answer. But take care with how you paraphrase. You want to clarify what the question was without coming across as condescending. Saying “What you mean is…” or “What you’re trying say is…” may seem insulting.- Keep your answer short and on target. Choose your words carefully. Don’t build a watch if the individual has only asked for the time. Avoid using the word obviously, which implies that the participant should already know the answer. I also try to avoid “you should,” “you must,” and other terms that appear to be controlling or moralizing. These words may discourage others from asking questions.
- Direct your response to the entire group, not just the person who asked the question. You may start by responding to the person who asked the question, but then look at the other participants during your response to ensure that the rest of the participants feel like they’re part of the discussion. Doing so also discourages the person from tagging on a second question, which may lead to a conversation between the two of you. Be especially careful with how you answer online.
- Watch the person’s body language. If you’re not sure you hit the mark, verify your response with “Is that what you were looking for?” or “Would you like more detail?”
- If you don’t know an answer, redirect it to the participants or another source, or state your follow-up plan for getting the information. In addition, “I don’t know” is an acceptable answer. Just be sure to tell the participant what you will do (and by when) to find the information. “I don’t know the answer to that, but I can call the office on break to obtain the information.” Don’t make up or fake an answer.
- If the question refers to something you plan to cover later, ask the participant to write the question on a sticky note and place it in the parking lot (a sheet of flip-chart paper on which you write questions or ideas). Address the question specifically at the time that the topic is introduced. Online, ask participants to put the question in the question feature.
- I avoid saying “That’s a good question” or “Gee, I’m glad you asked that question.” Offering a compliment after every question can come across as insincere. On the other hand, if you say it sometimes, some participants will wonder if their questions were not “good questions” or if you’re not “glad they asked a question.” It may seem minor, but avoiding the situation creates one less concern for you.
Asking questions
Questions are wonderful tools to encourage participation, personalize a presentation, or provoke participants to think about the content. To be effective with your questions, take these things into account:
- Plan your questions in advance, including when they should appear in your presentation.
- Consider your reason for including a question, such as whether you’re looking for a correct answer, reinforcing a key learning point, initiating controversy, or asking a rhetorical question.
- Early in the session, ask the question that will yield involvement by the most participants. For example, if you’re asking for a show of hands, ask the question that will cause the most people to raise their hands in response.
- Keep questions short and clear.
- Ensure that questions are relevant to your presentation.
- Know whether you want information or opinions.
- Go from general to specific when asking a series of questions.
- Get participation by asking questions early. Further, be sure to balance to whom you direct the questions.
- Ask open-ended questions — ones that can’t be answered with a “yes” or “no” response.
- Say the participant’s name first and then ask the question. You don’t need to “catch them” in a mini vacation.
- Pause after asking. Too often, trainers are uncomfortable with silence, so they will ask question, and when they don’t get an immediate response, they ask it again. If still no response, they answer it themselves. This approach teaches participants that if they wait long enough, the trainer will ask as well as answer all the questions! Instead, take a pause and look away for a couple of seconds. There is an excellent chance that someone is ready to answer when you look at the group.
- Be prepared to take action if you don’t get a response.
Asking questions is one of the most useful tools you have to encourage participation. Hone your questioning skills.
Creating Smooth Transitions
Keep your learners in mind as you transition from one topic to the next. Take them with you on a smooth journey as you move through your agenda. Help them see the relevance as well as the big picture and how things are connected. You will look like the professional that you are. Use these tips to assist you:
- When you’re designing the training, make sure it has a logical flow or sequence. This in itself will enable smooth transitions.
- Make sure you properly wrap up the previous topic before going on to the next. Ask whether there are questions. When there are no more, say “Now let’s move on to ________.”
- Use mini summaries to transition out of a section. You may present these summaries, but you don’t need to; you could instead ask for volunteers to do this for the group, or place participants in small groups and ask each group to identify two or three summary statements.
- Pick a common theme that relates to both the previous and the upcoming topic. Address that theme while moving from one topic to the next. Tell participants how the role play you just completed is related to the next module.
- Use the building-block approach. In your transition, summarize the concepts from the previous discussion that will be the foundation of the upcoming discussion.
- Use visual cues. If you’re following an agenda or a flowchart, show the change from one point to the next. I’ve used props at times. For example, I used two-by-four blocks to “build” a structure when discussing the Ten Building Blocks of Teams.
- Although it’s difficult to practice an entire training presentation, it is very easy to practice transitions. Go through every lesson of your training, and write down key points for each. Next, look for relationships with the activity or presentation before and after. Last, develop and write the transitions in your training notes. Finally, rehearse them until they are smooth.
Wrapping Up an Effective Training Session
Remember that the conclusion should provide a sense of closure for the learners, and you need to ensure that you met their expectations. One of the most common ways to verify that participants’ expectations were met is to review the expectations they developed at the beginning of the session. You can also conduct a verbal check with participants.
For virtual classrooms, the closure is typically a little shorter and frequently incorporates these items:
- Level 1 session evaluation.
- Level 2 knowledge assessment. Many platforms have built-in tools for these assessments, and the content is based on the class design.
- Follow-up reference materials such as a job aid or content that will be helpful when employees return to the workplace.
- A send-off that includes information about next steps — especially if the session was part of a series or a blended-learning design.
Read on for ideas on wrapping up a training session.
Providing a shared group experience
There are many ways to conduct closing activities. One of the most creative ways I’ve heard of is to develop a video or a PowerPoint collage. First, determine the equipment you’ll use, and then use it to take a video or pictures of the training room before participants arrive. Continue to capture pictures of the group throughout the training session: of working in small groups; individual activities; in a large group. Be sure that everyone is represented in the shots. If you’re taking digital shots, put them together in a collage presentation — and even add appropriate music if you want. Near the end of the session, announce that you want to show them all the hard work they have completed during the session, and sit back and enjoy the show. This is a very motivational way to end a session.
I’ve taken screen shots of participants in ongoing online sessions with teams or groups and then emailed one to them with a personal note after the final online session. I’ve also taken pictures during team-building sessions, had them developed at a photo shop, and shared a couple of sets with the participants, letting them each take a couple of their favorites. Again, if you do this, ensure that you get everyone in the pictures.
Evaluating the learning experience
All training sessions based on an instructional design model will include an evaluation element. You may evaluate participant reaction, knowledge gained, application of the skills and knowledge, or business results. (Chapter 7 provides more details about evaluation.) You may also consider conducting a feedback session.
You can also request feedback and improvement suggestions for future sessions. One successful method is to ask participants to say what went well and what improvements are needed. For in-person sessions, use two flip charts with a “What went well?” heading on one and “What would you change?” on the other. You may alternate making the lists on both flip charts at the same time. An easy way to do this online is to enter comments into the chat as participants are speaking. You’ll have a record of all thoughts.
Gaining commitment to action
To gain a commitment to action from your participants, you may want to review the training’s agenda and objectives and ask participants whether everything was covered. Commitment to action can be worked into a closing activity in which you ask, for example:
- What was the most valuable part of the training session?
- What will you implement back at the workplace?
- What will you change as a result of what you’ve learned?
One way to conduct these discussions is to break learners into small groups who then report to the larger group. To help with transfer of learning, you may also want participants to pair up with a “buddy,” each of whom will support each other after the session has ended. This is a good time for the buddies to exchange contact information and make plans for the first contact. Encourage buddies to record their plans in their participant materials or electronic scheduling devices.
Jenn Labin, mentoring expert, suggests that a good closing activity is to have participants send a calendar appointment to their supervisors to meet and discuss outcomes of the session. This is a great way to ensure transfer of learning and to obtain the supervisor’s support for new performance.
Sending people off with a final encouraging word — or two
Design your ending as tightly as you do your opening. You open the training with a BANG; end it with the same kind of fanfare.
To help participants remember the experience, give them encouragement, and send them off with something to think about after the session. Here are some ways to end: a call to action; a poem; a quote; a moral to a story; an anecdote or illustration; a visual; a reference to the introduction; a rhetorical question; a demonstration, a challenge; a magic trick; or something that makes the point. I will forever remember stabbing a plastic straw all the way through a raw potato as the facilitator said, “Positive thinking moves mountains. Believe that you will be successful, and you will be.”
Bob Lucas, author, trainer, and consultant, likes to end day-long training sessions by reading from the Dr. Seuss book Oh, the Places You’ll Go! The book’s message of optimism and reaching goals has high impact. Bob adds his own statement encouraging learners to achieve their goals. Every one of these endings works online, too.
Finally, stand at the door, shake participants’ hands, wish them luck, and say good-bye. Online, say goodbye to each person and be one of the last to leave the session.
Focusing on the importance of the asking-and-answering question section earlier in this chapter, here’s a quote by my favorite author, e.e. cummings: “Always the beautiful answer who asks a more beautiful question.”