
THE UMBRACO INSTALLATION COMPONENTS
As you know by now an Umbraco installation is made from a series of components. In this section you'll read more about which ones make up this sample application and how they function in relation to your Umbraco installation.
Before you install, you need to configure your Visual Studio project to reference the following Umbraco libraries, as shown in Figure 15-1.
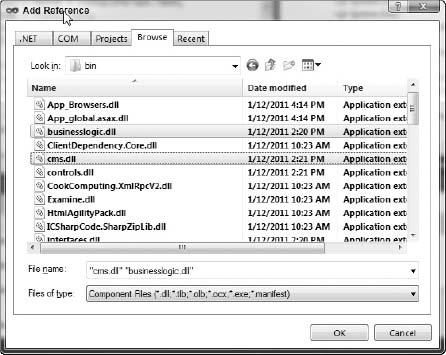
 You can find the Umbraco libraries in your <install root>/bin folder.
Now that you have the libraries configured, you'll need to set up the document types, templates, macros, and event hooks that will run the example. These are outlined in the following sections.
Document Types
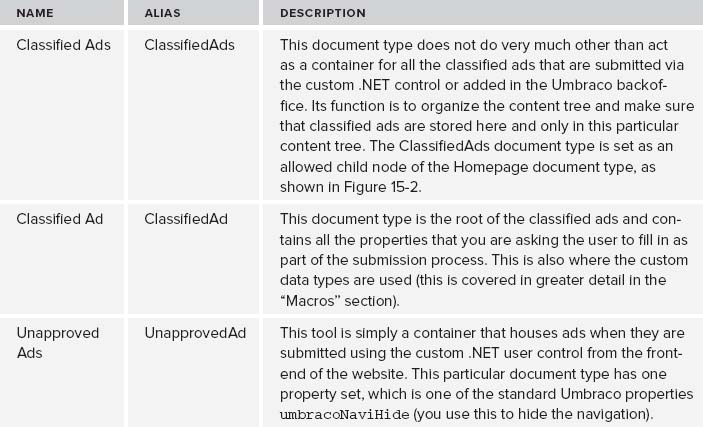
A few document types are needed to support the classified ads. This section shows how to use them and how they relate to the overall website. Table 15-1 describes each document type in detail.
Templates
Because you are leveraging one of the standard Umbraco skins, very little template work is involved in this sample application. Only one master page template is required in this case, and you use this master to output the details of a classified ad. Instead of starting from scratch and reworking the layout of the site, you can use the available Textpage template as a parent masterpage and inject the output from the ClassfiedAdDetails.xslt macro. Listing 15-1 contains the simple template code that was added to the Textpage.master file.
TABLE 15-1: Classified Ads Document Types

<%@ Master Language=“C#” MasterPageFile=“∼/masterpages/umbMaster.master”
AutoEventWireup=“true” %>
<asp:Content ID=“Content1”
        ContentPlaceHolderID=“cp_content” runat=“server”>
    <div id=“subNavigation”>
        <umbraco:Macro ID=“Macro1” Alias=“umb2ndLevelNavigation”
runat=“server”></umbraco:Macro>
    </div>
    <div id=“content” class=“textpage”>
        <div id=“contentHeader”>
          <h2><umbraco:Item ID=“Item1” runat=“server”
field=“pageName”/></h2>
        </div>

        <umbraco:Item ID=“Item2” runat=“server” field=“bodyText” />
        <asp:contentplaceholder id=“ClassifiedDetails”
runat=“server”></asp:contentplaceholder>
    </div>
</asp:Content>
The highlighted code snippet in Listing 15-1 shows what was added to the skin file. All this does is provide a target region to add the classified ad details to. Listing 15-2 shows what the added template, ClassifiedAdDetails.master, looks like.
LISTING 15-2: ClassifiedAdDetails.master
<%@ Master Language=“C#”
   MasterPageFile=“∼/masterpages/umbTextpage.master”
   AutoEventWireup=“true” %>
<asp:content ContentPlaceHolderId=“ClassifiedDetails” runat=“server”>
    <umbraco:Macro Alias=“ClassifiedAdDetails”
 runat=“server”></umbraco:Macro>
</asp:content>
The key to this file is the inclusion of the ClassifiedAdDetails macro, which renders all the properties of the individual classified ad that is currently displayed to the user.
The code in Listing 15-2 could as well have been displayed using a bunch of <umbraco:item …/> tags. But, because you have various fields that you must format (like dates and images), it's a cleaner separation and more readable format to output it in an XSLT macro.
Macros
As mentioned, you need a number of macros to support this level of customization. The XSLT that you use is a straightforward output with various filters. The .NET user control is how the user submits an ad without logging into the Umbraco backoffice and how you can instruct Umbraco to programmatically create a node using the Umbraco document API. Table 15-2 describes the features and functionality of each of the XSLT-powered macros.
For more details on using XSLT-powered macros, see Chapter 11.
| MACRO | DESCRIPTION |
| ClassifiedAdDetails.xslt | This macro displays each document type property from the Ad Detail tab. In addition to simply displaying straight values, it also formats the publication date and formats the optionally submitted ad image. |
| ClassifiedAdsLatest.xslt | To display the three latest ads that were added and approved, this XSLT macro does a few things. It used the <xsl:sort ../> tag to sort the retrieved nodes by the updated date in descending order (newest to oldest). It also restricts the output of the top three nodes of the nodeset that was returned from the xsl: for-each select statement by comparing the current position() in the loop to make sure that it is less than or equal to 3. Notice, too, that the selection of the original nodeset includes the XSLT extension GetXmlAll(). This means you can place this macro anywhere on the site and it always returns the classified ads without having to worry about where they live in the content hierarchy. The returned nodeset is also filtered by specifying that the name() should be equal to ClassifiedAd. This ensures that you are only returning classified ad nodes. |
| ClassifiedAdsListing.xslt | This macro is the most complex of the three because it uses what is referred to as the Muenchian method for grouping the output of classified ads by the specified ad category. This list is not filtered other than to compare the ad expiration date to today's date to make sure that it is greater than or equal to today. Any ads older than today should not appear. The output of the list also includes a thumbnail version of the optional ad image. A bit of jQuery shows and hides this image. The jQuery code is available in the scandia-bll.js script file, which you can find in the Visual Studio solution in the scripts folder. |
To get more details on the Muenchian method, see Chapter 5. For more on grouping, see Chapter 11.
The .NET portion of this application takes care of creating the submitted classified ads and uses the Umbraco document API to accomplish this task. Table 15-3 provides an overview of what each component does in the ClassifiedAd .NET user control–powered macro.
TABLE 15-3: ClassifiedAd .NET Macro
| USER CONTROL FILE | DESCRIPTION |
| ClassifiedAd.ascx | This file displays the classified ad submission form and contains nothing Umbraco specific at all. The code in this file is standard .NET controls and form validation. The Submit button executes the PostBack event, and the code-behind takes it from there. |
| ClassifiedAd.ascx.cs | This file is also known as the code-behind file. It is where all the business logic is executed and, more importantly, where the Umbraco-specific logic takes place. |
You must pay attention to several things in the ClassifiedAd ascx.cs file:
- Public Properties: The properties defined in the class scope of this file are used to capture the macro parameters that are set in the Umbraco macro. The code uses these values for storing the submitted classified ad in the right place in the content tree and also for storing the accompanying image if one is uploaded.
- Reading Configurations: Lines 30–44 are all about reading the configuration file that is located in the <install root>/config folder.
- Display Custom Data Type Values: Lines 46–78 query Umbraco for the custom data types and loop over the returned XML to parse and set list items for the HTML form.
- Creating the Classified Ad: The submit_click method does all the heavy lifting for creating the Umbraco node. Line 87 calls the document API and creates the document using the public properties passed in using the macro parameters, as well as locally set parameters. Each property is then saved to the newly created document via the getProperty method. You then skip the publishing of the new document because you want it to be reviewed in the backoffice first. Finally, you see a redirect to the Thank You page, which was also passed in using the macro parameters.
See Appendix D for details on how to work with Umbraco data types.
Event Hooks
Chapter 12 covers the Umbraco event model. In the sample application, you tap into the event hooks made available to you when a node is published (or in this case before it's published).
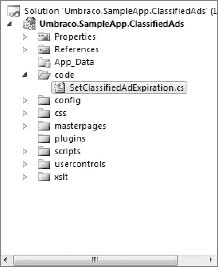
The code folder in the sample application Visual Studio project contains the code that executes when a node is published, as shown in Figure 15-3.
A couple of things to note when you open this file:
- The SetClassifiedAdExpiration class extends umbraco.BusinessLogic.ApplicationBase. Extending this class forces Umbraco to run it every time an action is performed in the Umbraco backoffice. This is what allows you to tap into the Umbraco event hooks and inject functionality to the backoffice without rewriting or changing the Umbraco source code. Cool, huh? The code in this case attaches to the umbraco.cms.businesslogic.web.Document.BeforePublish event.
- Make sure that the published node is of document type ClassifiedAd. If it's not, then the process continues.
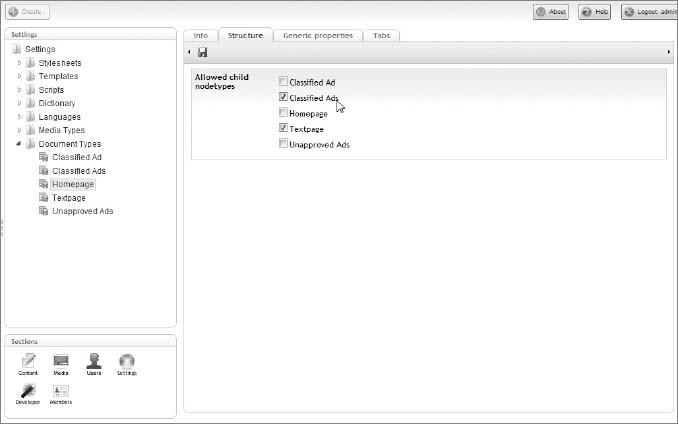
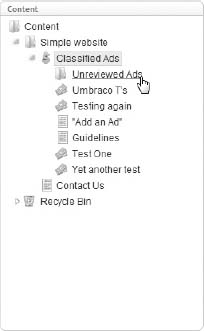
- Make sure that the parent of the published node is currently the Unreviewed Ads node, as shown in Figure 15-4.
All this code executes when a user clicks the Save & Publish button located in the top toolbar in the Umbraco backoffice.
 Leveraging the umbraco.BusinessLogic.Log class when working with events is very important. This registers entries in the umbracoLog table with messages that you specify. Without these log table entries, troubleshooting an event issue is difficult because you have no indication of the event taking place just by looking at the backoffice. You can find an example of this on line 28 in the SetClassifiedAdExpiration.cs class.
Of course, many other things can happen in this type of event hook that have not been implemented here; for example, sending an email notification to the user who submitted the ad with a message that the ad is now live.