
DICTIONARIES
By definition, a dictionary is “a reference book containing an alphabetical list of words with information about them,” as defined by the Princeton Wordnet dictionary. This holds true even in the world of Umbraco. The following sections describe how to work with dictionaries and why you would want to use them in the first place.
A dictionary in the context of Umbraco is a way for you to support multi-lingual labels and portions of text while maintaining these values in a common place. For example, if you needed to translate all the items in your top website navigation, you can use Umbraco dictionary entries to define how each item displays depending on the user's chosen language. The sections that follow show you how to implement this flexibility using the Umbraco backoffice.
The Umbraco Approach
The use of dictionaries has two distinct applications in the realm of Umbraco:
- For translations in a multi-lingual website
- To implement acronyms or other items that may be constants throughout the content of your site
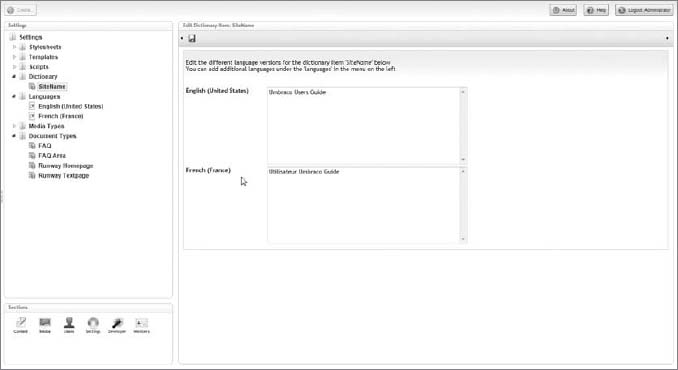
The former is probably the most common use for an Umbraco dictionary. What does using one do for you as an author, editor, or administrator? It enables you to set a dictionary key and apply values to this key on a per-language basis. Figure 6-2 shows an example of this usage. In this case, you can see a dictionary item called SiteName, which is translated in both English (United States) and French.
Similarly, as described in the second bullet, if you use a term in several places throughout your site you can define it once in one place. If you must make a change to this term, you can simply make that change in one place, and that change is instantaneously propagated wherever the dictionary item is used!
Adding a Language
To leverage multiple languages with Umbraco, both for use in the dictionary and to support localization (discussed in Chapter 7), you must add languages in the backoffice. To add a language in Umbraco, follow these simple steps:
- Navigate to the Settings section in the Umbraco backoffice.
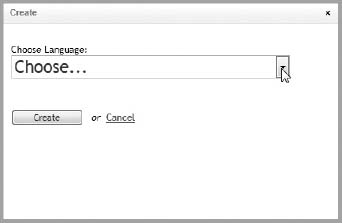
- Right-click the Languages node and click the Create menu option.
- Choose the language that you want to add from the Choose Language drop-down list, as shown in Figure 6-3.
- Click the Create button.
Now you can add dictionary items and translations for the added language(s) as well as specify the language as default for a given host, as discussed in Chapter 7.
Working with the Dictionary
To implement all that we have covered so far in this chapter, you must put on your XSLT hat. In Chapter 5 you learned about macros and how to leverage XSLT to output content. Umbraco ships with a library function called GetDictionaryItem. This library method takes a single argument, which is the key of the dictionary item that you are outputting to the page via your macro.
Listing 6-3 provides an example of how you can translate the name of your site by outputting the SiteName key as part of a macro that you can then include in your topmost template.
 For examples on how to include an XSLT extension method, like the one used in Listing 6-3, refer to Chapter 5, specifically the “Using XSLT Extensions” section.
LISTING 6-3: OutputDictionaryItems.xslt

<?xml version=“1.0” encoding=“UTF-8”?>
<!DOCTYPE xsl:stylesheet [ <!ENTITY nbsp “ ”> ]>
<xsl:stylesheet
version=“1.0”
xmlns:xsl=“http://www.w3.org/1999/XSL/Transform”
xmlns:msxml=“urn:schemas-microsoft-com:xslt”
xmlns:umbraco.library=“urn:umbraco.library”
xmlns:Exslt.ExsltCommon=“urn:Exslt.ExsltCommon”
xmlns:Exslt.ExsltDatesAndTimes=“urn:Exslt.ExsltDatesAndTimes”
xmlns:Exslt.ExsltMath=“urn:Exslt.ExsltMath”
xmlns:Exslt.ExsltRegularExpressions=“urn:Exslt.ExsltRegularExpressions”
xmlns:Exslt.ExsltStrings=“urn:Exslt.ExsltStrings”
xmlns:Exslt.ExsltSets=“urn:Exslt.ExsltSets”
xmlns:umbusersguide.library=“urn:umbusersguide.library”
exclude-result-prefixes=“msxml umbraco.library Exslt.ExsltCommon
Exslt.ExsltDatesAndTimes Exslt.ExsltMath Exslt.ExsltRegularExpressions
Exslt.ExsltStrings Exslt.ExsltSets umbusersguide.library “>
<xsl:output method=“xml” omit-xml-declaration=“yes”/>
<xsl:param name=“currentPage”/>
<xsl:template match=“/”>
<!-- start writing XSLT -->
<xsl:value-of select=“umbraco.library:GetDictionaryItem(‘SiteName’)”/>
</xsl:template>
</xsl:stylesheet>
Create a macro based on the preceding XSLT and include it in your Runway Master template by using the umbraco:Macro tag, as shown in Listing 6-4.
LISTING 6-4: Umbraco Macro Tag for Dictionary Item
<umbraco:Macro Alias=“OutputDictionaryItems” runat=“server”></umbraco:Macro>
The other approach to inserting and referencing dictionary items is by adding them directly to your template, as opposed to working with the dictionary item in an XSLT macro. The example in Listing 6-3 is overly verbose for outputting a single value. So, to output single values from the dictionary, you can simply leverage the <umbraco:Item /> tag using the following steps:
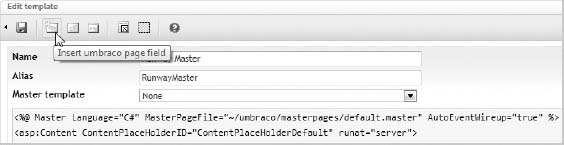
- Navigate to the Runway Master template.
- Click the Insert umbraco page field icon, as shown in Figure 6-4.
- In the dialog that appears, instead of choosing a field in the drop-down list, in the empty text box type the name of the dictionary item that you need, prefixed with a hash sign (#), as shown in Figure 6-5.
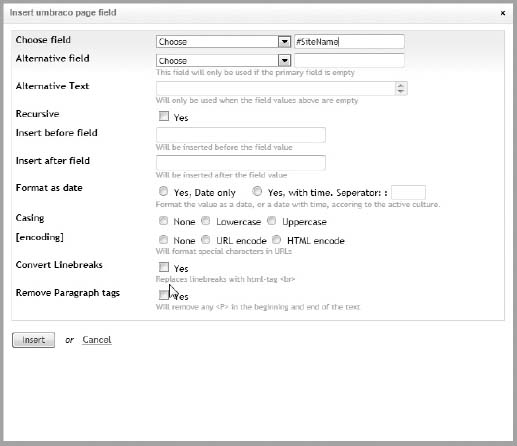
- Click the Insert button to finish. The tag is added to your template and looks like <umbraco:Item field=“#SiteName” runat=“server”></umbraco:Item>.