Before we get into the details of creating new content, you need to be aware that there are a couple of ways to create a new article.
In the back-end of Joomla, from the Control Panel, click the Add New Article button (shown in Figure 21).
You can also select Content → Article Manager and click the New button.

One of the things we talked about earlier in the book was the concept of categorized and uncategorized content, with categorization being provided using Sections and Categories in Joomla. In this section, we are going to provide a bit more detail on these two types and why you might use one over the other.
Categorized content, which can be thought of more simply as content with an assigned Section and Category, represent the ever growing and changing meat and potatoes of your site. Practically speaking, this type of content probably makes up 95% of your site's substance and represents the primary reason people are attracted to visit and revisit your site.
While many people think of web pages as flat two-dimensional, magazine-like pages, it's best to imagine categorized content as three-dimensional entities. Each content item can be used interchangeably within Joomla's various structures of content representation. In short, this means that with a few mouse clicks, you can rearrange the entire layout, organization, presentation, or order of your content without having to change your site template or rearrange the layout of each piece of content (text, photos, etc.) on a given page.
For example if you are trying to present the most recent press articles about your company, you can display them as a three-column vertical layout, or as a bulleted list of headlines (which link to the full text), or as a series of short blog-like teaser lines, which have Read More buttons that link to the rest of the articles. Joomla is able to provide this versatile functionality through the organization of the content items in Sections and categories.
Uncategorized content items, unlike categorized, do not belong to any Section or Category. With this lack of categorization comes with it the fact that uncategorized content items cannot be integrated with Joomla's various forms of dynamic content representation.
For instance, if a page of categorized content consists of a collection of ever changing/revolving individual content items, such as "Recent News," that is accessible from a main menu, whereas a link to uncategorized content will not change—it just links to "a page." If you have ever created websites made up of entirely of static, separated HTML pages, static content pages will seem familiar to you.
Now, just because the content isn't categorized doesn't mean you shouldn't use this feature. Here are some great uses of uncategorized content pages:
About Us
Terms and Conditions
Privacy Policy
Contact Us
Advertise With Us
Sign Up Now
Once you have begun the process of creating a new article, you are taken to a screen, like the one shown in Figure 22, where you will notice the information is divided into roughly two types—the article and parameters, including meta data. The part that contains details on the article has its own WYSIWYG (What You See Is What You Get) editor to facilitate easy authoring. The other part, which is mostly found on the right side, is a series of parameters controlling how your content is displayed and metadata about the article.

For adding content to your site, Joomla uses TinyMCE as its WYSIWYG editor, which is available for editing on both the backend and frontend. The editor works much like a typical word processor, such as Microsoft Word, OpenOffice.org Writer, or Apple iWork's Pages, so the toolbar should be fairly intuitive.
Enter the title of your content item, and enter the title under Title Alias. The title of your article is what will appear at the top of the article, usually in some form of header tag. A title alias is an alternate title for your content item, used by SEF scripts and dynamic title/meta scripts.
Assign a Section and a Category for your content item, using the drop-down menus.
Use the Joomla editor to enter your content.
If you prefer to write your own HTML, toggle the editor by selecting the HTML button provided in the menu options on the Joomla editor. You will see a pop-up window that enables you to edit the actual HTML source of your content item. Once you select the update button at the bottom of the window, the changes you have made to your content item appear in the Joomla editor.
Save your work.
You may save your work by selecting the Save or the Apply radio buttons in the top right hand corner of the screen. Each of these buttons saves your work, but with different functions. Selecting Save saves your work to the site, and closes the content item window, taking you back to the Article Manager screen. Selecting Apply saves your work to the site and allows you to keep working on the content item. This is a very useful option if you are working for long amounts of time on a particular content item and do not want to accidently lose your work or if you want to preview (in a new browser tab) your content item as a published article on the Web while you work.
When using the Joomla editor, be cautious when copying and pasting text or other content from a non-Joomla application, such as Microsoft Word, Adobe Dreamweaver, and so on, without washing it of all it's hidden formatting. Often with sophisticated word processing and/or HTML editing software, the text carries with it hidden formatting, such as line breaks, font styles, and other formatting, which is compatible only with the software in which it was created. If you, for example, paste content directly from Microsoft Word into Joomla, you may have skewed and unwanted layouts in your content item.
To remedy this situation, use the Remove Formatting button in the WYSIWYG editor by first highlighting the text and clicking the Remove Formatting icon. Another simple way is to first paste your text into a simple text editing application, such as TextEdit in Mac OS X or Notepad in Windows and then cut and paste the text from the text editing application into the Joomla editor. By using the text editor as the "middle man" in your cut-and-paste sequence you will remove the formatting. Of course, if you wanted to keep some of the formatting, then you will need to go back and reapply it from within the Joomla editor.
Parameters and metadata control and specify specific data about your article. The following list is not comprehensive, but outlines some of the more important items:
Primary Information: located just above the Joomla editor, where you type the article.
Published: radio button that specifies if the article should be live on the site.
Front Page: radio button that determines whether the article is displayed on the Front Page (aka Home Page). If this is set to yes, it will also show up in the Front Page Manager.
Section and Category: if your article is to be categorized, as we have discussed before, select the proper Section and Category here.
Article Parameters: items that control the overall article.
Author: allows you select, from a list of users in the system, who is the author of the article. This is very useful if your content is written by contractors or other outside parties, whom you do not, for whatever reason, allow to access the authoring environment directly.
Access Level: determines who can see the article. If you want to restrict it to logged-in users only, for instance, then select the option Registered. If you want everyone to see it, then select Public. By default this item is set to Public.
Start/Finish Publishing: this is a huge feature for anyone who has ever worked for an online media company, as there are often times you need to write an article that will need to go live at some point in the future. Let's say you have a Hot Tip of the Day feature, for instance. Well, you do not want to stay up to midnight every night to publish the new tip and unpublish the old one. Using this option, you can author as many tips in the future as you want and simply specify when they are suppose to become active (a.k.a. Published) and then inactive (a.k.a. Unpublished) and Joomla takes care of the rest!
Advanced Parameters: specifies everything from enabling ratings on the document, to including PDF, Print, and Email icons/links. Generally speaking, these should be controlled globally, which can be done by going to Content → Article Manager and clicking the Parameters icon.
Metadata Information: controls the
<meta>elements in the<head>of your HTML document.Description: if you care about Search Engine Optimization (SEO), which is briefly described near the end of the book, then you should always make an effort to include a solid description about any article you publish. The text you put here will be placed in the
<head>of your HTML document—specifically within a<meta name="description" content="your description here"/>element.Keywords: along the same lines as Description, this is where you can place keywords that help describe the article. These are also placed within the
<head>of your HTML document, within a<meta name="keywords" content="your keywords here" /> tag. It is also worth noting that if you add the Related Module to your site, the list of articles that show up under this module are driven by the keywords you use.
As you can see, Joomla provides a pretty powerful publishing environment that can accommodate the needs of most any publisher.
Placing images within a Joomla article can be accomplished using a few methods, which are basically reduced to the following:
Manually: providing the exact URL to the image you want to include, such as
/images/mylogo.gifor http://www.example.com/images/mylogo.gif.Drag-and-Drop: a second option, which is extremely nice if you have a repository or full-blown Digital Asset Management system, is to simply drag-and-drop the image into the Joomla WYSIWYG editor. Once dropped, you can edit the properties of the image to resize and position it for your article.
Using the Image Button: located just below the Joomla editor is a button simply titled Image. When clicked, after placing your cursor at the location you want the image inserted, you are presented with options to select an existing image (from the /images/stories/ directory of your Joomla installation) or upload a new one.
Warning
Regardless of how you put an image in an article, it is important to know that resizing the image for the article does not actually resize the image itself, but rather restricts the size it is displayed as. This is important, because if you specify a high resolution image that is, for instance, 10MB in size, its file size will not change and will therefore take a long time to download and display in a page.
In Figure 23, you can see an instance of dragging an image from one browser window, in this case Google Images search, into an article. Once released, the image will be displayed in the article, maintaining the original URL to the image, and be ready to edit (e.g., provide alt text, alignment, sizing, or any other styles).

Adding other types of media, such as QuickTime, Windows Media Player, Real, or even Flash movies are just as easy. Simply place your cursor where you want the item to be displayed, click the Insert/Edit Embedded Media toolbar item, and enter the details. Figure 24 shows what entering a YouTube video looks like after you enter the URL and tab away from it.

One of the nice features of Joomla is the ability to edit content directly from the frontend, which can make it very easy to fix errata on a site and/or submit new content. Imagine reading through your own website, looking over pages, articles, images, etc. and you notice a typo on a recently published item—yikes!
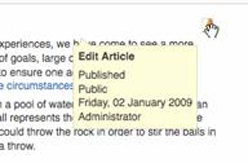
If you are logged into the site, like any other member, but with the appropriate permissions, you can simply click the pencil and paper icon that appears next to the content item, like the one shown in Figure 25. Once clicked, the Joomla editor appears. From here you can fix the error, click the Save button, and your page is corrected and is now live. No more having to log into the backend, hunt for the document, and then perform the edit—just edit it in real time!
In addition to editing existing content from the frontend, it is also possible for users assigned Author rights or above to submit articles and anyone who's registered to submit a Web Link from the frontend. This can be useful if you have a number of external authors submitting content.
In order for this to be active however, a couple prerequisites must be met:
You must first create a link to the submission form. This is done by clicking Menus and then selecting the menu you wish to add the link to. On the Menu Item Manager page, that shows existing links, click New. From there you can create links for either Articles, Web Links, or both:
Internal Links → Articles → Article → Article Submission Layout
Internal Links → Web Links → Web Link → Web Link Submission Layout
The user must be logged in and be assigned to have Author rights/permission or greater to submit an article. All of these as well as users with Registered rights, if allowed, can submit Web Links.
With these two items met, you are ready to receive content!
Note
Joomla sends email to the site administrator when content is submitted, which helps ensure you always know when something has been added to the site.
Considering that it is the first impression a user has of your site, the Home Page or Front Page, as Joomla calls it, deserves some special attention. There are two easy ways to publish articles to the Front Page of your site.
One is by selecting the proper option for the Front Page radio button on the main Article edit/creation page—its right under radio button where you specify whether the article is to be published or not. An easier way, however, is to access the Article Manager and simply click the red X for the article you want to publish on the front page under the Front Page column. To unpublish from the Front Page, click the green checkmark.
Once an item has been added to the Front Page, you can go to the Content → Front Page Manager to further control these items. From here you can publish or unpublish the items simply by clicking on the icon under the word Published for each item. You may also rearrange the order in which the items are displayed on the front page, either by clicking the arrows (corresponding to a particular content item) up or down. Or if you wish to reorder more than one content item at a time you can type in the order number you want to change next to the corresponding content item in the provided box. After you have the order you want, simply click the icon of the disk next to the word Order at the top of the page and Joomla saves and reorders your pages for you.
As you might imagine, archiving in Joomla refers to a way to store older items on your site, which may be past their prime in relevance, but still retain enough value to store online. This is especially helpful if you have a large number of pages, since you can use the Select State dropdown on the Article Manager to only display items that are Published, Unpublished, or Archived.
To Archive an item simply click the box next to its name from within the Article Manager and click the Archive button. To unarchive an item, simply click the box again and click the Unarchive item. Figure 26 shows what an Archived item looks like in the Article Manager.

If you still want to provide your users access to archived items, then you can add a new Archived Content module using the Module Manager. By publishing the Archive module, you can allow frontend users to have automatic access to these archived content items. A Calendar (month/year) is created within the module, which allows the reader to view archived items, based on the time they were created. This approach is often used for old press releases, news, or other legacy content.