In many ways, controlling the modules on your site controls how it looks, but at the same time it controls how it functions. These modules, which are managed using the Module Manager shown in Figure 14, can be accessed from the Extensions menu. Simply changing the position of modules, for instance, can dramatically change how your site looks and feels. Not sure you like the menus on the left? No problem—move the Main Menu to the module position named right.
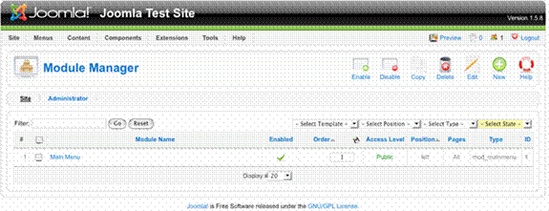
At a high level, the Module Manager allows you to:
Enable: modules can be turned on or off by Enabling or Disabling. Items under the Enabled column of the Module Manager with a red X are disabled while items with a green checkmark are Enabled.
Order and Position: there are two aspects to specifying the location of a module on your site. One is the position on the page, which is shown under the Position column. The position can be modified by editing the module and using the Position dropdown, as shown in Figure 15. The other is Order. The order represents the order the modules are displayed when multiple modules occur within the same position. You can change the order by using the arrows under the Order column or by manually editing the numbers displayed under the Order column and then clicking the little disk icon beside the column heading.
Access Level: if you build sites that provide the ability for users to register and log in, you will inevitably want the ability to only display some modules to people after they have logged in. Modules marked Public will be displayed to all users, while modules marked Registered will only be displayed to users after they have logged in.
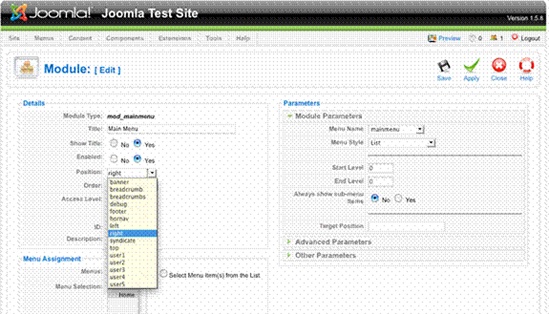
If you edit a given module, you will find even more configuration options. While all modules share the common settings we just covered, each has its own set of parameters that are specific to the module itself. The Main Menu module, for instance, allows you to select a Style, enable caching, or even specify how to indent images.
The rule of thumb here is if you want a given site module to perform differently, then be sure to click on it and see what kind of parameters are available—there is a good chance that what you want to do is there waiting for you to tweak and make your own.
The default Joomla installation comes with a single module—the Main Menu. But it has far more modules built in that you can add and configure. If you click on the New button in the Module Manager, you will see a complete list of modules you can add. Since this is a Short Cut, we are not going to cover all types here, but here are the ones we think will most interest you:
Breadcrumbs: ever been to a site that shows the path to the page you are viewing, such as News → 2009 → July? Breadcrumbs, which often seem to be displayed just below the header or top navigation of a site, not only help users have an awareness of where they are on your site, which is good for usability, but it can also have a positive SEO impact because it adds a link to every page. More on SEO later, just remember that breadcrumbs are good.
Custom HTML: probably our favorite module! In today's world where you may want to display your Facebook status on your site, have a YouTube video, or otherwise include a "widget" from another site on yours, this module allows you to do just that. All you have to do is give it a name and within the Custom Output editor, put in your text. If you need to paste in pure HTML, simply click the HTML icon on the editor, paste the HTML in the pop up, and hit Update. Then click Position, Order, Enable, Save, and you are done!
Latest News, Most Read Content, Newsflash, and Related Articles: three different modules, but all serve the same basic purpose—to help expose your user, regardless of where they are on the site, to other content they may want to see. This is often a beneficial tactic for a site to increase page views or page views per visits, and provide SEO lift. Think of it as cross-selling your users other articles and content they may want to see!
Login: if you plan on having users register on your site and then log in later, perhaps to edit their preferences or access private content, you will need to add a Login module to allow them to do so.
Poll: we actually cover polls later in the book, but if you want to ask your users to provide feedback or participate in a poll, here is where you would add the proper module to allow them to do so. Once added, you can add and manage polls from the Components → Polls menu.
Search: if you have a site, you probably want people to be able to search it! Simply add a Search module.
Although our list should help get you started, the best way to get a hang of site modules, honestly, is to open two browser windows and display them side by side. Have one displaying the home page and the other logged into the Modules Manager in the Joomla Administrator. Now, make changes to the modules from within the Modules Manager and save them and then refresh your other browser to see the changes. Turn off the Title, enable and disable, and change the Order and Position. Also try playing with the module-specific parameters.
You now have Joomla installed, up, and running and a general understanding of the core interworkings. Now it is time to start populating it with users to help you with creating and publishing your content. What better way to get things done more quickly than enlist the help of other people!