What good is a coffee shop without a menu? In this chapter we will add a menu to our coffee shop site. The contents of the menu will be managed through Netlify CMS. The menu will have different categories containing different drinks and bakery items, with descriptions and prices.
Nested lists
One of the many widget types in Netlify CMS is the List widget. A List contains other widgets, or sets of widgets, and items can be added and removed in the Content Manager. Lists can even contain other lists.
We’ll use the List widget type in our menu. The menu will consist of a list of categories – for example, Hot Drinks, Iced Drinks, or Bakery. Each category will, in turn, contain a list of menu items.
Defining the menu page
For the menu, we’ll add a new page under the Pages collection. Right now, this collection contains one page – the index page. Let’s add the menu page and its fields. Open the file static/admin/config.yml and update it with the code in Listing 10-1.
backend:
name: git-gateway
branch: master
media_folder: static/img
public_folder: /img
collections:
- name: "blog"
label: "Blog"
folder: "src/blog"
create: true
slug: "{{year}}-{{month}}-{{day}}-{{slug}}"
fields:
- name: "contentKey"
widget: "hidden"
default: "blog"
- label: "Title"
name: "title"
widget: "string"
- label: "Publish Date"
name: "date"
widget: "datetime"
- label: "Body"
name: "body"
widget: "markdown"
- name: "pages"
label: "Pages"
files:
- file: "src/pageData/index.md"
label: "Index Page"
name: "index-page"
fields:
- name: "contentKey"
widget: "hidden"
default: "indexPage"
- label: "Tagline"
name: "tagline"
widget: "string"
- label: "Hero Image"
name: "heroImage"
widget: "image"
- file: "src/pageData/menu.md"
label: "Menu"
name: "menu"
fields:
- name: "contentKey"
widget: "hidden"
default: "menu"
- label: "Title"
name: "title"
widget: "string"
- label: "Categories"
label_singular: "Category"
name: "categories"
widget: "list"
fields:
- label: "Name"
name: "name"
widget: "string"
- label: "Items"
label_singular: "Item"
name: "items"
widget: "list"
fields:
- label: "Name"
name: "name"
widget: "string"
- label: "Description"
name: "description"
widget: "text"
- label: "Price"
name: "price"
widget: "string"
Listing 10-1
Adding the Menu page to the configuration file
The Menu page has a list of categories, which in turn each contain a list of items.
You might notice we are using the label_singular property in a few places. When viewing the Menu page in the CMS, it will list “Categories” and “Items.” Without the label_singular property, the add buttons would be labeled “Add Categories” and “Add Items.” label_singular is used for the label on those buttons so that they are grammatically correct: “Add Category” and “Add Item.”
Once you have made the indicated changes, make a commit and push to GitHub:
git add .
git commit -m "Add menu page"
git push origin master
Adding menu items
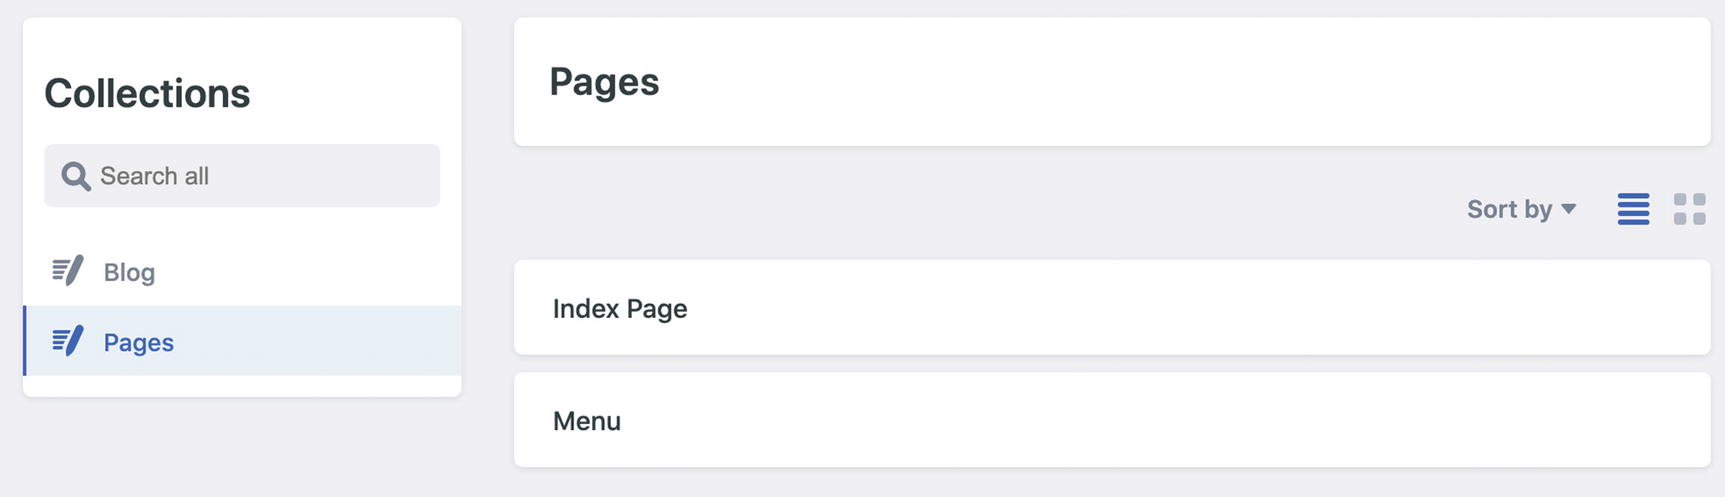
Once Netlify has deployed the new version of the site, open the CMS application. On the Home page, you should now see the Menu page listed after the index page in the “Pages” collection, as shown in Figure 10-1.
Figure 10-1
The new Menu page shown in the CMS
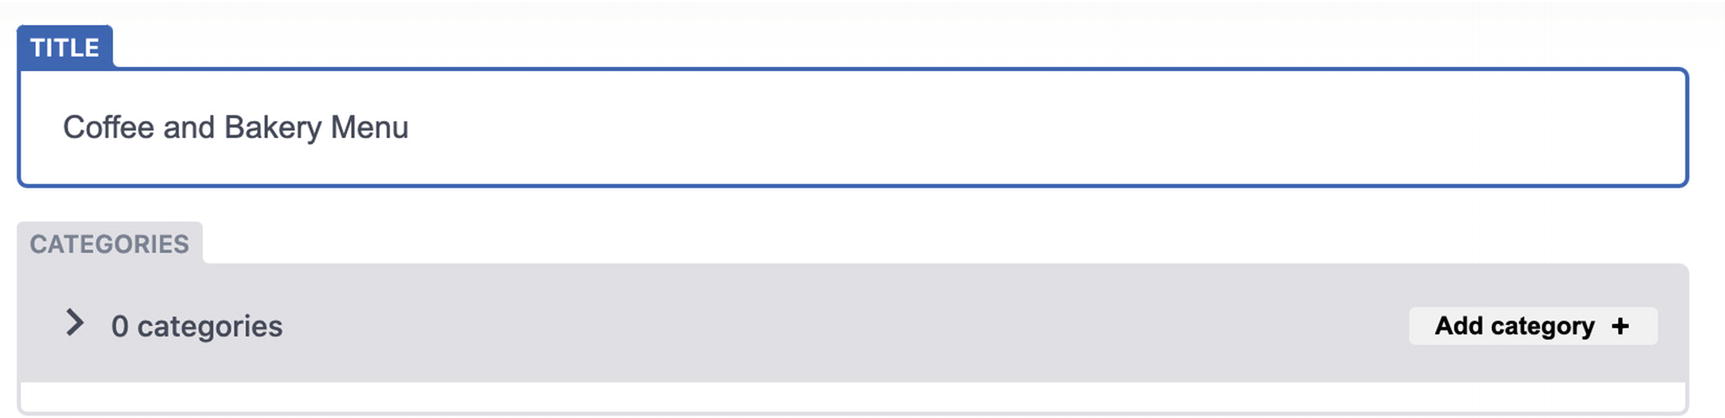
Figure 10-2
The title and empty category list
Click the “Menu” page. For the “Title” field, enter “Coffee and Bakery Menu.” Below the title, you will see a UI for adding new menu categories.
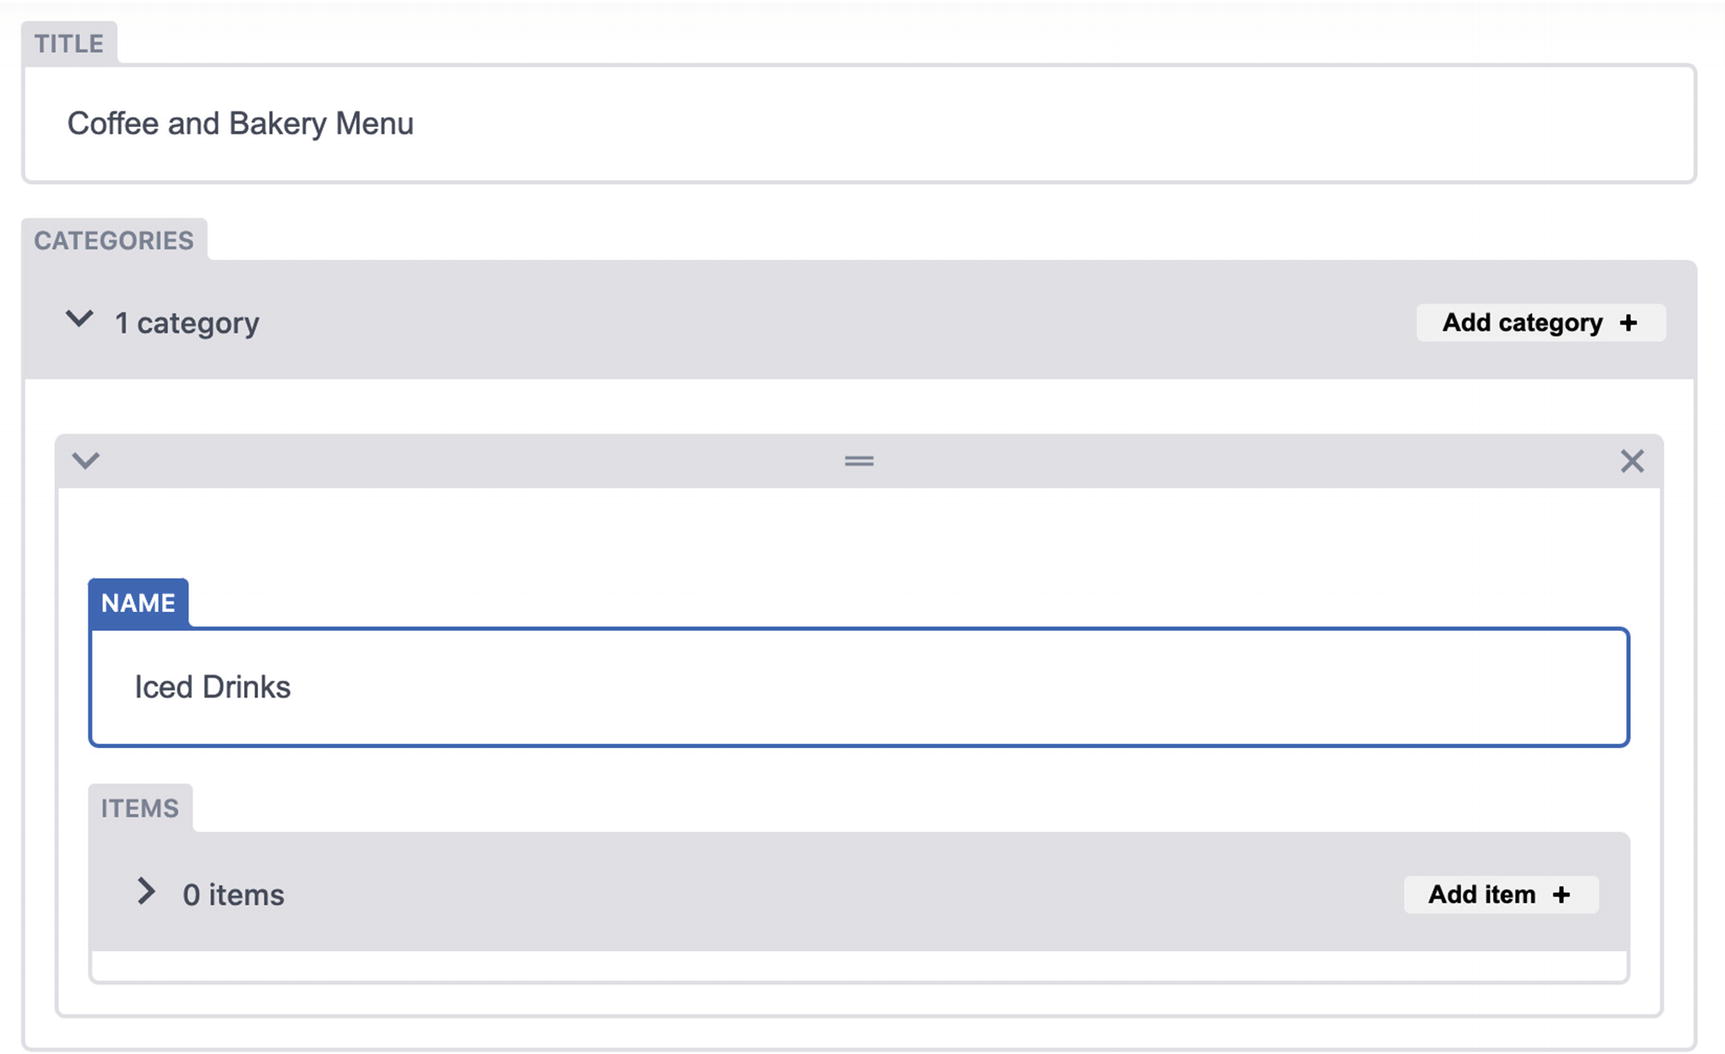
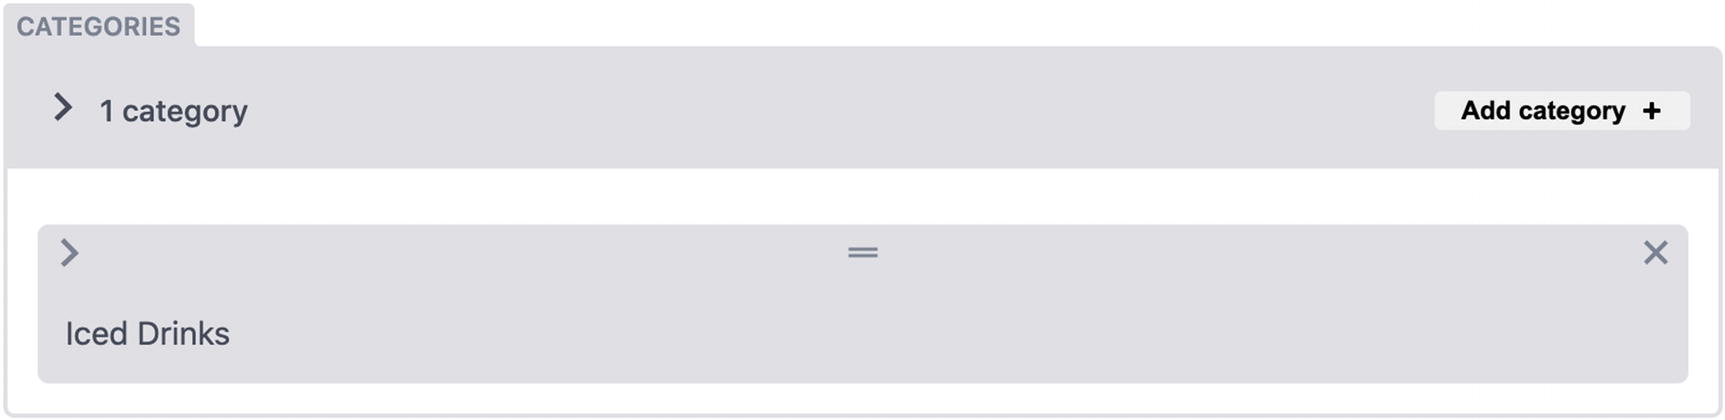
Let’s add our first category, Iced Drinks. Click the “Add category” button, and a new editor will appear for adding the new category. Enter “Iced Drinks” in the “Name” field. Just like with the category list, there is now an empty list for the menu items in the new category.
Figure 10-3
Adding a new category
Now, we’ll add a drink to the “Iced Drinks” category. Click the “Add item” button, and an editor will appear for the new item. Enter the following:
Name: Iced Coffee
Description: Fresh brewed and served over ice
Price: $2.49
Figure 10-4
Adding the first menu item
Let’s add a few more iced drinks to the menu in a similar fashion, by clicking “Add item” again.
Iced Latte
Description: Espresso and chilled milk poured over ice
Price: $3.49
Iced Tea
Description: Fresh brewed black tea leaves
Price: $2.25
Iced Mocha
Description: Espresso and mocha sauce, milk and ice, with whipped cream
Price: $3.49
Once you have added these items, publish the page. If everything worked successfully, let’s add one more category. Click the caret for the “Iced Drinks” category to collapse it. This just gives us some more room on the screen.
Figure 10-5
Collapsing the “Iced Drinks” category
Once again, click “Add category.” This time call the category “Hot Drinks.” Add the following items in the same way as you did with the “Iced Drinks” category:
Coffee
Description: Fresh brewed Colombian coffee
Price: $1.99
Cappuccino
Description: Espresso with frothed milk
Price: $2.49
Hot Cocoa
Description: Steamed milk with chocolate syrup
Price: $1.49
Once again, click “Publish” then “Publish now” in the upper right corner.
Next, open a terminal and go to the project directory. Perform a git pull operation:
git pull origin master
You should get two new commits, containing the new menu data we just added from the CMS, in the file src/pageData/menu.md.
Building the menu page
Before we create the menu page, let’s add a link in the header to the menu. Open the file src/components/Layout.js, and add a Link to /menu, as shown in Listing 10-2.
import React from 'react';
import { Link } from 'gatsby';
import styles from './Layout.module.css';
export default function Layout({ children }) {
return (
<div>
<header id={styles.header}>
<div id={styles.inner}>
<h1><Link to="/">Joe's Coffee Shop</Link></h1>
<Link to="/blog">Blog</Link>
<Link to="/menu">Menu</Link>
</div>
</header>
<main id={styles.main}>
{children}
</main>
</div>
);
}
Listing 10-2
Adding a link to the menu page
Start the development server by running gatsby develop and go to the index page. The links don’t look quite right in the header – there’s no whitespace between them.
Figure 10-6
The header links
We can fix this with a slight tweak to the layout’s CSS module. Open the file src/components/Layout.module.css and add a slight margin between links, as shown in Listing 10-3.
#header {
font-family: 'Oswald', sans-serif;
background: url('/coffee.jpg');
background-size: cover;
color: #FFFFFF;
}
#header #inner {
background: rgba(119, 79, 56, 0.85);
padding: 1rem;
display: flex;
align-items: center;
}
#header h1 {
margin: 0;
flex-grow: 1;
}
#header h1 a {
color: #FFFFFF;
text-decoration: none;
}
#header a {
color: #FFFFFF;
text-decoration: none;
margin: 0.5rem;
}
Listing 10-3
Adding margin to the links
Figure 10-7
Better spacing between links
The links have some space between them now. Next, we need to create the page for the menu. First, let’s create a reusable MenuCategory component that we’ll use on the menu page. Create a new file src/components/MenuCategory.js, and add the code from Listing 10-4.
import React from 'react';
import styles from './MenuCategory.module.css';
export default function MenuCategory({ category }) {
This is a simple presentational component. A menu category is passed as a prop, and the category’s items are rendered in order. Next, let’s create the CSS module referenced in this file. Create the file src/components/MenuCategory.module.css, and add the code from Listing 10-5.
.category {
margin: 1rem 2rem;
width: 15rem;
}
.category h2 {
margin: 0;
margin-bottom: 1px solid #774f38;
}
.category ul {
padding: 0;
}
.category li {
list-style-type: none;
display: flex;
flex-direction: column;
margin: 1rem;
}
.name {
font-weight: bold;
font-size: 1.2rem;
}
.description {
font-style: italic;
}
Listing 10-5
Styles for the MenuCategory component
Now that we’ve created the MenuCategory component, let’s go back and create the menu page. Create the file src/pages/menu.js and add the code from Listing 10-6.
import React from 'react';
import Layout from '../components/Layout';
import MenuCategory from '../components/MenuCategory';
Next, let’s create the CSS module. Create the file src/pages/menu.module.css and add the code in Listing 10-7.
#main {
padding: 1rem;
}
#main h1 {
margin: 0;
}
#menu {
display: flex;
}
Listing 10-7
The styles for the menu page
There’s one last step needed. When we created the menu page data, the CMS created the Markdown file containing the menu data. However, it did not add the contentKey field to the front matter. We’ll need to add that manually as a one-time step.
Open the file src/pageData/menu.md. Add the contentKey field as shown in Listing 10-8.
---
title: Coffee and Bakery Menu
contentKey: menu
categories:
- name: Iced Drinks
items:
- name: Iced Coffee
description: Fresh brewed and served over ice.
price: "$2.49 "
- name: Iced Latte
description: Espresso and chilled milk poured over ice.
price: $3.49
- name: Iced Tea
description: Fresh brewed black tea leaves.
price: $2.25
- name: Iced Mocha
description: Espresso and mocha sauce, milk and ice, with whipped cream.
price: $3.49
- name: Hot Drinks
items:
- name: Coffee
description: Fresh brewed Colombian coffee.
price: $1.99
- name: Cappuccino
description: Espresso with frothed milk.
price: $2.49
- name: Hot Cocoa
description: Steamed milk with chocolate syrup.
price: $1.49
---
Listing 10-8
Adding the contentKey to the menu page data
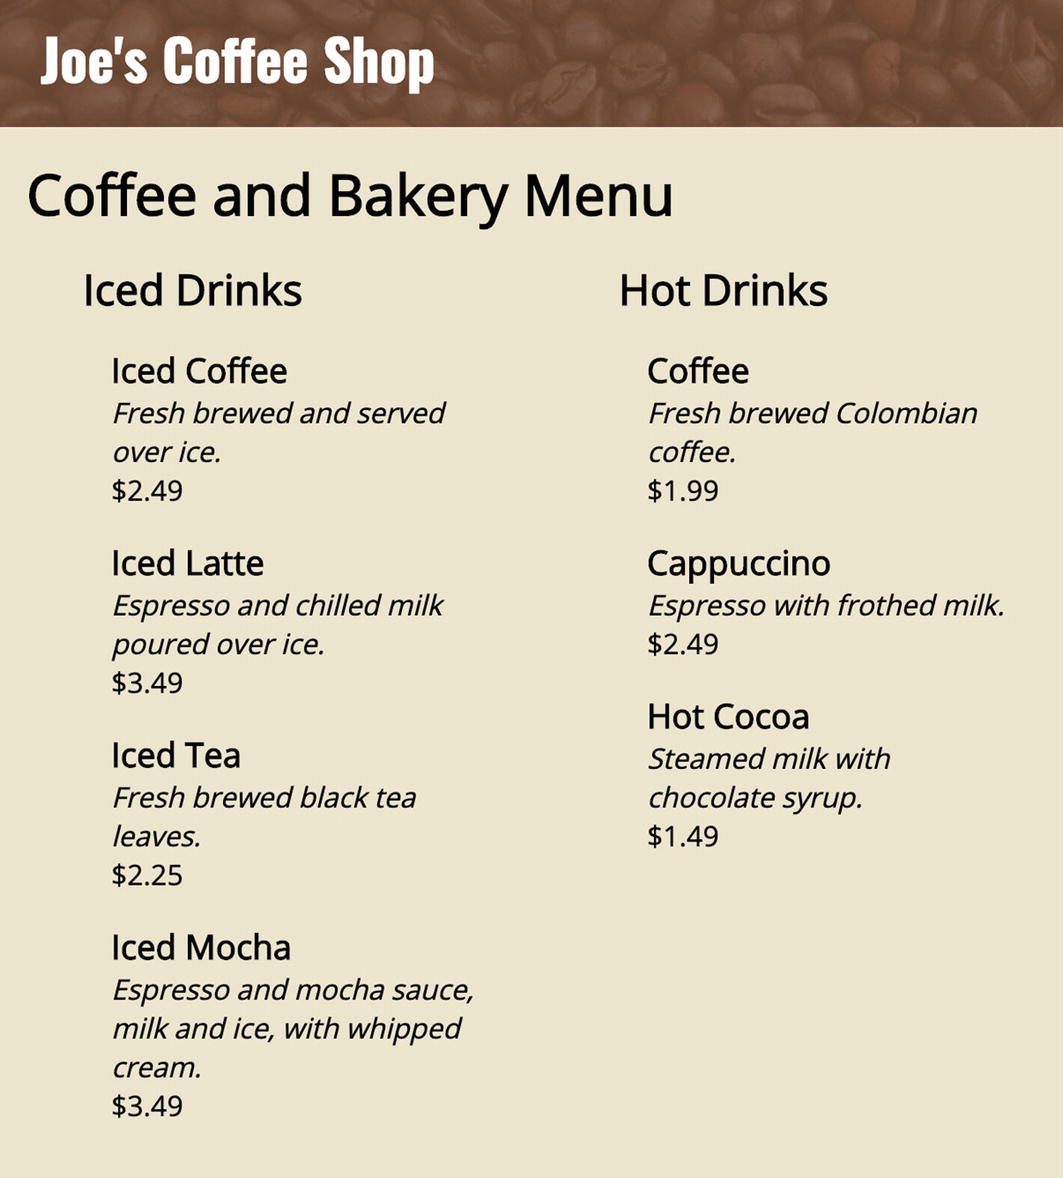
Once this is done, restart the development server, and navigate to http://localhost:8000/menu. The menu page should be shown, including all the menu items we added.
Figure 10-8
The menu page
Lastly, as always, let’s commit and push:
git add .
git commit –m "Add coffee menu"
git push origin master
Ease of maintenance
We’ve created a fully customizable coffee and bakery menu. Now, the managers of the coffee shop can add items or adjust prices, all without writing a single line of code. Later, we’ll add a custom preview component so that they can see a live preview of what the rendered menu page will look like.
Summary
In this chapter, we
Added a new page to the CMS for the menu
Added some menu categories and items
Created a menu page to query the menu data with GraphQL and display it