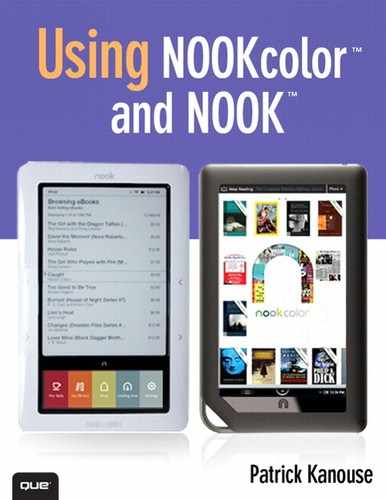
Chapter 10. Getting Started with Your NOOK
If you’re reading this book on your NOOK, you’ve actually already made it past the most difficult thing about using the NOOK—opening the package. (If you haven’t opened your NOOK yet, you’ll know what I’m talking about when you do.) Now you’re ready to begin reading and discovering all the incredible things your NOOK can do.
Before getting into the details of using your NOOK, you need to do some things right now.
Registering Your NOOK
When you first turn on your NOOK, you see a tip informing you to use the touchscreen to get started. If the touchscreen is already lit, tap the Tap Here to Get Started link. If the touchscreen is not lit, double-tap your NOOK’s Home button (the NOOK logo on the black bar above the touchscreen); then tap Tap Here to Get Started on the touchscreen.
Tip
To wake the touchscreen when it’s not lit, you can press and release the Power button at the top of your NOOK, tap the touchscreen, or use the Home button as previously described. Tapping the touchscreen doesn’t always work; double-tapping the Home button works every time.
The first step in getting started with your NOOK is to register it with Barnes & Noble (simply B&N from now on). To register your NOOK, you need an account on the B&N website. If you don’t have one already, go to www.NOOK.com/setup to create one. After you have an account on the B&N website, tap the Register with Your Existing Account link on your NOOK’s touchscreen to register with B&N.
Note
B&N requires a default credit card with a valid billing address to be associated with your B&N account to register your NOOK.
The NOOK comes in two types: 3G+Wi-Fi and Wi-Fi only. The 3G is also called B&N Fast & Free Wireless. If you have the former, you can register without setting up a Wi-FI connection. If you have the latter, you first need to set up a Wi-Fi connection (see the section “Using Wi-Fi Hotspots” to set up your Wi-Fi connection). The instructions assume you have the 3G+Wi-Fi NOOK, which is fine because all the instructions apply for the Wi-Fi-only NOOK, so long as you have set up your Wi-Fi connection.
On the Register Your NOOK screen, enter the email address and password you use to sign in to your account on the B&N website; then tap Submit on the touchscreen. To move from the email field to the password field on the registration screen, press the down arrow on the touchscreen.
Registration requires access to B&N Fast & Free Wireless or access to a Wi-Fi hotspot. If you aren’t in an area with B&N Fast & Free Wireless, you can use the Wi-Fi hotspot at any B&N store or use your own Wi-Fi hotspot. If you want to use your own Wi-Fi hotspot, you need to tap Register Later on the touchscreen and register your NOOK after you connect to your Wi-Fi hotspot.
Note
If you live outside the United States and have trouble registering your NOOK, make sure you’ve upgraded to the latest firmware. As of version1.2, B&N enables registration outside the United States.
For more information on connecting your NOOK to a Wi-Fi hotspot, see “Using Wi-Fi Hotspots,” later in this chapter.
Tip
There’s a great video walk-through showing how to register your NOOK at www.barnesandnoble.com/NOOK/video.asp?#vid1.
After your NOOK has been successfully registered, you have an option to take the NOOK tour, a 10-page synopsis of NOOK features. B&N saves the NOOK tour in your library, so you can read the tour later if you’d like to skip it for now.
Using Wi-Fi Hotspots
In addition to connecting to B&N’s Fast & Free Wireless, your NOOK can also connect to Wi-Fi networks. B&N offers free Wi-Fi access in all B&N stores. If you take your NOOK to a B&N store, it automatically connect a to the Wi-Fi hotspot in that store.
For more information on using your NOOK in a B&N store, see Chapter 16, “Shopping and Visiting B&N on Your NOOK.”
To connect your NOOK to a Wi-Fi hotspot other than one in a B&N store, follow these steps:
- If the NOOK is not currently at the Home screen, tap the NOOK logo just above the touchscreen until the Home screen is displayed.
- Tap the Wi-Fi button on the touchscreen. You may have to scroll to the right on the touchscreen to see the Wi-Fi button.
- Tap Wi-Fi hotspot.
- Tap the Wi-Fi hotspot you want to use. (Your NOOK displays the SSID for all Wi-Fi hotspots in range.)
- Tap Connect and enter the password for your Wi-Fi hotspot.
- Tap Submit.
Your NOOK should now show that you are connected to your Wi-Fi hotspot on the reading screen. You should also see the Wi-Fi signal indicator at the top of the screen next to the battery indicator.
Note
When a configured Wi-Fi hotspot is available, the NOOK connects to the Wi-Fi hotspot rather than Fast & Free Wireless.
If your Wi-Fi hotspot isn’t listed after you tap Wi-Fi hotspot, tap Other hotspot. You can then enter the service set identifier (SSID), select the type of security (if the Wi-Fi is secured), and enter the password for your Wi-Fi hotspot if necessary. If you don’t know this information, ask the person who set up the Wi-Fi network.
Your NOOK can connect to a Wi-Fi hotspot that requires you to browse to a web page to authenticate yourself. For example, many hotel Wi-Fi hotspots require you to enter a room number or other information to connect. Because B&N added a web browser in version 1.3 of the NOOK’s firmware, you can connect to a Wi-Fi hotspot that has this requirement by launching the web browser from the Home screen after you join the Wi-Fi network.
For more information on using Airplane Mode, see “Configuring Your NOOK’s Settings.”
Disconnecting from a Wi-Fi Hotspot
If you have configured a Wi-Fi connection for your NOOK, that connection will be preferred over the Fast & Free Wireless connection. If you want to stop using a Wi-Fi hotspot and use Fast & Free Wireless instead, you need to disconnect your NOOK from the Wi-Fi hotspot. To do that, follow these steps:
- If the NOOK is not currently at the Home screen, tap the NOOK logo just above the touchscreen until the Home screen displays.
- Tap the Wi-Fi button on the touchscreen.
- Tap Wi-Fi hotspot.
- Tap the name of the Wi-Fi hotspot you use. (“Connected” displays next to the name of the Wi-Fi hotspot.)
- Tap Forget to disconnect from the Wi-Fi hotspot.
After disconnecting from the Wi-Fi hotspot, your NOOK uses Fast & Free Wireless when a network connection is required.
Tip
Disconnecting from your Wi-Fi hotspot doesn’t actually turn off the Wi-Fi card in your NOOK. Your NOOK’s Wi-Fi card is always on so that it can connect automatically to the Wi-Fi hotspot if you are in a B&N store.
For more information on configuring the settings in your NOOK (including turning off the Wi-Fi card), see “Configuring Your NOOK’s Settings.”
Caring for Your NOOK’s Battery
Your NOOK uses a high-tech battery called a lithium polymer battery. Unlike older rechargeable batteries, your NOOK’s battery doesn’t suffer from a charge “memory.” However, you should still follow some basic rules to maximize the life of your battery:
• Try to avoid fully discharging your battery. Recharge it when it gets down to about 20% or so. Although charging it repeatedly is not necessarily a bad thing, the battery seems to function optimally if you charge it only when it drops down toward that 20% area.
• To maximize battery life, turn on Airplane Mode and leave it on. Turn off Airplane Mode to download your new books, subscription content, and read the Daily. By not having your NOOK search for and maintain a Wi-Fi or Fast and Free Wireless Connection, you can significantly extend the life of the battery between charges.
• Avoid high heat. Reading in sunlight is fine, but avoid storing your NOOK near a heat source.
• If storing your NOOK for a long period (a week or more), charge the battery to about 50% rather than giving it a full charge.
By following these steps, your NOOK’s battery should last years. However, if you ever need a new battery, you can purchase one from B&N and replace it yourself. To find out how to replace your NOOK’s battery, see the video at www.barnesandnoble.com/NOOK/video.asp?#vid3.
Tip
For your new NOOK, if you let its battery drain to about 20% of battery life, recharge it, and repeat this process several times, you should actually see an increase in battery life.
Charging Your NOOK’s Battery
You can charge your NOOK’s battery either by plugging your NOOK into your computer’s USB port or by plugging your NOOK into a wall outlet using the supplied AC adapter. Plugging your NOOK into a wall outlet is preferred because it charges the NOOK much more quickly.
When You Are Not Reading
When you finish reading, let your NOOK go to sleep instead of turning it off. I realize that it’s not intuitive to leave electronic devices turned on, but because your NOOK uses almost no power unless you do something that requires it to refresh the E Ink display, you can leave it turned on without draining your battery.
By leaving your NOOK on, it occasionally downloads content from B&N such as subscription content (assuming you have Airplane Mode turned off), updated information for The Daily (articles of interest to NOOKies), and any books that you purchase from the B&N website. When you’re ready to start reading again, simply press and release the power switch at the top of your NOOK to wake it up.
Note
If you don’t believe that your NOOK’s display requires no power to maintain the current screen, remove the back cover of your NOOK and remove the battery while the screen displays a page. Even with the battery removed, the page still displays.
Your NOOK’s Controls
Before you get into enjoying content on your NOOK, review the controls on your NOOK.
The Power Button
The Power button is a silver bar at the top of your NOOK. In addition to powering your NOOK on and off, the Power button can wake your NOOK when it’s sleeping or put it to sleep when you finish reading.
To put your NOOK to sleep or wake it using the Power button, press and release the Power button quickly. To turn off your NOOK, press and hold the Power button for 5 seconds. To turn on your NOOK again, press and release the Power button quickly.
Tip
When turning on your NOOK, it might seem unresponsive for several seconds. That’s completely normal. Wait a few seconds, and your NOOK will display a message letting you know that it’s starting.
The Home Button
The Home button is identified by the NOOK logo and is located in the center of the black bar along the top of the touchscreen display. Like the Power button, the Home button performs more than one function.
If your touchscreen is not illuminated, you can wake it up by double-tapping the Home button. If the touchscreen is already illuminated, tapping the Home button takes you back to your NOOK’s Home screen.
Tip
As mentioned earlier, the NOOK user guide instructs you to tap the Home button once to activate the touchscreen. However, tapping the Home button once often takes you to the Home screen instead of just waking up your touchscreen. Double-tapping the Home button to wake the touchscreen always works.
Page Turn Buttons
Along the left and right edges of your NOOK are the page Turn buttons. The top page Turn button moves back one page with each press, and the bottom page Turn button moves forward one page with each press. You probably already know that, but what you might not know is that you can quickly press a page Turn button multiple times to turn more than one page. For example, if you press the next Page button three times quickly, your NOOK will turn three pages.
Color Touchscreen
Your NOOK’s color touchscreen is a feature that is unique to the NOOK. The touchscreen’s functionality changes depending on what you do. For example, when you are on the Home screen, the touchscreen displays nine large buttons to access various functions of your NOOK. When reading, the touchscreen displays functions for interacting with reading content. When user input is required, the touchscreen displays a full keyboard.
As you progress through the rest of this book, you learn how to use the touchscreen to interact with your NOOK.
Your NOOK’s Operating System
The operating system (OS) your ebook reader runs is usually not important, but your NOOK is unique in that it runs an OS developed by Google. It’s called Android, and B&N’s choice to use the Android OS means that it’s easy to extend the capabilities of your NOOK. If you properly prepare your NOOK using a technique called rooting, you can install many third-party applications on your NOOK, including a powerful book launching and management application.
This capability is such an exciting feature that an entire section of this book is dedicated to it.
For more information on extending your NOOK, see “Rooting Your NOOK.”
Now that you’re familiar with the controls on your NOOK, you can discover some of the ways to customize and personalize your NOOK.