
In this chapter, we learn how to import the assets that we exported from Blender and Substance Painter into Unreal Engine 4.
Import Settings
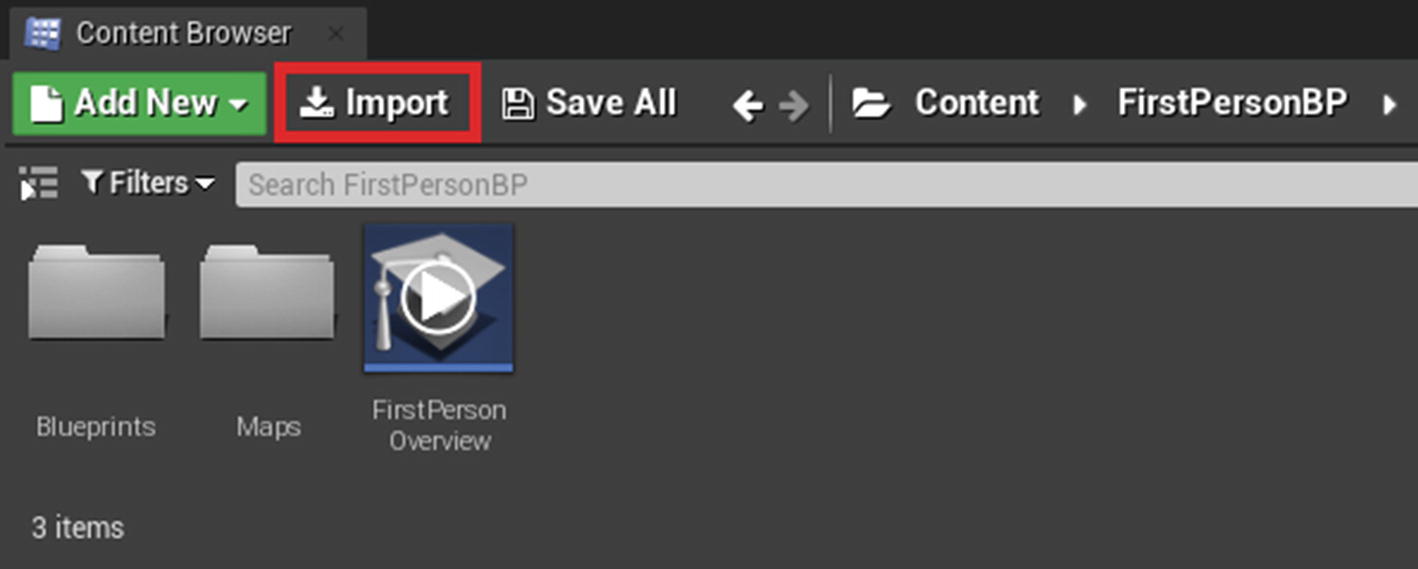
Importing assets
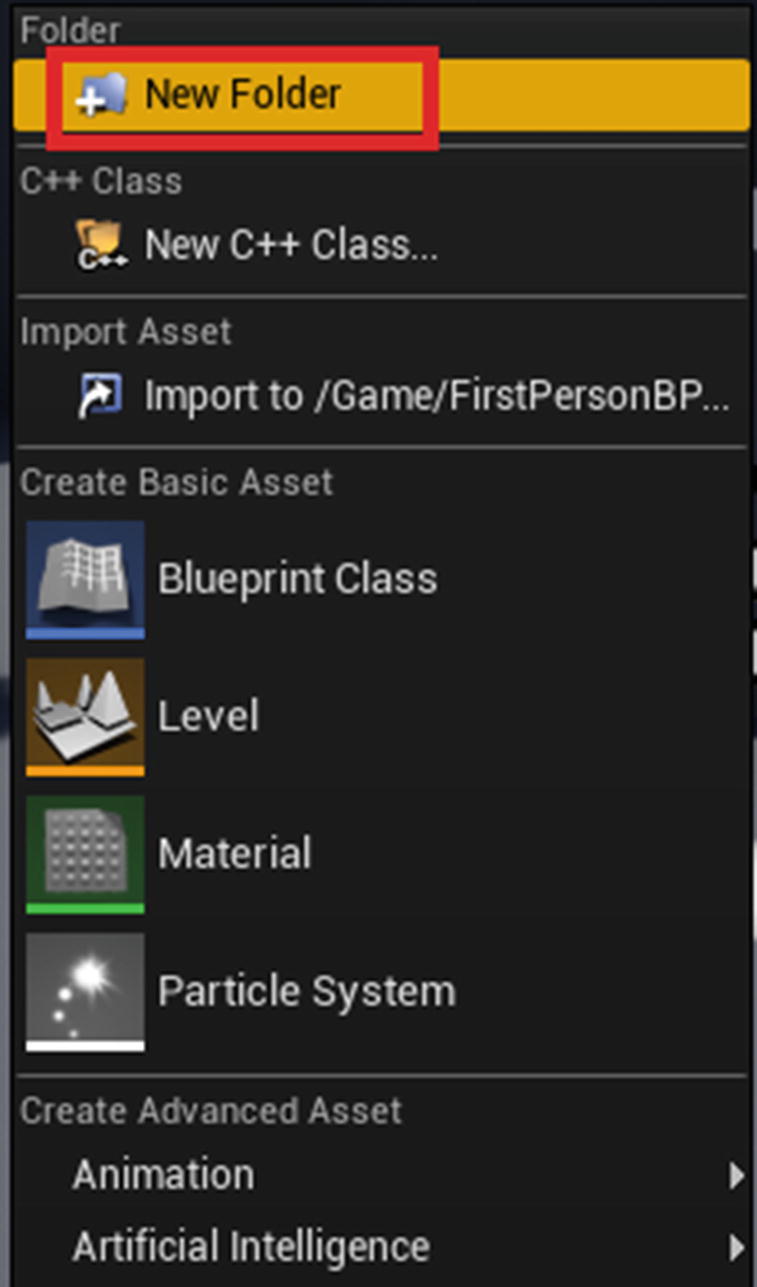
Create menu in UE4
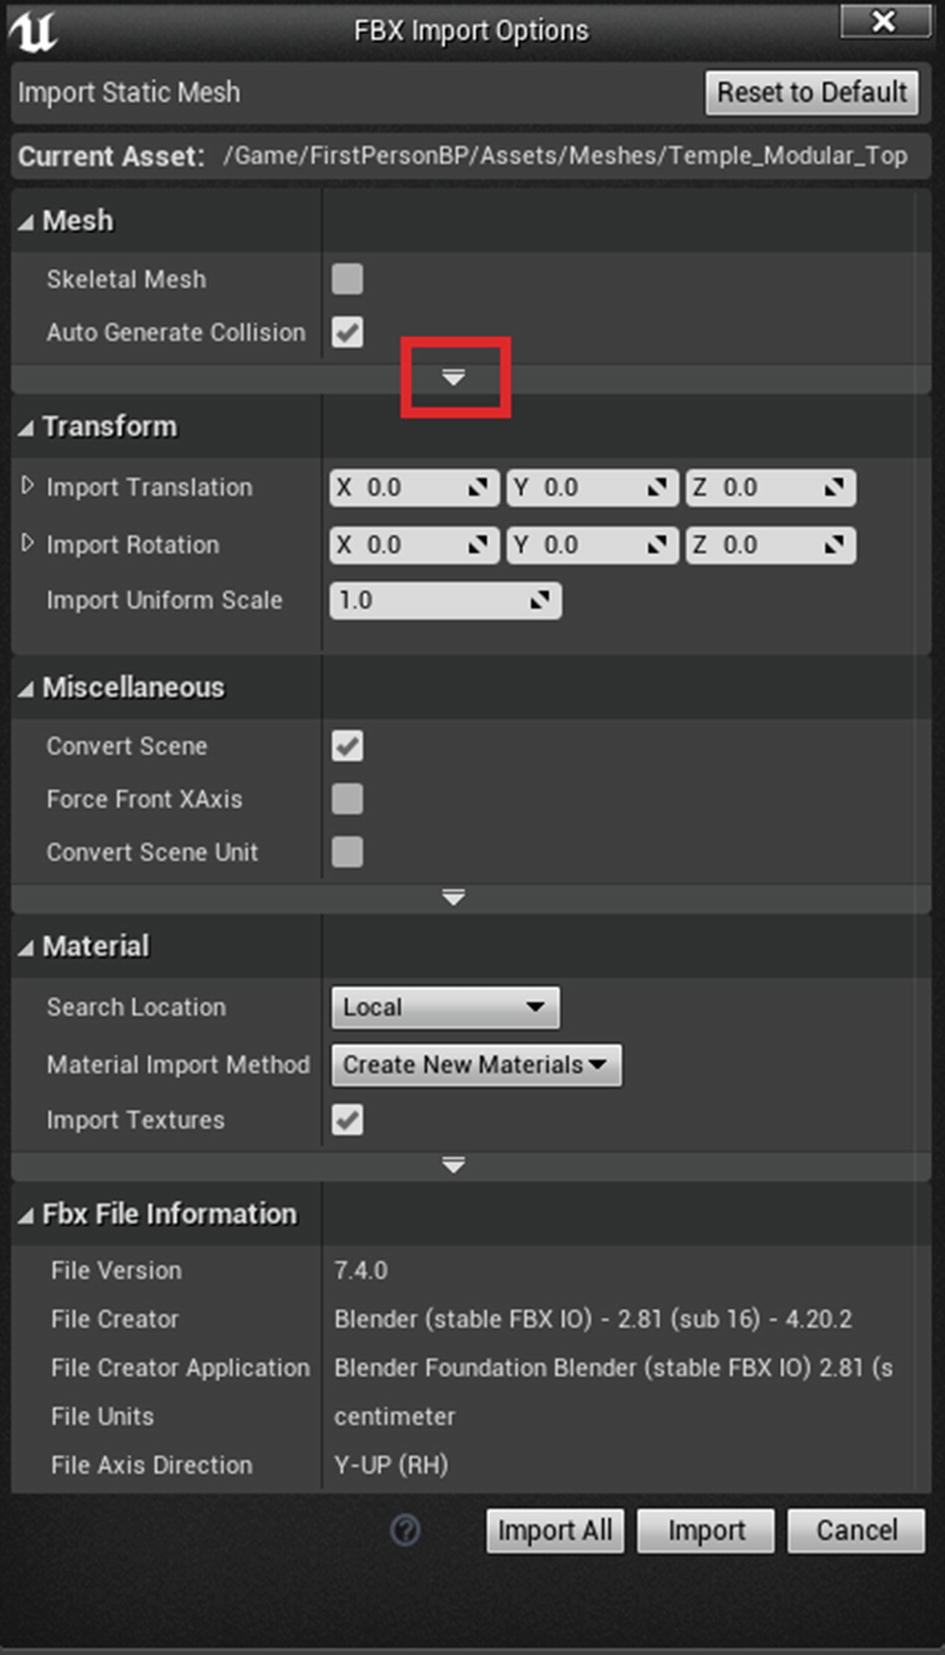
Import options window
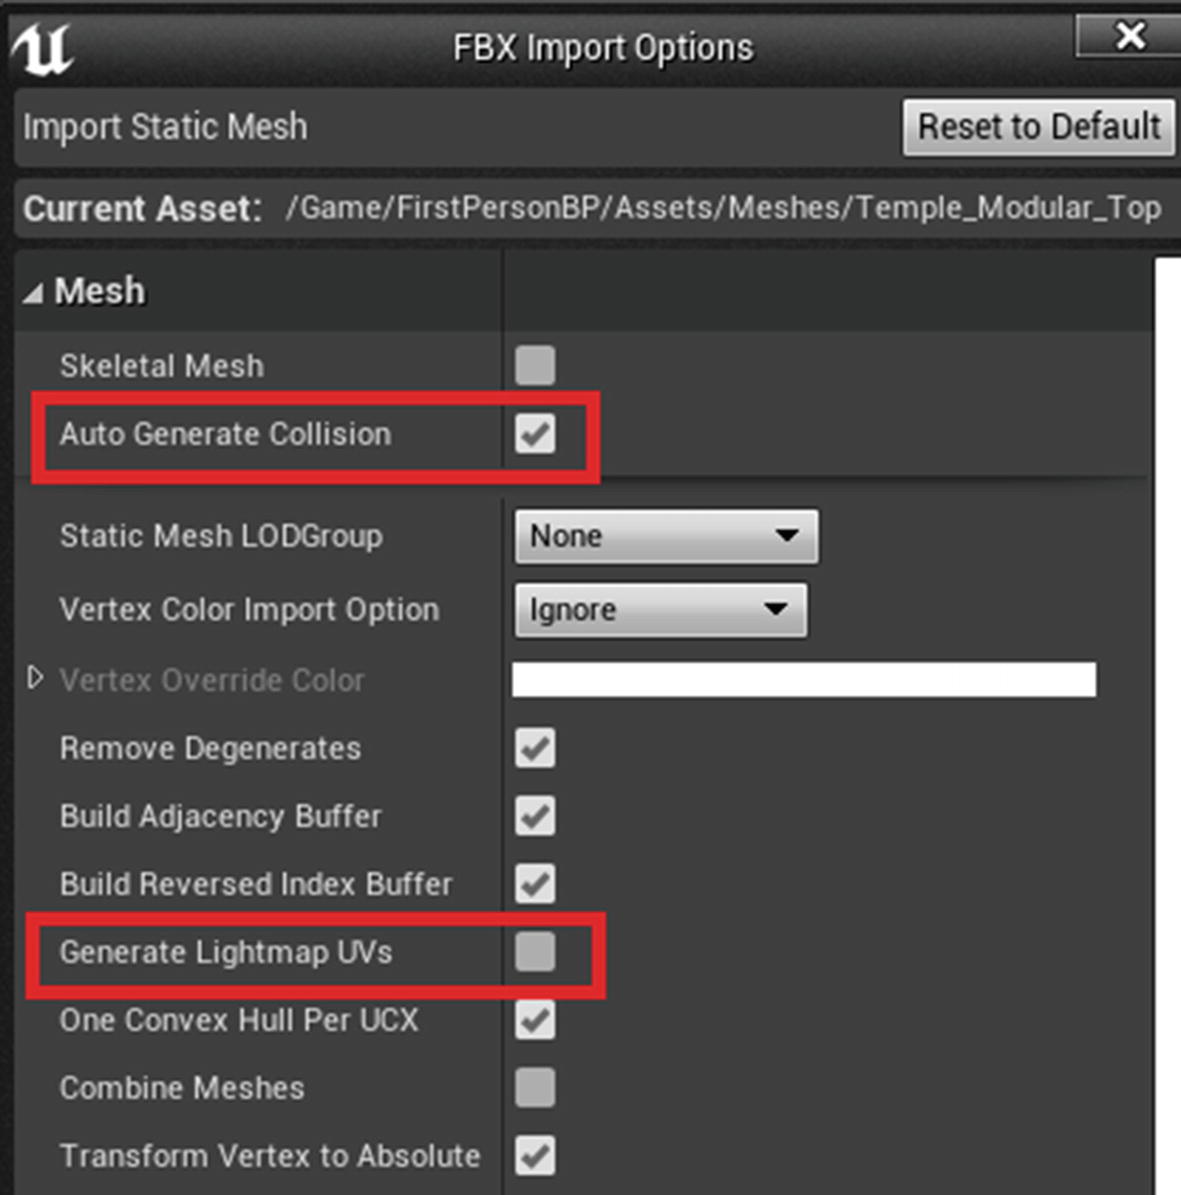
Auto Generate Collision: Every static mesh that is a solid object needs to have a collision that tells UE4 that another solid object cannot pass through it. Generating collisions is actually pretty simple. All you have to do is create a simple 3D mesh that surrounds the object. Or you can check this option and let UE4 figure out the collision by itself, which we will do this time.
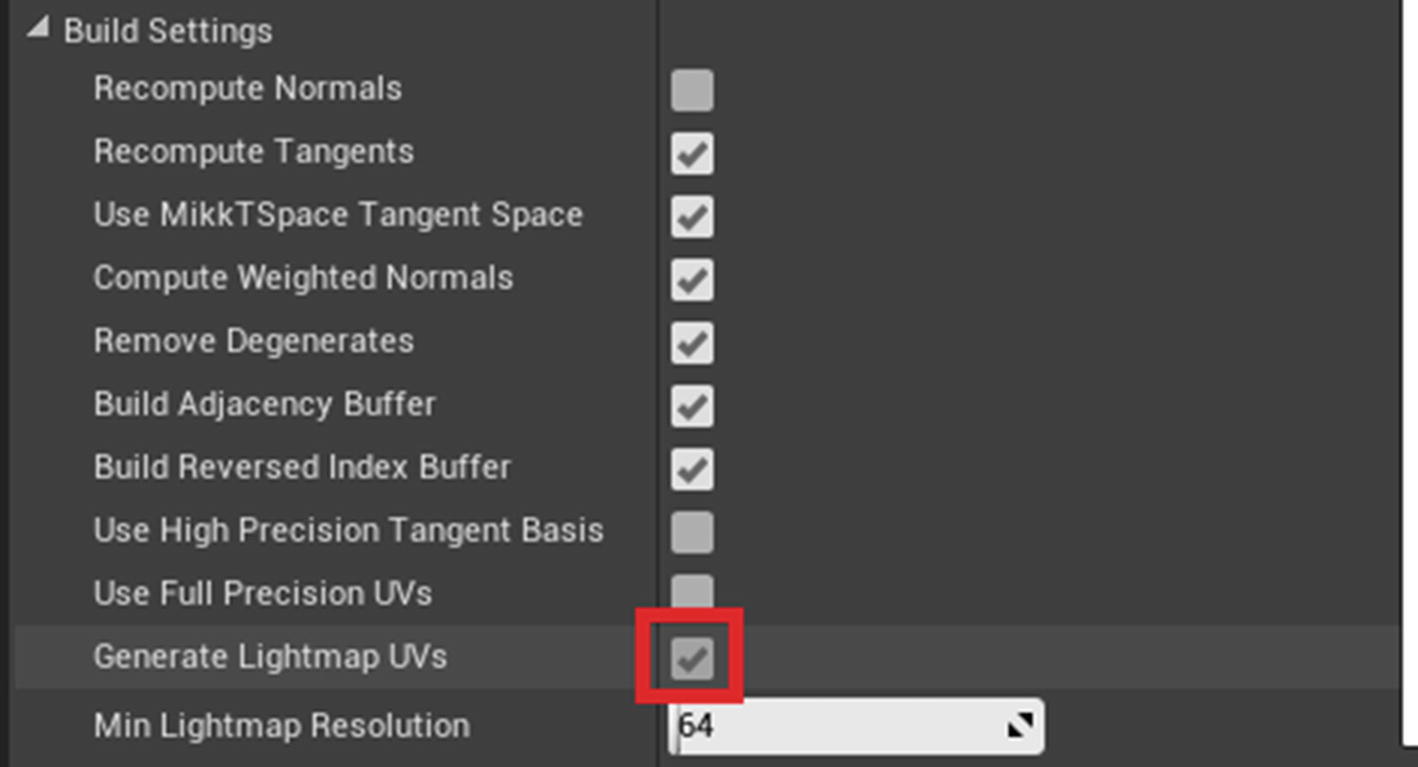
Generate Lightmap UVs: Lightmap UVs are used for storing light and shadow data for any mesh. Since we created our own in Blender, we will uncheck this option.
Modifying the import parameters
Now click on Import. This will be the setting for all the meshes that you import. If you haven’t generated Lightmap UVs for any of your meshes, you can enable the Generate Lightmap UVs option. UE4 is generally not too good at generating Lightmap UVs by itself, so it is recommended that you do it yourself. Sometimes it does a serviceable job, so try it when you want decent results with less effort.
If your asset creates unwanted material files automatically, simply Force Delete them. We will create materials on our own.
As for importing textures, UE4 does not create much fuss. Simply drag and drop your exported textures inside the Materials folder and create more subfolders to better organize everything. Textures will be imported without any parameter windows, so just ignore any warnings that appear.
Always remember to save this file with the correct naming and in the right folder so it is easier to identify in later stages.
Exploring the Properties Editor

Properties Editor
Material Slots: In this category (see Figure 10-6), you can assign a material (which we will create in the next chapter) to your mesh. Then, whenever you create a new instance of your mesh, this material will be applied to it as well as to every old instance that was created previously.
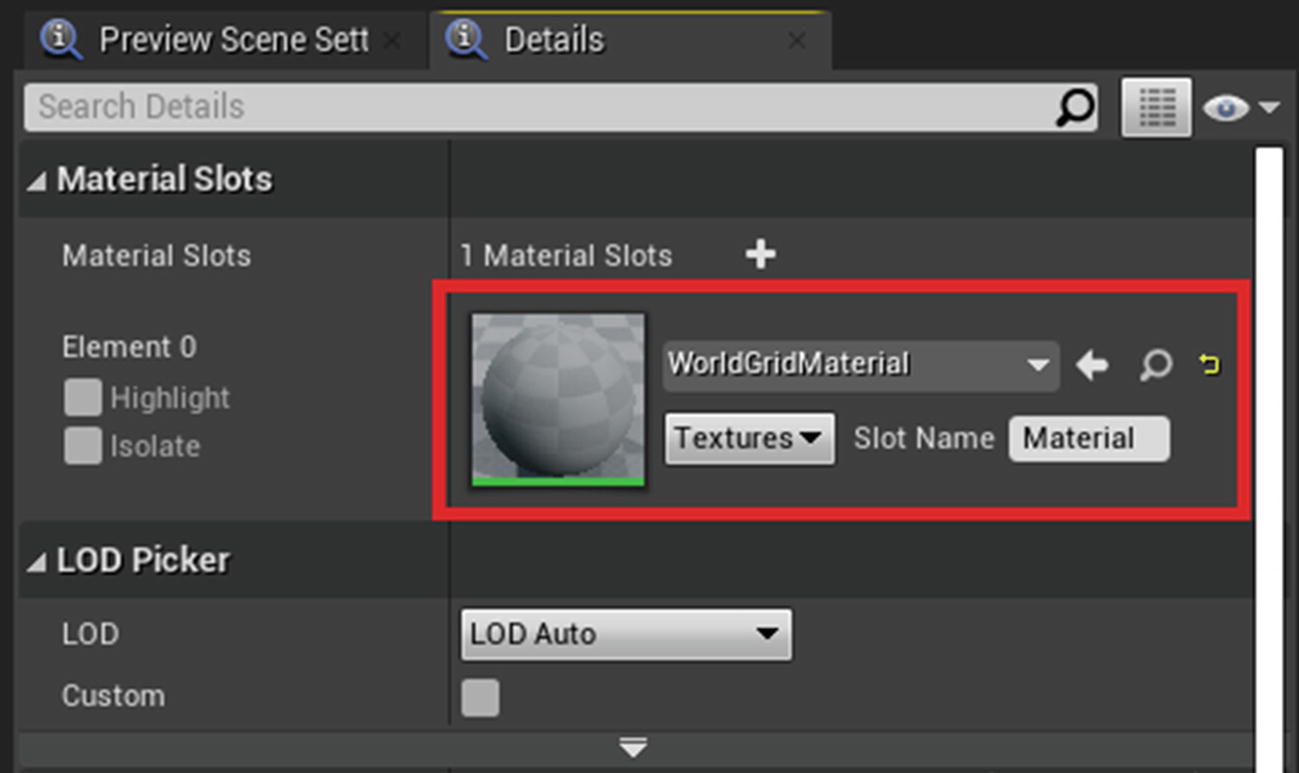
Material slot of mesh properties
Build Settings: This allows you to build and rebuild various kinds of mesh-related options like recomputed tangents, to build light maps in case you don’t have them, to designate an index of a Lightmap UV, and so on (see Figure 10-7). These options will make more sense once you start working with them.
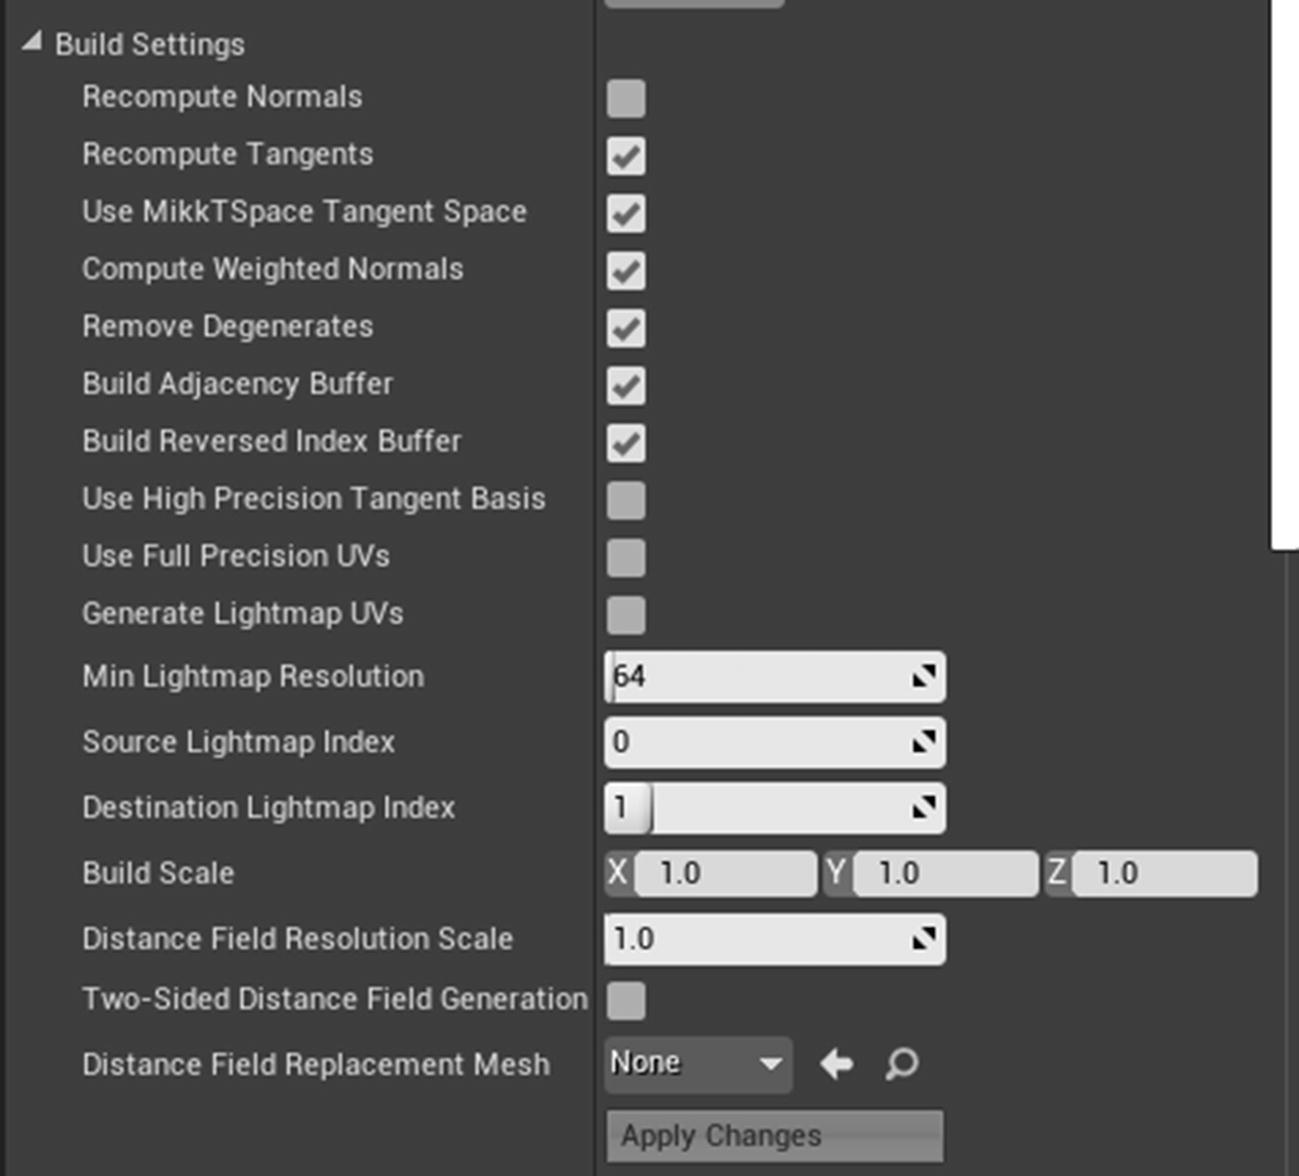
Build Settings
- General Settings: These are other mesh-related settings that you will use (see Figure 10-8). Some of them are quality and optimization related and are important to understand because, when creating a game environment, you must maintain a balance between good quality and performance optimization. Some of these settings that you should know about include:
Lightmap Resolution: A higher lightmap resolution will produce a higher quality shadow bake and will eliminate any artifacts or errors occurring during light bakes on the mesh. Increasing this too much will increase the load on the system and performance will decrease. In this case, you can increase it to something like 256. If problems persist then you may increase it to as high as 512 or 1024. But beyond that is not recommended.
Generate Mesh Distance Field: This is an important setting for open world games. This generates a proxy mesh for objects used in light-related calculations and for generating shadows. Using this will optimize your game and reduce performance impacts of large scenes with lots of large objects. This may not be useful in this case, but nonetheless you should know about it.

General Settings
Build Settings in Detail
Let’s look at some build settings in detail and see how you can use them to bake Lightmap UVs.
Generating Lightmap UVs
Then set the Source Lightmap Index to be the index of the UV map that you want to be the reference for the Lightmap UV that UE4 generates. The value starts at 0, with 0 being your UV map for the textures. If you want this to be your reference, then enter 0 in Source Lightmap Index field.
If you want the Lightmap UV that you created to be the source, then enter 1, because ideally that should be its index.
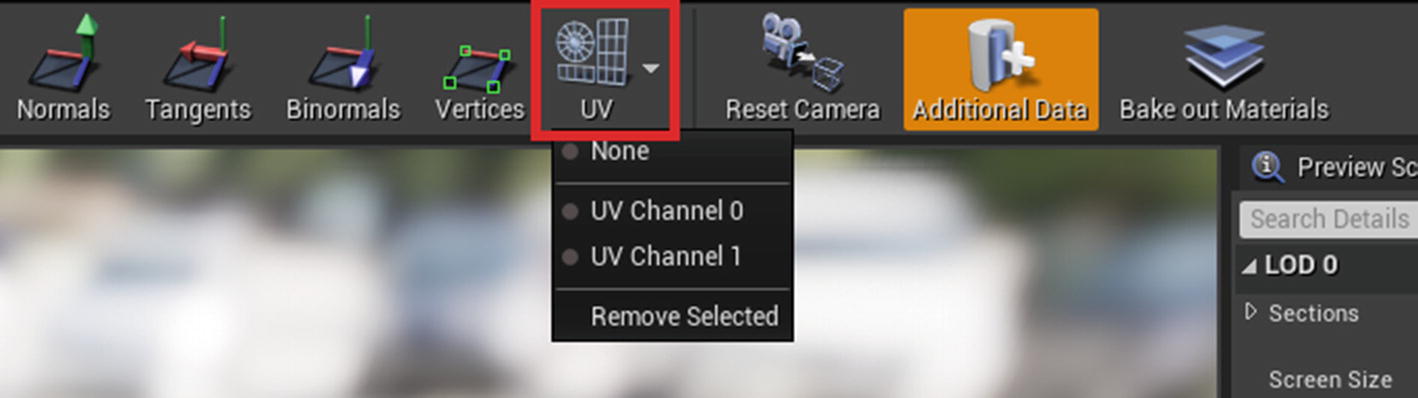
List of available UVs
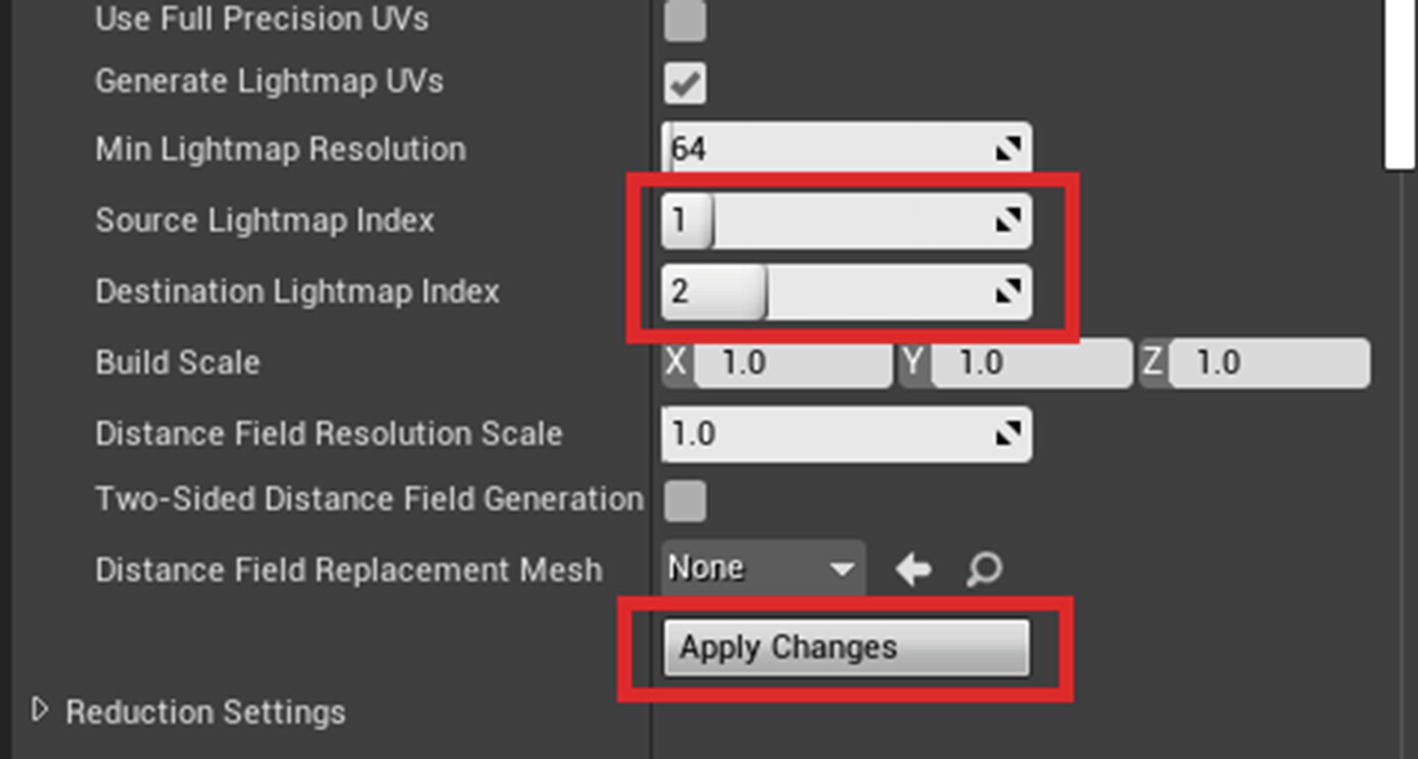
Generating new Lightmap UVs
Once you click on Apply, you will see a new UV in the UV tab. If you are happy with the result then continue; otherwise, you can regenerate new UVs with different settings.
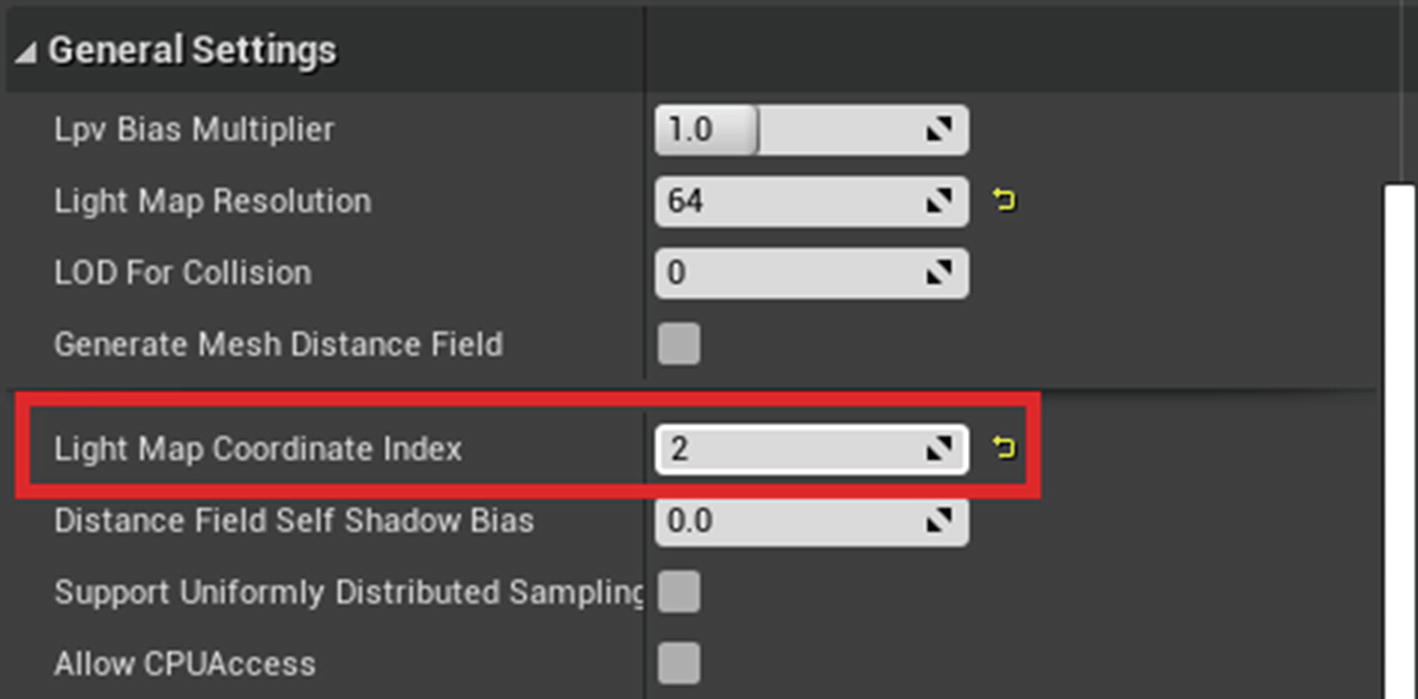
Setting the Lightmap coordinate index
Editing Collisions
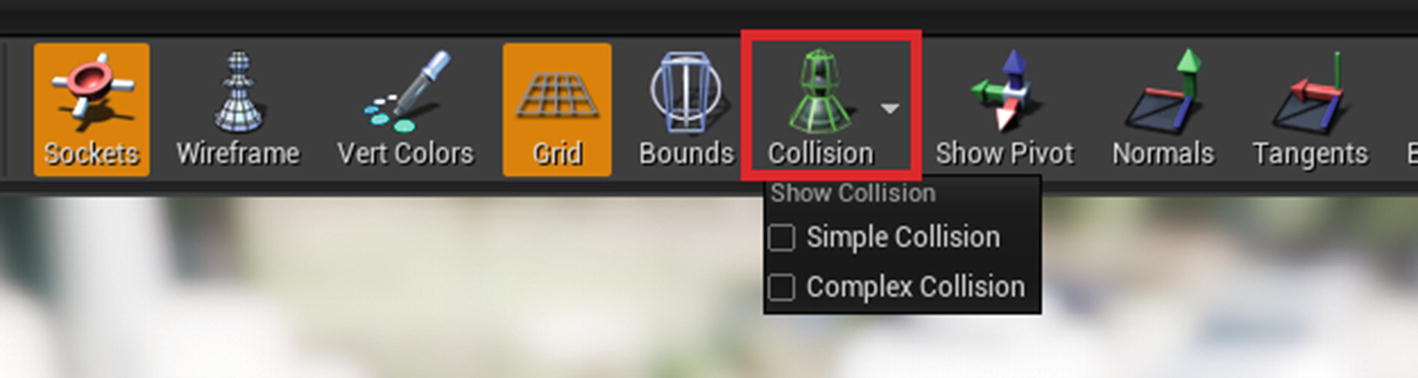
Viewing the collision
Check each of the box individually to visualize what your collisions look like. The Simple Collision option is simply a bounding box around the shape. It does not have much detail. While the Complex Collision option is generated according to the shape of the object, and it will follow the object’s shape accurately. Simple Collision is not as performance heavy but is less accurate, while Complex Collision is obviously more accurate but will hamper performance if it’s used too much in a scene.
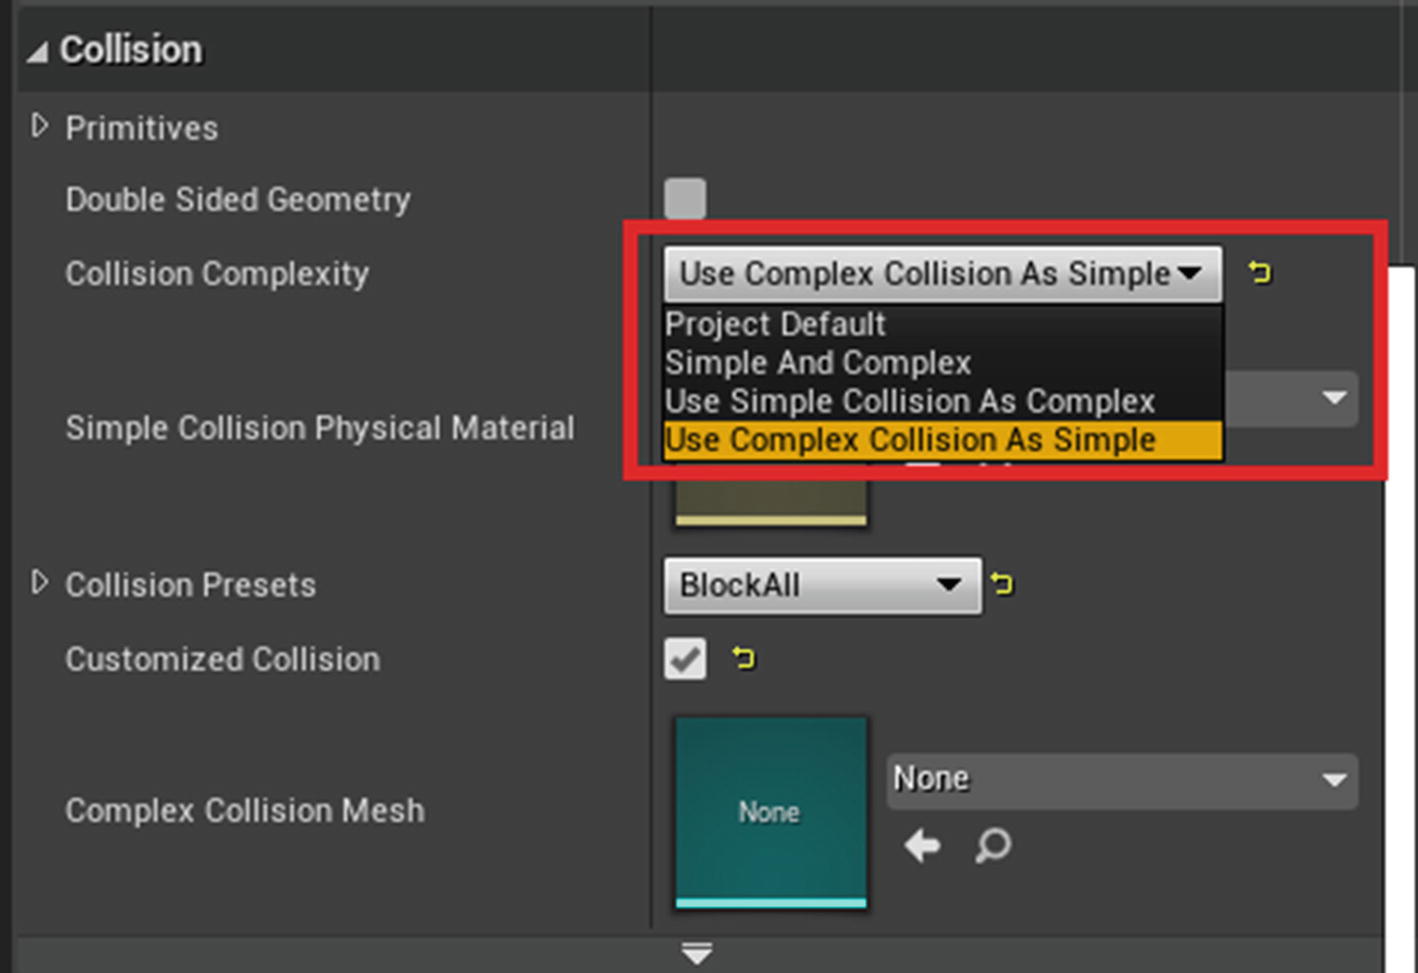
Changing the collision type
This will make the mesh use the Complex Collision option as its default. Everything has its uses and for objects like this large wall, it is better to use the Simple Collision option. But you will want to use Complex Collision option for walls with holes or doors so that you can traverse through the gap.
That’s all for this chapter. I hope you have adequately learned how to import and set up your assets inside Unreal Engine 4. In the next chapter, you will learn about different ways to set up your materials.