We are now on the verge of getting started on the Dungeon Crawler game, which is the focus of most of this book! The first chapter should have brought you up to speed on the goals for the game, while this chapter will explain how we can merge graphics with forms and controls. We will begin studying the graphics capabilities of the .NET Framework that will make it possible to build a complex game. You will learn how to detach controls from the “Form Designer” and just create them at runtime. Although future chapters will continue to need forms and controls, the graphics code will not be dependent on controls such as PictureBox. The .NET Framework has abstracted classes around the Windows Graphics Device Interface (GDI) so that we can create drawing surfaces and render shapes onto them using classes such as Graphics and Bitmap in conjunction with a PictureBox control. We will just create what is needed at runtime.
Here’s what is covered in this chapter:
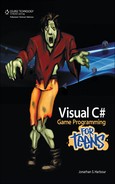
Lines and other vector shapes may not be very exciting but we are going to use line drawing as a starting point for learning about graphics programming with the .NET Framework and GDI+. The graphics code we’ll cover produces the result shown in Figure 2.1.
For our purposes in this chapter, we will just look at the features specific to 2D graphics programming using the Image property of a PictureBox control. The PictureBox can be added to a form manually, but it’s easier to use a global PictureBox control and just create it at runtime in the Form1_Load function. In fact, we will just configure the form in code as well so that no manual property editing is needed. Any property you see in the Properties window of the Form Designer can be modified in code—and it’s easier to do that in code. So, in the globals section of public partial class Form1, let’s add some variables, including a PictureBox control:
PictureBox pb;
Timer timer;
Random rand;
In Form1_Load, we will create this new PictureBox and add it to the form. The Parent property is used to attach the control to Form1 (referred to with the this keyword—which refers to the current Form). DockStyle.Fill causes the PictureBox to fill the entire form, so that we can set the size of the form and the PictureBox will resize with it.
pb = new PictureBox();
pb.Parent = this;
pb.Dock = DockStyle.Fill;
pb.BackColor = Color.Black;
While we’re working in Form1_Load, let’s just go ahead and set the form’s settings. Again, this is being done in code while it could also be done using the Properties window in the Form Designer.
//set up the form
this.Text = "Line Drawing Demo";
this.FormBorderStyle = System.Windows.Forms.FormBorderStyle.FixedSingle;
this.MaximizeBox = false;
this.Size = new Size(600, 500);
//create random generator
rand = new Random();
Back in the globals sections at the top of the code, we need two new objects: a Bitmap and a Graphics object.
Bitmap surface;
Graphics device;
The Bitmap represents a drawing surface and is really just a pointer to the data in memory. After drawing something using the Graphics object (onto a PictureBox.Image), we then set the Bitmap variable (which is a pointer) equal to the PictureBox.Image, and that Bitmap can then be treated as an independent surface—which can be copied elsewhere, saved to a file, and other things. The Bitmap should be created with the same dimensions as the PictureBox control. This code goes in Form1_Load:
//create graphics device
surface = new Bitmap(this.Size.Width, this.Size.Height);
pb.Image = surface;
device = Graphics.FromImage(surface);
There are quite a few versions of the Graphics.DrawLine() function with various parameter variations that use Points, float- and int-based X,Y coordinates, and drawing modes. The version I use will use a Pen defined with the desired color and line width. The drawLine() function creates a pen with a random color and random line size, and two random points for the line ends that fit inside the dimensions of the form. After calling DrawLine(), then the PictureBox.Image is refreshed.
public void drawLine()
{
    //make a random color
    int A = rand.Next(0, 255);
    int R = rand.Next(0, 255);
    int G = rand.Next(0, 255);
    int B = rand.Next(0, 255);
    Color color = Color.FromArgb(A, R, G, B);
    //make pen out of color
    int width = rand.Next(2, 8);
    Pen pen = new Pen(color, width);
    //random line ends
    int x1 = rand.Next(1, this.Size.Width);
    int y1 = rand.Next(1, this.Size.Height);
    int x2 = rand.Next(1, this.Size.Width);
    int y2 = rand.Next(1, this.Size.Height);
    //draw the line
    device.DrawLine(pen, x1, y1, x2, y2);
    //refresh the drawing surface
    pb.Image = surface;
}
We can even create a Timer in code without using the Form Designer. There is just one extra step to take and then the new Timer will work like usual—when setting its properties, we have to create an event handler.
Timer timer;
The Timer object is created in Form1_Load:
//set up the timer
timer = new Timer();
timer.Interval = 20;
timer.Enabled = true;
timer.Tick += new System.EventHandler(TimerTick);
When a new event handler is created, then it becomes “visible” to the event handler system in Visual C#, and can be used as an event trigger even when we write the function ourselves (rather than having Visual C# generate it for us). In this example, I want the drawLine() function to run every 20 milliseconds, which is 50 frames per second (50 Hz).
public void TimerTick (object source, EventArgs e)
{
    drawLine();
}
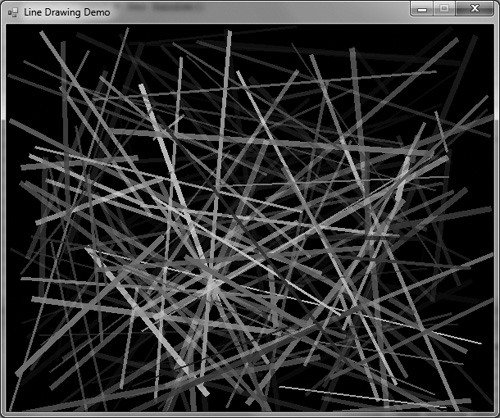
One final point: we should free memory after we finish with objects created in our programs. Visual C# (or, more specifically, the runtime) will free objects automatically in most cases, but it’s a good programming habit to free memory that you use. This is best done in the Form1_FormClosed event. At a certain point, it becomes too difficult to manage everything in code; some events like this one are best left up to the event handler in the Form Properties. To bring up the Events, open the Form1.cs in design view, then in the Properties window click the Events button (which looks like a lightning bolt). You will see all of the events, as shown in Figure 2.2. I wouldn’t say that freeing memory is crucial, but it’s a good idea.
private void Form1_FormClosed(object sender, FormClosedEventArgs e)
{
    device.Dispose();
    surface.Dispose();
    timer.Dispose();
}
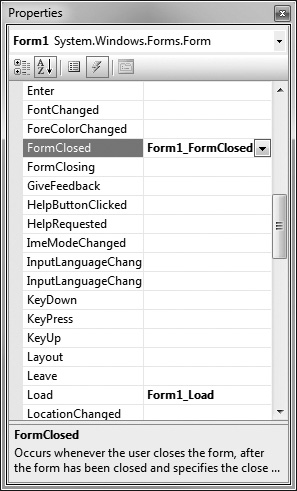
Once we have the framework in place to draw lines, there are many other vector shapes that can be drawn with only a few minor changes in the code. One such shape is a rectangle, which we will look at next. Figure 2.3 shows the result.
For reference, we’ll go over the entire code listing (which is still quite short). First up are the global variables, Form1_Load, which initializes the program, and Form1_FormClosed, which frees memory.
using System;
using System.Drawing;
using System.Windows;
using System.Windows.Forms;
public partial class Form1 : Form
{
    PictureBox pb;
    Timer timer;
    Bitmap surface;
Graphics device;
Random rand;

public Form1()
{
    InitializeComponent();
}

private void Form1_Load(object sender, EventArgs e)
{
    //set up the form
    this.Text = "Rectangle Drawing Demo";
    this.FormBorderStyle = System.Windows.Forms.FormBorderStyle.
        FixedSingle;
    this.MaximizeBox = false;
    this.Size = new Size(600, 500);
    //create a new picturebox
    pb = new PictureBox();
    pb.Parent = this;
    pb.Dock = DockStyle.Fill;
    pb.BackColor = Color.Black;
    //create graphics device
    surface = new Bitmap(this.Size.Width, this.Size.Height);
    pb.Image = surface;
    device = Graphics.FromImage(surface);
    //create random generator
    rand = new Random();
    //set up the timer
    timer = new Timer();
    timer.Interval = 20;
    timer.Enabled = true;
    timer.Tick += new EventHandler(timer_Tick);
}

private void Form1_FormClosed(object sender, FormClosedEventArgs e)
{
    device.Dispose();
    surface.Dispose();
    timer.Dispose();
}
Lastly, we have the timer_Tick event and the drawRect() function, which does the actual rasterizing of rectangle shapes. Again, there are several versions of the Graphics.DrawRectangle() function, and I have just chosen the easiest one, but there are others that let you use a Point for the coordinates instead of individual X and Y values.
    private void drawRect()
    {
        //make a random color
        int A = rand.Next(0, 255);
        int R = rand.Next(0, 255);
        int G = rand.Next(0, 255);
        int B = rand.Next(0, 255);
        Color color = Color.FromArgb(A, R, G, B);

        //make pen out of color
        int width = rand.Next(2, 8);
        Pen pen = new Pen(color, width);
        //random line ends
        int x = rand.Next(1, this.Size.Width - 50);
        int y = rand.Next(1, this.Size.Height - 50);
        Rectangle rect = new Rectangle(x, y, 50, 50);

        //draw the rectangle
        device.DrawRectangle(pen, rect);

        //refresh the drawing surface
        pb.Image = surface;
    }

    private void timer_Tick(object source, EventArgs e)
    {
        drawRect();
    }
}
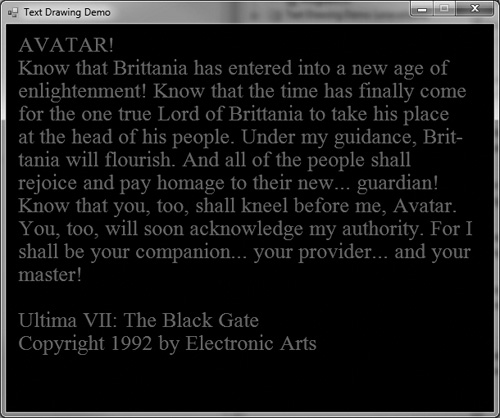
We will need to draw text onto the game screen using any desired font, and the Graphics class gives us this ability too, via the DrawString() function. There are several versions of the function with various sets of parameters, but we will be using the simplest version that just needs a String (for the words we want to print out), a custom Font object, the color, and the coordinates. Figure 2.4 shows the result of this example program.
using System;
using System.Drawing;
using System.Windows.Forms;
public partial class Form1 : Form
{
    string[] text = {
        "AVATAR!",
        "Know that Brittania has entered into a new age of",
        "enlightenment! Know that the time has finally come",
        "for the one true Lord of Brittania to take his place",
        "at the head of his people. Under my guidance, Brit-",
        "tania will flourish. And all of the people shall",
        "rejoice and pay homage to their new...  guardian!",
        "Know that you, too, shall kneel before me, Avatar.",
        "You, too, will soon acknowledge my authority. For I",
        "shall be your companion...  your provider...  and your",
        "master!", "",
        "Ultima VII: The Black Gate",
        "Copyright 1992 by Electronic Arts"
    };

    PictureBox pb;
    Bitmap surface;
    Graphics device;
    Random rand;

    public Form1()
    {
        InitializeComponent();
    }

    private void Form1_Load(object sender, EventArgs e)
    {
        //initialize
        this.Text = "Text Drawing Demo";
        this.FormBorderStyle = System.Windows.Forms.FormBorderStyle.
            FixedSingle;
        this.MaximizeBox = false;
        this.Size = new Size(600, 500);
        rand = new Random();

        //create a new picturebox
        pb = new PictureBox();
        pb.Parent = this;
        pb.Dock = DockStyle.Fill;
        pb.BackColor = Color.Black;

        //create graphics device
        surface = new Bitmap(this.Size.Width, this.Size.Height);
        pb.Image = surface;
        device = Graphics.FromImage(surface);

        //make a new font
        Font font = new Font("Times New Roman", 26, FontStyle.Regular,
            GraphicsUnit.Pixel);

        //draw the text
        for (int n = 0; n < text.Length; n++)
        {
            device.DrawString(text[n], font, Brushes.Red, 10, 10 + n*28);
        }

        //refresh the drawing surface
        pb.Image = surface;
    }

    private void Form1_FormClosed(object sender, FormClosedEventArgs e)
    {
        device.Dispose();
        surface.Dispose();
    }
}
There are other shapes in addition to lines, rectangles, and text that the Graphics class can draw. Now that you have a foundation, see if you can modify the program to use any of the following functions:
DrawArcDrawBezierDrawCurveDrawEllipseDrawPieDrawPolygon
Trick
To simplify the code in this C# project, I have removed the default namespace that Visual C# automatically added to the new project. In a larger project with many source code files and libraries, we would want to use a namespace, but for simple examples like this it is okay to skip the namespace.
Learning to draw a bitmap is the first step toward creating a 2D game like our impending Dungeon Crawler game. When we have the ability to draw just one bitmap, then we can extend that to animation by drawing one frame after another in a timed sequence—and presto, sprite animation becomes a reality! We will focus on sprite animation in Chapter 3, and work on the basics of bitmap drawing now as a prerequisite.
Drawing on the code we learned about earlier in the chapter, a Bitmap object, a PictureBox, and a Graphics object work in tandem to represent a rendering device capable of drawing vector shapes as well as bitmaps. Once again for reference, we have to declare the two variables:
Bitmap surface;
Graphics device;
and then, assuming we have a PictureBox control called pictureBox1, create the objects. The PictureBox control can be created at runtime or we can just add it to the form manually.
surface = new Bitmap(this.Size.Width, this.Size.Height);
pictureBox1.Image = surface;
device = Graphics.FromImage(surface);
So, we already knew this startup code, but—just to lay the groundwork—this is what is needed up front as a rendering device to draw a bitmap.
We can load a bitmap in C# by using the Bitmap class. But there is no Bitmap. Load() function (unfortunately!) so we have to use the constructor instead by passing the bitmap filename when the object is created.
Bitmap bmp;
bmp = new Bitmap("image.bmp");
Definition
A constructor is a class function (also called a method) that runs when an object is first created. This is where class variables (also called properties) are initialized. A destructor is a class function that runs when the object is being destroyed: via object.Dispose() or object = null.
Although both approaches work, and we can even pass a string rather than hard coding the filename, there is the very serious problem of error handling: if the file does not exist, an exception error will crash the program. Missing files are fairly common (usually due to their being in the wrong folder), and we want to display a friendly error message rather than watch the program crash. The solution is to wrap the bitmap loading code in a try...catch block. Here is an example:
try
{
    bmp = new Bitmap(filename);
}
catch (Exception ex) { }
This code will not crash if the file is missing or if some other error occurs while reading the file. So, let’s put it into a reusable function that returns a Bitmap if the file exists or Nothing (null) if it fails. One caveat: be sure to free memory used by the bitmap when the program ends.
public Bitmap LoadBitmap(string filename)
{
    Bitmap bmp = null;
    try
    {
        bmp = new Bitmap(filename);
    }
    catch (Exception) { }
    return bmp;
}
If the file does not exist, then LoadBitmap() will return Nothing as the object pointer rather than crashing with an exception error. This is a very handy little function! And it demonstrates the power of code reuse and customization—whatever features we need that are not already in an SDK or library we can just write ourselves. One might even go so far as to write their own new Bitmap wrapper class (called something like CBitmap?) with a Load() function. You could easily do this yourself with just the small amount of code we have used so far. I’m just going to skip this step, though, and add bitmap loading in the Sprite class when we get to it in Chapter 3.
Hint
To ensure that created objects are properly disposed of when the program ends, I recommend putting the Form1_FormClosed() function at the top of the source code, just below the variable declarations, where it will be quick and easy to write the code needed to free an object. Always write creation/deletion code together in pairs to avoid memory leaks!
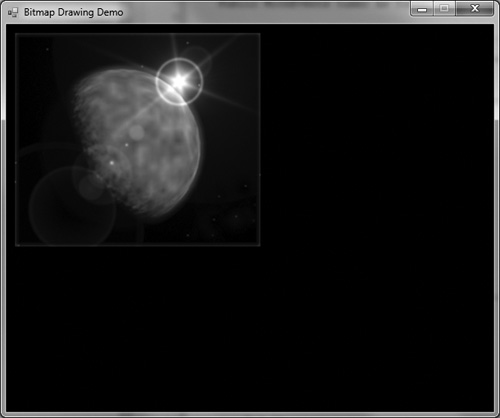
There are several versions of the Graphics.DrawImage() function; the alternate versions are called overloaded functions in “OOP speak.” The simplest version of the function calls for just a Bitmap or Image parameter and then the X and Y position. For example, this line
device.DrawImage(bmp, 0, 0);
will draw the bitmap bmp at pixel coordinates 0,0. Figure 2.5 shows an example.
We can optionally use a Point with the X and Y coordinates combined into one object, or use floating-point Single variables. There are also scaling features that make it possible to resize the image. By passing additional width and height parameters, we can define a new target size for the image. Figure 2.6 shows another example with the addition of this line, which draws another copy of the bitmap scaled down to a smaller size.
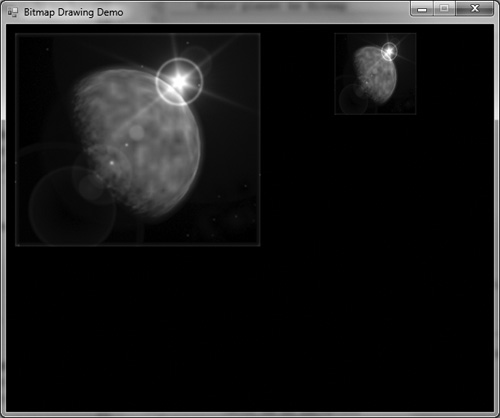
device.DrawImage(planet, 400, 10, 64, 64);
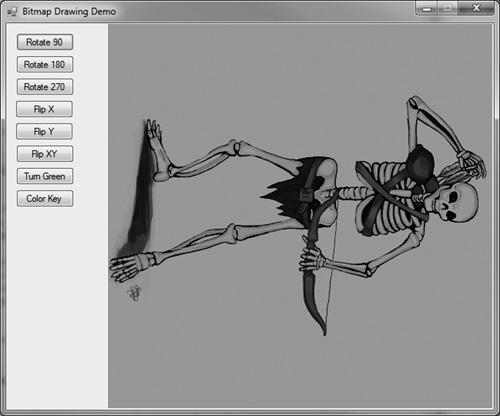
The Bitmap class has some helper functions for manipulating the image and even its individual pixels. The Bitmap.RotateFlip() function will rotate a bitmap in 90-degree increments (90, 180, and 270 degrees), as well as flip the bitmap vertically, horizontally, or both. Here is an example that rotates the bitmap 90 degrees:
planet.RotateFlip(RotateFlipType.Rotate90FlipNone);
The RotateFlipType options are as follows:
The Bitmap Drawing demo has several buttons on the form to let you explore rotating and flipping a bitmap in various ways, as you can see in Figure 2.7. In addition to calling RotateFlip(), we still need to draw the image again and refresh the PictureBox like usual:

image.RotateFlip(RotateFlipType.Rotate180FlipNone);
device.DrawImage(planet, 0, 0);
pictureBox1.Image = surface;
We can also examine and modify the pixel buffer of a bitmap directly using functions in the Bitmap class. The Bitmap.GetPixel() function retrieves the pixel of a bitmap at given X,Y coordinates, returning it as a Color variable. Likewise, the Bitmap.SetPixel() will change the color of a pixel at the given coordinates. The following example reads every pixel in the planet bitmap and changes it to green by setting the red and blue components of the color to zero, which leaves just the green color remaining. Figure 2.8 shows the Bitmap Drawing demo with the pixels modified—not very interesting but it does a good job of showing what you can do with this capability.
for (int x = 0; x < image.Width - 1; x++)
{
    for (int y = 0; y < image.Height - 1; y++)
    {
        Color pixelColor = image.GetPixel(x, y);
        Color newColor = Color.FromArgb(0, pixelColor.G, 0);
        image.SetPixel(x, y, newColor);
    }
}
Here is the source code for the Bitmap Drawing demo. There are controls on the form, so you must open the project in order to run it; the source code here does not build the user interface like some of our simpler examples have done.
using System;
using System.Drawing;
using System.Windows.Forms;
public partial class Form1 : Form
{
    Bitmap surface;
    Graphics device;
    Bitmap image;

    public Form1()
    {
        InitializeComponent();
    }

    private void Form1_Load(object sender, EventArgs e)
    {
        //set up the form
        this.Text = "Bitmap Drawing Demo";
        this.FormBorderStyle = System.Windows.Forms.FormBorderStyle.
            FixedSingle;
        this.MaximizeBox = false;
        //create graphics device
        surface = new Bitmap(this.Size.Width, this.Size.Height);
        pictureBox1.Image = surface;

        device = Graphics.FromImage(surface);
        //load the bitmap
        image = LoadBitmap("skellyarcher.png");
        //draw the bitmap
        device.DrawImage(image, 0, 0);
    }

    public Bitmap LoadBitmap(string filename)
    {
        Bitmap bmp = null;
        try
        {
            bmp = new Bitmap(filename);
    }
    catch (Exception ex) { }
    return bmp;
}

private void Form1_FormClosed(object sender, FormClosedEventArgs e)
{
    device.Dispose();
    surface.Dispose();
    image.Dispose();
}

private void button9_Click(object sender, EventArgs e)
{
    image.RotateFlip(RotateFlipType.Rotate90FlipNone);
    device.DrawImage(image, 0, 0);
    pictureBox1.Image = surface;
}

private void button10_Click(object sender, EventArgs e)
{
    image.RotateFlip(RotateFlipType.Rotate180FlipNone);
    device.DrawImage(image, 0, 0);
    pictureBox1.Image = surface;
}

private void button11_Click(object sender, EventArgs e)
{
    image.RotateFlip(RotateFlipType.Rotate270FlipNone);
    device.DrawImage(image, 0, 0);
    pictureBox1.Image = surface;
}

private void button12_Click(object sender, EventArgs e)
{
    image.RotateFlip(RotateFlipType.RotateNoneFlipX);
    device.DrawImage(image, 0, 0);
    pictureBox1.Image = surface;
}
private void button13_Click(object sender, EventArgs e)
{
    image.RotateFlip(RotateFlipType.RotateNoneFlipY);
    device.DrawImage(image, 0, 0);
    pictureBox1.Image = surface;
}

private void button14_Click(object sender, EventArgs e)
{
    image.RotateFlip(RotateFlipType.RotateNoneFlipXY);
    device.DrawImage(image, 0, 0);
    pictureBox1.Image = surface;
}

private void button15_Click(object sender, EventArgs e)
{
    Color white = Color.FromArgb(255, 255, 255);
    Color black = Color.FromArgb(0, 0, 0);
    for (int x = 0; x < image.Width - 1; x++)
    {
        for (int y = 0; y < image.Height - 1; y++)
        {
            if (image.GetPixel(x,y) == white)
                image.SetPixel(x, y, black);
        }
    }
    device.DrawImage(image, 0, 0);
    pictureBox1.Image = surface;
}

private void button16_Click(object sender, EventArgs e)
{
    for (int x = 0; x < image.Width - 1; x++)
    {
        for (int y = 0; y < image.Height - 1; y++)
        {
            Color pixelColor = image.GetPixel(x, y);
            Color newColor = Color.FromArgb(0, pixelColor.G, 0);
            image.SetPixel(x, y, newColor);
        }
        }
        device.DrawImage(image, 0, 0);
        pictureBox1.Image = surface;
    }
}
We have enough code now at this point to begin constructing a game framework for our future C# projects. The purpose of a framework is to take care of repeating code. Any variables and functions that are needed regularly can be moved into a Game class as properties and methods where they will be both convenient and easily accessible. First, we’ll create a new source code file called Game.cs, which will contain the source code for the Game class. Then, we’ll copy this Game.cs file into the folder of any new project we create and add it to that project. The goal is to simplify the whole process of creating a new game project and make most of our C# game code reusable. Let’s get started:
using System;
using System.Drawing;
using System.Diagnostics;
using System.Windows;
using System.Windows.Forms;

public class Game
{
    private Graphics p_device;
    private Bitmap p_surface;
    private PictureBox p_pb;
    private Form p_frm;
You might recognize the first three of these class properties from previous examples. They have a p_ in front of their names so it’s easy to tell at a glance that they are private variables in the class (as opposed to, say, parameters in a function). The fourth property, p_frm, is a reference to the main Form of a project, which will be set when the object is created. Yes, our Game class will even customize its form so we don’t have to do anything more than supply the form to the class.
Hint
A class is a blueprint written in source code for how an object should behave at runtime. Just as an object does not exist at compile time (i.e., when we’re editing source code and building the project), a class does not exist during runtime. An object is created out of the class blueprint.
The constructor is the first method that runs when a class is instantiated into an object. We can add parameters to the constructor in order to send information to the object at runtime—important things like the Form, or maybe a filename, or whatever you want.
Definition
Instantiation is the process of creating an object out of the blueprint specified in a class. When this happens, an object is created and the constructor method runs. Likewise, when the object is destroyed, the destructor method runs. These methods are defined in the class.
Here is the constructor for the Game class. This is just an early version, as more code will be added over time. As you can see, this is not new code, it’s just the code we’ve seen before to create the Graphics and Bitmap objects needed for rendering onto a PictureBox. Which, by the way, is created at runtime by this function and set to fill the entire form (Dock = DockStyle.Fill). To clarify what these objects are used for, the Graphics variable is called p_device—while not technically correct, it conveys the purpose adequately. To help illustrate when the constructor runs, a temporary message box pops up which you are welcome to remove after you get what it’s doing.
public Game(Form1 form, int width, int height)
{
    Trace.WriteLine("Game class constructor");
    //set form properties
    p_frm = form;
    p_frm.FormBorderStyle = FormBorderStyle.FixedSingle;
    p_frm.MaximizeBox = false;
    p_frm.Size = new Size(width, height);

    //create a picturebox
    p_pb = new PictureBox();
    p_pb.Parent = p_frm;
    p_pb.Dock = DockStyle.Fill;
    p_pb.BackColor = Color.Black;

    //create graphics device
    p_surface = new Bitmap(p_frm.Size.Width, p_frm.Size.Height);
    p_pb.Image = p_surface;
    p_device = Graphics.FromImage(p_surface);
}
The destructor method is called automatically when the object is about to be deleted from memory (i.e., destroyed). In C#, or, more specifically, in .NET, the name of the destructor is Finalize(), but we create a sub-class destructor using the tilde character (~) followed by the class name. So, if our class name is Game, then the destructor method will be ~Game(). In this method, we again send a message sent to the output console using System.Diagnostics.Trace.WriteLine(). Feel free to use Trace any time you need to see debugging information, as it will be sent to the output window. Note that p_frm is not disposed—leave that alone as it is just a reference to the actual form.
~Game()
{
    Trace.WriteLine("Game class destructor");
    p_device.Dispose();
    p_surface.Dispose();
    p_pb.Dispose();
}
Our first reusable method for the Game class is LoadBitmap:
public Bitmap LoadBitmap(string filename)
{
    Bitmap bmp = null;
    try
    {
        bmp = new Bitmap(filename);
    }
    catch (Exception ex) { }
    return bmp;
}
We probably will not need an Update() function at this early stage but it’s here as an option should you wish to use it to update the PictureBox any time drawing occurs on the “device.” In due time, this function will be expanded to do quite a bit more than its meager one line of code currently shows. Also shown here is a Property called Device. A Property allows us to write code that looks like just a simple class property is being used (like p_device), when in fact a function call occurs.
    public Graphics Device
    {
        get { return p_device; }
    }

    public void Update()
    {
        //refresh the drawing surface
        p_pb.Image = p_surface;
    }
}
So, for example, if we want to get the value returned by the Device property, we can do that like so:
Graphics G = game.Device;
Note that I did not include parentheses at the end of Device. That’s because it is not treated as a method, even though we are able to do something with the data before returning it. The key to a property is its get and set members. Since I did not want anyone to modify the p_device variable from outside the class, I have made the property read-only by using a get without a corresponding set member. If I did want to make p_device writable, I would use a set member.
Properties are really helpful because they allow us to protect data in the class! You can prevent changes to a variable by making sure the change value is in a valid range before allowing the change—so in that sense, a property is like a “variable with benefits.”
The code in this Framework demo program produces pretty much the same output as what we’ve seen earlier in the chapter (drawing a purple planet). The difference is, thanks to the new Game class, the source code is much, much shorter! Take a look.
using System;
using System.Drawing;
using System.Windows.Forms;

public partial class Form1 : Form
{
    public Game game;
    public Bitmap planet;

    public Form1()
    {
        InitializeComponent();
    }

    private void Form1_Load(object sender, EventArgs e)
    {
        //set up the form
        this.Text = "Framework Demo";

        //create game object
        game = new Game(this, 600, 500);

        //load bitmap
        planet = game.LoadBitmap("planet.bmp");
        if (planet == null)
        {
            MessageBox.Show("Error loading planet.bmp");
            Environment.Exit(0);
        }

        //draw the bitmap
        game.Device.DrawImage(planet, 10, 10);
        game.Device.DrawImage(planet, 400, 10, 100, 100);
        game.Update();
    }

    private void Form1_FormClosed(object sender, FormClosedEventArgs e)
    {
        //delete game object
        game = null;
    }
}
Eliminating any reusable source code by moving it into a support file is like reducing a mathematical formula, rendering the new formula more powerful than it was before. Any code that does not have to be written increases your productivity as a programmer. So, look for every opportunity to cleanly and effectively recycle code, but don’t reduce just for the sake of code reuse—make sure you keep variables and functions together that belong together and don’t mish-mash them all together.
This chapter gave us the ability to create a rendering system in code and bypass the Form Designer by creating controls at runtime instead of design time. Using this technique, we created a PictureBox for use in rendering. We also learned how to work with bitmaps and manipulate them in interesting ways that will be very useful in a game. We have now learned enough about 2D graphics programming to begin working with sprites in the next chapter!