
Chapter 6: Build Your Own Link-sharing Site with Nuxt.js and vue-kindergarten
by Nilson Jacques
In this tutorial, we’re going to create a our own link-sharing news site, along the lines of Echo JS or Hacker News, complete with comments and upvoting. The tech stack we’ll be using consists of Vue.js, the Nuxt.js Vue framework, and an access-control/authorization library called vue-kindergarten.
This guide is not intended as a “deep dive” into any of the libraries used. Rather, the aim is to give you some exposure to these tools and how they can be used together to create a real-world application.
Node and npm
To follow along, you’ll need to have a recent version of Node.js installed, and your copy of npm needs to be >= 5.2.0.
The GitHub Repo
There’s a GitHub repo available with the finished code.
Installing Nuxt.js
We’re going to use Nuxt.js for this project. Although it’s well known for its server-side rending (SSR) functionality, we won’t actually be using this part of Nuxt. Instead, we’ll take advantage of Nuxt’s convention-over-configuration approach to reduce the amount of boilerplate we have to write to get a single page application up and running.
Open up a terminal/command prompt and create a new folder. I’ve called mine “yans” for “Yet Another News Site”, but feel free to name yours as you like:
mkdir yans && cd yans
Commands
These commands are for Linux, and will probably work on macOS too. Windows users will have to translate accordingly!
To bootstrap the project, launch the Nuxt.js installer via npm:
npx create-nuxt-app client
The npx tool will download and run the installer, and you’ll be presented with a series of questions. This isn’t an in-depth tutorial on Nuxt, so I’m not going to go into detail on these.
Here are the selections you’ll need to select to follow along with this guide:
- Project name (your choice)
- Project description (your choice)
- Use a custom framework (“none”)
- Use a custom UI framework (“bulma”)
- Choose rendering mode (“Single Page App”)
- Use axios module (“yes”)
- Use eslint (your choice)
- Use prettier (your choice)
- Author name (your choice)
- Choose a package manager (your choice)
Linting and Coding Styles
If you install ESLint and Prettier (as I did for this tutorial) you’ll need to run npm run lint -- --fix after installation, or your Nuxt project won’t compile.
The code formatting used in this guide reflects the default configuration. If this bothers you, feel free to change the settings to your liking (Prettier will even add those semicolons back in for you!) or opt out altogether (recommended).
When the installer has finished, it’s time to change into the newly created client folder and start building the site!
Layout and Styling
We’re going to be using the Bulma CSS framework to style our news site. Nuxt helpfully gave us the option to add this from the installer, but we’ll also need to pull in Font Awesome for the icons.
The most straightforward way to do this is to edit the Nuxt config file and add a link to the CDN CSS file.
client/nuxt.config.js
/*
 ** Headers of the page
 */
 head: {
   title: pkg.name,
   meta: [
     { charset: 'utf-8' },
     { name: 'viewport', content: 'width=device-width, initial-scale=1' },
     { hid: 'description', name: 'description', content: pkg.description }
   ],
   link: [
     { rel: 'icon', type: 'image/x-icon', href: '/favicon.ico' },
     {
       rel: 'stylesheet',
       href: 'https://use.fontawesome.com/releases/v5.6.3/css/all.css'
     }
   ]
 },
We’re adding a second item to the link array, under the head property. This will add the CDN link to our SPA’s template.
The next thing we’re going to want to do is customize the basic layout, to add a menu bar that will appear across all the pages on the site.
Open up layouts/default.vue, and replace the contents with the following code.
client/layouts/default.vue
<template>
  <div>
    <nav
      class="navbar is-info"
      role="navigation"
      aria-label="main navigation"
    >
      <div class="navbar-brand">
        <nuxt-link
          class="navbar-item"
          to="/"
        >
          YANS!
        </nuxt-link>

        <a
          role="button"
          class="navbar-burger burger"
          aria-label="menu"
          aria-expanded="false"
          data-target="navbarBasicExample"
        >
          <span aria-hidden="true"/>
          <span aria-hidden="true"/>
          <span aria-hidden="true"/>
        </a>
      </div>

      <div class="navbar-menu">
        <div class="navbar-start">
          <nuxt-link
            to="/"
            class="navbar-item"
          >Top</nuxt-link>
          <nuxt-link
            to="/new"
            class="navbar-item"
          >New</nuxt-link>
          <nuxt-link
            to="/submit"
            class="navbar-item"
          >Submit</nuxt-link>
        </div>

        <div class="navbar-end">
          <div class="navbar-item">
            <div class="buttons">
              <nuxt-link
                to="/register"
                class="button is-primary"
              >
                <strong>Register</strong>
              </nuxt-link>
              <nuxt-link
                to="/login"
                class="button is-light"
              >Log in</nuxt-link>
            </div>
          </div>
        </div>
      </div>
    </nav>
    <nuxt/>
  </div>
</template>
The basic markup for the navigation bar comes from Bulma’s own documentation, but we’re replacing the anchor tags with Nuxt’s own <nuxt-link> components, which allow us to interact with the instance of Vue Router it uses. Also, notice that, down near the bottom of the template, we have the <nuxt/> element, so the router knows where to display our content.
As you can see, our menu bar has links for Top (posts in order of the most voted), New (most recent posts), and Submit (a form for submitting new links).
Faking the Back End
Rather than cover building a back end for the site (a topic best left to a separate guide) we’re going to create a fake API server. Normally for this sort of task I’d reach for json-server, which does a great job of turning a JSON file into a RESTful mock API, but we’re also going to need to support authentication.
Fortunately, there’s a module called json-server-auth which builds on json-server to add JWT authentication and access control. Let’s install that and get it set up as our fake back end.
Switch from your client folder into the parent directory. Create a new folder called server and change into it, and init a new package.json file:
cd ..
mkdir server && cd server
npm init -y
Also install the json-server-auth package:
npm i json-server-auth
If you’re not familiar with the original json-server package, the way it works is that you create a JSON file which is used as a data store for the mock API. The file contains an object with keys for each of the endpoints you wish your API to have (such as “users”).
Our file will look as follows.
server/db.json
{
  "users": [],
  "posts": [],
  "comments": []
}
This is the basic structure we need for our news site. You can find a copy of db.json, prepopulated with sample data in the project repo.
Under normal circumstances, that would be enough to get a mock back end up and running. However, as we’re going to be using the the Nuxt community’s Auth module, we need to do a little customization first.
After the Auth module makes a successful authentication request, it makes a request to a “user” endpoint, which it expects to return a JSON object representing the logged-in user.
The json-server-auth module doesn’t provide this functionality out of the box, so we’re going to add it ourselves. Create a new file called index.js, and add the following code.
server/index.js
const jsonServer = require('json-server')
const auth = require('json-server-auth')

const app = jsonServer.create()
const router = jsonServer.router('db.json')

const { rewriter } = require('json-server-auth/dist/guards')

const rules = rewriter({
  user: 660
})

app.use(rules)

app.db = router.db

app.use(auth)
app.get('/user', (req, res, next) => {
  const { email } = req.claims
  const { db } = req.app
  const user = Object.assign({}, db.get('users').find({ email }).value())
  delete user.password
  res.json({ user })
})
app.use(router)

app.listen(3001)
console.log('API server started on port 3001')
Most of this code comes from the json-server-auth documentation, but this is the code I’ve added:
app.get('/user', (req, res, next) => {
  const { email } = req.claims
  const { db } = req.app
  const user = Object.assign({}, db.get('users').find({ email }).value())
  delete user.password
  res.json({ user })
})
When a request is made to the /users endpoint, this handler gets the user’s email (from the JWT) and fetches the user from the JSON file DB. It removes the password field from the object, before returning it in the response.
Now that’s done, we can spin up an instance of our back end and leave it running as we develop the site itself:
node index.js
If you’re following along, you’ll also need to start the Nuxt server in the client folder with:
npm run dev
Proxying with the axios Module
We’re going to take advantage of one of the features of Nuxt’s axios module: proxying. This will allow us to treat our API as if it’s on the same server as the site itself, making requests to /api/users instead of something like http://localhost:3001/users.
To set this up, all we have to do is add some settings to the Nuxt configuration file.
client/nuxt.config.js
/*
** axios module configuration
*/
axios: {
  proxy: true
},

proxy: {
  '/api/': { target: 'http://localhost:3001', pathRewrite: { '^/api/': '' } }
},
What we’re doing here is telling axios that we want to use a proxy, and then defining a separate proxy key with details of the URL we want to map.
In this case, we’re taking any requests to URLs beginning in /api/ and redirecting them to our mock API server. The pathRewrite option strips off the /api/ segment from the path, as we don’t need it as part of the server URL.
Now that we’ve got our back-end server set up and the proxy configured, let’s start adding some functionality to our site.
Authentication
As I mentioned before, we’re going to use the Auth module plugin for Nuxt. With a little configuration, this module provides us with some helpful methods for authenticating a user with our server, and some Nuxt middleware for restricting routes to logged-in users.
The first thing we need to do is install the module from npm (don’t forget to change back to the client folder before this step!):
npm i @nuxtjs/auth
Once this has downloaded, we need to open the Nuxt config file again, and add some settings.
client/nuxt.config.js
/*
** Nuxt.js modules
*/
modules: [
  '@nuxtjs/auth',
  // Doc: https://github.com/nuxt-community/axios-module#usage
  '@nuxtjs/axios',
  // Doc:https://github.com/nuxt-community/modules/tree/master/packages/bulma
  '@nuxtjs/bulma'
],
First of all, we need to tell Nuxt about the plugin, by adding the module name to the modules array as above.
Directly below the modules section, let’s add a new key for the auth module’s settings.
client/nuxt.config.js
auth: {
  strategies: {
    local: {
      endpoints: {
        login: {
          url: '/api/login',
          method: 'post',
          propertyName: 'accessToken'
        },
        logout: false,
        user: { url: '/api/user', method: 'get' }
      }
    }
  }
},
The auth module allows you to configure different “strategies” (that is, different authentication methods), and we want to set up the “local” strategy which supports JWT-based authentication.
Within the configuration for the strategy, we need to specify details of “login”, “logout”, and “user” endpoints for the module to make requests to, and how it can retrieve the auth token. Note that we’re setting logout to false as our authentication API doesn’t support this method. The module will just delete the cached token and revert to a logged out state.
The other thing we need to do to get the module working is have a Vuex store, as it uses this to store the authentication state and the logged-in user. We’ll also be using a Vuex for our application, so let’s go ahead and set this up as an empty store.
client/store/index.js
import Vuex from 'vuex'

const createStore = () => {
  return new Vuex.Store({
    state: {},
    getters: {},
    actions: {},
    mutations: {}
  })
}

export default createStore
Nuxt requires our store to be exported as a factory function due to how the SSR functionality works, but other than that this is a regular Vuex store.
We’ll also need a couple of pages to handle registration and logging in. Let’s create those next.
Registration
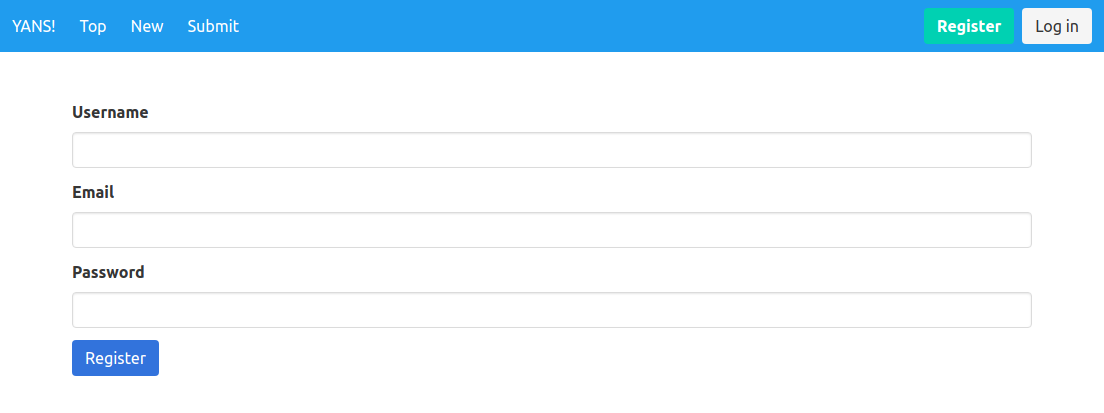
First, create a new file called register.vue within the pages folder. Let’s look at the template section before we add the script block.
client/pages/register.vue
<template>
  <section class="section">
    <div class="container">

      <div class="field">
        <label class="label">Username</label>
        <div class="control">
          <input
            v-model="username"
            class="input"
            type="text"
            autofocus
          >
        </div>
      </div>

      <div class="field">
        <label class="label">Email</label>
        <div class="control">
          <input
            v-model="email"
            class="input"
            type="text"
          >
        </div>
      </div>

      <div class="field">
        <label class="label">Password</label>
        <div class="control">
          <input
            v-model="password"
            class="input"
            type="password"
          >
        </div>
      </div>

      <div class="field">
        <div class="control">
          <button
            :disabled="isSaving"
            class="button is-link"
            @click="registerUser"
          >Register</button>
        </div>
      </div>
    </div>
  </section>
</template>
Here we’ve just got three basic input fields, all connected via v-model to data properties on the component. When the submit button is clicked, it will call the registerUser method in the component.
And now the code:
<script>
import { mapActions } from 'vuex'

export default {
  data: () => ({
    isSaving: false,
    username: null,
    email: null,
    password: null
  }),
  methods: {
    ...mapActions(['saveUser']),
    async registerUser() {
      this.isSaving = true

      await this.saveUser({
        username: this.username,
        email: this.email,
        password: this.password
      })

      this.$auth.login({
        data: {
          email: this.email,
          password: this.password
        }
      })

      this.$router.push('/')
    }
  }
}
</script>
The registerUser method is pretty straightforward. We set an isSaving flag to true, which prevents the form being resubmitted while we’re processing it. We then dispatch a Vuex action, saveUser, passing in the three input values and waiting for it to complete. Lastly, we call the auth module’s login method with the same values to log the newly registered user in, and redirect to the home page.
One of the benefits to using Nuxt is that we don’t have to manually create routes for the pages. Any component created in the pages folder will automatically have a route generated for it with the same name.
We don’t actually have a saveUser action in our store yet, so let’s write that now.
client/store/index.js
actions: {
  async saveUser(context, { username, email, password }) {
    const data = {
      id: uuid(),
      username,
      email,
      password,
      timestamp: new Date().getTime()
    }

    try {
      await this.$axios.post('/api/register', data)
    } catch (error) {
      console.error(error)
    }
  }
}
This action takes the email, username, and password data passed into it and builds a new user object. Notice that we’re assigning a UUID as the user ID here. Although json-server-auth will assign an ID for us if we leave it blank, I prefer to use a UUID.
We’ll need to install the module for generating UUIDs via npm, and import it at the top of the store:
npm i uuid
client/store/index.js
import Vuex from 'vuex'
import uuid from 'uuid/v4'
The axios module makes axios available in the store as this.$axios, making it straightforward to send a POST request to our API server. We’re just going to log any errors to the console for now, but you’d probably want to notify the user of the error somehow (for example, with the Nuxt toast module).
The finished page should look like this:
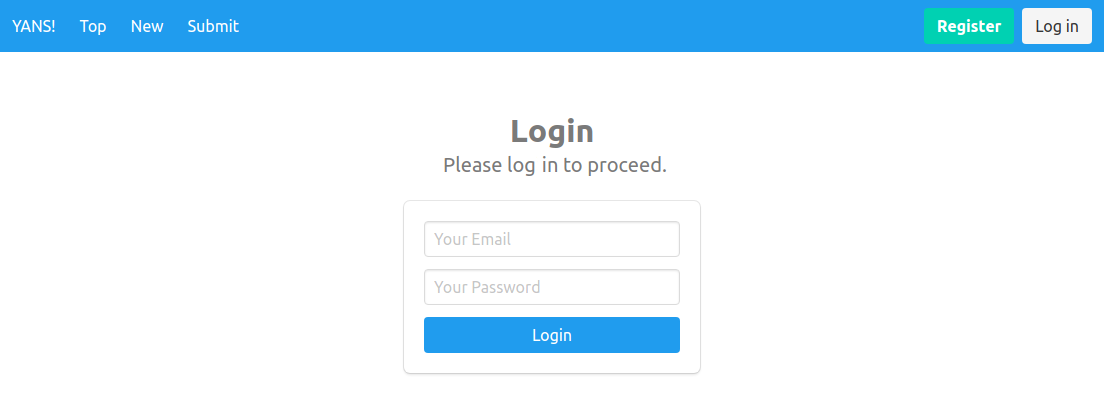
Login
Let’s tackle the login page next. Create login.vue within the pages folder, and add the following template.
client/pages/login.vue
<template>
  <section class="hero">
    <div class="hero-body">
      <div class="container has-text-centered">
        <div class="column is-4 is-offset-4">
          <h3 class="title has-text-grey">Login</h3>
          <p class="subtitle has-text-grey">Please log in to proceed.</p>
          <div class="box">
            <form @submit.prevent="onSubmit">
              <div class="field">
                <div class="control">
                  <input
                    v-model="email"
                    class="input"
                    type="email"
                    placeholder="Your Email"
                    autofocus
                  >
                </div>
              </div>

              <div class="field">
                <div class="control">
                  <input
                    v-model="password"
                    class="input"
                    type="password"
                    placeholder="Your Password"
                  >
                </div>
              </div>
              <button class="button is-block is-info is-fullwidth">Login</button>
            </form>
          </div>
          <div
            v-if="showError"
            class="notification is-danger"
          >
            <strong>Oops — we couldn't log you in!</strong><br>
            Please check your email and password and try again.
          </div>
        </div>
      </div>
    </div>
  </section>
</template>
Most of the markup here is for applying styling, courtesy of Bulma. The important things to note are that we’ve got v-model properties set on the inputs, so the component can access the values, and we’ve got an onSubmit handler attached to the form (along with a .prevent modifier, to prevent the default action). There’s also an error message that will be shown if the showError data property is set to true.
Here’s the script section:
<script>
export default {
  data: () => ({
    email: '',
    password: '',
    showError: false
  }),
  methods: {
    async onSubmit() {
      try {
        await this.$auth.login({
          data: {
            email: this.email,
            password: this.password
          }
        })
      } catch (error) {
        this.showError = true
      }
    }
  }
}
</script>
This should be fairly self-explanatory, but we’re calling the auth module’s login method and passing the credentials from the form. If an error is thrown, we set showError to true, alerting the user that there was a problem.
Now that we’ve added registration and login functionality, we should go back and tweak our layout slightly, to change the menu based on the current user’s authentication state.
client/layouts/default.vue
<div class="navbar-end">
  <div class="navbar-item">
    <div class="buttons">
      <nuxt-link
        v-if="!$auth.loggedIn"
        to="/register"
        class="button is-primary"
      >
        <strong>Register</strong>
      </nuxt-link>
      <nuxt-link
        v-if="!$auth.loggedIn"
        to="/login"
        class="button is-light"
      >Log in</nuxt-link>
      <button
        v-else
        class="button is-light"
        @click="$auth.logout()"
      >Log out</button>
    </div>
  </div>
</div>
The auth module provides us with a helper ($auth.loggedIn from within a template) for checking the logged-in state. We can use it to hide the “register” and “log in” buttons if the current user is authenticated and display a “log out” button instead.
Here’s what the finished page looks like:
Adding New Posts
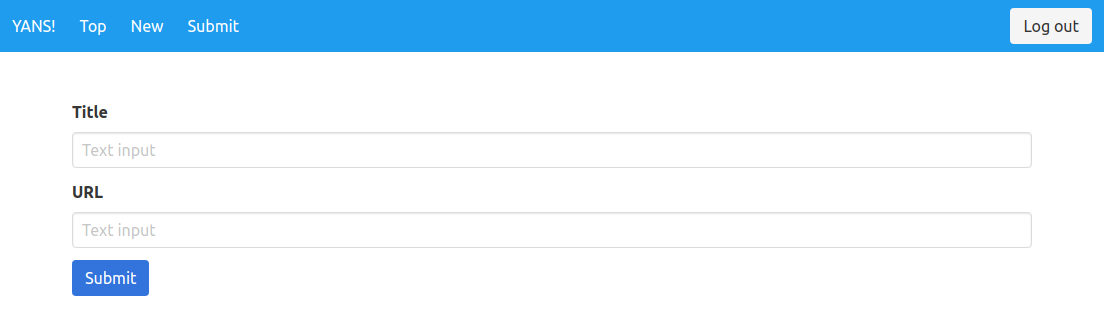
Now that we have our authentication set up, and a way for users to register and log in, let’s create a page to allow users to submit new links for our news site.
Go to the pages folder and create a new file called submit.vue.
client/pages/submit.vue
<template>
  <section class="section">
    <div class="container">

      <div class="field">
        <label class="label">Title</label>
        <div class="control">
          <input
            v-model="title"
            class="input"
            type="text"
            placeholder="Text input"
          >
        </div>
      </div>

      <div class="field">
        <label class="label">Full URL (inc. http(s)://)</label>
        <div class="control">
          <input
            v-model="url"
            class="input"
            type="text"
            placeholder="Text input"
          >
        </div>
      </div>

      <div class="field">
        <div class="control">
          <button
            :disabled="isSaving"
            class="button is-link"
            @click="submitPost"
          >Submit</button>
        </div>
      </div>
    </div>
  </section>
</template>
The template here is very similar in structure to our registration form: just a couple of input fields with associated v-model properties, and a submit button that triggers a handler on the component.
Here’s the script section:
<script>
import { mapActions } from 'vuex'

export default {
  middleware: 'auth',
  data: () => ({
    isSaving: false,
    title: null,
    url: null
  }),
  methods: {
    ...mapActions(['savePost']),
    async submitPost() {
      this.isSaving = true

      await this.savePost({
        title: this.title,
        url: this.url
      })

      this.title = null
      this.url = null
      this.isSaving = false
    }
  }
}
</script>
This section is also very similar to what we did before, taking the details and dispatching the savePost action to the store. On completion, we’re simply resetting the form to allow further submissions. It would be a good idea to pop up a notification at this point to inform the user their link has been saved, which I’ll leave as an exercise for the reader.
Note that for this component, we’re specifying a middleware property of “auth”. This middleware is part of the auth module, and will restrict access to the page to logged-in users. If a guest user tries to access the page, they’ll be redirected to the login form.
The form should look like this:
Let’s go ahead and write the savePost action.
clients/store/index.js
actions: {
  // ...
  async savePost(context, { title, url }) {
    const user = this.$auth.user
    const data = {
      id: uuid(),
      userId: user.id,
      author: user.username,
      title,
      url,
      votes: [],
      timestamp: new Date().getTime()
    }

    try {
        await this.$axios.post('/api/posts', data)
    } catch (error) {
        console.error(error)
    }
  },
},
We start off by getting a reference to the current user from the auth module (available within our store as this.$auth). We’re then constructing an object literal with the properties for the new post. We’re also adding an empty votes array, as this is how we’re going to keep track of the users who’ve upvoted a post.
Once the data object is built, we’re using the axios module to submit it via a POST request to our back-end API.
Fetching and Displaying Posts
Now that we have a way for users to submit links, we’re going to need a way to retrieve those and display them, so let’s build out the “new posts” page.
Before creating the page itself, let’s make the necessary changes to the store.
client/store/index.js
state: {
  posts: []
},
First of all, we need to add a posts array to the store state, to hold the posts once we’ve retrieved them from the API.
Next, we’ll need an action to make the API request.
client/store/index.js
actions: {
  // ...
  async getPosts({ commit }) {
    try {
      const res = await this.$axios.get('/api/posts')
      commit('setPosts', { posts: res.data })
    } catch (error) {
      console.error(error)
    }
  },
},
Here we’re just making a GET request to the posts endpoint of the API, and passing the result along to the setPosts mutation. Let’s add that.
client/store/index.js
mutations: {
  setPosts(state, { posts }) {
    state.posts = posts
  }
},
This is a simple mutation that simply replaces the existing posts array with the one we get back from the API.
For our “new posts” view, we’re going to display the links in descending order of creation. Although this logic could go in the component itself, let’s create a Vuex getter. This will enable us to access the sorted list of posts elsewhere in the app should we want to.
client/store/index.js
getters: {
  newPosts: state => state.posts.sort((a, b) => a.timestamp - b.timestamp)
},
As with computed properties within components, if the posts array is modified, the newPosts getter will update and be re-rendered by any components using it.
Displaying the “Top Posts” Page
The page to display the top voted posts is virtually identical to this one, except that it uses a different getter to return the posts in a different order. You can have a go at building this out yourself, or take a look at this guide’s accompanying code repo.
Let’s add the listing page. Create a new file under pages called new.vue, and add the following code.
client/pages/new.vue
<template>
  <section class="section">
    <div class="container">
      <h1 class="title">Latest Links</h1>
      <div>
        <news-item
          v-for="post in newPosts"
          :key="post.id"
          :item="post"
        />
      </div>
    </div>
  </section>
</template>

<script>
import { mapActions, mapGetters } from 'vuex'
import NewsItem from '~/components/NewsItem'

export default {
  components: { NewsItem },
  fetch({ store }) {
    store.dispatch('getPosts')
  },
  computed: mapGetters(['newPosts'])
}
</script>
I’ve shown the entire file here, as it’s only a relatively small component. It contains the Nuxt-specific fetch method, which is called whenever the user tries to navigate to the page. The method receives a context object containing the store (among other things), allowing us to dispatch actions before the component is loaded.
Once the getPosts action has completed, the newPosts getter will be updated, and the component can render the list of posts. We’re delegating the display of each post to the <NewsItem> component here, which is actually a custom component. Let’s take a look at that next.
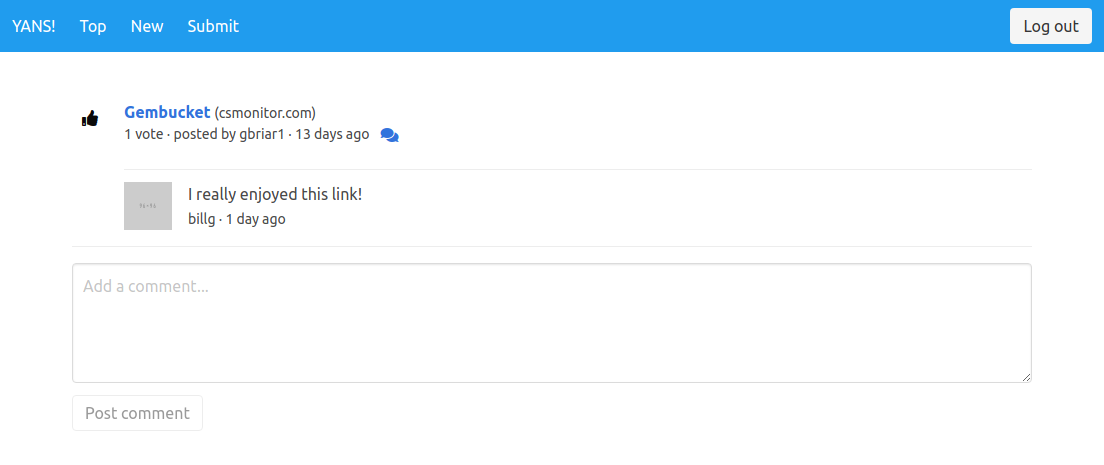
The NewsItem Component
Displaying a post seems like something we might want to do in multiple places on our news site, so it makes sense to extract this into a separate component. It also encapsulates any markup and display logic, helping to keep the parent components cleaner and focused on the code needed to do their jobs.
Let’s go to the components folder and create a new component file called NewsItem.vue. As we’ve done previously, we’ll look at the template first.
client/components/NewsItem.vue
<template>
  <article class="media">
    <figure class="media-left">
      <button class="button is-white">
        <span class="icon is-small">
          <i
            class="fas fa-thumbs-up"
            title="Vote up" />
        </span>
      </button>
    </figure>
    <div class="media-content">
      <div>
        <p>
          <a :href="item.url"><strong>{{ item.title }}</strong></a> <small>({{ item.url | domain }})</small>
        </p>
      </div>
      <nav class="level is-mobile">
        <div class="level-left">
          <span class="level-item">
            <small>{{ votes }} · posted by {{ item.author }} · {{ item.timestamp | timeAgo }}</small>
          </span>
          <nuxt-link
            :to="`/news/${item.id}`"
            class="level-item"
          >
            <span class="icon is-small"><i class="fas fa-comments" /></span>
          </nuxt-link>
        </div>
      </nav>
    </div>
  </article>
</template>
A lot of this markup is part of Bulma’s media object, which provides us with a nice structure to build on. You’ll notice we’ve got an upvote button (which we’ll wire up a bit later on), and a couple of output filters: domain and timeAgo. Let’s look at the JavaScript and see what they’re doing.
client/components/NewsItem.vue
<script>
import parseDomain from 'parse-domain'
import distanceInWordsStrict from 'date-fns/distance_in_words_strict'

export default {
  filters: {
    domain(value) {
      if (!value) return ''
      const parts = parseDomain(value)
      return parts ? `${parts['domain']}.${parts['tld']}` : ''
    },
    timeAgo(value) {
      if (!value) return ''
      return distanceInWordsStrict(new Date(), new Date(value), {
        addSuffix: true
      })
    }
  },
  props: {
    item: {
      type: Object,
      required: true
    }
  },
  computed: {
    votes() {
      const votes = this.item.votes.length
      const suffix = votes === 1 ? 'vote' : 'votes'
      return `${votes} ${suffix}`
    }
  }
}
</script>
As you can see from the component code, we’re importing two third-party modules to help with the formatting: parse-domain, and the date-fns function distanceInWordsStrict.
The parse-domain module takes a URL and returns an array of the constituent parts. Using this, we can display just the domain of the link, so the user knows at a glance which site the content comes from. The distanceInWordsStrict function takes two dates and returns a human-friendly description of the time elapsed (such as “5 minutes ago”).
Dependencies!
Don’t forget to install the dependencies!
npm i parse-domain date-fnsBoth of these could have been implemented as computed functions, but because their purpose is to format output for display, using filters seemed more appropriate. In addition, we could easily re-implement them as global filters, if we needed to use them in other components of the app, without having to change the template.
One place we are using a computed property is to display the number of votes and correctly pluralize the text when necessary.
With the page and NewsItem component complete, the screen should look something like this with the dummy data:

Handling Comments
Having a list of links is all well and good, but we could do with a way to get users interacting more with the site. Let’s add a comments view to allow our users to discuss the links that get posted.
This page is a little different from the ones we’ve created so far. Since we’re going to be displaying the comments for an individual post, we want the URL to contain the post ID. In this case, we want our URL to conform to the format /news/6d369e63-da45-4bc3-8853-47106636e256, where the ID is a dynamic parameter.
To do this in Nuxt, we name our page component pages/news/_id.vue. The underscore prefix lets Nuxt know it needs to make this part of the route dynamic, and make the value available to us via a router param.
Let’s create the file, and add in the following code.
client/pages/news/_id.vue
<template>
  <section class="section">
    <div class="container">
      <news-item :item="selectedPost"/>
      <comment-form
        v-if="$auth.loggedIn"
        @post="saveComment"
      />
      <p v-else>
        Please <nuxt-link to="/register">register</nuxt-link> or
        <nuxt-link to="/login">log in</nuxt-link> to comment.
      </p>
    </div>
  </section>
</template>

<script>
import { mapActions, mapState } from 'vuex'
import NewsItem from '~/components/NewsItem'
import CommentForm from '~/components/CommentForm'

export default {
  fetch({ store, params }) {
    const postId = params.id
    return store.dispatch('getComments', { postId })
  },
  components: { CommentForm, NewsItem },
  computed: mapState(['selectedPost']),
  methods: mapActions(['saveComment'])
}
</script>

<style scoped>
p {
  text-align: center;
  margin: 2em;
}
</style>
The fetch method here is retrieving the dynamic route parameter id from the context object and dispatching the getComments action to the store, passing the parameter.
We’re making use of the NewsItem component again to display the selected post, and we’re also rendering a CommentForm component (that we’ll create in a moment). We’re only going to display the form if the user is authenticated. Otherwise, we’ll prompt them to either log in or register. The form component emits a post event, which we’re using to directly trigger the store action saveComment.
client/components/CommentForm.vue
<template>
  <article class="media">
    <div class="media-content">
      <div class="field">
        <p class="control">
          <textarea
            v-model="body"
            class="textarea"
            placeholder="Add a comment..."
          />
        </p>
      </div>
      <div class="field">
        <p class="control">
          <button
            :disabled="!body"
            class="button"
            @click="commentPosted"
          >Post comment</button>
        </p>
      </div>
    </div>
  </article>
</template>

<script>
export default {
  data: () => ({
    body: null
  }),
  methods: {
    commentPosted() {
      this.$emit('post', { body: this.body })
      this.body = null
    }
  }
}
</script>
The CommentForm component is pretty straightforward, as we’re only dealing with a single input. When the user clicks the button, the component emits a post event with the comment text as the payload.
Let’s create the two store actions we need for this page to work.
client/store/index.js
state: {
  posts: [],
  selectedPost: null
},
Firstly, we add a selectedPost property to hold the post the user is viewing.
client/store/index.js
actions: {
  // ...
  async getComments({ commit }, { postId }) {
    try {
      const res = await this.$axios.get(
        `/api/posts/${postId}?_embed=comments`
      )
      commit('setSelectedPost', { post: res.data })
    } catch (error) {
      console.error(error)
    }
  },
  async saveComment({ commit, state }, { body }) {
    const user = this.$auth.user
    const data = {
      id: uuid(),
      postId: state.selectedPost.id,
      userId: user.id,
      author: user.username,
      body,
      timestamp: new Date().getTime()
    }

    try {
      const res = await this.$axios.post('/api/comments', data)
      commit('addComment', { comment: res.data })
    } catch (error) {
      console.error(error)
    }
  }
},
Both of these actions are similar to the ones we created previously, so there’s not much to point out about this code. One thing that’s worth mentioning, though, is that we’re re-requesting the selected post from the API, but appending ?_embed=comments to the URL. This will tell json-server-auth to return the post with all the associated comments attached as an array.
We also need a couple of additional mutations.
client/store/index.js
mutations: {
  // ...
  addComment(state, { comment }) {
    state.selectedPost.comments.push(comment)
  },
  setSelectedPost(state, { post }) {
    state.selectedPost = post
  },
},
Commiting setSelectPost assigns the passed post object to the selectedPost key in the store’s state. The addComment mutation takes the comment (having already been persisted by our API) and pushes it into the comments array on our current post, allowing the view to update.
Displaying Posted Comments
You might have noticed we aren’t displaying the comments anywhere in our page! Let’s rectify that by updating the NewsItem to display comments if they’re present on the post object. Open up the component and add the following markup to the template, below the closing </nav> tag.
client/components/NewsItem.vue
<article
  v-for="comment in comments"
  :key="comment.id"
  class="media"
>
  <figure class="media-left">
    <p class="image is-48x48">
      <img src="https://bulma.../Images/placeholders/96x96.png">
    </p>
  </figure>
  <div class="media-content">
    <div class="content">
      <p>
        {{ comment.body }}
        <br>
        <small>{{ comment.author }} · {{ comment.timestamp | timeAgo }}</small>
      </p>
    </div>
  </div>
</article>
Also add a new computed property to the component object:
computed: {
  comments() {
    return this.item.comments || []
  },
  votes() {
    // ...
  }
}
And voila! You should now see a nicely formatted list of comments appear beneath the post as you add them!
Upvoting Posts
The only thing that’s left to add to our news site is the ability for users to upvote quality posts. Let’s start by adding the necessary action and mutation to the store.
client/store/index.js
actions: {
  // ...
  async upvotePost({ commit }, { postId }) {
    const postUrl = `/api/posts/${postId}`
    try {
      const { data } = await this.$axios.get(postUrl)
      data.votes.push(this.$auth.user.id)
      const res = await this.$axios.put(postUrl, data)
      commit('updatePost', { post: res.data })
    } catch (error) {
      console.error(error)
    }
  }
},
Our upvotePost action receives the ID of the post to upvote. Firstly, we re-fetch the post from the API, and push the current user’s ID into the votes array. After saving the post back to the server, we commit the updatePost mutation, which we’ll write next.
client/store/index.js
mutations: {
  // ...
  updatePost(state, { post }) {
    const index = state.posts.findIndex(p => p.id === post.id)
    if (index >= 0) {
      state.posts.splice(index, 1, post)
    }
    if (state.selectedPost && state.selectedPost.id === post.id) {
      state.selectedPost.votes = post.votes
    }
  }
},
This mutation looks up the index of the post that’s been upvoted, and replaces it with the copy returned from the server. If the user is voting from one of the list views, they’ll see the vote count update dynamically. We also check if selectedPost is set and is the same as the upvoted post and updates the votes property.
Let’s wire up these new actions to our existing list and comments views, so users can start voting on their favorite links.
First of all, we need to make a small change to the NewsItem component, so it can emit an event when the upvote button is clicked.
client/components/NewsItem.vue
<button
  class="button is-white"
  @click="$emit('upvote')"
>
  <span class="icon is-small">
    <i
      class="fas fa-thumbs-up"
      title="Vote up" />
  </span>
</button>
Next, let’s amend the “New Posts” page.
client/pages/new.vue
<news-item
  v-for="post in newPosts"
  :key="post.id"
  :item="post"
  @upvote="upvotePost(post)"
/>
In the template, all that’s required is to add a listener for the upvote event. There’s no payload emitted with the event, we’re simply passing the current post in the loop to the component’s upvotePost method.
client/pages/new.vue
methods: {
  ...mapActions(['upvotePost']),
  onUpvote(post) {
    this.upvotePost({ postId: post.id })
  }
},
In the component object, we’ve added the onUpvote method, which just extracts the ID from the post object and dispatches it to the store’s upvotePost action.
The comments page is similar.
client/pages/news/_id.vue
<news-item
  :item="selectedPost"
  @upvote="onUpvote(selectedPost)"
/>
The component’s onUpvote method is slightly different, as we have to remember to set the updateSelectedPost flag.
client/pages/news/_id.vue
methods: {
  ...mapActions(['saveComment', 'upvotePost']),
  onUpvote(post) {
    this.upvotePost({ postId: post.id })
  }
},
Authorization
One thing you may have noticed while working on the last section is that there’s nothing to stop a user from upvoting a post more than once. In fact, there’s nothing to stop them from upvoting their own posts, either, which seems a little unfair!
Rather than put the logic to check for this into our components, we’re going to make use of an authorization library called vue-kindergarten. The benefit of using a library like this is that it allows us to separate out the authorization logic from our components, preventing it from bloating them with extra responsibilities, and making that logic easy to re-use across our application.
So, let’s install the package from npm:
npm i vue-kindergarten
Once it’s downloaded, we need to register it with Vue.js. Normally we’d do this in the file where we create our main Vue instance, but with Nuxt we do this by creating a plugin file.
client/plugins/vue-kindergarten.js
import Vue from 'vue'
import VueKindergarten from 'vue-kindergarten'

Vue.use(VueKindergarten, {
  child: store => store && store.state.auth.user
})
The code is pretty straightforward: we import Vue and the vue-kindergarten library, and register it as we would in a normal Vue app. The plugin takes an options object with a child property. This should be a function that will be passed an instance of the Vuex store and return the current user.
vue-kindergarten Terminology
The library’s terminology revolves around pre-school, with concepts like sandboxes, perimeters, and governesses, so wherever you see “child”, read “user”.
With the plugin file created, we just need to add a reference to it to the plugins array in the Nuxt config file.
client/nuxt.config.js
plugins: ['~/plugins/vue-kindergarten'],
Our next step is to create a perimeter. This is a file that contains all the authorization logic for a particular entity or situation. Make a new folder within the Nuxt project called perimeters, and add a new file called postsPerimeter.js with the following content.
client/perimeters/postsPerimeter.js
import { createPerimeter } from 'vue-kindergarten'

export default createPerimeter({
  purpose: 'post',

  can: {
    upvote(post) {
      return (
        this.isAuthenticated() &&
        this.isAuthor(post) === false &&
        post.votes.includes(this.child.id) === false
      )
    }
  },

  isAuthenticated() {
    return this.child !== null
  },

  isAuthor(post) {
    return this.child.id === post.userId
  }
})
Here we’re importing the createPerimeter function from the vue-kindergarten module, and using it to define a new perimeter, or set of rules. The purpose property lets us define the name of the entity that the rules apply to. When we add the perimeter to a component, its rules become available under the $post variable within the template.
The perimeter contains a couple of helper methods for checking if the user is logged in, and if they’re the author of a given post. We also have a can property that lets us define actions the current user is allowed to take. Here, we’ve added an upvote method, which will return true only if the user is authenticated, is not the author of the post, and hasn’t already upvoted the post.
Let’s see how we can use this perimeter within our “New Posts” page to control who is allowed to vote on any given post.
client/pages/new.vue
<script>
import { mapActions, mapGetters } from 'vuex'
import postsPerimeter from '~/perimeters/postsPerimeter'
import NewsItem from '~/components/NewsItem'

export default {
  components: { NewsItem },
  fetch({ store }) {
    store.dispatch('getPosts')
  },
  computed: mapGetters(['newPosts']),
  methods: {
    ...mapActions(['upvotePost']),
    onUpvote(post) {
      if (this.$isAllowed('upvote', post)) {
        this.upvotePost({ postId: post.id })
      }
    }
  },
  perimeters: [postsPerimeter]
}
</script>
The sharp-eyed among you will have spotted that we’re importing our new perimeter, and adding it to a new perimeters array on the component. The only other change here is to the onUpvote method, where we’re using the this.$isAllowed helper to check if the vote should be submitted.
As you can see, all the checking logic is neatly encapsulated in the perimeter. If we decide to add an additional requirement in future (for example, that the user must have confirmed their email address, or must have a minimum ranking on the site) we can do that without requiring any changes to our components.
Summary
And there we have it: you’ve now built your own news site that you can use to start your own version of Reddit! In all seriousness though, I do hope you’ve enjoyed following along and have picked up some useful knowledge that you can apply to future projects of your own.
If you’d like to take a more in-depth look at Nuxt.js, and Vue in general, check out my new SitePoint book called Jump Start Vue.js.