
Data is the most valuable asset in the world right now, and knowing how to manage it is a must. In Vue, we have the power to choose how we can gather this data, manipulate it as we want, and deliver it to the server.
In this chapter, we will learn more about the process of data manipulation and data handling, form validations, data filtering, how to display this data to the user, and how to present it in a way that is different from what we then have inside our application.
We will learn how to use the vue-devtools to go deep inside the Vue components and see what is happening to our data and application.
In this chapter, we'll cover the following recipes:
Creating the "hello world" component
Creating an input form with two-way data binding
Adding an event listener to an element
Removing the v-model from the input
Creating a dynamic to-do list
Creating computed properties and exploring how they work
Displaying cleaner data and text with custom filters
Adding form validation with Vuelidate
Creating filters and sorters for a list
Creating conditional filtering to sort list data
Adding custom styles and transitions
Using vue-devtools to debug your application
Technical requirements
In this chapter, we will be using Node.js and Vue CLI.
> npm install -g windows-build-tools.
To install Vue CLI, you need to open Terminal (macOS or Linux) or Command Prompt/PowerShell (Windows) and execute the following command:
> npm install -g @vue/cli @vue/cli-service-global
Creating the "hello world" component
A Vue application is a combination of various components, bound together and orchestrated by the Vue framework. Knowing how to make your component is important. Each component is like a brick in the wall and needs to be made in a way that, when placed, doesn't end up needing other bricks to be reshaped in different ways around it. We are going to learn how to make a base component, with some important principles that focus on organization and clean code.
Getting ready
The pre-requisite for this recipe is as follows:
Node.js 12+
The Node.js global objects that are required are as follows:
@vue/cli
@vue/cli-service-global
How to do it...
To start our component, we can create our Vue project with Vue CLI as learned in the 'Creating your first project with Vue CLI' recipe in Chapter 2, Introducing TypeScript and the Vue Ecosystem, or start a new one.
To start a new one, open Terminal (macOS or Linux) or Command Prompt/PowerShell (Windows) and execute the following command:
> vue create my-component
The command-line interface (CLI) will ask some questions that will help with the creation of the project. You can use the arrow keys to navigate, the Enter key to continue, and the spacebar to select an option. Choose the default option:
? Please pick a preset: (Use arrow keys)
❯ default (babel, eslint)
Manually select features
Let's create our first "hello world" component, following these steps:
Let's create a new file called CurrentTime.vue file in the src/components folder.
On this file, we will start with the <template> part of our component. It will be a shadowed-box card that will display the current date formatted:
<template>
  <div class='cardBox'>
    <div class='container'>
      <h2>Today is:</h2>
      <h3>{{ getCurrentDate }}</h3>
    </div>
  </div>
</template>
Now, we need to create the <script> part. We will start with the name property. This will be used when debugging our application with vue-devtools to identify our component and helps the integrated development environment (IDE) too. For the getCurrentDate computed property, we will create a computed property that will return the current date, formatted by the Intl browser function:
<script>
export default {
  name: 'CurrentTime',
  computed: {
    getCurrentDate() {
      const browserLocale =
        navigator.languages && navigator.languages.length
          ? navigator.languages[0]
          : navigator.language;
      const intlDateTime = new Intl.DateTimeFormat(
        browserLocale,
        {
          year: 'numeric',
          month: 'numeric',
          day: 'numeric',
          hour: 'numeric',
          minute: 'numeric'
        });

      return intlDateTime.format(new Date());
    }
  }
};
</script>
For styling our box, we need to create a style.css file in the src folder, then add the cardBox style to it:
.cardBox {
  box-shadow: 0 5px 10px 0 rgba(0, 0, 0, 0.2);
  transition: 0.3s linear;
  max-width: 33%;
  border-radius: 3px;
  margin: 20px;
}

.cardBox:hover {
  box-shadow: 0 10px 20px 0 rgba(0, 0, 0, 0.2);
}

.cardBox>.container {
  padding: 4px 18px;
}

[class*='col-'] {
  display: inline-block;
}

@media only screen and (max-width: 600px) {
  [class*='col-'] {
    width: 100%;
  }

  .cardBox {
    margin: 20px 0;
  }
}

@media only screen and (min-width: 600px) {
  .col-1 {width: 8.33%;}
  .col-2 {width: 16.66%;}
  .col-3 {width: 25%;}
  .col-4 {width: 33.33%;}
  .col-5 {width: 41.66%;}
  .col-6 {width: 50%;}
  .col-7 {width: 58.33%;}
  .col-8 {width: 66.66%;}
  .col-9 {width: 75%;}
  .col-10 {width: 83.33%;}
  .col-11 {width: 91.66%;}
  .col-12 {width: 100%;}
}

@media only screen and (min-width: 768px) {
  .col-1 {width: 8.33%;}
  .col-2 {width: 16.66%;}
  .col-3 {width: 25%;}
  .col-4 {width: 33.33%;}
  .col-5 {width: 41.66%;}
  .col-6 {width: 50%;}
  .col-7 {width: 58.33%;}
  .col-8 {width: 66.66%;}
  .col-9 {width: 75%;}
  .col-10 {width: 83.33%;}
  .col-11 {width: 91.66%;}
  .col-12 {width: 100%;}
}

@media only screen and (min-width: 992px) {
  .col-1 {width: 8.33%;}
  .col-2 {width: 16.66%;}
  .col-3 {width: 25%;}
  .col-4 {width: 33.33%;}
  .col-5 {width: 41.66%;}
  .col-6 {width: 50%;}
  .col-7 {width: 58.33%;}
  .col-8 {width: 66.66%;}
  .col-9 {width: 75%;}
  .col-10 {width: 83.33%;}
  .col-11 {width: 91.66%;}
  .col-12 {width: 100%;}
}

@media only screen and (min-width: 1200px) {
  .col-1 {width: 8.33%;}
  .col-2 {width: 16.66%;}
  .col-3 {width: 25%;}
  .col-4 {width: 33.33%;}
  .col-5 {width: 41.66%;}
  .col-6 {width: 50%;}
  .col-7 {width: 58.33%;}
  .col-8 {width: 66.66%;}
  .col-9 {width: 75%;}
  .col-10 {width: 83.33%;}
  .col-11 {width: 91.66%;}
  .col-12 {width: 100%;}
}
In the App.vue file, we need to import our component to be able to see it:
<template>
  <div id='app'>
    <current-time />
  </div>
</template>

<script>
import CurrentTime from './components/CurrentTime.vue';

export default {
  name: 'app',
  components: {
    CurrentTime
  }
}
</script>
In the main.js file, we need to import the style.css file to be included in the Vue application:
import Vue from 'vue';
import App from './App.vue';
import './style.css';

Vue.config.productionTip = false

new Vue({
  render: h => h(App),
}).$mount('#app')
To run the server and see your component, you need to open Terminal (macOS or Linux) or Command Prompt/PowerShell (Windows) and execute the following command:
> npm run serve
Here is your component rendered and running:

How it works...
The Vue component works almost like the Node.js packages. To use it in your code, you need to import the component and then declare it inside the components property on the component you want to use.
Like a wall of bricks, a Vue application is made of components that call and use other components.
For our component, we used the Intl.DateTimeFormat function, a native function, which can be used to format and parse dates to declared locations. To get the local format, we used the navigator global variable.
See also
You can find more information about Intl.DateTimeFormat at https://developer.mozilla.org/en-US/docs/Web/JavaScript/Reference/Global_Objects/DateTimeFormat.
You can find more information about Vue components at https://v3.vuejs.org/guide/single-file-component.html
Creating an input form with two-way data binding
To gather data on the web, we use HTML form inputs. In Vue, it's possible to use a two-way data binding method, where the value of the input on the Document Object Model (DOM) is passed to the JavaScript—or vice versa.
This makes the web form more dynamic, giving you the possibility to manage, format, and validate the data before saving or sending the data back to the server.
Getting ready
The pre-requisite for this recipe is as follows:
Node.js 12+
The Node.js global objects that are required are as follows:
@vue/cli
@vue/cli-service-global
How to do it...
To start our component, we can create our Vue project with Vue CLI, as learned in the 'Creating your first project with Vue CLI' recipe in Chapter 2, Introducing TypeScript and the Vue Ecosystem, or use the project from the 'Creating the "hello world" component' recipe.
Now, let's follow these steps to create an input form with a two-way data binding:
Let's create a new file called TaskInput.vue in the src/components folder.
In this file, we're going to create a component that will have a text input and a display text. This text will be based on what is typed on the text input. At the <template> part of the component, we need to create an HTML input and a mustache variable that will receive and render the data:
<template>
  <div class='cardBox'>
    <div class='container tasker'>
      <strong>My task is: {{ task }}</strong>
      <input
        type='text'
        v-model='task'
        class='taskInput' />
    </div>
  </div>
</template>
Now, on the <script> part of the component, we will name it and add the task to the data property. As the data always needs to be a returned Object, we will use an arrow function to return an Object directly:
<script>
export default {
  name: 'TaskInput',
  data: () => ({
    task: '',
  }),
};
</script>
We need to add some style to this component. In the <style> part of the component, we need to add the scoped attribute so that the style remains only bound to the component and won't mix with other Cascading Style Sheets (CSS) rules:
<style scoped>
  .tasker{
    margin: 20px;
  }
  .tasker .taskInput {
    font-size: 14px;
    margin: 0 10px;
    border: 0;
    border-bottom: 1px solid rgba(0, 0, 0, 0.75);
  }
  .tasker button {
    border: 1px solid rgba(0, 0, 0, 0.75);
    border-radius: 3px;
    box-shadow: 0 1px 2px 0 rgba(0, 0, 0, 0.2);
  }
</style>
Now, we need to import this component into our App.vue file:
<template>
  <div id='app'>
    <current-time class='col-4' />
    <task-input class='col-6' />
  </div>
</template>

<script>
import CurrentTime from './components/CurrentTime.vue';
import TaskInput from './components/TaskInput';

export default {
  name: 'app',
  components: {
    CurrentTime,
    TaskInput,
  }
}
</script>
To run the server and see your component, you need to open Terminal (macOS or Linux) or Command Prompt/PowerShell (Windows) and execute the following command:
> npm run serve
Here is your component rendered and running:

How it works...
When you create an HTML input element and add a v-model to it, you are passing a directive, built into Vue, that checks the input type and gives us sugar syntax for the input. This handles the update of the value of the variable and the DOM.
This model is what is called two-way data binding. If the variable is changed by the code, the DOM will re-render, and if it's changed by the DOM via user input, such as the input-form, the JavaScript code can then execute a function.
See also
Find more information about the form input bindings at https://v3.vuejs.org/guide/forms.html
Adding an event listener to an element
The most common method of parent-child communication in Vue is through props and events. In JavaScript, it's common to add event listeners to elements of the DOM tree to execute functions on specific events. In Vue, it's possible to add listeners and name them as you wish, rather than sticking to the names that exist on the JavaScript engine.
In this recipe, we are going to learn how to create custom events and how to emit then.
Getting ready
The pre-requisite for this recipe is as follows:
Node.js 12+
The Node.js global objects that are required are as follows:
@vue/cli
@vue/cli-service-global
How to do it...
To start our component, we can create our Vue project with Vue CLI, as learned in the 'Creating your first project with Vue CLI' recipe in Chapter 2, Introducing TypeScript and the Vue Ecosystem, or use the project from the 'Creating an input form with two-way data binding' recipe.
Follow these steps to add an event listener in an element on Vue:
Create a new component or open the TaskInput.vue file.
At the <template> part, we are going to add a button element and add an event listener to the button click event with the v-on directive. We will remove the {{ task }} variable from the component, as from now on it will be emitted and won't be displayed on the component anymore:
<template>
  <div class='cardBox'>
    <div class='container tasker'>
      <strong>My task is:</strong>
      <input
        type='text'
        v-model='task'
        class='taskInput' />
      <button
        v-on:click='addTask'>
            Add Task
      </button>
    </div>
  </div>
</template>
On the <script> part of the component, we need to add a method to handle the click event. This method will be named addTask. The method will emit an event called add-task and send the task on the data. After that, the task on the component will be reset:
<script>
export default {
  name: 'TaskInput',
  data: () => ({
    task: '',
  }),
  methods: {
    addTask(){
      this.$emit('add-task', this.task);
      this.task = '';
    },
  }
};
</script>
On the App.vue file, we need to add an event listener bind on the component. This listener will be attached to the add-task event. We will use the shortened version of the v-on directive, @. When it's fired, the event will call the method, addNewTask, which will send an alert that a new task was added:
<template>
  <div id='app'>
    <current-time class='col-4' />
    <task-input
      class='col-6'
      @add-task='addNewTask'
    />
  </div>
</template>
Now, let's create the addNewTask method. This will receive the task as a parameter and will show an alert to the user, displaying that the task was added:
<script>
import CurrentTime from './components/CurrentTime.vue';
import TaskInput from './components/TaskInput';

export default {
  name: 'app',
  components: {
    CurrentTime,
    TaskInput,
  },
  methods:{
    addNewTask(task){
      alert(`New task added: ${task}`);
    },
  },
}
</script>
To run the server and see your component, you need to open Terminal (macOS or Linux) or Command Prompt/PowerShell (Windows) and execute the following command:
> npm run serve
Here is your component rendered and running:

How it works...
The HTML events are read by Vue with the v-on event handling directive. When we attached the v-on:click directive to the button, we added a listener to the button so that a function will be executed when the user clicks on it.
The function is declared on the component methods. That function, when called, will emit an event, denoting that any component using this component as a child can listen to it with the v-on directive.
See also
You can find more information about event handling at https://v3.vuejs.org/guide/events.html
Removing the v-model from the input
What if I told you that behind the magic of the v-model there is a lot of code that makes our magic sugar syntax happen? What if I told you that the rabbit hole can go deep enough that you can control everything that can happen with the events and values of the inputs?
We will learn how to extract the sugar syntax of the v-model directive and transform it into the base syntax behind it.
Getting ready
The pre-requisite for this recipe is as follows:
Node.js 12+
The Node.js global objects that are required are as follows:
@vue/cli
@vue/cli-service-global
How to do it...
To start our component, we can create our Vue project with Vue CLI, as learned in the 'Creating your first project with Vue CLI' recipe in Chapter 2, Introducing TypeScript and the Vue Ecosystem, or use the project from the 'Adding an event listener to an element' recipe.
In the following steps, we will remove the v-model directive sugar syntax from the input:
Open the TaskInput.vue file.
At the <template> block of the component, find the v-model directive. We'll remove the v-model directive. Then, we need to add a new bind to the input called v-bind:value or the shortened version, :value, and an event listener to the HTML input element. We need to add an event listener to the input event with the v-on:input directive or the shortened version, @input. The input bind will receive the task value as a parameter and the event listener will receive a value attribution, where it will make the task variable equal the value of the event value:
<template>
  <div class='cardBox'>
    <div class='container tasker'>
      <strong>My task is:</strong>
      <input
        type='text'
        :value='task'
        @input='task = $event.target.value'
        class='taskInput'
      />
      <button v-on:click='addTask'>
        Add Task
      </button>
    </div>
  </div>
</template>
To run the server and see your component, you need to open Terminal (macOS or Linux) or Command Prompt/PowerShell (Windows) and execute the following command:
> npm run serve
How it works...
As a sugar syntax, the v-model directive does the magic of automatically declaring the bind and the event listener to the element for you, but the side effect is that you don't have full control over what can be achieved.
As we've seen, the bound value can be a variable, a method, a computed property, or a Vuex getter, for example. And for the event listener, it can be a function or a direct declaration of a variable assignment. When an event is emitted and passed to Vue, the $event variable is used to pass the event. In this case, as in normal JavaScript, to catch the value of an input, we need to use the event.target.value value.
See also
You can find more information about event handling at https://v3.vuejs.org/guide/events.html
Creating a dynamic to-do list
One of the first projects every programmer creates when learning a new language is a to-do list. Doing this allows us to learn more about the language process around the manipulation of states and data.
We are going to make our to-do list using Vue. We'll use what we have learned and created in the previous recipes.
Getting ready
The pre-requisite for this recipe is as follows:
Node.js 12+
The Node.js global objects that are required are as follows:
@vue/cli
@vue/cli-service-global
How to do it...
There are some basic principles involved in making a to-do application—it must have a list of tasks; those tasks can be marked as done and undone, and the list can be filtered and sorted. Now, we are going to learn how to take the tasks and add them to the task list.
To start our component, we can create our Vue project with Vue CLI, as learned in the 'Creating your first project with Vue CLI' recipe in Chapter 2, Introducing TypeScript and the Vue Ecosystem, or use the project from the 'Removing the v-model from the input' recipe.
Now, follow these steps to create a dynamic to-do list with Vue and the previous recipes:
In the App.vue file, we will create our array of tasks. This task will be filled every time the TaskInput.vue component emits a message. We will add an object to this array with the task, and the current date when the task was created. The date when the task was finished will be undefined for now. To do this, in the <script> part of the component, we need to create a method that receives a task and add this task with the current date to the taskList array:
<script>
import CurrentTime from './components/CurrentTime.vue';
import TaskInput from './components/TaskInput';

export default {
  name: 'TodoApp',
  components: {
    CurrentTime,
    TaskInput,
  },
  data: () => ({
    taskList: [],
  }),
  methods:{
    addNewTask(task){
      this.taskList.push({
        task,
        createdAt: Date.now(),
        finishedAt: undefined,
      })
    },
  },
}
</script>
Now, we need to render this list on the <template> part. We will iterate the list of tasks using the v-for directive of Vue. This directive, when we use it with an array, gives us access to two properties—the item itself and the index of the item. We will use the item to render it and the index to make the key of the element for the rendering. We need to add a checkbox that, when marked, calls a function that changes the status of the task and the display when the task was done:
<template>
  <div id='app'>
    <current-time class='col-4' />
    <task-input class='col-6' @add-task='addNewTask' />
    <div class='col-12'>
      <div class='cardBox'>
        <div class='container'>
          <h2>My Tasks</h2>
          <ul class='taskList'>
            <li
              v-for='(taskItem, index) in taskList'
              :key='`${index}_${Math.random()}`'
            >
              <input type='checkbox'
                :checked='!!taskItem.finishedAt'
                @input='changeStatus(index)'
              />
              {{ taskItem.task }}
              <span v-if='taskItem.finishedAt'>
                {{ taskItem.finishedAt }}
              </span>
            </li>
          </ul>
        </div>
      </div>
    </div>
  </div>
</template>
We need to create the changeStatus function on the methods property of the App.vue. This function will receive the index of the task as a parameter, then go to the array of tasks and change the finishedAt property, which is our marker for when a task is done:
changeStatus(taskIndex){
  const task = this.taskList[taskIndex];
    if(task.finishedAt){
      task.finishedAt = undefined;
    } else {
      task.finishedAt = Date.now();
    }
}
Now, we need to add the task text to the left-hand side of the screen. On the <style> part of the component, we will make it scoped and add the custom class:
<style scoped>
  .taskList li{
    text-align: left;
  }
</style>
To run the server and see your component, you need to open Terminal (macOS or Linux) or Command Prompt/PowerShell (Windows) and execute the following command:
> npm run serve
Here is your component rendered and running:

How it works...
As we received the emitted message from the component, we hydrated the message with more data and pushed it to a local array variable.
In the template we iterate this array, making it a list of tasks. This displays the tasks we need to do, the checkbox to mark when the task is done, and the time that a task was done.
When the user clicks on the checkbox, it executes a function, which marks the current task as done. If the task is already done, the function will set the finishedAt property as undefined.
See also
You can find more information about list rendering at https://v3.vuejs.org/guide/list.html#mapping-an-array-to-elements-with-v-for
You can find more information about conditional rendering at https://v3.vuejs.org/guide/conditional.html#v-if
You can find more information about Math.random at https://developer.mozilla.org/en-US/docs/Web/JavaScript/Reference/Global_Objects/Math/random.
Creating computed properties and understanding how they work
Imagine that every time you have to fetch manipulated data, you need to execute a function. Imagine you need to get specific data that needs to go through some process and you need to execute it through a function every time. This type of work would not be easy to maintain. Computed properties exist to solve these problems. Using computed properties makes it easier to obtain data that needs preprocessing or even caching without executing any other external memorizing function.
Getting ready
The pre-requisite for this recipe is as follows:
Node.js 12+
The Node.js global objects that are required are as follows:
@vue/cli
@vue/cli-service-global
How to do it...
We will continue our to-do list project or you can create a new Vue project with Vue CLI, as learned in the 'Creating your first project with Vue CLI' recipe in Chapter 2, Introducing TypeScript and the Vue Ecosystem.
Now, follow these steps to create a computed property and understand how it works:
On the App.vue file, at the <script> part, we will add a new property between data and method, called computed. This is where the computed properties will be placed. We will create a new computed property called displayList, which will be the one that will be used to render the final list on the template:
<script>
import CurrentTime from './components/CurrentTime.vue';
import TaskInput from './components/TaskInput';

export default {
  name: 'TodoApp',
  components: {
    CurrentTime,
    TaskInput
  },
  data: () => ({
    taskList: []
  }),
  computed: {
    displayList(){
      return this.taskList;
    },
  },
  methods: {
    addNewTask(task) {
      this.taskList.push({
        task,
        createdAt: Date.now(),
        finishedAt: undefined
      });
    },
    changeStatus(taskIndex){
      const task = this.taskList[taskIndex];
      if(task.finishedAt){
        task.finishedAt = undefined;
      } else {
        task.finishedAt = Date.now();
      }
    }
  }
};
</script>
The displayList property, for now, is just returning a cached value of the variable, and not the direct variable as itself.
Now, on the <template> part, we need to change where the list is being fetched:
<template>
  <div id='app'>
    <current-time class='col-4' />
    <task-input class='col-6' @add-task='addNewTask' />
    <div class='col-12'>
      <div class='cardBox'>
        <div class='container'>
          <h2>My Tasks</h2>
          <ul class='taskList'>
            <li
              v-for='(taskItem, index) in displayList'
              :key='`${index}_${Math.random()}`'
            >
              <input type='checkbox'
                :checked='!!taskItem.finishedAt'
                @input='changeStatus(index)'
              />
              {{ taskItem.task }}
              <span v-if='taskItem.finishedAt'>
                {{ taskItem.finishedAt }}
              </span>
            </li>
          </ul>
        </div>
      </div>
    </div>
  </div>
</template>
To run the server and see your component, you need to open Terminal (macOS or Linux) or Command Prompt/PowerShell (Windows) and execute the following command:
> npm run serve
How it works...
When using the computed property to pass a value to the template, this value is now cached. This means we will only trigger the rendering process when the value is updated. At the same time, we made sure that the template doesn't use the variable for rendering so that it can't be changed on the template, as it is a cached copy of the variable.
Using this process, we get the best performance because we won't waste processing time re-rendering the DOM tree for changes that have no effect on the data being displayed. This is because if something changes and the result is the same, the computed property caches the result and won't update the final result.
See also
You can find more information about computed properties at https://v3.vuejs.org/guide/computed.html.
Displaying cleaner data and text with custom filters
Sometimes you may find that the user, or even you, cannot read the Unix timestamp or other DateTime formats. How can we solve this problem? When rendering the data in Vue, it's possible to use what we call filters.
Imagine a series of pipes through which data flows. Data enters each pipe in one shape and exits in another. This is what filters in Vue look like. You can place a series of filters on the same variable, so it gets formatted, reshaped, and ultimately displayed with different data while the code remains the same. The code of the initial variable is immutable in those pipes.
Getting ready
The pre-requisite for this recipe is as follows:
Node.js 12+
The Node.js global objects that are required are as follows:
@vue/cli
@vue/cli-service-global
How to do it...
We will continue our to-do list project or you can create a new Vue project with Vue CLI, as learned in the 'Creating your first project with Vue CLI' recipe in Chapter 2, Introducing TypeScript and the Vue Ecosystem.
Follow these steps to create your first custom Vue filter:
In the App.vue file, at the <script> part, in the methods, create a formatDate function inside this property. This function will receive value as a parameter and enters the filter pipe. We can check if the value is a number because we know that our time is based on the Unix timestamp format. If it's a number, we will format based on the current browser location and return that formatted value. If the passed value is not a number, we just return the passed value:
<script>
  import CurrentTime from './components/CurrentTime.vue';
  import TaskInput from './components/TaskInput';

  export default {
    name: 'TodoApp',
    components: {
      CurrentTime,
      TaskInput
    },
    data: () => ({
      taskList: []
    }),
    computed: {
      displayList() {
        return this.taskList;
      }
    },
    methods: {
      formatDate(value) {
        if (!value) return '';
        if (typeof value !== 'number') return value;

        const browserLocale =
          navigator.languages && navigator.languages.length
            ? navigator.languages[0]
            : navigator.language;
        const intlDateTime = new Intl.DateTimeFormat(
          browserLocale,
          {
            year: 'numeric',
            month: 'numeric',
            day: 'numeric',
            hour: 'numeric',
            minute: 'numeric'
          });

        return intlDateTime.format(new Date(value));
      },
      addNewTask(task) {
        this.taskList.push({
          task,
          createdAt: Date.now(),
          finishedAt: undefined
        });
      },
      changeStatus(taskIndex) {
        const task = this.taskList[taskIndex];
        if (task.finishedAt) {
          task.finishedAt = undefined;
        } else {
          task.finishedAt = Date.now();
        }
      }
    }
  };
</script>
On the <template> part of the component, we need to pass the variable to the filter method. To do that, we need to find the taskItem.finishedAt property and make it the parameter of the formatDate method. We will add some text to denote that the task was Done at: at the beginning of the date:
<template>
  <div id='app'>
    <current-time class='col-4' />
    <task-input class='col-6' @add-task='addNewTask' />
    <div class='col-12'>
      <div class='cardBox'>
        <div class='container'>
          <h2>My Tasks</h2>
          <ul class='taskList'>
            <li
              v-for='(taskItem, index) in displayList'
              :key='`${index}_${Math.random()}`'
            >
              <input type='checkbox'
                :checked='!!taskItem.finishedAt'
                @input='changeStatus(index)'
              />
              {{ taskItem.task }}
              <span v-if='taskItem.finishedAt'> |
                Done at:
                {{ formatDate(taskItem.finishedAt) }}
              </span>
            </li>
          </ul>
        </div>
      </div>
    </div>
  </div>
</template>
To run the server and see your component, open Terminal (macOS or Linux) or Command Prompt/PowerShell (Windows) and execute the following command:
> npm run serve
Here is your component rendered and running:
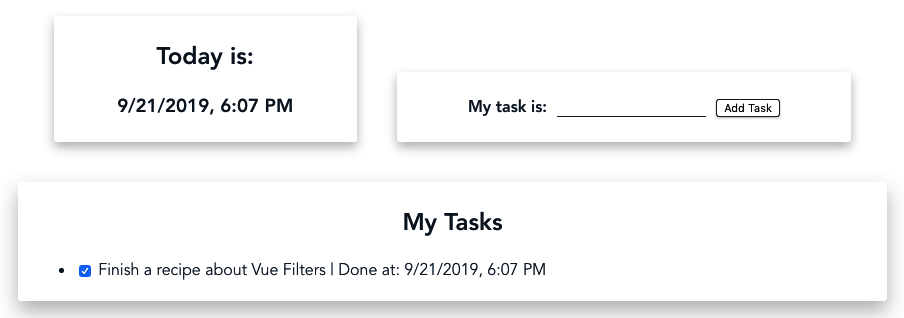
How it works...
Filters are methods that receive a value and must return a value to be displayed on the <template> section of the file, or used in a Vue property.
When we pass the value to the formatDate method, we know that it's a valid Unix timestamp, so it was possible to invoke to a new Date class constructor, passing the value as a parameter because the Unix timestamp is a valid date constructor.
The code behind our filter is the Intl.DateTimeFormat function, a native function that can be used to format and parse dates to declared locations. To get the local format, we use the navigator global variable.
See also
You can find more information about Intl.DateTimeFormat at https://developer.mozilla.org/en-US/docs/Web/JavaScript/Reference/Global_Objects/DateTimeFormat.
Adding form validation with Vuelidate
Originally, JavaScript was used just for validating HTML forms before sending these to servers; we didn't have any JavaScript frameworks or the JavaScript ecosystem that we have today. However, one thing remains the same: form validation is to be done first by the JavaScript engine before sending the forms to the server.
We will learn how to use one of the most popular libraries on the Vue ecosystem to validate our input form before sending it.
Getting ready
The pre-requisite for this recipe is as follows:
Node.js 12+
The Node.js global objects that are required are as follows:
@vue/cli
@vue/cli-service-global
How to do it...
We will continue our to-do list project or you can create a new Vue project with Vue CLI, as learned in the 'Creating your first project with Vue CLI' recipe in Chapter 2, Introducing TypeScript and the Vue Ecosystem.
Now, follow these steps to add a form validation into your Vue project, and your form component:
To install Vuelidate, you need to open Terminal (macOS or Linux) or Command Prompt/PowerShell (Windows) and execute the following command:
> npm install vuelidate --save
To add the Vuelidate plugin to the Vue application, we need to import and add it to Vue in the main.js file in the src folder:
import Vue from 'vue';
import App from './App.vue';
import Vuelidate from 'vuelidate';
import './style.css';

Vue.config.productionTip = false
Vue.use(Vuelidate);

new Vue({
  render: h => h(App),
}).$mount('#app')
In the TaskInput.vue file, we will add a new property to the Vue object. This property is interpreted by the new plugin that was installed. At the end of the object, we will add the validations property, and inside that property, we will add the name of the model. The model is a direct name of the data or computed property that the plugin will check for validation:
<script>
export default {
  name: 'TaskInput',
  data: () => ({
    task: ''
  }),
  methods: {
    addTask() {
      this.$emit('add-task', this.task);
      this.task = '';
    }
  },
  validations: {
    task: {}
  }
};
</script>
Now, we need to import the rules that already exist on the plugins that we want to use—those will be required and minLength. After the import, we will add those rules to the model:
<script>
import { required, minLength } from 'vuelidate/lib/validators';

export default {
  name: 'TaskInput',
  data: () => ({
    task: ''
  }),
  methods: {
    addTask() {
      this.$emit('add-task', this.task);
      this.task = '';
    }
  },
  validations: {
    task: {
      required,
      minLength: minLength(5),
    }
  }
};
</script>
Now, we need to add the validation before emitting the event. We will use the $touch built-in function to tell the plugin that the field was touched by the user and check for validation. If there are any fields that had any interaction with the user, the plugin will set the flags accordingly. If there are no errors, we will emit the event and we will reset the validation with the $reset function. To do this, we will change the addTask method:
addTask() {
    this.$v.task.$touch();

    if (this.$v.task.$error) return false;

    this.$emit('add-task', this.task);
    this.task = '';
    this.$v.task.$reset();
    return true;
}
To alert the user that there are some errors on the field, we will make the input change the style to a complete red border and have a red text. To do this, we will need to make a conditional class on the input field. This will be attached directly to the model's $error property:
<template>
  <div class='cardBox'>
    <div class='container tasker'>
      <strong>My task is:</strong>
      <input
        type='text'
        :value='task'
        @input='task = $event.target.value'
        class='taskInput'
        :class="$v.task.$error ? 'fieldError' : ''"
      />
      <button v-on:click='addTask'>Add Task</button>
    </div>
  </div>
</template>
For the class, we can create a fieldError class in the style.css file in the src folder:
.fieldError {
  border: 2px solid red !important;
  color: red;
  border-radius: 3px;
}
To run the server and see your component, you need to open Terminal (macOS or Linux) or Command Prompt/PowerShell (Windows) and execute the following command:
> npm run serve
Here is your component rendered and running:

How it works...
Once installed, the Vuelidate plugin adds a new $v property to the Vue prototype and checks for a new object property in the Vue object, called validations. When this property is defined and has some rules, the plugins check for the model's rules on each update.
Using this new Vue prototype, we can check inside our code for the errors inside the rules we defined, and execute functions to tell the plugin that the field was touched by the user to flag as a dirty field or reset it. Using those features, we're able to add a new conditional class based on the rules that we defined on the task model.
The task model is required and has a minimum of five characters. If those rules are not met, the plugin will mark the model with an error. We take this error and use it to show the user that the task field has an active error. When the user fulfills the requirements, the display of the error disappears and the event can be emitted.
See also
You can find more information about Vuelidate at https://vuelidate.netlify.com/.
You can find more information about class and style bindings at https://v3.vuejs.org/guide/class-and-style.html
Creating filters and sorters for a list
When working with lists, it's common to find yourself with raw data. Sometimes, you need to get this data filtered so that it's readable for the user. To do this, we need a combination of the computed properties to form a final set of filters and sorters.
In this recipe, we will learn how to create a simple filter and sorter that will control our initial to-do task list.
Getting ready
The pre-requisite for this recipe is as follows:
Node.js 12+
The Node.js global objects that are required are as follows:
@vue/cli
@vue/cli-service-global
How to do it...
We will continue our to-do list project or you can create a new Vue project with Vue CLI, as learned in the 'Creating your first project with Vue CLI' recipe in Chapter 2, Introducing TypeScript and the Vue Ecosystem.
Follow these steps to add a set of filters and sorts into your list:
In the App.vue file, at the <script> part, we will add new computed properties; those will be for sorting and filtering. We will add three new computed properties, baseList, filteredList, and sortedList. The baseList property will be our first manipulation. We will add an id property to the task list via Array.map. As JavaScript arrays start at zero, we will add 1 to the index of the array. The filteredList property will filter the baseList property and return just the unfinished tasks, and the sortedList property will sort the filteredList property so that the last added id property will be the first displayed to the user:
<script>
import CurrentTime from "./components/CurrentTime.vue";
import TaskInput from "./components/TaskInput";

export default {
  name: "TodoApp",
  components: {
    CurrentTime,
    TaskInput
  },
  data: () => ({
    taskList: [],
  }),
  computed: {
    baseList() {
      return [...this.taskList]
        .map((t, index) => ({
            ...t,
            id: index + 1
          }));
    },
    filteredList() {
      return [...this.baseList]
            .filter(t => !t.finishedAt);
    },
    sortedList() {
      return [...this.filteredList]
          .sort((a, b) => b.id - a.id);
    },
    displayList() {
      return this.sortedList;
    }
  },
  methods: {
    formatDate(value) {
      if (!value) return "";
      if (typeof value !== "number") return value;

      const browserLocale =
        navigator.languages && navigator.languages.length
          ? navigator.languages[0]
          : navigator.language;
      const intlDateTime = new Intl.DateTimeFormat(browserLocale, {
        year: "numeric",
        month: "numeric",
        day: "numeric",
        hour: "numeric",
        minute: "numeric"
      });

      return intlDateTime.format(new Date(value));
    },
    addNewTask(task) {
      this.taskList.push({
        task,
        createdAt: Date.now(),
        finishedAt: undefined
      });
    },
    changeStatus(taskIndex) {
      const task = this.taskList[taskIndex];

      if (task.finishedAt) {
        task.finishedAt = undefined;
      } else {
        task.finishedAt = Date.now();
      }
    }
  }
};
</script>
On the <template> part, we will add the Task ID as an indicator and change how the changeStatus method sends the argument. Because now the index is mutable, we can't use it as a variable; it's just a temporary index on the array. We need to use the task id:
<template>
  <div id="app">
    <current-time class="col-4" />
    <task-input class="col-6" @add-task="addNewTask" />
    <div class="col-12">
      <div class="cardBox">
        <div class="container">
          <h2>My Tasks</h2>
          <ul class="taskList">
            <li
              v-for="(taskItem, index) in displayList"
              :key="`${index}_${Math.random()}`"
            >
              <input type="checkbox"
                :checked="!!taskItem.finishedAt"
                @input="changeStatus(taskItem.id)"
              />
              #{{ taskItem.id }} - {{ taskItem.task }}
              <span v-if="taskItem.finishedAt"> |
                Done at:
                {{ formatDate(taskItem.finishedAt) }}
              </span>
            </li>
          </ul>
        </div>
      </div>
    </div>
  </div>
</template>
On the changeStatus method, we need to update our function too. As the index now starts at 1, we need to decrease the index of the array by one to get the real index of the element before updating it:
changeStatus(taskId) {
    const task = this.taskList[taskId - 1];

    if (task.finishedAt) {
    task.finishedAt = undefined;
    } else {
    task.finishedAt = Date.now();
    }
}
To run the server and see your component, you need to open Terminal (macOS or Linux) or Command Prompt/PowerShell (Windows) and execute the following command:
> npm run serve
Here is your component rendered and running:

How it works...
The computed properties worked together as a cache for the list and made sure there were no side effects on the manipulation of the elements:
At the baseList property, we created a new array with the same tasks but added a new id property to the task.
At the filteredList property, we took the baseList property and only returned the tasks that weren't finished.
At the sortedList property, we sorted the tasks on the filteredList property by their ID, in descending order.
When all the manipulation was done, the displayList property returned the result of the data that was manipulated.
See also
You can find more information about Array.prototype.map at https://developer.mozilla.org/en-US/docs/Web/JavaScript/Reference/Global_Objects/Array/map.
You can find more information about Array.prototype.filter at https://developer.mozilla.org/en-US/docs/Web/JavaScript/Reference/Global_Objects/Array/filter.
You can find more information about Array.prototype.sort at https://developer.mozilla.org/en-US/docs/Web/JavaScript/Reference/Global_Objects/Array/sort.
Creating conditional filters to sort list data
After completing the previous recipe, your data should be filtered and sorted, but you might need to check the filtered data or need to change how it was sorted. In this recipe, we will learn how to create conditional filters and sort the data on a list.
Using some basic principles, it's possible to gather information and display it in many different ways.
Getting ready
The pre-requisite for this recipe is as follows:
Node.js 12+
The Node.js global objects that are required are as follows:
@vue/cli
@vue/cli-service-global
How to do it...
We will continue our to-do list project or you can create a new Vue project with Vue CLI, as learned in the 'Creating your first project with Vue CLI' recipe in Chapter 2, Introducing TypeScript and the Vue Ecosystem.
Now, follow these steps to add a conditional filter to sort your list data:
In the App.vue file, at the <script> part, we will update the computed properties, filteredList, sortedList, and displayList. We need to add three new variables to our project, hideDone, reverse, and sortById. All three are going to be Boolean variables and will start with a default value of false. The filteredList property will check if the hideDone variable is true. If it is, it will have the same behavior, but if not, it will show the whole list with no filter. The sortedList property will check if the sortById variable is true. If it is, it will have the same behavior, but if not, it will sort the list by the finished date of the task. The displayList property will check if the reverse variable is true. If it is, it will reverse the displayed list, but if not, it will have the same behavior:
<script>
import CurrentTime from "./components/CurrentTime.vue";
import TaskInput from "./components/TaskInput";

export default {
  name: "TodoApp",
  components: {
    CurrentTime,
    TaskInput
  },
  data: () => ({
    taskList: [],
    hideDone: false,
    reverse: false,
    sortById: false,
  }),
  computed: {
    baseList() {
      return [...this.taskList]
        .map((t, index) => ({
            ...t,
            id: index + 1
          }));
    },
    filteredList() {
      return this.hideDone
        ? [...this.baseList]
            .filter(t => !t.finishedAt)
        : [...this.baseList];
    },
    sortedList() {
      return [...this.filteredList]
          .sort((a, b) => (
            this.sortById
              ? b.id - a.id
              : (a.finishedAt || 0) - (b.finishedAt || 0)
          ));
    },
    displayList() {
      const taskList = [...this.sortedList];

      return this.reverse
      ? taskList.reverse()
      : taskList;
    }
  },
  methods: {
    formatDate(value) {
      if (!value) return "";
      if (typeof value !== "number") return value;

      const browserLocale =
        navigator.languages && navigator.languages.length
          ? navigator.languages[0]
          : navigator.language;

      const intlDateTime = new Intl.DateTimeFormat(browserLocale, {
        year: "numeric",
        month: "numeric",
        day: "numeric",
        hour: "numeric",
        minute: "numeric"
      });

      return intlDateTime.format(new Date(value));
    },
    addNewTask(task) {
      this.taskList.push({
        task,
        createdAt: Date.now(),
        finishedAt: undefined
      });
    },
    changeStatus(taskId) {
      const task = this.taskList[taskId - 1];

      if (task.finishedAt) {
        task.finishedAt = undefined;
      } else {
        task.finishedAt = Date.now();
      }
    }
  }
};
</script>
On the <template> part, we need to add the controllers for those variables. We will create three checkboxes, linked directly to the variables via the v-model directive:
<template>
  <div id="app">
    <current-time class="col-4" />
    <task-input class="col-6" @add-task="addNewTask" />
    <div class="col-12">
      <div class="cardBox">
        <div class="container">
          <h2>My Tasks</h2>
          <hr />
          <div class="col-4">
            <input
              v-model="hideDone"
              type="checkbox"
              id="hideDone"
              name="hideDone"
            />
            <label for="hideDone">
              Hide Done Tasks
            </label>
          </div>
          <div class="col-4">
            <input
              v-model="reverse"
              type="checkbox"
              id="reverse"
              name="reverse"
            />
            <label for="reverse">
              Reverse Order
            </label>
          </div>
          <div class="col-4">
            <input
              v-model="sortById"
              type="checkbox"
              id="sortById"
              name="sortById"
            />
            <label for="sortById">
              Sort By Id
            </label>
          </div>
          <ul class="taskList">
            <li
              v-for="(taskItem, index) in displayList"
              :key="`${index}_${Math.random()}`"
            >
              <input type="checkbox"
                :checked="!!taskItem.finishedAt"
                @input="changeStatus(taskItem.id)"
              />
              #{{ taskItem.id }} - {{ taskItem.task }}
              <span v-if="taskItem.finishedAt"> |
                Done at:
                {{ formatDate(taskItem.finishedAt) }}
              </span>
            </li>
          </ul>
        </div>
      </div>
    </div>
  </div>
</template>
To run the server and see your component, you need to open Terminal (macOS or Linux) or Command Prompt/PowerShell (Windows) and execute the following command:
> npm run serve
Here is your component rendered and running:

How it works...
The computed properties worked together as a cache for the list and made sure there weren't any side effects on the manipulation of the elements. With the conditional process, it was possible to change the rules of the filtering and sorting through a variable, and the display was updated in real-time:
At the filteredList property, we took the baseList property and returned just the tasks that weren't finished. When the hideDone variable was false, we returned the whole list without any filter.
At the sortedList property, we sorted the tasks on the filteredList property. When the sortById variable was true, the list was sorted by ID in descending order; when it was false, the sorting was done by the task finish time in ascending order.
At the displayList property, when the reverse variable was true, the final list was reversed.
When all the manipulation was done, the displayList property returned the result of the data that was manipulated.
Those computed properties were controlled by the checkboxes on the user screen, so the user had total control of what they could see and how they could see it.
See also
You can find more information about Array.prototype.map at https://developer.mozilla.org/en-US/docs/Web/JavaScript/Reference/Global_Objects/Array/map.
You can find more information about Array.prototype.filter at https://developer.mozilla.org/en-US/docs/Web/JavaScript/Reference/Global_Objects/Array/filter.
You can find more information about Array.prototype.sort at https://developer.mozilla.org/en-US/docs/Web/JavaScript/Reference/Global_Objects/Array/sort.
Adding custom styles and transitions
Adding styles in your components is a good practice, as it allows you to show your user what is happening more clearly. By doing this, you are able to show a visual response to the user and also give a better experience on your application.
In this recipe, we will learn how to add a new kind of conditional class binding. We will use CSS effects mixed with the re-rendering that comes with each new Vue update.
Getting ready
The pre-requisite for this recipe is as follows:
Node.js 12+
The Node.js global objects that are required are as follows:
@vue/cli
@vue/cli-service-global
How to do it...
We will continue our to-do list project or you can create a new Vue project with Vue CLI, as learned in the 'Creating your first project with Vue CLI' recipe in Chapter 2, Introducing TypeScript and the Vue Ecosystem.
Follow these steps to add custom styles and transitions to your component:
In the App.vue file, we will add a conditional class to the list items for the tasks that are done:
<template>
  <div id="app">
    <current-time class="col-4" />
    <task-input class="col-6" @add-task="addNewTask" />
    <div class="col-12">
      <div class="cardBox">
        <div class="container">
          <h2>My Tasks</h2>
          <hr />
          <div class="col-4">
            <input
              v-model="hideDone"
              type="checkbox"
              id="hideDone"
              name="hideDone"
            />
            <label for="hideDone">
              Hide Done Tasks
            </label>
          </div>
          <div class="col-4">
            <input
              v-model="reverse"
              type="checkbox"
              id="reverse"
              name="reverse"
            />
            <label for="reverse">
              Reverse Order
            </label>
          </div>
          <div class="col-4">
            <input
              v-model="sortById"
              type="checkbox"
              id="sortById"
              name="sortById"
            />
            <label for="sortById">
              Sort By Id
            </label>
          </div>
          <ul class="taskList">
            <li
              v-for="(taskItem, index) in displayList"
              :key="`${index}_${Math.random()}`"
              :class="!!taskItem.finishedAt ? 'taskDone' : ''"
            >
              <input type="checkbox"
                :checked="!!taskItem.finishedAt"
                @input="changeStatus(taskItem.id)"
              />
              #{{ taskItem.id }} - {{ taskItem.task }}
              <span v-if="taskItem.finishedAt"> |
                Done at:
                {{ formatDate(taskItem.finishedAt) }}
              </span>
            </li>
          </ul>
        </div>
      </div>
    </div>
  </div>
</template>
At the <style> part of the component, we will create the CSS style sheet classes for the taskDone CSS class. We need to make the list have a separator between the items; then, we will make the list have a striped style; and when they get marked as done, the background will change with an effect. To add the separator between the lines and the striped list or zebra style, we need to add a CSS style sheet rule that applies for each even nth-child of our list:
<style scoped>
  .taskList li {
    list-style: none;
    text-align: left;
    padding: 5px 10px;
    border-bottom: 1px solid rgba(0,0,0,0.15);
  }

  .taskList li:last-child {
    border-bottom: 0px;
  }

  .taskList li:nth-child(even){
    background-color: rgba(0,0,0,0.05);
  }
</style>
To add the effect on the background, when the task is done, at the end of the <style> part, we will add a CSS animation keyframe that indicates the background color change and apply this animation to the .taskDone CSS class:
<style scoped>
  .taskList li {
    list-style: none;
    text-align: left;
    padding: 5px 10px;
    border-bottom: 1px solid rgba(0,0,0,0.15);
  }

  .taskList li:last-child {
    border-bottom: 0px;
  }

  .taskList li:nth-child(even){
    background-color: rgba(0,0,0,0.05);
  }

  @keyframes colorChange {
    from{
      background-color: inherit;
    }
    to{
      background-color: rgba(0, 160, 24, 0.577);
    }
  }

  .taskList li.taskDone{
    animation: colorChange 1s ease;
    background-color: rgba(0, 160, 24, 0.577);
  }
</style>
To run the server and see your component, you need to open Terminal (macOS or Linux) or Command Prompt/PowerShell (Windows) and execute the following command:
> npm run serve
Here is your component rendered and running:

How it works...
Each time a new item in our application is marked as done, the displayList property gets updated and triggers the re-rendering of the component.
Because of this, our taskDone CSS class has an animation attached to it that is executed on rendering, showing a green background.
See also
You can find more information about CSS animations at https://developer.mozilla.org/en-US/docs/Web/CSS/CSS_Animations/Using_CSS_animations.
You can find more information about class and style bindings at https://v3.vuejs.org/guide/class-and-style.html
Using vue-devtools to debug your application
vue-devtools is a must for every Vue developer. This tool shows us the depths of the Vue components, routes, events, and vuex.
With the help of the vue-devtools extension, it's possible to debug our application, try new data before changing our code, execute functions without needing to call them in our code directly, and so much more.
In this recipe, we will learn more about how we can use the devtools to find more information on your application and how it can be used to help your debug process.
Getting ready
The pre-requisite for this recipe is as follows:
Node.js 12+
The Node.js global objects that are required are as follows:
@vue/cli
@vue/cli-service-global
You will need to install the vue-devtools extension in your browser:
Chrome extension—http://bit.ly/chrome-vue-devtools
Firefox extension—http://bit.ly/firefox-vue-devtools
How to do it...
We will continue our to-do list project or you can create a new Vue project with Vue CLI, as learned in the 'Creating your first project with Vue CLI' recipe in Chapter 2, Introducing TypeScript and the Vue Ecosystem.
When developing any Vue application, it's always a good practice to develop with vue-devtools to hand.
Follow these steps to understand how to use vue-devtools and how to properly debug a Vue application:
To enter vue-devtools, you need to have it installed in your browser first, so check the 'Getting ready' section of this recipe for the links to the extension for Chrome or Firefox. In your Vue development application, enter browser developer inspector mode. A new tab with the name Vue must appear:

The first tab that you are presented with is the Components tab. This tab shows your application component tree. If you click on a component, you will be able to see all the available data, the computed property, extra data injected by plugins such as vuelidate, vue-router, or vuex. You can edit the data to see the changes in the application in real time:

The second tab is for vuex development. This tab will show the history of the mutations, the current state, and the getters. It's possible to check on each mutation the passed payload and do time-travel mutations, to "go back in time" in the vuex changes in the states:

The third tab is dedicated to event emitters in the application. All events that are emitted in the application will be shown here. You can check the event that was emitted by clicking on it. You can see the name of the event, the type, who was the source of the event (in this case, it was a component), and the payload:

The fourth tab is dedicated to the vue-router plugin. There, you can see the navigation history, with all the metadata passed to the new route. You can check all the available routes in your application:

The fifth tab is a Performance tab. Here, you can check your component loading time, the frames per second that your application is running by the events that are happening in real time. This first screenshot shows the current frames per second of the current application, and for the selected component:

This second screenshot shows the components lifecycle hooks performance and the time it took to execute each hook:

The sixth tab is your Settings tab; here, you can manage the extension, change how it looks, how it behaves internally, and how it will behave within the Vue plugins:

The last tab is a refresh button for the vue-devtools. Sometimes, when the hot-module-reload occurs or when some complex events happen in your application component tree, the extension can lose track of what is happening. This button forces the extension to reload and read the Vue application state again.
See also
You can find more information about vue-devtools at https://github.com/vuejs/vue-devtools.