

✓ | How to store temporary visitor information in the Session object. |
✓ | How to store temporary application data in the Application object. |
✓ | How to retrieve data from the Session and Application objects. |
✓ | How to mark folders and files so that visitors requesting access must identify themselves. |
✓ | How to write a page that visitors can use for logging on to an application. |
The ViewState mechanism introduced in Chapter 4 provides an excellent way to preserve information from one form submission to another. Unfortunately, it’s a rather unwieldy and unreliable way to save temporary information for longer periods of time. Passing ViewState information from one Web page to another requires special programming, and if the visitor navigates through even a single Web page that lacks these precautions, the ViewState information is lost. Fortunately, ASP.NET provides two objects that save transient information more reliably and for longer periods of time:
The Session object stores temporary information that pertains to each visitor who accesses an application.
Every time a visitor requests an ASP.NET page within an application, ASP.NET checks to see whether that visitor already has a Session object. If the visitor does, ASP.NET matches up the current request and the existing Session object. If no Session object exists, ASP.NET creates a new one.
Session objects get a new lease on life every time the associated visitor accesses any ASP.NET page in the application. ASP.NET destroys the Session object only after some period of inactivity (usually 20 minutes).
The Application object stores temporary information that pertains to the entire application. ASP.NET creates the Application object the first time any visitor accesses any ASP.NET page in the application, and deletes it only when the application shuts down (that is, when the Web server shuts down). Each application has only one Application object.
Both the Session and Application objects have built-in properties and methods, but the most used, in both cases, is the Contents collection. This collection is also the default property of these objects. Both of the following statements, for example, store items in the Application.Contents collection:
Application.Contents("todaysspecial") = "Meatballs"
Application("todaysdessert") = "Avocado Sorbet"
If you code statements such as these in a Web page, you should surround them with Application.Lock and Application.Unlock statements as shown here:
Application.Lock
Application.Contents("todaysspecial") = "Meatballs"
Application("todaysdessert") = "Avocado Sorbet"
Application.Unlock
This keeps two different Web pages (or the same page servicing two different visitors) from trying to update the Application object at the same time, which can lead to corruption.
Similarly, the following statements store items in the Session.Contents collection. There are no such methods as Session.Lock and Session.Unlock, nor is there any need for them.
Session.Contents("partysize") = 2
Session("partyname") = "Salvador"
The same expressions retrieve variables from the corresponding objects. Here are two examples:
strDietPlan = Application("todaysdessert")
strPartyName = Session.Contents("partyname")
Statements such as these can appear within any ASP.NET page in your application, and also in four special event handlers that you code in a file named global.asax. This file, should you decide to use it, must reside in your application’s root folder. If you put a file named global.asax anywhere else, ASP.NET will ignore it.
The event handlers in the global.asax file run every time ASP.NET creates or destroys an Application or Session object (four event handlers in all). If you decide to use these event handlers, you must code them within a code declaration block as follows. The order is unimportant, and of course, there’s no need to code event handlers you don’t plan to use.
<script runat="server">
Sub Application_OnStart ()
'    Your statements go here.
End Sub

Sub Application_OnEnd()
'    Your statements go here.
End Sub

Sub Session_OnStart ()
'    Your statements go here.
End Sub

Sub Session_OnEnd()
'    Your statements go here.
End Sub
</script>
The Application_OnStart event handler is a good place to load the Application object with values that change occasionally and that multiple Web pages need to use. Database connection strings are prime examples. The Application_OnStart handler shown here, for example, loads the connection string for a SQL server database into the Application object:
Sub Application_OnStart ()
Application("conNwind") = "Data Source=localhost;" & _
                          "User ID=northweb;Password=ydniw" & _
                          "Initial Catalog=northwind"
End Sub
With this code in effect, any page in the application can open the connection with these statements.
Dim conNwind As SqlConnenction
conNwind = New SqlConnenction(Application("conNwind"))
Coding all your Web pages to get connection strings from the Application object makes coping with changes like new passwords and moving to another database server very easy. You can simply update the global.asax file.
Note
Whenever you update the global.asax file, Windows informs ASP.NET that the update occurred. ASP.NET then restarts the application; that is, it runs the Application_OnEnd and Session_On event handlers, deletes the Application object and all Session objects, creates a new Application object, and runs the Application_OnStart event handler. Visitors will create new Session objects the next time they access any ASP.NET page in the application.
Coding connection strings for Access databases presents an additional problem. At first glance, it might seem very attractive to set an Application variable like this:
Application("conClasf") = _
    "Provider=Microsoft.Jet.OLEDB.4.0;" & _
    "Data Source=" & _
    Server.MapPath("db/classified.mdb") & ";")
This statement converts the URL db/classified.mdb to a physical file path on the server and uses this path to build the connection string. This is the approach you’ve seen in all connection strings so far. A problem occurs, however, because there’s no way to predict what the current URL folder will be when the global.asax file runs. The current folder will be that of the first Web page a visitor happens to request after the Web server starts.
Coding a fully qualified URL or file path is one solution; an example appears here. However, this works only if you know the fully qualified location beforehand and know it won’t change.
Application("conClasf") = _
    "Provider=Microsoft.Jet.OLEDB.4.0;" & _
    "Data Source=" & _
    Server.MapPath("/webdbpgm/ch11/db/classified.mdb") & ";")
You could build a fully qualified path on the fly with code such as Request.ApplicationPath & "/db/classified.mdb". But this poses a further problem: the Request object isn’t available when the Application_OnStart event handler runs. Fortunately, the Request object is available when the Session_OnStart event handler runs. The following code, therefore, provides a fully portable way of centralizing an Access connection string:
Public Sub Session_OnStart()
  Dim strDbUrl As String
  strDbUrl = Request.ApplicationPath
  If Right(strDbUrl,1) <> "/" Then
    strDbUrl &= "/"
  End If
  strDbUrl &= "db/classified.mdb"
  Session("conClasf") = _
    "Provider=Microsoft.Jet.OLEDB.4.0;" & _
    "Data Source=" & Server.MapPath(strDbUrl) & ";"
End Sub
This code, of course, runs every time a new visitor requests a page from your application ("new" in the sense of not having requested an ASP.NET page within the last 20 minutes). This is more resource-intensive than building the connection string in the Application_OnStart event handler, which runs only once (when the application starts), but it’s less resource-intensive than building the string once per Web page.
Use of the Application and Session OnStart and OnEnd handlers isn’t limited to simple assignment statements. In the following global.asax file, for example, the Session_OnStart event handler looks up the Domain Name System (DNS) name that corresponds to the visitor’s IP address and stores it in a Session variable named hostname.
Note
Translating an IP address to a hostname constitutes a reverse DNS lookup. Normal—or forward—DNS lookups translate hostnames to IP addresses.
<%@ Import Namespace="System.Net" %>
<script runat="server">
Public Sub Session_OnStart()
  Session("hostname") = _
    Dns.GetHostByAddress(Request.UserHostAddress).HostName
</script>
Web pages in the same application can then use the expression Session("hostname") to get the visitor’s computer name. This illustrates the breadth of things you can do in the global.asax file. However, if you want your own application to look up DNS names, you should be aware of these facts:
The Dns.GetHostByAddress method might throw exceptions. Therefore, you should surround it with a Try...Catch...End Try block and take some sort of corrective action in the Catch block. For example, you could store Request.UserHostAddress or "Unknown" in the Session("hostname") variable.
If the Dns.GetHostByAddress method times out, the Web page that caused ASP.NET to create the Session object will time out.
Precautions similar to this and the previous one apply not only to the Dns.GetHostByAddress method, but also to any other code you put in the global.asax file. Deal with exceptions gracefully and avoid potentially lengthy processing.
Especially on the Internet, the Dns.GetHostByAddress method might be less useful than you suspect. Network traffic from many visitors passes through dial-up servers, firewalls, or Network Address Translation (NAT) devices that disguise the visitor’s true IP address and might not have DNS names.
Translating IP addresses to host names tends to be more successful on intranets, but even then, it’s generally a mistake to write Web pages that malfunction if reverse DNS lookup fails.
If the Dns.GetHostByAddress method can’t get a computer name from DNS, it will look for a Windows Networking computer name. This is the computer name that appears in the Control Panel’s System applet. If you’re getting computer names like COLLAR instead of collar.interlacken.com, this is the reason.
The Session_OnEnd and Application_OnEnd events are generally less useful than their OnStart counterparts. Session_OnEnd, for example, runs only when the session times out, which is usually 20 minutes after the visitor’s last page request. Similarly, Application_OnEnd runs only when the Web server or application shuts down. If the server or application crashes, it never runs at all. These are seldom the best times for anything to run.
The Application and Session objects can also be useful in scenarios that don’t involve the global.asax file. Anytime you want to retain information about a visitor for the duration of a visit, the Session object is a good candidate. Similarly, anytime you want to share transient information among all the pages in your application, consider using the Application object.
Normally, ASP.NET keeps Session objects in the Web server’s memory space. This presents a problem if your application is going to run on a server farm (meaning a group of Web servers that service incoming requests at random). If a visitor’s first request runs on one server and the same visitor’s second request runs on another, the second server won’t have access to the Session object that the first server created. To resolve this problem, ASP.NET supports three ways of handling session information:
InProc. This mode stores session information in each Web server’s memory space. This is the default and fastest mode.
StateServer. This method stores session information in a standalone Microsoft Windows service. If you configure all servers in the same farm to use the same StateServer, they’ll all share the same session information. This mode is slower than the previous one because it spends time communicating across processes and machines.
SqlServer. This mode is similar to StateServer, except that it stores the session information in a SQL Server database. This preserves the session information even if one or more servers—including the State Server—go down. Although this method offers the highest level of reliability, it’s also the slowest.
For more information about Application and Session states, search the MSDN Web site (msdn.microsoft.com/library) for the term ASP.NET State Management.
This procedure organizes several files from previous chapters into a new application. Then it uses the global.asax file to provide a database connection string for the classified.mdb database and—if available via DNS—the name of the Web visitor’s computer.
If you’d rather look at the finished results than make all the changes yourself, refer to the ch11 folder you installed from the companion CD. Be aware, however, that this folder also contains the results from the second procedure in this chapter. Proceed as follows:
Create a new folder on your Web server and name it ch11. (This procedure assumes you’re not using the ch11 folder you installed from the companion CD.)
Copy all the following into the new ch11 folder:
The ads.aspx, ad-dtl.aspx, banner.ascx, selcat.ascx, and classified.mdb files you used in the previous chapter.
The pix folder (and the four files it contains) you used in the previous chapter.
The images folder (and all the files it contains) from the root folder you installed from the companion CD.
Any other files you used for purposes of appearance or page layout. In the case of the sample files, this includes the normal.css file from the root folder you installed from the companion CD.
Open the ad-dtl-aspx page you just copied and make sure the following items have no path prefix: the normal.css file, the pix folder, and the images folder. Then save and close the file.
Open the ads.aspx file you just copied and make sure the normal.css file has no path prefix. Then save and close the file.
Mark the ch11 folder as an IIS application. This is something you or the Web server’s administrator must use Internet Services Manager to do. For instructions, refer to "Creating a Web Server Application" in Chapter 2.
Test the ads.aspx file and make sure it’s working as well as it did in the previous chapter. Clicking in the ID field of any found ad should display the ad-dtl.aspx page.
Create a subfolder named db within the ch11 folder you created in step 1. Move the classified.mdb file from the ch11 folder to the ch11/db folder.
Open a new, blank file in your favorite text editor. Create a code declaration block that contains a subroutine named Session_OnStart. Here’s the required code:
<script runat="server">
Sub Session_OnStart()
End Sub
</script>
Within this subroutine, define a string variable named strDbUrl. This variable will eventually contain the URL of the classified.mdb database. Follow the declaration with a statement that copies the Request.ApplicationPath property into this variable. Here’s the required code:
Dim strDbUrl As String
strDbUrl = Request.ApplicationPath
If the path in the strDbUrl variable doesn’t end in a slash, append one. Then append the database location db/classified.mdb. The new statements appear in blue.
Dim strDbUrl As String
strDbUrl = Request.ApplicationPath
If Right(strDbUrl,1) <> "/" Then
  strDbUrl &= "/"
End If
strDbUrl &= "db/classified.mdb"
Use the value in strDbUrl to construct a database connection string, and save the string in a Session variable named conClasf. This requires the following code, which uses the strDbUrl variable (shown in blue) rather than a hard-coded file name:
Session("conClasf") = _
  "Provider=Microsoft.Jet.OLEDB.4.0;" & _
  "Data Source=" & Server.MapPath(strDbUrl) & ";"
The next few steps will look up the Web visitor’s computer name. To begin, add the following declaration as the first line in the file:
<%@ Import Namespace="System.Net" %>
Code a Try...Catch...End Try block after the statement you entered in step 11 (and just before the End Sub statement).
Try
' Code to attempt DNS lookup will go here.
Catch ex As Exception
' Code to recover from lookup failure will go here.
End Try
Replace the first comment in step 13 with a line of code that gets the visitor’s IP address from the Request object, looks it up, and saves the result in a Session variable named hostname. Here’s the required code:
Session("hostname") = _
  Dns.GetHostByAddress(Request.UserHostAddress).HostName
If the DNS lookup fails, store the visitor’s IP address in the hostname variable. The file should now look like this. The new statement in blue replaces the second comment in step 13.
<%@ Import Namespace="System.Net" %>
<script runat="server">
Sub Session_OnStart()
  Dim strDbUrl As String
  strDbUrl = Request.ApplicationPath
  If Right(strDbUrl,1) <> "/" Then
    strDbUrl &= "/"
  End If
  strDbUrl &= "db/classified.mdb"
  Session("conClasf") = _
    "Provider=Microsoft.Jet.OLEDB.4.0;" & _
    "Data Source=" & Server.MapPath(strDbUrl) & ";"
  Try
    Session("hostname") = _
     Dns.GetHostByAddress(Request.UserHostAddress).HostName
  Catch ex As Exception
    Session("hostname") = Request.UserHostAddress
  End Try
End Sub
</script>
Save this file in the ch11 folder, giving it the name global.asax.
This procedure will modify three existing ASP.NET pages to use the database connection string you just added to the Session object. Then, if you ever need to change connection strings, you only need to do it once (in the global.asax file).
Open the ad-dtl.aspx, ads.aspx, and selcat.ascx files. In each case, replace the statement
conClasf = New OleDbConnection( _
  "Provider=Microsoft.Jet.OLEDB.4.0;" & _
  "Data Source=" & server.mappath("classified.mdb") & ";")
with the following statement:
conClasf = New OleDbConnection(Session("conClasf"))Then save each file.
Test the ads.aspx file and make sure it still works as well as it did in step 6 of the previous procedure. Clicking the ID field of any found ad should display the ad-dtl.aspx page.
This procedure creates a home page that displays the visitor’s computer as determined by the global.asax file and stored in the Session object.
To display the visitor’s computer name, start a new, blank Web page that contains all the usual structural tags and any page-level formatting you want. Title the page Home Page, and then add the following directives at the top of the file:
<%@ Page Language="vb" Debug="true" Explicit="True"%>
<%@ Register TagPrefix="webdbpgm" TagName="banner"
             src="banner.ascx" %>
Then add the following tag in the <body> section:
<webdbpgm:banner runat="server" />
Immediately after the directives, add a code declaration block, a Page_Load subroutine, and a statement that copies the hostname variable into a Literal Web server control named litHostName. Here’s the required code:
<script runat="server">
Sub Page_Load (sender As Object, e As EventArgs)
  litHostName.Text= Session("hostname")
End Sub
</script>
Just before the </body> tag, add an ordinary hyperlink to the ads.aspx page. You can format this hyperlink any way you want, but here’s an example:
<table align=center>
<tr>
<td><a href="ads.aspx">Search For Ads by Category</a></td>
</tr>
</table>
Immediately after this code, create a second HTML table. Within this table, add the title Your computer name: and a Literal Web server control named litHostName. Here’s an example:
<table>
<tr><td>Your computer name: </td></tr>
<tr><td><asp:literal id="litHostName"
             runat="server" /></td></tr>
</table>
Save this file in the ch11 folder, giving it the name default.aspx. When you browse this file, the table you created in step 4 should display the name or IP address of the computer running the browser.
Because the ASP.NET code in the default.aspx page is so simple and involves no new techniques, a full listing doesn’t appear here. To view the sample file, open the default.aspx file in the ch11 folder you installed from the companion CD. Be forewarned, however, that the sample file also includes results from this chapter’s second step-by-step procedure.
Classic ASP includes no built-in features that stop unidentified visitors from accessing parts of a Web site. The authentication features of IIS are available, but these require setting up a Windows NT or Windows 2000 logon account for each visitor in advance. This is seldom practical except on intranets, where the visitors already have logon accounts for other forms of access. To develop a site where visitors self-register, pass verification, and then gain access, a classic ASP developer must develop or acquire a custom authentication system.
Once again ASP.NET comes to the rescue, this time by providing three kinds of authentication:
Windows authentication uses the authentication features of IIS, very much as classic ASP has done for years.
For more information about this kind of authentication, refer to "Managing Windows 2000 and Windows XP Security for Web Pages" in Chapter 2.
Passport-based authentication is a service that Microsoft provides. Passport offers single visitor logon accounts and centralized visitor services for member sites.
To use Passport authentication, you must first register your site with the Passport service, accept the license agreement, and install the Passport Software Development Kit. For more information about Passport-based authentication, refer to the MSDN Web site location mentioned at the end of this list.
Forms-based authentication is a system whereby
You tell ASP.NET which areas of a Web site to protect.
Whenever an unidentified visitor tries to access those areas, ASP.NET redirects the visitor to a logon page you design.
The logon page displays whatever prompts and performs whatever validations you want.
When your code determines that the visitor passes muster, it calls a special method that tells ASP.NET that the visitor is OK, what username the visitor has established, and whether to store the authorization permanently on the visitor’s computer.
If step 4 is successful, ASP.NET allows the visitor to access the protected area and makes the given username available to code in each protected page.
Forms-based authentication is probably the approach most beginning ASP.NET developers will use; consequently, the rest of this chapter discusses only that method. For more detailed information about all three methods, search the MSDN Web site (msdn.microsoft.com/library) for the term ASP.NET Web Application Security.
Using forms-based authentication is a fairly simple process that requires no administrative access to the Web server. Here are the basic steps:
Choose a folder scheme that divides your application into protected and unprotected areas. Many such schemes are possible, but the most straightforward are these:
The entire application is protected except for one folder.
Only one folder in the application is protected.
There’s nothing intrinsically wrong with having multiple protected or unprotected folders. Just do yourself a favor and keep things simple.
Choose a name and location for your logon page. This needs to be an unprotected folder because—guess what—the visitors who need to log on won’t be logged on yet!
Modify or create a web.config file that activates forms-based authentication, specifies which areas to protect, and specifies the name of the logon page.
Code the logon page, taking care to save it in the location you specified in step 3. This page can prompt the visitor for whatever information you want and match it to any source you want. However, at some point it must call a method named FormsAuthentication.RedirectFromLoginPage. This establishes an identity for the visitor and redirects the visitor to the protected page—if any—he or she originally tried to access.
Here are the contents of a relatively simple and typical web.config file:
<configuration>
  <system.web>
    <customErrors mode="Off"/>
    <compilation debug="true"/>
    <authentication mode="Forms">
      <forms name=".AUTHCOOKIE"
             loginUrl="login.aspx"
             protection="All"
             timeout="15"/>
    </authentication>
    <authorization>
      <allow users="*,?"/>
    </authorization>
  </system.web>
  <location path="reg">
    <system.web>
      <authorization>
      <deny users="?"/>
      </authorization>
    </system.web>
  </location>
</configuration>
Like all web.config files, this one contains XML. The <configuration> and </configuration> tags form a container for the entire file. The <system.web> and </system.web> tags shown in blue form a container for application defaults.
The <compilation> tag makes debugging the default for all pages in this application, and the <customErrors> tag tells ASP.NET to display a fully detailed error page even if the current visitor is accessing the server over a network connection. For more information about these two tags, refer to Chapter 2.
The tag <authentication mode="Forms"> specifies that forms-based authentication is in effect for the current application. To specify an authentication mode of Windows, Passport, or None, code one of these keywords instead of the keyword Forms. None is the default.
The <forms> tag configures forms-based authentication. Here are the attributes you can code within this tag:
Name specifies a name for the HTTP cookie that forms-based authentication will use. The default is .ASPXAUTH.
loginUrl specifies the URL of a page that ASP.NET will display when an unauthenticated visitor requests a protected page. The default is default.aspx.
Protection controls the means ASP.NET will use to protect the value of the authentication cookie. Two kinds of protection are available:
Encryption means that ASP.NET will encrypt the authentication cookie. ASP.NET uses Triple-DES if it’s available and the key is 48 bytes or more; otherwise, it uses DES. This ensures that Web visitors can’t decipher or inspect the cookie value.
Validation means that ASP.NET will calculate and append a Message Authentication Code (which is a kind of checksum) to the outgoing authentication cookie. ASP.NET then repeats the calculation for incoming cookie values and compares the two results. If the two checksums match, it’s extremely likely that no tampering or corruption has occurred.
By coding the following values in the Protection attribute, you can specify zero, one, or both kinds of protection. The default is All.
Protection Value
Uses Encryption
Uses Validation
All
Yes
Yes
Encryption
Yes
No
Validation
No
Yes
None
No
No
Timeout specifies the number of whole minutes that authentication cookies remain valid. A value of 15, for example, means that the cookie will expire after about 15 minutes of inactivity from the visitor.
The number of minutes is approximate because ASP.NET doesn’t reset the timeout until half the timeout value has passed. Suppose, for example, that the timeout value is 15 and the visitor requests pages 6, 8, and 10 minutes after requesting the first page. The cookie would expire at minute 23 (8 + 15). The page request at minute 6 wouldn’t reset the timer, because more than half the timeout interval remained. Neither would the request at minute 10, because the timer would have been reset two minutes earlier.
Path is the path the application specifies on authentication cookies. The default value is a slash ("/"). This is because most browsers are case-sensitive and won’t send cookies back if there’s a path case mismatch.
If your application resides at the URL path /whatever/, you might think that forms-based authentication would use a cookie path of /whatever/ as well. That way, only your application would receive the authentication cookie.
Because cookie paths are case-sensitive, however, the browser wouldn’t return the cookie with any request that specifies a folder name such as /Whatever/, /whatEver/, or /whATEver/. Not finding the cookie, ASP.NET would redirect the visitor to the logon URL.
Using a slash ("/") for the cookie path avoids case issues, but at a price. Specifically, this path tells the browser to send your application’s authentication cookie with every request to your Web server. This involves a bit of extra transmission to and from the browser, but more importantly, it means that two applications on the same server—both using the cookie path / and the same cookie name—might end up fighting over control of the same cookie. This is a good reason to specify a custom cookie name for every application.
The sample web.config file shown earlier contained the following <authorization> section within <system.web>:
<authorization>
  <allow users="*,?"/>
</authorization>
Because this <authorization> section appears within the <system.web> section, it specifies the default access rules for the entire application.
An <authorization> section can contain any number of <allow> and <deny> tags. These tags allow access and deny access, respectively. Within each <allow> or <deny> tag, you can specify any of the following attributes:
users. A comma-delimited list of users who will receive the specified permission. A question mark ("?") means anonymous users, and an asterisk ("*") means all users.
roles. A comma-delimited list of roles that will receive the specified permission. In Windows-based authentication, roles correspond to Windows NT or Windows 2000 groups. Forms-based authentication, however, makes no use of roles.
verbs. A comma-delimited list of HTTP transmission methods that should have the specified permission. ASP.NET recognizes the verbs GET, HEAD, POST, and DEBUG.
If you specify any users other than ("?") and ("*"), you must define their usernames and passwords elsewhere in the web.config file. For example, to define a user named Oscar with a password of cichlids, you would add the lines shown in blue. (This is not, however, something you need to do for visitors who log on through a custom logon page).
<authentication ... >
  <forms ... >
    <credentials passwordFormat="Clear">
      <user name="Oscar" password="cichlids" />
    </credentials>
  </forms>
</authentication>
To specify access rules that differ from the default for one page or folder tree, add a group of lines such as the following after the closing </system.web> tag for the application. These lines also appear in the listing on page 403.
<location path="reg">
  <system.web>
    <authorization>
      <deny users="?"/>
    </authorization>
  </system.web>
</location>
The path attribute in the <location> tag can specify either a folder name or a file name. The <system.web> and <authorization> sections are required. As before, <deny> and <allow> tags in the <authorization> section specify the access rules. In this example, ASP.NET will deny anonymous users access to the reg folder.
If a visitor doesn’t have access to a given page or folder (such as the reg folder in the preceding example), ASP.NET redirects the visitor to the page you specified in the loginUrl attribute of the <forms> tag. (Refer to the web.config listing on page 403 if you’ve forgotten where this occurs.) If this page verifies—through any method you care to code—that the visitor should have access, it calls the FormsAuthentication.RedirectFromLoginPage method as shown here:
FormsAuthentication.RedirectFromLoginPage( _
             <username>, <createPersistentCookie>)
In this statement:
username is the name of the user for purposes of cookie authentication. This doesn’t need be an account name defined anywhere else.
createPersistentCookie, if True, specifies that ASP.NET should issue a durable authentication cookie (that is, one that the browser will save on the visitor’s hard disk). This saves the visitor from having to log on again days or weeks in the future, but incurs the risk of someone else stealing a copy of the cookie.
If you set this parameter to False, the cookie will disappear when the visitor closes all browser windows. This is usually the best choice.
For more information about forms-based authentication, search the MSDN Web site (msdn.microsoft.com/library) for the term Forms Authentication Provider.
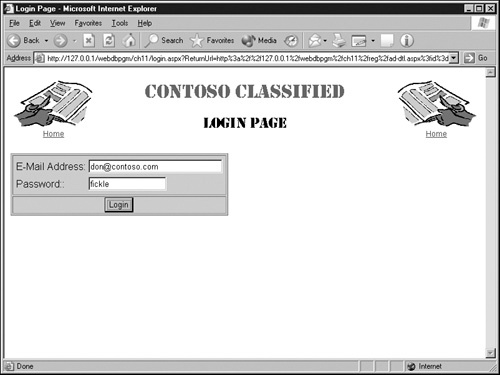
This procedure will modify the Contoso Classified Web site to provide an incentive for Web visitors to register. Using the ads.aspx page (which searches for ads) won’t require registration, but using ad-dtl.aspx page (which provides the information necessary to contact the seller) will require registration. To identify themselves, visitors will use the login.aspx page shown in the following graphic.
If you’d rather look at the finished results than change the ch11 folder and create the login.aspx Web page, refer to the ch11 folder you installed from the companion CD. Otherwise, proceed as follows:
Within the ch11 folder you used earlier in this chapter, create a subfolder named reg.
Move the ad-dtl.aspx page out of the ch11 folder and into the ch11/reg folder.
Open the relocated page, locate the following directive, and change its path to the value shown in blue:
<%@ Register TagPrefix="webdbpgm" TagName="banner"
             src="../banner.ascx" %>
Make sure the following items have the path prefix ../: the normal.css file, the pix folder, and the images folder. In other words, these three items should now appear as ../normal.css, ../pix, and ../images.
Locate the hyperlink that points to ads.aspx and change it to ../ads.aspx.
Save and close the ad-dtl.aspx page.
Open the ads.aspx file and locate the hyperlink that points to the ad-dtl.aspx file. Change the path in this link so it includes the reg folder. This requires the new code shown in blue:
DataNavigateUrlFormatString="reg/ad-dtl.aspx?id={0}"When finished, save and close the page.
Display the ads.aspx page in your browser, taking care to specify an HTTP URL and not a disk location. Search for some ads, click an ID number, and verify that the ads-dtl.aspx page displays and works properly. If not, adjust any relative URLs as necessary.
Open your favorite text editor and enter the web.config page shown on page 404. Then save this file in your ch11 folder, giving it the name web.config.
A copy of this file is available in the ch11 folder you installed from the companion CD.
Repeat step 8. When you click the ID number of any found ad, you should get an error message such as
The resource cannot be found.
Description: HTTP 404. The resource you are looking for (or one of its dependencies) could have been removed, had its name changed, or is temporarily unavailable. Please review the following URL and make sure that it is spelled correctly.
Requested Url: /webdbpgm/ch11/login.aspx
This error message appears because ASP.NET has recognized the need to validate the Web visitor. ASP.NET therefore tried to display the login.aspx page specified in the web.config file you supplied in step 9. Because this file doesn’t exist yet, the Web server returns a 404 status code.
If you fail to get this error, make sure that (1) the Web server considers the ch11 folder an application and (2) the folder doesn’t already contain a login.aspx page.
This procedure creates the login.aspx page that, in the previous procedure, you specified to validate forms-based logon requests. Here’s how to do this:
Start a new, empty Web page with all the usual structural tags. Apply any overall page formatting you want.
Add the following directives at the top of the page. All this code should be familiar:
<%@ Page Language="vb" Debug="true" Explicit="True"%>
<%@ Register TagPrefix="webdbpgm" TagName="banner"
             src="banner.ascx" %>
<%@ Import Namespace="System.Data" %>
<%@ Import NameSpace="System.Data.OleDb" %>
Just after the <body> tag, add a tag that displays the banner.ascx custom server control. Here’s the required code:
<webdbpgm:banner runat="server" />
Add a Web form area immediately after the code you just entered:
<form method="post" runat="server">
' Form elements will go here.
</form>
Replace the comment in the previous step with the following elements:
An HTML InputText control with an id of txtMemberid.
An HTML InputText control with an id of txtPassword.
An HTML InputButton control with the following attributes:
type
=
submit
id
=
btnLogin
value
=
Log On
onServerClick
=
btnLogin_Click
The code for these tags is as follows. Use whatever HTML you like to arrange these elements. To precisely reproduce the example, refer to the HTML listing at the end of this procedure.
<input type="text" id="txtMemberid"
                   size="30" runat="server" />

<input type="text" id="txtPassword"
                   size="15" runat="server" />

<input type="submit" id="btnLogin" value="Log On"
       onServerClick="btnLogin_Click" runat="server"/>
Within the same Web form, create two RequiredFieldValidator controls that raise errors if either the txtMemberid box or the txtPassword box is empty. The code for these controls appears here. The name of the control each one validates appears in blue:
<asp:RequiredFieldValidator id="valMemberid"
     ControlToValidate="txtMemberid"
     Display="Dynamic" CssClass="err" runat="server">
You must enter an E-Mail Address.
</asp:RequiredFieldValidator>

<asp:RequiredFieldValidator id="valPassword"
     ControlToValidate="txtPassword"
     Display="Dynamic" CssClass="err" runat="server">
You must enter a Password.
</asp:RequiredFieldValidator>
The attribute CssClass="err" applies a predefined format to any message these controls display. The normal.css file specifies bold, dark red text for any text marked with the CSS class err.
Within the same Web form, define a Literal custom server control named litErrMsg. This will display any error messages from code elsewhere in the Web page:
<asp:literal id="litErrMsg" EnableViewState="False"
             runat="server" />
Setting the EnableViewState attribute to False saves ASP.NET the nuisance of restoring this control’s value during every postback. This, in turn, saves the nuisance of writing code to blank out the restored error message.
This procedure creates the program code that runs when the visitor clicks the Login button you created in the previous procedure. Begin at step 1.
Add a code declaration block just before the page’s <html> tag. Within this block, define a subroutine named btnLogin_Click. This subroutine will run every time the visitor clicks the btnLogin button you defined in the previous procedure. To define the subroutine, add code shown here in blue:
<%@ Import NameSpace="System.Data.OleDb" %>
<script runat="server">
Public Sub btnLogin_Click(sender As Object, e As EventArgs)
End Sub
</script>
<html>
Within the btnLogin_Click subroutine you just defined, declare the following variables:
Dim conClasf As OleDbConnection
Dim cmdMbr As OleDbCommand
Dim rdrMbr As OleDbDataReader
Dim strSQL As String
Dim booLoginOk As Boolean = False
The first three variables are for a database connection, a database command, and a data reader that will look up the memberid and password the Web visitor supplies. The fourth variable will contain a SQL statement. The last variable, initialized to False, will become True if the given memberid and password are valid.
If either validation control from the previous procedure detected an error, exit the subroutine with no further processing. The validation control will display the error message. Enter the following code after the declarations from the previous step:
If Not Page.IsValid Then
  Exit Sub
End If
Next, create and open a database connection that points to the classified.mdb database. Note that this code retrieves the session variable that the first procedure in this chapter created. This code goes next in sequence.
conClasf = New OleDbConnection(Session("conClasf"))
conClasf.Open
Code a SQL statement to retrieve the members record that corresponds to the member ID the Web visitor entered. Here’s what the database should receive:
SELECT * FROM members WHERE memberid = '[email protected]'Of course, whatever the visitor enters in the txtMemberid text box will replace the characters in blue. The following code will assemble this SQL statement. Insert it after the code from the previous step.
strSQL = "SELECT * " & _
           "FROM members " & _
          "WHERE memberid = '" & txtMemberid.Value & "' "
Use the database connection from step 4 and the SQL statement from step 5 to create an OleDbCommand object. Then, use this command object to open a data reader. Here are the required statements:
cmdMbr = New OleDbCommand(strSQL, conClasf)
rdrMbr = cmdMbr.ExecuteReader
Attempt to return one record from the data reader you opened in the previous step. If this returns False, the members table contains no matching records. You should therefore send the visitor an error message via the litErrMsg control you defined in the previous procedure. Here’s the required code; it belongs next in line.
If Not rdrMbr.Read Then
  litErrMsg.Text = "E-Mail Address '" & _
                  txtMemberid.Value & "' isn't registered."
End If
If the attempt to read a record is successful, compare the password in the database to the password from the visitor. If these aren’t equal, send the visitor an error message. This requires the new code shown in blue:
If Not rdrMbr.Read Then
  litErrMsg.Text = "E-Mail Address '" & _
                  txtMemberid.Value & "' isn't registered."
ElseIf rdrMbr.Item("password") <> txtPassword.Value Then
  litErrMsg.Text = "Password not matched."
End If
If the passwords match, make sure the visitor has confirmed his or her identity. Send an error message if no confirmation has occurred.
If Not rdrMbr.Read Then
  litErrMsg.Text = "E-Mail Address '" & _
                  txtMemberid.Value & "' isn't registered."
ElseIf rdrMbr.Item("password") <> txtPassword.Value Then
  litErrMsg.Text = "Password not matched."
ElseIf Not rdrMbr.Item("confirmed") Then
  litErrMsg.Text = "E-Mail Address '" & _
                  txtMemberid.Value & "' is unconfirmed."
End If
If none of the preceding error conditions are true, indicate that the logon attempt is valid by setting the booLoginOk variable you defined in step 2 to True. The new code appears in blue:
If Not rdrMbr.Read Then
  litErrMsg.Text = "E-Mail Address '" & _
                  txtMemberid.Value & "' isn't registered."
ElseIf rdrMbr.Item("password") <> txtPassword.Value Then
  litErrMsg.Text = "Password not matched."
ElseIf Not rdrMbr.Item("confirmed") Then
  litErrMsg.Text = "E-Mail Address '" & _
                  txtMemberid.Value & "' is unconfirmed."
Else
  booLoginOk = True
End If
Close the data reader, dispose of the command object, and close the database connection. To do this, code the following statements after the End If statement in the previous step:
rdrMbr.Close
cmdMbr.Dispose
conClasf.Close
If step 10 set the booLoginOk variable to True, call the FormsAuthentication.RedirectFromLoginPage method, specifying the value in the txtMemberid box as the username and False to skip creation of a persistent cookie. This code goes after the three statements you entered in step 11:
If booLoginOk Then
  FormsAuthentication.RedirectFromLoginPage( _
      txtMemberid.Value, False)
End If
Save the page in the ch11 folder, giving it the name login.aspx.
Clicking an ID number in the ads.aspx page should now display the login.aspx page. If you enter a valid memberid and password (such as [email protected] and fickle) and then click Login, ASP.NET should run the ad-dtl.aspx page and display the ad you requested.
This completes all the procedure steps for this exercise. Here’s the complete code listing for the login.aspx page:
<%@ Page Language="vb" Debug="true" Explicit="True"%>
<%@ Register TagPrefix="webdbpgm" TagName="banner"
             src="banner.ascx" %>
<%@ Import Namespace="System.Data" %>
<%@ Import NameSpace="System.Data.OleDb" %>
<script runat="server">
Public Sub btnLogin_Click(sender as Object, e as EventArgs)
  Dim conClasf As OleDbConnection
  Dim cmdMbr As OleDbCommand
  Dim rdrMbr As OleDbDataReader
  Dim strSQL As String
  Dim booLoginOk As Boolean = False

  If Not Page.IsPostBack Then
    Exit Sub
  End If
  If Not Page.IsValid Then
    Exit Sub
  End If
  conClasf = New OleDbConnection(Session("conClasf"))
  conClasf.Open
  strSQL = "SELECT * " & _
             "FROM members " & _
            "WHERE memberid = '" & txtMemberid.Value & "' "
  cmdMbr = New OleDbCommand(strSQL, conClasf)
  rdrMbr = cmdMbr.ExecuteReader
  If Not rdrMbr.Read Then
    litErrMsg.Text = "E-Mail Address '" & _
                    txtMemberid.Value & "' isn't registered."
  ElseIf rdrMbr.Item("password") <> txtPassword.Value Then
   litErrMsg.Text = "Password not matched."
  ElseIf Not rdrMbr.Item("confirmed") Then
    litErrMsg.Text = "E-Mail Address '" & _
                   txtMemberid.Value & "' is unconfirmed."
  Else
    booLoginOk = True
  End If
  rdrMbr.Close
  cmdMbr.Dispose
  conClasf.Close
  If booLoginOk Then
    FormsAuthentication.RedirectFromLoginPage( _
        txtMemberid.Value,False)
  End If
End Sub
</script>
<html>
<head>
<title>Login Page</title>
<link rel="stylesheet" type="text/css" href="normal.css">
</head>
<body>
<webdbpgm:banner runat="server" />
<form method="post" runat="server">
<table border="1" cellspacing="2"
       bordercolor="#000000"  bordercolorlight="#999999"
       bordercolordark="#666666" bgcolor="#CCCCCC">
  <tr>
    <td>
    <table border="0" cellpadding="0" cellspacing="4">
      <tr>
        <td>E-Mail Address:</td>
        <td><input type="text" id="txtMemberid"
                   size="30" runat="server" /></td>
      </tr>
      <tr>
        <td>Password::</td>
        <td><input type="text" id="txtPassword"
                   size="15" runat="server" /></td>
      </tr>
    </table>
    </td>
  </tr>
  <tr>
    <td align="center">
<input type="submit" id="btnLogin" value="Login"
       onServerClick="btnLogin_Click" runat="server"/></td>
  </tr>
</table>
<asp:RequiredFieldValidator id="valMemberid"
     ControlToValidate="txtMemberid"
     Display="Dynamic" CssClass="err" runat="server">
You must enter an E-Mail Address.
</asp:RequiredFieldValidator>
<asp:RequiredFieldValidator id="valPassword"
     ControlToValidate="txtPassword"
     Display="Dynamic" CssClass="err" runat="server">
You must enter a Password.
</asp:RequiredFieldValidator>
<p class=err><asp:literal id="litErrMsg"
                  EnableViewState="False"
                  runat="server" /></p>
</form>
</body>
</html>
As a matter of interest, each of the following expressions will display the username of the current visitor (provided, of course, that the visitor has logged in.) In the case of forms-based authentication, this is the first argument you specified when you called the FormsAuthentication.RedirectFromLoginPage method.
Request.ServerVariables("AUTH_USER")
Request.ServerVariables("LOGON_USER")
Request.ServerVariables("REMOTE_USER")
Page.User.Identity.Name
Any ASP.NET page in your application that needs the Web visitor’s identity can get it from any of these sources. Of course, the identity will be available only if the visitor has logged on. You can ensure that this has occurred by placing the Web page in a folder that requires authentication.
The default.aspx page in the ch11 folder you installed from the companion CD contains some very simple code that displays these values, as depicted in the following figure. To view the code, open the copy you installed from the companion CD.

The banner.ascx file in this folder also contains a hyperlink to the application’s home page. The code that does this is quite ordinary, but if you wish to examine it, just open the file in your favorite text editor.
This chapter first explained how to use the Session and Application objects for storing temporary data about visitors and entire applications. A step-by-step procedure then showed how to use the Session object to store the connection string for an Access database and the host name from a reverse DNS lookup.
The chapter continued by explaining how ASP.NET can restrict all or part of an application to visitors willing to identify themselves. Step-by-step instructions explained how to protect an application folder named reg and how to create a logon page that validates visitors’ identities against the members table of the classified.mdb database.
The next chapter will explain how to write ASP.NET pages that update databases. The examples will include a page that visitors can use to self-register and another that registered visitors can use to enter an ad.