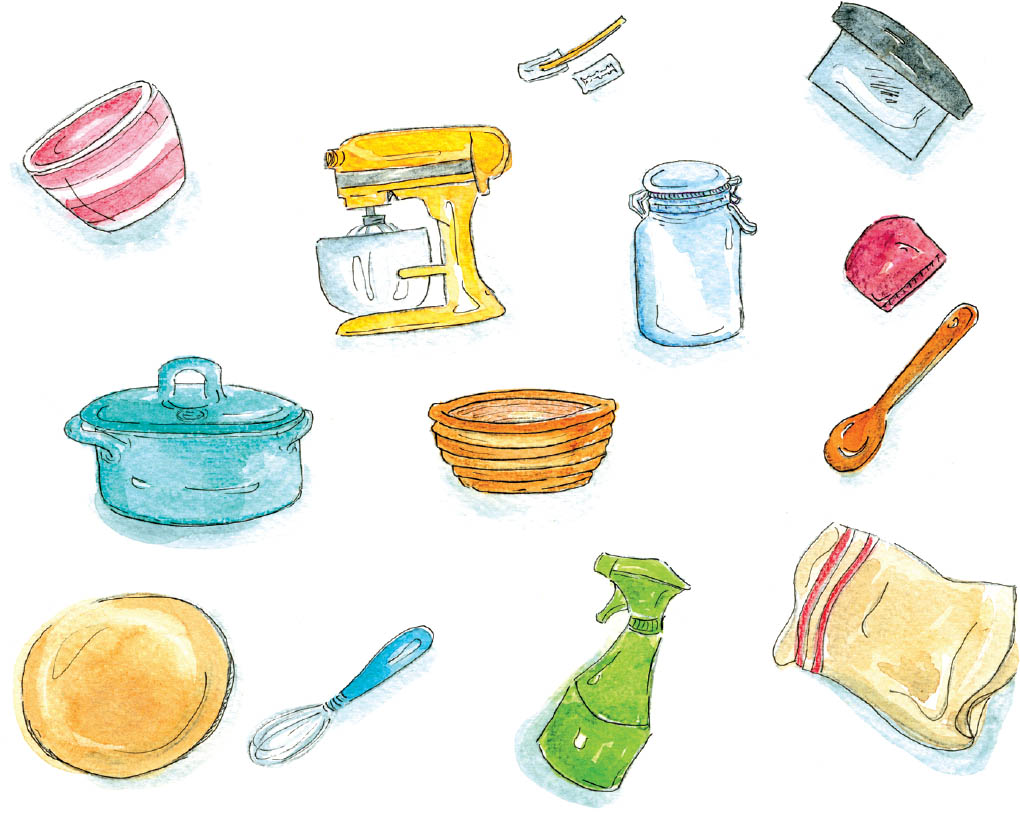
ELECTRIC SCALE
This may seem obvious: a kitchen scale is essential. You can make bread, even great bread, by relying only on the texture of your batter, but that is often a challenge for a beginner. Using a scale is even more important when you are starting and maintaining a wild yeast starter culture. The recipes in this book are based on a starter that has been hydrated to 100%, which means that it contains the same quantity of water as it does of flour. Because you will need to adhere to this ratio for the recipe to succeed properly, the recipes in this book list the ratios for all ingredients, including the liquid ingredients, in grams. Always begin by weighing all of the ingredients, because even though you can use spoon measurements for some optional fillings, it is important to weigh the main ingredients of the recipe, which are flour, water, salt, and the wild yeast starter.
JARS
To start and maintain a wild yeast starter, you will need at least one jar with a lid, ideally one made out of glass. Failing that, a plastic jar with a lid will work too. I recommend that you only use transparent containers, which will allow you to observe the starter and to monitor its activity more easily. Also note that while you will be able to use small containers like jam jars when you are first establishing a starter, as the days go by it will be harder to make do with those, because the starter may well start to overflow.
BOWLS
When it's time to refresh, or “feed,” the starter, a small bowl will allow you to mix the ingredients directly and ensure that the mixture is well aerated before you transfer it into a jar. When you are preparing the bread dough itself and combining all of the ingredients, you will have to use a large bowl.
Although some people prefer to mix their ingredients right on their work surface, I personally do not find that very practical, especially when the dough is very sticky or the work surface small. You can use the food processor bowl; otherwise, a large salad bowl will do the job. Some containers even come with their own fitted lid, which is very convenient and means that you will not have to use plastic wrap.

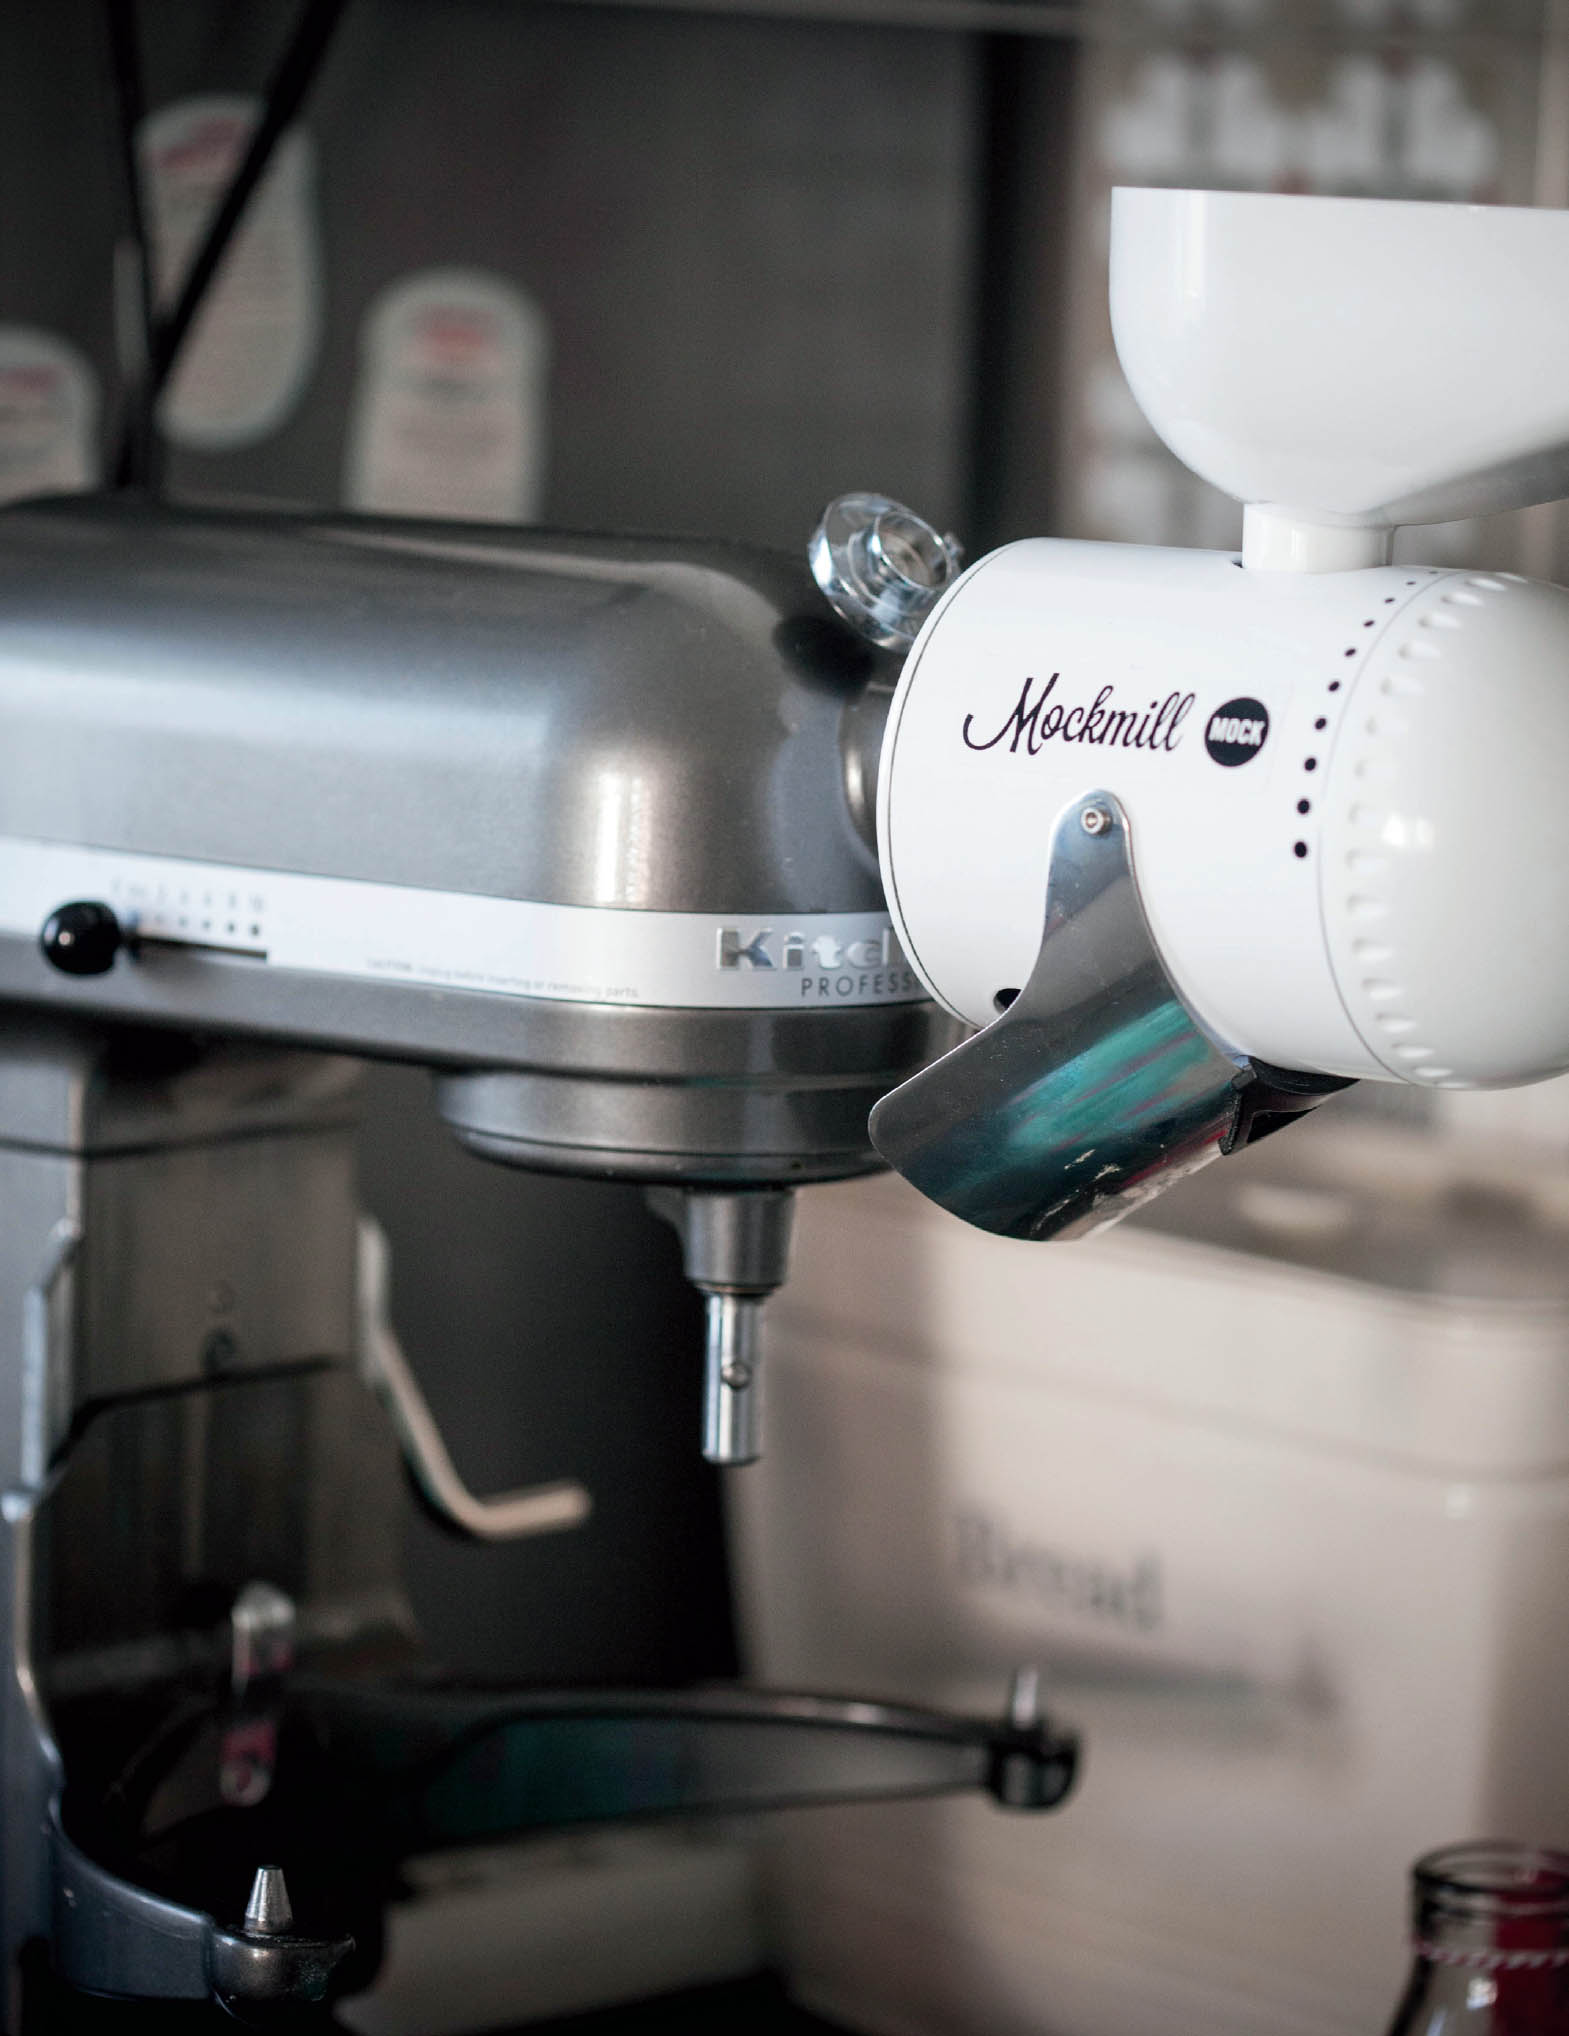
DOUGH MIXER
Using an electric dough mixer can save you an enormous amount of time and energy, but when you are just starting, I strongly recommend that you knead the dough by hand in order to feel it and become familiar with it. Different kinds of flour and different levels of hydration will result in different textures for your dough, and the best way to judge that is to touch the dough, stretch it, and fold it. You do all of these things with your fingers, and no utensil is more sensitive or efficient than your own hands. You will find a simple kneading method on page 51 is just the first page of the chapter, not the kneading method. Just giving the chapter should be enough. “Dough: The Key Steps.”
Once you have familiarized yourself with the texture and appearance of the dough that you want to make, it will be easier in the future to knead the dough using an electric dough mixer, which is, in fact, an extraordinary tool, especially for very wet and sticky dough.
The recipes in this book can be made using only the dough mixer (for myself, I use a KitchenAid with a hook attachment). I don't give any specific kneading times because I think that is too abstract for a home baker. I believe that it is more appropriate to learn to observe the dough throughout the process of kneading, especially when the dough has been prepared by hand ahead of time.
Safety
During the kneading, you will often have to stop the machine in order to scrape the edges of the bowl so that the ingredients can fall back into the center and the hook can reach them all. Watch out for your fingers; never do this while the machine is running!
AIRTIGHT JARS OR BOXES
A plastic or glass storage box with an airtight lid can replace the bowl during the fermentation stage. This is very convenient when you need to allow the dough to rest in a cool place for a few hours; it takes up less space and will make it easy for you to make folds in the dough (see chapter 4) while monitoring the dough's increase in volume.

BANNETONS
(PROOFING BASKETS)
Banneton, or proofing basket, is what we call the basket used in the last phase of fermentation, the proofing (see chapter 4), right before the bread is baked. Originally made out of wicker, they can also be found in plastic, in different shapes and sizes. Some of them are covered with linen fabric to make it easier to remove the dough.
These baskets are handy for maintaining the shape of the dough, but if you don't have one, a small basket or a bowl covered with a floured dishcloth will work as well. Ideally, the banneton should be floured with rice flour, which makes things a lot easier and avoids unpleasant surprises when you unmold the dough before baking, especially for a high hydration dough.
BAKER’S COUCHE
Some kinds of bread, like baguettes, are set out to ferment during the proofing stage on floured linen baker's couche cloth. It is a good idea to brush it regularly. You can also use thick, floured dishcloths.
BAKING DISHES
After trying out several different ways of baking my bread at home in my kitchen oven, I quickly realized that the best way to achieve uniform baking with a good amount of steam was to use a baking dish (such as a Dutch oven, a bread cloche, or a casserole dish). The advantage is that you don't have to worry about the steam, and you can put the bread straight into the oven (after having made sure to preheat the baking dish and its lid).
There are various kinds of baking dishes, including the legendary Le Creuset. For bread cloches, there is a much narrower range of choices. The only real drawback of using a baking dish is that the bread has to be shaped in such a way that it can be baked in it. For more unusual shapes, you will have to use a different baking method, such as a baking stone.
BAKING STONE OR PIZZA STONE
A baking stone, or pizza stone, is an excellent basis for baking breads like baguette, ciabatta, and, of course, pizza at home. These stones are available in a variety of sizes, shapes, and thicknesses, and sometimes come with peels that allow you to easily transfer the dough to the stone. You will need to make sure, before you buy one, that the size of the stone matches the width of your oven, especially for rectangular models. Note that the stone must be preheated at the same time as the oven, usually about 45 to 60 minutes before you start baking the bread. To make it easier, turn the loaf directly out of the baking dish onto parchment paper and then slide it onto the stone using the peel or a plate or tray.
PASTRY CUTTER OR DOUGH SCRAPER
A dough cutter is an essential tool for making bread, and even more so when you are working with a dough that is a little bit sticky. I use the dough cutter to detail the dough, to pre-shape it, to transfer the dough into the baking dish, and to scrape and clean my work surface. It's really very handy! But if you don't have one, a good knife will allow you to cut the dough just as easily.
A rigid dough scraper (a plastic half-moon-shaped scraper) is also very useful for scraping the sides of the bowl, especially during kneading. You can also use it with some doughs that are highly hydrated for making folds. If you don't have a dough scraper, a large silicone spatula can also work.
BREAD SCORER OR BLADE
A bread scorer, which looks a lot like a scalpel, allows you to make incisions and to easily score your loaf before putting it in the oven. There are several different models of scorers, from the most basic to the most sophisticated. You can even use a razor blade mounted on a wooden handle or a very sharp small knife. Always remember to protect the blade when you put it away!
SPRAY BOTTLE OR LAVA ROCKS
Unlike what can be done in a professional baker's oven, you can't inject steam into a regular kitchen oven. However, there are a few different things you can do to create a favorable environment for your baking. For example, a little spray bottle filled with water is perfect for breads baked on a baking stone, although there is the issue that you have to open the hot oven to spray.
Another method is to use lava rocks, which are readily available from online stores or stores selling barbecue equipment. Just put a few of them into a dish that you put in the oven, preheating them at the same time as the baking stone, and pour boiling water over them when you put the bread in the oven. They will then release steam, and you will not have to open the oven again in the first few minutes of baking.
If you use a baking dish, this is not something you have to worry about.