
Chapter 6: Cryptography and the Penetration Tester
Julius Caesar is known to have used encryption – a method known today as Caesar’s cipher. You may think the cipher of one of history’s most well-known military generals would be a fine example of security, but the method – a simple alphabet shift substitution cipher – is probably the easiest kind of code to break. It’s said that it was considered secure in his time because most of the people who may have intercepted his messages couldn’t read. Now that you have a fun tidbit of history, let’s be reminded that cryptography has come a very long way since then, and your pen testing clients will not be using Caesar’s cipher.
Cryptography is a funny topic in penetration testing: it’s such a fundamental part of the entire science of information security but is also often neglected in security testing. We’ve explored avoiding the task of attacking encryption by finding ways to trick an application into sending plaintext data, but such attacks are not compromises of an encryption algorithm. In this chapter, we’re going to take a look at a few examples of direct attacks against cryptographic implementations. We are going to cover the following topics:
- Bit-flipping attacks against cipher block chaining algorithms
- Sneaking in malicious requests by calculating a hash that will pass verification; we’ll see how cryptographic padding helps us
- Padding oracle attacks; as the name suggests, we will continue to look at the padding concept
- How to install a powerful web server stack
- Installing two deliberately vulnerable web applications for testing in your home lab
Technical requirements
For this chapter, you will need the following:
- Kali Linux running on a laptop
- The XAMPP web server stack software
- The Mutillidae II vulnerable web application
Flipping the bit – integrity attacks against CBC algorithms
When we consider attacks against cryptographic ciphers, we usually think about those attacks against the cipher itself that allow us to break the code and recover the plaintext. It’s important to remember that the message can be attacked, even when the cipher remains unbroken and the full message is unknown. Let’s consider a quick example with a plain stream cipher. Instead of XOR bits, we’ll just use decimal digits and modular arithmetic.
XOR is the exclusive or operation. It simply compares two inputs and returns true if they are different. Of course, with binary, the inputs are either true (1) or false (0), so if the inputs are both 1 or both 0, the result will be 0.
We’ll make our message MEET AT NOON while using 01 for A, 02 for B, and so on. Our key will be 48562879825463728830:
13050520012014151514
+ 48562879825463728830
--------------------
51512399837477879344
Now, let’s suppose we can’t crack the algorithm, but we can intercept the encrypted message in transit and flip some digits around. Using that same key, throwing in some random numbers would just result in nonsense when we decrypt. But let’s just change a few of the final digits – now, our key is 51512399837469870948 and suddenly, the plaintext becomes MEET AT FOUR. We didn’t attack the algorithm; we attacked the message and caused someone some trouble. Now, this is a very rough example designed to illustrate the concept of attacking messages. Now that we’ve had some fun with modular arithmetic, let’s dive into the more complex stuff.
Block ciphers and modes of operation
In our fun little example, we were working with a stream cipher; data is encrypted one bit at a time until it’s done. This is in contrast to a block cipher, which, as the name suggests, encrypts data in fixed-length blocks. From a security standpoint, this concept implies that secure encryption can easily be achieved for a single block of data; you could have high-entropy key material that’s the same length as the block. But our plaintext is never that short; the data is split into multiple blocks. How we repeatedly encrypt block after block and link everything together is called a mode of operation. As you can imagine, the design of a block cipher’s mode of operation is where security is made and broken.
Let’s look at probably the simplest (I prefer the word medieval) block cipher mode of operation, called Electronic Codebook (ECB) mode, so named because it’s inspired by the good old-fashioned literal codebook of wartime encryption efforts – you encrypt and decrypt blocks of text without using any of that information to influence other blocks. This would probably work just fine if you were encrypting random data, but who’s doing that? No one; human-composed messages have patterns in them. Now, we’ll provide a demonstration with openssl and xxd on Kali, which is a nice way to encrypt something and look at the actual result. I’m going to tell the world that I’m an elite hacker and I’m going to repeat the message over and over again – you know, for emphasis. I’ll encrypt it with AES-128 operating in ECB mode and then dump the result with xxd:

Figure 6.1 – AES in ECB mode
Oh, nice. At first glance, I see just a bunch of random-looking hexadecimal characters jumbled together. A solid encrypted message should be indistinguishable from random data, so my work here is done. But, hark! Upon closer inspection, a very long string of characters repeats throughout:

Figure 6.2 – A hex dump reveals a pattern
You may look at this and think – So what? You still don’t know what the message is. In the realm of cryptanalysis, this is a major breakthrough. A simple rule of thumb about good encryption is that the ciphertext should have no relationship whatsoever with the plaintext. In this case, we already know something is repeating. The effort to attack the message is already underway.
Introducing block chaining
With ECB, we were at the mercy of our plaintext because each block has its own thing going on. Enter cipher block chaining (CBC), where we encrypt a block just like before – except before we encrypt the next block, we XOR the plaintext of the next block with the encrypted output of the previous block, creating a logical chain of blocks. I know what the hacker in you is thinking now: if we XOR the plaintext block with the encrypted output of the previous block, what’s the XOR input for the first block? Nothing gets past you. Yes, we need an initial value – appropriately called the initialization vector (IV):

Figure 6.3 – Cipher block chaining in action
The concept of an IV reminds me of when clients ask me, what do you think of those password vault apps? I tell them, they’re pretty great if you need help remembering passwords, and certainly better than using the same password for everything – but I just can’t shake that creepy feeling I get about the whole kit and caboodle depending on that one initial password. With CBC, security is highly reliant on that IV.
Setting up your bit-flipping lab
With a tiny bit of background out of the way, let’s dive in. We’re going to attack a web application to pull off the bit-flipping attack. What’s nice about this hands-on demonstration is that you’ll be left with a powerful web app hacking lab for your continued study. I bet some of you have worked with the famous Damn Vulnerable Web App (DVWA) before, but recently, I’ve found myself turning to the OWASP project Mutillidae II. I like to host Mutillidae II on the XAMPP server stack as its initial setup is fast and easy, and it’s a powerful combination; however, if you’re comfortable loading it into whatever web server solution you have, go for it.
If you’re following my lab, then first, download the XAMPP installer, chmod it to make it executable, and then run the installer. You can go to www.apachefriends.org/download.html to find both current and earlier versions:
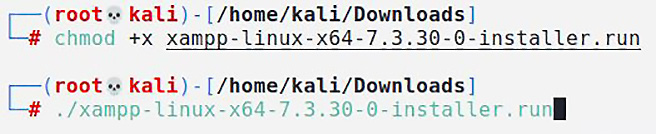
Figure 6.4 – Installing XAMPP
Once this has been installed, you can find /opt/lampp on your system. Next, we must use git to grab the Mutillidae II project from GitHub. We want everything in /opt/lampp/htdocs, so you can run the git clone command there or just use mv once you’ve grabbed everything:

Figure 6.5 – Installing Mutillidae II
We’re almost there, but there’s just one tweak we need to make before we get started. By default, no password is set for the root user in MySQL, but Mutillidae’s default configuration will try mutillidae as the password. It’s easier to just make the database configuration agree. So, find the database configuration and open it with nano (or your favorite editor) with the nano /opt/lampp/htdocs/includes/database-config.inc command, find the line where DB_PASSWORD is defined, and erase mutillidae so that the value is null:

Figure 6.6 – Configuring the database
At long last, we can start up XAMPP. Run ./lampp start, grab a browser, and head on over to localhost:

Figure 6.7 – Starting up XAMPP
When you first visit the page, you’ll probably see an error that says your database server is offline. The very first option below this error is a link that says, Click here to attempt to set up the database. Click that link, click OK, and the Mutillidae home page will load. Once you reach the home page, you must make some final tweaks: click Toggle Security so that you can enable client-side security, click Toggle Hints (when the option is visible) to disable hints, and then click Enforce TLS so that we can work with a more realistic target environment. (Keep in mind that your browser will warn you about the self-signed certificate; accept the risk and continue.) Now, take a breath and grab some coffee – we can start playing with our new toy.
Manipulating the IV to generate predictable results
Navigate to OWASP 2017 on the left, then Injection | Other, and then CBC Bit Flipping. So, let’s get acquainted. Here, we’re currently running with User ID 174 with Group ID 235. We need to be user 000 in group 000 to become the almighty root user. The site is protected with SSL, so intercepting the traffic in transit would be a bit of a pain. What else do you notice about this site?
How about the URL itself? That is, https://127.0.0.1/index.php?page=view-user-privilege-level.php&iv=6bc24fc1ab650b25b4114e93a98f1eba.
Oh my – it’s an IV field, right there for the taking. We’ve seen how the IV is XOR with the plaintext before encryption to create the encrypted block, so manipulating the IV would necessarily change the encrypted output. First, let’s take a look at the IV itself: 6bc24fc1ab650b25b4114e93a98f1eba. We know that it’s hexadecimal and it’s 32 characters long; thus, the length is 128 bits.
Remember when we experimented with CBC encryption with openssl? We used AES, which always has a 128-bit block size. Considering our IV is 128 bits long, the application may be AES-encrypting a single block of data, which would make it the first (and only) block, so CBC requires an IV. Remember that any plaintext block that’s shorter than the algorithm’s block size must be padded. Note what happens to the user data when you try changing the bytes at the end of the IV.
We can sit here analyzing all day but by now, you’ve probably figured out I like breaking things, so let’s modify the IV in the URL, submit it, and see if anything happens. I’m changing the initial character into a zero, making the IV 0bc24fc1ab650b25b4114e93a98f1eba:

Figure 6.8 – Tweaking the IV
Our IDs didn’t change, but check out what happened to the Application ID value. Now, it’s !1B2. It used to be A1B2. What if I change the first two hexadecimal digits to zeros? Our Application ID is now *1B2. If I change the first three, then the next character in the Application ID value falls apart because the resulting binary doesn’t have an ASCII representation. Now, we know that the first two hexadecimal characters in the IV (8 bits) modify the first ASCII character in the Application ID value (8 bits). This is a breakthrough that pretty much translates into the final stretch to privilege escalation because we’ve just established a direct relationship between the plaintext and the IV, which means we can figure out the ciphertext. And when we know two of the three, in any order, we can calculate the third by using simple binary XOR math. Now, we haven’t found the hexadecimal digits where the User ID and Group ID values can be manipulated just yet, but let’s take a quick break to see if we can figure out this relationship based on what we have so far.
We saw the Application ID value change from A to ! to *. Thus, the ID is represented in ASCII, the most common modern standard for character encoding. What’s important to us here is that a single ASCII character is 8 bits (1 byte) long. Hexadecimal, on the other hand, is simply a base 16 numeral system. We see hexadecimal everywhere in the gritty underbelly of computing because 16 is a power of 2, which means converting from base 2 (that is, binary) to base 16 is easy as pie. (How is pie easy? Never mind, I digress.) 2 to the power of 4 equals 16, which means a hexadecimal digit is 4 bits long. Now, let’s get back to our lab:

Do you see our golden ticket yet? Well, let’s XOR the binary IV values with the known binary ASCII result in the Application ID value. If they match, then we have the value that was XORed with the IV values to generate the Application ID value. Remember, if we know two out of three, we know the third.
First, let’s look at the original IV:
- Hexadecimal 6b: 0110 1011
- ASCII A: 0100 0001
- XOR result: 0010 1010
Now, let’s look at our test manipulated IV:
- Hexadecimal 00: 0000 0000
- ASCII *: 0010 1010
- XOR result: 0010 1010
And that, my friends, is why they call it bit-flipping. We figured out that the application is taking this byte of the IV and XORing it with 0010 1010 during decryption. Let’s test our theory by calculating what we’ll get if we replace the first two hexadecimal digits with, say, 45:
- Hexadecimal 45: 0100 0101
- Ciphertext XOR: 0010 1010
- Binary result: 0110 1111
01101111 encodes to an ASCII o (lowercase O). So let’s test our theory and see if we end up with an Application ID of o1B2:

Figure 6.9 – Confirming our control over the Application ID property
Doesn’t that just get your blood pumping? This is an exciting breakthrough, but we just picked up on some behind-the-scenes mechanisms; we still aren’t root. So, let’s get to work on finding the bits we need to flip.
Flipping to root – privilege escalation via CBC bit-flipping
You probably thought we could just step through hex pair by hex pair until we find the right spot and flip our way to victory. Not exactly.
The way the User ID and Group ID values are encoded is a little funky, and there’s a different piece of ciphertext being XORed against when we work our way down the IV. So, at this point, it’s pure trial and error while relying on the hints we’ve already gathered. As I worked this one out, I took some notes:

Figure 6.10 – A chart to link ciphertext to ID output
It’s a little tedious, but I only needed to play with a few characters to understand what’s going on here. I discovered two main points:
- Though each position is 8 bits, only modifying the final 4 bits would change the User ID/Group ID value in that position. For example, I noted that when I replaced the two hexadecimal characters in a position with 00, the result broke (that is, the resulting binary value isn’t ASCII-friendly).
- I go and do the XOR calculation on the trailing 4 bits of each byte to find the key that I need and discover the value isn’t the same for all positions.
The hacker in you was already expecting unique XOR values for each character, right? The stream of bits that’s being XORed with the IV wouldn’t be a byte-long repeating pattern. The effort to discover these values pays off, though, because all we have to do now is calculate the XOR for each position: if we XOR the hexadecimal character in the IV with the hexadecimal of the User ID/Group ID value in that position, the result will be the enciphered bits at that position. And since we’re looking for all zeroes, the result for each position is the binary equivalent of the hexadecimal character we need to put in the IV instead of the original.
Let’s translate that conclusion with an example from the IV: position 09 is b4, which corresponds to the middle digit in the Group ID value, which is 3. Hexadecimal 4 in binary is 0100 and hexadecimal 3 is 0011. 0100 XOR 0011 equals 0111. 0111 is the binary equivalent of 7, which means we would replace b4 with b7 to get a 0.
Now, I must repeat this calculation for all six positions and learn what I needed: the byte-long IV positions 05 through 10 correspond to the User ID and Group ID values, respectively, and the final 4 bits of each position need to be replaced with the hexadecimal values of (in order) a2f774 to get root. Position 05 in the original IV was ab, so it becomes aa; position 06 was 65, so it becomes 62; and so on.
Thus, the IV from the 5th byte to the 10th changes from ab650b25b411 to aa620f27b714:

Figure 6.11 – Correlating IV byte position with the IDs
The moment of truth: I am going to change the IV from 6bc24fc1ab650b25b4114e93a98f1eba to 6bc24fc1aa620f27b7144e93a98f1eba:

Figure 6.12 – Full control over the User and Group ID values
Now that we’ve played with encryption, let’s take a look at cryptographic hashes and the clues they leave for us hackers.
Sneaking your data in – hash length extension attacks
As you may recall from our brief introduction to hashes in Chapter 4, Windows Passwords on the Network, hashing isn’t encryption. An encrypted message can be decrypted into a readable message. A cryptographic hash, on the other hand, has no plaintext representation; it cannot be reversed. However, a particular input sent through a particular hashing algorithm will always result in the same hash output (called a one-way function). This makes hashing algorithms useful for integrity checks, as even a slight change to the input produces a radically different hash output. However, let’s consider the fact that a hash’s output is a fixed length, regardless of the message being hashed; for long messages, the hash function is done in rounds on blocks of message data, over and over until the entire message is hashed.
With the result depending on all of the previous inputs, we could – in theory – add blocks to the message, and the data that was used as input to the next round would be the same as if the whole operation had ended on that last block. We’ll leverage that juicy tidbit to attack message authentication mechanisms with hash length extension attacks, with length extension referring to the fact that we’re adding our chosen data to the end of the message.
This is a little more sophisticated than our bit-flipping adventure, so we’re going to introduce the inimitable web application testing framework Burp Suite to give us a bird’s-eye view. Burp Suite is powerful enough for it to be covered in several chapters, but in this demonstration, we’re going to set it up as a local proxy so that we can see and easily manipulate HTTP traffic in transit.
Setting up your hash attack lab
Another great vulnerable web app to have in your repertoire is CryptOMG. If you’re following along with how I did it, it’s the same procedure here – install XAMPP, download and extract the contents of the CryptOMG ZIP file to the htdocs folder, and then run ./lampp start.
In with the Old
Unlike Mutillidae II, CryptOMG isn’t being actively supported anymore and it depends on an older version of PHP. Therefore, you’ll need to dig into the older XAMPP installers on the Apache Friends website. It’s an intentionally vulnerable lab, so this doesn’t affect the details of the underlying vulnerability, which is still surprisingly common in internal assessments against dedicated appliances and home-grown applications.
The attack tool we’ll use for this demonstration, hash_extender, is worth keeping on your Kali installation for future use. Other tools can be used for the task (notably HashPump), but I prefer hash extender’s ease of use and integration into other tasks. The easiest way to get it running on Kali is by installing it with git. Note that we’re also making sure that the SSL development toolkit is installed:
# git clone https://github.com/iagox86/hash_extender
# apt-get update && apt-get install libssl-dev
# cd hash_extender && make
Fire up the tool with no parameters with ./hash_extender and get acquainted.
Understanding SHA-1’s running state and compression function
In our browser window, let’s pick Challenge 5 (gain access to /etc/passwd), change the algorithm to SHA-1, click save, and then click on test.
Well, I don’t see much happening here. But that URL sure looks interesting. Check out the parameters visible to us (and, apparently, under our control): http://127.0.0.1/ctf/challenge5/index.php?algo=sha1&file=test&hash=dd03bd22af3a4a0253a66621bcb 80631556b100e.
Clearly, algo=sha1 is defining the algorithm we selected. But file=test and the hash field should be catching our attention, as they appear to work as a message authentication code mechanism for authorizing access to the file called test. If I modify the hash right now, I will get a File Not Found error. Let’s do a quick review of how this works before we conduct the attack.
In our example, access to the test file is authenticated with the attached hash. You might be thinking, what good is that? All the signature will tell me is that no one modified the name of the file. Well, unless we attach a secret to the message, in which case, we’re hashing the secret + message. Surely, based on what we know about hashes, only the secret + message would produce the correct hash. Hash functions are one-way functions, so it’s impossible to reverse and find the secret. We want to inject our data, so we must perform a directory traversal attack to obtain /etc/passwd; that is, request a file and provide a valid hash to validate the request. This seems impossible on the surface, but we’re missing two crucial mechanisms that are built into the hashing algorithm – padding and initial hash values (also called registers).
SHA-1 is iterative. It takes a message and splits it into 512-bit blocks of data, and then applies a compression function to each block. There are two inputs to each round of the compression function: the 160-bit hash from the previous round, and the next 512-bit block of message data. I can hear you shouting at this book, so, does that mean there’s an initialization vector? Yes, there is. What’s interesting about SHA algorithms is that their initial hash value (IV) is standardized and fixed. In the case of SHA-1, the initial hash value is 67452301efcdab8998badcfe10325476c3d2e1f0. With 3.97 bits of entropy, it’s a good random number (but of course, since it’s standardized, it isn’t random – the entire world knows it). That initial hash value is split into five 32-bit chunks. During the hashing process, the five chunks are stored in registers (H0 to H4). These values are known as the running state. When the whole message has been processed and the final block’s compression function has spat out the final 160-bit running state, that value is the actual SHA-1 hash for the whole message.
Simply put, whenever you see an SHA-1 hash, you’re seeing the final running state for the final 512-bit block of message data. The compression function took the previous running state as one of the inputs, going back to the beginning of the message and the specification-defined initial hash value.
So, why do we care about all these nifty details? The key to how the length extension attack works is that the SHA-1 hash isn’t just the output of the entire operation; it’s the running state at that point in the hashing process. Suppose the hash process were to continue with another block of message data; the running state at the penultimate block would be exactly what we can see here. That running state came from the output of the last compression function, which itself took in the previous running state, and so on – until we’re back at the initial hash value as the 160-bit input and the first block of message data as the 512-bit input, which contains the unknown secret! First, we’ll create a new message with the attacker’s data on the end, plus whatever padding is needed to get us to a 512-bit block. Then, we’ll take the original hash as the running state input to the compression function for the last block so that we end up with a new hash that fundamentally derives from the first secret block. We will never find out what the secret is, and we don’t have to – its DNA is built into the numbers we do have:

Figure 6.13 – The SHA-1 algorithm in action
I know what the hacker in you is saying at this point: since the final block will have padding, we don’t know the length of the padding without knowing the length of the secret; therefore, we can’t slip our data in without knowledge of the secret’s length. True, but elementary, Watson! We will rely on one of the most powerful, dangerous, mind-blowing hacking techniques known to mankind – we’ll just guess. The secret can’t be just any length; it has to fit in the block. This limits our guessing, making this feasible. But let’s make life a little easier by using Burp Suite to send the guesses.
Data injection with the hash length extension attack
Back to our demonstration. You may recall that the name of the file is test. This means that test is the actual data, and thus the 512-bit input to the compression function was made up of a secret, test, and padding. All we need to tell hash extender is the current hash, the original data, the range of byte length guesses for the secret, and the data we want to inject – it will do the rest by spitting out a hash for each guess. Then, we can construct a URL with our attacker data as the filename, as well as our new hash – if we get the length of the secret right, then our hash will pass validation. Let’s check out the command:
# ./hash_extender --data=test --signature=dd03bd22af3a4a0253a66621bcb80631556b100e --append=../../../../../../../etc/passwd --format=sha1 --secret-min=8 --secret-max=50 --table --out-data-format=html > HashAttackLengthGuesses.txt
The following terms were used in the preceding command:
- --data defines the data that’s being validated. In the terminology we’ve been using so far, this would be our message when referring to secret + message. Remember, hash_extender is assuming that we know the data that’s being validated (in this case, the name of the file to be accessed); by definition, we don’t know anything about the secret. The only thing we hope to learn is the length of the secret, but that’s after trial and error.
- --signature is the other part of the known parameters: the hash that we know correctly validates the unmodified message. Remember, we need to provide the running state that would be used as input to our next compression function round.
- --append is the data we’re sneaking in under the door. This is what is going to be retrieved, and what our specially generated attack hash is validating. For our attack, we’re trying to nab the passwd file from etc. We’re using the handy ../../../ to climb out of wherever we are in the filesystem back to /, and then jumping into /etc/passwd. Keep in mind that the number of jumps through parent folders is unknown since it would depend on the specific implementation of this web application, so I’m throwing out a guess for now. I’ll know later if I need to fix it. You don’t need a valid path to find the new hash!
- --format is the hash algorithm. You can know this for a fact, or perhaps you need to guess based on the length of the hash; this may also require some trial and error.
- --secret-min and --secret-max specify the range of secret length guesses in bytes. The individual circumstances of your test may require this to be used very carefully – for example, I’m using a pretty wide range here because I’m in my lab, planning on using Burp Suite and Intruder, and I know the web app doesn’t defend against rapid-fire requests. Some systems may lock you out! You may need to take the results and just punch in URLs manually, like in the good old days.
- --table is going to make our results look pretty by organizing them in a table format.
- --out-data-format is handy for situations where a system is expecting data in, for example, hexadecimal format. In our case, we would like the HTML output as we’re just going to feed this information into web requests.
- Finally, I told Linux to dump the output into a text file.
Go ahead and take a peek at the result. You’ll see it’s a list of hashes lined up with the data we hope to inject; each line will have a different amount of padding as it is associated with a particular guess of the secret length. The wider the range you defined for secret-min and secret-max, the more lines you’ll have here.
Now, I can fire up Burp Suite, which creates a local HTTP proxy on port 8080 by default. When I’m ready to let Burp Suite in on the action, I must configure my browser’s network settings to talk to my proxy at 127.0.0.1:8080. Then, I must click the test link again on the CryptOMG page to create a new GET request to be intercepted by Burp Suite. When I see it, I must right-click on it and send it to Intruder.
Intruder is an aggressive tool for firing off requests with custom parameters that I define – these custom parameters are called payloads. Note that payloads are defined with sectional symbols. Simply highlight the text that you want to substitute with payloads and click the Add button on the right. We already know our algorithm is SHA-1 and we aren’t changing that, so I’ve only defined file= and hash= as payload positions:

Figure 6.14 – Setting payload positions in Burp Suite
Now, we click on the Payloads tab so that we can define what’s going to be placed in those payload positions we just defined. For this part, you’ll need to do a little preparation first. You need two separate lists for each payload position. hash_extender gave us everything we need but in a space-delimited text file. How you separate those columns is up to you (one method is to use spreadsheet software).
I define the payload sets in order of position; for example, since the file= parameter is the first position I will encounter while reading from left to right, I must make the list of attacker data Payload set 1. Then, my list of hashes goes in Payload set 2. Now, the fun can begin – weapons free!

Figure 6.15 – Configuring payload sets
Kick back with a cup of coffee as Intruder fires off GET request after GET request, each one with customized parameters based on our payload definitions. So, what happens if a particular filename and verification hash combination is wrong? We just get a File Not Found error – in HTTP status code terms, a 404. A total of 27 requests later, check out our status column — we received an HTTP 200 code. Bingo – we created a malicious request and had the hash verified. Let’s click the Response tab and revel in the treasures of our find. Uh oh – failed to open stream: no such file or directory? What’s going on here?
One thing we know for sure is the byte length of the secret. Note the number of guesses with the same hash, but only the request succeeded. That’s because finding the hash was only part of the fun – we needed the exact length of the secret. Each item in the Payload1 column is our data with varying padding lengths. Since we defined our exact range, it’s a matter of counting the requests needed to succeed. We’re on the 26th request and started with 8 bytes for a secret length, so the length of the secret is 34 bytes:

Figure 6.16 – Finding our golden ticket
As for the file not found problem, we simply didn’t climb the right number of parent folders to get to /etc/passwd. Despite this, we provided data with the correct padding length and a valid hash, so the system considers us authorized; it’s simply telling us it can’t find what we’re allowed to steal.
Now that we know the length of the secret, we can just go back to manual requests. This part will take good old-fashioned trial and error. I’ll just keep adding jumps until I get there. It won’t take long before I’ve convinced the host to spit out the passwd file:

Figure 6.17 – Capturing the flag
Now, we’re going to look at things a little differently – this time, we’ll look at ciphertext with padding and an authority who helpfully lets us know when the padding is broken. We’ll discover that it’s just a little too much information for the bad guys.
Busting the padding oracle with PadBuster
Secure cryptosystems shouldn’t reveal any plaintext-relevant information about encrypted messages. Oracle attacks are powerful demonstrations of how you don’t need much seemingly meaningless information to end up with a full decrypted message. Our CryptOMG web app provides a challenge that can be defeated by exploiting a padding oracle: a system that gives us information about the validity of padding in a decryption process without revealing the key or message. Let’s start some conversations with our oracle and see what these responses look like.
Interrogating the padding oracle
Let’s load up the CryptOMG main page and select the first challenge (like last time, we’re out to get /etc/passwd). On the test page, there’s nothing of interest in the actual content of the page, so let’s examine the URL: http://127.0.0.1/ctf/challenge1/index.php?cipher=3&encoding=2&c=81c14e504d73a84cc 6279ab62d3259f6e2a2f52dbc5387d57911ee7565c5a829.
Take a look at the c= field. That’s 64 hexadecimal characters (256 bits). It’s safe to say that we’re dealing with some sort of ciphertext. Again, in the spirit of just breaking things to see what happens, let’s flip some bits around.
First, let’s modify some bits at the beginning of the string and resubmit the request:

Figure 6.18 – Tweaking bits but no server error
This is interesting because this error suggests the decryption was successful. The server is telling us that it decrypted a request for a file; the problem is that the file doesn’t exist. The fact that the server is telling us this means it understood our request – and this is despite not knowing the encrypted message.
Now, let’s try modifying some bits around the trailing half of the 256-bit encrypted value and resubmit it:

Figure 6.19 – Padding oracle telling us we broke the padding
We’ve all had that one friend who just talks too much and ends up giving away too much information. In this case, our friend is an oracle – a system that inadvertently reveals information that’s useful in an attack, even though the information itself is supposed to be meaningless. We’ve just learned that there is padding in this message, making it a block cipher; let’s assume AES in CBC mode. And, most importantly, we know that the target is functioning as a padding oracle, letting us know the validity status of the padding in the encrypted message.
Let’s bust out PadBuster to attack the padding oracle in this demonstration. Once we’ve nabbed our passwd file, we can take a look at what happened behind the scenes.
Decrypting a CBC block with PadBuster
First, we need to install PadBuster:
# apt install padbuster
If you run PadBuster with no parameters, you’ll get a help screen that gives you its simple usage requirements: you just need that URL, the encrypted block of data itself, and the block size (in bytes). Since we’re assuming AES, the block size would be 128 bits (128 / 8 = 16 bytes):
# padbuster "http://127.0.0.1/ctf/challenge1/index.php?cipher=
3&encoding=2&c=81c14e504d73a84cc6279ab62d3259f6e2a2f52dbc5387d
57911ee7565c5a829" 81c14e504d73a84cc6279ab62d3259f6e2a2f52dbc
5387d57911ee7565c5a829 16 -noiv -encoding 1
Don’t worry about the fact that the encrypted message here doesn’t match the one in your lab; it changes with every session. The basic usage format is padbuster "[url]" [message] [block size] but we’ve added two options to the end:
- -noiv is specifying that there is no IV known to us; it isn’t in the URL like in our previous demonstration, so we’re roughing it without it as it will be derived from the first [block size] bytes.
- -encoding 1 is important since we’re letting PadBuster know to use lower hexadecimal (lowercase letters) encoding.
When we execute the command, PadBuster has a chat with the oracle. A table is shown to us with response signatures based on the oracle’s answers. PadBuster will recommend one for you, but we already saw a 500 status code when we tampered with the padding, so that’s what we should pick here:

Figure 6.20 – Response analysis in PadBuster
PadBuster then gets to work decrypting based on the information it gathered. After about 10 seconds, we will get our decrypted result: some random ASCII characters, a pipe symbol, and the file path. Now that we know how the message is formatted, we’re going to reverse the process to generate an encrypted message with our request in it:

Figure 6.21 – Decrypted data in different formats
We’re just going back and using the same command but with the plaintext flag at the end. That’s it. PadBuster makes this too simple:
# padbuster "http://127.0.0.1/ctf/challenge1/?&c= 81c14e504d73a84cc6279ab62d3259f6e2a2f52dbc5387d57911ee7565c
5a829" 81c14e504d73a84cc6279ab62d3259f6e2a2f52dbc5387d
57911ee7565c5a829 16 -noiv -encoding 1 -plaintext "lFA5\C84VQE_T|../../../../../../../../../etc/passwd"
This will spit out an encrypted value. Now, we merely need to replace the c= value in the URL with the following string:

Figure 6.22 – The encrypted value we need to send
Now, we can drop that in the URL and hit Enter, and voila – the server understood our request:

Figure 6.23 – Captured flag
So, how did PadBuster pull off this magical feat? Let’s take a look at the standards behind padding in encryption.
Behind the scenes of the oracle padding attack
PadBuster speaks the language of padding. That’s just a poetic way of saying that padding is not arbitrary; it follows a standard and PadBuster creates requests accordingly. The padding that we encounter in the operation of CBC mode ciphers is called PKCS#5/PKCS#7 padding.
That initialism isn’t as scary as it looks; it just means Public Key Cryptography Standards, a family of standards that started as descriptions of proprietary technology in the 1990s. #5 and #7 refer to the fifth and seventh of those standards, respectively. They describe more than padding, but the particular method of padding that’s relevant here comes from these standards. We’re using both interchangeably here because the only difference between #5 and #7 is that #7 defines block sizes of 8 or 16 bytes (64 bits and 128 bites); #5 only defines block sizes of 8 bytes/64 bits.
The concept is pretty simple. As we know, the heart of a block cipher is its fixed-length block of data. Of course, messages that need to be encrypted are not of a fixed length; they may be as short as Hello, World! or as long as the Zimmermann Telegram. This is where padding comes in. PKCS#5/PKCS#7 uses padding bytes, which are nothing more than a hexadecimal number. The number is equal to the number of padding bytes. For example, if there are five padding bytes, they’ll all be 0x05. If a message happens to be evenly divisible by the block size, then an additional block of nothing but padding bytes (the value of which is, by definition, equal to the block size in bytes) is appended to the message. The purpose of this is to provide the error-checking mechanism inherent to this design. So, if I come along and decrypt a message only to find five padding bytes with the value 0x07, then guess what prophecy this wise oracle is telling me? A padding error.
Thus, the oracle can tell us one of three things when we pass encrypted data to the target:
- The encrypted data was padded correctly and contains valid server data once decrypted. This is a completely normal operation. The server responds with HTTP 200 OK.
- The encrypted data was padded correctly and contains invalid server data once decrypted. This is just like sending something unexpected to a server without encryption, such as a file request for a non-existent file. This is technically an HTTP 200, but typically with a custom error (for example, File Not Found).
- The encrypted data was padded incorrectly, which breaks the decryption process, so nothing gets passed to the server. This causes a cryptographic exception and the response is an HTTP 500 Internal Server Error.
This is half of the recipe for compromise. The other half is the concept we introduced at the beginning of this chapter: when you know two out of three binary values that have an XOR relationship to each other, you can easily find out what the missing field is. So, we must tweak the enciphered bits and repeatedly submit our modified requests, chatting with the oracle for state feedback, until we stop breaking decryption and the oracle tells us the padding looks good. With the oracle confirming the correct padding, this attack becomes a form of known-plaintext cryptanalysis, allowing us to decrypt the message.
Recall that block ciphers have an IV to serve as the last block to start the block-chaining process; in these attacks, the IV is not always known to the attacker and, indeed, in our lab, none have been defined for us. PadBuster can work with this via the -noiv flag and thus uses the first bytes as an IV; the number of bytes used as an IV is defined in the block size parameter. We also know that CBC mode ciphers XOR the intermediary bits (that is, the bits after the encryption process) with the corresponding bits from the previous block (block chaining), so once decryption has begun, PadBuster works backward.
Summary
In this chapter, we explored some basic cryptography attacks. We started with cipher block chaining bit-flipping and learned how to modify the initialization vector predictably. Then, we leveraged this information to compromise the lab server. Here, we explored hash length extension attacks by exploiting flaws in message verification methods. We did this by leveraging the core compression functionality of the hash algorithm to produce an attacking hash that will pass verification. To prepare for this demonstration, we installed a powerful web and database server stack on Kali to host a vulnerable web app for legal study and testing in our home lab. We exploited the same lab environment in the final section on padding oracle attacks, which built upon the core knowledge that was introduced earlier in this book.
With some cryptography basics out of the way in this chapter, we’ll jump back into the cockpit of Metasploit as we look at more advanced strategies.
Questions
Answer the following questions to test your knowledge of this chapter:
- Calculate the output of this exclusive or operation: 001011100101010 ⊕ 1111000110100101.
- ECB in 3DES-128-ECB stands for __________.
- _______ is employed to ensure the message is divisible by the algorithm’s block length.
- PadBuster needs upper hexadecimal numbers defined with the _________ flag.
- How many payload sets would you need to define for Burp Suite’s Intruder if the attack packet has four payload positions?
- The SHA-1 compression function takes ______-bit and _____-bit inputs.
- The padding oracle attack gets its name from a 1994 flaw in Oracle 7.2. (True | False)