
When working with network applications, it comes in handy to be able to see open ports and connections and to be able to interact with ports on different hosts for testing purposes. In this section, we will be looking at some basic commands for networking and in what situations they might come in handy.
The first command is netstat:
netstat -plnt
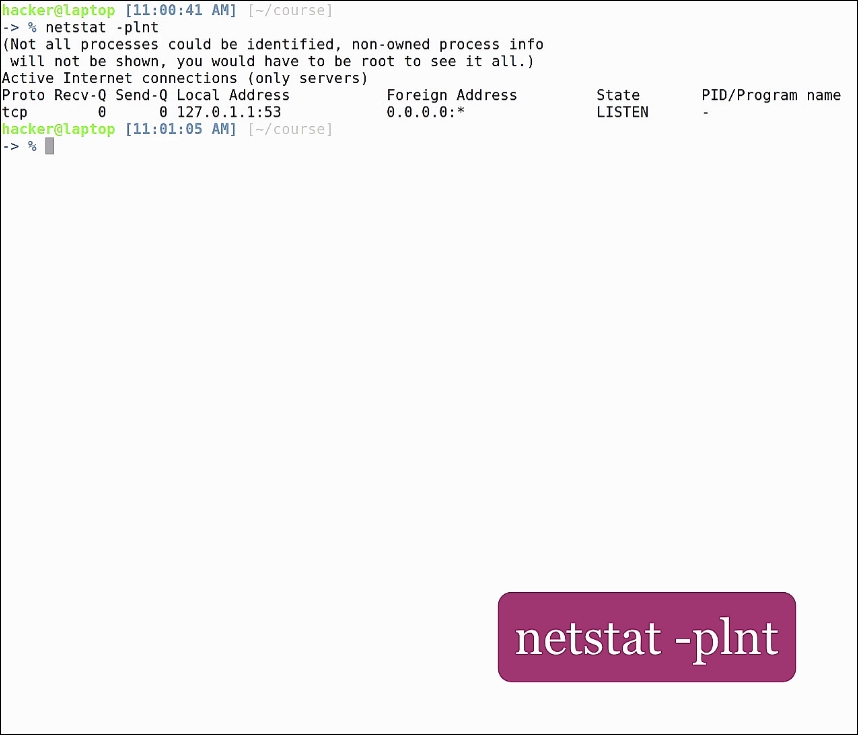
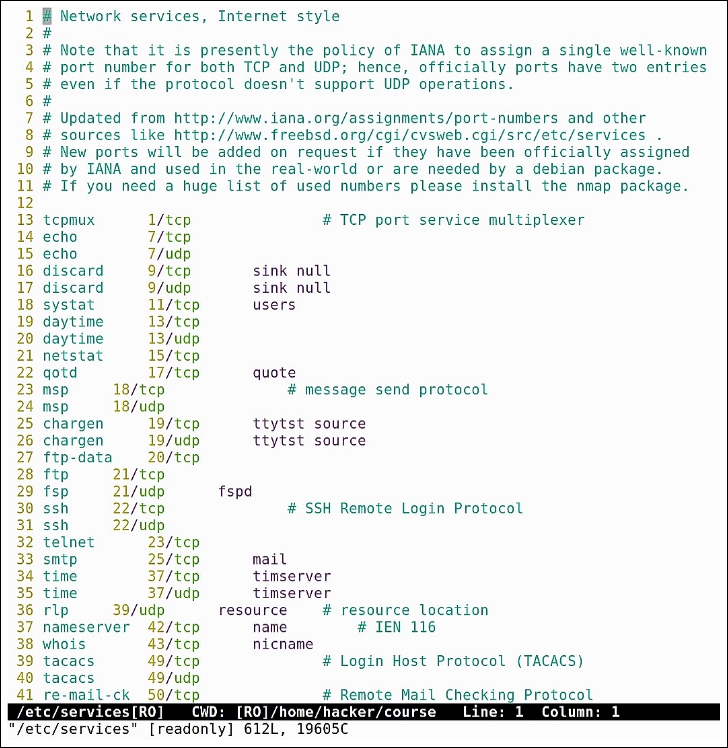
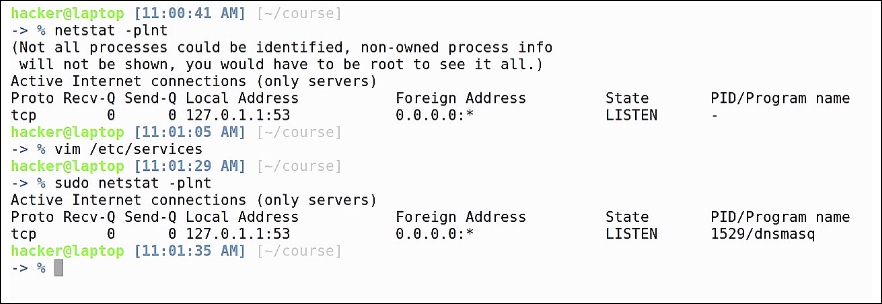
This will show all open ports on our host. You can see here that we only have one open port on a default Ubuntu desktop installation, which is port 53. We can look this up in the special file /etc/services. This file contains all basic port numbers for programs and protocols. We see here port 53 is the DNS server:
Just by analyzing the output, we cannot determine which program is listening on this port, because this process is not owned by our current user. That's why the PID/Program Name column is empty. If we run the same command again with sudo, we see that this process is named dnsmasq and, if we want more information, we can look it up in the man page. It's a lightweight DHCP and caching DNS server:
Other useful information we get from this command:
- The program protocol, in this case dhcp.
- Total bytes not copied.
- Total bytes not acknowledged.
- Local and foreign address and port. Getting the port is the main reason we are using this command. This is also important for determining if the port is open just on localhost or if it's listening for incoming connections on the network.
- The state of the port. Usually this is LISTEN.
- The PID and program name, which helps us identify which program is listening on what port.
Now, if we run a program that is supposed to be listening on a certain port and we don't know if it's working, we can find out with netstat. Let's open the most basic HTTP server by running the command:
python -m SimpleHTTPServer

As you can see from the output, it's listening on port 8000 on interface 0.0.0.0. If we open a new pane and run the netstat command, we will see the open the port, and the PID / name.
You probably already know this but, just to be on the safe side, we will look at adding different hostnames as static dns entries on our machine. This is helpful when developing applications that need to connect to servers and the servers change their IP address, or when you want to emulate a remote server on a local machine. For this we type:
sudo vim /etc/hosts

You can quickly understand the format of the file from the existing content. Let's add an alias for our localhost, so that we can access it under a different name. Add the following line:
127.0.0.1 myhostname.local
We recommend using non existing top level domain names for localhost, such as .local or .dev. This is to avoid overriding any existing address, because /etc/hosts takes precedence in dns resolution. Now, if we open the address in the browser on port 8000, we will see our local Python server running and serving content.
The next command is nmap. As you can see, it is not installed by default on Ubuntu, so let's go ahead and install it by typing:
sudo apt install nmap

Nmap is a command used for checking all open ports on a remote host, also known as a port scanner. If we run nmap on our network gateway, which, in our case, is 192.68.0.1, we'll get all of the open ports on the gateway:
Type: nmap 192.168.0.1
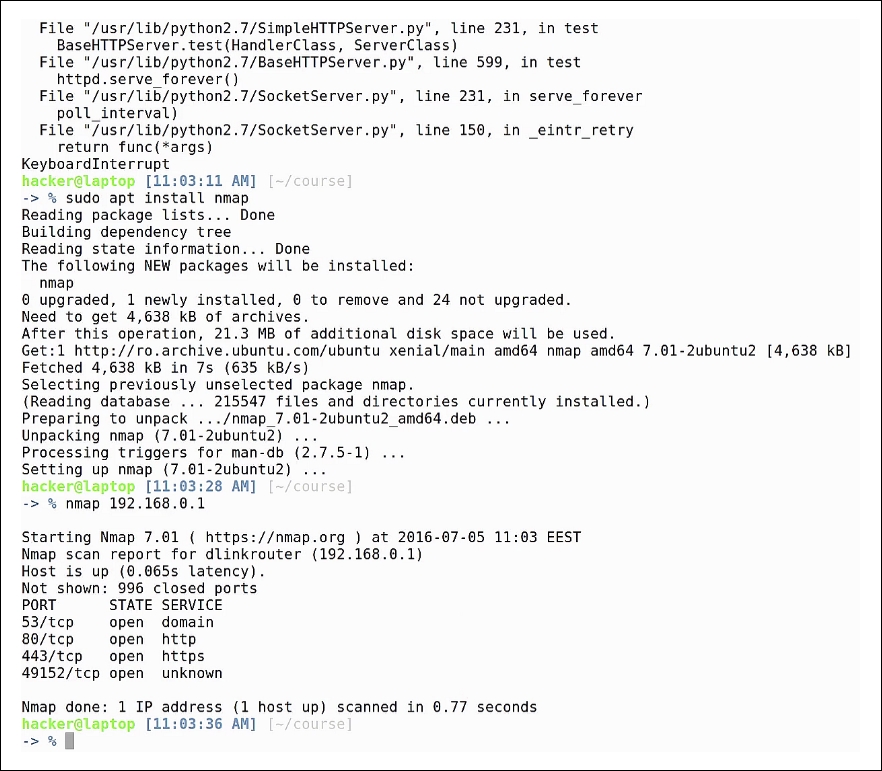
As you can see, there is again the dns port open, the http and https servers, which are used as a web page for configuring the router, and port 49152, which, at this time, is not specific to any common protocol-and that's why it is marked as unknown. Nmap does not know for sure that those specific programs are actually running on the host; all it does is verify what ports are open and write the default application that usually runs on that port.
If we are not sure what server we need to, connect to or if we want to know how many servers are in our current network, we can run nmap on the local network address, specifying the network mask as the destination network. We get this information from ifconfig; if our IP address is 192.168.0.159, and our network mask is 255.255.255.0, that means the command will look like this:
nmap -sP 192.168.0.0/24

In /24 = 255.255.255.0, basically the network will have ips ranging from 192.168.0.0 to 192.168.0.255. We see here that we have three active hosts, and it even gives us the latency, so we can determine which host is closer.
Nmap is helpful when developing client-server applications, for example, when you want to see what ports are accessible on the server. However, nmap might miss application-specific ports, which are non-standard. To actually connect to a given port, we will be using telnet, which comes preinstalled on Ubuntu desktop. To see if a particular port accepts connections, just type the hostname, followed by the port:
telnet 192.168.0.1 80

If the port is listening and accepts connections, telnet will output a message like this:
- Trying
192.168.0.1... - Connected to
192.168.0.1 - Escape character is
^]
This means that you can also connect from your application. So if you are having difficulties connecting, it's usually a client problem; the server is working fine.
To get out of telnet, hit: Ctrl +], followed by Ctrl + d.
Also, in some cases we need to get the ip address of a particular hostname. The simplest way to do this is to use the host command:
host ubuntu.com

We've learned only the basics, the minimum elements you need, in order to start working with hostnames and ports. For a deeper understanding of networks and package traffic, we recommend checking out courses on penetration testing or network traffic analyzing tools such as Wireshark. Here's one such course: https://www.packtpub.com/networking-and-servers/mastering-wireshark" .